Tag: MOMs

Not-Just-for-Moms No-Bake Lactation Cookies {Gluten-Free, Dairy-Free}

The other day, Bill and I were hanging out with my brother, his wife and their two adorable kiddos, Braxton & Raleigh.

We are lucky to live so close to each other to be able to see our nephew and niece grow up.

IMG_8841

We had just finished eating this Better-than-Takeout Chicken “Fried” Rice dish for dinner before throwing together our favorite Snickerdoodle Cookie Dough Bites (which our nephew LOVED!).

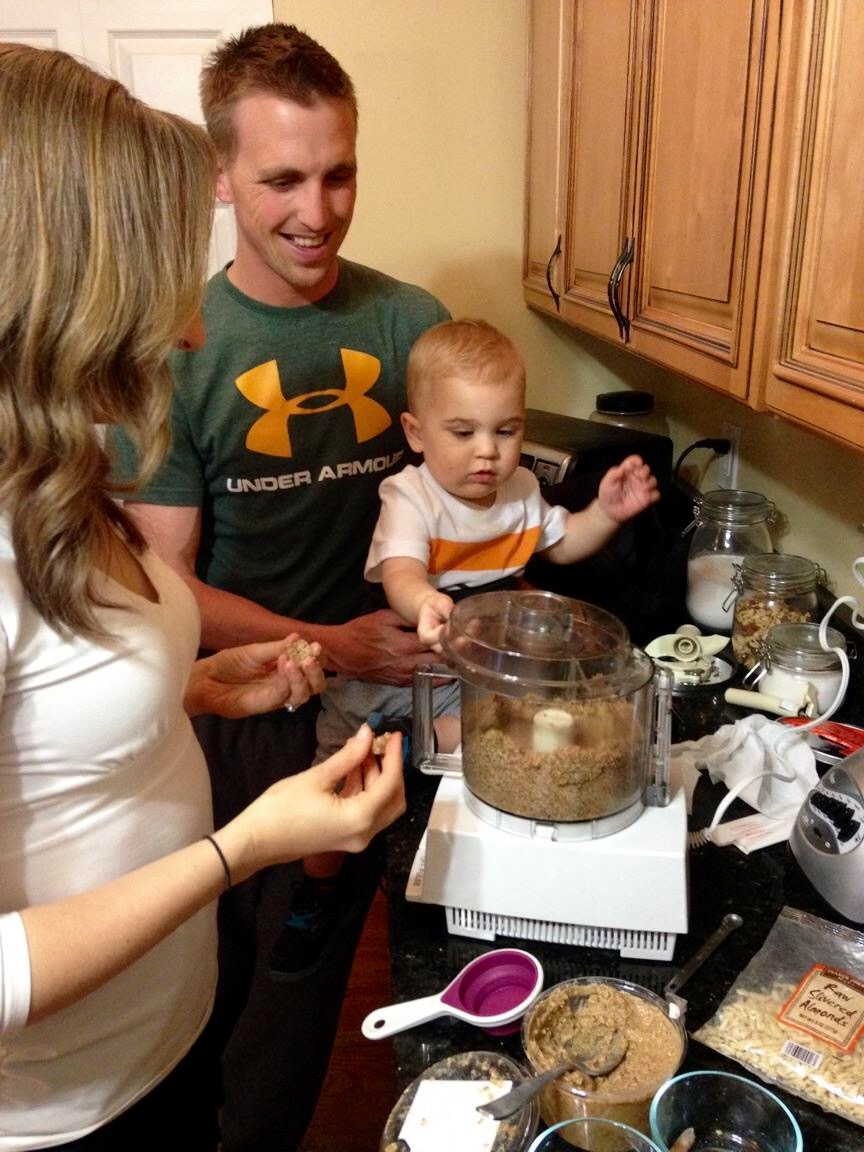
He wanted to help us make them, too, so we propped him up on the counter next to the food processor and laughed as he watched the food processor whirl, mesmerized and totally focused on his newfound entertainment.

Braxton making Snickerdoodle bites

My sister-in-law, Layne mentioned that she’d heard a mom on a local radio station talk about Lactation Cookies that she used to stimulate milk production while she was nursing.

The only problem?

It costs $40 for one dozen cookies.

Not exactly something most of us could afford on a consistent basis, no matter how tasty or helpful they are.

Layne had also heard about the benefits of Mother’s Milk tea from Traditional Medicinals, which contains many of the lactogenic ingredients listed below.

mothers milk

Determined to find an alternative to the $40/dozen cookies, I went into nerdy food research mode and started looking online to learn more about lactogenic foods called galactagogues (ga-LAC-ta-goggs) – foods that are known to naturally increase milk production. I found a few different lists, but certain foods were consistent:

  • Flaxseed
  • Oats
  • Nuts, seeds and nut butters
  • Beans & legumes (lentils, peas, beans)
  • Leafy green vegetables (spinach, kale, broccoli, etc.)
  • Carrots
  • Stone fruits like papaya, dates, and apricots
  • Ginger
  • Garlic
  • Coconut & coconut milk
  • Brown rice
  • Herbs & spices like cumin seeds, anise, fennel seeds, fenugreek, alfalfa, milk thistle, and turmeric

As I was looking through the list, I noticed some common themes. They’re all whole, unprocessed, real foods, and many of them also have strong anti-inflammatory properties.

So whether you’re breastfeeding or not, these foods are nourishing! And, no, you won’t start lactating just because you’re eating lactation cookies. You have to be breastfeeding for that to happen 🙂

Check out the recipe below to make your OWN no-bake lactation cookies (much cheaper than $40/dozen!).  The key lactogenic ingredients are oats, flaxseed, dates, cinnamon, and coconut.

lacto cookies

A few notes about this recipe that will be helpful as you shop for ingredients:

  • We buy gluten-free oats from Trader Joe’s.
  • We use a coffee grinder to grind our flaxseeds, but you can also just buy milled flaxseed or flaxseed meal. You get the most nutrition from the seeds when you grind the whole seeds just before using them.
  • We always use raw honey because of its health benefits. Trader Joe’s, Wegmans, MOMs, Whole Foods, and any natural foods store sell raw honey.
  • You can use almond butter instead of peanut butter for a greater lactogenic effect. If you use almonds, use a total of two tablespoons of honey because almond butter is milder in flavor than peanut butter.
  • The shredded coconut is optional and doesn’t leave a coconut taste – it just adds another galactagogue! If you absolutely hate coconut (like my husband) or are allergic, you can leave it out. The peanut butter dominates the taste anyway, so Bill didn’t even notice the coconut 🙂

NB Lactation Cookies

No-Bake Lactation Cookies

These little bite combine a bunch of lactation-supportive ingredients that nourish both mama and baby.

  • 2/3 cup rolled oats (gluten-free)
  • 1/3 cup flaxseed (ground)
  • 1/2 cup shredded coconut
  • 1/4 teaspoon fine grain sea salt
  • 1/2 teaspoon cinnamon
  • 1/2 cup Medjool dates (pitted)
  • 1/2 cup sunflower seed butter (or almond or peanut butter (I prefer to make them allergen-free))
  • 2 tablespoons raw honey
  • 1.5 tablespoon vanilla extract
  1. Put the oats, ground flaxseeds, shredded coconut, salt and cinnamon in a food processor fitted with the S-blade, and run for about one minute until it reaches the consistency of a fine meal.

  2. Add the rest of the ingredients, and run the food processor for about 60-90 seconds or until everything is combined and starts to clump around the sides.

  3. Mold hunks of the dough about one tablespoon at a time into round balls. Store in the fridge in a glass container. We like taking them out a few minutes before eating so they soften up a bit.

I used to put chocolate chips in these, but babies are supposed to stay away from chocolate until about their first birthday because of the caffeine content, so if you’re not a nursing mama, feel free to add in 1/4 cup dark chocolate chips or cacao nibs before taking the dough out of the food processor!

If you’re not a huge fan of flax, cut the portion back to 1/4 cup.

If you’re a mom and want to learn more about how to increase your milk supply, boost your immunity, lift depression, lose weight, and even reduce colic and allergies, check out the book Mother Food by Hilary Jacobson. Please consult with your doctor or lactation consultant for further guidance.

Here are a few other recipes on my blog that are full of galactagogues. I’ve given you a link to the recipe and listed the lactogenic foods next to it:

curry

coconut chai bites

Healthy & Homemade Donut Holes! {Gluten-Free, Paleo, Vegan}

 “These satisfy my sweet tooth without eating Little Debbie Donut Bites!”

“These won’t make it home!”

And finally, “So, there’s no sugar in these?”

These were just a few of the comments made by a donut-loving friend last night as he was enjoying a new treat I prepared for our church small group that we host each Tuesday.

I had never made them before, so I didn’t know what to expect. They were a huge hit, so you can bet I will be making them again, given the response! I never thought they would be compared to donut holes in terms of taste and texture, but I’ll take it!

They are SO easy to make, too. They’ll become a new staple in your house, I’m sure!

Healthy & Homemade “Donut” Holes

Mmm delicious!

Mmm delicious!

The recipe is adapted from this one on the Nourishing Meals blog. Tom and Ali have some awesome gluten-free, dairy-free, soy-free recipes, so I will be featuring more of them in the future.

Ingredients (see notes below regarding substitutions & where to find ingredients*)

  • 1/2 cup raw almonds
  • 1/2 cup raw walnuts
  • 1 cup Medjool dates, pitted
  • 1/4 cup raisins
  • 1/4 teaspoon cinnamon
  • 1/4 teaspoon ground cardamom
  • 1/4 cup raw almond butter
  • 1/2 teaspoon vanilla extract
  • 1/4 teaspoon fine grain sea salt
  • unsweetened, shredded organic coconut

Directions

  1. In the food processor fitted with the “s” blade, grind the almonds and walnuts until finely ground.
  2. Add the dates, raisins, spices, and salt and grind to a fine meal.
  3. Add the almond butter and vanilla extract and process again until completely mixed.
  4. Form into balls and roll in shredded coconut.

I put mine in the fridge for about an hour, so they would firm up a little bit, but you can enjoy them right away, if you’d like!

Ground

Ground “meal” prior to rolling them into balls

*Ingredient & Substitution Notes

  • Can’t have walnuts or almonds? Use any other nuts or seeds in this recipe instead!
  • You find Medjool dates in the produce section of the grocery store OR online. We buy ours at BJs Wholesale club in a big container. Trader Joe’s also sells them.
  • If you don’t have cardamom, you can sub in ground ginger, more cinnamon or a combo of nutmeg and cinnamon instead.
  • The cheapest place I have found almond butter is at Trader Joe’s. If you can’t have almonds, sub in Sunbutter.
  • You can find unsweetened, shredded coconut in the baking aisle of most grocery stores or online here. We buy ours at MOMs in bulk.

The Secrets to Cooking Perfect Quinoa…Revealed!

Quinoa is everywhere these days.

Popping up in funny Miller Lite commercials in the form of “queen-o” burgers.

Receiving props worldwide with 2013 being deemed “The International Year of Quinoa.” (Seriously, there is such a thing!)

And showing up on grocery store shelves in everything from cereals to snack foods.

All the while driving people crazy with its less than phonetic spelling!

Here are some fun facts about this hearty little seed:

  • It’s pronounced “KEEN-wah.”
  • It’s technically a seed or pseudocereal and is harvested from a plant related to beets and spinach.
  • It comes in a variety of colors (red, white, black, orange, brown, pink, pale yellow).
  • It’s a complete protein (contains all 9 essential amino acids) and is packed with nutrients like calcium, phosphorus, magnesium and iron.
  • There is a naturally occurring, bitter outer coating on quinoa called saponin that needs to be rinsed off prior to eating, otherwise it will be bitter.
  • It doesn’t contain gluten, the sticky protein found in barley, rye, wheat, and a few other grains, so it is safe for people with gluten sensitivities or intolerances.
  • Swap it out to replace rice or couscous to change up your recipes.

IMG_3428

Where do you buy quinoa?

I buy a big 4 pound bag for $10-$15 at BJs Wholesale Club, and it lasts for months. You can find it cheap at Trader Joe’s and in the bulk section of grocery stores like Wegmans and Whole Foods as well as in natural food stores like MOMs and Roots Market. All major grocery stores sell it these days, but it’s cheaper to buy it in bulk at the stores above or wholesale clubs than in a box at Safeway.

Want to know the secrets to cooking perfect quinoa every time? Follow these steps!

  • 1 cup quinoa
  • 2 cups water or low sodium vegetable stock (some people find using a little less liquid – 1.75 cups – works well, too, but I’ve always used two!)
  • Pinch of sea salt

Optional ingredient: Instead of sea salt, use a thumb-size piece of kombu (you find this seaweed online or at any of the stores listed above). When you add kombu to grains (and beans) while cooking them, it infuses them with minerals, makes the grain more digestible, and reduces acidity and gas!

  1. Rinse and drain the quinoa in a fine mesh strainer until the water runs clear. This gets rid of the bitter coating, so it is an important step!
  2. Put the rinsed quinoa, water and salt (or kombu, if using) in a pot.
  3. Cover and bring to a boil, then reduce the heat to a low simmer and cook for about 15 minutes.
  4. DO NOT STIR THE QUINOA WHILE IT IS COOKING. It will not cook properly if you do. If you want to check on it, just remove the lid and tilt the pot a little – if the water hasn’t been absorbed, keep simmering.
  5. When all the water is absorbed and the curly white tail “pops” off the quinoa, you know it’s done!
  6. Remove the pot from the heat, and discard the kombu (if using).
  7. Fluff quinoa with a fork. Let it cool slightly (10-15 minutes) before serving.

For the more visual learners, check out this one-minute video that shows you how to cook quinoa!

Unfortunately, many people’s first experience with this nutrient-packed seed is eating it plain, and they are often so scarred by that experience that they never to try it again.

I love quinoa, but I don’t like plain quinoa it’s boring and bland!

In my next post, I’ll be sharing my favorite way to prepare this super seed along with a few other delicious recipes, so stay tuned! Hooray for no more boring quinoa! 🙂

Powered by WordPress & Theme by Anders Norén