Month: February 2015 Page 1 of 2

Asian-Inspired Cilantro Pesto {Dairy-Free, Gluten-Free}

Pesto sauce is one of my all-time favorite condiments.

I was never a big fan of sauces or anything on top of my food for most of my life, but I always had a heart for pasta and all things Parmesan, so, naturally, I liked pesto sauce 🙂

I shared a basil walnut pesto recipe a few months ago that has been a BIG hit among my friends and in my cooking classes.

You should check the recipe out by clicking here!

plate of pesto

This recipe is from my wonderful teacher, Meghan Telpner, whose culinary nutrition program I just finished this winter. She comes up with some amaaazing recipes (all of which are also dairy-free and gluten-free), and this pesto is no exception.

I was a little thrown off at first glance because she calls it Coriander Pesto. Cilantro is the Spanish word for coriander leaves, so when a pesto recipe calls for coriander, grab a bunch of cilantro (kinda confusing, right?).

I wasn’t sure what to expect before making this recipe because I’m not a HUGE fan of cilantro – I do like it, but a little goes a long way.

I became a believer very quickly once I dipped my finger in to the bowl to taste test the pesto after blending.

From the “bite” of the fresh ginger to the rich taste of the toasted sesame oil (one of my fave flavorings!) to the saltiness of the tamari and sweetness of the honey, this pesto is a flavor-packed, anti-inflammatory powerhouse!

cilantro pesto

Ingredients (try to use organic ingredients as much as possible)

  • 1 bunch cilantro, leaves and stems washed and spun dry
  • 1 inch fresh ginger root, peeled and chopped coarse
  • 2 cloves garlic, peeled and chopped coarse
  • 1 tablespoon toasted sesame oil
  • 1 tablespoon extra virgin olive oil
  • 1/3 cup almond butter
  • 2 tablespoons low sodium tamari (use coconut aminos if paleo)
  • 2 teaspoons raw honey* (the original recipe calls for agave, but I used raw honey)
  • 1/2 lemon, juiced
  • 1/8 teaspoon cayenne pepper, or to taste (the original recipe called for 1-1 1/2 teaspoons which is WAAAY to spicy for me, but do what makes your taste buds happy!)

*Notice I used raw honey instead of agave and WAY less cayenne than the original recipe called for.*

Directions

Click here for the full recipe!

Sweet & Salty Super Food Chocolate Bark {Dairy-Free, Paleo}

Chocolate.

bark2

It’s one of the foods we think we “can’t have” when we eat in a way most people would consider healthy.

Fortunately, chocolate is one of the foods that absolutely can (and should!) be part of a nourishing, satisfying way of eating.

When it comes to chocolate, quality matters.

Raw cacao beans and powder (pronounced ka-KOW) have more antioxidants than any other food. Raw cacao isn’t treated by heat (and therefore damaged) like the more familiar cocoa powder, so its supercharged, health-boosting, disease-fighting antioxidant properties remain intact.

When we hear about the health benefits of chocolate, this is the kind we’re talking about.

bark3

Here are just a few more of the health benefits of raw cacao:

This bark recipe is truly a super food recipe because it contains TWO types of chocolate – cacao powder and cacao nibs.

Raw cacao nibs come from the whole cacao beans, so they are a bit bitter but have a nice crunch to them. They work well in this recipe because the sweetness of the bark offsets the bitterness.

I served it last week at a luncheon at work and this past weekend at a women’s retreat where I did a presentation about taking a “Real Food Reset.” It was so much fun!

gfc

I also used almonds, which are rich in heart healthy monounsaturated fats, and provide an additional crunch factor.

In another variation of the recipe, I used pumpkin seeds instead of almonds. Both were delicious!

bark aerial

There’s one more ingredient in this bark that might not be so familiar – goji berries – but don’t let that deter you!

Goji berries, also known as wolfberries, are considered a superfood because of their high antioxidant concentration (when you hear “antioxidant,” think anti-aging, protective and pro-health!). Some of their antioxidant compounds can help protect our vision, too.

They tend to be a bit pricy, but a bag lasts me for several months, so I find that it’s worth it. I buy them on Amazon or at our local Asian grocery store (cheapest place to buy!), Vitacost.com, Wegmans, Whole Foods, Home Goods and most natural food stores.

barkmain

pumpkinseedbark1

Ingredients

  • 1/2 cup coconut oil
  • 1/4 cup coconut nectar, raw honey or 100% pure maple syrup
  • 1 1/2 teaspoons vanilla extract
  • 1/3 cup raw cacao powder
  • 2 teaspoons maca powder (optional but recommended)
  • 2 tablespoons almonds or pumpkin seeds, lightly toasted and roughly chopped
  • 2 tablespoons goji berries
  • 2 tablespoons raw cacao nibs
  • 1/4 cup dried cherries or cranberries, roughly chopped
  • coarse sea salt, to taste

bark2

Directions

  1. Line a 9 x 13 baking dish with parchment paper. Spread nuts/seeds, goji berries, and cacao nibs evenly on the sheet.
  2. Fill a small saucepan with 1-2 inches of water and place it on the stove top. Rest a small glass bowl on top and turn the heat to medium low. Put the oil and sweetener in the glass bowl and whisk together until the oil melts.
  3. Once oil and sweetener are combined, gently whisk in the vanilla extract, raw cacao powder, and maca powder until silky smooth. **Be careful not to overmix or the chocolate will get clumpy.** That’s what happened to us the first time we made this!chocolate melting
  4. As soon as chocolate is smooth and shiny, pour it on top of the nuts/seeds, berries/fruit and nibs to cover them. Shake the sides of the parchment paper, so all of the nuts/berries/nibs collect in the middle and are covered with chocolate then use a spatula to spread it out in an even layer.
  5. Sprinkle a couple pinches of sea salt on top of the chocolate.
  6. Set in the freezer to harden for about 30 minutes.
  7. Remove bark from parchment paper, break into pieces and enjoy! Store in the freezer or refrigerator, as coconut oil begins to melt as it warms up to room temperature.

Meal Planning Made Easy: Step 3…Get To It!

This is the third and final post in a series of three posts about how to make meal planning easy and doable. In case you missed the previous posts, here they are!

Step 1…Get Inspired

Step 2…Get Organized {Plus My #1 Meal Planning Tool!}

—————————————————————————————————————————————————

pinteresBy this point, we’re inspired and organized, so all that’s left for us to do is to “get to it” and get it done! 🙂

Check out my top tips below for how to make meal planning a reality!

1) Prep!

For starters, you can chop your fruits and vegetables when you get home BEFORE you put them away. Just think of it as an extension of your shopping trip. Since you already have your meal plan prepped, you know exactly what you need to do to each ingredient throughout the week. However, I realize chopping can be tedious and boring, especially if there’s a lot of fruit and veg to get through. Why not enlist the help of a vegetable chopper? It’ll save you plenty of prep time and saves you from boredom. If you’re unsure of what you’re looking for, check out what people are saying online about individual choppers, like this chopper review!

Making soup? Chop onions, celery and carrots.

Serving up a stir fry? Cook a pot of brown rice (set it and forget it!).

Having tacos on Tuesday? Brown your meat or cook your lentils if you’re going meatless.

Do you like smoothies? Measure out your dry ingredients (seeds, nuts, powders, dried fruit) at the beginning of the week, so you just have to dump them in the blender when you’re ready to whip up a nutrient-packed breakfast. Store them in the fridge.

Ingredients for everything from smoothies to snacks  prepped and ready for the week!

Ingredients for everything from smoothies to snacks prepped and ready for the week!

2) Pack & Store

This is where your mason jars come in handy. Once you’ve prepped and chopped all of your ingredients, grab a roll of masking tape and write what recipe that ingredient is for and stick it on the mason jar. Then, when it’s time to cook, the chopping is already done and you just have to dump it in!

We’re also fans of Pyrex bowls with lids and glass baking dishes. One of the prep and stores steps we take at the beginning of the week is chopping up a head of celery into stalks and a few carrots into sticks. Then, we put them in a 9 x 13 glass baking dish and fill the dish with water until the veggies are just about covered. We store it in the fridge for a week, so we have easy grab and go snacks.

Once the week wraps up, if we still have veggies left, we dump out the water, refill it and then enjoy the veggies for ANOTHER week. It’s a great way to extend the life of your produce 🙂

To pack and store food, we’re also fans of thermos’, since they can be used to keep food cold (like smoothies for breakfast) or hot (like soups for lunch). They’re not expensive.

If you don’t have one already, invest in an insulated lunch box to make it easier for you to transport healthy food with you no matter where you are.

3) Freeze It!

When it comes to meal planning and saving time and money, the freezer is your friend. Whether you’re prepping ingredients for crock pot meals ahead of time, storing leftover broth or soup, or using frozen fruit or vegetables, the freezer can come in handy. (BJs Wholesale Club has organic frozen fruits and veggies that we LOVE to use in our smoothies!)

If you’re storing liquids in the freezer in mason jars, just make sure you leave 2 inches of open space between the bottom of the lid and the top of your liquid, as the liquid will expand as it freezes. We don’t want broken glass jars or shards of glass in our freezer (although it has happened to me!).

Hearty Black Bean and Rice Stew that we froze and enjoyed over multiple weeks!

Hearty Black Bean and Rice Stew that we froze and enjoyed over multiple weeks!

Make a double batch of soup or stew or a casserole and throw it in the freezer. If you’re in a pinch one night or have a busy week it’s easy to just reheat it in the oven or on the stove.

4) Love Those Leftovers

This goes along with #3 above but uses up your fridge space, too! When you make a big batch of a casserole, soup, stew or other dish, store some in the fridge (what you know you’ll eat up in a few days) and freeze the rest.

Check out this page for a list of my soup and casserole recipes as well as a recipe for mini make-ahead frittatas – perfect for breakfast, lunch or dinner!

We love making batches of soup to have throughout the week, along with chopped veggies, energy bites, and paleo parmesan cheeze.

5) Make It Social

You can get really creative with this, but here are some ideas that have inspired me:

*Have a meal swap potluck party with neighbors or friends. Invite a small group of friends over (you could even do this with 1-2 other couples) and have each person prepare a dish or two. Then, bring your glass jars and containers, so you can take home a little bit of everything. It’s a great way to try new recipes and enjoy other people’s cooking.

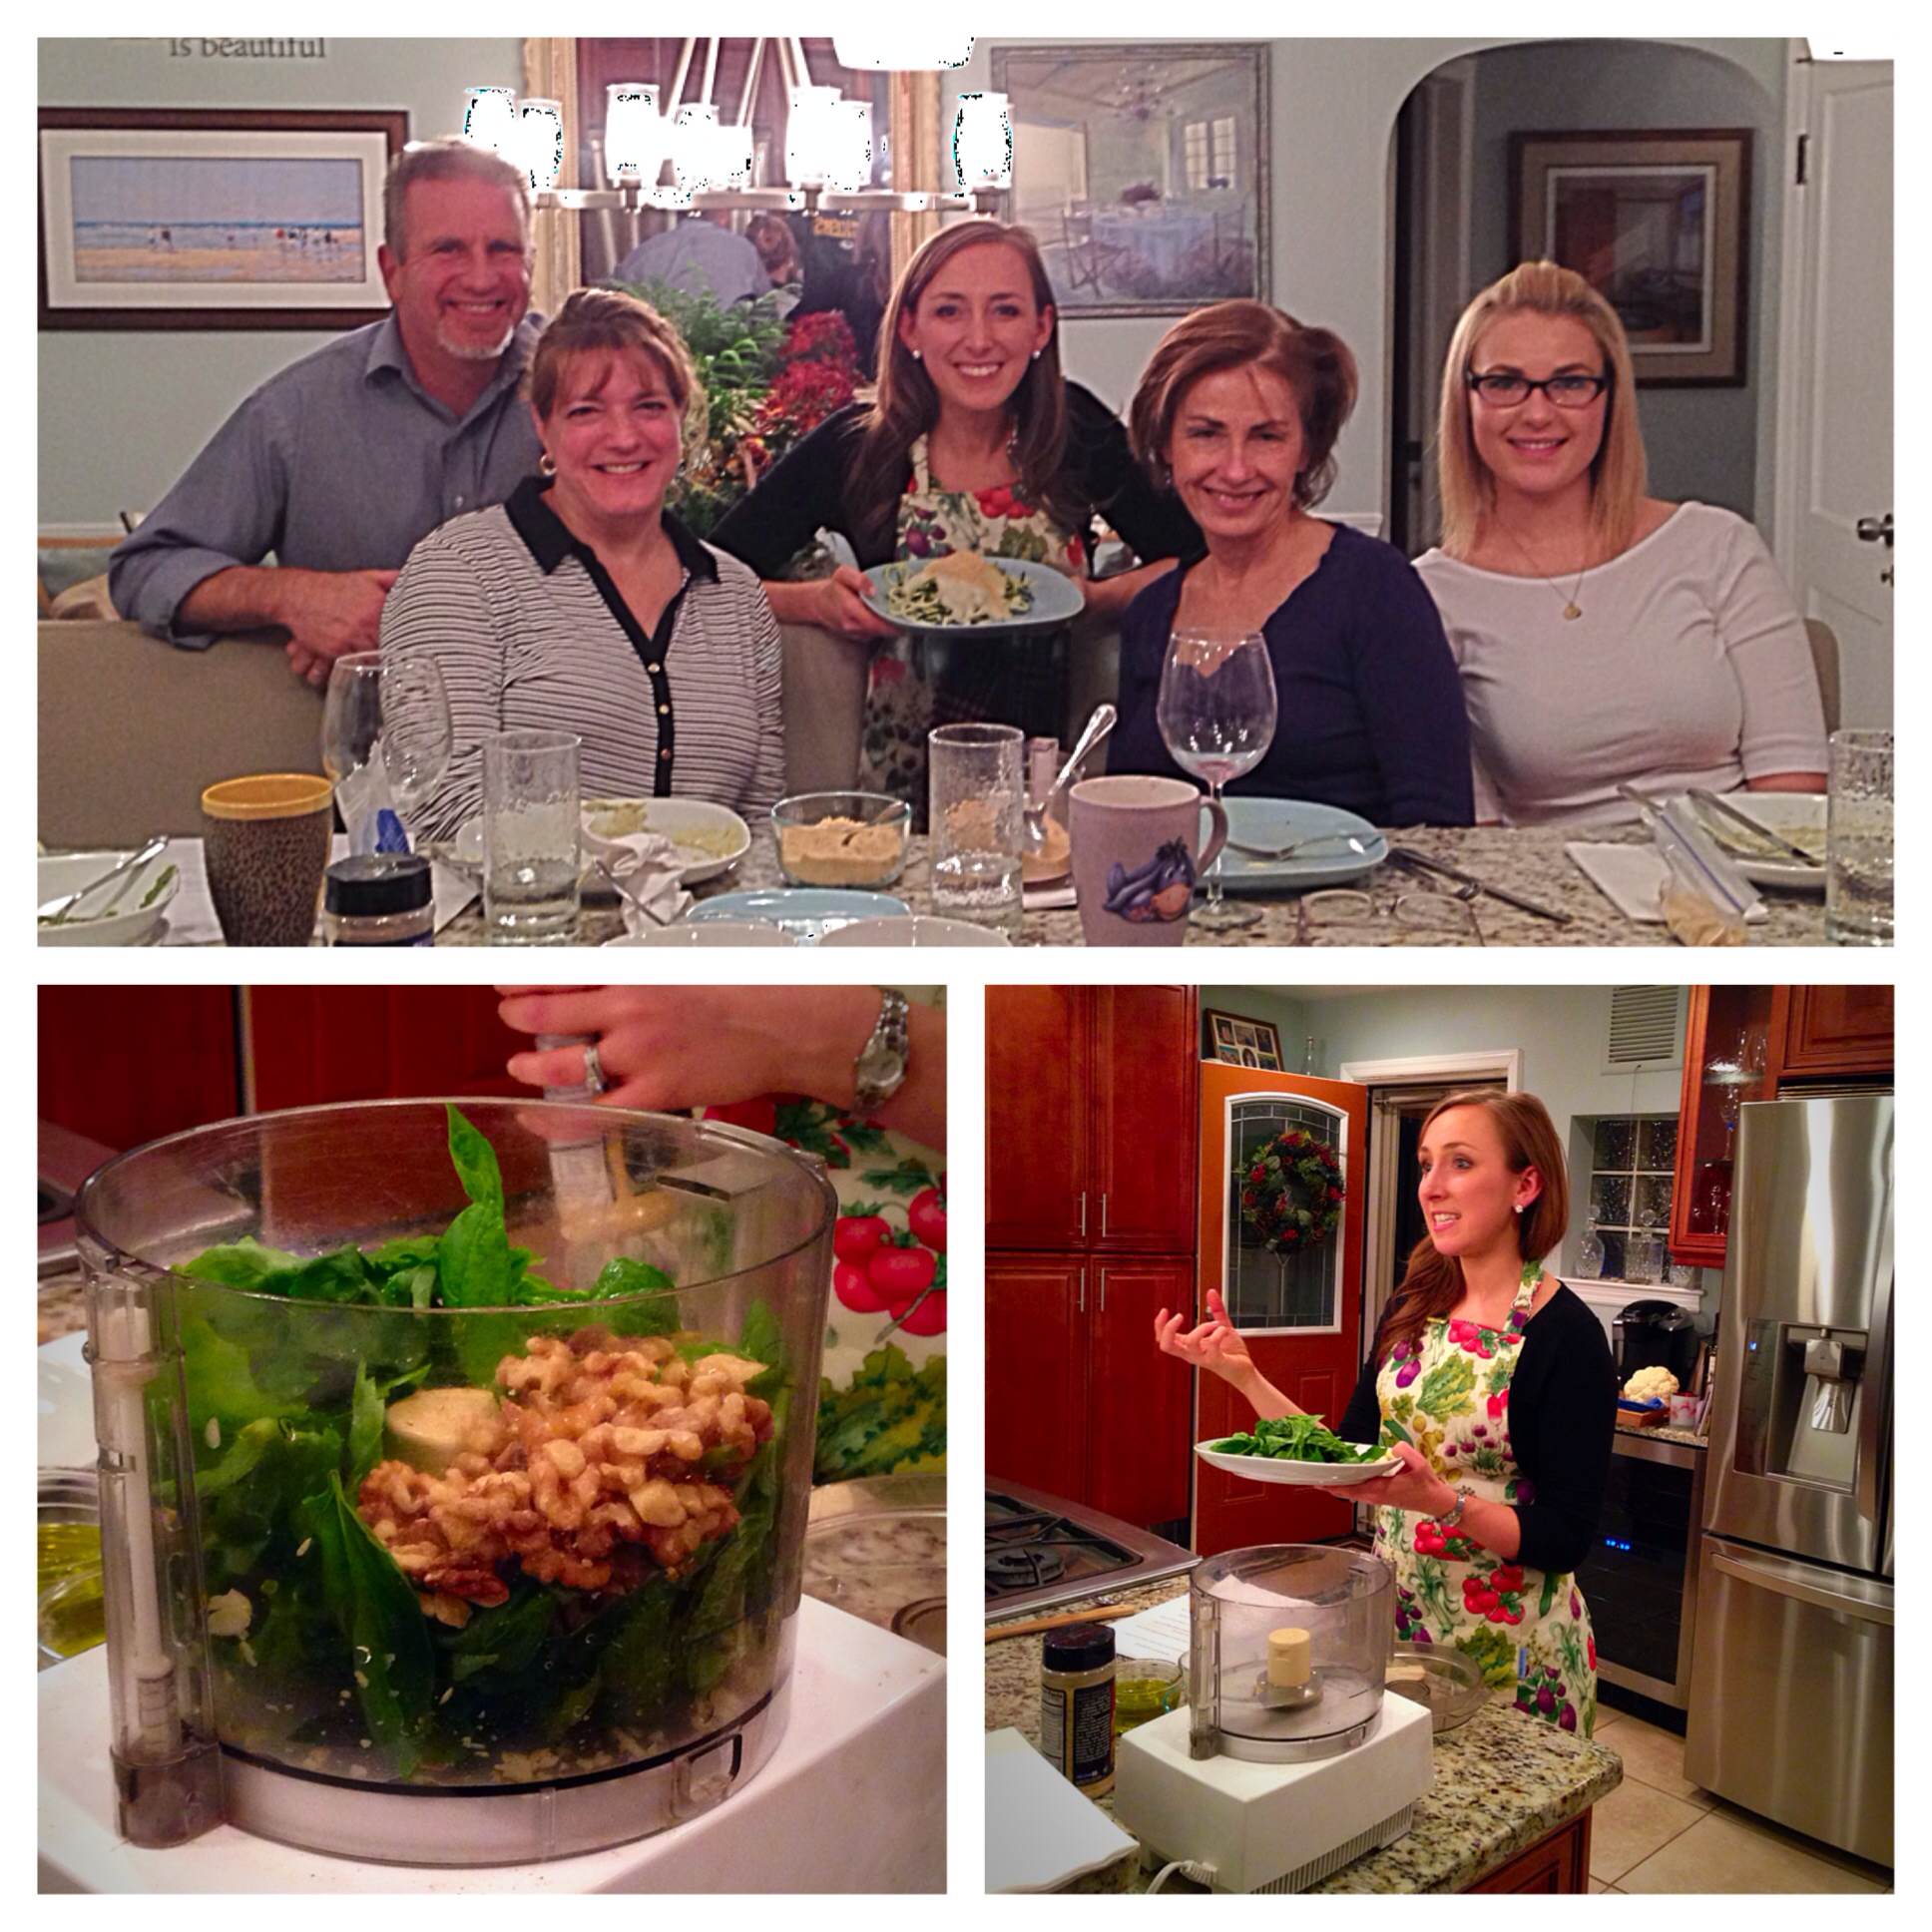
*Use a meal planning tool like the one I shared in the second post in this series and plan meals together with coworkers, friends or family. I read on another blog that two moms did this while their daughters were at ballet lessons. They brought cookbooks and planned out the week’s meals together. It was a great way to bond and get stuff done!

My favorite meal planning tool!

My favorite meal planning tool!

*Have a crock pot party with a group of friends (everyone bring your crock pots together with the ingredients you need and then set it and forget it!). You could even make a day of it – prep in the morning, head out to do something fun and then come back to the mouthwatering smells emanating from your crock pots!

*Create a dinner party group and rotate who hosts the group. The host is responsible for the main dish and everyone else brings a simple side. Bring containers for leftovers!

6) Pump Up the Volume

I’ve always loved music, and rocking out in the kitchen to my favorite Pandora or other radio station is a great way to add some fun into a seemingly boring task…like chopping vegetables.

Working out is more fun with music (which is probably why I love Zumba so much), so why not apply the same way of thinking to cooking?! Time will fly, and you’ll have fun 🙂

7) Make Cooking Time Quality Time

Instead of cooking being something that “takes up time” or pulls you away from other ways you want to spend your time, make cooking time quality time – time to spend with your family and friends – with everyone having a task to do to help pull together a meal.

One of the easiest ways to make cooking time quality time is to pick a theme that makes it fun to be together. From Take Out Fake Out Thursday to Eat Like a Viking night, check out all of the ideas about how to “Get Inspired” from the first post of this series.

You can even host a cooking class at your house to bring friends and/or family together to learn new recipes and get inspired. Contact me here if you want to learn more about classes I can teach!

IMG_7040 (1)

8) Use a Meal Kit Service

If you like to cook but hate the idea of doing all of this prep, check out one of the meal planning kit services below! I also recommend taking a look at the benefits of home chef vs blue apron. You pay for the convenience of having everything done for you, but it may be worth it, even if just once a week. Meal prep and planning can be very tiring so a meal kit might be a great option for you if you have a busy lifestyle.

  1. BlueApron
  2. HelloFresh
  3. Plated

And, there you have it! Those are my 3 steps to make meal planning fun and time and money-saving. From getting inspired to getting organized and then finally “getting to it,” I hope you learned at least one new thing that will help you make meal planning easier!

Ok, now it’s your turn! Do you have any meal planning tips you’d like to share?What did you find MOST helpful from this series? Feel free to share below! I really do love hearing from you 🙂

Meal Planning Made Easy: Step 2…Get Organized

As I shared in my first post in this series, Meal Planning Made Easy: Step 1…Get Inspired!, meal planning doesn’t have to be a drag or feel like a chore…it can even be FUN once you start to get some creative ideas flowing 🙂

In today’s post, I’m going to tell you about my absolute FAVORITE meal planning tool. It makes meal planning and easy and even gives you the option to print a shopping list directly from the site!

Let’s take a look at my top 3 tips to Get Organized!

1) Tackle your toolbox.

I’m not talking hammers and nails here, but the truth is, if we want to plan and start cooking our meals, we have to have the right tools in our kitchen to make prepping and cooking easier and more efficient.

Here are my top 6 tools: (1) glass mason jars for food prep, storage and freezing; (2) a chef’s knife; (3) crock pot; (4) high-speed blender; (5) food processor; and (6) thermos (to transport hot & cold food!).

kitchen tools

The key to using these tools is to make them accessible. If they’re stowed away in a closet in your basement, you won’t use them. Trust me. Put them on the countertop or on a table in your kitchen or dining room. If they are easy to access, you will be much more likely to use them!

2) Clean out & restock your pantry.

I like to think of my approach to eating as “common sense nutrition,” so here’s a simple rule of thumb – If you keep healthy food in your house, you will eat healthy food. If you keep junk food in your house, you will eat junk food.

Start with a pantry clean out and toss anything that is expired or that you don’t use. (That would include your jar of sage from 2003 🙂) Ask yourself,

“Does this support my healthy goals? The person I want to be? How I want to feel?”

If the answer is “no,” toss it. Make it easier for yourself to make healthy choices!

I’ve shared my top 10 everyday pantry essentials and my top 11 sweet treat staples in previous posts, so check them out if you want to know some staples I always have on hand in addition to the basics like beans, lentils, peas, brown rice, and quinoa.

pantry staples text

3) Use a Meal Planning Tool!

My favorite is Plan to Eat. I introduced it to my coworkers a few weeks ago, and they LOVED it. Here’s why!

  1. Add Recipes: You can add your own recipes manually, use the Plan to Eat bookmark bar just like the Pinterest pin icon to automatically upload whatever recipe you’re viewing into your recipe book, or paste a URL from a recipe website into the box on the Recipes page using the Add Recipe button.
  2. Plan Using the Calendar: Drag and drop your recipes into the calendar and plan meals for a day, week or for several months!PTE
  3. Printable Shopping List: As you add recipes to your planner, the shopping list will update and add in all ingredients you need for each meal. You end up with an organized, easy to follow shopping list that you can print out and take with you to the store. You can check off items you already have and even add certain items to your grocery staples list.
  4. Add Stores: Do you shop at multiple stores? No problem! Add each store to your list and you can move items on your shopping list to the store where you buy them.
  5. Get Social: You can Add Friends, which lets you access each other’s recipes.

They don’t have an app, but the website is 100% mobile-enabled, so you can easily use it from any device.

You can sign up for a free 30-day trial to try it out yourself before you commit. They don’t take your credit card info ahead of time like other websites do, so it really is free. The cost for an annual membership is $39. Renew on Black Friday to get a year for $19!

Check out the quick video below to learn more about how Plan To Eat works and see it in action!

If you’re interested in checking out meal planning apps, take a look at MealBoard or Paprika. I can’t speak from experience on those, but they do have good reviews online.

In my final post of this series, I’ll be sharing some practical tips for how to actually “Get To It” and start putting the ideas in steps 1 and 2 into practice!

What’s your favorite meal planning tool? Do you have any tips you’d like to share?

Meal Planning Made Easy: Step 1…Get Inspired!

This is the first in a series of three posts about my top tips for meal planning. Planning our meals is one of the keys to eating healthy, saving time and money, and taking the stress out of mealtime!

—————————————————————————————————-

We have lots of priorities and commitments that demand our time, attention, and energy, but we only have so much we can do in one day.

It can be easy to let something like food slip into the lower level of those priorities, especially if we associate it with being stressful and having to do more work.

A recent study found that 85% of people said eating a healthy dinner was important to them, despite the fact that fewer than 50% were reaching that goal.

Easy healthy dinner idea!

Easy healthy dinner idea!

So, where’s the disconnect?

We’re not cooking...

But why?

Many people don’t cook because they don’t think they can, others rely on a partner who does all the cooking, some hate cleaning up the mess or say they don’t have time to cook, and most think going grocery shopping takes too much time.

guy fieri

Let’s talk about time.

In 2013, the average American, regardless of weekly earnings, watched 2-3 hours of TV per day.

Hear me out on this one.

This isn’t about guilt, blame, shame, or condemnation – I’m never about those things on this blog. And I like watching Jimmy Fallon, The Voice, and Top Chef as much as the next person.

This is about taking a step back and being honest with ourselves. Here’s the reality:

If we want to have ENERGY, feel GREAT and be HEALTHY, then we have to make food a priority.

It’s not about having time, it’s about making time. Each of us has 24 hours each day – no more, no less.

The idea of meal planning initially SEEMS time intensive, but trust me, once you make it a habit, you will be amazed by how much money (AND time) you save, how much healthier you eat, and how calm and unstressful mealtime can become.

Remember, if food is what fuels and nourishes us throughout the day, and we want to feel energized, then taking ownership over what we eat by planning and preparing our meals is the #1 way to get there.

Inspired by The Kitchn, an awesome website for all things cooking, food, and tips and tricks, I want to share with you 3 keys to get you excited about meal planning!

  1. Get Inspired
  2. Get Organized
  3. Get To It

*Get Inspired*

1) Grab a cookbook! If you want to take the intimidation factor of meal planning and cooking down a notch, just use ONE cookbook to pull recipes from instead of spending hours searching online. Five Below often has great deals on Paleo and other healthy cookbooks.

Take Action: Here’s a post I wrote about some of my top picks for healthy & delicious cookbooks.

IMG_6709

2) Use recipe templates. The Environmental Working Group and a grad student from NYU have created two handy guides that you can use to find healthy recipes for breakfast, lunch, dinner, and snacks. What I like about templates is that they give us flexibility and can take some of the stress out of cooking for fear we will “mess up.”

Take Action: Click here to go to the full post I wrote about eating healthy on a budget to access the 2 FREE guides or click on the links below:

Good Food on a Tight Budget Recipes

Eat Well on $4/Day: Good & Cheap Guide

3) Pin It! If you like Pinterest (it took me awhile to warm up to it), that can be a great place to go for inspiration and specific searches.

Some of my top words and phrases to search on Pinterest are: “paleo,” “dairy-free,” “vegan,” “gluten-free,” and “clean eating” plus whatever ingredient I want to use or cuisine I’m in the mood for (i.e., Mexican, Indian, Chinese, etc.). Anything that is paleo or vegan will, by definition, be dairy-free, too (except butter, the paleo way of eating includes grass-fed butter).

Take Action: Click here to follow my boards on Pinterest!

pinning recipes

4) Make It FUN and follow a theme. Meatless Monday, Taco Tuesday, Wacky Wednesday (Viking Night – eat with your hands!), Take Out Fake Out Thursday (stir fry, make your own healthy pizza station, make your own salad station), Fish or Fiesta Friday, Souper Saturday, and Casserole or Crockpot-Style Sunday are just a few ideas to get you started.

Take Action: Pick ONE theme idea that appeals to you. Try it out next week and see how you like it!

Come back tomorrow as I share my top tips to help you “Get Organized” as well as my FAVORITE meal planning tool and how you can get it free for 30 days! 

Which of these ideas is most helpful to you? I’d love to hear from you!

Hearty Black Bean & Rice Stew {Gluten-Free, Vegan}

We’ve been using our vegetable scraps to make homemade vegetable broth and at one point had nearly a dozen mason jars full of broth, sooo we had to find a way to use it!

That’s why we’ve been making LOTS of soups and stews.

bean stew2

This one-pot recipe makes a lot of food and doesn’t require much effort. Once you saute the base vegetables, you just toss in the rest of the ingredients and less than an hour later, you have a big pot of warm, cozy, and hearty stew.

You could really use whatever vegetables you have on hand for this – sub out spinach or Swiss chard for kale or use different herbs, if you prefer.

We had mushrooms to use up, so we chopped them up and put them in to add a bit of a “meaty” texture but without the meat. Plus, mushrooms are one of Dr. Joel Fuhrman’s GBOMBS foods – some of the healthiest foods on the planet!

black bean stew

Yield: ~10 cups

Ingredients

  • 1 tablespoon coconut oil
  • 2 medium onions, diced
  • 2 cloves garlic, minced
  • 2 medium carrots, chopped
  • 1/2 pound cremini (AKA baby Portobello) mushrooms, diced
  • 1/4 teaspoon cayenne pepper
  • 1 1/2 teaspoons dried oregano
  • 1/2 teaspoon sea salt
  • 2 cans diced tomatoes, no salt added (don’t drain off the juices)
  • 1 15-ounce BPA-free can black beans (we like Eden brand)
  • 2 bay leaves
  • 1 cup long grain brown rice (Trader Joe’s sells 15-minute brown rice!)
  • 6 cups vegetable broth (Click here to see how cheap and EASY it is to make your own)
  • 4 cups dark greens, chopped (we used red curly kale)
  • black pepper to taste

Directions

  1. In a colander/fine mesh strainer, rinse rice under cold water. Set aside.
  2. In a large stock/soup pot over medium-high heat, heat oil. Add chopped onions, garlic, carrots and mushrooms to pot. Mix well. Cook until veggies are soft, about 5-7 minutes.
  3. Add cayenne pepper, oregano and sea salt to vegetables and saute 1-2 minutes more.
  4. Add tomatoes and their juices, beans, bay leaves, brown rice, and broth. Stir to combine. Bring to a simmer.
  5. Once simmering, cover and reduce heat. Cook at a low simmer for 40-50 minutes or until rice is fully cooked. We used 15-minute quick cooking brown rice from Trader Joe’s, so we had a much shorter cooking time.
  6. Once rice is cooked, add dark greens and stir to combine. Add water if needed (we added about 1 cup of water). Cover and let cook about 5 minutes or until greens are wilted.
  7. Remove bay leaves and serve.

Since this made such a large batch, we froze some of the soup in mason jars, so we will have it in the future when we don’t feel like cooking but want a home cooked meal 🙂 If you freeze it, make sure to leave 2 inches of room between the top of the stew and the lid, so it has room to expand!

Energy-Boosting Super Food Trail Mix

I made an announcement a week ago that I had been selected as one of the Top 10 Health Promotion Professionals in the country, and I was SO excited about it!

Well, I found out even more amazing news this week!! I WON the whole thing and was selected as the #1 Health Promotion Professional in the COUNTRY! Ahhhh! I seriously couldn’t believe it when I found out on Tuesday afternoon.

welcoa

The prize is an all expenses paid trip to San Diego for the WELCOA conference in late March AND I will have the honor of being called up on stage to be recognized and be given a few minutes to speak. I was so excited about it that I woke up yesterday morning and wrote what I want to say! I can’t wait.

Here’s the write-up that WELCOA put together about the award. I’m immensely grateful to have this recognition and the opportunity to share my passion and vision with more and more people.

All of my friends, family, coworkers, classmates, and mentors have been so gracious with their kind words this week. Thank you to everyone who has believed in and supported me. I couldn’t be happier!

I’ve definitely been feeling the love as we make our way into Valentine’s Day this weekend 🙂

What better way to celebrate than to share an energizing, beautifying, heart healthy trail mix recipe with you!

As I’ve shared in the past, one of the keys to eating for all-day energy is to make sure we are including a combination of protein + healthy fats + fiber into our meals and snacks.

It’s also important to include lots of nutrient-rich foods (foods loaded with vitamins, minerals, antioxidants, phytochemicals, and other health and beauty-boosting ingredients).

When our body has the nutrients it needs, we’re less likely to have cravings and more likely to maintain our health and weight.

trail mix

Today’s trail mix fits the bill. We make a batch at the beginning of the week, and it lasts us for about 2 weeks.

Most of the ingredients in this recipe (nuts, seeds, berries) are GBOMBS, an acronym for some of the healthiest foods we can eat – foods that fight inflammation, damage to our cells and fat storage. It also contains blood-sugar balancing cinnamon as a natural sweetener.

Check out some of the super awesome health benefits of this super food trail mix. Click the hyperlink for each ingredient to learn more specifics about why it’s such a super-powered food!

Pumpkin Seeds: Loaded with vitamins, minerals, fats, and protein that may promote heart health, immune health, help fight diabetes, and offer unique benefits for men’s prostate health and women’s relief of menopause symptoms

Sunflower Seeds: Good source of magnesium to calm your nerves, muscles and blood vessels; anti-inflammatory, heart healthy fats and vitamins; the detoxifying and cancer preventive mineral selenium; rich in compounds called phytosterols that promote healthy cholesterol levels.

IMG_6173

Almonds: Rich in the skin-beautifying, anti-aging antioxidant vitamin E and full of anti-inflammatory fats and phytochemicals (think, fight-o-chemicals!) that help protect our skin and our heart.

Walnuts: Cancer-fighting properties, promote heart health, contain powerful and protective antioxidants, aid in weight control, boost brain health, and help with blood sugar control in diabetics. Our heart health is something we should all take very seriously. Many people’s diets are poisoned with fast food and sugary snacks. Now more than ever, it is of paramount importance that people learn CPR. In fact, CPR training in Ottawa might help you master the skill.

Goji Berries: Known as the “longevity” fruit in China after being used in Chinese medicine for thousands of years, goji berries are truly a super food. They have been associated with vision and immune health, improved memory, and cancer protection. Find them cheapest at an Asian market or Home Goods. You can also find them in health food stores and on Amazon and Vitacost, but they are a bit pricy.

Cacao Nibs: Raw cacao contains more than 300 phytochemicals and more antioxidants than any other plant food. It’s loaded with compounds that are known to improve heart health, cholesterol, stress levels, and inflammation and naturally boost our mood and feelings of “bliss.” Raw cacao nibs are basically pieces of the raw cacao bean (where chocolate comes from). They are a bit bitter but have a nice crunch, so I usually eat them in a trail mix or sprinkle them on a smoothie.

Coconut: Check out this post about the health benefits of coconut. I wrote about it in my 11 Sweet Treat Pantry Essentials Post.

You can find all of these ingredients at Nuts.com!

super food trail mix jar aerial

Ingredients

1 cup raw sunflower seeds
1 cup raw pumpkin seeds
1 cup raw almonds
1 cup raw walnuts, chopped
1/2 cup goji berries or raisins
1/2 cup raw cacao nibs
1 cup coconut flakes, lightly toasted
1 cup roasted chickpeas (Nuts.com, The Good Bean, Biena and Chickpeatos are great brands!)
1 1/2 teaspoons ground cinnamon
1/8 teaspoon sea salt

Directions

Mix all ingredients in a bowl until evenly coated and store in a glass container in the fridge.

Coconut Chai Almond Butter Bites {Paleo, Vegan, Gluten-Free}

When I lived in Granada, Spain during my semester abroad in college, I spent a lot of time at places called teterias or “tea houses” as they’re known in English.

We sat on ornate cushions at low tables as we sipped aromatic herbal teas and took in the bold scents and colors as well as the relaxed vibe of the room.

teteria

Visits to teterias introduced me to the vibrant and complex flavors of masala chai tea, which is what inspired today’s recipe.

The word chai actually means tea, so whenever you hear someone refer to “chai tea,” they are likely talking about the mix of spices in it known as masala chai.

Depending on who you ask, masala recipes vary, but they almost always include cinnamon, cardamom, ginger, cloves, and black pepper. Some blends also use nutmeg and/or star anise, which has a licorice-like taste.

Not only does this spice blend make for a rich and flavorful tea, but it also works well in dessert recipes like this one.

bite2 coco bites

Almonds and almond butter serve as the base of this recipe.

I love using almonds in any form because they are loaded with some serious health benefits:

coconut chai bites

Yield: ~18 bites

Ingredients

  • 1/2 cup raw almonds
  • 1/2 cup + 2 tablespoons shredded coconut, unsweetened
  • Medjool dates, pits removed
  • 1 tablespoon coconut oil
  • 2 tablespoons hemp seeds
  • 1/4 cup almond butter
  • 1/2 teaspoon ground cinnamon
  • 1/2 teaspoon ground ginger
  • 1/4 teaspoon ground cardamom
  • 1/8 teaspoon ground cloves
  • 1/8 teaspoon black pepper (yes, you read that right!)
  • 1/4 teaspoon fine grain sea salt
  • 1/2 teaspoon vanilla extract

Directions

  1. Pulse almonds and 1/2 cup shredded coconut in a food processor until completely ground (no chunks of almonds!).
  2. Add the remaining ingredients, except for the 2 tablespoons of shredded coconut, and blend in the food processor until all ingredients are combined into a dough-like consistency.
  3. Lightly toast the remaining 2 tablespoons of shredded coconut until lightly browned.
  4. Roll dough into balls with the palms of your hands, and then roll them in the toasted shredded coconut.
  5. Store in the refrigerator in a glass container. They will firm up in the fridge because the coconut oil will cause them to “set” at that cooler temperature. If you want them to be a little softer, feel free to set them out on the counter for 10-15 minutes before eating. As you chew them slowly, they will feel like they are melting in your mouth because of the coconut oil melting 🙂

Enjoy for breakfast, a snack or dessert!

What are some of your favorite flavor combinations? Let me know and I’ll try to incorporate them into a future recipe!

Chocolate-Covered Cherry Smoothie {Dairy-Free, Paleo, Vegan}

You guys…THIS IS AMAZING!

Seriously, it’s so good! It tastes like a decadent dessert, but you can have it for breakfast.

I couldn’t decide whether to call it a smoothie or a milkshake, so I opted for “smoothie shake.” 🙂

I was inspired to make this recipe after making a cherry chocolate pudding and thought I would try to make a drinkable version. It’s one of the tastiest things I’ve made and is now Bill’s “go to” smoothie in the morning.

What I like the most about smoothies (or, in this case, milkshakes!) is how easily you can pack lots of energy, immune and beauty-boosting nutrients into ONE glass.

This one is loaded with anti-inflammatory and beautifying foods like hemp seeds, cacao powder, avocado and spinach.

But cherries are the star. They’re a fruit that we’re all familiar with but don’t hear too much about healthwise. Check out all of the health-boosting benefits of cherries below.

cherries

Why I love cherries:

Check out this link from Dr. Mercola or this one from Dr. Joel Fuhrman to learn about even more of the health benefits of these power-packed fruits 🙂

Not only is this smoothie shake fueling and nourishing, it’s also rich, creamy, chocolatey and silky smooth. You have to try it!

choco cherry 1Cherrychocshake1

Ingredients

  • 2 cups baby spinach, loosely packed (this has the LEAST flavor of any greens)
  • 1 Medjool date, pit removed
  • 1/4 avocado
  • 2 tablespoons hemp seeds (my go to protein source for smoothies!)
  • 1 tablespoon raw cacao powder
  • 1/4 teaspoon almond extract (optional but amazing)
  • 3/4 cup frozen cherries (BJs Wholesale club now sells bags of organic frozen cherries)
  • 1 – 1 1/2 cups unsweetened almond milk (check out my video for how to make your own)
  • Pinch fine grain sea salt
  • Optional: sprinkle some cacao nibs on top for a chocolatey crunch!

Directions

Put all ingredients in a blender in the order listed above and blend for about a minute or until smooth and creamy.

**If you don’t have a high-speed blender like a Vitamix, Blendtec or Ninja, blend the liquid and spinach FIRST and then add the other ingredients 🙂

Recognized as One of the Top 10 in Health Promotion!

I AM SO EXCITED TO SHARE THIS NEWS!

A panel of wellness industry experts selected me as one of the Top 10 Health Promotion Professionals in the COUNTRY! EEEK!

I’m pretty sure I was smiling ear to ear the whole day yesterday when I found out 🙂

welcoa top 10

210 nominees applied for the award, 100 Health Promotion Professionals were chosen as the best of the best, and I made it into the top 10!

On January 29, 2015, less than one week ago, I was inspired to write this in my journal during my morning quiet time:

Something BIG is about to happen, and I’m ready for it. Bring it on!

I had no idea things would move SO QUICKLY or that a “big” recognition like this would be coming my way.

But if I’ve learned anything in the past 5 months from visionaries who make things happen – Vani Hari (the Food Babe), Meghan Telpner, and Danielle LaPorte – it’s that you have to OWN what you want in your life and pursue it with passion.

intention

Over the past 8+ years in my role as the Wellness Director at Silberstein Insurance Group, I’ve had the privilege of working with companies and their employees, guiding them to build healthier workplace cultures and teaching them how to eat for nourishment, energy, and vitality. A healthier workplace can promote great mental wellbeing as well as efficient work output. There is more here about this and what interest and input into a workforce can do for companies.

I get to share my story, what I’ve learned, and how I’ve healed and deliver a refreshing message of hope and inspiration that sparks people to make themselves and their health a priority.

Since setting my intentions this year about how I want to FEEL, I’ve been actively pursuing things that generate these feelings:

IMG_7369

When I’m speaking, presenting, teaching, cooking or writing, I feel those things. I come alive, get “in the zone.” and feel purposeful and “on fire.”

I am the best and most authentic version of myself, doing what I know I am meant to be doing with my life.

It’s an immensely gratifying feeling.

Yesterday, I had a special opportunity to feel fully alive as I spoke at the Carroll County SHRM‘s quarterly meeting about Creating a Culture of Health at Work to an engaged group of HR professionals and business leaders.

ccshrm

Tomorrow I’m teaching my co-workers the tips and tricks to Meal Planning 101, and next Tuesday I’ll be visiting a client in Delaware to talk about Decoding Food Labels and Debunking Health Claims Hype.

At the end of the month, I’m leading a workshop at a women’s retreat in Gettysburg, Pennsylvania to share what I’ve learned about how to eat for energy, beauty, and optimal health. Click here to learn more about the retreat or to register.

With each of these opportunities, I feel more vibrant, connected, and radiant and clear about my life’s purpose.

I’m also working with my web designer to brand and completely revamp the look and feel of this website, and I can’t wait for you to see the unveiling in March! It’s going to be amazing 🙂

This has already been an incredible year, and I am SO grateful for your support, kind words, and encouragement. I look forward to sharing more delicious recipes, tips and tricks for healthy living, and inspirations to encourage you to go after what you want and be bold about what is truly possible in your life.

Here’s to 2015 – the year of being radiant and making great things happen!

IMG_1162

Page 1 of 2

Powered by WordPress & Theme by Anders Norén