Month: March 2014

How Functional Medicine Has Transformed My Health & Life

My goal in writing this post is to introduce you to a new way of thinking about health and approaching health care.

One of the keys to my healing journey has been partnering with healthcare professionals who are trained to understand my body as an integrated system rather than a series of disconnected symptoms.

Today, I feel better than I’ve ever felt, and you can, too.

doctor_of_future

For most of my life, I was diagnosed and treated by multiple physicians, who prescribed me medications of some sort at least once a year – medications that, over the span of several decades, damaged my body and compromised my health.

Because of my painful, chronic ear and sinus infections, I started seeing specialists when I was four years old and was prescribed countless doses of antibiotics over the next decade. By the time I was in high school, I had been through a half dozen ear and sinus surgeries. Scarring caused by all of the infections eventually resulted in a 40% hearing loss in my left ear, which I still have today.

One of the most important things to remember after your hearing loss diagnosis is that there are a number of different treatments and products out there that can make managing the health of your ears a little easier. Thankfully, there are treatments and products available now that can combat most types of hearing loss and provide you with a better quality of life. Speaking to your doctor, be they from Southwest Care or elsewhere, is key when it comes to making the choices to help you in your treatment.

For example, one of my friends who lives with hearing loss uses a hearing amplifier and has found that this small device has improved her ability to hear. As with any health-related matter, it is so vital to find unique ways to combat your ailments.

At the age of 19, I started seeing a gastroenterologist for digestive health issues and was put on the acid-reducing medication Prilosec. I ended up staying on a variation of that medicine to control my reflux until I was 28 years old.

The odd thing about all of this? I thought it was normal.

I had bought in to the idea that I needed to see a specialist for every symptom and take “a pill for every ill.” No one was asking what was at the root of my health issues. I was frustrated.

What if it didn’t have to be that way?

What if I could figure out the underlying causes of my discomfort and pain? Was it possible that my ear and sinus issues were related to my digestive problems? Could what I was or wasn’t eating be at the root of why I was sick?

Until recently, I didn’t know that 70-80% of the immune system resides in and along the wall of the digestive tract. Since everything we eat goes through our digestive system and, therefore, interacts with our immune system, how can what we eat not affect our health?

Like so many people, I figured all of the specialists I was seeing would have made connections between what I was eating and why I was sick and in less than optimal health.

Unfortunately, traditional medical school training is focused on diagnosing and treating illness with relatively little education about the significant role of proper nutrition.

In fact, the 2010 Nutrition in Medicine project, which surveyed all 127 accredited medical schools in the U.S., revealed that doctors receive about 20 contact hours of nutrition education in medical school, down from 22.3 hours in 2004. Only about 25% of schools required a dedicated nutrition course.

The bottom line? Nutrition education in medical schools is inadequate, especially given all that is known about the role of food as medicine.

I’m optimistic that this will change in the coming years as prestigious institutions like the University of Maryland, Harvard, Duke, and Yale serve as leaders in preventive, integrative, and functional medicine and nutrition. While less familiar to the general public but widely respected in natural healing circles, I hope students hailing from schools like Bastyr University will play a greater role in our future healthcare system.

In addition to the changes I’ve made on my own to heal my body and restore my health through nutrition, I’ve learned a tremendous amount from reading books and hearing lectures by dozens of renowned physicians and nutrition experts, including Drs. Mark Hyman, Joel Fuhrman, John LaPuma, David Katz, and Alejandro Junger along with nutritionists, Tom Malterre, Kasia Kines and Kimberly Snyder.

A new wave of medicine that looks at the system, not just the symptom, is coming. Health care professionals who know that a focus on diagnosis and treatment isn’t enough if we want to have vibrant health and be well are pursuing training in functional and integrative medicine.

Are you curious about functional medicine from the perspective of a medical doctor? Do you want to know what a qualified medical practitioner thinks of holistic medical care? A doctor who has used this approach to heal dozens of his own health issues and thousands of people who were sick and tired of feeling sick and tired? This video could change the way you look at health forever:

I’ve been fortunate to partner with several health care practitioners who are trained to understand and have experience healing patients by tapping into the diet-disease connections. They are helping me heal my body and undo years of damage.

For the first time in my life, I’ve gone a full year without taking a prescription medication or even so much as an Advil.

For the first time in my life, I’m able to understand the underlying causes of why I was sick for so many years.

For the first time in my life I’m hopeful, no longer in the dark about my health, and inspired to continue my healing journey and help others do the same.

We can be well and stay well. Health and vitality can become the new normal.

Want to find a functional medicine practitioner where you live? Check out this link!
5 Simple Tips & Tricks to Stretch Your Fresh Food Dollars

On average, Americans throw away 20 pounds of food waste each month. That amounts to about $2,275 per year for a family of four, according to the USDA.

Bill and I are committed to buying and eating fresh, high quality food. We know it’s money well spent because our health is very important to us. We’d rather pay the farmer now than the doctor later! With that being said, we got to a stage where we were spending a lot of money on food we wouldn’t use in time. This wasted a lot of money and for people trying to improve our finances and build a credit score, this wasn’t good news! If you’re in the same situation but don’t have any credit history then make sure you take a look at credit cards to apply for with no credit because it will let you improve your finances a lot. So, we began our mission to both cut our spending and waste less! We’ve come a long way and think we have nailed it now. We also want to make sure we are getting the biggest bang for our buck and want our food to last as long as possible.

Check out 5 of my favorite tips and tricks below 🙂

Put a paper towel on top of your salad greens to absorb moisture, so your greens will stay fresh all week!

Put a paper towel on top of your salad greens to absorb moisture, so your greens will stay fresh all week!

Nothing is worse than stinky, slimy salad greens, especially when you buy a one pound carton of them like we tend to and want it to last for the week. A trick that we use that keeps our greens fresh for the whole week is to put a dry paper towel on top of the greens as soon as we open the container. The paper towel helps the greens stay fresh longer because it absorbs the moisture that naturally occurs in the container.

Annoyed by the layer of oil on top of your peanut or nut butter? Turn that jar upside down!

Annoyed by the layer of oil on top of your peanut or nut butter? Turn that jar upside down!

You’ve made the switch to “natural” peanut and nut butters and moved away from the processed, sugary versions – great! You may discover that a layer of oil forms on top of the peanut or nut butter when you open the jar and that mixing it in can be a real pain and result in oil being spilled all over the jar, your hands and your kitchen counter, making for quite a mess. Other times, you mix in the oil but end up with a dry mass of nut butter at the bottom of the jar that the oil didn’t quite reach. Bummer.

Here’s the trick to make sure that never happens again! When you get home, store the jar upside down in your pantry. When you’re ready to open it, flip it right-side up, give it a brief stir and then refrigerate. You’ll be happy to see that the oil has mixed in and you won’t have to deal with a messy jar anymore. Cool, huh?

Freeze bananas to use in smoothies and dairy-free ice cream

Freeze bananas to use in smoothies and dairy-free ice cream

Are your bananas quickly browning and about to go to waste? Never throw away a banana again! When they start to brown and you don’t think you will get around to eating them before they do, peel them, cut them up into chunks or discs and freeze them! We always keep a bag of frozen bananas in our freezer and put half of one in our smoothies each morning (instant creaminess!) AND use them to make delicious, dairy-free “ice cream” (recipe to come!).

Store your nuts and seeds in the fridge to keep them fresher longer

Store your nuts and seeds in the fridge to keep them fresher longer

We use nuts or seeds of some kind just about every day either in smoothies, salads, snacks or other recipes like these. Because they contain delicate oils that will go rancid (spoil) when exposed to heat, it’s important to keep them cool. We go through them pretty quickly, so we store them in the fridge, but if you buy them in bulk or don’t use them often, store them in your freezer until ready to use. They won’t “freeze” because they have very little water content. We store them in glass containers that we buy really cheaply at Home Goods.

Tired of greens going limp? Cut off the ends and put them in a cup of cold water in the fridge!

Tired of greens going limp? Cut off the ends and put them in a cup of cold water in the fridge!

We eat a lot of leafy green vegetables each week. Doing this has been one of the keys to losing weight and keeping it off. Leafy greens are awesome because they are potent cancer-fighters, reduce inflammation (the root of most disease) and detoxify the body. They are also very cleansing and energizing. We want them to last as long as possible!

The other day, I had some kale in the fridge and hadn’t used it quickly enough, so the leaves had started to wilt and go limp. I cut off about a half inch of the bottom of the stem, put them in a cup of water in the fridge, and in a matter of hours, the greens came back to life! The stem pulls up water into the leaves to rehydrate them. I’ve done this with other veggies like Swiss chard and celery (cut it into sticks and put it in a container of water).

Do you have any favorite money and food-saving tips or tricks? Feel free to share them below!

Lemon Tahini Kale Salad Recipe {Vegan, Gluten-Free, Paleo}

love kale. 

Prior to about 4 years ago, I had never eaten kale, and, to be honest, I didn’t even know what it was. I had no idea that the leafy green garnishes I had seen at buffets or the “leaves” on Edible Arrangements were none other than…kale!

Saw this sign on a walk and DC and had to take a picture. It's so true!

Saw this sign on a walk and DC and had to take a picture. It’s so true!

Kale is an absolute nutritional powerhouse. It scores a whopping 1,000 points on the ANDI scale, which stands for “Aggregate Nutrient Density Index,” a scoring system that rates foods on a scale from 1 to 1,000 based on nutrient content. To give some context, blueberries (another super healthy food) receive a score of 132. Kale is cancer fighting, anti-inflammatory, detoxifying, and loaded with bone-building and brain-boosting nutrients. This leafy green is definitely a standout!

We use kale in everything from smoothies and salads to soups, stir-fries and sautees. It is super versatile and a great way to pack a nutritional punch at any meal. It’s also one of the “Dirty Dozen” veggies that is most likely to be contaminated with harmful pesticides, so it’s important to buy it organic.

A Christmas gift from my dad - 50 Shade of Kale cookbook!

A Christmas gift from my dad – 50 Shade of Kale cookbook!

A few years ago, I befriended two holistic health coaches, who were trained by the health coaching program I recently completed and were a big part of the reason I pursued it. They introduced me to their delicious 5-flavor kale salad…one that has now become my absolute favorite and a staple in our house!

I bring this salad to potlucks and parties and enjoy it probably once a week for dinner. It’s the way that I introduce friends, family and clients to kale when they’ve never had it before. I haven’t had anyone turn it down yet, and it’s now my dad’s favorite, go-to salad, too. He raves about it!

5-Flavor Kale Salad

Dressing ingredients & a head of dino kale for the 5-flavor kale salad

Dressing ingredients & a head of dino kale for the 5-flavor kale salad

Dressing:
1/4 cup olive oil
3 Tbsp. raw tahini (sesame paste)
3 Tbsp. lemon juice (add more to taste)
1 Tbsp. maple syrup (we use Grade B)
1 Tbsp. tamari (wheat-free soy sauce) OR coconut aminos
1/2 tsp. crushed red pepper flakes
2 cloves crushed raw or roasted garlic
dash of sea salt
1/4 tsp. black pepper

Salad:
1 large bunch curly kale or dino kale (stems removed), washed and chopped (dino kale is also called Tuscan Kale or Lacinato Kale and holds up best in this recipe)
2/3 cup Dressing
1/2 cup raw sunflower seeds
1/2 cup shredded carrots

Click here for the full recipe!

5-Flavor Kale Salad served with garlic ginger shrimp & quinoa and roasted zucchini

5-Flavor Kale Salad served with garlic ginger shrimp & quinoa and roasted zucchini

Healthy & Homemade Donut Holes! {Gluten-Free, Paleo, Vegan}

 “These satisfy my sweet tooth without eating Little Debbie Donut Bites!”

“These won’t make it home!”

And finally, “So, there’s no sugar in these?”

These were just a few of the comments made by a donut-loving friend last night as he was enjoying a new treat I prepared for our church small group that we host each Tuesday.

I had never made them before, so I didn’t know what to expect. They were a huge hit, so you can bet I will be making them again, given the response! I never thought they would be compared to donut holes in terms of taste and texture, but I’ll take it!

They are SO easy to make, too. They’ll become a new staple in your house, I’m sure!

Healthy & Homemade “Donut” Holes

Mmm delicious!

Mmm delicious!

The recipe is adapted from this one on the Nourishing Meals blog. Tom and Ali have some awesome gluten-free, dairy-free, soy-free recipes, so I will be featuring more of them in the future.

Ingredients (see notes below regarding substitutions & where to find ingredients*)

  • 1/2 cup raw almonds
  • 1/2 cup raw walnuts
  • 1 cup Medjool dates, pitted
  • 1/4 cup raisins
  • 1/4 teaspoon cinnamon
  • 1/4 teaspoon ground cardamom
  • 1/4 cup raw almond butter
  • 1/2 teaspoon vanilla extract
  • 1/4 teaspoon fine grain sea salt
  • unsweetened, shredded organic coconut

Directions

  1. In the food processor fitted with the “s” blade, grind the almonds and walnuts until finely ground.
  2. Add the dates, raisins, spices, and salt and grind to a fine meal.
  3. Add the almond butter and vanilla extract and process again until completely mixed.
  4. Form into balls and roll in shredded coconut.

I put mine in the fridge for about an hour, so they would firm up a little bit, but you can enjoy them right away, if you’d like!

Ground

Ground “meal” prior to rolling them into balls

*Ingredient & Substitution Notes

  • Can’t have walnuts or almonds? Use any other nuts or seeds in this recipe instead!
  • You find Medjool dates in the produce section of the grocery store OR online. We buy ours at BJs Wholesale club in a big container. Trader Joe’s also sells them.
  • If you don’t have cardamom, you can sub in ground ginger, more cinnamon or a combo of nutmeg and cinnamon instead.
  • The cheapest place I have found almond butter is at Trader Joe’s. If you can’t have almonds, sub in Sunbutter.
  • You can find unsweetened, shredded coconut in the baking aisle of most grocery stores or online here. We buy ours at MOMs in bulk.

I LOVE Caramel…and This Rich & Creamy Caramel Apple Dip! {Paleo, Vegan}

Whether they’re from Wockenfuss, Rheb’s or Krause’s, homemade dark chocolate caramels have always been my favorite indulgence since I was a kid.

I just love the rich, creamy, buttery taste of caramel!

IMG_7956

One of the unfortunate side effects of the typical deprivation and dieting mentality is that we feel like we have to “give up” anything that tastes sweet or satisfying.

At some point, we decided that “healthy” food just doesn’t taste good and that we have to settle for less flavor if something is deemed healthy.

Well, I refuse to give up flavor or sweets! When I cook and bake, I make sure that any recipes I prepare are delicious AND nourishing, even the sweet ones!

I came across this recipe for a raw caramel apple dip while I was on one of my favorite blogs, Nourishing Meals, and I just HAD to make it (and share it with all of you!).

Make it for yourself, your friends and family or bring it to a party or potluck. It has become one of my go to recipes for parties, and people often ask me to bring it back again. It’s super easy to make, too.

Dip your favorite fruit in it (we used some crispy, sweet organic Fuji apples), and enjoy!

caramelIMG_7961

Ingredients
1 cup medjool dates, pits removed (about 8 to 10 dates)
1/4 cup 100% maple syrup
2 teaspoons vanilla extract
pinch of sea salt

soaking water from dates, as needed

Here’s the full recipe from Nourishing Meals!

Just a few simple ingredients go into this tasty dip!

Just a few simple ingredients go into this tasty dip.

Soaked cashews serve as the creamy base. You would never guess it's dairy-free!

Soaked cashews serve as the creamy base. You would never guess it’s dairy-free!

Medjool dates. These are used to naturally sweeten foods and act like caramel in most of my sweet recipes!

Medjool dates. These are used to naturally sweeten foods and act like caramel in most of my sweet recipes!

5 MORE Must-Have Kitchen Gadgets Under $20!

Having the right tools in the kitchen helps to make food prep and cooking more efficient, easier, and fun!

If you missed my first post about 5 must-have kitchen gadgets – like the AvoSaver, garlic rocker, and an awesome dicing knife – click here to check it out!

Today, I’m sharing 5 MORE of our favorite kitchen gadgets (under $20!). We use these at least weekly, if not daily!

Here is a more extensive list of the best kitchen gadgets with some gadgets which cost over $20, but I thought I would do a smaller list for some of the cheaper items. So, with no further ado, here it is!

Fine mesh strainer, peeler trio set, stainless steel cup, onion saver, and microplane grater

Fine mesh strainer, peeler trio set, stainless steel cup, onion saver, and microplane grater

  1. Microplane Zester/Grater – We use this tool to grate ginger and turmeric root and to zest lemons, limes and oranges. We are thinking about getting these gloves because if you’re not careful with this thing you can definitely cut yourself.
  2. Swissmar Swiss Trio Peeler Set – There are few things more frustrating in the kitchen than a really dull vegetable peeler. Since we eat a lot of vegetables, we peel a lot of vegetables, so we use these peelers on a daily basis. I use it to peel the hunk of ginger root that I put in my smoothies in the morning. We also use these gadgets to peel butternut squash, carrots, parsnips, sweet potatoes, and eggplant.
  3. Stainless Steel Blender Cup – Bill and I make smoothies for breakfast most mornings, and sometimes we make a pretty hearty serving that doesn’t fit into a regular cup. Like most people, we like our smoothie to stay chilled. We looked online for one of those cups that restaurants give you when you get a milkshake and they make too much, and we found this one! We use it every day, and it does a great job keeping our smoothies nice and cold.
  4. Onion Saver – We eat lots of onions. Onions are one of the healthiest foods you can eat and are anti-cancer powerhouses. We dice them up in just about every stir fry, soup and saute we make, and we LOVE chopping them in big chunks and roasting them by themselves or with other veggies. They are SO good! Sometimes we don’t use the whole onion at one time, so we store the leftovers in this little onion house.
  5. OXO Good Grips Fine Mesh Strainer – The main reason we use this strainer is to rinse quinoa. We eat a decent amount of quinoa in the Druckenmiller household, and this fine mesh strainer is great because none of those pesky little quinoa seeds can fit through the holes, so you can rinse your quinoa worry-free! Check out this post about how to make quinoa and this one for my absolute favorite quinoa recipes!

We have an Amazon Prime membership, so we get free two-day shipping on just about everything we order from Amazon and just pay an annual fee of $79. We ordered a cast iron skillet on Amazon once, and those things are super heavy…but we didn’t have to pay any shipping! We love being able to price shop, and the 2-day shipping is awesome for everything from gadgets to cookbooks to dishwasher detergent packs.

A big thank you to my friend Jessica for introducing me to it two years ago! She used it as a way to get the least expensive diapers for her son, but we use it for everything from superfoods and kitchen gadgets to Christmas gifts and cookbooks!

Kitchen gadgets can be an affordable way to make your life that little bit easier. However, if you’ve got some extra money to spend, then why not consider upgrading your kitchen using an automation system like Creston? You can control everything form your television screen to the lighting, entirely remotely and at the touch of a button. A friend of mine has recommended this great crestron system in london if you’re tempted to learn more about turning your property into a smart home.

Do you have any favorite kitchen gadgets you can’t live without? Feel free to share them in the comments below!

How to Eat Without Guilt and Enjoy Your Food

Every day, we make choices.

And so many of us struggle with our choices around eating.

It’s a challenge to consistently eat a nourishing diet…or to even keep track of what that means amidst the newest diet or health food fads that flood the media.

It’s hard to know exactly what and how we “should” eat.

People often ask me for advice related to these key questions. Here’s what I’ve learned and found to be most helpful and transformative along my journey of health and healing.

It isn’t about eating  “good” foods or “bad” foods.

Nor is it about “cheat” days or “cheat” meals.

And no, we’re not talking about “being on a diet.”

We glorify some foods and villainize others for the sake of “being good” or to have an excuse for those times when we want to “cheat.”

What if we started thinking and talking about food differently?

What if, instead of thinking of food in terms of good/bad, healthy/unhealthy, following the rules/cheating, we began to think of it as real/fake? Living/dead? Nutrient-rich/nutrient-depleting? Anti-inflammatory/inflammatory? Detoxifying/toxic? Healing/harmful?

At this point in my journey, this perspective shift means a commitment to being a “qualitarian” – fueling my body with the freshest, most nourishing, nutrient-rich, delicious food available to me, so that I have the energy and health to do the things I want to do and am called to do with my life. Having this kind of vitality also means being able to spend lots of quality time with my friends and family.

When I eat, I don’t think of the food as “good” or “bad” or ask myself if I’m “cheating.” Those words stir up feelings of guilt and shame, which don’t make us feel particularly good and aren’t the best motivators for lasting changes.

Our body actually processes food differently when we eat it in a state of guilt and shame vs. one of calmness and acceptance. If we’re going to eat it, we might as well enjoy it.

I know that Krause’s dark chocolate caramels aren’t exactly loaded with health-promoting nutrients, but they taste delicious, and sometimes I want one. When I do, I eat it and enjoy it. If I eat it, I own it. I wasn’t “bad.” I didn’t “cheat.”

I simply made a choice.

Eating without guilt is very freeing. It actually means we can enjoy food more.

And food was meant to be enjoyed.

Chocolate-covered strawberry in the middle!

Bill and I enjoying our delicious chocolate-covered strawberry!

Instead of “being bad” or “cheating,” what if we started asking ourselves questions like these before making food choices?

  1. Is it real? (Hint: If it has 35 ingredients and a third-grader couldn’t pronounce most of them, then it’s not a real, whole food. Michael Pollan has written an awesome book that distinguishes between “real” food vs. what he calls “edible food-like substances.” Following the guidelines in his book provides a helpful starting point for determining what’s real and what’s not.)
  2. Is/was it living? (Hint: The life in food gives us life. If we’re constantly eating highly processed foods created in factories and industrial plants and not including adequate amounts of naturally growing, living, plant-based foods in our diet, then we’re very likely to be missing out on how alive we can feel when we are well nourished.)
  3. Is it nutrient-rich? (Hint: High quality, fresh, organic (if possible) foods are full of vitamins, minerals, antioxidants, and phytochemicals that help our bodies function at their best, resist and fight disease, heal and stay energized and vibrant. Not only are highly processed and refined foods nutrient-deficient, but they also pull nutrients from our bodies as we process them; they deal a double blow.)
  4. Is it anti-inflammatory? (Hint: Inflammation is one of the main reasons we are getting and staying sick and carrying excess weight that won’t seem to budge. Inflamed tissues hold on to weight and are the breeding ground for disease and sickness. When we eat anti-inflammatory foods, we can reduce inflammation and impact weight and disease risk).
  5. Is it detoxifying? (Hint: Most of the food and drinks in our modern diet are literally toxic to our bodies, causing us to get sick, stay sick, and hold on to weight. Low quality, highly processed, refined, and sugary foods loaded with chemicals like pesticides, hormones, preservatives and antibiotics keep our bodies in a toxic state. Eating foods that naturally detoxify the body helps to keep us well.)
  6. Is it healing? (Hint: If the answer to the previous 5 questions is “no,” then there’s a good chance that  what we’re eating/drinking may be harmful to our body and our health. This can vary from person to person. For many people, myself included, dairy products are harmful – their consumption is tied to weight gain, inflammation, ear/nose/throat infections and illnesses, bronchitis, congestion, allergies, skin issues, etc. For others, gluten (the sticky protein found in wheat, barley, rye, and a few other grains) is inflammatory and makes them very ill or keeps them from feeling their best. Curious if you might have a food allergy (we’re not just talking peanuts!)? Check out this post.)

If we start to shift the ways we think and talk about food, perhaps we can start making some lasting changes around what we’re eating without “dieting” and without guilt. 

When foods are no longer “bad” foods or “cheat” foods, it diminishes their allure, and we don’t want to eat them as much. We’re no longer rebelling against ourselves but are supporting ourselves to be well.

Imagine the health, energy, and physical well-being we could have if we focused on eating real, living, nutrient-rich, anti-inflammatory, detoxifying, healing foods!

The next time you eat, regardless of what it is, remind yourself, “it’s a choice, not a cheat“…and enjoy it!

How to Make Quinoa Taste Delicious: My Favorite Recipes!

In my post the other day, I shared the secret to cooking perfect quinoa every time. No more overcooked mush!

Knowing how to cook quinoa by itself is great, but for many of us, eating it plain has been our only experience with this little super seed. When we think of quinoa we think “bland, boring, and tasteless.”

It doesn’t have to be this way! Today I’m going to share how we make quinoa dishes taste delicious.

Quinoa with roasted red onions, carrots, white sweet potatoes and garlic with Swiss chard

Quinoa with roasted red onions, carrots, white sweet potatoes and garlic with Swiss chard

Here is my favorite way to prepare quinoa. It’s not super technical (i.e., no measurements – AHH!), but that’s okay. Part of the FUN of cooking is experimenting and giving yourself permission to not follow so many stinkin’ rules 🙂

  1. Cook one cup of it. It expands to 3-4 times its size so 1 cup dry = 3-4 cups cooked.
  2. Chop & roast some veggies (I love using red and vidalia onions, garlic, carrots and sweet potatoes or butternut squash, broccoli and cauliflower are great, too!). A few pinches of thyme, rosemary, and/or sage give roasted veggies great flavor. Use whatever veggies, herbs and spices YOU like!
  3. Chop up some greens (kale, Swiss chard, spinach, etc.).
  4. Put the quinoa and roasted veggies in a large skillet or saute pan on the stove and turn heat to medium-low.
  5. Add the greens. Toss everything together for a few minutes with tongs until the greens cook down but are still bright. Add a few splashes of water or veggie broth to prevent sticking/drying out.
  6. Remove from heat and squeeze the juice of 1/2 – 1 whole lemon or splash raw apple cider vinegar over the mixture and stir (acid = bite/flavor!).
  7. Top with toasted nuts/seeds (I like pecans, pumpkin seeds, walnuts and pine nuts), and for something sweet, dried cranberries or raisins.
  8. Add 1-2 tablespoons of olive oil (you may need more) as well as sea salt and pepper to your liking.
Quinoa with roasted butternut squash, yellow onion, and garlic with toasted pecans and kale

Quinoa with roasted butternut squash, yellow onion, and garlic with toasted pecans and kale

For anyone who likes to follow recipes with numbers in them, check out the yummy ideas below for some seasonal quinoa dishes! We made the first one this week for dinner 🙂

Roasted Sweet Potato, Kale & Quinoa Skillet – This is a perfect, warming winter dish. We cooked it in our cast iron skillet and made a few changes to the recipe. Roasting whole sweet potatoes in the oven took a long time, so next time, we’ll chop them up, toss them in some coconut oil, salt and pepper and roast them in the oven for 30-40 minutes at 400F. Also, we added a few squeezes of lemon juice and some toasted pumpkin seeds to the dish just before serving, and it was delicious!

Quinoa with Caramelized Butternut Squash & Roasted Brussels Sprouts – These are a few of my absolute favorite things 🙂

Quinoa Fried Rice – Bill and I prepare variations of this all the time. We throw in whatever veggies we have on hand, so don’t feel like you’re stuck with this recipe as is – modify it to include your favorites!

Super Simple Quinoa & Sweet Potato Chili – Is it time to change up your chili recipe? Give this one a try!

I have lots of other quinoa recipes on my Pinterest boards, so check them out!

Roasted sweet potato, quinoa and kale skillet

Roasted sweet potato, quinoa and kale skillet. Yum!

The Secrets to Cooking Perfect Quinoa…Revealed!

Quinoa is everywhere these days.

Popping up in funny Miller Lite commercials in the form of “queen-o” burgers.

Receiving props worldwide with 2013 being deemed “The International Year of Quinoa.” (Seriously, there is such a thing!)

And showing up on grocery store shelves in everything from cereals to snack foods.

All the while driving people crazy with its less than phonetic spelling!

Here are some fun facts about this hearty little seed:

  • It’s pronounced “KEEN-wah.”
  • It’s technically a seed or pseudocereal and is harvested from a plant related to beets and spinach.
  • It comes in a variety of colors (red, white, black, orange, brown, pink, pale yellow).
  • It’s a complete protein (contains all 9 essential amino acids) and is packed with nutrients like calcium, phosphorus, magnesium and iron.
  • There is a naturally occurring, bitter outer coating on quinoa called saponin that needs to be rinsed off prior to eating, otherwise it will be bitter.
  • It doesn’t contain gluten, the sticky protein found in barley, rye, wheat, and a few other grains, so it is safe for people with gluten sensitivities or intolerances.
  • Swap it out to replace rice or couscous to change up your recipes.

IMG_3428

Where do you buy quinoa?

I buy a big 4 pound bag for $10-$15 at BJs Wholesale Club, and it lasts for months. You can find it cheap at Trader Joe’s and in the bulk section of grocery stores like Wegmans and Whole Foods as well as in natural food stores like MOMs and Roots Market. All major grocery stores sell it these days, but it’s cheaper to buy it in bulk at the stores above or wholesale clubs than in a box at Safeway.

Want to know the secrets to cooking perfect quinoa every time? Follow these steps!

  • 1 cup quinoa
  • 2 cups water or low sodium vegetable stock (some people find using a little less liquid – 1.75 cups – works well, too, but I’ve always used two!)
  • Pinch of sea salt

Optional ingredient: Instead of sea salt, use a thumb-size piece of kombu (you find this seaweed online or at any of the stores listed above). When you add kombu to grains (and beans) while cooking them, it infuses them with minerals, makes the grain more digestible, and reduces acidity and gas!

  1. Rinse and drain the quinoa in a fine mesh strainer until the water runs clear. This gets rid of the bitter coating, so it is an important step!
  2. Put the rinsed quinoa, water and salt (or kombu, if using) in a pot.
  3. Cover and bring to a boil, then reduce the heat to a low simmer and cook for about 15 minutes.
  4. DO NOT STIR THE QUINOA WHILE IT IS COOKING. It will not cook properly if you do. If you want to check on it, just remove the lid and tilt the pot a little – if the water hasn’t been absorbed, keep simmering.
  5. When all the water is absorbed and the curly white tail “pops” off the quinoa, you know it’s done!
  6. Remove the pot from the heat, and discard the kombu (if using).
  7. Fluff quinoa with a fork. Let it cool slightly (10-15 minutes) before serving.

For the more visual learners, check out this one-minute video that shows you how to cook quinoa!

Unfortunately, many people’s first experience with this nutrient-packed seed is eating it plain, and they are often so scarred by that experience that they never to try it again.

I love quinoa, but I don’t like plain quinoa it’s boring and bland!

In my next post, I’ll be sharing my favorite way to prepare this super seed along with a few other delicious recipes, so stay tuned! Hooray for no more boring quinoa! 🙂

Unexpected “Fries” Surprise! (+ A Kickin’ Tomato Dipping Sauce)

I like eggs. I love plants

But for some reason, I’ve never been much of a fan of eggplant…And really, couldn’t we have come up with a better name? It’s called “aubergine” in French. Doesn’t that make it sound more appealing? 🙂

I’ve eaten it a few times, mixed in with a ratatouille, fried as “chips” when I was in Spain, and probably thrown into a soup at some point (people are sneaky!). I don’t know if it’s the texture or what, but I’ve never been crazy about this odd-looking vegetable.

IMG_3404

As I experiment with recipes each week, I like to incorporate foods I’ve never eaten before or try them using a new preparation. In my Hometown Harvest bag this week, I came across none other than…eggplant!

I’ve never actually bought or cooked eggplant before, but I’m up for the make-eggplant-taste-good challenge!

Whenever I need inspiration for recipes, I check out the dozen or so cookbooks I have, browse through my favorite blogs, or search on Pinterest. I found two yummy recipes and am sharing both with you today!

Baked Eggplant Fries & Kickin’ Tomato Dipping Sauce

**The KEY to making sure these don’t become limp, soggy eggplant mush is to put them on a paper towel on a baking sheet and sprinkle salt on them to pull out the water. Let them sit for about 25 minutes and pat them dry. The more moisture you pull out, the “crispier” the fries will be.**

IMG_3421

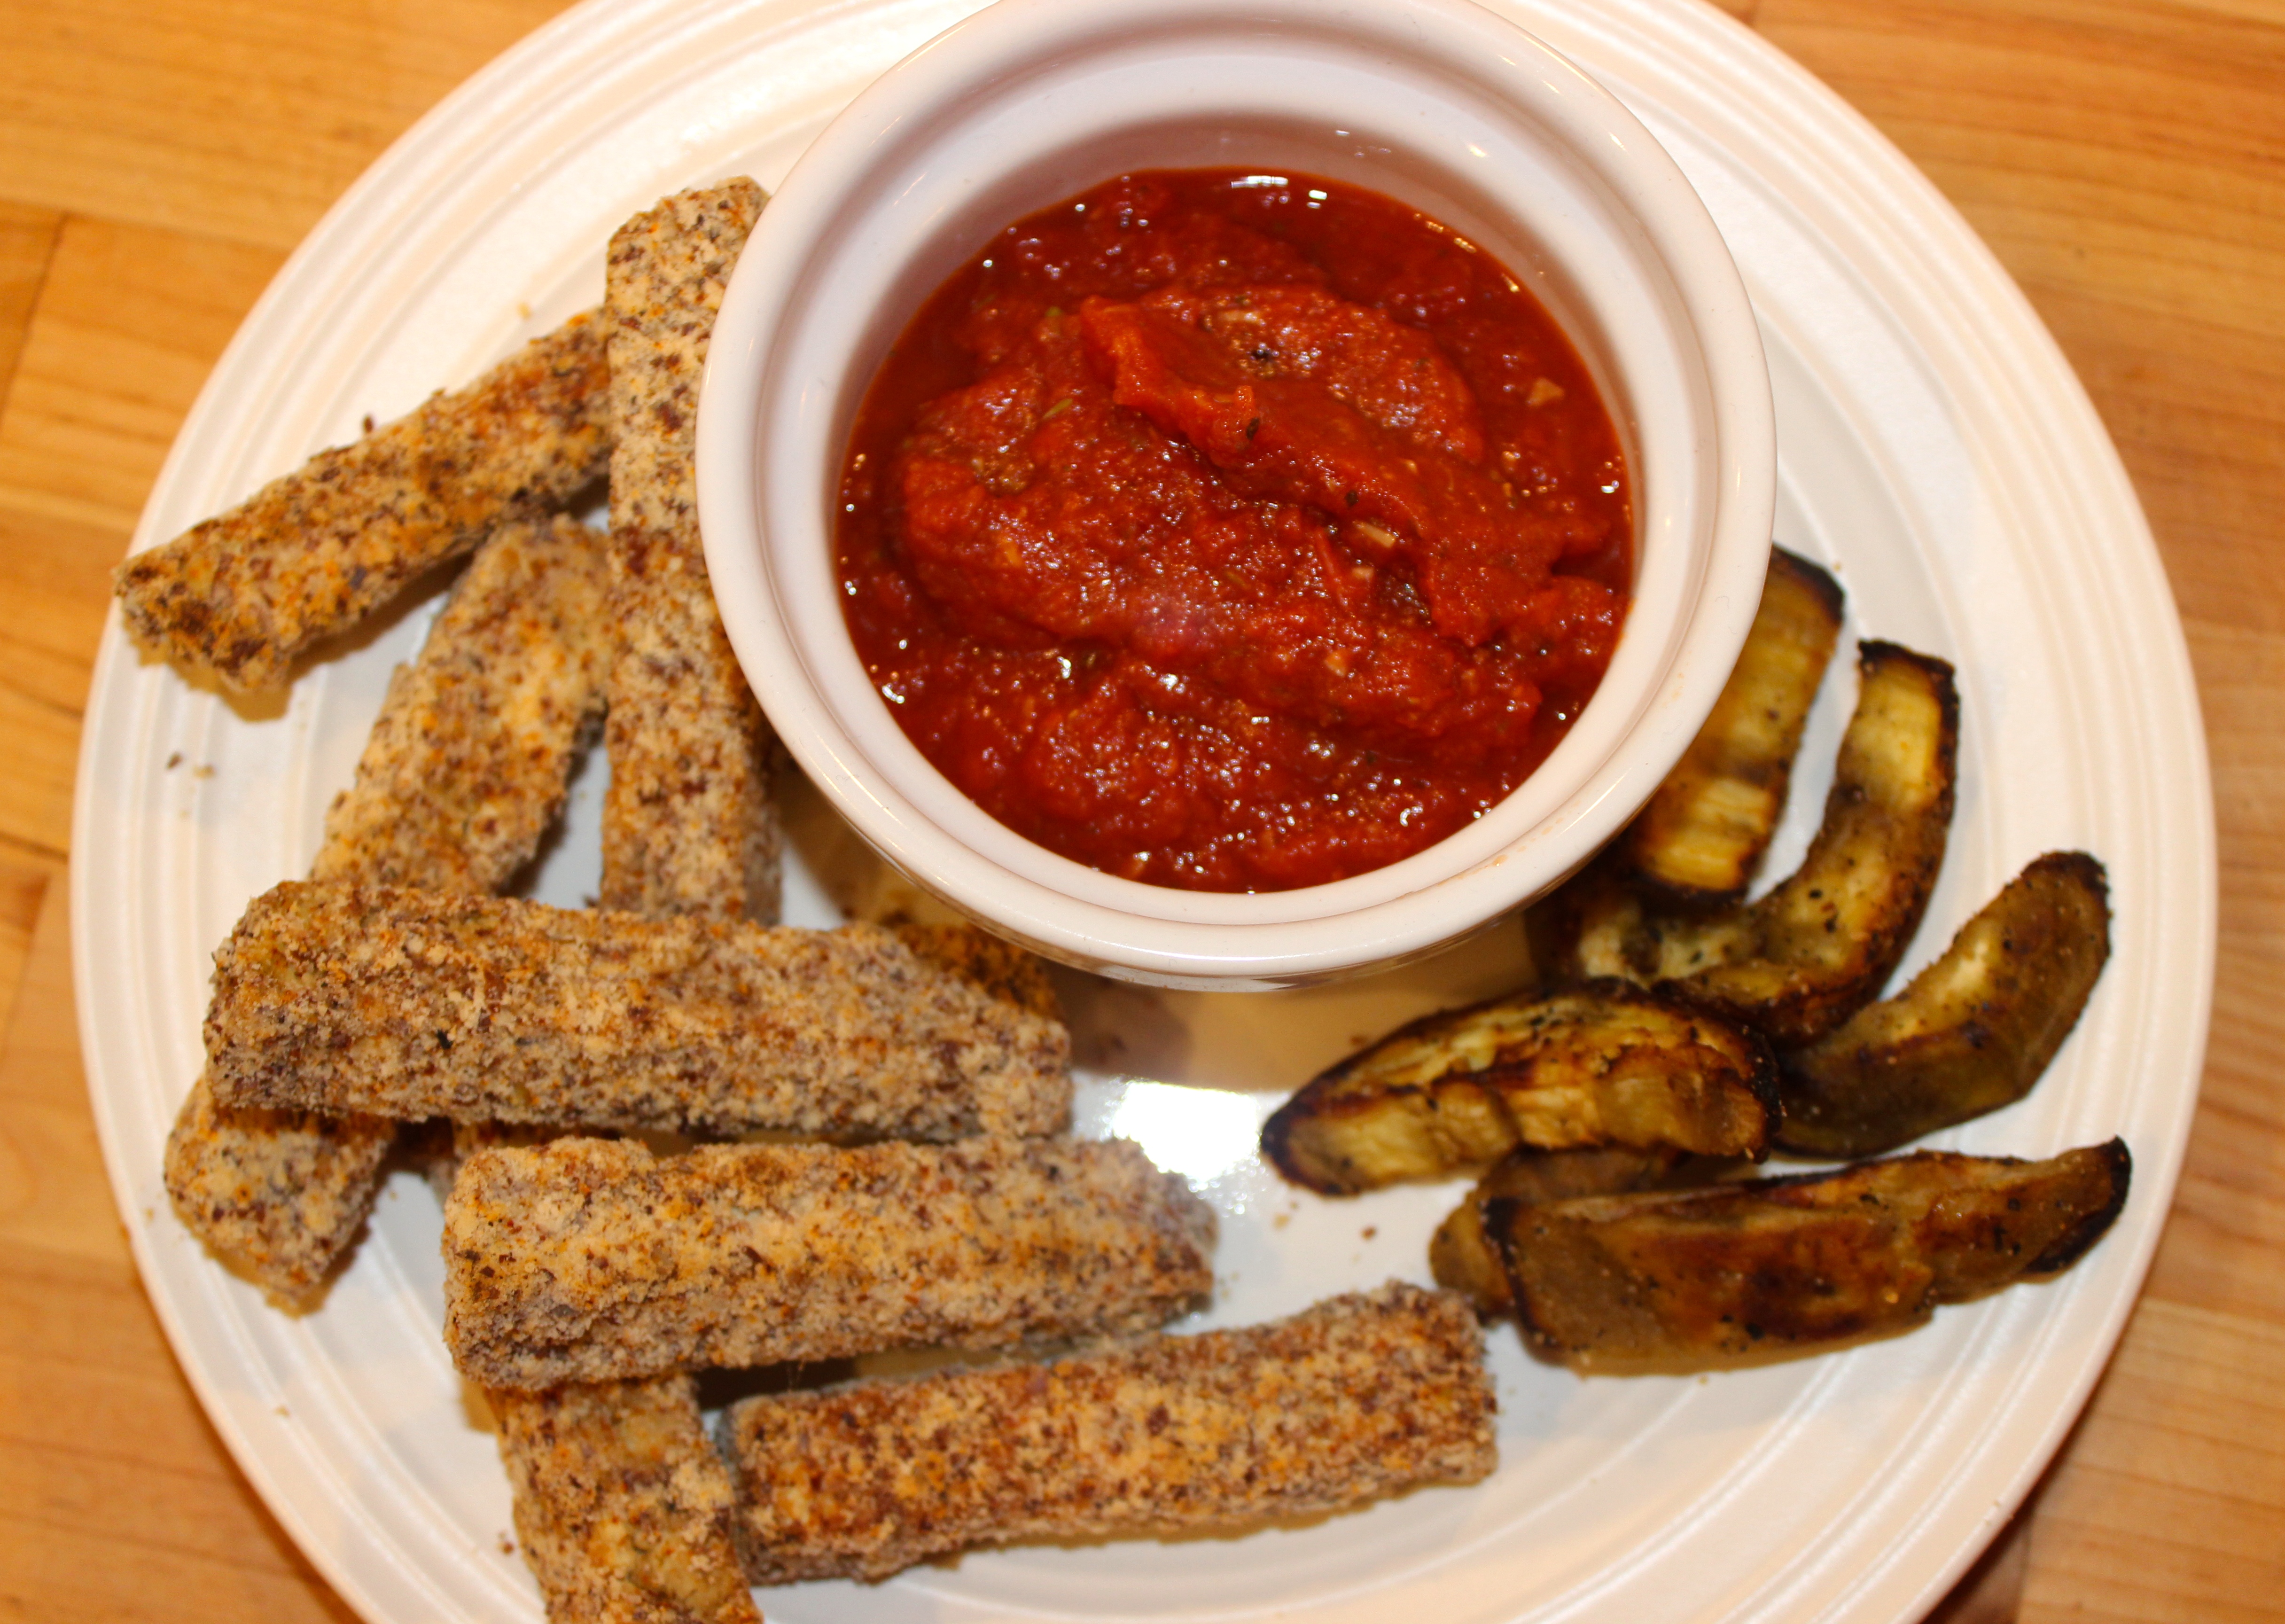
The crispy baked fries are on the left and the easy paleo fries are on the right

Ingredients

Eggplant Fries – Version 1
1 medium eggplant, peeled and cut into matchsticks
1 cup almond flour/meal + 2 tablespoon arrowroot powder OR 1 ½ cups cornmeal (Both work – your choice!)
1 ½ teaspoon fine grain sea salt, divided
½ teaspoon dried oregano
½ teaspoon garlic powder
½ teaspoon paprika
1 tablespoon olive oil or coconut oil, melted
2 free-range organic eggs

Almond meal/flour can be on the pricy side, but I usually find a good deal at Trader Joe’s, or you can click here for how to make your own

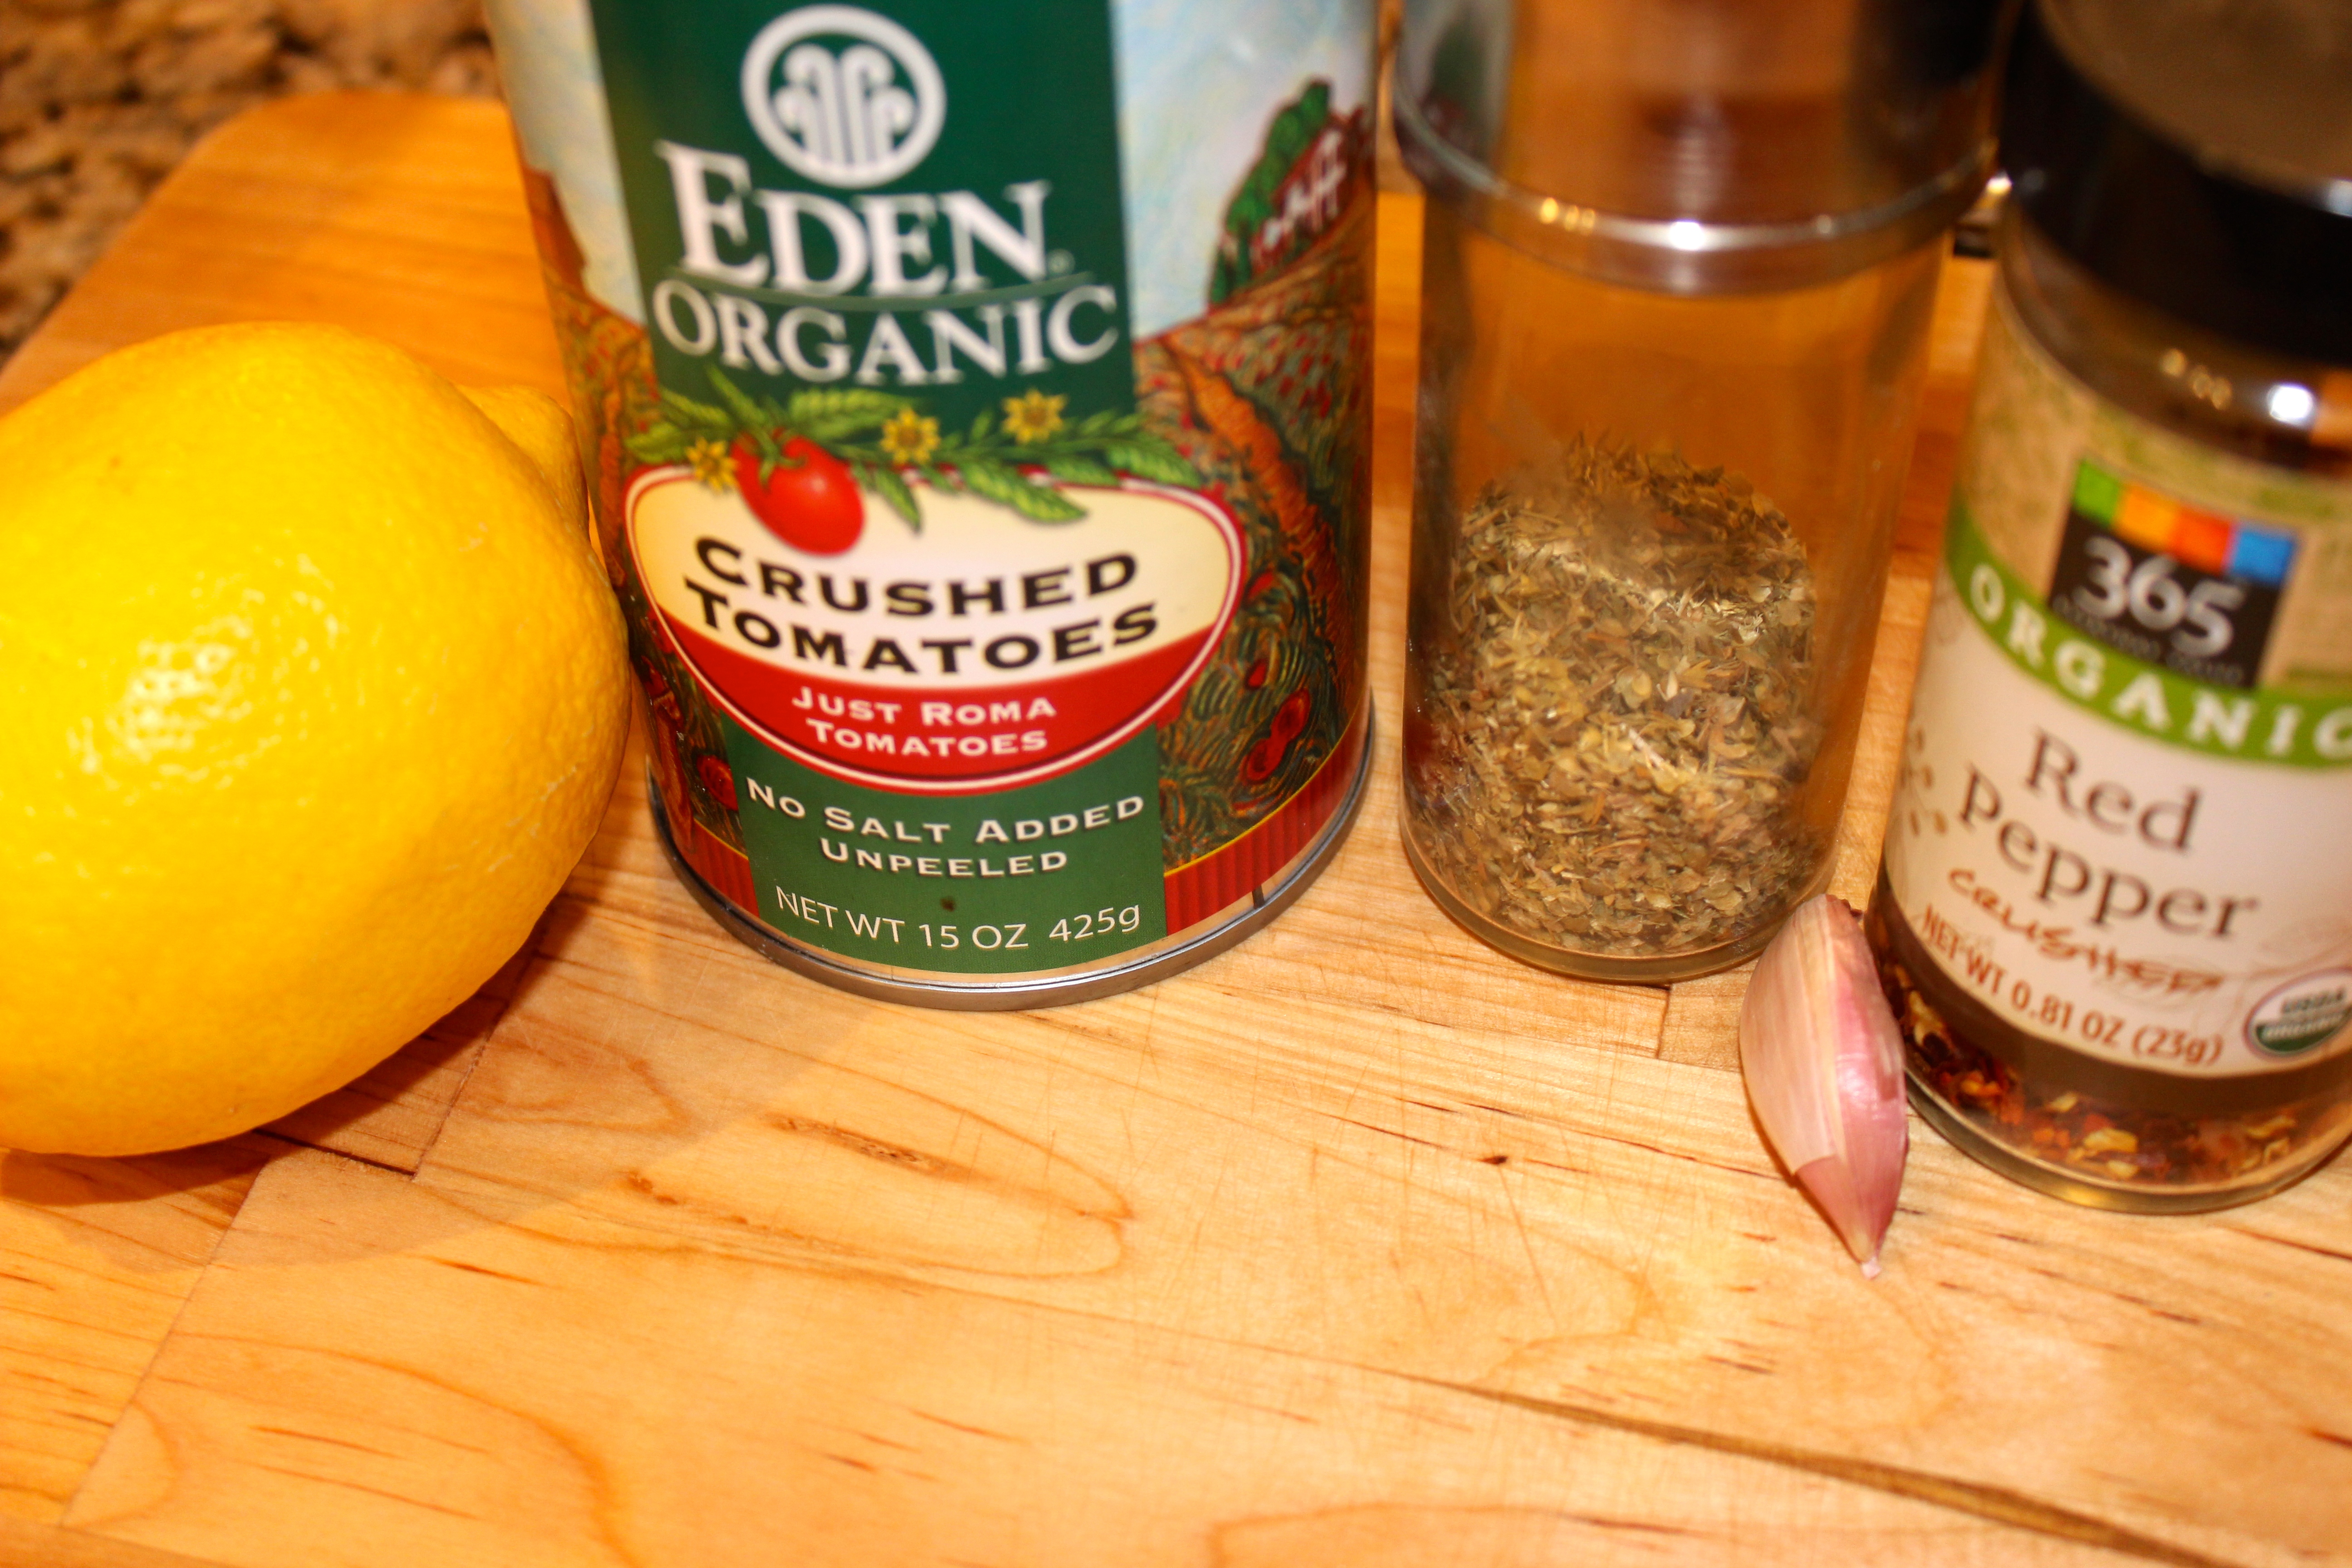
Spicy Tomato Sauce
1 tablespoon olive oil
½ teaspoon crushed red pepper flakes
½ teaspoon fine grain sea salt
1 clove of garlic, finely chopped
1 14 oz can crushed red tomatoes
zest of half lemon
1 tablespoon oregano

Click here for the full recipes for the crispy fries and tomato sauce! Also, check out my step-by-step pictures below for how to make the fries!

Here is the recipe for the Easy Paleo Eggplant Fries – Version 2

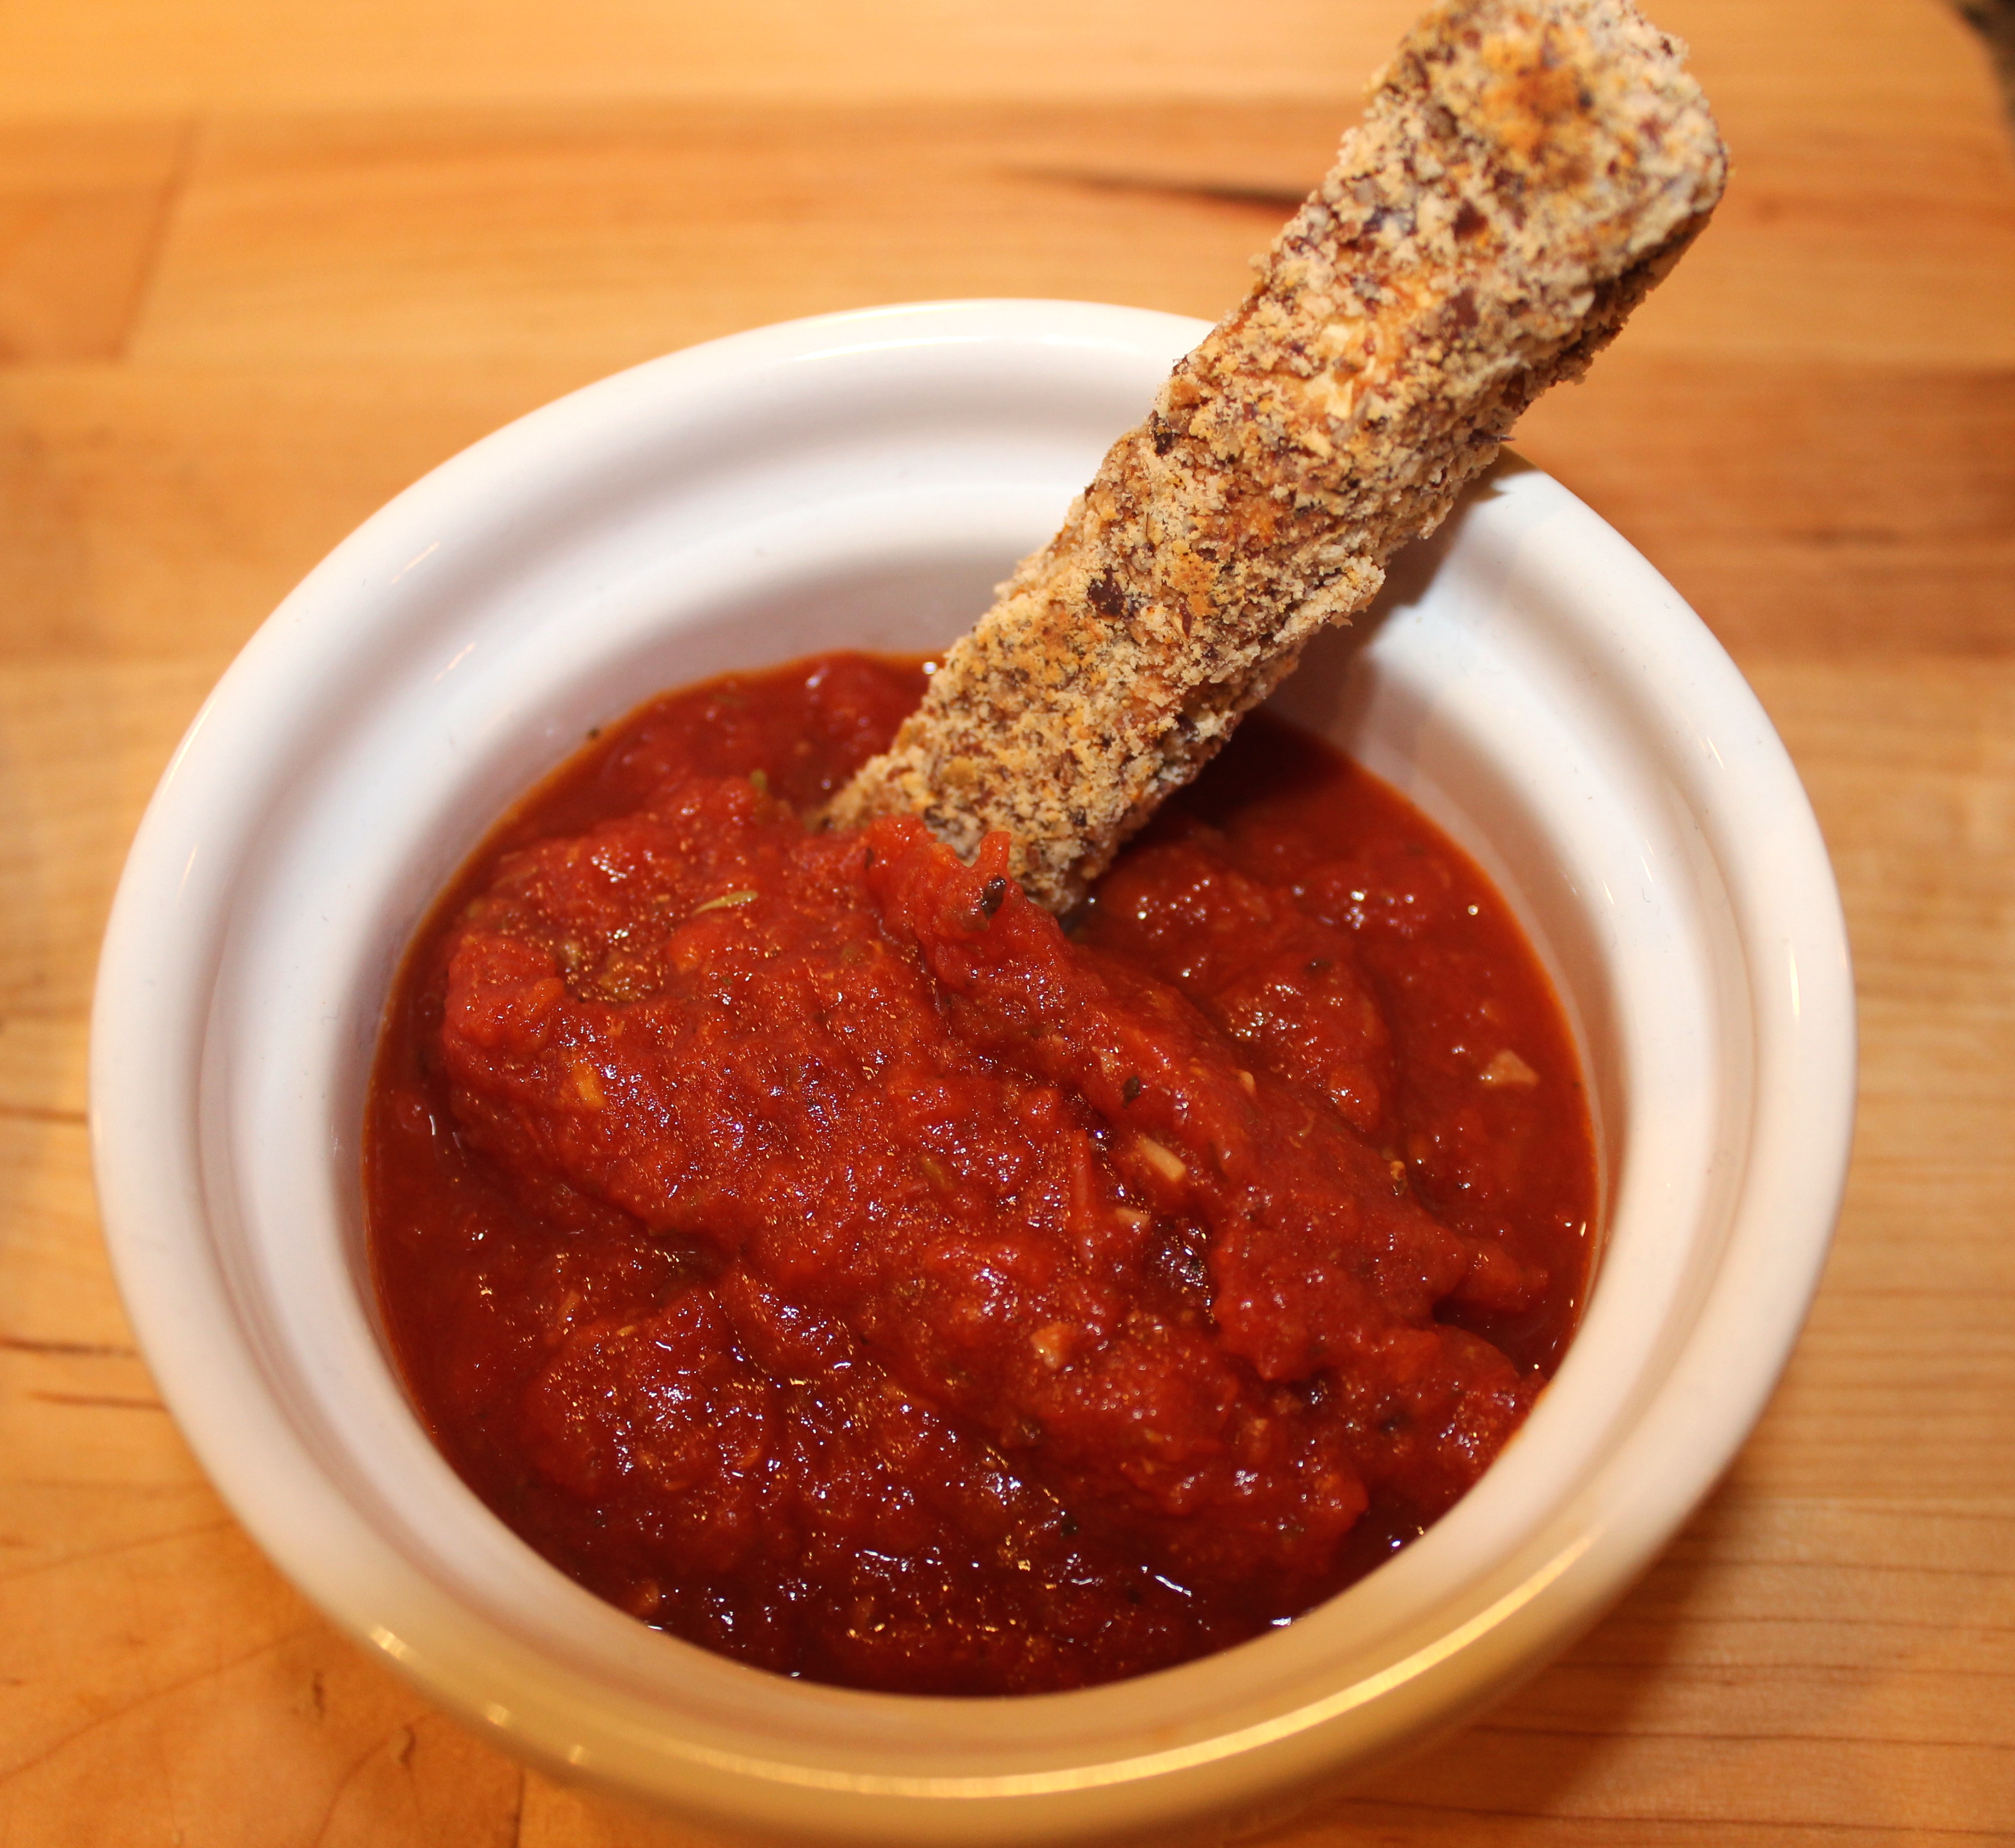
I didn’t know what to expect because I have only really ever had mushy eggplant, but the “breaded” fries held up really well! There is a nice crunch when you bite into them, and the breading is delicious. The kickin’ tomato sauce is really tasty, and that is coming from someone who doesn’t like “spicy” food!

Cut the eggplant discs into matchsticks after you peel it

After you peel the eggplant, cut it into discs and then into matchsticks

Lay the sticks out on a paper towel-lined baking sheet and sprinkle with salt to pull out the moisture

Lay the sticks out on a paper towel-lined baking sheet and sprinkle with salt to pull out the moisture

Dip the sticks in the egg base and then coat with almond and herb mixture before laying on baking sheet

Dip the sticks in the egg base and then coat with the almond and herb mixture before laying them on the baking sheet

Prepare the kickin' tomato sauce dip while the fries are roasting!

Prepare the kickin’ tomato dipping sauce while the fries are roasting!

Rotate the fries halfway through cooking for even browning and then dip in tomato sauce - YUM!

Rotate the fries halfway through cooking for even browning and then dip in tomato sauce and enjoy – YUM!

It was my first time cooking eggplant, so I have a lot more I want to learn, but I would say this first attempt was a success 🙂

What did you think? Do you have any other eggplant recipes that you like to make? Feel free to share any of your favorites in the comments below!

Powered by WordPress & Theme by Anders Norén