Month: September 2014 Page 1 of 2

I Met The Food Babe: 6 Lessons I Learned About Living On Purpose

When a once in a lifetime opportunity comes along, we don’t want to miss it.

Last week was one of those moments for me.

I had the privilege, honor and joy of meeting Vani Hari AKA the Food Babe and spending one-on-one time with her.

I met her earlier in the day in the press room at the Natural Products Expo East in Baltimore – an event showcasing the up and coming trends and products in the natural products industry. I had wanted to go for years, but it’s expensive, and prior to this year, I didn’t have the credentials needed to get in to the event.

IMG_5742

As a blogger, I found out that I’m considered “press” and got to attend for free! šŸ™‚

I was like a kid on Christmas, brimming with excitement about what I would learn and thrilled that I would be spending the day with other like-minded people who share my passion. (Stay tuned for a post on my favorite food finds at the expo!)

About a week before the event, I saw a post on the Food Babe’s Facebook page about an exclusive fundraising dinner for GMO-labeling that would be held in Baltimore the Thursday of the expo.

Had I read that right?

I couldn’t believe that one of THEĀ leaders, mover shakers and change agents in the health and food industry was going to be in my hometown of Baltimore…and that I mightĀ have the chance to meet her!

Millions of people have rallied behind VaniĀ in what is known as the Food Babe Army to support the charge she is leading to get the junk out of our food supply and demand that the food industry be transparent about and remove the harmful chemicalsĀ they’ve put in our food.

Subway, Kraft, Chick-fil-aĀ and most recently, Starbucks, have felt the restlessness and discontentĀ of the Food Babe’s followers and the collective power they have to sparkĀ change.

Despite my initial reservations about the cost of the dinner and the fact that I wouldn’t know anyone, I had a feeling it would be worth it, so I bought my ticket to what would ultimately be a sold out event.

It was a perfect late summer night, as all of the attendees gathered on the rooftop level of The Inn at the Black Olive restaurant with a delicious, local, organic spread laid out before us.

We listened intently as several of the speakers shared updates about what is happening in the movement to demand labeling of genetically modified organisms (GMOs) inĀ our food supply.

As dinner was winding down, I finished my conversation with my neighbor and looked to the other side of the room where Vani was chatting with a few other people.

I met the Food Babe!

I met the Food Babe!

Hoping I might have the chance to talk with her one-on-one, I lingered a bit. She signaled to me that she wanted to talk with me as she mouthed, “Are you leaving?” from across the room. I turned to the side, assuming she must have been talking to someone other than me.

I realized she wasn’t.

“Who, me?? Nope, not going anywhere!”

I wasĀ beyond thrilled thatĀ she was going to make time for me.

For the nextĀ 20 minutes or so, Vani sat with me, giving me her undivided attention, as she graciously listened to me recountĀ some of my health journeyĀ and share my passion for why I do what I do and how IĀ pursue my calling to help others transform their lives through food.

I asked her if she had any words of wisdom to share with me, any lessons she had learned along the way.

I tried to takeĀ in what she sharedĀ and store it in my memory for later, asĀ I wasn’t writing anything down while we talked. I’ve captured the gist of our conversation below.

6 LessonsĀ I Learned from The Food Babe

tell you no rnk

Vani experiences this first hand just about everyday.

Whether it’s Starbucks telling her they don’t want to meet with her or a grocery store kicking her out, she doesn’t let rejection or dismissals like that dismay her.

They just fuel her fire even more and give her yet another reason to keep fighting for what she and many others know is right.

No matter what you’re going through or what fight you’re fighting, be encouraged that you are doing it for a reason. Don’t let anybody tell you no if you’re fighting for what’s right.

go for it - 2

and

getreal - rnk

One of the things VaniĀ told me was that she held herself back more than anyone else.

Prior to going into blogging and activism full-time, she was working at a bank but was repeatedly encouraged by family and friends to drop the corporate gig and pursue her passion for food and health as a career.

She had beenĀ reading the bookĀ The Fire Starter SessionsĀ by Danielle LaPorte at the time and developing clarity aroundĀ her purpose and what she really wanted to do with her life.

VaniĀ said the book asks questions that help you “get real” with yourself about what you’re meant to do, which is exactly what she was trying to do two years ago in the midst of aĀ career transition.

After going through the questions in the book, she said she felt SO clearĀ about what she was supposedĀ to do with her life. She just hadn’t taken that next step to make it happen.

IMG_5954

The tipping point came on New Year’s Eve twoĀ years ago when she and her husband were at the top of Machu Picchu in Peru. Her phone (which hadn’t been working for days) suddenly came on, and in her email inbox was a notice from her jobĀ indicating thatĀ her current contract was about to expire.

She had to let them know whether she wanted to renew it.

With encouragement and affirmationĀ from her husband, VaniĀ made the decision in that moment not to renew her contract and to go after her passion as an activist and consumer advocate full-time.

If there’s something that makes your soul come alive and fuels your passion, go after it! You have been given that desire and that fire for a reason.

Following Vani’sĀ recommendation, I ordered the book and am already loving what I’m reading!Ā You can find it on Amazon if you want to order it for yourself to help you develop clarity aboutĀ what you’re meant to do.

betterplace - rnk

Vani got a little choked up when we got to this part.

In her corporate job,Ā she said allĀ she was doing was making more money for the bank. That wasn’t cutting it – not for someone as purpose-driven and intentional as she is.

She wanted to do something that would impact people’s lives and make the world a better place.

“How do weĀ want to be remembered when we’reĀ gone?”Ā she asked.

“I do this because I want to help people. I want to make a difference.”

Whatever you do with your life – whether you’re raising the next generation as a stay-at-home parent, nurturing and trainingĀ kids as a teacher, guiding and coaching people through challenging areas of life, like finance or health, or simply serving people with kindness and humility – commit to making the world a better place just by being in it.

Haters - rnk

I took some creative liberty with the exact wording on thisĀ one, butĀ here’s the gist of what Vani said in a speech earlier that night:

“The more progress we make, the more haters come out.”

All the more reason to keep fighting.

Vani shared with me that one of the challenges she runs into is that peopleĀ questionĀ herĀ credibility and qualifications to do what she does.

“I’m not a doctor or a food scientist,” she acknowledged.

But, you don’t have to be a doctor to impact people’s health and change their lives.

I face a similar feeling of inadequacy at times. “I’m not a dietitian or a nutritionist,” I tell myself. Some could use that as a reason to dismiss what I have to say about food and nutrition.

My dad? He’s an organizational consultant who is an expert at helping people and businesses get “unstuck.” He’s so good at what he does, he could have his own TV show and easily write a book. His background? SecondaryĀ Education and American History.

People come to us for guidance, advice or a listening ear because they can are inspired byĀ our passion, know how voraciously we pursue knowledge and see our commitment to excellence.

But, most importantly, because they know we genuinely care.

So, no matter who we are or what our training is or isn’t, here’s the truth:

We know enough to help someone.

We don’t have to have a particular title or trainingĀ to make a difference in the world.Ā 

What we do need areĀ passion, intellect, a desire to relentlessly pursue TRUTH, and persistence to “stick with it” when times get tough or we’re discouraged.

share rnk

It’s going to takeĀ all of usĀ comingĀ together to make change happen.

It can’t be up to one person.

Sharing information isĀ how we spreadĀ messages about what is true, right and good. Share what you learn with your friends, family, workplace, community, etc.

The Food Babe knows that much of her reach and success are due in large part to the Food Babe Army rallying behind her on social media and in their communities, doing their part to getĀ the message out to their circles of influence.

The more we share information intended to make the world a better place and help people, the greater ourĀ likelihood of having an impact.

If you have information or a skill or tool that can help another person, share it!

My hope is that you walk away from this post inspired and ready to stand up for whatever you believe in, Ā whatever fuels your fire, whatever makes you come alive.

One person can make a difference. The more we support each other, the greater the ripple effect each of us can have on the world.

IMG_4676

Top 10 Tips to Get Your Husband (& Kids!) To Eat Vegetables

When my husband, Bill, and I started dating, he was like most college studentsĀ and wasn’t a huge fan of vegetables.

The only vegetables he would eat wereĀ iceberg lettuce, carrots and raw green peppers.

That’s the case for most college-aged guys who are more concerned with Saturday’s party than whether or not they’re eating enough of their leafy greens.

College days...almost 9 years ago with my then "crush" and now husband! Pictures from college can be pretty humbling!

College days…almost 9 years ago in my first picture with my then “crush” and now husband! (Pictures from college can be pretty humbling!)

When we were talking about this topic the otherĀ day, Bill sharedĀ what a typical college day of eating looked like for him:

  • Breakfast: If he ate it, it was eggs, sausage, bread, and milk or cereal with coffee if he didn’t make it to the dining hall.
  • Lunch: Taco salad in a fried shell topped with cheese orĀ aĀ roast turkey sandwich with cheese, lettuce and mayoĀ with cookies for dessert…with a soda on the side.
  • Dinner: Whatever the dinner special was that night and ice cream or cookies for dessert.
  • Fourth Meal: If he was still hungry (or wanted something to do at night), he would go to The Pub for a fried fourth meal, which often consisted of either a cheese steak or chicken tenders and curly fries.

Fortunately for him, he had a revved up metabolism, since he was always playing sports, so he didn’t notice the ill effects of his diet at the time.

Over the past 8+ years, both of our diets and our bodies have undergone some pretty dramatic transformations, and we feel better than ever!

IMG_5209

I traded in my Beefaroni and buttered egg noodles for bok choy and quinoa, and Bill made the transition from cheese steaks and curly fries to smoothies and garlicky green beans.

I asked him what he has found to be MOST surprising and enjoyableĀ aboutĀ getting to where he is today, and very thoughtfully, he shared these two observations…

  1. “I’m surprised by how filling beans can be…and that I don’t need meat at every meal to feel full.”
  2. “I like knowing that I can order a meal at a restaurant…without holding the onions…and tomatoes…and mushrooms. I just order it ‘as is’.”

When people see how I eat, they almost immediately turn to Bill with a bit of skepticism and ask,

“Do you eat this stuff??”

One of Bills new) favorites! Garlicky green beans with lemon and slivered almonds

One of Bill’s (new) favorites! Garlicky green beans with lemon and slivered almonds

He does. And it’s 100% hisĀ choice.

Why?

He’s experienced for himself the energy, health, satisfaction, and flavor that comes from eating whole, fresh, unprocessed, nourishing food, and that’s why he’s made it a priority in his life, too.

In fact, he’s now the one who comes to me and says, “I forgot my lunch today, so I had to eat in the cafeteria. I doubled up on the tomato and cucumber salad butĀ had theĀ cafeteria pizza [he’s a teacher]. I figured I would feel crappy and tired a few hours later…and I did.”

It’s been a journey for both of us, and all of these changes have happened gradually over time…over 8 years, in fact!Ā Even to this day we’ll try things and find out that we don’t like them…but most of the time we DO like the foods we try and the dishes we make.

Shopping for, preparing, cooking, and sharing food together has become an integral part of our relationship and is an opportunity for us to bond, be adventurous and spend quality time together.

Berry-picking together on a Saturday morning!

Berry-picking together on a Saturday morning!

So, what are the secrets to how we’ve made this transition…and how Bill has grown to like vegetables so much?

I’ve listedĀ my top 10 tips below and explained each tip in more detail in a post onĀ another health blog I write for on a monthly basis.

**For the full scoop on each tip, check out theĀ “Upgrade Your Diet & Veggie Up” post I wrote for Nava Health Center’s blog this month by clicking here!**

  1. Eat more of what you like already.
  2. Pick your own.
  3. Meal plan together.
  4. Take a field trip.
  5. Make it fun and play with your food.
  6. Blend it up!
  7. Roast them.
  8. Veggie scramble.
  9. Soups, stews & chilis….oh my!
  10. Puree away.

Do you have any secrets to “upgrading” your diet or that of a loved one? Feel free to share below!

“The Best Thing Youā€™ve EVER Made” {My Father Knows Best!}

Iā€™m especially excited about this recipe because it marks a special point in my food journey.

As I shared in one of my first posts, I used to hate the main ingredient in this recipe…

IMG_6569

Eggplant.

The very idea of the funky-shaped purple vegetable weirded me out, and I had no desire to eat itā€¦ever.

Fast forward to today, and Iā€™ve come up with an eggplant recipe that I dare say would get ANYONE (even kids!) to like eggplant.

I made a similar version of these a few months ago in the form of eggplant fries, but the coating on these chipsĀ is absolutely to die for and makes them – as my dad AND husband said –Ā ā€œOne of the best things youā€™ve EVER made.ā€

We liked them SO much that my sister, Jane, even requested that I make them for her 21st birthday dinner the other night. Everyone gobbled them up!

Almond & Rosemary-Crusted Eggplant Chips

IMG_6655

Ingredients

  • 1 large eggplant, cut into Ā¼ā€ discs
  • 1-2 free-range eggs, whisked (I only needed 1, but depending on the size of your eggplant, you might need 2)
  • 1 cup raw almonds
  • 2 tablespoons arrowroot powder (sub in cornstarch if you donā€™t have arrowroot)
  • 1 heaping tablespoon fresh rosemary (or 1-2 tsps dried…fresh tastes best!)
  • 1 teaspoon garlic powder
  • 3/4Ā teaspoon sea salt
  • 1/2 teaspoon black pepper
  • Additional sea salt to sprinkle on the eggplant to draw out moisture

Directions

  1. Preheat oven to 425F.

    Place eggplant slices on a paper towel and sprinkle sea salt on top and let sit for 15-20 minutes. Youā€™ll notice little pools of liquid forming on top of the slices. This helps draw the moisture out of the eggplant, so that it crisps up when baked. Use another paper towel to press any remaining moisture out of the eggplant slices, and shake off any excess salt.

    Place eggplant slices on a paper towel and sprinkle sea salt on top and let sit for 15-20 minutes. Youā€™ll notice little pools of liquid forming on top of the slices. This helps draw the moisture out of the eggplant, so that it crisps up when baked. Use another paper towel to press any remaining moisture out of the eggplant slices, and shake off any excess salt.

IMG_5622

Grind the almonds, arrowroot powder, rosemary, garlic, pepper and sea salt in a food processor until small chunks remain. Pour almond coating onto a plate.

IMG_6615

Dip the eggplant slices one by one in the egg wash and shake off any excess egg. Then, coat both sides of each slice generously with the almond coating.

Place eggplant slices on a foil or parchment-lined baking sheet and bake for 20-25 minutes, flipping once at the 10-12 minute mark.

Place eggplant slices on a foil or parchment-lined baking sheet and bake for 20-25 minutes, flipping them over at the 10-12 minute mark.

IMG_6655

Remove from oven and enjoy by themselves or in aĀ tomato dipping sauce linked below!

Crispy, crunchy, and savory with a hint of salt. No soggy eggplant here, folks!

They’re also incredibly addictive and DEEElicious!

You’ll enjoyĀ them even more with this tomato dipping sauceĀ on the side.

I guarantee you will eat the whole tray.

We did šŸ™‚

How to Make Your Own Pumpkin Puree {Step-by-Step Guide!}

Iā€™m a big advocate of eating food that is as fresh and unprocessed as possible.

Sometimes, for convenience sake, I opt for minimally processed versions of certain foods.

Like pumpkin puree.

Most of the time, it’sĀ easier and quicker to buy a can of it to put into my smoothies, muffins, and overnight oats than to make it from scratch.

But last week I got this in my Hometown Harvest bag and knew it was time for me to figure out how to make my own.

The squash below is actually just an autumn squash, but you can follow the process I outline for autumn squash, butternut squash or pumpkin to make your own puree.Ā 

IMG_6434

Roasting your own vegetablesĀ for this puree gives them a velvety smooth texture andĀ deepĀ flavor that definitely tastes better than the canned stuff!

Step-by-step instructions for how to make your own squashĀ puree

Preheat the oven to 350F.

IMG_6624

For a round squash, cut off the top (including the stem) with a sharp knife and then cut the squashĀ in half. For flatter squash, like the one I had, cut it in half with a sharp knife, cutting one side first and then the other on either side of the stem.

IMG_6625

Break it apart with your hands along the seam where you cut.

IMG_6629

Scoop out the seeds with a spoon. Save them to make your own toasted seeds (something I plan to do in the future).

IMG_6630

Cut the pumpkin into chunks. I cut along the existing creases.

Cut the squashĀ into chunks. I cut along the existing creases.

Pumpkin chunks ready for roasting!

SquashĀ chunks ready for roasting!

Put the pumpkin slices on a baking sheet and roast for 45-60 minutes or until you can easily pierce the pumpkin with a fork.

Put the squashĀ slices on a baking sheet and roast in a 350F oven for 45-60 minutes oven or until you can easily pierce the squashĀ with a fork.

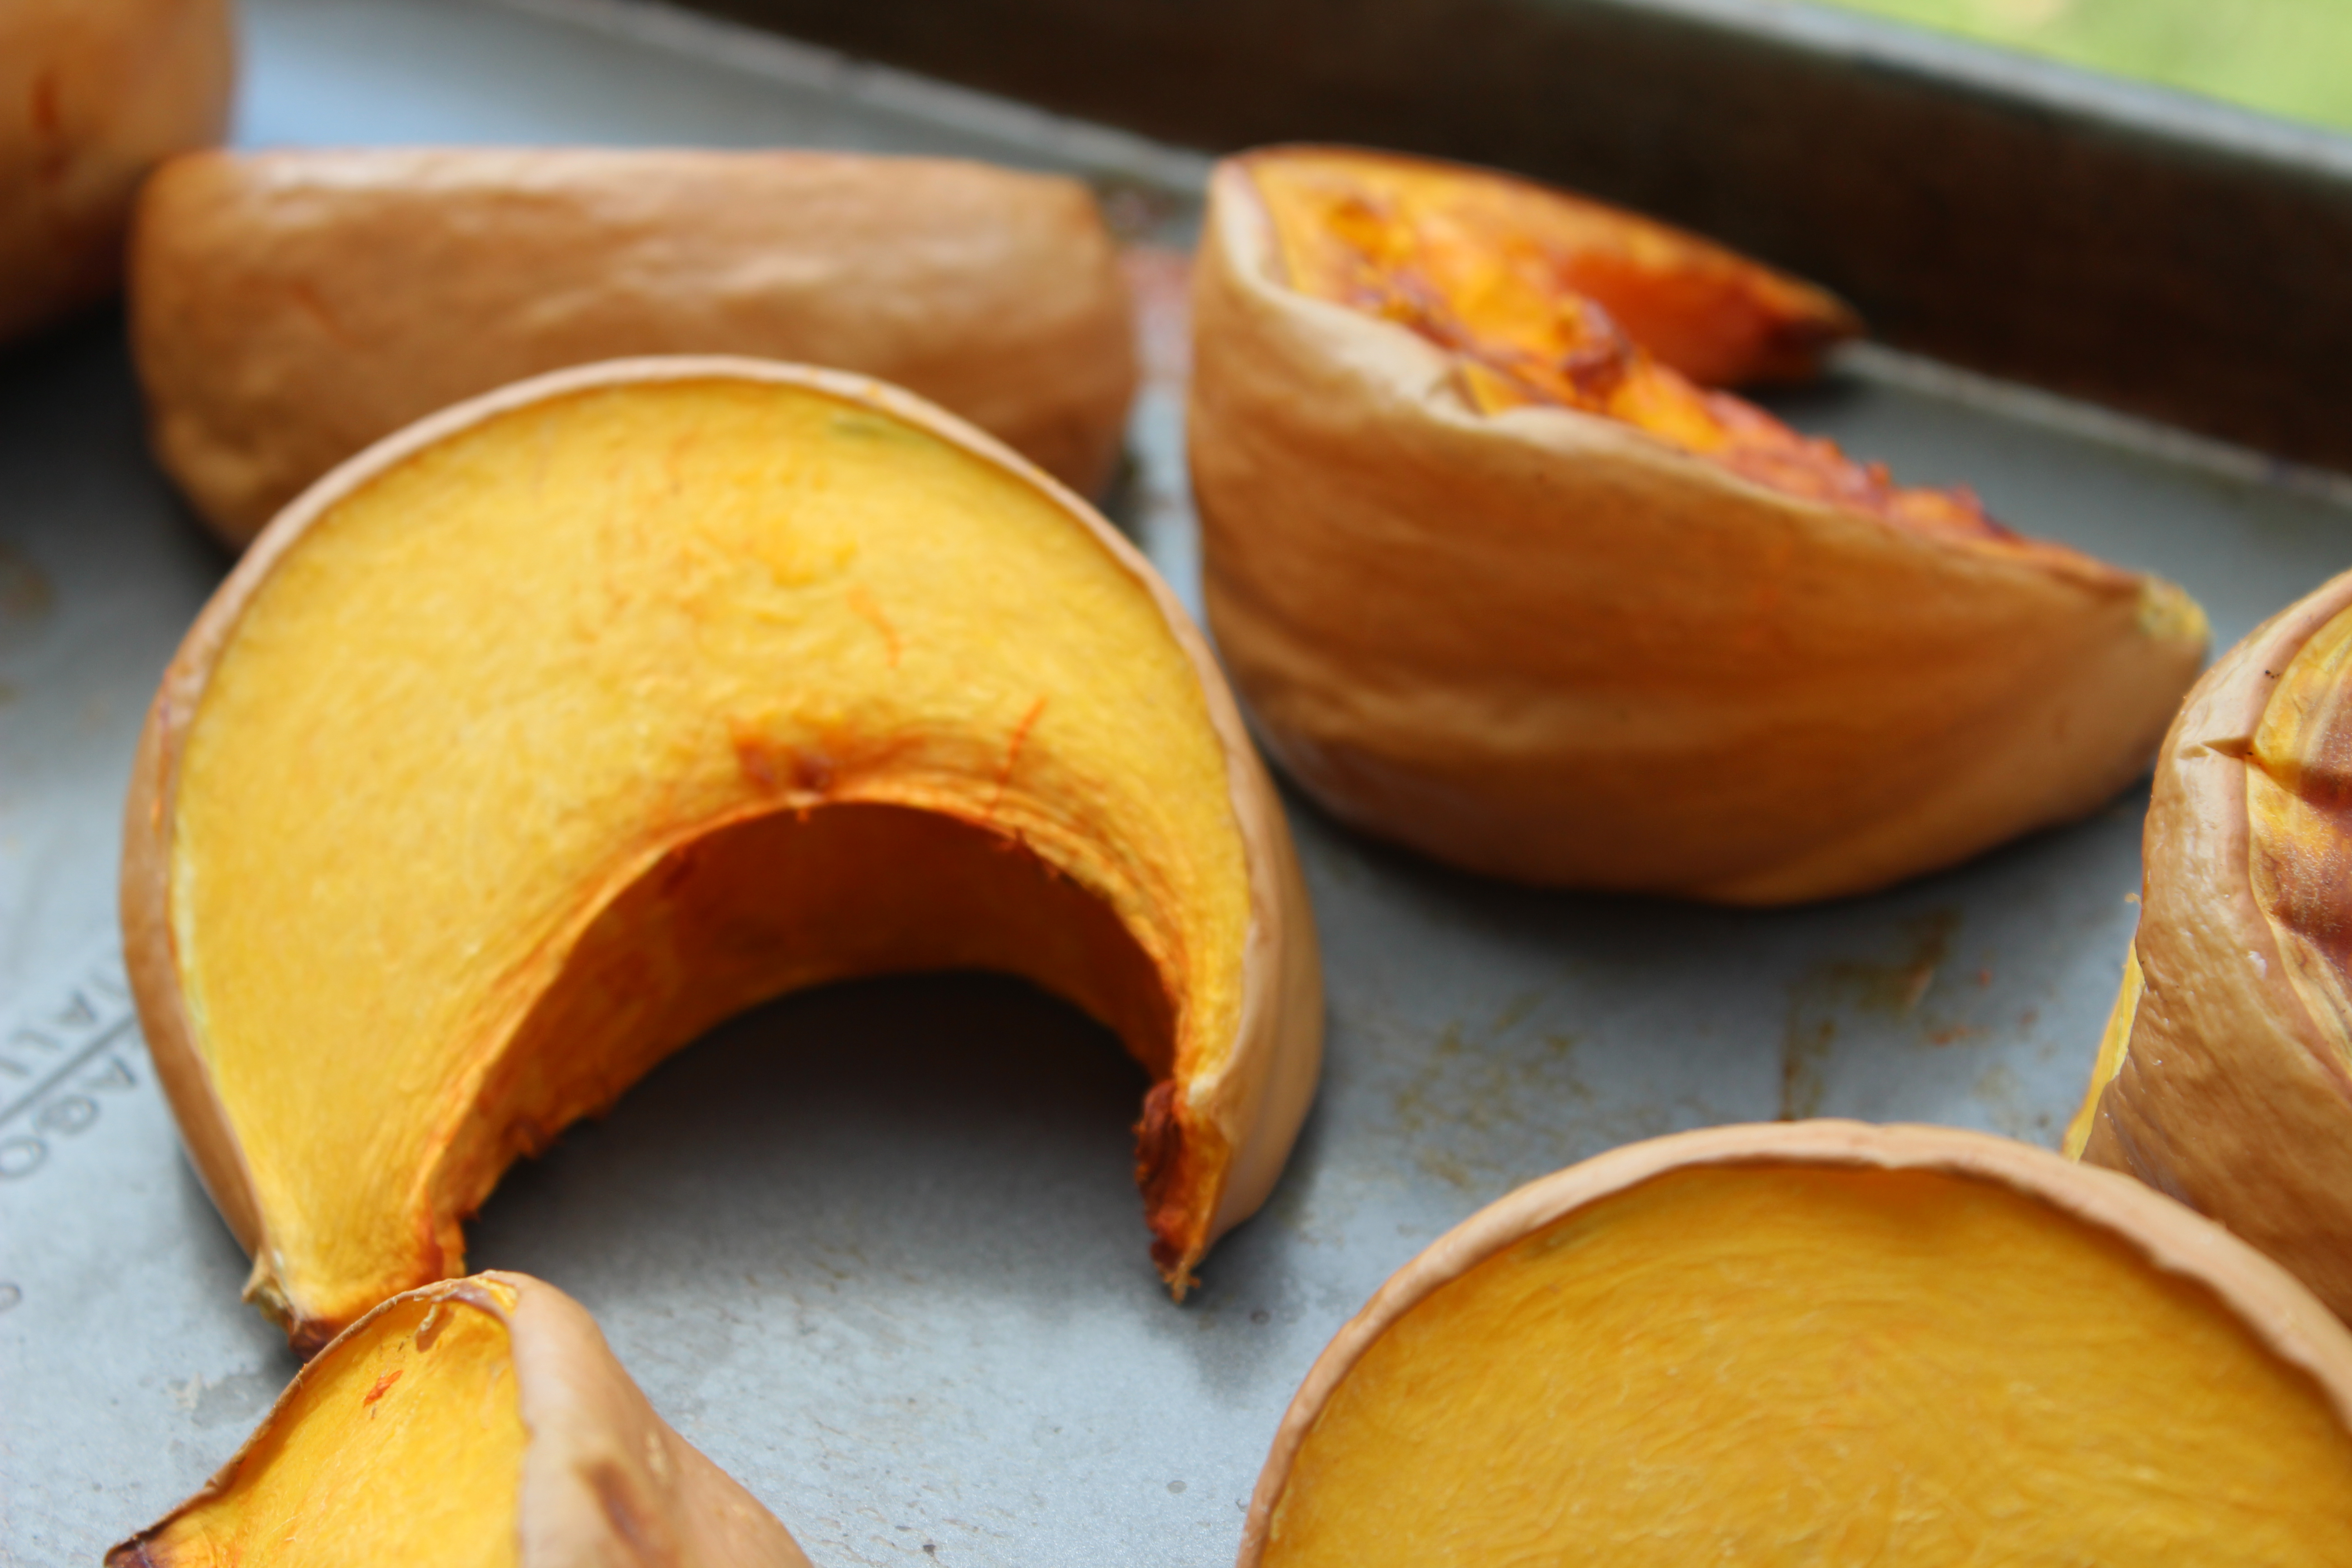
Pumpkins are done roasting when they look like this.

SquashĀ is done roasting when itĀ looks like this.

Let the slices cool and then take a spoon and scoop out the ā€œmeatā€ from the rind.

Let the slices cool on a plate and then useĀ a spoon and scoop out the ā€œmeatā€ from the rind.

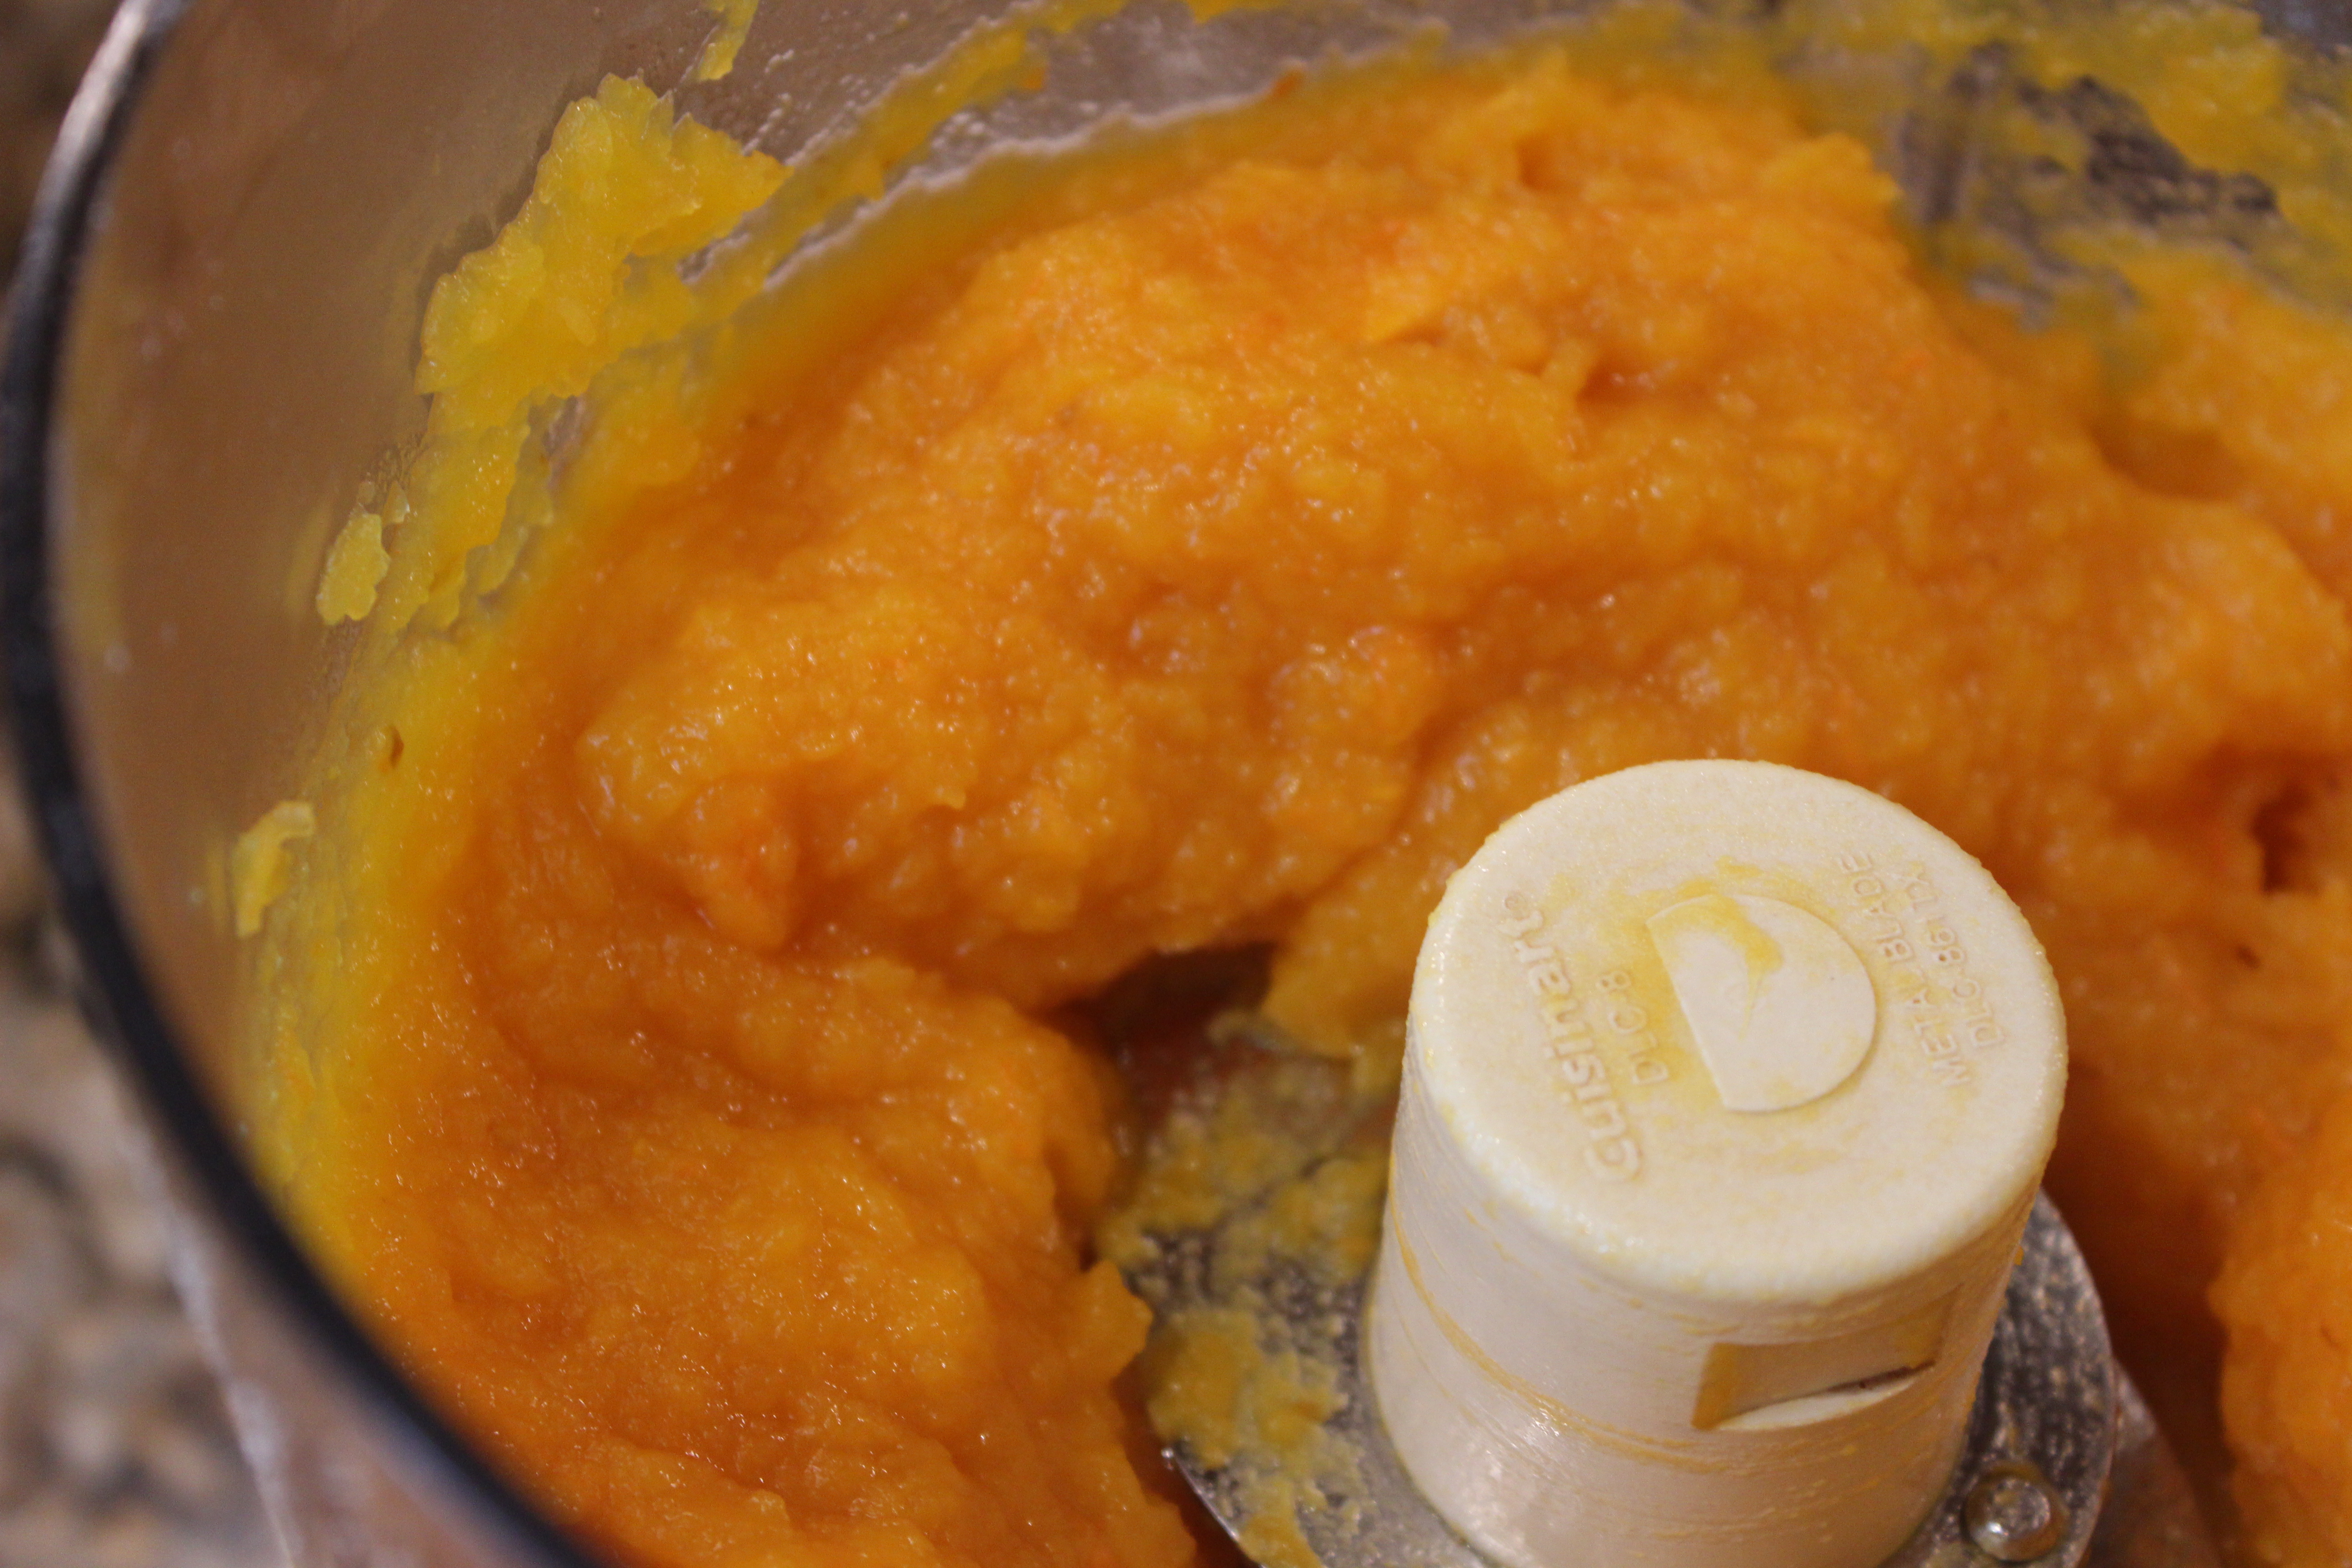
Puree all of the pumpkin in a food processor until smooth.

Puree all of the squashĀ in a food processor until smooth.

IMG_6733

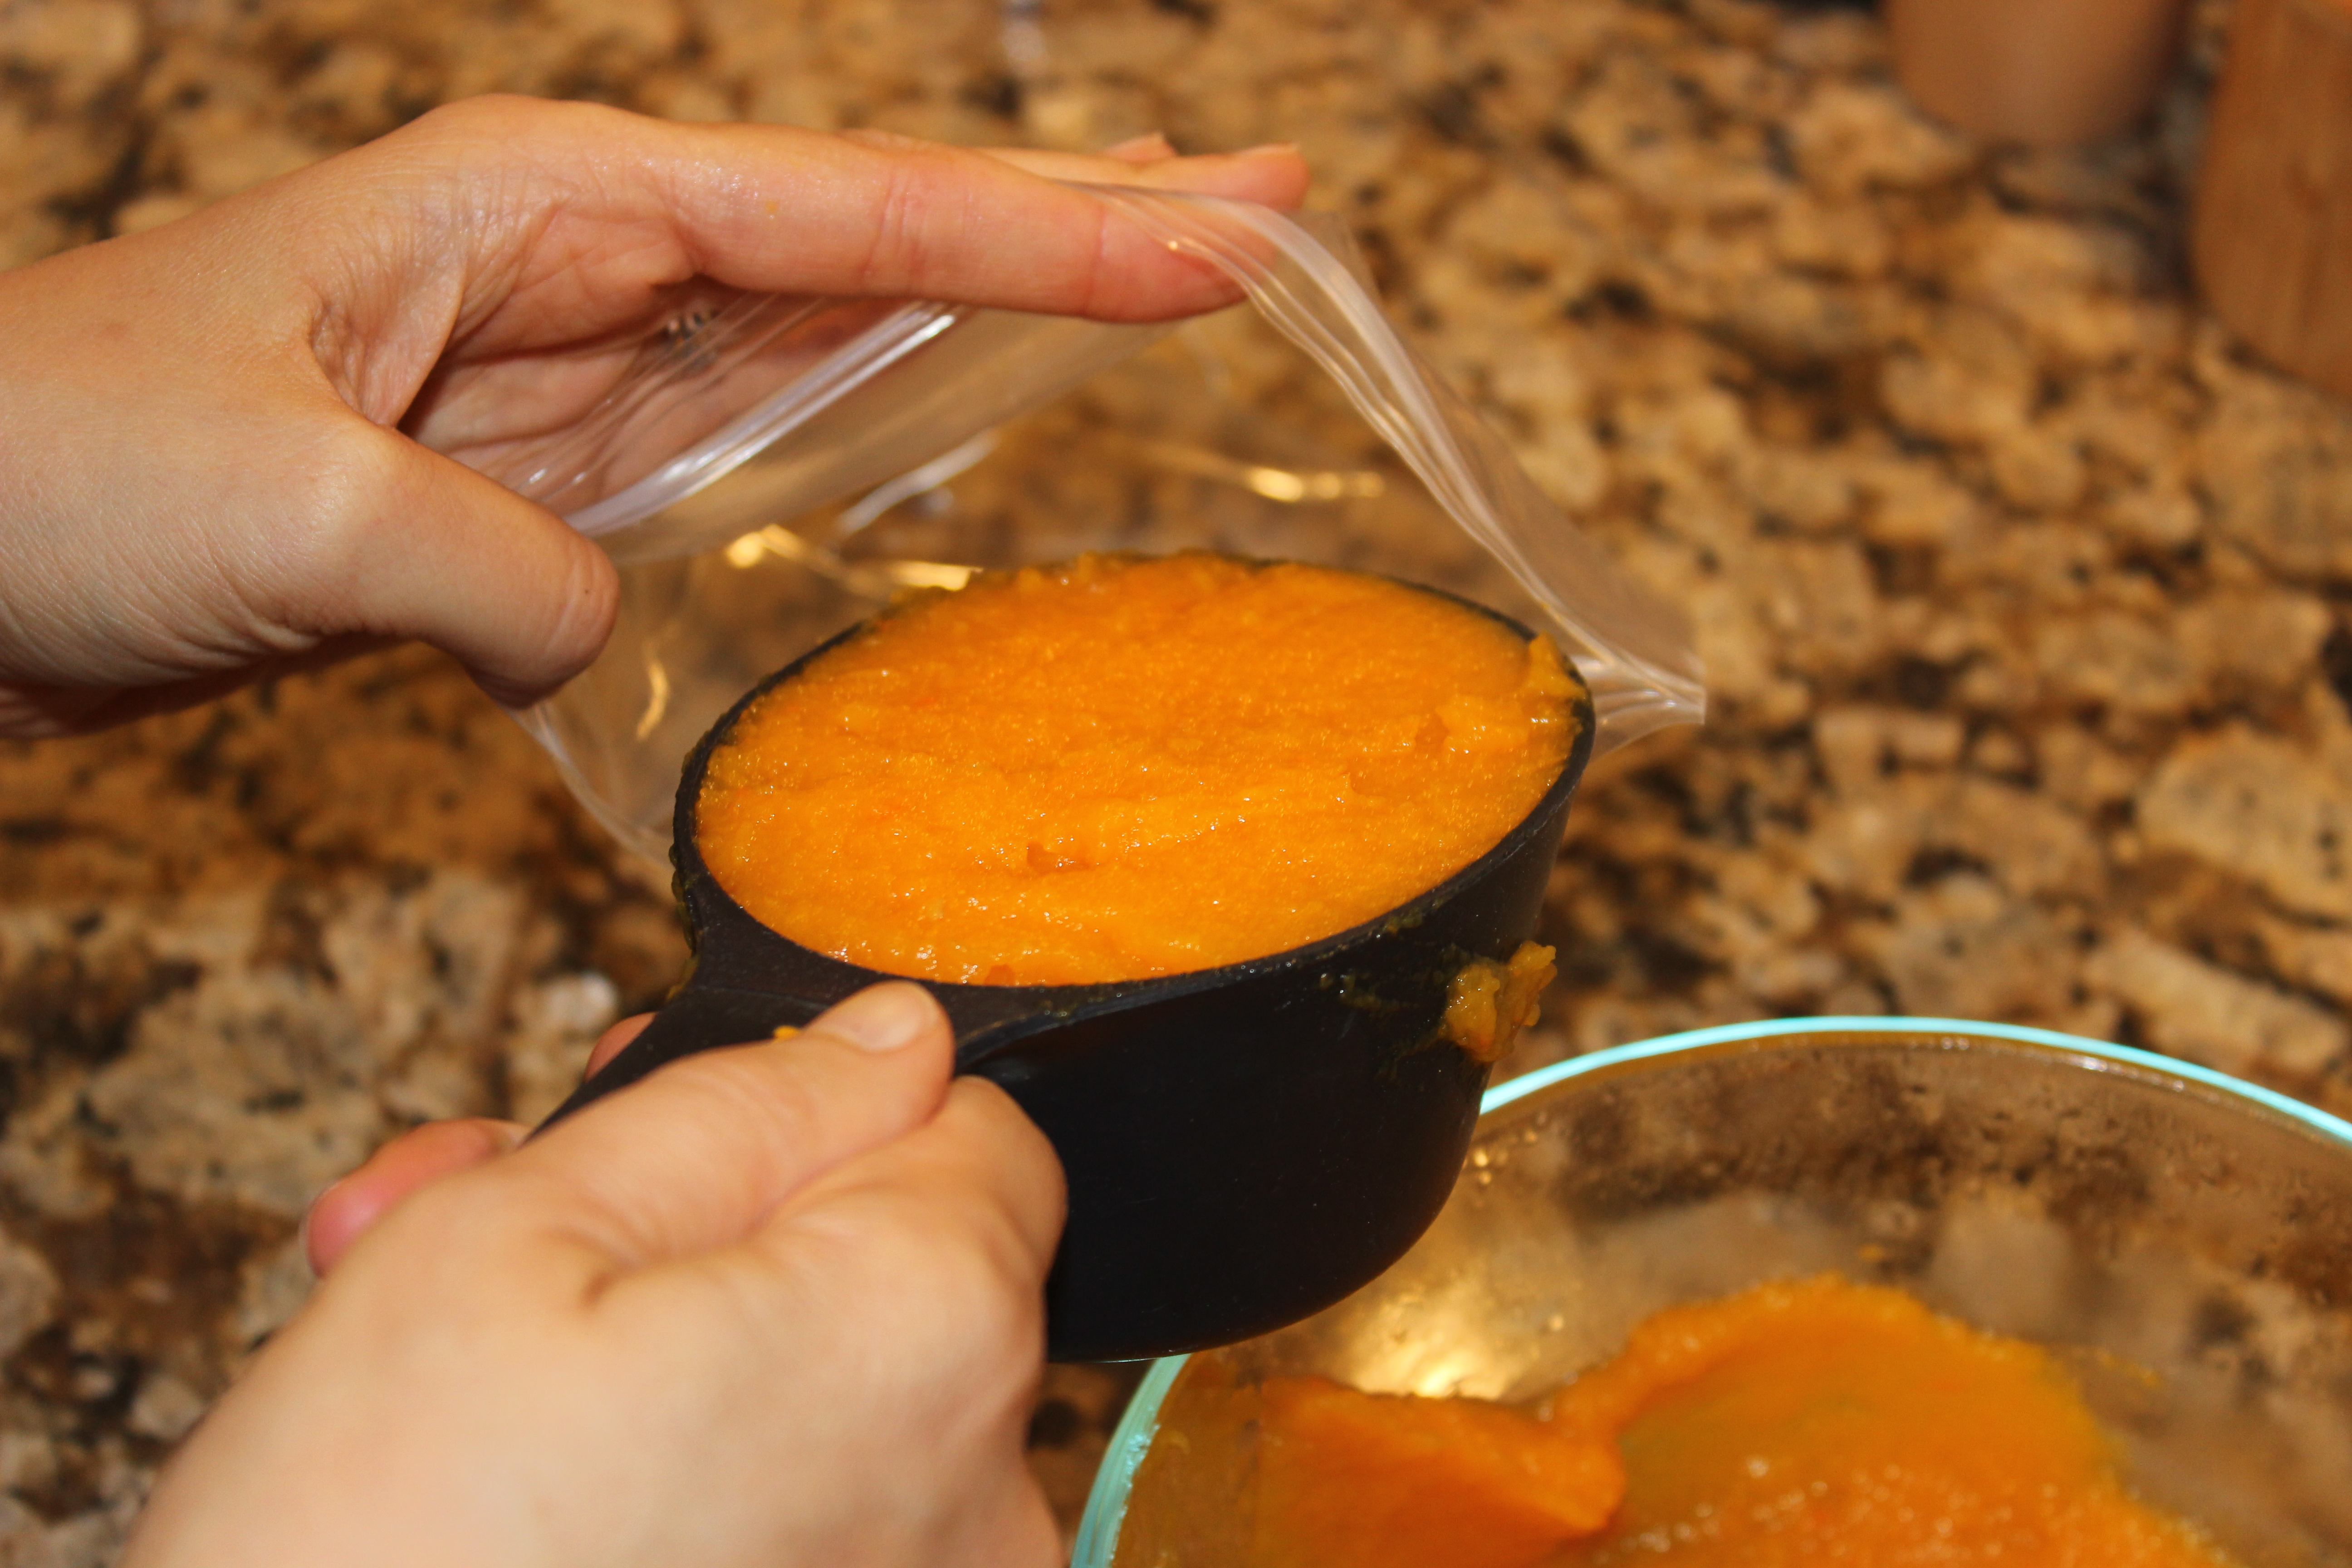
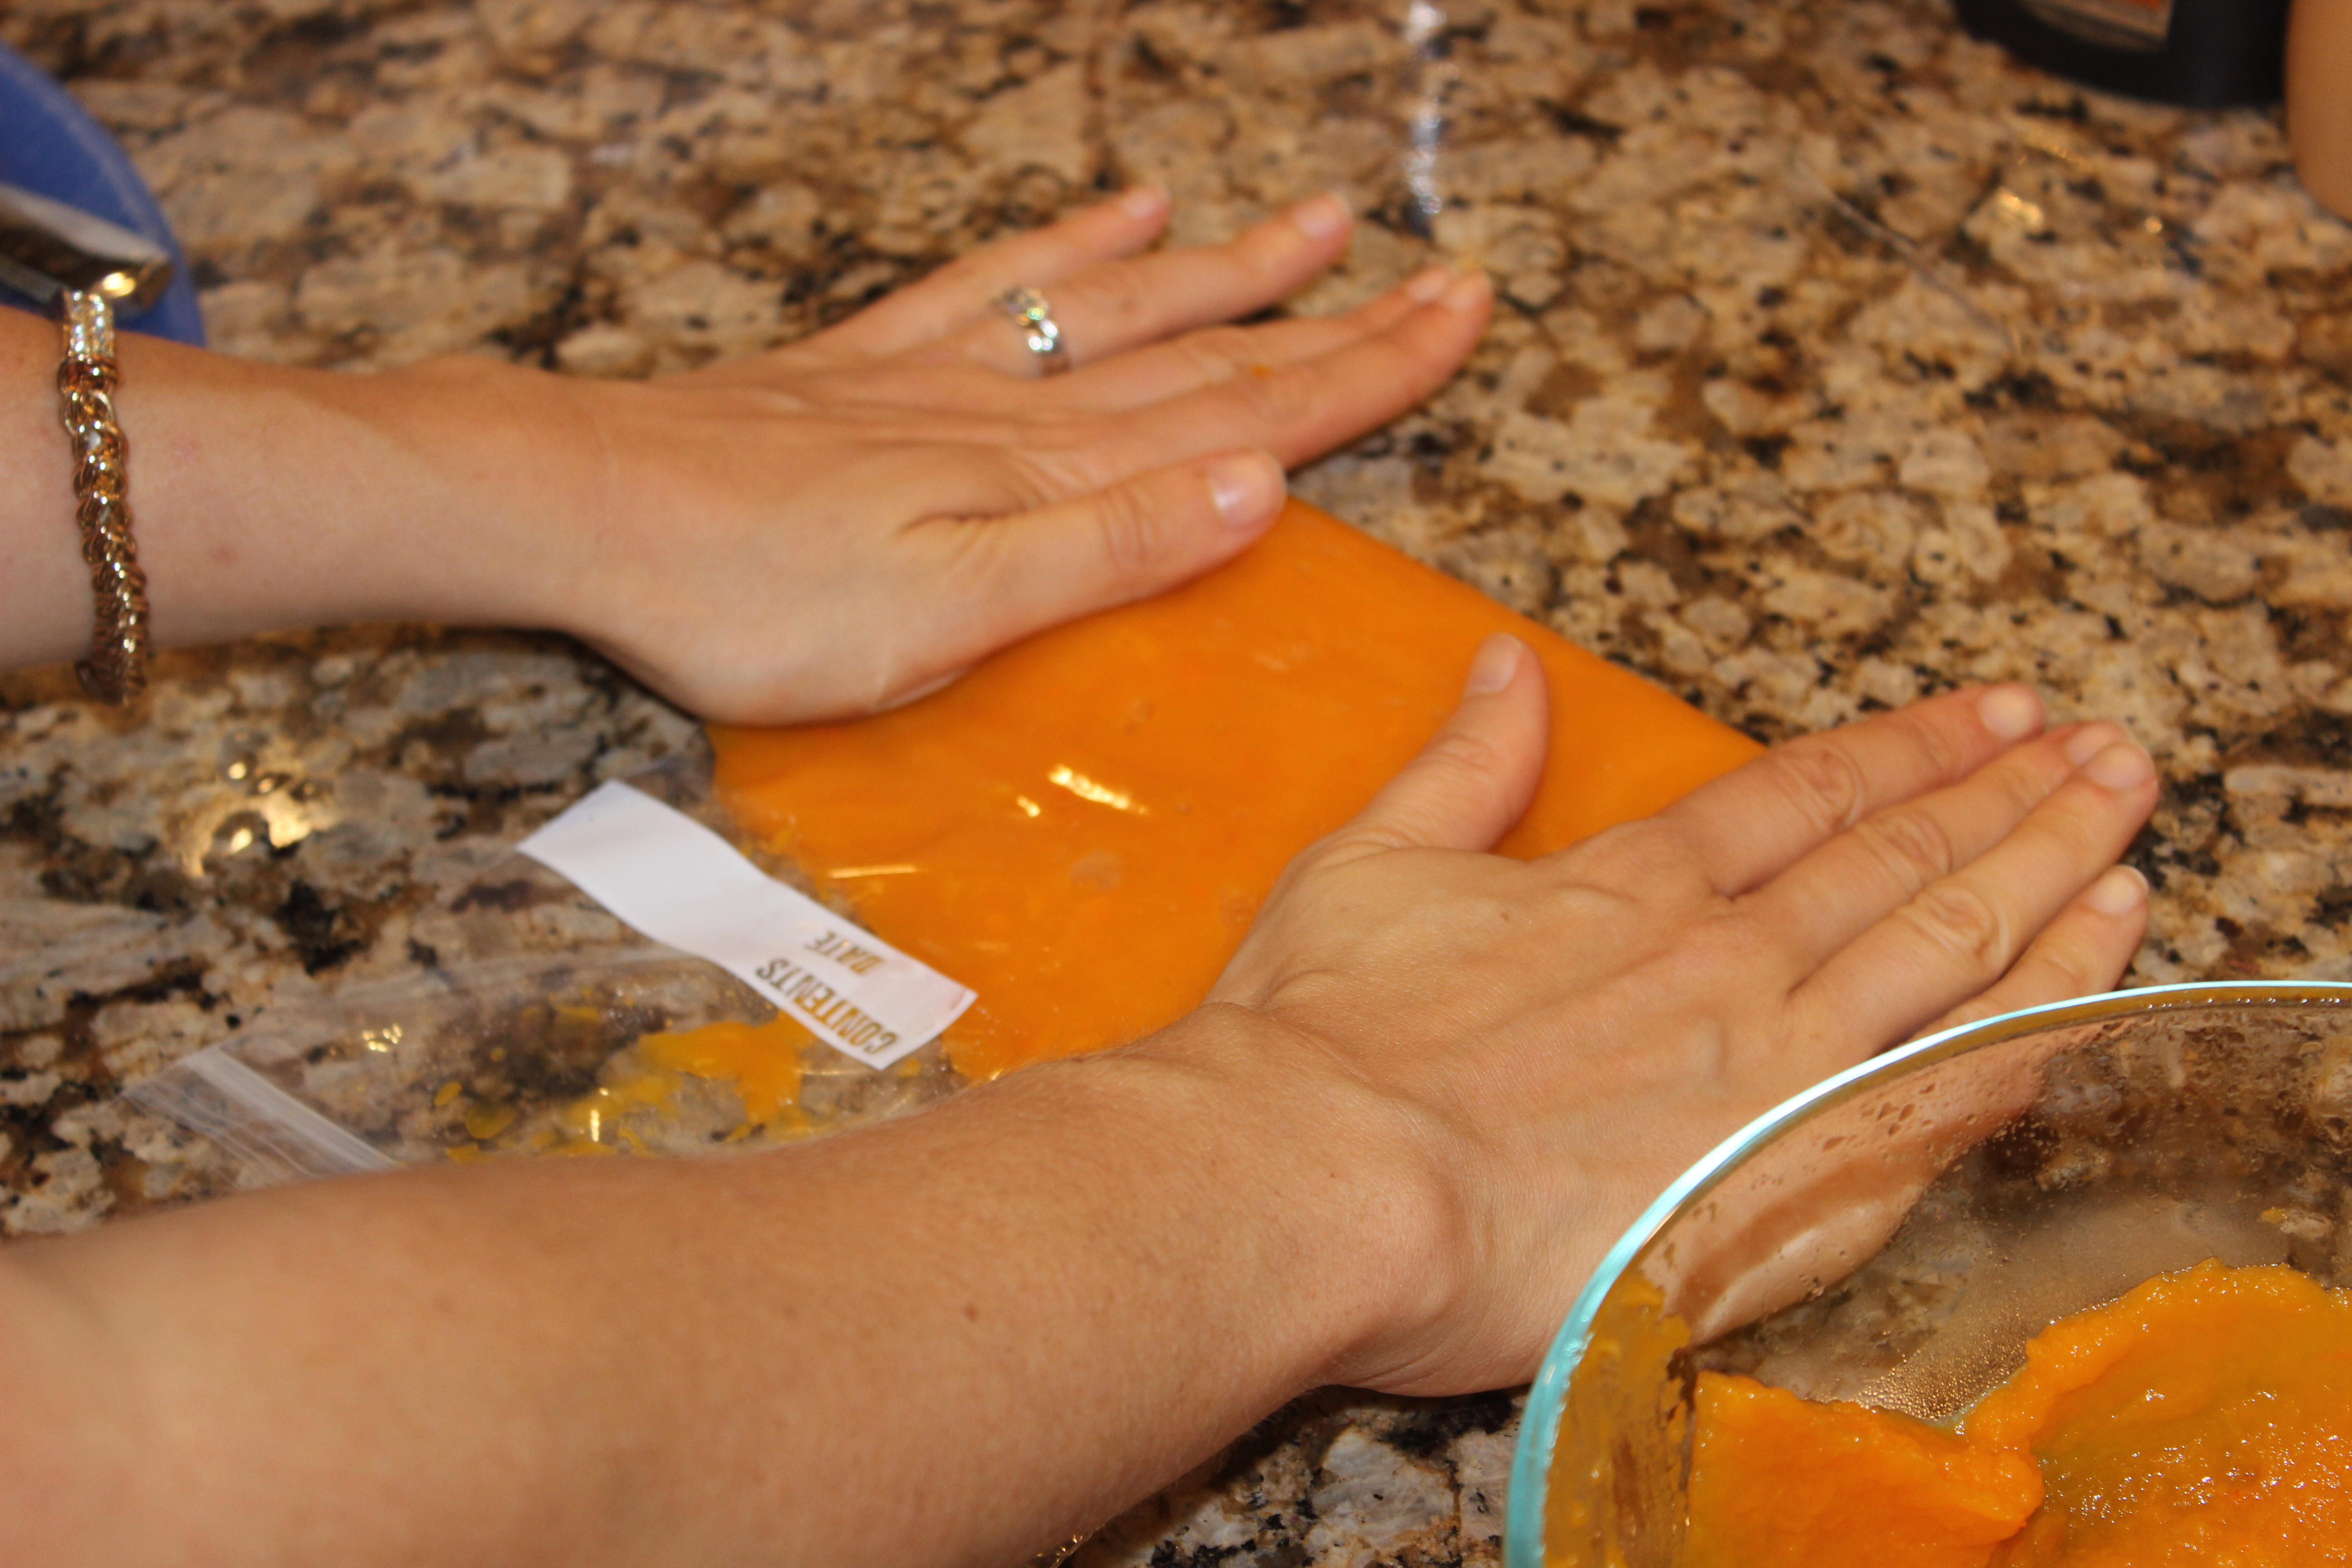
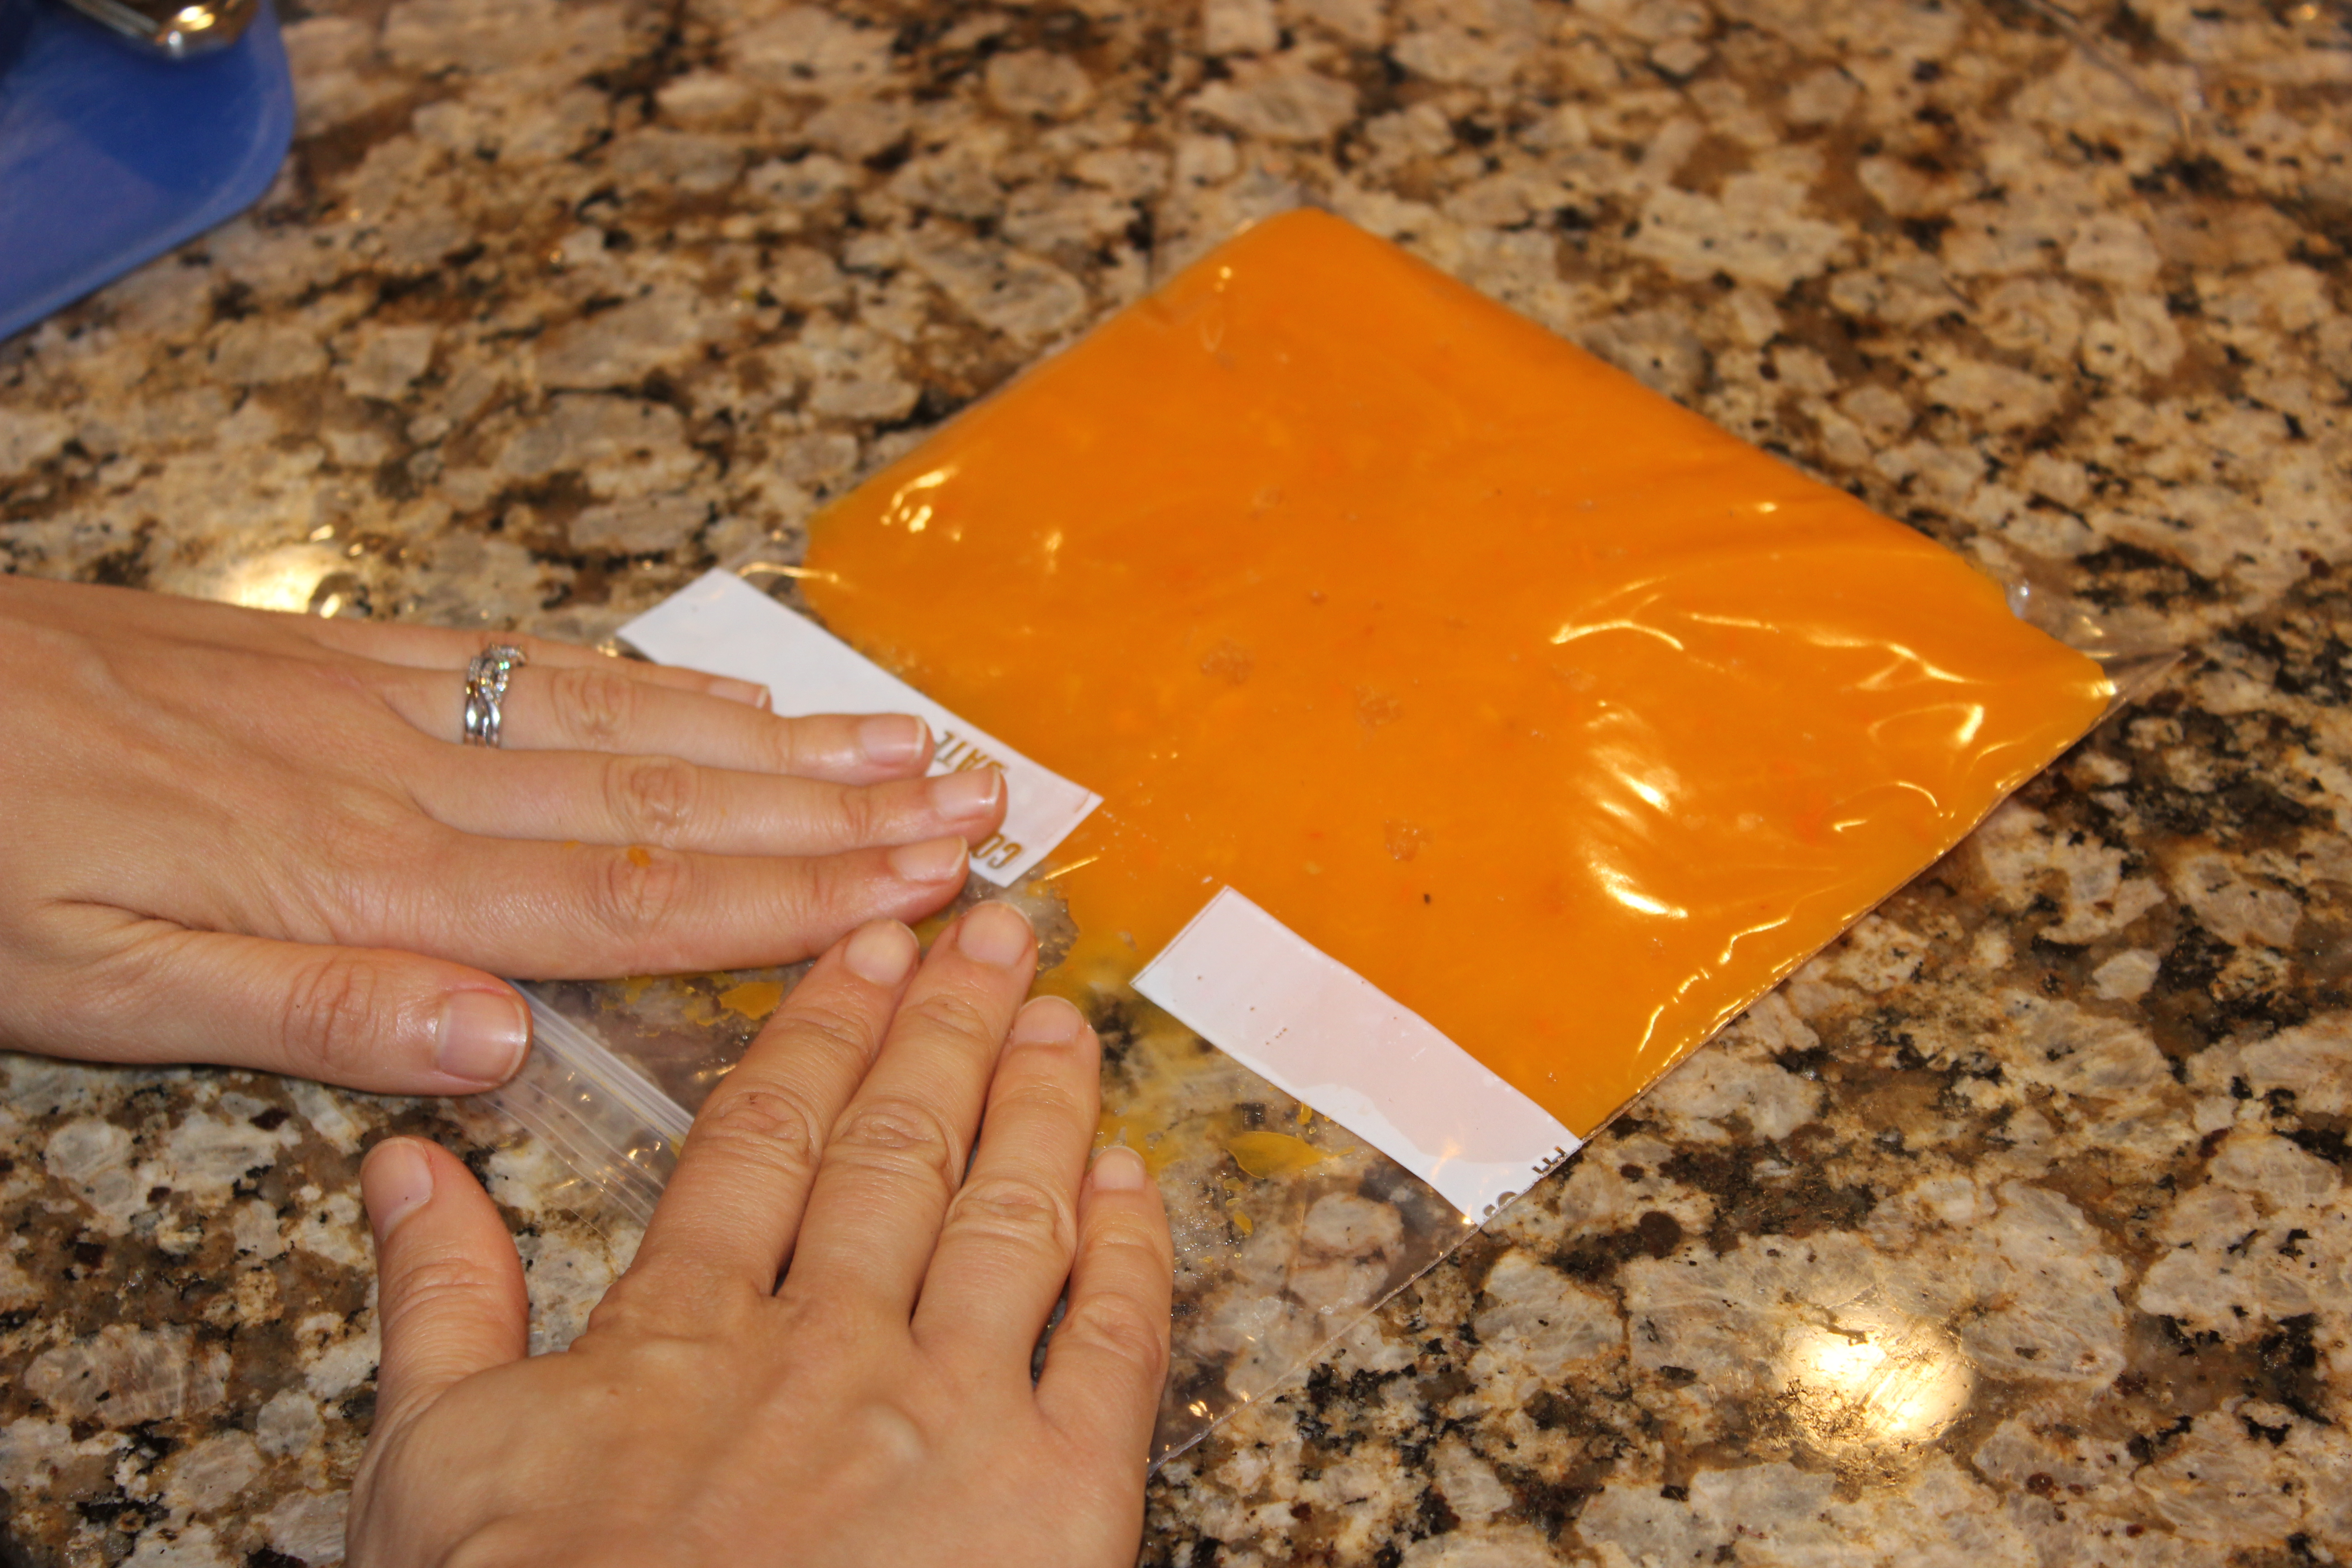
Use the puree immediately OR measure out 1-cup servings and put the pureeĀ in freezer bags, squeezing out all of the air, so it’sĀ ready to use whenever you need squashĀ in the future.

Follow the step-by-step process below!

IMG_6737 IMG_6740 IMG_6742 IMG_6744 IMG_6746

If you’re using pumpkins, onceĀ you have your puree ready, try using it in this Ultimate Pumpkin Pie Smoothie Recipe,Ā Pumpkin Pie Overnight Oats, or these Paleo Pumpkin Spice Muffins!

What’s your favorite way to use squash? Are you looking for any recipe ideas? Feel free to leave a comment below to let me know šŸ™‚

Paleo Pumpkin Spice Muffins (GF)

paleopumpkinSpiceMuffins

ā€œThis is one of the best muffins Iā€™ve ever had.ā€Ā 

That’s whatĀ one of my co-workers said when she tried these the other day.

I served these pumpkin muffins at a client meeting, and one of my other coworkers, who is a meatball sub and Fritos-lover, went back for seconds.

Thatā€™s how I knew this recipe was a keeper!

If youā€™ve been following my blog for some time or are a newbie (welcome!), youā€™ll notice that all of the recipes are gluten-free and dairy-free, most are vegan (though I am not), and all focus on making ā€œupgradesā€ to typical favorite recipes…all while nourishing our body!

Some of the recipes I make are also paleo-friendly (no refined or processed sugars or oils; grain-free, dairy-free; bean-free). Itā€™s supposedly the way the cavemen ate.

(There are still disputes about what the cavemen actually ate, so if youā€™re interested in learning more about that, check out this TED Talk or this post.)

Many people who have health conditionsĀ likeĀ irritable bowel syndrome, acid reflux, thyroid issues, and even multiple sclerosis find they feel a lot better when they ā€œeat paleo,ā€ even if just for a trial period.

This recipe for pumpkin muffins happens to be paleo, so it should fit with most peopleā€™s health needs and concerns. šŸ™‚

IMG_6707

Enough about paleo…let’s talk PUMPKINS!

Fall is my absolute favorite season, and pumpkins are one of my favorite things about fall.

Because I like to focus on WHY we should add in more good stuff (like pumpkin!) to crowd out the otherĀ stuff. I want to share just howĀ nourishing pumpkin isĀ for our bodies before we get into the recipe:

  • Fun facts: Pumpkins are actually fruits (not veggies) and are related to cantaloupes and cucumbers (Who knew??)
  • High in fill-you-up fiber, which keeps us “regular” (this is a good thing!)Ā and keeps us feeling satisfied for hours
  • Excellent source of beta-carotene – a potent antioxidant and cancer-fighter that also happens to be good for our eyes and skin health
  • Loaded withĀ lycopene and carotenoids that are known to help “diminish cancer cells, inhibit diabetes, hypertension, the signs of aging, and prevent macular degeneration”
  • Full of potassium, which helps restore ourĀ body’s electrolyte balance

I wrote a blog post the other day about some of my top “Sweet Treat Pantry Staples.” Youā€™ll see some of them below (coconut flour, maple syrup), and I mentioned some of the others in my Top 10 Gluten-Free, Dairy-Free Everyday Pantry EssentialsĀ post (coconut oil, raw apple cider vinegar).

Paleo Pumpkin Muffins (Gluten-Free)

IMG_6703

IMG_6709

Ingredients

  • Ā½ cup coconut flour
  • 1 cup canned pumpkin puree (or fresh puree!)**
  • Ā¼ cup coconut oil
  • Ā¼ cup 100% pure maple syrup or raw honey (I used maple syrup and loved it!)
  • 4 eggs
  • Ā¾ tablespoon pumpkin pie spice
  • Ā½ teaspoon baking soda
  • Ā½ teaspoon raw apple cider vinegar (Bragg’s brand)
  • Ā¼ teaspoon sea salt
  • Ā¼ cup pecans, chopped (I added this ingredient)

I followed the directions in the original recipe but used 100% pure maple syrup instead of honey and sprinkled pecans on top before baking. I really liked the added crunch!

**Make sure you donā€™t buy pumpkin pie filling if you buy the canned stuff, by the way. Itā€™s totally different from pumpkin puree!

I cooked them for a full 30 minutes. Coconut flour has a tendency to dry out, so make sure you donā€™t overcook them.

Click here for the full directions for how to make these yummy muffins šŸ™‚

I love my silicone muffin holders!

I love my silicone muffin holders!

The Easiest Way to Roast Beets {A Simple How to Photo Guide}

Whenever I think of beets, I canā€™t help but think of The Office’s Dwight Schrute and his epic beet farm.

As well asĀ Jim Halpertā€™s impersonation of DwightĀ and his ā€Bears. Beets. Battlestar Galacticaā€ line.

beets

Had to reminisce about that for a second šŸ™‚

Now, let’s get to the beets!

Over the past few months, Iā€™ve had several friends ask me how to roast beets.

To be honest, I had never had much success with it in the past, but I was determined to figure it out.

IMG_4922

Beets are one of those foods that, if we havenā€™t tried them before, can be a bit intimidating to prepare.

I hope to take that intimidation factor down a notch today and show you how easy it is to cook beets.

One of my goals when I cook and teach about food is to share how certain foodsĀ nourish our body, so I have to share some of the reasons beets are so good for us!

  • They contain a nutrient called betaine that fights inflammation (inflamed body = sick, overweight body), improves our heart health, and protects our cells and internal organs.
  • Like any deep-colored fruits and veggies, beets have anti-cancer properties, and some research has shown that beetroot extract reduced tumor formation in animal models.
  • They help our bodies detoxify (clean out!), helping to purify our blood and our liver, which is crucial to keeping weight off, feeling our best, and staying healthy.
  • They’re loaded with vitamin C, fill-you-up fiber, and minerals that are good for our bones, liver, kidneys, and healthy nerve and muscle function.

Now that we know how good for us these little crimson gems are, let’s talk about how to cook and peel them!

How to Roast & Peel Beets

IMG_6578

Step 1: Preheat the oven to 350F.

Step 2: Cut the tops (beet greens) and bottom ā€œtailā€ off the beets, so they will sit upright in a pan. Save the beet greens. You can sautee them on the stove just like you would any other greens like kale or Swiss chard (more on how to do that in a future post!).

IMG_6575

Step 3: Place the beets in a covered baking dish as shown below. Cover the dish with an oven-proof lid. I used a Corningware dish and a glass lid.

IMG_6586

Step 4: Bake for 50-90 minutes, depending on how big the beets are. I used relatively small beets and they took almost an hour. You can check them for doneness by piercing them with a fork ā€“ they will be ā€œfork tenderā€ when theyā€™re done.

Step 5: Let them cool.

IMG_6645

Step 6: Take a paper towel and rub/pull the skin off of the beets as shown in the pictures below. This minimizes stains on your fingers.

IMG_6658 IMG_6661 IMG_6663 IMG_6664 IMG_6665 IMG_6668 IMG_6671

The aftermath of another culinary adventure!

The aftermath of another culinary adventure!

Step 7: Once the beets are peeled, you can do whatever you want with them. They have an “earthy” and slightly sweet flavor.Ā Nothing else really tastes like a beet, so you’ll just have to try it yourself to see how you like it!

I sliced them up and put them onĀ a salad.

You could also eat them by themselves, throw in a few in a smoothie (they will make it VERY red!) or toss them in a vinaigrette. They pair well with balsamic vinaigrette as well asĀ herbs like rosemary.

Here’s a recipe for a beet, pear and almond salad you can try šŸ™‚

Simple salad of sliced beets, chopped pecans, and field greens

Simple salad of sliced beets, chopped pecans, and field greens

How do you like to useĀ beets?Ā Feel free to share your favorite recipes with us below!

How To Stock A Healthy Pantry: 11 Sweet Treat Staples & Baking Basics (Gluten-Free & Dairy-Free)

Nom nom seductive raw chocolate fudge...one of my many yummy sweet treats!

Nom nom seductive raw chocolate fudge…one of my many yummy sweet treats!

When we think of “eating healthy,” images of carrot sticks and rice cakes often come to mind.

I hope that through reading this blog, you’ve come to expand your view of healthy food and how delicious, fun and exciting it can be!

One of the philosophies that shapes my approach to eating, cooking, and baking is the concept of “upgrading and crowding out.” By eating more of the good stuff that nourishes, energizes and heals us, we naturallyĀ have less room for the stuff that doesn’t.

In today’s post I want to share some of the staples we always have on hand for all of the sweet treat recipes I prepare (that my hubby loves oh so much!).

As I mentioned in my previous post about my top 10 (gluten-free, dairy-free) pantry essentials, don’t feel like you have to go out and get ALL of these tomorrow.

Just try one at a time – maybe pick a recipe that sounds good that you’ve never made before using that ingredient and see how you like it! You won’t know until you try šŸ™‚

MyĀ Top 11 Gluten-free, Dairy-free Sweet Treat Staples & BakingĀ Basics

IMG_5532

Medjool Dates

Why I Love Them: Theyā€™re loaded with ā€œkeep it movinā€™ & fill-you-upā€ fiber as well as dozens of healing, protective, anti-aging, anti-cancer vitamins and minerals (click here for the full scoop on their health benefits!). Not to be confused with ā€œDegletā€ dates, which are waxier in texture, Medjool dates are more versatile and flavorful. Dates have become my primary way to sweeten most recipes, as they give sweets a caramel-like texture and flavorā€¦and I LOVE caramel anything. Deglet dates (the ones you’re most likely familiar with) donā€™t have the same caramelizing effect.

How I Use Them: First and foremost, make sure you remove the pit! All Medjool dates have pits, so squeeze them open, and take it out before using or eating them. I use dates in a lot of recipes: caramel apple dip, healthy donut holes, homemade fudgesicles, dairy-free cheesecakes, chocolate avocado mousse, and almost every smoothie.

One of my favorite snacks is to take a date, split it in half and stuff it with almond butter or peanut butter. You donā€™t know what youā€™re missing if you havenā€™t tried this little bite of caramel bliss!

Where to Find Them: I get a big container of Medjool dates from BJs Wholesale Club, as Iā€™ve found that to be cheapest route to go. Trader Joeā€™s sells them at a pretty decent price, too. You can also get a good deal on them from Nuts.com (worth ordering something JUST to get the super cool, catchy and creative packaging they use!). Most grocery stores carry them, too ā€“ some in the dried fruit section and other stores in the produce section.

IMG_5533

Cacao Powder

Why I Love It:Ā It has more antioxidants than any other food…and gives many of my desserts their chocolate taste! Cacao powder isn’t treated by heatĀ (and therefore damaged) like the more familiar cocoa powder, so its supercharged, health-boosting, disease-fighting antioxidant properties remain intact.Ā Buy it raw and, ideally, organic.

How I Use It:Ā Great in raw or cooked desserts.Ā Try my hubbyā€™s favorite Peanut Butter CupĀ smoothie or Chocolate-Covered Strawberry smoothie, Chocolate Avocado Mousse, Fudgesicles, Divine Chocolate Peanut Butter Dip, No-Bake Chocolate Fudge, Homemade Rolos, or 2-minute peanut butter chocolate ice cream.

Where to Find It: Wegmans, Whole Foods, and any natural food store like MOMs Organic Market. We get ours online through Amazon Prime. I’veĀ foundĀ that it’s cheaper to buy it on Amazon or Vitacost instead of at the store, unless it’s on sale. This is another product that Home Goods has sometimes, so check out their pantry section the next time you’re there to see if they have it.

IMG_5528

Flaxseed/Flaxseed Meal

Why I Love Them: Known for their anti-inflammatory, disease-preventing, and fat-fightingĀ (AKA GBOMBS!) properties, flaxseeds keep our brain, heart, and joints healthy due to their Omega-3 fatty acid content. Since our body doesn’t produce Omega-3 fatty acids on its own, we need to make sure we’re incorporating them into our diet. Flaxseeds have a nutty flavor and are loaded with fiber, which helps regulate blood sugar (a key to staying energized!), keeps us feeling fuller, and promotes healthy digestion. Flaxseeds are also a great anti-PMS food because of the lignans they contain, which help balance our hormones.

If you buy the whole seeds make sure you grind the seeds before eating them or they will pass through your body undigested.

How I Use Them: You can create something called a flax egg and use it as a substitute for whole eggs in certain recipes. I put a couple of teaspoons of flaxseeds in my morning smoothies, including this seasonal Pumpkin Pie Smoothie and Peanut Butter Cup Smoothie Shake and use it in other sweet treat recipes, including Chocolate Chip Cookies, Chocolate Walnut Brownies, and No-Bake Fig Newton Bites. Remember, all of these recipes are also gluten-free and dairy-free!

Where to Find Them: Most of the major grocery stores, every health food store, Trader Joeā€™s, Whole Foods, and Wegmans all sell flaxseed. Iā€™ve also had luck finding them in the food section of Home Goods,Ā Amazon, Vitacost and Nuts.com are always options as well!

IMG_6173

Raw Nuts (especially Walnuts, Almonds & Cashews)

Why I Love Them: Dr. Joel Fuhrman, one of the most respected nutrition experts in the world, classifies nuts as one of his GBOMBS foods (the second ā€œSā€ stands for seeds and nuts) for their anti-inflammatory, anti-fat storage, disease-fighting compounds. They are a great source of heart, brain & joint health-supporting fats and contain fiber and protein to keep us feeling full and satisfied. Buy them raw/unroasted because they take on different flavor when roasted that changes the taste of a dish (especially cashews) .

How I Use Them: In a LOT of recipes! You can toss a few teaspoons in to your morning smoothie, sprinkle them on top of a salad or a jar of overnight oats, toast them and add them to sautƩed vegetables or greens. If you have trouble digesting nuts, try soaking them in water overnight before adding them in to dishes, as that makes them easier to digest.

Here are links to recipes on the blog that uses each kind of nuts:

Cashews: These are one of my MAIN sources of making desserts, smoothies, and even cheesecake taste creamy, decadent and satisfying without using dairy! The key is buying raw cashews and usually soaking them in water overnight. Try these recipes: My FAVE parmesan cheese substitute ā€“ Paleo Parmesan Cheese, Caramel Apple Dip, Dairy-Free Nacho Cheese Sauce, Mini-Cheesecakes (DECADENT alert!), and Peaches ā€˜n Cream Smoothie.

Walnuts: Seductive Raw Chocolate Walnut Fudge, Homemade Donut Holes, Simply Amazing Chocolate Walnut Brownies, Upgrade Kale Waldorf Salad, Zucchini Basil Pesto, and No-Bake Fig Newton Bites.

Almonds: Quinoa Almond & Apple Potluck Salad, Garlicky Lemon Green Beans, Ooey Gooey Berry Peach Crisp, Dairy-Free Cheesecake Crust, Donut Holes and Fig-Newton Bites.

Where to Find Them: All grocery stores sell them, but Trader Joeā€™s and Nuts.com appear to sell them cheapest. Wegmans also sells big containers of raw nuts, and I just got a giant container of raw cashews there that will last awhile! I store all of my seeds and nuts in glass jars in the fridge to prevent the oils in them from going bad.

IMG_5327

100% Pure Maple Syrup (Grade B)

Why I Love It: Weā€™re not talking about the super processed Log Cabin or Aunt Jemima stuff you grew up pouring on pancakes. Those maple-flavored syrups contain lots of highly processed sugar called high fructose corn syrup (HFCS) and other chemical additives as wellā€¦basically not real food ingredients. 100% pure maple syrup has a darker color and richer flavor but also has some minerals and antioxidants intact. Keep in mind that itā€™s still sugar, which is something we should limitĀ our intake of, but on a scale of ā€œgood, better, best,ā€ itā€™s a better choice than pure white table sugar. Click here for the full scoop on maple syrup from Authority Nutrition.

How I Use It: In addition to raw honey, we use maple syrupĀ as our primary sweetener in sweet and savory recipes. It has turned a Brussels sprouts hater into a lover with this recipe, and I’ve used it to sweeten everything from decadent chocolate mousse and Peanut Butter Bliss balls to the sweet and tangy dressing for my favorite kale salad.

Where to Find It: Every grocery store sells 100% maple syrup, but Iā€™ve had to look a little harder to find the good Grade B kind, which is deepest in color and flavor and best for baking. I usually buy a 32-ounce jar at MOMs for about $14 (see picture above!). It lasts for several months, so I donā€™t mind spending the money. Trader Joeā€™s also sells Grade B syrup.

IMG_5536

Coconut Milk (Unsweetened, Canned)

Why I Love It: Since cutting out dairy, Iā€™ve had to find alternatives to cowā€™s milk, and this stuff is a great option. Coconut milk is rich, creamy, and incredibly satisfying. Itā€™s high in saturated fatty acids and medium-chain triglycerides (MCT), which areĀ both easily burned by the body as fuel. MCTs are especially beneficial because bile acids (which we usually need to break down fats) arenā€™t needed to digest them.

How I Use It: In SO many recipes from one of YOUR favorite recipes, the Set-It-And-Forget-It Comfort Food Casserole, to fudgesicles, frittatas, dairy-free cheesecakes, and coconut whipped cream. Coconut milk gives food a really deep, rich flavor and adds a nice creamy texture to any dish. We always have a few cans in our pantry!

Where to Find It: Every grocery store sells coconut milk, and you can find it at stores likes Target, too. Itā€™s usually in the international foods aisle or in the natural foods section. Buy the canned stuff (not the coconut milk in the refrigerated section of the store). The best brand to buy is Native Forest because their cans are BPA-free. BPA is a chemical found in the lining of canned foods that makes its way into the food, so whenever you buy canned goods look for the words ā€œBPA-free.ā€ Also, buy the full fat kind. You can always thin it out yourself with water if you prefer it thinner. Check out this post by Chris Kresser for more info on coconut milkā€¦even how to make it yourself!

IMG_5538

Shredded Coconut AND Coconut Flakes (Unsweetened)

Why I Love It: I should start by saying I used to HATE coconut. Yup, whenever I got those little Almond Joys or Mounds in my trick-or-treat bag as a kid, into the trash they went. Itā€™s only been in the past 3-4 years or so that Iā€™ve taken to coconut in all forms, but I use it in lots of recipes. See the info in the coconut milk blurb above, but also know that shredded, unsweetened coconut is a healthy, natural sweetener to use in recipes because it wonā€™t spike your blood sugar like white sugar will. Coconut also contains high amounts of two fatty acids that have anti-viral, anti-bacterial, anti-septic and anti-fungal properties.

How I Use It: Simple ways to use shredded or flaked coconut are to toss it in with some homemade trail mix, onto your overnight oats, or into your morning smoothie, or even toast it and toss it onto a salad. I use shredded coconut in my kid-friendly healthy donut holes and Caribbean island breeze smoothie.

Where to Find It: The brand I recommend is ā€œLetā€™s Do Organic.ā€ You can find it at Wegmans, Whole Foods, MOMs Organic Market, any natural food store, or online at Amazon, Vitacost, and Nuts.com. They sell shredded coconut at every grocery store (usually in the baking aisle or health food aisle) and also at places like Target ā€“ just make sure you buy the unsweetened kind!

IMG_5534

Raw Almond Butter (Creamy, Unsalted)

Why I Love It: This has been a staple in our pantry for years, and we always keep several jars on hand. Almonds are a great source of protein, healthy fats (food for our brain, skin, heart, and joints!), as well as several other vitamins and minerals like magnesium, vitamin E, and manganese. Itā€™s best to buy almond butter in its RAW form, which means it hasnā€™t been heat-treated to high temps and is closest to its natural form (AKA blended almonds).

How I Use It: I love this stuff! Iā€™ll add a tablespoon to my morning smoothies for some creaminess, use it in my Gluten-free Dark Chocolate Chip Cookies, No-bake Chocolate-covered Cookie Dough Bites, Healthy Donut Holes, Berry Quick Overnight Oats, and Raw Almond Butter Cups. To avoid the oil-dripping-over-the-sides-headache when you first open it, store the jar upside down when you first bring it home. When youā€™re ready to use it, open the jar and stir ā€“ the oil will already be partially blended, which will save you from a giant mess!

Where to Find It: By far, the BEST place to buy raw almond butter at the lowest price is Trader Joeā€™s. About a year ago, I got word that they were discontinuing it and switching manufacturersā€¦and subsequently bought 8 jars of it, thinking they would be my last. Fortunately, they didnā€™t discontinue it! Yay! Trader Joeā€™s raw almond butter sells for $3-$7 less PER JAR than almost any other raw almond butter out there. In other words, itā€™s worth the trip to TJs to get this stuff.

IMG_5537

Rolled Oats

Why I Love Them: Oats are most known for their high fiber content and its ability to help remove cholesterol from our digestive system that would otherwise end up in our bloodstream. The fiber content in oats also helps stabilize blood sugar, which directly translates into how energized we are (stable blood sugar = stable energy). Oats also contain a wide range of vitamins and minerals that give our body the nutrients it needs. For all of those reasons, oats have been tied to healthier hearts, reduced risk of disease like diabetes and cancer, and more stable energy. For information about all of the health benefits of oats, click here.

How I Use Them: I use oats most commonly in breakfast foods like these berry and pumpkin pie overnight oats as well as to thicken drinks like this PB&J smoothie, make a crust for this berry peach crisp, or in these decadent Peanut Butter Granola Bars.

Where to Find Them: I buy a big bag of gluten-free rolled oats at Trader Joeā€™s and they last me a long time. Oats have a high likelihood of being ā€œcross-contaminatedā€ by wheat because of where theyā€™re processed, so be careful when selecting oats if youā€™re sensitive or allergic to wheat. You can find rolled oats (NOT instant or quick oats) at any grocery store or online at Amazon or Vitacost.

IMG_5535

Coconut Flour

Why I Love It: Since we cook and bake without using gluten (found in traditional white and wheat flours), this stuff really comes in handy. Not only is coconut flour gluten-free, it’s also a good source of dietary fiber, safe for diabetics (won’t spike your blood sugar!), high in healthy fats and packed with protein. For even more info about why you should get to know this ingredient, check out this articleĀ from Food Matters about the Health Benefits of Baking with Coconut Flour.

How I Use It: In baking recipes. It’s NOT a 1:1 substitution for regular flour, so be sure to follow recipes when you start using it. Most paleo recipes (i.e., no beans, grains, dairy, or refined foods) use it as the primary baking flour in addition to almond flour (another great choice for your pantry!). I used it in these Strawberry Lemon Cupcakes, these decadent Chocolate Peanut Butter Bliss BallsĀ and in a pumpkin muffin recipe I will be posting later this week!

Where to Find it: This stuff is popping up at more stores each day. Trader Joe’s sells organic coconut flour for $2.99/bag, so that’s where I’ve been getting mine. Whole Foods, Wegmans and MOMs or Roots will carry it, as will any natural food store. I’ve started seeing it in the more mainstream grocery stores in the gluten-free aisle. You can also order it online at Amazon, Vitacost, or Nuts.com.Ā I’m also a big fan of having almond flour on hand, so check out those same places to buy almond flour.

IMG_5323

Enjoy Life Chocolate Chips

Why I Love Them: These are one of the most ā€œprocessedā€ foods we keep around the house. I like them because theyā€™re 1) allergy-friendly (no wheat/gluten, dairy, peanuts, soy, eggs, tree nuts), 2) not genetically modified, and 3) donā€™t have artificial anything. The only ingredients are unsweetened chocolate and cane sugar (yay for 2 ingredients!) vs. Nestle morsels, which contain Sugar, ChocolateĀ Cocoa Butter, Milkfat,Ā Soy Lecithin, Natural Flavors.Ā I’m all about “upgrading” recipes and finding better alternatives to common foods that we love.
How I Use Them: I might use them in a recipe once a month ā€“ again, sparingly ā€“ but itā€™s nice to have an option when a recipe calls for chocolate chips šŸ™‚ I used them in just about every recipe featured in my 5 Favorite Sweet Treats post as well as in Chocolate Peanut Butter Bliss Balls, No-Bake Cookie Dough Bites, the Easiest Chocolate Chip Cookies Youā€™ll Ever Make, AND in one of the best recipes Iā€™ve ever made ā€“ Mini Deliciously Dairy-Free Cheesecakes!

Where to Find Them: In the gluten-free or baking section of Wegmans, Target, MOMs and Whole Foods. Iā€™ve found them cheapest at Wegmans or at MOMs if they are on sale or I have a coupon. Use this link on their website to find which stores sell them near you.

Did you like this post? Find it helpful?

I love hearing from you and knowing what you think, so feel free to leave a comment below and share this with your family, friends andĀ Facebook!

Simply Slow Roasted Tomato Sauce

When I needed to figure out a creative way to use up the jumbo slicing tomatoes weĀ had on our counterĀ before leaving for vacation, this recipe was born!

Roasting the tomatoes before blending them gives this sauce a rich, deep flavor that you don’t get from the canned stuff.

We ended up putting it on top of some brown rice pasta, broccoli and sautĆ©ed eggplant, but you could also use it as a dipping sauce (like I plan to for the amazing eggplant “chips” we made this past week!

IMG_5525

Tomatoes are loaded with an antioxidant (antioxidant = anti-disease, anti-aging) called lycopene, which has been shown to haveĀ anti-cancerous properties. Lycopene is not naturally produced in our body, so it must be supplied throughĀ our diet.

The antioxidants and nutrients in tomatoes also contribute to our bone health and protect our heart and blood vessels.

It’s important to eat tomatoes with some fat (i.e., top them with a drizzle of an oil-based vinaigrette or enjoy them with avocado…something with fat!) since lycopene is what is known as a fat-soluble nutrient. Ā It has to be eaten with dietary fat in order to beĀ properlyĀ absorbed by our body.

To read more about the awesome health benefits of tomatoes, click here or here.

The recipe is very simple to make and tastes delicious. Chances are, you already have all of the herbs and spices in your pantry!

Stay tuned for a recipe later this week for what my dad AND husband said is one of THE BEST things I’ve ever made…it’s pairs nicely with this tomato dipping sauce, too šŸ™‚

SimplyĀ Slow Roasted Tomato Sauce

IMG_5624

Ingredients

  • 2 poundsĀ tomatoes, quartered (see first pic above!)
  • 3 cloves garlic, minced
  • 1 cup yellow onion, chopped
  • 1/4-1/2 teaspoon sea salt, depending on your taste preference
  • 1 teaspoon dried oregano
  • 1 teaspoon dried basil
  • 1 teaspoon dried rosemary
  • Black pepper, to taste

Directions

  1. Preheat oven to 400F.
  2. Place the tomatoes on a foil-lined baking sheet, cut side down, and sprinkle 1/4 teaspoon of sea salt on top of the slices. CookĀ tomatoes in the oven for 60 minutes, flipping the tomatoes halfway for even roasting. Remove from oven and set aside to cool.
  3. While the tomatoes are cooling, saute onions and garlic in your choice of vegetable broth, cooking oil, ghee, or grass-fed butter until the onions and garlic have softened, about 10-15 minutesĀ (Click hereĀ for info on why grass-fed butter may be tolerated just fine on a dairy-free diet, as I’ve found it to be for myself…everyone is different!).
  4. PureeĀ the roasted tomatoes, sauteed onions and garlic, herbs, and pepper inĀ a blenderĀ until smooth.Ā Season with black pepper and salt, to taste. Adjust the amount of herbs based on your taste preference.
  5. Heat sauce on the stove in a medium saucepan until ready to serve.

Better-Than-Takeout Chicken "Fried" Rice {Gluten-Free}

Every now and then we stumble upon a recipe that becomes a staple in our house, and this stir fry is one of those recipes!

IMG_6388

IMG_6377

Whenever we’re in a pinch and don’t have anything else to make, we make this healthier version of a take-out favorite – chicken “fried” rice.

A few things are different about this version from the original, but it’s still FULL of flavor!

  • Brown rice vs.Ā white rice (which has been stripped of all the good-for-you nutrients and fiber)
  • LOTS of veggies (You can use any variety you want, but our staples are carrots, onion, celery and garlic. Snow peas, broccoli, peppers, and green peas would work really well, too!)
  • Sauteed on the stove in a wok vs. fried
  • Tamari vs.Ā soy sauce (Tamari is wheat-free soy sauce – make sure the label reads “gluten free” to be 100% sure. It has a milder yet richer taste than regular soy sauce.)
  • No MSG (monosodium glutamate)! A lot of Chinese restaurantsĀ useĀ this additive as a “flavor enhancer” but it’s really harmful to our health. Read more about MSGĀ and why we’re better off avoiding it here.

The best part is that you can use whatever protein you want – from chicken and fish to tempeh – depending on your preference. Feel free to add in whateverĀ veggies you like best – the more the merrier šŸ™‚

I love dishes that give me lots of options to use a variety of vegetables, and this one is no exception. Try it for yourself!

Better-Than-Takeout Chicken “Fried” Rice

IMG_6395IMG_6407Ā 

Better-than-Takeout Chicken Fried Rice

This delicious recipe is a quick and easy go to meal. You can use whatever vegetables you have on hand, too, so let your creativity run wild!

  • 1 chicken breast (diced and cooked)
  • 2 tablepoons coconut oil or avocado oil
  • 2 eggs beaten (try for free-range and pastured)
  • 2 scallions (roughly chopped)
  • 2 cloves garlic (peeled and minced)
  • 1 cup carrots (diced)
  • 1 cup celery (diced)
  • 1.5 cups onion (diced)
  • 2 cups brown rice (cooked)
  • 2 tablespoons tamari or coconut aminos (tamari is wheat-free soy sauce; find it in the Asian or health food section of the store)
  • 2 tablespoons water
  • 1 teaspoon toasted sesame oil
  • salt & pepper (to taste)
  • sesame seeds (sprinkle on top)
  • 1 teaspoon ginger root (peeled and minced (optional but delicious!))
  1. In a large skillet or wok, heat 1 tablespoon of oil over medium/high heat.

  2. Add garlic and ginger and stir for 30 seconds, then add eggs and scallions. Cook, breaking up the eggs with a spoon until they are lightly browned and combined with the scallions.

  3. Stir in the rest of the vegetables and saute for 5 minutes. Add the brown rice and chicken, and stir to combine.

  4. In a small bowl, whisk the tamari and sesame oil with 2 tablespoons of water, and pour over the rice mixture. Turn heat up to high. Continue cooking, stirring frequently, until the rice has absorbed all the liquid, about 2-3 minutes.

  5. Season with the salt and pepper, and, if you prefer, additional tamari or sesame oil. Top with lightly toasted sesame seeds.

Notes*

We cooked the diced chicken in 1 tablespoon of coconut oil in a skillet over medium high heat for 12-15 minutes. Internal temperature of the chicken should read 165F with a meat thermometer.

While it’s best to cook brown rice from scratch on the stove and avoid the microwave, an easy shortcut is to use the microwaveable bags of plain brown rice from the grocery store or Target.

Tamari is a wheat-free soy sauce found in the Asian or gluten-free section of the grocery store.

IMG_6390

Page 1 of 2

Powered by WordPress & Theme by Anders Norén