Category: Detoxifying Page 4 of 5

The Easiest Way to Roast Beets {A Simple How to Photo Guide}

Whenever I think of beets, I can’t help but think of The Office’s Dwight Schrute and his epic beet farm.

As well as Jim Halpert’s impersonation of Dwight and his ”Bears. Beets. Battlestar Galactica” line.

beets

Had to reminisce about that for a second 🙂

Now, let’s get to the beets!

Over the past few months, I’ve had several friends ask me how to roast beets.

To be honest, I had never had much success with it in the past, but I was determined to figure it out.

IMG_4922

Beets are one of those foods that, if we haven’t tried them before, can be a bit intimidating to prepare.

I hope to take that intimidation factor down a notch today and show you how easy it is to cook beets.

One of my goals when I cook and teach about food is to share how certain foods nourish our body, so I have to share some of the reasons beets are so good for us!

  • They contain a nutrient called betaine that fights inflammation (inflamed body = sick, overweight body), improves our heart health, and protects our cells and internal organs.
  • Like any deep-colored fruits and veggies, beets have anti-cancer properties, and some research has shown that beetroot extract reduced tumor formation in animal models.
  • They help our bodies detoxify (clean out!), helping to purify our blood and our liver, which is crucial to keeping weight off, feeling our best, and staying healthy.
  • They’re loaded with vitamin C, fill-you-up fiber, and minerals that are good for our bones, liver, kidneys, and healthy nerve and muscle function.

Now that we know how good for us these little crimson gems are, let’s talk about how to cook and peel them!

How to Roast & Peel Beets

IMG_6578

Step 1: Preheat the oven to 350F.

Step 2: Cut the tops (beet greens) and bottom “tail” off the beets, so they will sit upright in a pan. Save the beet greens. You can sautee them on the stove just like you would any other greens like kale or Swiss chard (more on how to do that in a future post!).

IMG_6575

Step 3: Place the beets in a covered baking dish as shown below. Cover the dish with an oven-proof lid. I used a Corningware dish and a glass lid.

IMG_6586

Step 4: Bake for 50-90 minutes, depending on how big the beets are. I used relatively small beets and they took almost an hour. You can check them for doneness by piercing them with a fork – they will be “fork tender” when they’re done.

Step 5: Let them cool.

IMG_6645

Step 6: Take a paper towel and rub/pull the skin off of the beets as shown in the pictures below. This minimizes stains on your fingers.

IMG_6658 IMG_6661 IMG_6663 IMG_6664 IMG_6665 IMG_6668 IMG_6671

The aftermath of another culinary adventure!

The aftermath of another culinary adventure!

Step 7: Once the beets are peeled, you can do whatever you want with them. They have an “earthy” and slightly sweet flavor. Nothing else really tastes like a beet, so you’ll just have to try it yourself to see how you like it!

I sliced them up and put them on a salad.

You could also eat them by themselves, throw in a few in a smoothie (they will make it VERY red!) or toss them in a vinaigrette. They pair well with balsamic vinaigrette as well as herbs like rosemary.

Here’s a recipe for a beet, pear and almond salad you can try 🙂

Simple salad of sliced beets, chopped pecans, and field greens

Simple salad of sliced beets, chopped pecans, and field greens

How do you like to use beets? Feel free to share your favorite recipes with us below!

"I Can't Believe There's No Mayo" Cole Slaw {Paleo, Too!}

Guilt-free, mayo-less, nourishing, healthy…cole slaw?

It’s possible!

nomayocoleslaw

As I’ve mentioned before, I used to be a super picky eater (and wouldn’t even let different foods “touch” on my plate).

One of the foods I’ve never liked is cole slaw. 

Since I’ve started experimenting more in the kitchen, I thought I would take a stab at a cole slaw recipe after my friend Elise posted one on my Facebook page a few months ago.

I first attempted this recipe a few weeks ago and brought it to a bachelorette party weekend to serve at lunch alongside this Chipotle-style burrito bowl (which was also a HIT!).

I don’t even know what cole slaw is supposed to taste like since I’d never eaten it, so I crossed my fingers and hoped everyone would like it.

Much to my surprise, they LOVED it!

What I like about this recipe is that it UPGRADES the ingredients in a traditional cole slaw recipe, and that’s what I like to focus on doing – upgrading our diet to nourish our bodies.

Cabbage is one of the ultimate anti-cancer GBOMBS foods. GBOMBS are a group of the most nutrient-dense, disease-fighting, health-promoting foods in the world, foods we should eat a lot of on a daily basis. Go to this post for the full details on GBOMBS and how you can benefit from eating them! In the meantime, here are the other health benefits of cabbage:

  • Anti-aging/great for your skin because it contains vitamins A, C and E
  • Helps to detoxify or purify the blood (which also contributes to clearer skin and reduced inflammation…good for anyone with inflammatory conditions like arthritis, skin irritations, diabetes, etc.)
  • High in fiber so it “keeps things moving” 🙂
  • Good for the thyroid and other endocrine glands because of its iodine content

I wrote about why two other ingredients in this recipe – raw apple cider vinegar and raw honey – are so good for our bodies in this post, so check it out!

Two of the surprise ingredients in this delicious cole slaw!

Two of the surprise ingredients in this delicious cole slaw!

Here’s a challenge for you. The next time you go to a party and need to bring a side dish, bring this.

I talked to a friend at a wedding this weekend, and she said she prepared this at home for her husband after the bachelorette party, and he said it was the best cole slaw he’d ever had!

nomayocoleslaw

Testing Note: Due to some helpful feedback from a reader, I revised the original recipe for improved taste, so check out the revised recipe below.

Serves: A crowd! You can easily feed 20 people with this recipe as a side dish. I pack it in mason jars and have it with my lunches during the week. It holds up well!

Ingredients

  • 8-10 cups green cabbage, shredded
  • 1 cup canned, full fat coconut milk (we use the Native Forest brand. Make sure you shake the can first)
  • 2 tablespoons raw apple cider vinegar
  • 1 tablespoon raw honey
  • 1/2 teaspoon sea salt
  • 1/2 teaspoon black pepper
  • 1/2 teaspoon onion powder
  • 1/2 teaspoon garlic powder
  • 1/2 teaspoon celery seed
  • You could also add some shredded carrots for an additional pop of color!

Directions

Whisk together coconut milk, apple cider vinegar, raw honey, sea salt, pepper, onion and garlic powder, and celery seed for the dressing. Set aside.

IMG_6764

Shred one head of green cabbage. I cut mine into chunks, cutting off the tough, inner triangle piece at the base as shown in the picture below. I used the shredding attachment on my food processor and just pushed the pieces through the tube, but you could also use a knife or a box grater.

IMG_6754 IMG_6757 IMG_6758

IMG_6759

Pour dressing over cabbage and toss to combine, so all of the cabbage is coated. Set in the fridge for at least one hour (but preferably a few hours or even overnight), so all of the flavors combine.

Set out for about 10 minutes before serving (that’s what I prefer) and toss just before serving, as the dressing settles a bit at the bottom of the bowl. Enjoy!

IMG_7146

The Recipe That Got My Husband to Like Green Beans

IMG_6333

Everyone dislikes certain foods.

For me, it’s olives.

My friend Sam loves olives and would probably put them on just about everything if she could.

I’m just not a fan.

I even lived in Spain when I was in college, and Spain is THE place for olives.

I remember one meal in particular that my Spanish host family served me – a tuna fish, olive, and hard-boiled egg salad.

At the time, those three foods by themselves were a no-go, so the trifecta totally grossed me out.

But I had to at least TRY it because it’s rude not to in Spain (even if you’re 100% sure you won’t like it). After forcing down one nausea-inducing bite, I smiled and politely said, “It’s not my favorite” and was off the hook for the evening. Phew!

For my husband, Bill, that “thanks, but no thanks” food was green beans. 

Until tonight.

IMG_6319

Sometimes, the reason we don’t like certain foods is because we’ve only had them prepared in ways that doesn’t make them taste very good.

When most people think of green beans, for instance, images of the precut, brownish-green, mushy beans that come in a can and are then boiled to death come to mind.

Maybe you’ve only ever had canned vegetables and have never tried those same vegetable prepared a different way – roasted, sauteed, or tossed into a chili or stew.

Consider giving them a second chance…like Bill did!

To put it bluntly, we housed this recipe. We couldn’t stop eating them. They were that good.

Cooked “al dente” (AKA still crispy and brightly colored!), the green beans were tossed in a mixture of garlic, lemon, slivered almonds and a touch of sea salt. They were downright addictive.

We were licking the bowl clean, scraping up the last bits of crunchy slivered almonds before finally putting the bare dish in the sink.

My husband is a green-bean-hater no more. Mission accomplished!

Garlicky Green Beans Almondine with Lemon

IMG_6334

Ingredients

  • Equal parts water and vegetable broth (see step 1 below)
  • 2 pounds green beans, ends cut off
  • 3/4 cup slivered raw almonds
  • 4 cloves fresh garlic, peeled & minced
  • 3 tablespoons fresh lemon juice
  • 2-3 tablespoons coconut oil (The original recipe called for cold pressed extra virgin olive oil, which you could also use. I use coconut oil because it holds up better than olive oil when it’s heated.)
  • Âœ tsp finely grated lemon zest
  • sea salt, to taste

Directions

  1. Fill a large stock pot with half water, half vegetable broth and bring it to a boil. Make sure the amount of water/broth is at least twice as much as the amount of beans you intend to cook.
  2. Gently blanch the green beans (cook them in the boiling liquid for about 3 minutes until just al dente (brightly colored and crisp)). Drain beans in ice cold water (or put them in a bowl containing an ice water bath and set aside). This stops the cooking process.
  3. In a wok or large deep frying pan, heat the oil and garlic on medium heat for 2-3 minutes. Don’t let the garlic brown.
  4. Add in the almonds and stir for about a minute. Then mix in the lemon juice and finely grated lemon zest.
  5. Add the cooked beans to the stir fry mixture and toss to combine and coat. Add salt to taste (I added about 1/4-1/2 teaspoon of sea salt).
  6. Top the beans with additional lemon zest, if you prefer.

For more information about WHY green beans are so good for us (including building strong bones, filling us up, and being an anti-fat storage anti-cancer GBOMBS food according to Dr. Fuhrman) click here.

The recipe above is a variation of this recipe from Healthy Blender Girl.

Crispy Baked "Smokra" Bites (Incredibly Simple…and Hubby-Approved!) {Paleo, Vegan, Gluten-Free}

This is probably not the first vegetable you think to grab at the grocery store or farmer’s market.

Before this week, it wasn’t at the top of my list either.

In fact, I’d never bought it or cooked with it before, so all of us are in for a learning experience this week 🙂

IMG_6269

I write for another blog (Hometown Harvest), and depending on the week, my friend Kaitlyn who works for them will send me challenges for seasonal ingredients to use.

“Can you make anything with…eggplant?”

(I was less than thrilled, considering eggplant was, at the time, my least favorite vegetable.)

“I’ll see what I can do!” I replied.

The best part of getting requests like that is having to think beyond what’s familiar to me and do something I encourage other people to do all the time…try new foods (even ones we’ve sworn we despise!).

So, on another creative culinary journey I went. It turns out that I actually don’t mind eggplant, as long as it’s prepared certain ways.

Eggplant fries = the recipe that got me to like eggplant! Check it out here.

My challenge vegetable this week?

Okra.

IMG_6307

Prior to cooking okra for the first time this week, I knew two things about it:

1) It’s my dad’s least favorite vegetable, and

2) Stone Mill Bakery uses it in their ridiculously awesome vegetable soup (which, although a bit overpriced, is worth the splurge if you’re looking for a delicious lunch in Baltimore).

I can’t say I was super pumped about this one, considering how little I knew about how to prepare okra.

So, to Pinterest I went in search of a tasty way to cook up this less than popular veg…and ways to make it not slimy, since that was a common complaint among people trying to cook with it.

I also wanted to learn more about okra’s healthy claims to fame.

When I find out just how good something is for my body, I tend to be a lot more excited to try it!

IMG_0018_2

Check out this blurb about all of the health benefits of okra from another blogger, Nourished & Grounded:

Okra is FULL of vitamins and minerals, especially vitamin C, A, K, Folate, Niacin, Thiamin, B6, magnesium, manganese, carotene, as well as lutein and zeazanthin [crucial for eye health].  It contains polysaccharides that improve blood circulation.  It contains numerous antioxidants such as epicatechin, catechin, rutin, procyanidin B1 and B2 and quercetin which help the body prevent damage from oxidative stress and environmental factors.  And what about that gooey liquid that gives it such a bad wrap?  Surprise, that’s the best part! The gel-like fiber (mucilage) soothes and coats the intestines, and a healthy gut is crucial for overall health.  This is the same stuff found in aloe vera and it’s SUPER healing.

My favorite way to make just about any other vegetable is to roast it, so that’s what I did with okra. Prep time is under 5 minutes, and these little okra bites will be ready in about 20 minutes!

Even after I tried them and approved of their crunchy texture, mild flavor, and pleasant “pop” from the edible seeds, I wasn’t 100% sure my husband would like them.

To my surprise (and satisfaction!) he did 🙂

That makes these crispy little bites wife-tested and hubby-approved.

Crispy Baked Okra Bites: 2 Ways

IMG_6272

IMG_0021

Basic Ingredients

  • 1/2 pound okra, chopped into 1/2 inch discs (about 18 pods) – cut off the top and bottom stems
  • 1-2 tablespoons coconut oil, melted
  • 1/2 teaspoon sea salt, or to taste
  • 1/4 teaspoon black pepper, or to taste

**You can use any combination of spices you like on these. They taste great with just salt and pepper if you want to keep it simple, or try one of my favorite variations below:

Garlic Version: Add 1 teaspoon garlic powder.

Smokra Version: Add 1 teaspoon smoked paprika (also called “smoked sweet paprika” – This spice is AWESOME on everything from roasted veggies to soups to popcorn. Add it to your grocery list!).

IMG_0016

Directions

  1. Preheat oven to 450F.
  2. Toss okra with coconut oil and spices and spread out in a single layer on a foil or parchment-lined baking sheet.
  3. Roast for 20 minutes, stirring halfway through, until the bites are browned and crispy. Cook longer to crisp them up even more!
  4. Serve immediately.

IMG_0019

Crispy Baked “Smokra” Bites (Incredibly Simple…and Hubby-Approved!) {Paleo, Vegan, Gluten-Free}

This is probably not the first vegetable you think to grab at the grocery store or farmer’s market.

Before this week, it wasn’t at the top of my list either.

In fact, I’d never bought it or cooked with it before, so all of us are in for a learning experience this week 🙂

IMG_6269

I write for another blog (Hometown Harvest), and depending on the week, my friend Kaitlyn who works for them will send me challenges for seasonal ingredients to use.

“Can you make anything with…eggplant?”

(I was less than thrilled, considering eggplant was, at the time, my least favorite vegetable.)

“I’ll see what I can do!” I replied.

The best part of getting requests like that is having to think beyond what’s familiar to me and do something I encourage other people to do all the time…try new foods (even ones we’ve sworn we despise!).

So, on another creative culinary journey I went. It turns out that I actually don’t mind eggplant, as long as it’s prepared certain ways.

Eggplant fries = the recipe that got me to like eggplant! Check it out here.

My challenge vegetable this week?

Okra.

IMG_6307

Prior to cooking okra for the first time this week, I knew two things about it:

1) It’s my dad’s least favorite vegetable, and

2) Stone Mill Bakery uses it in their ridiculously awesome vegetable soup (which, although a bit overpriced, is worth the splurge if you’re looking for a delicious lunch in Baltimore).

I can’t say I was super pumped about this one, considering how little I knew about how to prepare okra.

So, to Pinterest I went in search of a tasty way to cook up this less than popular veg…and ways to make it not slimy, since that was a common complaint among people trying to cook with it.

I also wanted to learn more about okra’s healthy claims to fame.

When I find out just how good something is for my body, I tend to be a lot more excited to try it!

IMG_0018_2

Check out this blurb about all of the health benefits of okra from another blogger, Nourished & Grounded:

Okra is FULL of vitamins and minerals, especially vitamin C, A, K, Folate, Niacin, Thiamin, B6, magnesium, manganese, carotene, as well as lutein and zeazanthin [crucial for eye health].  It contains polysaccharides that improve blood circulation.  It contains numerous antioxidants such as epicatechin, catechin, rutin, procyanidin B1 and B2 and quercetin which help the body prevent damage from oxidative stress and environmental factors.  And what about that gooey liquid that gives it such a bad wrap?  Surprise, that’s the best part! The gel-like fiber (mucilage) soothes and coats the intestines, and a healthy gut is crucial for overall health.  This is the same stuff found in aloe vera and it’s SUPER healing.

My favorite way to make just about any other vegetable is to roast it, so that’s what I did with okra. Prep time is under 5 minutes, and these little okra bites will be ready in about 20 minutes!

Even after I tried them and approved of their crunchy texture, mild flavor, and pleasant “pop” from the edible seeds, I wasn’t 100% sure my husband would like them.

To my surprise (and satisfaction!) he did 🙂

That makes these crispy little bites wife-tested and hubby-approved.

Crispy Baked Okra Bites: 2 Ways

IMG_6272

IMG_0021

Basic Ingredients

  • 1/2 pound okra, chopped into 1/2 inch discs (about 18 pods) – cut off the top and bottom stems
  • 1-2 tablespoons coconut oil, melted
  • 1/2 teaspoon sea salt, or to taste
  • 1/4 teaspoon black pepper, or to taste

**You can use any combination of spices you like on these. They taste great with just salt and pepper if you want to keep it simple, or try one of my favorite variations below:

Garlic Version: Add 1 teaspoon garlic powder.

Smokra Version: Add 1 teaspoon smoked paprika (also called “smoked sweet paprika” – This spice is AWESOME on everything from roasted veggies to soups to popcorn. Add it to your grocery list!).

IMG_0016

Directions

  1. Preheat oven to 450F.
  2. Toss okra with coconut oil and spices and spread out in a single layer on a foil or parchment-lined baking sheet.
  3. Roast for 20 minutes, stirring halfway through, until the bites are browned and crispy. Cook longer to crisp them up even more!
  4. Serve immediately.

IMG_0019

A New Veggie Recipe to Try (Plus Natural Heartburn Relief!)

Bill and I love going out to new restaurants to eat, but doing that more than a couple times a month can really add up!

Sometimes, we choose to create our own meals at home for a fraction of what we would have paid at a restaurant.

Plus, we don’t have to worry about tacking on a tip to the meal or running late (which never happens… 🙂 )

Out to dinner at Woodberry Kitchen, one of our favorite restaurants, for our one-year anniversary

Out to dinner at Woodberry Kitchen, one of our favorite restaurants, for our one-year anniversary

When we were figuring out what to make for dinner the other night, we decided to try a new vegetable. It keeps the meal exciting and makes it more like a true restaurant experience.

Not only that, but the vegetable we used has some serious medicinal/healing properties that help our digestive system work better (bonus!).

As I’ve been working on healing my digestion over the past few years (it’s a process!), I’ve learned a thing or two about what foods make it work best. After years of going from doctor to doctor, surgery to surgery and pill to pill to “fix” me, I finally feel like I have some answers
and let me tell you, it has been a really empowering experience and confidence-booster!

Apparently, the combination of all of the antibiotics I took as a kid and the 10 years of daily acid reducers as an adult, along with the lifetime impact of eating lots of processed, packaged foods and what turned out to be problem foods for me (dairy and wheat) did a number on my digestive system.

I didn’t know it at the time, but they were also some of the reasons I used to get sick so often, struggled with 15-20 pounds that just wouldn’t budge, and why I had lots of bloating, gas, and other digestive frustrations. Sounds like a party, right?

I had no idea that 70-80% of my immune system was located in and around my digestive tract, mainly my intestines. By healing my digestion, I would start to heal (and energize!) my entire body. Who knew??

The main reason I’m such a fan of this lesser known veggie is because of how healing it is for the stomach and rest of the digestive system.

It’s also a potent cancer fighter.

Fennel bulbs

Funky-looking fennel bulbs!

Meet fennel.

Fennel is a plant that most of us have heard of but few of us have actually bought/prepared/eaten. It has a very mild licorice flavor and is subtly sweet.

You’ve probably walked by it at the grocery store, given it an odd look, and thought, “What the heck is that, and what do I do with it??” I’m here today to tell you!

Fennel and licorice are both known as digestive soothers, and many people (especially those with reflux/heartburn/indigestion) find that drinking fennel tea, and taking either digestive enzymes containing fennel or DGL (deglycyrrhizinated licorice) tablets before a meal promotes improved digestion. My mom now swears by DGL tablets, and I’ve had lots of success taking them myself.

DGL tablets create a soothing coating that lines your digestive system prior to eating, which calms and soothes your digestive tract and reduces the likelihood you’ll have to deal with indigestion, gas and bloating. Pretty cool, right?

Click this link or this one to order DGL tablets and learn more about them. Talk to your doctor or to a functional medicine doctor about whether these could be a good option for you.

Now, back to the veg!

Fennel tastes delicious when roasted, so that’s how we prepared it today.

We served the roasted fennel with some local, grass-fed beef tenderloin along with broccoli that was lightly steamed and then sautéed with roasted red pepper flakes, garlic, and some sea salt and pepper. It was a very tasty meal!

There you have it. Now you no longer have an excuse to ignore fennel at the grocery store or farmer’s market...and have lots of reasons to try this super healthy, medicinal veggie!

Easy Oven-Roasted Fennel

Roasted fennel with beautiful caramelization!

Roasted fennel with beautiful caramelization!

Ingredients

  • 1 pound fennel, quartered lengthwise (I used 2 bulbs)
  • 1-2 tablespoons of extra virgin olive oil or coconut oil
  • 1/2 teaspoon of sea salt, more to taste
  • freshly ground black pepper, to taste
  • juice from 1/2 lemon
  • Optional: sprinkle some freshly chopped rosemary on top before roasting

Directions

  1. Preheat oven to 475F.
  2. Follow the step-by-step pictures below to prep and quarter the fennel.  Cut off the green stalks and a 1/2″ disc from the bottom of the bulb, and remove any discolored outer leaves from the bulb, so you’re just left with the white/light-green fennel bulb to quarter and roast.
  3. In a medium bowl, toss the fennel quarters with your choice of oil, sea salt and black pepper.
  4. Put the fennel on a parchment or foil-lined baking sheet, cut-side down, so they’re evenly spaced out. Roast for 15 minutes, or until the edges begin to brown. Flip the fennel to the other side and continue roasting until they are browned, about 10  more minutes.
  5. Place the fennel back in the bowl you tossed them with and squeeze the juice of half a lemon on top of the fennel. Toss to coat evenly.
Chop off the bottom tough disc - about 1/2"

Chop off the bottom tough disc – about 1/2″

Chop off the tougher green parts. You can save them and throw them into soups as you would celery. You can save the fuzzy parts (AKA fronds) and use them as decoration like you would dill.

Chop off the green stalks. You can save them and throw them into soups as you would celery. You can save the fuzzy parts (AKA fronds) and use them as decoration like you would dill.

Chop the white bulb into quarters

Chop the white bulb into quarters

This is what the bulb looks like inside once you've quartered it

This is what the bulb looks like inside once you’ve quartered it

Give it a nice drizzle of coconut or olive oil along with some sea salt and black pepper before putting it in the oven to roast!

Give it a nice drizzle of coconut or olive oil along with some sea salt and black pepper before putting it in the oven to roast!

Why I Became a Qualitarian…And How It Changed My Life

People often ask me how and what to eat. I’ve been asked the following questions:

“I’ve heard you should only eat 9 almonds a day…Is that true?”

“Is it really okay to eat frozen fruits and vegetables?

“What kind of bread do you eat?”

“Should I be eating paleo? Vegan? Vegetarian? Raw?”

We have a tendency to want to label the way we eat and what we eat. It makes sense because it provides a shortcut, and we love shortcuts because they make life a bit easier.

If I had to answer the question about what to eat or what “diet” I’m on, I’d borrow a word coined by Dr. Mark Hyman and say this:

I’m a qualitarian who focuses on eating unprocessed, fresh, whole foods that are – when possible – organic and locally grown or raised.

And, in the wise words of Michael Pollan, I strive to “eat food, not too much, mostly plants, especially leaves.” leafy green veggies…not leaves from a tree 🙂

In addition, because of my personal health history and what I’ve learned about my body over the years about the impact of two foods on my health, I avoid milk products and wheat.

I leave room for indulgences like birthday cake, high quality dark chocolate, or a homemade cookie or cupcake, but I focus on eating nourishing foods most of the time because I feel most energized and alive when I do. I like feeling good.

I choose to do what I do because of how it makes me feel.

Feeling good on my 30th birthday...celebrating another special year of life at a nearby French restaurant with my hubby!

Feeling good on my 30th birthday…celebrating another special year of life at a French restaurant with my hubby!

I’ve been encouraged and motivated by all of the benefits I’ve experienced since becoming a qualitarian:

  • I’ve lost and kept off 20 pounds for over 4 years
  • I naturally stay within 3-5 pounds of the same weight
  • I have sustained energy all day long (no caffeine needed and no 3:00 crash!)
  • My skin is clearer than it’s ever been and is blemish-free 99% of the time. (I had dry skin most of my life and some mild adult acne in my early 20s, so this is a big deal for me!)
  • I rarely get sick, and if I do it’s not for very long
  • I no longer have seasonal allergies or suffer from sinus congestion
  • My digestion has improved tremendously (almost no more burping, bloating, or gas!)
  • I’m medication-free for the first time since I was a teenager and no longer have acid reflux/heartburn

This food list by one of my favorite nutrition and health experts – Dr. Junger – captures the gist of what I eat (since people sometimes want specifics!), but I eat things outside of this list as well, so these are just the general guidelines by which I make food choices rather than absolutes.

My qualitarian “diet” focuses on fruit, veggies, beans, gluten-free grains/cereals/pastas, nuts and seeds, free-range/grass-fed animal meats/eggs as well as vinegars, oils, herbs and spices for flavoring and cooking.

One of the most interesting things I’ve learned since changing what and how I eat and delving deeper into studying nutrition is that most of us are overfed yet undernourished.

Most of what we’re eating is so nutrient-deficient that our body tells us to keep eating – it’s not being “fed” what it needs. What we’re eating actually depletes our body of nutrients, making us work even harder to replace them. It’s only when we start taking in nourishing food that contains nutrients we need to thrive that we can really start to feel full and satisfied.

I’ve found that following a few clear and simple Food Rules from Michael Pollan’s book of the same name (GREAT book!) helps to keep me on track.

food-rules-cover-484

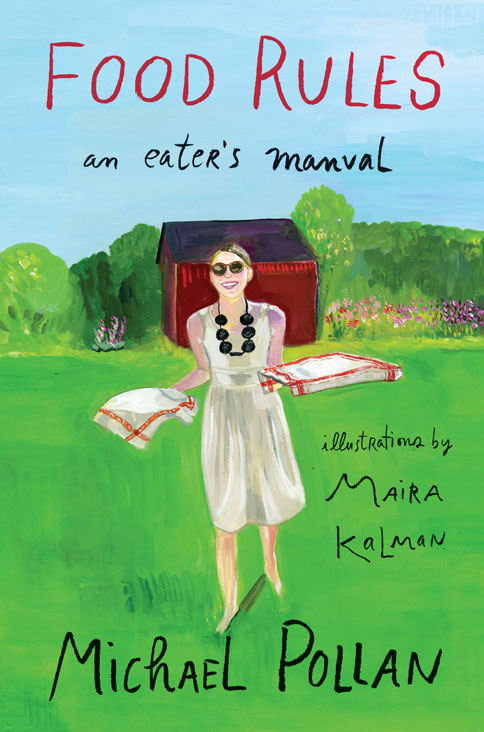
1) Eat food, not too much, mostly plants, especially leaves.

I’m not vegan or vegetarian, but I make plants a priority at each meal. Upgrading my diet to include lots of plants has been a key to me keeping off weight and not getting sick. I focus on incorporating a variety of leafy greens because they are anti-inflammatory, detoxifying, oxygenating and contain disease-fighting, anti-aging compounds. Overall, I eat more vegetables now than I ever have before.

I treat veggies more like the main course and the other foods (grass-fed meat, gluten-free grains, beans, etc.) as the side dishes.

2) Eat real food.

What’s real food? Something that grew in the ground, on a tree, or in a field OR was at one time alive and moving on land, air or water. The life in food makes us feel alive.

So much of what we eat today isn’t real food, it’s a food-like substance. We wouldn’t find the ingredients in a normal person’s pantry…they’re more likely to be found in a chemistry lab.

The remaining rules will give you a better idea of how to tell if something is a real food or food-like substance.

Eating real food means enjoying lots of fresh fruits and veggies!

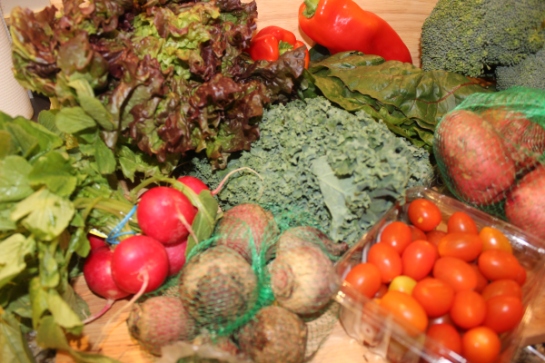
Eating real food means enjoying lots of fresh and colorful fruits and veggies!

3) If it came from a plant, eat it; if it was made in a plant, don’t.

Did someone have to wear a surgical mask and a full body suit to manufacture your food? Would you even recognize your food as food when it is being “created” like this American favorite?

Focus on eating real food vs. what was processed in an industrial plant. It’ll have fewer chemicals, your body will know what to do with it, and you’ll look and feel better and more energized.

4) Eat only foods that will eventually rot.

In general, the faster a food spoils, the more nutrients it has and the better it is for you. If a processed food stays “fresh” on the shelf or in your pantry for a year, what’s in it that’s making it last so long? Most likely lots of chemicals, preservatives and other harmful additives that overburden and damage our bodies.

Check out this story about a man who kept a McDonald’s burger for 14 years and how well it was preserved.

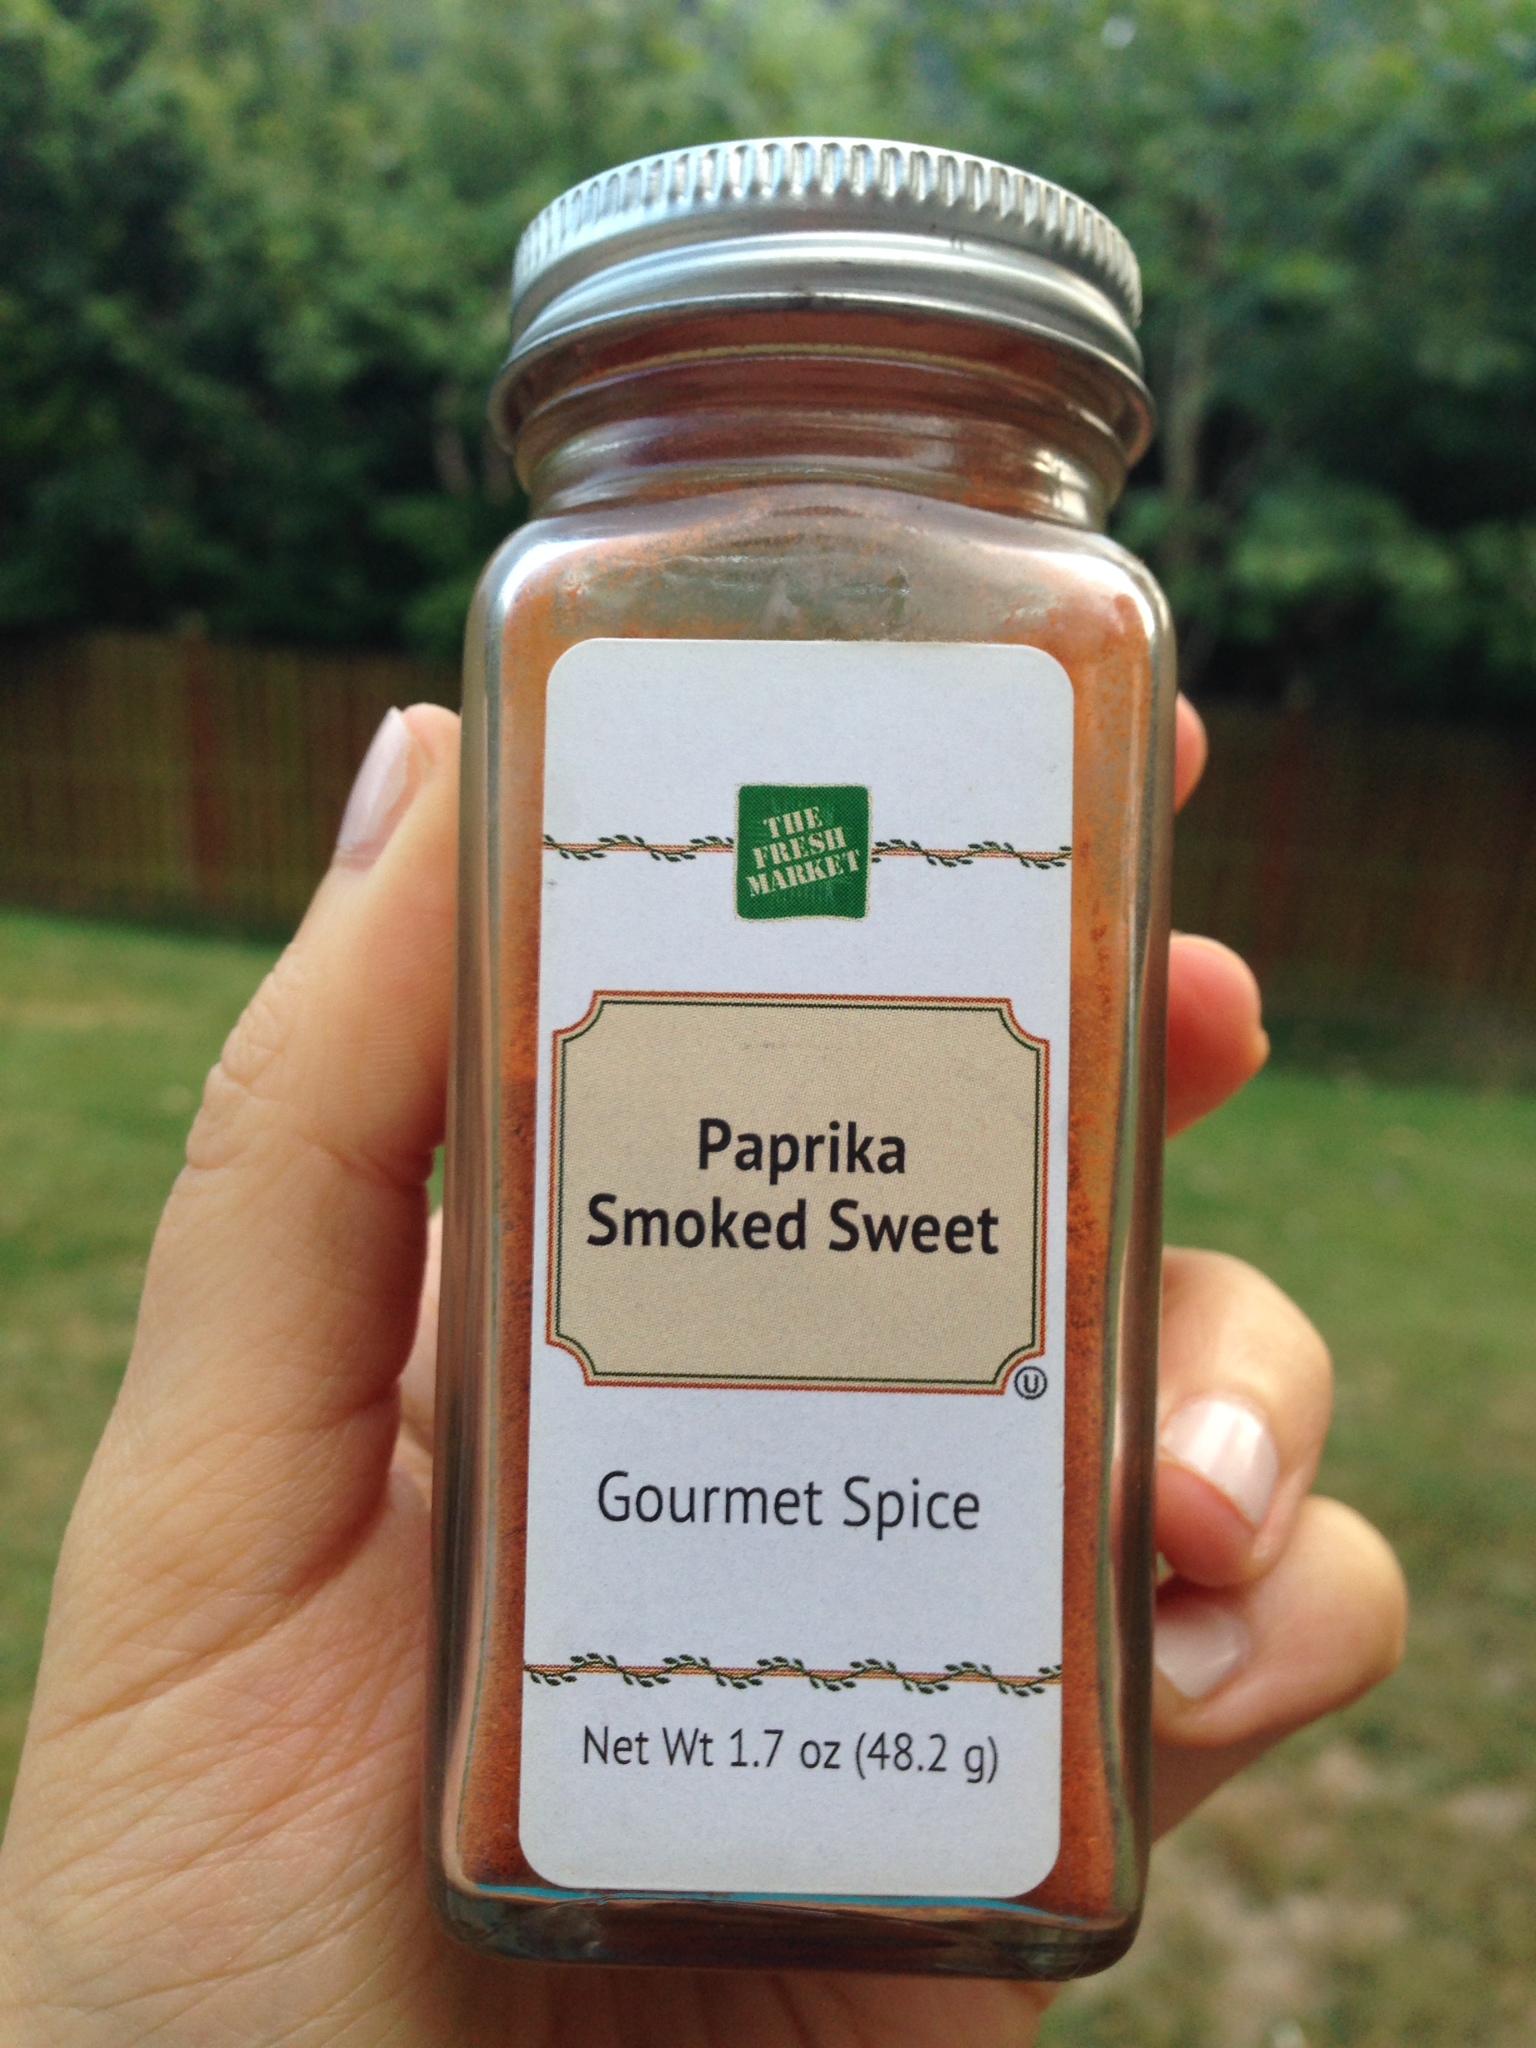
5) Avoid food products that contain more than 5 ingredients.

This is a great rule of thumb to follow. Is it a hard and fast rule with no exceptions? No, but try to keep it in mind the next time you’re grocery shopping or cleaning out your pantry. Forget about the pretty marketing on the front of the package and go straight to the ingredient list. Aim for foods with fewer ingredients, ideally 5 or fewer.

If you want to take an initial step and make healthier choices when it comes to processed foods, check out this super cool, free app on your phone. If you have kids, have them use it and strive for “Bs or better,” just like they would in school.

The Fooducate app. Download it on to your phone today!

The Fooducate app. Download it on to your phone today!

6) Avoid food products that contain ingredients a third-grader can’t pronounce.

Assuming we’re not talking about the genius third-graders who are winning the national spelling bee, if a third grader can’t pronounce it, chances are it is not a real, whole food. In other words, it probably won’t give you lasting energy, help you lose weight, or keep you healthy.

Sodium benzoate or monosodium glutamate (MSG), anyone?

7) Cook.

We’ve lost touch with where our food comes from and how it is prepared. We all feel pressed for time these days, but most of us (myself included!) still find at least an hour a day to be online, watching TV, or on social media at home. Cooking doesn’t mean you have to be a fancy chef either. Just focus on using simple ingredients with simple preparations. Start with something like this burrito bowl or one of these smoothies.

We always make time for the things that matter. If we want to be in the best health possible, cooking matters. 

I had to throw in ONE final bonus rule…

8) If you eat real food, you don’t need rules!

Focus on eating more whole foods that don’t come in packages. Shop the perimeter of the grocery store or, better yet, the farmer’s market. Eat food that was once alive. 

This way of eating can fit into even the busiest life. It can (and should!) taste delicious. And it doesn’t have to break the bank. Check out this post for tips on how to eat organic without going broke. For links to all of the recipes I’ve posted on this blog, click here.

Caribbean Island Breeze Smoothie {Vegan, Paleo, Dairy-Free}

This smoothie takes me back to August 2011 when my hubby and I were relaxing poolside on our honeymoon in Jamaica.

We tried all different kinds of mixed drinks while we were there and loved the island flavors. We also enjoyed fresh fruit every day, including papaya, pineapple and mango. The island was beautiful and definitely felt like paradise! If you would like to visit, why not do so in style? Check out villas in Jamaica from Exceptional Villas.

On the beach in Jamaica, mon!

On the beach in Jamaica, mon!

Fast forward almost three years, and Bill and I have found a way to bring some of those island flavors to our kitchen through our cooking AND smoothie making!

We enjoy a smoothie just about every day for breakfast because it fills us up for hours and is a quick and easy way to get a concentrated source of anti-aging, disease fighting, energy-boosting nutrients into our diet. For all of those reasons, it’s also one of the ways I effortlessly regulate my weight. Click here to learn more about the health benefits of green smoothies.

In today’s smoothie, I used a variety of super healthy ingredients that come together to bring you a taste of paradise 🙂

Coconut Water

Think of coconut water as the new Gatorade…but healthier! Gatorade is loaded with chemicals, refined sugar and artificial colors and flavors that don’t nourish our bodies. Coconut water is a great natural source of electrolytes – minerals in our blood and body fluids that carry an electric charge, which affects the amount of water in our body, muscle function, and a variety of other processes.

Harmless Harvest makes my favorite coconut water (which I just found out Safeway sells! Whole Foods, MOMs and Wegmans sell it, too). This site has a great post about the top 10 ways your body benefits from coconut water. To learn more about the best coconut water brands click here.

Leafy Greens

A curly bunch of kale!

A curly bunch of kale!

Leafy greens are one of the most nutrient-dense, disease-fighting, health-promoting foods in the world, foods we should eat a lot of on a daily basis. They are detoxifying (clean us out!), antiinflammatory (cool the body), cancerfighting, oxygenating, alkaline (reduce acidity in our body), and loaded with anti-aging antioxidants and nutrients.

It’s important to rotate your greens, too. Variety is the spice of life 🙂 Check out this link for tips on how to do that. I like to rotate between kale (baby and regular), spinach, collard greens, Swiss chard and Romaine lettuce.

Pineapple

The magic of pineapple is an enzyme called “bromelain” (say it, “BRO-ma-lane”). This enzyme breaks down proteins and foods and is a natural detoxifier (AKA body gunk cleaner outer). It also helps improve circulation and reduce mucus, which builds up in our digestive system, sinuses, and respiratory system. Clearing out mucus is important for overall health and beauty. Pineapple also contains manganese, which promotes skin healing and overall skin health.

Chia Seeds

Ch-ch-ch-chia seeds! You can find these at any health food store, Wegmans, Trader Joes or online at Amazon, Vitacost or other stores.

Ch-ch-ch-chia seeds! You can find these at any health food store, Wegmans, Trader Joes or online at Amazon, Vitacost or other stores.

These teeny tiny seeds are a beauty detox and anti-inflammatory super food. They swell to 10-15 times their original size when combined with liquid and form a gel, which helps to keep us feeling full and hydrated for hours.

Since they contain lots of fiber, they help balance our blood sugar and keep energy levels up. Their gel-like consistency promotes optimal digestion and keeps things moving in our digestive system (trust me, we want to keep things moving!).

Lastly, they contain high levels of antioxidants, which help counteract the damage of things like stress, poor diet, smoking and other health stressors, and omega-3 fatty acids, which are important for balancing hormones and nerve functions.

Bananas, shredded coconut, and mango are a few other ingredients in this smoothie that are loaded with health benefits, too, but let’s just get on with the recipe! To learn more about the health benefits of any one of those foods, check out this link for the World’s Healthiest Foods.

Caribbean Island Breeze Smoothie

IMG_4710

Caribbean Island Breeze Smoothie

Inspired by the tropical flavors from our honeymoon, this smoothie is packed with nourishment and will keep you full for hours!

  • 2 cups filtered water (or coconut water)
  • 2 cups baby spinach (loosely packed)
  • 1 cup frozen pineapple
  • 1 cup frozen mango
  • 1 banana (peeled and frozen)
  • 2 tablespoons chia seeds (or hemp seeds)
  • 1/2 teaspoon fresh ginger root
  • 1/2 avocado flesh
  • 1 teaspoon fresh lime juice
  1. Put all ingredients in a blender, in the order listed above, and blend for 30-60 seconds until the smoothie is fully blended.

**If you don’t have a high powered blender, try blending just the liquid and greens FIRST and then add in the other ingredients once the greens have blended.**

tropical-breeze smoothie

Zucchini Basil Pesto Sauce (Watch Me Make It!)

I LOVE pesto. It’s my favorite Italian sauce for pasta, veggies, and even chicken.

Anything with basil and garlic in it is bound to taste good, right?

Most pesto sauce recipes are loaded with oil, cheese, and pine nuts, all of which can be clogging to our bodies if eaten in excess. I’m a huge fan of pine nuts and love the way they taste, but there are one of the most expensive nuts you can buy, so I wanted to share a recipe that uses walnuts instead.

This recipe also includes a “surprise” ingredient that you’ve probably never seen in pesto…zucchini!

Zucchini adds creaminess to the sauce and boosts its nutrient content.

I like serving pesto over top of zucchini pesto noodles AKA “zoodles.” (click the link for a “how to” demo!).

Oil-Free Zucchini Basil Pesto Sauce

The completed pesto sauce!

Ingredients

1 cup diced zucchini (no need to peel it!)
1 handful fresh basil leaves (about 3/4 oz.)
2 garlic cloves (the recipe called for 4 cloves, but I found that to be wayyy too much, so I would use 2)
œ cup raw walnuts
3 tablespoons water (the recipe calls for a 1/4 cup, but I found that slightly less – 3 T works best)
2 tablespoons fresh lemon juice
1/2 teaspoon sea salt, or to taste

*I also added in about 2-3 tablespoons of nutritional yeast to give it a little more of a “cheezy” flavor, but you can taste test it yourself and decide whether or not you want to add that in!

Click here for the super simple directions from one of my favorite bloggers and fellow health coaches, The Detoxinista. You can also watch my How To video below!

Tart & Tangy Raspberry Lime Popsicles

Growing up, I was always jealous of the kids who went to the beach for vacation.

Despite the fact that I’ve lived in Baltimore my whole life, the first time I ever went to Ocean City, Maryland in the summer was for “Senior Week” after graduating from high school.

When I was a kid, I went on vacation with my family to the Adirondack Mountains of Upstate New York, where my mom spent her summers as a kid.

As an adult, I truly appreciate the Adirondacks and still spend a week of every summer up there with my husband and family. I now look forward to the beauty, solitude and slower pace of mountain life.

A beautiful view from an Adirondack mountaintop

A beautiful view from an Adirondack mountaintop

But when I was a kid, the mountains weren’t exactly “the place to be” in the summer.

It wasn’t cool to have to drive 8+ hours to get to our vacation spot when all of our friends and classmates had a 3 hour drive to the beach. As a 14-year-old, spending 1-2 weeks in a cabin in the woods with no friends wasn’t as appealing as walking around on the boardwalk, playing in the ocean and sand, or laying out on a towel at the beach.

Though I didn’t always appreciate the awesomeness of the mountains as a kid, there’s one thing I always loved about being “Up North.”

Wild raspberries.

Can't get enough of these berries!

Ever since I was a little girl, I have loved raspberries.

To this day, I still can’t find anything that matches the taste of freshly picked wild raspberries from bushes lining the mountain roads. Maybe it’s the clean, crisp, cool mountain air. Whatever it is, I can’t get enough of them.

For today’s super simple, kid-friendly recipe, I used black raspberries, but feel free to use red raspberries instead! Either one will work.

Black raspberries give these popsicles their bright pink color. So pretty!

Black raspberries give these popsicles their bright pink color. So pretty!

Berries are one of the anti-cancer, anti-fat storage GBOMBS foods. They are also lower in sugar than almost any fruit, especially raspberries, which contain a mere 5 grams of naturally occurring sugar in a one cup serving.

Raspberries are high in filling fiber and are supercharged with disease-fighting, anti-aging antioxidants. Click here to read even more about the amazing health benefits of raspberries!

The pairing of

Ingredients

  • 1.5 cups fresh raspberries (I used black raspberries for this recipe, but you could use either kind or combine them!)
  • 1 can full fat coconut milk
  • Juice of one lime
  • 2 teaspoons pure vanilla extract
  • 1/4 cup pure maple syrup or honey (I used raw honey when I made them but plan to try the maple syrup option next time!) 

Directions

  1. Put all ingredients into a high-speed blender and blend until smooth.
  2. Pour mixture into popsicle molds and freeze until solid.
  3. Gently remove the popsicles from the mold by running the mold under warm water until the popsicle pops out.
  4. Enjoy!

tart raspberries with tangy lime juice and creamy coconut milk makes for a refreshing sweet treat that you and your kids will love!

As always, these popsicles are dairy-free, so everyone can enjoy them. 🙂

Tart & Tangy Black Raspberry & Lime Popsicles

IMG_5217

Ingredients

  • 1.5 cups fresh raspberries (I used black raspberries for this recipe, but you could use either kind or combine them!)
  • 1 can full fat coconut milk
  • Juice of one lime
  • 2 teaspoons pure vanilla extract
  • 1/4 cup pure maple syrup or honey (I used raw honey when I made them but plan to try the maple syrup option next time!) 

Directions

  1. Put all ingredients into a high-speed blender and blend until smooth.
  2. Pour mixture into popsicle molds and freeze until solid.
  3. Gently remove the popsicles from the mold by running the mold under warm water until the popsicle pops out.
  4. Enjoy!

Page 4 of 5

Powered by WordPress & Theme by Anders Norén