Category: Tips & Tricks Page 5 of 7

How to Make Your Own Almond Milk & Why I Ditched Dairy {Step-by-Step Video!}

Mother’s milk is an integral part of our first food memory. It single-handedly sustained and nourished us through our initial months and years of life.

It’s no wonder we have such an emotional tie to milk and the products made from it. 

From Polly-o string cheese and Parmesan cheese to yogurt, ice cream, and frozen yogurt, I loved dairy products for most of my life. If you had told me there would be a time when I wouldn’t eat them, I would have told you that you were nuts 🙂

almond milk 2

But ever since I cut out milk products three years ago, I’ve felt better than ever.

For years, my body was sending me signals that I basically ignored and never knew were connected to my body’s intolerance to dairy. When I cut it out, my sinus congestion disappeared, I stopped getting bronchitis twice a year, and my post-nasal drip went away. That meant no more Sudafed, Advair, Mucinex or Tylenol Cold & Sinus – all medications I used to take multiple times throughout the year.

My skin and digestion also improved significantly – less dryness and zits and less bloating and gas (just being honest!). Giving up dairy is also one of the reasons I was finally able to get off of medicine I used to take daily to control acid reflux.

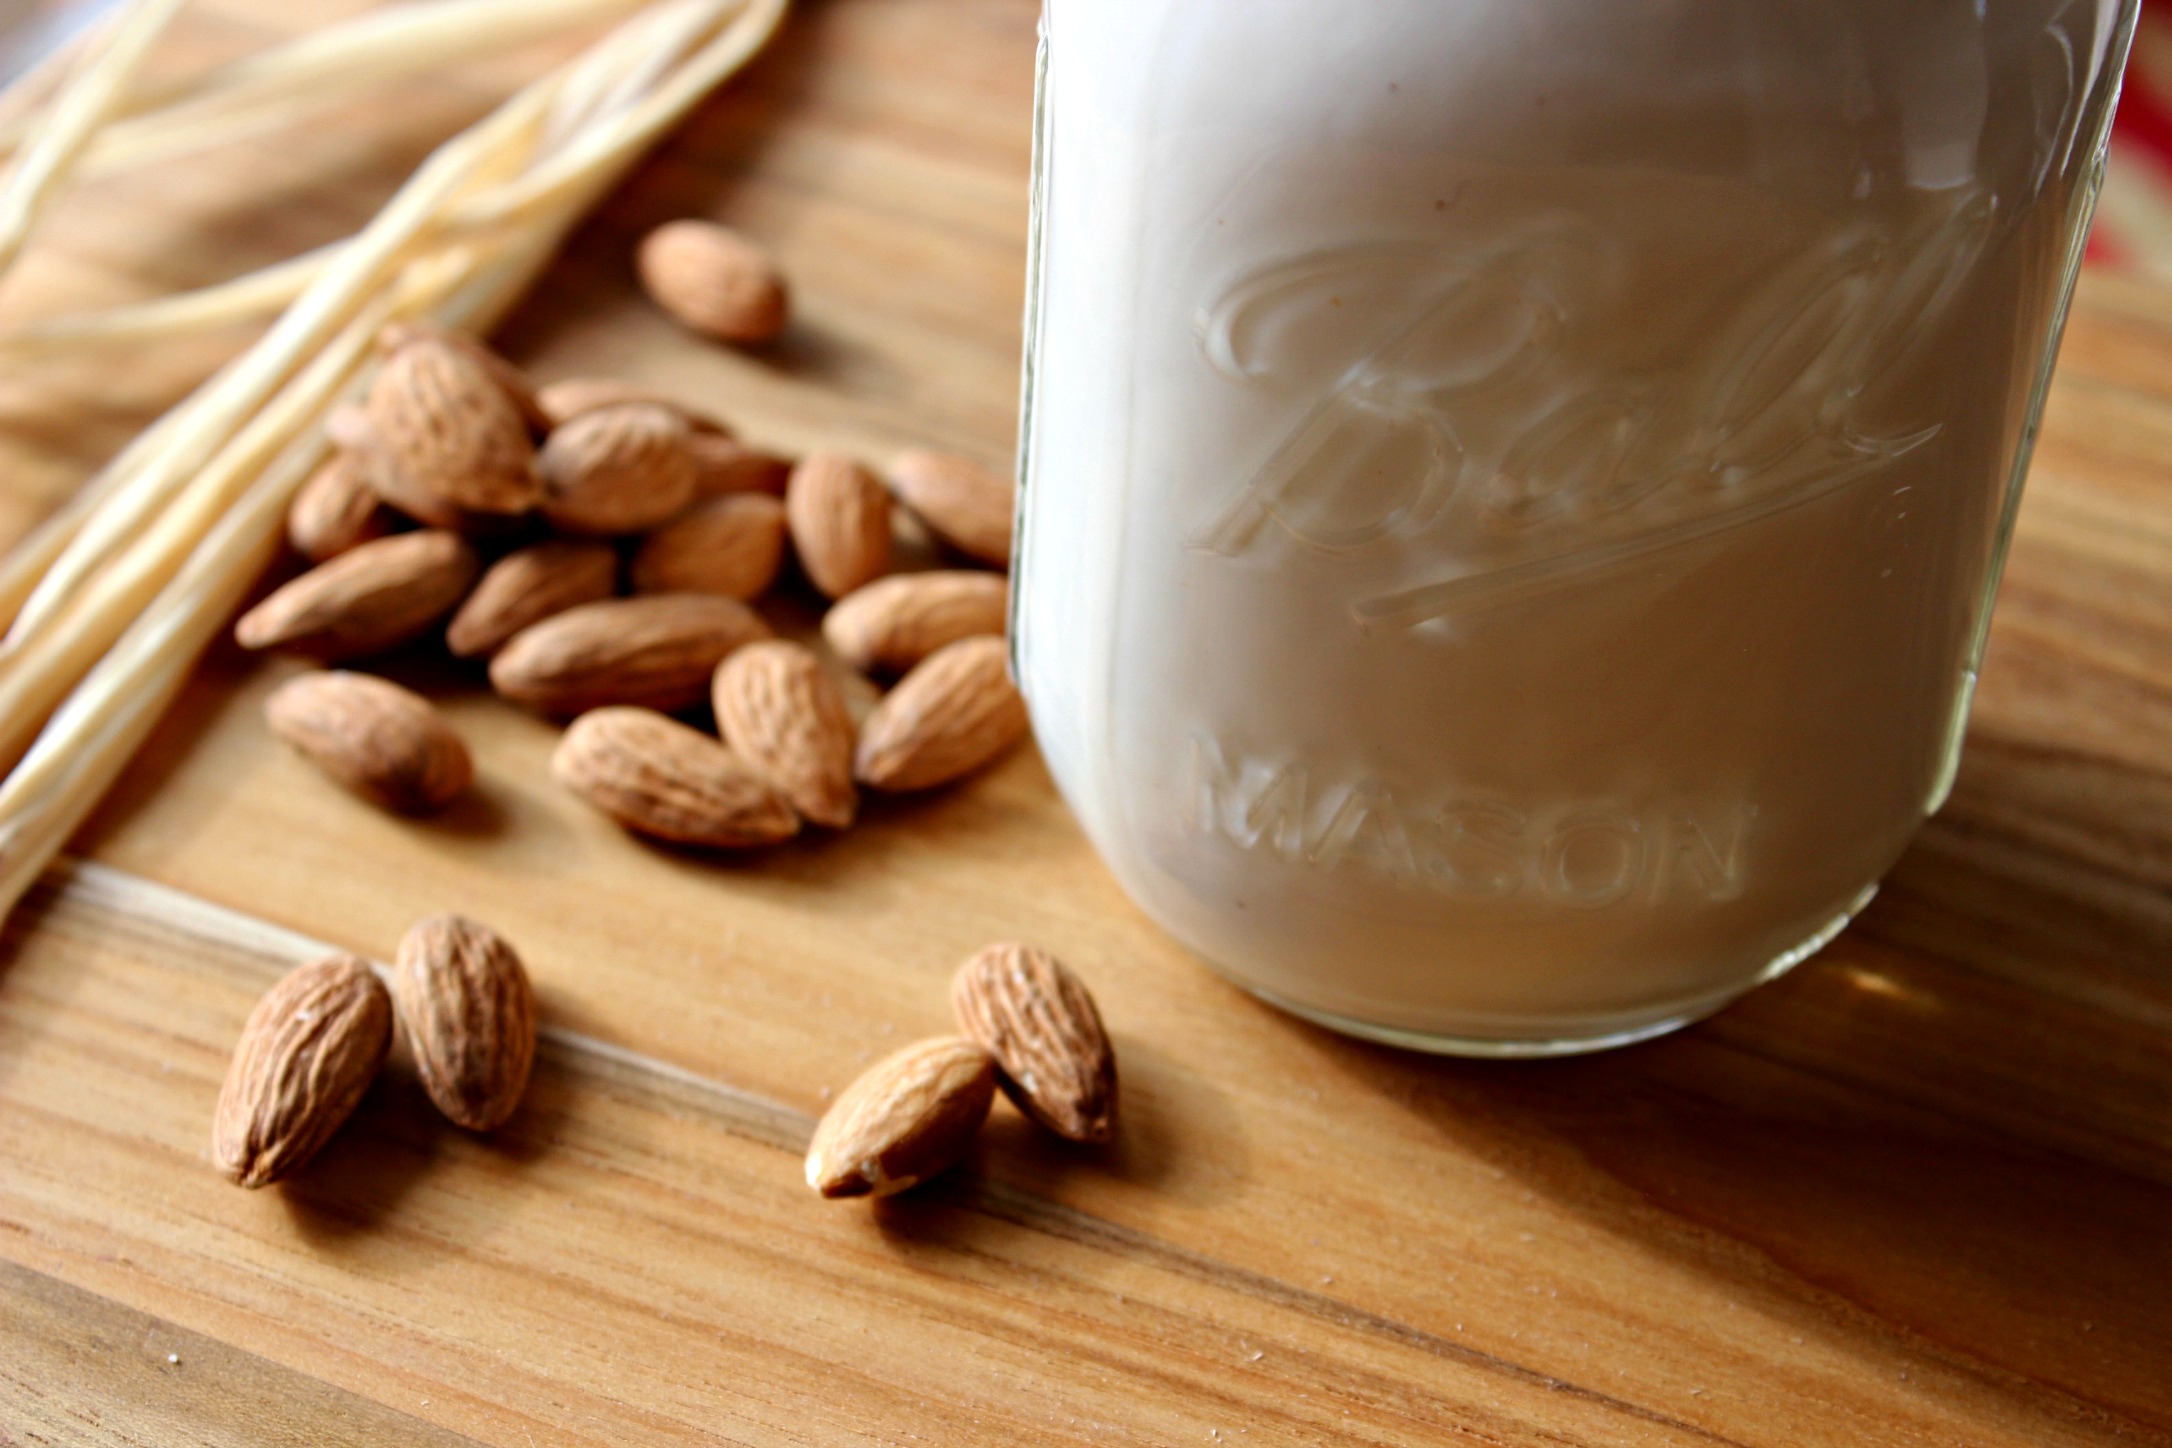
Since cutting out dairy, I’ve had to find tasty alternatives to something most of us drink or use in things like smoothies every day – milk. I’ve been drinking almond milk for years but always bought the boxed versions from the grocery store.

almond milk1

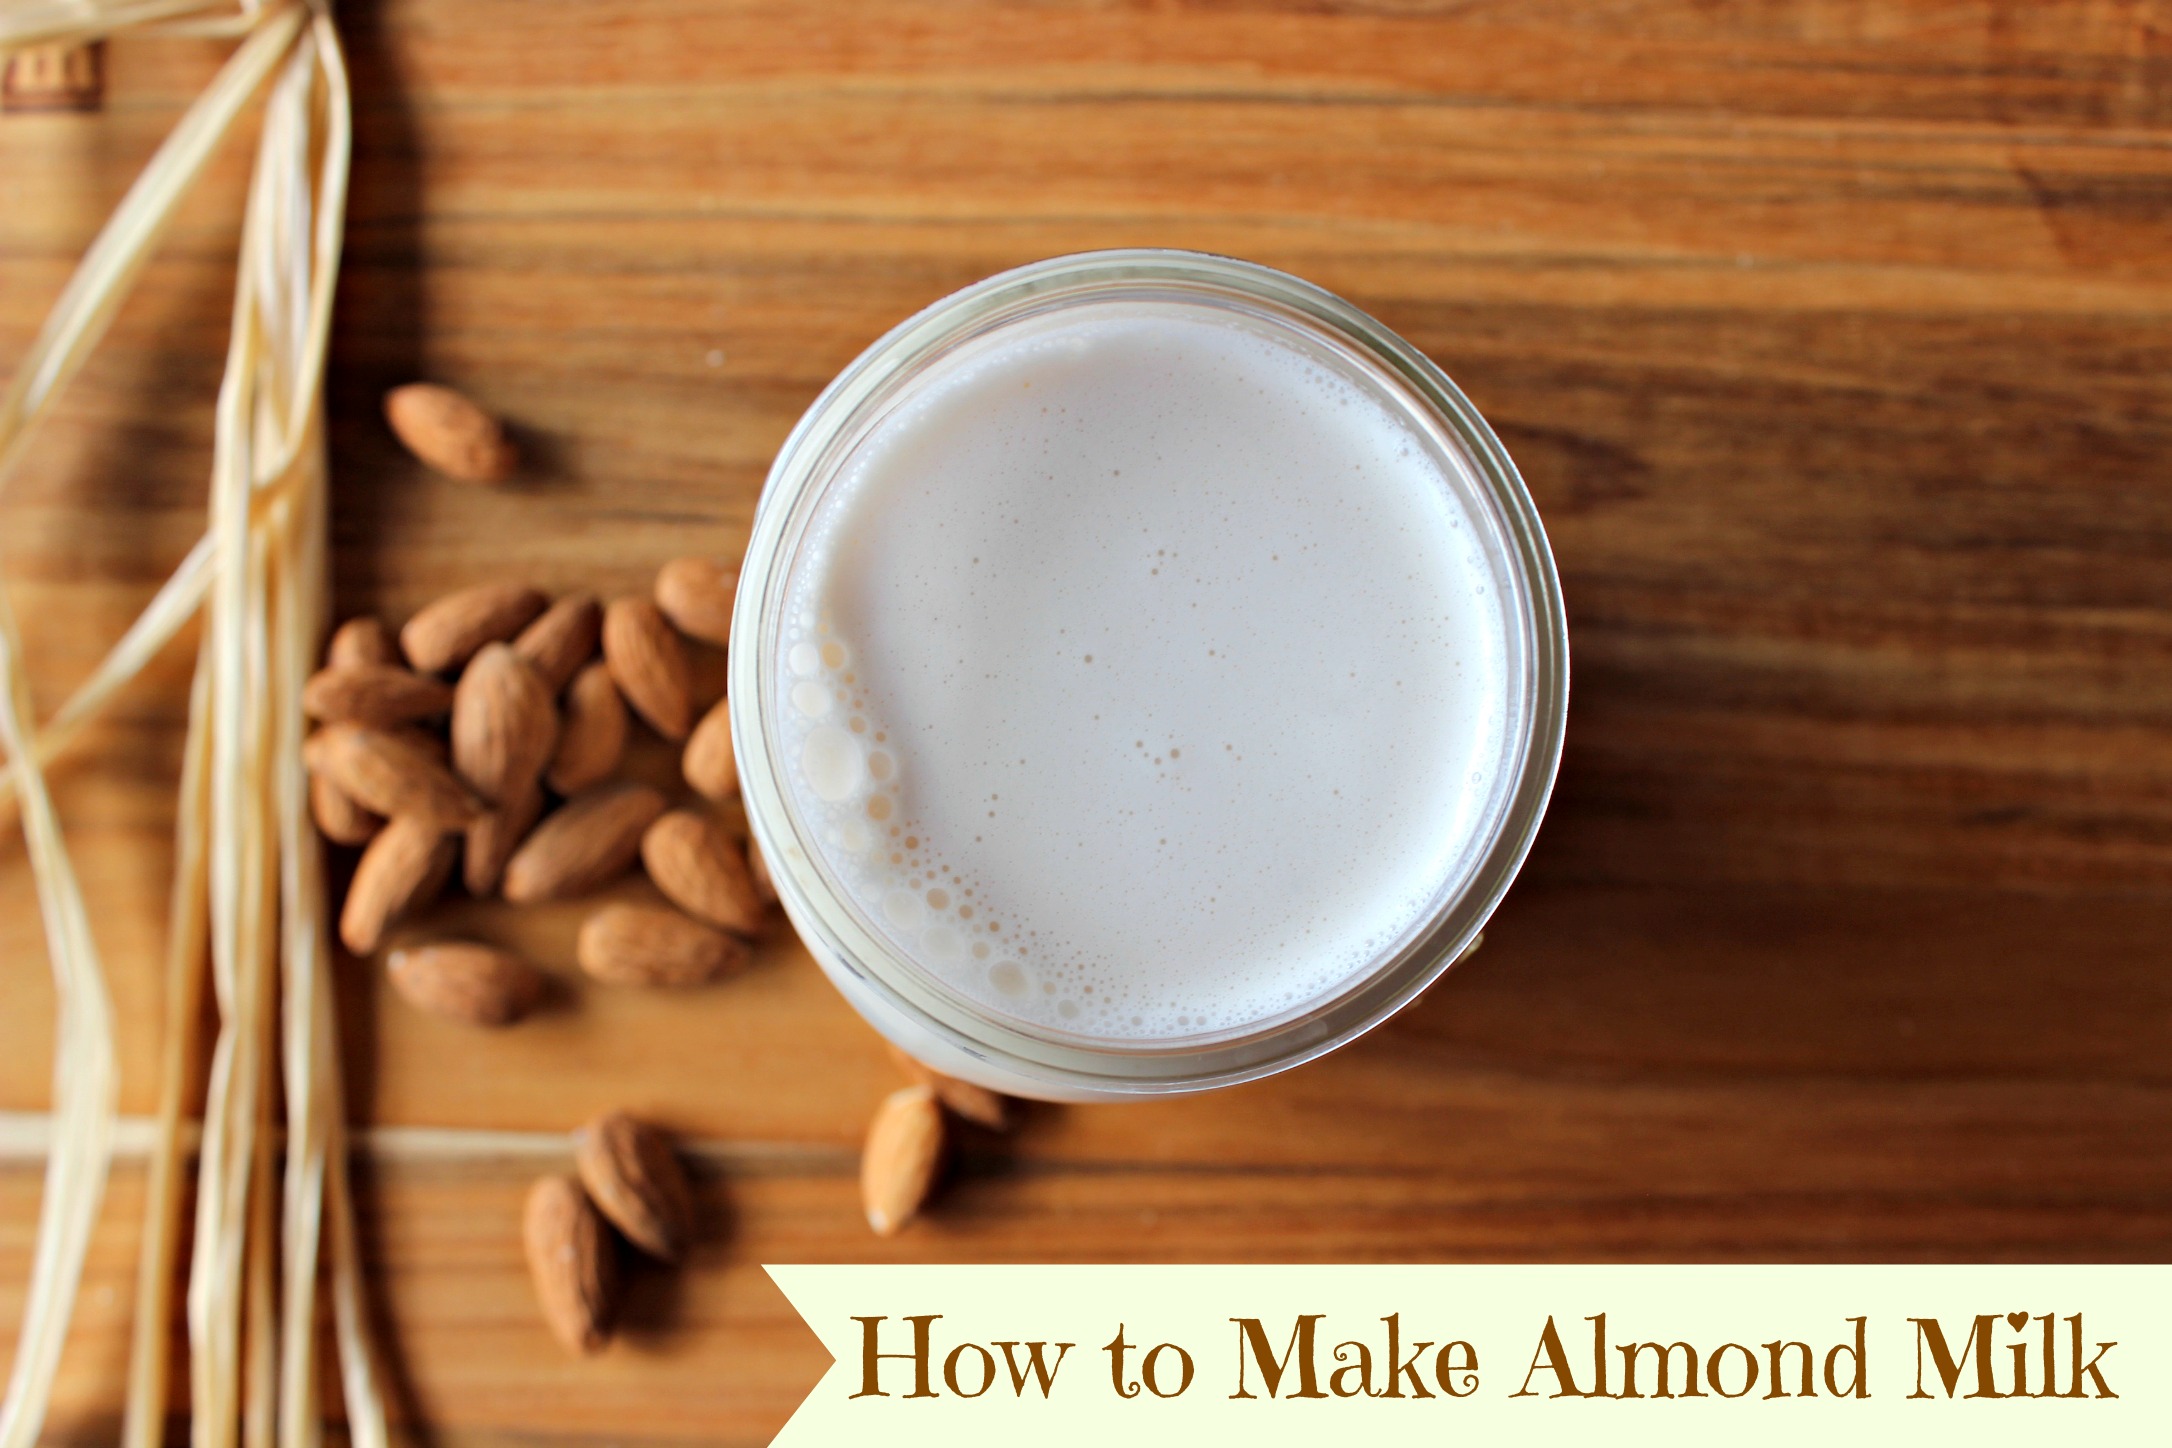
During my culinary nutrition program this fall I was finally inspired to make my own almond milk. It was easier than I thought. I just had to do it.

In the video below, I show you exactly how to make almond milk in a step-by-step, foolproof way. I also share my favorite natural sweeteners and flavor enhancers to add to almond milk to make it taste delicious.

Resources From the Video

almond milk banner

Ingredients

1 cup raw almonds
6 cups filtered water (2 cups for soaking, 4 cups for blending)
1 teaspoon vanilla extract
Sweetener of choice: 1-2 tablespoons 100% pure maple syrup, raw honey or coconut nectar OR 2 pitted Medjool dates

Directions

  1. Soak almonds in 2 cups of water at least 3 hours or overnight.
  2. Rinse almonds in colander and then pour nuts into blender. You don’t NEED a high-speed blender like a Vitamix or Blendtec to make this, but it helps.
  3. Add 4 cups of water to blender and blend on high for about 1 minute.
  4. Position nut milk sack over a large bowl or 8 cup measuring cup and pour liquid from blender into nut milk sack. Pull drawstring at top and GENTLY squeeze milk out of sack, leaving the pulp in the sack.
  5. Rinse blender and then pour strained milk back into blender. Add sweetener of choice and vanilla extract and blend for 10-15 seconds.
  6. Drink immediately or store in a glass jar in the fridge for 3-5 days. You can also pour the milk into ice cube trays and freeze it so it lasts longer and then add it to smoothies without worrying about it going bad 🙂

The Easiest and Cheapest Way to Make Your Own Vegetable Broth

Until about a month ago, I had never made my own vegetable broth.

I always bought boxes of broth at the grocery store for about $3 a pop because I assumed it was too much work and way too difficult to make it myself.

Turns out I was wrong!

Not only is it easy, but it’s also CHEAP. The secret is using vegetable scraps you would have probably thrown away, so you don’t even have to spend extra money 🙂

I learned about this technique when I attended a soups and stocks cooking class at Pure Sweets & Co. in Philadelphia earlier this month.

It’s just one of the ways they make using all organic vegetables more sustainable and affordable because they use the ENTIRE vegetable…no waste!

Once you see how EASY it is to make your own broth, I bet you will actually do it!

veggie broth banner

Ingredients

  • Scraps, peels, stems, skins, ends, nubs from a variety of vegetables (garlic, onions, mushrooms, potatoes, carrots, celery, herbs, squash, turnips, broccoli) – use a variety or you will have a one-note broth 🙂
  • Water

scrap soup how to pics

Directions

  1. Save your scraps. Whenever you are prepping vegetables or herbs, put all of the stuff you would normally throw away (butts/ends, stems, skins, tops, leaves, peels) into a bag and store the bag in your freezer.
  2. When you’re ready to make your broth, simply fill about 1/3 of an 8-quart pot with the vegetable scraps and the rest with water. If you have extra fresh veggies like carrots, onions, or parsley, you can chop them up and throw them in, too.
  3. Bring pot to a boil then lower heat to a simmer and cover. Let simmer for 1-2 hours. The longer it simmers, the richer the flavor will be.
  4. Let broth cool to room temperature, then strain off the vegetables so you’re left with just broth. Compost the scraps.
  5. Pour the broth into glass jars, leaving AT LEAST 2 inches of air above the broth before you seal it, so the broth has room to expand in the jar once you freeze it. If you don’t leave enough room, the jar could crack from the pressure…which may have happened to me once already…Oops! (By the way, we swear by this canning jar funnel to prevent spills. It’s totally worth it.)
  6. Store broth in the fridge for up to one week or in the freezer for up to six months.

We had lots of scraps…sooo now we have about 32 ounces of vegetable broth 🙂 Stock up on those mason jars for storage! You can find them at Home Goods, Michael’s, Target, Walmart, and online.

Do you have any favorite soup recipes or requests? I have white bean and fennel soup and creamy butternut squash recipes coming up soon. Let me know if you have any requests!

Cozy Crock Pot Lentil Chili: Set It And Forget It! {Vegan, Gluten-Free}

I love my job! I have so much fun sharing my passion for healthy eating and delicious, nourishing food with my co-workers, our clients, and with all of you! 🙂

Yesterday, I taught a new workshop called Eating for All-Day Energy.

We talked about the challenges of having low energy and what we tend to eat and do when we feel that way. In most cases, we reach for another coffee or snack without giving much thought to how those choices impact our energy.

E4E3

I shared my top four secrets for eating for energy and will be sharing the first of those with you today.

Many of us are riding “the blood sugar roller coaster,” dealing with a series of cravings and energy spikes and crashes all day long. We often feel tired, irritable, moody, and not as energized or focused as we’d like to be.

blood-sugar roller coaster

The truth is, what we eat affects us.

If we want to feel energized, then we have to FUEL and NOURISH our bodies with foods and drinks that give us energy.

So, here’s tip #1:

To have all-day energy, stabilize your blood sugar by having the following combination of foods at each meal:PFF

When we eat meals that have protein + healthy fats + fiber, we stabilize our blood sugar and help it release slowly over time rather than dealing with sudden spikes and drops. (I’ll be sharing more details about exactly how blood sugar works in a future post but wanted to keep it limited for today.)

  1. Protein (nuts: almonds, walnuts, pistachios, pecans, Brazil nuts, macadamia nuts, cashews; seeds: pumpkin, chia, hemp, flax, sunflower, sesame; lentils, peas, beans, tempeh (recipe to come!), nut butters, and grass-fed/farm-raised meat, poultry, eggs, and fish)
  2. Healthy Fats (nuts and seeds, avocado, nut and seed butters, wild caught salmon, pasture-raised eggs, extra virgin olive oil, coconut milk, coconut oil, guacamole, tahini (sesame paste), ghee (clarified butter), grass-fed butter if you can tolerate some dairy)
  3. Fiber (vegetables, especially leafy greens; summer squash; cruciferous veggies like broccoli, Brussels sprouts, cabbage and cauliflower; fruit, especially berries, peaches, cherries, apples, pears and plums; beans, peas, lentils; gluten-free grains like quinoa, brown rice, wild rice, millet, oats, and amaranth).

At the end of the class, I shared two demos of recipes that will keep you full AND sustain your energy, including this yummy chili.

Everyone loved it! It’s easy to make, too. You just have to saute a few vegetables and spices for about 10 minutes and then dump everything into a crock pot for 8 hours. Set it and forget it! 🙂

chili 2

This meal is a GREAT option for stabilizing blood sugar, especially if you serve it with some diced avocado on top. There’s PROTEIN in the lentils, FIBER in the lentils and vegetables, and HEALTHY FATS in the avocado.

Lentils fill me up more than just about any other food, too, so you might find the same to be true for yourself.

Don’t let yourself be intimidated by the length of this ingredient list – 1/3 are spices, 1/3 are common veggies, and the rest is pretty basic, too. The only things you might have to buy are the lentils and roasted red peppers…and maybe the tomato puree and diced tomatoes if you don’t already keep them on hand for things like marinara sauce. Every grocery store sells those ingredients.

This is a hearty, filling, heart-warming, nutrient-rich meal. Enjoy it for breakfast, lunch or dinner!

crock pot chili

chili 3

Ingredients

  • 1 tablespoon coconut oil
  • 2 medium onions, chopped
  • 6 garlic cloves, minced
  • 1 cup carrots, chopped
  • 2 tablespoons chili powder
  • 2 teaspoons cumin powder
  • 1 teaspoon dried oregano
  • 1/8 teaspoon ground cayenne pepper (add more if you like more of a “kick”)
  • 1 (28-ounce) can or jar tomato puree, no sodium added
  • 1 (28-ounce) can or jar crushed or diced tomatoes, no sodium added (I like Pomi brand)
  • 2 roasted red peppers, diced
  • 2 cups dried green lentils or French lentils
  • 1 teaspoon 100% pure maple syrup
  • 1 bay leaf
  • 1/4 teaspoon black pepper
  • 4 cups filtered water
  • 3/4 teaspoon sea salt
  • Optional: avocado slices and scallions for toppings

Directions

  1. Heat oil in a large saute pan over medium heat. Add onions, garlic, and carrots and saute until onions are soft, about 5-7 minutes.
  2. Add chili powder, cumin, oregano, and cayenne to vegetables and saute for another 1-2 minutes.
  3. Add tomato puree, crushed or diced tomatoes and roasted red pepper and stir to combine.
  4. Transfer mixture from saute pan to crock pot. Add lentils, maple syrup, bay leaf and water. Stir to combine all ingredients.
  5. Cover and cook on low for 8 hours.
  6. Remove bay leaf and stir in salt before serving.

Top with diced avocado and chopped scallions for a good dose of healthy fat and a pop of color!

Do you have a favorite chili recipe or energy-boosting snack or meal? Feel free to share below 🙂

Zucchini Pasta with Cauli-fredo Sauce!

IMG_6721

The past two weeks have been a bit of a whirlwind.

I haven’t felt quite like myself because I’ve been stretching myself too thin.

All of the projects I’ve been working on have been amazing opportunities, but when I said, “yes” to them separately about 2-3 months ago, I didn’t realize they would ALL end up happening within the same week in November.

I have SO much I want to write about and a ton of new recipes to share, but a few wise friends and family members have suggested that I s-l-o-w d-o-w-n a bit and take a moment to breathe amidst this craziness.

That’s why you may notice fewer blog posts until things calm down and my schedule gets back to normal in the next 2 weeks or so.

One of the things I’m working on is a series of posts about “My Favorite Things,” where I’ll share my favorite gadgets, stocking stuffers and cookbooks, just in time for holiday shopping 🙂

I’m also working with a web designer to do some pretty cool things to this blog over the next few months, and I’m really excited to see what happens with that!

I can’t write this post without mentioning that my husband has been nothing short of a saint over the past few weeks in particular, and I’m so incredibly grateful for his support, encouragement and patience. I am very, very blessed.

IMG_6318

Although I’ve felt stretched and stressed lately, I’ve gotten to do some really fun and exciting things…many of which were milestones that I couldn’t have imagined happening a year ago!

  • I trained the staff of a local restaurant to understand the differences among some current dietary trends and types (like paleo, vegetarian, gluten-free, vegan)
  • I facilitated a documentary movie night at my church where a group of about 20 of us watched Food, Inc. and enjoyed some healthy snacks, including my favorite caramel apple dip and this kickin’ buffalo hummus
  • I taught my FIRST full cooking class in my friend’s kitchen for a party at her house. I showed the group how to make my favorite kale salad, caulifredo zucchini noodles (recipe below!) and hazelnut truffles.

IMG_7758

The process of planning out and prepping for a cooking demo is intense, and I have a new appreciation for anyone who has their own cooking show and what goes into making that happen.

Phew! It’s definitely a lot of work…but I LOVED having the opportunity to teach the group through hands on cooking.

The most rewarding part of the whole experience was hearing people say things like, “Oh my gosh, this is amazing!” and “I’m shocked by how good that tastes.” 

It’s so fun to see people get excited about eating nourishing food!

We got to play with my NEW favorite kitchen toy (a Paderno Spiralizer) during the demo as we made our own zucchini noodles in seconds. I’ve included a video below for how to use it.

Zucchini noodles are a great alternative to pasta because they don’t spike our blood sugar or contain gluten like most pasta. You’ll be AMAZED at how similar the texture is to pasta…you can still twirl it on your fork, too! The spiralizer is something you’ll want to add to your wish list.

We topped the zucchini noodles with this creamy cauliflower alfredo sauce. It’s a variation of a recipe I shared earlier this year, but I made some tweaks to improve it! I think you’ll love it.

Enjoy!

caulifredo

IMG_6721

Ingredients

  • 4 zucchini, spiralized using this awesome gadget! (You could also sub in your favorite gluten-free pasta of choice – we like the Tinkyada brown rice pasta)
  • 2 teaspoons coconut oil

Caulifredo Sauce

  • 3 cloves garlic, minced
  • 1 tablespoon coconut oil, ghee/clarified butter or grass-fed butter
  • 1 head cauliflower, chopped into florets (here’s how to break apart a head of cauliflower in seconds!)
  • 1 cup water
  • 1 teaspoon sea salt
  • Âœ teaspoon onion powder
  • 1 generous pinch of pepper, to taste
  • juice from 1/2 lemon (about 1.5 tablespoons)

Directions

  1. Sauté the minced garlic in coconut oil or butter in a medium saucepan over low heat. Allow to cook for a few minutes, until the garlic is tender and fragrant but not browned.
  2. Add the 1 cup of water to the saucepan, along with the cauliflower florets, and bring the water to a boil. (The water will not cover the cauliflower, but that’s okay.) Once the water is boiling, reduce the heat to a simmer and cover the pot for 12-15 minutes or until the cauliflower is fork-tender and very soft.
  3. Transfer the entire contents of the saucepan into a blender or food processor, and season with salt and pepper. Add in lemon juice and onion powder. Process until very smooth and creamy, with a texture similar to traditional cream sauce. (Always be careful when blending hot liquids– the steam pressure can blow the lid off your blender!).
  4. Season with additional salt and pepper, if desired, and serve hot. If it seems thick, add more water. If it seems dry, add a liberal drizzle of olive oil.
  5. Place spiralized zucchini in a medium-sized frying pan greased with coconut oil, and stir for 3-4 minutes or until zucchini takes on a cooked pasta texture, sort of wilted and soft. Be careful not to overcook.
  6. Transfer zucchini noodles (AKA “zoodles”) to a plate or bowl and pour sauce on top. Sprinkle this 3-ingredient paleo parmesan cheeze on top and start eating!

Happy {Healthy} Halloween: 19 Spooktacular, Kid-Friendly Snacks!

Growing up in a neighborhood filled with dozens of kids, I have great memories of dressing up and trick-or-treating when I was younger.

You knew Halloween was approaching when you stepped outside, and breathed in the crisp, cool, smoky-smelling autumn air.

I remember rushing away from the dinner table with my brother, so we had as much time as possible to trick-or-treat…and so we wouldn’t miss the people who gave out FULL SIZED candy bars (EVERY kid – and parent – remembered where those people lived).

Halloween

Once we got to middle school, we outgrew our plastic jack-o-lanterns and their black handles that were known to snap off without warning.

We used pillow cases. We meant business.

My favorite candy was anything with peanut butter (Reeses Pieces, PB M&Ms, PB cups) or caramel (Snickers, Twix, Rolos). I hated anything with coconut. I remember coming home after a long night of candy collecting, dumping out my bag and strategically sorting through, categorizing, and counting up every candy type.

Yes, even as a child I was very particular. 🙂

As an adult, I like to focus on “adding in” or UPgrading what we eat to include food that fuels and nourishes our body in a way that is fun and delicious.

Check out the “spooktacular” ideas below for healthy Halloween recipes and treats to bring to your event or party this year. All of them are kid-friendly, dairy-free and gluten-free, too!

Eat Clean Halloween: 19 Spooktacular Recipes

Spooky Fruit Spiders from Kitchen Fun with My Three Sons

Spooky Spider Snack from Kitchen Fun with My 3 Sons

Pumpkin Patch Dippers & Hummus from Family Fun Magazine

Carrot Patch Hummus

Stuffed Roaches from Nouveau Raw

Stuffed Cockroaches

Orange & Black Fruit Kabobs from Sparkpeople

Black and Orange Fruit Skewers

Raw Witch’s Fingers from Fork & Beans

Witch's Fingers

Melon Brain from Instructables

melon brain

Goblin Grins from Just a Pinch

Goblin Grins

Protein-Packed Pumpkin Spice Dip from Rachel’s Nourishing Kitchen

Protein Packed Pumpkin Spice Dip

Candy Corn Veggie Platter from Parents

Candy Corn Veggie Platter

Apple Sun Butter Teeth Bites from Fork & Beans

Use any nut butter you like, including almond butter, cashew butter, or peanut butter if it doesn’t bother you

Apple Sun Butter Teeth Bites

Candy Corn Fruit Pops from Kitchen Fun with My Three Sons

candy corn

Caramel Apple Dip from Nourishing Meals

caramel

Homemade Rolos from oh she glows

homemade rolos

Boo-nana Ghosts & Clementine Pumpkins from One Little Project

Clementine Pumpkins and Boo Nanas

Paleo Pumpkin Spice Muffins from Rachel’s Nourishing Kitchen

Paleo Pumpkin Spice Muffins

Sweet Potato Jack-O-Lanterns from Tablespoon

Sweet Potato Jack O Lanterns

(Use coconut palm sugar or maple syrup instead of white sugar. I would also use coconut oil instead of olive oil)

Orange Jack-O-Lantern Fruit Bowls (source unknown)

Fruit Jack O Lantern

Halloween Graveyard Salad from Fork & Beans

Halloween Graveyard Salad

Veggie Skeleton from Feeding Frenzy

Halloween Veggie Skeleton

Serve this veggie skeleton with a delicious, spicy tahini dip that is dairy-free!

What are YOUR favorite spooky treats? Feel free to share them below!

Candied Maple-Cinnamon Delicata Squash {Easy, Vegan, Paleo}

mapledelicatat

This dish is ridiculously good.

Almost addictive.

And it’s easy to make.

It turned out to have a slightly crunchy, caramelized coating that’s almost candy-like. Let’s put it this way, you won’t have leftovers when you make this, so you might want to make a double batch!

I shared a post on another blog I write for last week about how to cut up and prepare delicata squash (WAY easier than pumpkin or butternut squash).

You can even eat the peel 🙂

IMG_7219

This dish combines the sweetness of maple syrup, subtle spiciness of ginger, hint of salt, and the butteryness (is that word??) of pecans.

The squash has a slight, candied crunch on the outside edges and is soft and comforting on the inside.

Hungry yet?

mapledelicatat

Adapted from this recipe.

Ingredients

  • 1 medium delicata squash, trimmed to 1/2-inch pieces (Here’s how to cut it up – it’s easy!)
  • 2 tablespoons coconut oil, melted
  • 1 teaspoon cinnamon
  • 3 teaspoons 100% pure maple syrup, separated (1 tsp before cooking, 2 teaspoons after)
  • 3/4 teaspoons ground ginger
  • 1/2 teaspoon sea salt, or to taste
  • 1/3 cup pecans, lightly toasted and chopped

Directions

  1. Preheat oven to 425F and line a baking sheet with parchment paper.
  2. Cut the squash into half moons and then cut in half again as shown in the picture above.
  3. Combine coconut oil, cinnamon, 1 tsp maple syrup, ginger, and sea salt in a bowl and toss the squash in the bowl to evenly distribute the coating.
  4. Arrange squash in a flat even layer on a baking tray, making sure the sides don’t touch (we don’t want them to steam, we want them to roast!).
  5. Bake for 18 minutes, then remove tray and flip pieces over on the other side. Continue roasting for 10-12 minutes or until squash can be pierced easily with a fork and is browned and caramelized.
  6. Remove squash from oven and toss with 2 more teaspoons of maple syrup and chopped pecans.

How to Cook Spaghetti Squash {Step-by-Step Photo Guide}

Spaghetti squash is one of those foods that a lot of us have heard about or seen at the grocery store or farmer’s market
but perhaps been a bit too intimidated or weirded out to try.

I’ve got good news for you!

spaghettisquash


Spaghetti squash is very easy to cook AND fun to play with 🙂  I’m always up for anything that makes cooking more fun, and this ingredient definitely does!

You can upgrade your pasta by swapping it out for spaghetti squash.

As its name implies, the inside of the squash can be scraped out to form spaghetti-like strands, so you can serve it just like you would spaghetti.  Top it with your favorite marinara or pesto sauce or sautĂ© it with garlic, onions, spinach and some herbs. It’s tender but has a slight “crunch” to it.

It’s rich in fiber as well as beta-carotene, which is good for our vision, immune system, and healthy skin.

I’ll be sharing a recipe for a Tuscan spaghetti squash boat later this week, but in the meantime, here’s how you make spaghetti squash!

How to Cook Spaghetti Squash

Preheat oven to 400F while you prep the squash.

IMG_7017

Slice a line down the length of the spaghetti squash, about a half inch deep, but don’t cut it in half. It’s usually too hard to cut in half at this point, unless you have a really good knife.

IMG_7021

Turn the squash the other way and cut about 4 strokes into the squash, cross hatching the longer line you already cut. Cutting the squash this way allows it to steam in the oven and prevents it from exploding 🙂 Put the squash in a baking dish in the oven for 20 minutes, so it can soften enough to cut it in half.

IMG_7073

Remove squash from the oven and cut it in half. It should cut easily at this point.

IMG_7082

Wearing an oven mitt (the squash will be HOT), pry it open with your hands.

IMG_7083

IMG_7090

Scoop out the seeds with a spoon.

IMG_7094

Put the squash cut-side down in a 9×13 baking dish and fill the bottom of the dish with about 1/4-1/2 cup of water (enough to cover the bottom of the pan). Return squash to oven for 30-40 minutes or until the squash easily pulls away from the shell.

IMG_7117

Let the squash cool and then scrape out the inside with a fork. It should pull away easily into spaghetti-like strands!

IMG_7123

IMG_7154

Beautiful spaghetti squash ready to be used for your delicious kitchen creations!

Top 10 Tips to Get Your Husband (& Kids!) To Eat Vegetables

When my husband, Bill, and I started dating, he was like most college students and wasn’t a huge fan of vegetables.

The only vegetables he would eat were iceberg lettuce, carrots and raw green peppers.

That’s the case for most college-aged guys who are more concerned with Saturday’s party than whether or not they’re eating enough of their leafy greens.

College days...almost 9 years ago with my then "crush" and now husband! Pictures from college can be pretty humbling!

College days…almost 9 years ago in my first picture with my then “crush” and now husband! (Pictures from college can be pretty humbling!)

When we were talking about this topic the other day, Bill shared what a typical college day of eating looked like for him:

  • Breakfast: If he ate it, it was eggs, sausage, bread, and milk or cereal with coffee if he didn’t make it to the dining hall.
  • Lunch: Taco salad in a fried shell topped with cheese or a roast turkey sandwich with cheese, lettuce and mayo with cookies for dessert…with a soda on the side.
  • Dinner: Whatever the dinner special was that night and ice cream or cookies for dessert.
  • Fourth Meal: If he was still hungry (or wanted something to do at night), he would go to The Pub for a fried fourth meal, which often consisted of either a cheese steak or chicken tenders and curly fries.

Fortunately for him, he had a revved up metabolism, since he was always playing sports, so he didn’t notice the ill effects of his diet at the time.

Over the past 8+ years, both of our diets and our bodies have undergone some pretty dramatic transformations, and we feel better than ever!

IMG_5209

I traded in my Beefaroni and buttered egg noodles for bok choy and quinoa, and Bill made the transition from cheese steaks and curly fries to smoothies and garlicky green beans.

I asked him what he has found to be MOST surprising and enjoyable about getting to where he is today, and very thoughtfully, he shared these two observations…

  1. “I’m surprised by how filling beans can be…and that I don’t need meat at every meal to feel full.”
  2. “I like knowing that I can order a meal at a restaurant…without holding the onions…and tomatoes…and mushrooms. I just order it ‘as is’.”

When people see how I eat, they almost immediately turn to Bill with a bit of skepticism and ask,

“Do you eat this stuff??”

One of Bills new) favorites! Garlicky green beans with lemon and slivered almonds

One of Bill’s (new) favorites! Garlicky green beans with lemon and slivered almonds

He does. And it’s 100% his choice.

Why?

He’s experienced for himself the energy, health, satisfaction, and flavor that comes from eating whole, fresh, unprocessed, nourishing food, and that’s why he’s made it a priority in his life, too.

In fact, he’s now the one who comes to me and says, “I forgot my lunch today, so I had to eat in the cafeteria. I doubled up on the tomato and cucumber salad but had the cafeteria pizza [he’s a teacher]. I figured I would feel crappy and tired a few hours later…and I did.”

It’s been a journey for both of us, and all of these changes have happened gradually over time…over 8 years, in fact! Even to this day we’ll try things and find out that we don’t like them…but most of the time we DO like the foods we try and the dishes we make.

Shopping for, preparing, cooking, and sharing food together has become an integral part of our relationship and is an opportunity for us to bond, be adventurous and spend quality time together.

Berry-picking together on a Saturday morning!

Berry-picking together on a Saturday morning!

So, what are the secrets to how we’ve made this transition…and how Bill has grown to like vegetables so much?

I’ve listed my top 10 tips below and explained each tip in more detail in a post on another health blog I write for on a monthly basis.

**For the full scoop on each tip, check out the “Upgrade Your Diet & Veggie Up” post I wrote for Nava Health Center’s blog this month by clicking here!**

  1. Eat more of what you like already.
  2. Pick your own.
  3. Meal plan together.
  4. Take a field trip.
  5. Make it fun and play with your food.
  6. Blend it up!
  7. Roast them.
  8. Veggie scramble.
  9. Soups, stews & chilis….oh my!
  10. Puree away.

Do you have any secrets to “upgrading” your diet or that of a loved one? Feel free to share below!

How to Make Your Own Pumpkin Puree {Step-by-Step Guide!}

I’m a big advocate of eating food that is as fresh and unprocessed as possible.

Sometimes, for convenience sake, I opt for minimally processed versions of certain foods.

Like pumpkin puree.

Most of the time, it’s easier and quicker to buy a can of it to put into my smoothies, muffins, and overnight oats than to make it from scratch.

But last week I got this in my Hometown Harvest bag and knew it was time for me to figure out how to make my own.

The squash below is actually just an autumn squash, but you can follow the process I outline for autumn squash, butternut squash or pumpkin to make your own puree. 

IMG_6434

Roasting your own vegetables for this puree gives them a velvety smooth texture and deep flavor that definitely tastes better than the canned stuff!

Step-by-step instructions for how to make your own squash puree

Preheat the oven to 350F.

IMG_6624

For a round squash, cut off the top (including the stem) with a sharp knife and then cut the squash in half. For flatter squash, like the one I had, cut it in half with a sharp knife, cutting one side first and then the other on either side of the stem.

IMG_6625

Break it apart with your hands along the seam where you cut.

IMG_6629

Scoop out the seeds with a spoon. Save them to make your own toasted seeds (something I plan to do in the future).

IMG_6630

Cut the pumpkin into chunks. I cut along the existing creases.

Cut the squash into chunks. I cut along the existing creases.

Pumpkin chunks ready for roasting!

Squash chunks ready for roasting!

Put the pumpkin slices on a baking sheet and roast for 45-60 minutes or until you can easily pierce the pumpkin with a fork.

Put the squash slices on a baking sheet and roast in a 350F oven for 45-60 minutes oven or until you can easily pierce the squash with a fork.

Pumpkins are done roasting when they look like this.

Squash is done roasting when it looks like this.

Let the slices cool and then take a spoon and scoop out the “meat” from the rind.

Let the slices cool on a plate and then use a spoon and scoop out the “meat” from the rind.

Puree all of the pumpkin in a food processor until smooth.

Puree all of the squash in a food processor until smooth.

IMG_6733

Use the puree immediately OR measure out 1-cup servings and put the puree in freezer bags, squeezing out all of the air, so it’s ready to use whenever you need squash in the future.

Follow the step-by-step process below!

IMG_6737 IMG_6740 IMG_6742 IMG_6744 IMG_6746

If you’re using pumpkins, once you have your puree ready, try using it in this Ultimate Pumpkin Pie Smoothie Recipe, Pumpkin Pie Overnight Oats, or these Paleo Pumpkin Spice Muffins!

What’s your favorite way to use squash? Are you looking for any recipe ideas? Feel free to leave a comment below to let me know 🙂

The Easiest Way to Roast Beets {A Simple How to Photo Guide}

Whenever I think of beets, I can’t help but think of The Office’s Dwight Schrute and his epic beet farm.

As well as Jim Halpert’s impersonation of Dwight and his ”Bears. Beets. Battlestar Galactica” line.

beets

Had to reminisce about that for a second 🙂

Now, let’s get to the beets!

Over the past few months, I’ve had several friends ask me how to roast beets.

To be honest, I had never had much success with it in the past, but I was determined to figure it out.

IMG_4922

Beets are one of those foods that, if we haven’t tried them before, can be a bit intimidating to prepare.

I hope to take that intimidation factor down a notch today and show you how easy it is to cook beets.

One of my goals when I cook and teach about food is to share how certain foods nourish our body, so I have to share some of the reasons beets are so good for us!

  • They contain a nutrient called betaine that fights inflammation (inflamed body = sick, overweight body), improves our heart health, and protects our cells and internal organs.
  • Like any deep-colored fruits and veggies, beets have anti-cancer properties, and some research has shown that beetroot extract reduced tumor formation in animal models.
  • They help our bodies detoxify (clean out!), helping to purify our blood and our liver, which is crucial to keeping weight off, feeling our best, and staying healthy.
  • They’re loaded with vitamin C, fill-you-up fiber, and minerals that are good for our bones, liver, kidneys, and healthy nerve and muscle function.

Now that we know how good for us these little crimson gems are, let’s talk about how to cook and peel them!

How to Roast & Peel Beets

IMG_6578

Step 1: Preheat the oven to 350F.

Step 2: Cut the tops (beet greens) and bottom “tail” off the beets, so they will sit upright in a pan. Save the beet greens. You can sautee them on the stove just like you would any other greens like kale or Swiss chard (more on how to do that in a future post!).

IMG_6575

Step 3: Place the beets in a covered baking dish as shown below. Cover the dish with an oven-proof lid. I used a Corningware dish and a glass lid.

IMG_6586

Step 4: Bake for 50-90 minutes, depending on how big the beets are. I used relatively small beets and they took almost an hour. You can check them for doneness by piercing them with a fork – they will be “fork tender” when they’re done.

Step 5: Let them cool.

IMG_6645

Step 6: Take a paper towel and rub/pull the skin off of the beets as shown in the pictures below. This minimizes stains on your fingers.

IMG_6658 IMG_6661 IMG_6663 IMG_6664 IMG_6665 IMG_6668 IMG_6671

The aftermath of another culinary adventure!

The aftermath of another culinary adventure!

Step 7: Once the beets are peeled, you can do whatever you want with them. They have an “earthy” and slightly sweet flavor. Nothing else really tastes like a beet, so you’ll just have to try it yourself to see how you like it!

I sliced them up and put them on a salad.

You could also eat them by themselves, throw in a few in a smoothie (they will make it VERY red!) or toss them in a vinaigrette. They pair well with balsamic vinaigrette as well as herbs like rosemary.

Here’s a recipe for a beet, pear and almond salad you can try 🙂

Simple salad of sliced beets, chopped pecans, and field greens

Simple salad of sliced beets, chopped pecans, and field greens

How do you like to use beets? Feel free to share your favorite recipes with us below!

Page 5 of 7

Powered by WordPress & Theme by Anders Norén