Category: Tips & Tricks Page 4 of 7

My #1 Secret to Resist Food Temptation

Most of us have good intentions when it comes to eating well.

But sometimes, despite the best of our intentions, tiredness and temptation get in the way.

We know we “should” eat what tastes good and leaves us feeling satisfied and energized, but most of us struggle to actually do that on a daily basis.

The next time you’re in a social situation where food is involved and you’re feeling pressured to make a choice you really don’t want to make, I’m going to let you in on a little secret – the main way I respond when someone offers me something I would rather not eat.

I first heard it in Hungry for Change (one of my favorite food documentaries!), and it has stuck with me ever since.

Instead of saying, “I want it, but I can’t have it,” say:

IMG_9561

See what we did there??

The first response is all about the deprivation-oriented dieting mentality and makes it seem like we’re not choosing what we eat. But, we’re all adults, and we know that everything we eat or drink IS our choice, so let’s own that.

The new way is a freedom-based response. It says,

“Sure, I can eat anything I want because I’m an adult and make my own choices.

BUT I care about my body and want to fill it up with food that makes me feel good and energized, so I’m choosing to eat something nourishing. Thank you.”

I don’t know of anyone in my life who would continue to bug me after getting a response like that.

Be firm and confident about WHY you’re doing what you’re doing.

After all, it’s YOUR life, so you have the final say about what goes at the end of your fork 🙂

Top 10 Tips to Upgrade Your Summer Cookout!

Hot dogs, potato salad, chips, soda, and ice cream.

It seems like when we’re in social situations, especially at events like summer cookouts or picnics, we temporarily stop trying to eat well. We know how we’re going to feel later, but we decide it doesn’t matter as much as feeling good in the moment.

I’m here with some great news!

We can eat nourishing AND delicious food at cookouts without feeling deprived…or bloated, gassy and tired 🙂

The next time you’re headed to a cookout and want to make the best choices possible for yourself and your friends and family, check these out!

IMG_9562

1) Bring a nourishing dish/side/drink. Most of the time when we are going to an event someone else is organizing, we tend to cop out and pick up something cheap and quick at the store, without taking into consideration how that food will make everyone feel. If you bring something nourishing that you like to eat, you’ll be guaranteed to make better choices while you’re there…and help others in the process!

Try this Tomato-Basil Pasta Salad. It’ll be a HIT!

Tomatoe Basil Salad

2) Instead of mayo as the base in different salads, try using an oil-based vinaigrette or mashed avocado. I used to hate avocados (before ever trying them), but they have almost no flavor, so they won’t mess with the flavor of whatever dish you put them in.

3) Load up on veggies. Whether you throw them into a pasta salad or greens salad, put them on a kabob or roast them in a foil pack, make sure you load up on veggies. Whenever I go to a cookout or picnic, if there is a platter of roasted vegetables, it gets eaten up quickly!

IMG_9519

4) Add in some minced veggies to your burger patties. If you finely dice them, no one will notice, and they will add flavor and moisture to your burgers. Try things like onions, garlic, mushrooms, celery, diced peppers, and herbs.

5) Don’t char your meat. As much as some of us might love the taste of charred meat, we should avoid it to reduce our exposure to cancer-causing compounds. Charring, burning or grilling meat, poultry and fish over high temperatures causes cancer-causing compounds to form, which can damage our genes, raising the risk for stomach and colorectal cancers. Marinating your meat for 30 minutes prior to cooking can reduce that risk dramatically. To learn more about healthy grilling, click here. We also want to make sure we’re upgrading our meat and fish to grass-fed beef, pasture-raised poultry and wild caught seafood. Check out LocalHarvest to find a supplier near you.

6) Go bunless. Sometimes we do things out of habit. Grabbing a bun to go with our burger is one of them. If I have a burger, I just cut it up and treat it like a mini steak – no bun needed. Another option is to wrap lettuce leaves around it, just like you would a lettuce wrap and eat it that way.

7) Go for simpler chips. When it comes to chips, focus on upgrading your options from things like Doritos to Way Better Chips, Jackson’s Honest Chips, Kettle Chips, and even kale chips! Look for chips with as few ingredients as possible.

Dairy-Free Queso Dip with Way Better Chips

Dairy-Free Queso Dip with Way Better Chips

Jackson's Honest Sweet Potato Chips

Jackson’s Honest Sweet Potato Chips

8) Upgrade your dips and spreads. Instead of heavy, cheesy dips or things like ketchup, mayo, and BBQ sauce (which is just like pancake syrup in terms of sugar content), try guacamole, hummus, salsa, bean dips, queso dip (dairy-free!), sauerkraut, or mustard.

9) Instead of sugary drinks, sweet tea or lemonade, try infused water. From lemon-lime to strawberry basil and orange/pear, infused waters are refreshing and flavorful, and the variations you can make are limitless!

10) Focus on fruit for dessert. Make it fun, and try simple popsicles made with coconut milk and fruit, a fruit salad with mint, or grilled fruit kabobs with a honey glaze.

This berry peach crisp is always a hit, too!

Delicious Berry Peach Crumble

Delicious Berry Peach Crisp

**Bonus Tip #11**

Focus on FRIENDS and FAMILY instead of FOOD.

It can be SO easy to become consumed by all of the smells and sights at a cookout or summer party.

See what happens when you are intentional about focusing more on the people at the party and less on the food on your plate 🙂

Celebrating summer with friends

Celebrating summer with friends

In my next post, I’ll be sharing a bunch of recipes (from entrees and sides to dips, drinks and desserts) that will help YOU answer the following question:

“What exactly should I bring to the potluck?”

Rosemary Apple Chicken Skillet {Gluten-Free, Paleo}

We JUST made the decision to renovate our kitchen and dining room (YAY!) but don’t want to use our small space as an excuse not to have people over for dinner.

We were trying out a new chicken recipe for our friends Brian and Kara and also prepared some of our go-to staple dishes like this super simple asparagus and this creamy roasted garlic cauliflower mash.

We devoured it and couldn’t get over how tender and flavorful the chicken was!

Cutting the chicken into cutlets makes it cook faster and more evenly on the stove than keeping the chicken breasts whole, so I included a picture of how we did that below.

The key to this recipe is giving it about 30 minutes to marinate in the fridge, which you can totally do while you’re preparing the rest of the meal.

This will become a new family favorite! It’s one of the tastiest dishes we’ve ever made…and so simple!

Ingredients

  • 2 large boneless, skinless organic chicken breasts, cut in half to form 4 thin chicken cutlets (see pics below)
  • 4 cloves garlic, minced
  • 2 tablespoons fresh rosemary, minced
  • Juice from 1 lemon (about 3 tablespoons)
  • 1/2 teaspoon sea salt
  • 1/4 teaspoon ground black pepper
  • 2 tablespoons extra virgin olive oil
  • 2 apples, cored and thinly sliced

Directions

  1. Combine garlic, rosemary, lemon juice, olive oil, salt and pepper in a large plastic bag and add the chicken. Massage, so the marinade evenly covers the chicken, and then put the bag in the fridge for about 30 minutes, so the chicken can marinate (longer if you have the time!).

    Bill cutting the chicken into thinner, faster-cooking cutlets!

    Bill cutting the chicken into thinner, faster-cooking cutlets!

  2. Heat a large saute pan over medium heat and dump contents of marinade bag onto pan, along with apple slices.
  3. Saute for 5-7 minutes, tossing apples but leaving chicken on one side to brown. Then, flip chicken pieces to the other side and cook 5-7 more minutes or until done.

San Diego: A Healthy Foodie’s Paradise & Top 10 Places to Eat

Eating healthy and traveling can be a challenge, but in San Diego, it is almost effortless.

With juice and smoothie bars popping up on every corner and a commitment to serving sustainable, local, fresh and nourishing cuisine, San Diego is a healthy foodie’s dream.

(Especially for someone like me who is always looking for tasty dairy-free and gluten-free options!)

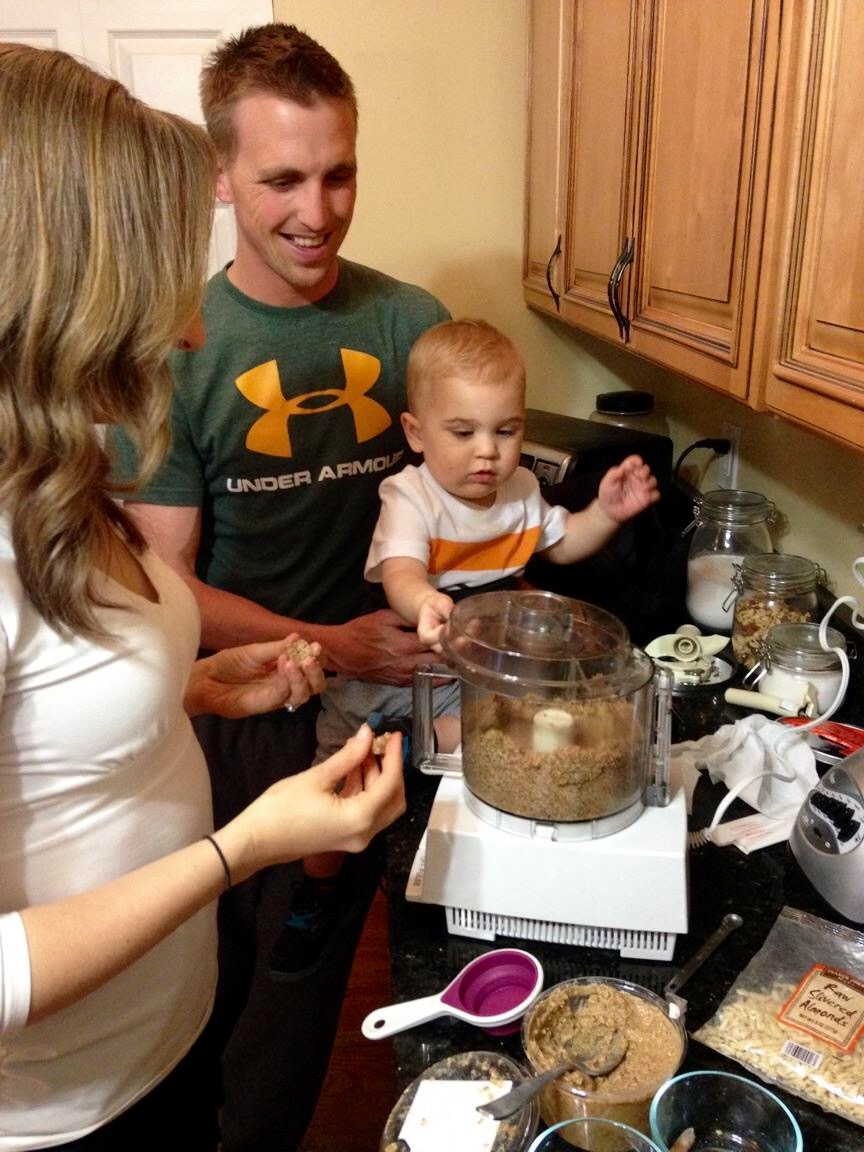
My husband Bill and I recently made our first trip to California and had an amazing time exploring the relaxing and beautiful coast and eating lots of delicious and energizing food.

hello san diego san diego pics

I have to give a shout out to my friend, Janna, who was kind enough to take the time to send me a few of the recommendations below. Bill and I did some exploring on our own, too, and came across some awesome food that we wish we could have brought home with us.

Check out my top picks below for places to try the next time you’re in sunny San Diego! I will give you more details about the vibe, what we ate, and what you have to try if you go there. Here is the short list (in no particular order).

  • Vitality Tap
  • Cafe21
  • Peace Pies
  • Georges at the Cove
  • Juice Crafters
  • Hillcrest Farmers Market
  • Plumeria
  • Burger Lounge
  • Jimbos Naturally!
  • SOL CAL Cafe – HAS SINCE CLOSED

Vitality Tap

650 1st Avenue, San Diego; 619-237-7625; www.vitalitytap.com

vitality tap

The Vibe: If you do not know what to look for, you could easily miss this place. It is inside of a nutrition store. They had a list of dozens of superfood boosters, including chlorella, goji berries, lucuma powder, and chaga mushrooms that you could add to any smoothie. Which reminds me, I have been doing a lot of research about chaga mushrooms recently, as one of my friends told me that she uses them to boost her immune system. You can read more about the therapeutic potential of chaga mushrooms here: https://www.chagainsight.com. Vitality Tap also encouraged us to post a review on Yelp to get a free detox shot. Free? Sign me up 🙂

What We Ate

  • Green Ingredient Smoothie (I was warned this was a pretty “intense” smoothie, due to the lack of sweetness, but I was ready for it). With a blend of greens, mango, lime, lemon, hemp seed, cucumber and spirulina, I knew it was an anti-inflammatory, detoxifying concoction that my body would love. Remember, medicine doesn’t always taste good, but people take it anyway 😉 This is true when food is medicine, too!
  • Flexin’ Smoothie (This was Bill’s favorite)
  • Avocado Bliss Smoothie
  • Undressed Greens Juice
  • All Day Energy Shot
  • Detox Shot

Cafe21

802 5th Avenue, San Diego; 619-795-0721, www.cafe-21.com

cafe21

The Vibe: Farm-to-table restaurant in the heart of the Gaslamp district that sources its food from local farmers and distributors and is committed to crafting creative, seasonal, and delicious dishes and drinks. There is a Mediterranean vibe that I loved about this place, but their menu is eclectic and offers something for everyone. The chef was accommodating and creative when it came to my dairy and gluten-sensitivities, and any dish our servers recommended was a winner. We liked it so much that we went for dinner and brunch. It was the best thing ever to come from Tennis Lessons San Diego and sit down and eat lunch at this place.

What We Ate

Dinner

  • Lentil, Cauliflower & Chicken Soup
  • Avocado, Mushroom & Eggplant Fries with Mediterranean-inspired Red Pepper Dip & Avocado Mousse (They made it dairy-free and gluten-free for me!)
  • Sangria-Marinated Short Ribs (Bill had these and they melted off the bone)
  • Black-Eyed Peas, Mushrooms, Tomatoes, Onions & Peppers with Spaghetti Squash

Brunch

  • Garden & Vegetable Omelet Skillet with a Strawberry & Mixed Greens Side Salad
  • Mango Sweetie Hot Tea (you have to try their homemade teas!)

You Have to Trythe Avocado, Mushroom & Eggplant Fries. Our minds were blown (hence Bills face in the pic above)!

Also, if you sign up for their newsletter, they’ll send you special deals, including a free meal on your birthday!

Peace Pies

4230 Voltaire Street, San Diego; 619-223-2880; www.peacepies.com

peace pies

The Vibe: I was super excited to check out this place when I saw their menu online. It is a Bohemian café with a locally sourced menu of raw, vegan, gluten-free, and soy-free dishes. I’m pretty sure we went to Peace Pies three times for some combination of lunch/dinner/dessert. We loved it!

What We Ate

  • Magical Mango Curry Wrap with Kale Chips
  • Mediterranean Sampler
  • Voltaire Street Tacos
  • Majestic Mediterranean Wrap
  • Banana Chocolate Coffee Pie
  • Chocolate Chip Cookie Sandwich
  • Stuffed Date with Maca Cashew Butter

You Have to TryMango Curry Wrap & Kale Chips (yum x100)…and the Chocolate Chip Cookie Sandwich!

Georges at the Cove

1250 Prospect Street, La Jolla; 858-454-4244, www.georgesatthecove.com

georges

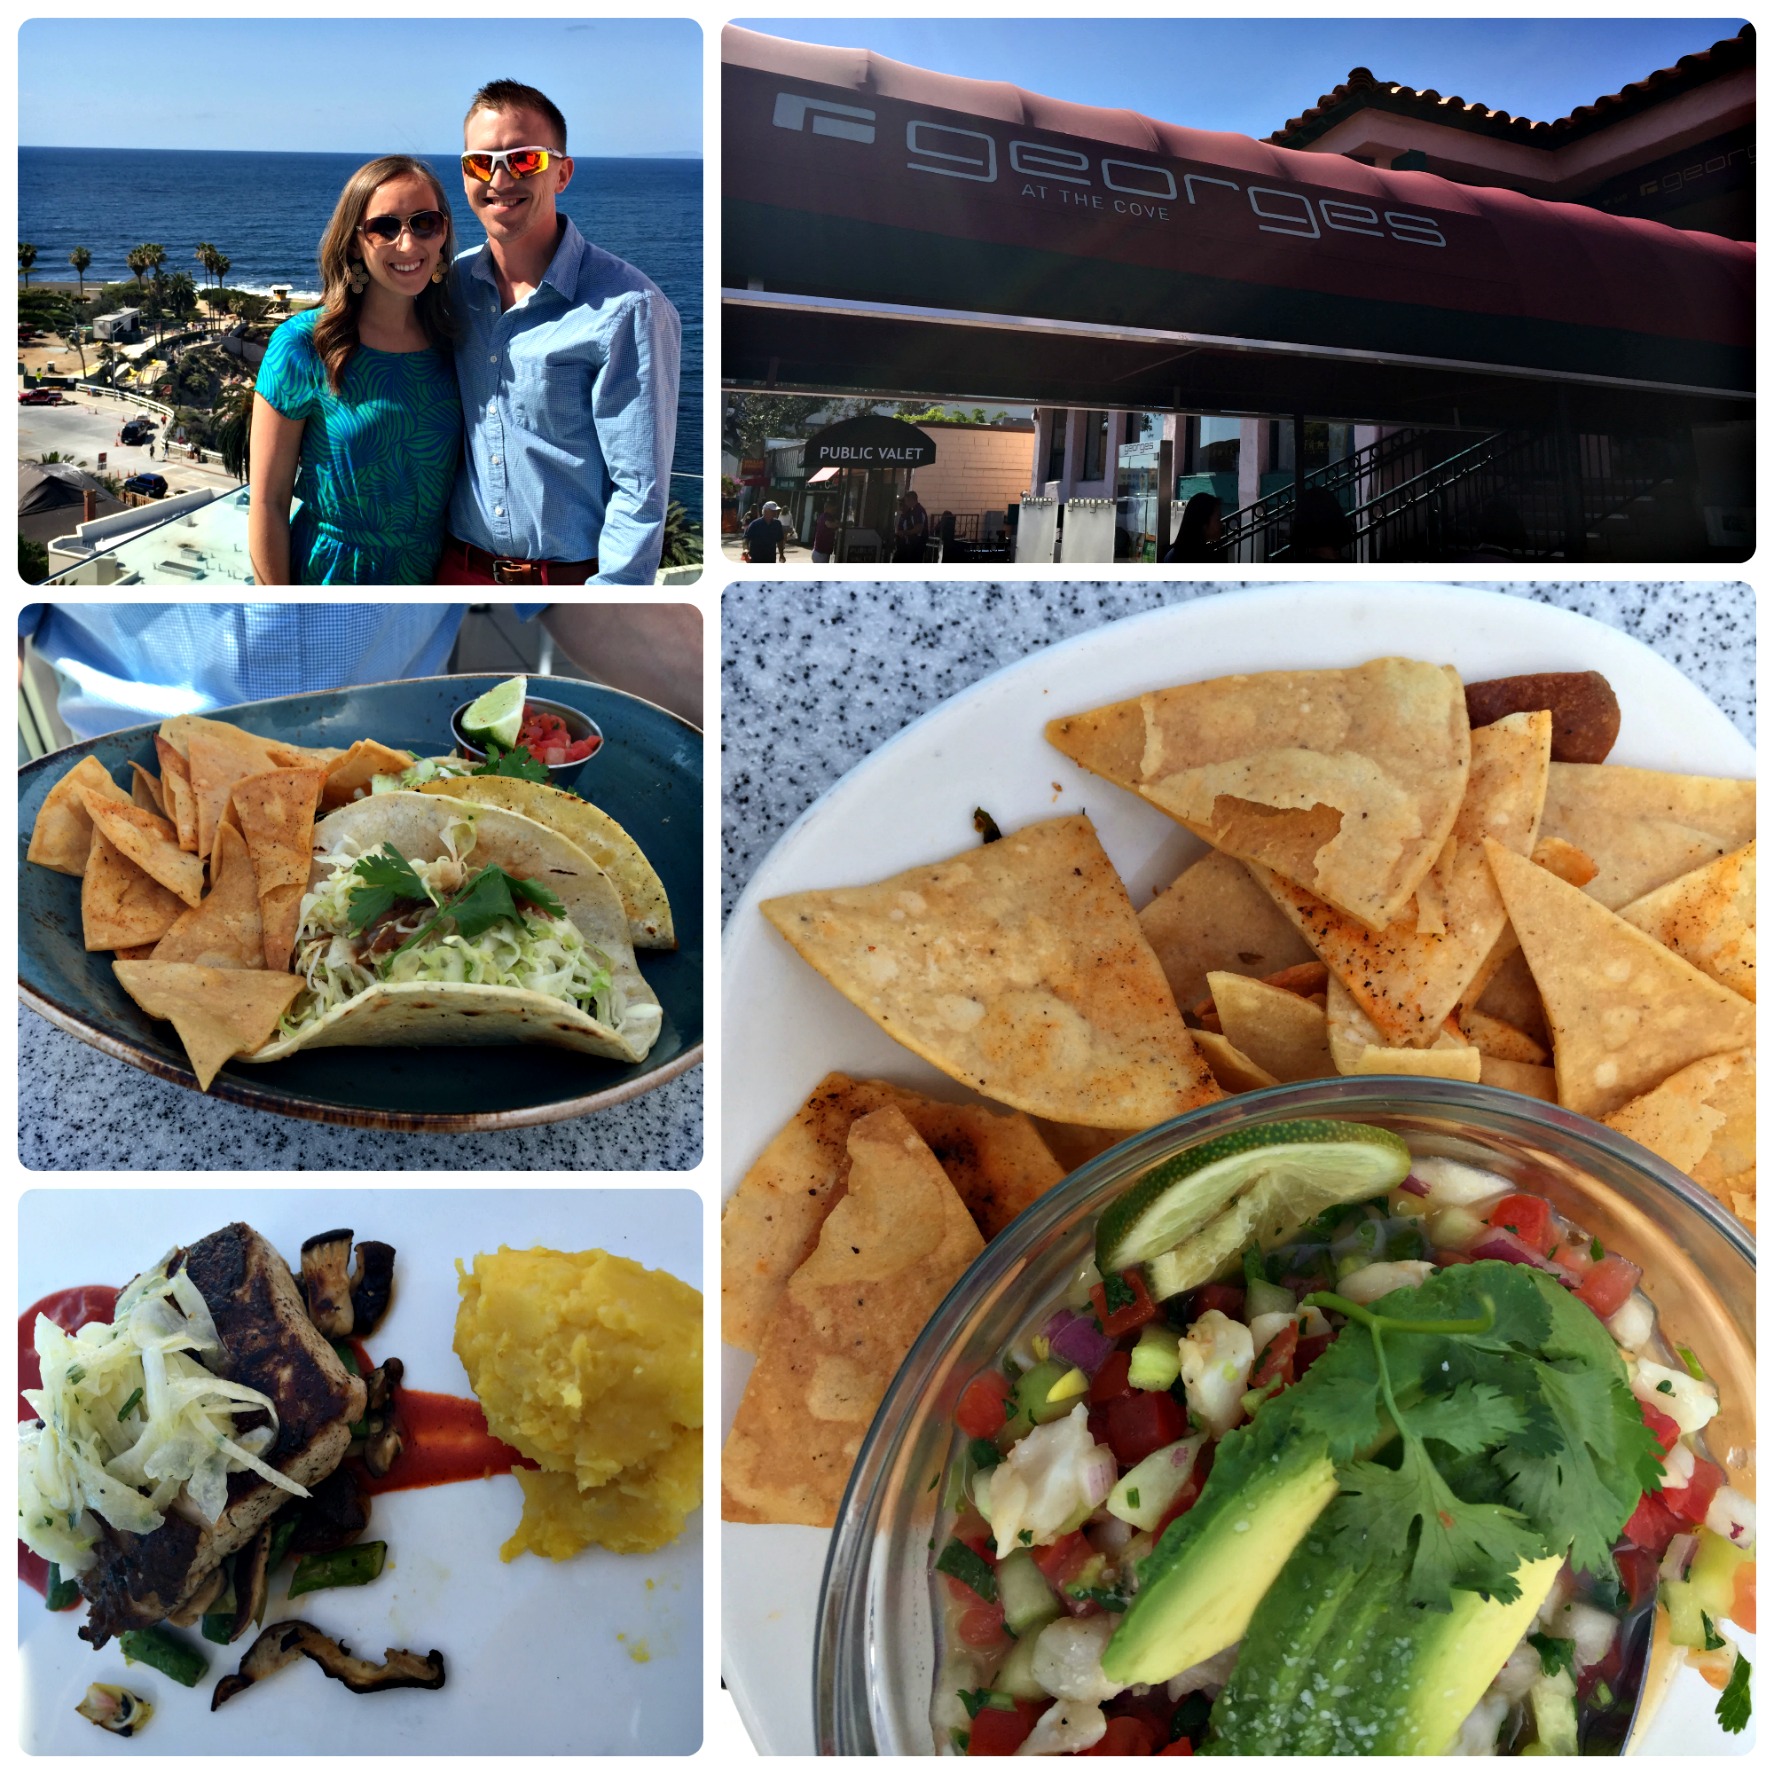
The Vibe: Talk about a view. Wow. Not only was our rooftop table overlooking the Pacific picture perfect, but so was our meal. The sea was absolutely stunning and we found out from some locals that you can take a kayak tour of the sea caves in La Jolla, San Diego which will have to try next time we visit. After multiple people recommended we check out Georges, we knew we had to make it part of our trip.

What We Ate

  • Scallop Ceviche
  • Seared Yellowtail with Asparagus, Mushrooms and Red Pepper Puree
  • Fresh Fish Tacos (Bill ate tacos every day :))

You Have to TryScallop Ceviche. My co-worker, Gina, turned us on to this appetizer. She told us we absolutely had to have it, and we’re so glad we took her advice! Light, crisp and refreshing, it was a perfect start to our West Coast lunch on a breezy afternoon.

Juice Crafters

Multiple Locations; 935 Silverado Street, La Jolla; www.juicecrafters.com

juicecrafters

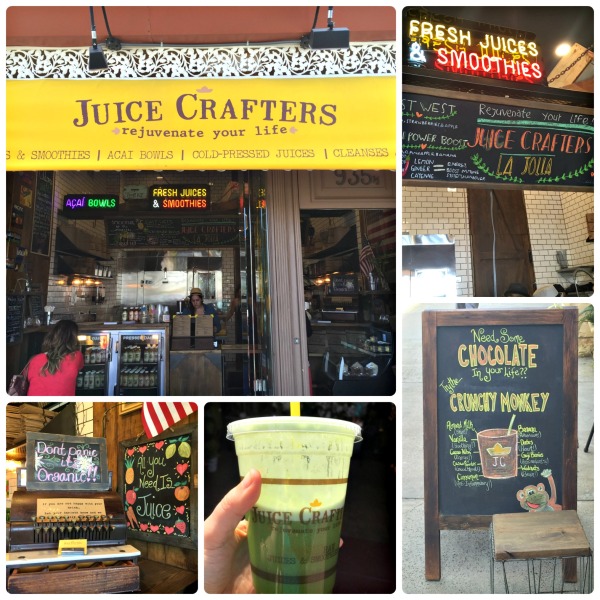
The Vibe: We stumbled upon this place when we were wandering around La Jolla and looking for something hydrating and energy-boosting before dinner. Juice Crafters is a family-owned cold-pressed juice and powerhouse smoothie bar whose approach is to “live well and be well.” That’s my kind of place!

What We Drank

  • Green Juice Plus

You Have to TryAnything on the menu! We only stopped by for something to hydrate us before dinner, but all of their smoothies looked good, especially the Chunky Monkey Smoothie they were advertising outside that day.

Hillcrest Farmer’s Market

3960 Normal Street, San Diego, www.hillcrestfarmersmarket.com

hillcresthillcrest2

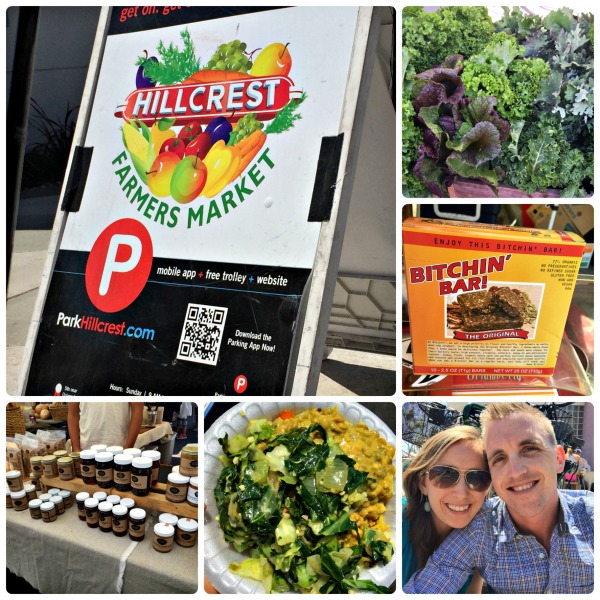
The Vibe: Held Sundays from 9:00 a.m. – 2:00 p.m., this was our favorite of the three farmer’s markets we checked out while in San Diego. There are over 175 vendors there, so give yourself some time to explore. Take a look out all the awesome eats below!

What We Ate:

  1. Taste of Africa – This was one of our favorite meals of the whole trip…and the cheapest. For $11, each of us ordered a bowl served with jasmine rice and vegetables topped with rich and creamy (and dairy-free!) curried lentils and chopped and sautéed collard greens. Bill ordered the jerk chicken instead of the lentils, and both of us took our first bite, looked at each other and made “the face” we make whenever we’ve just tasted a little bite of heaven.
  2. Green Fix – They sell juices and smoothies that highlight vegetables as the star, unlike many smoothie places that load up on the sweet stuff. They have options that accommodate a wide range of taste preferences with varying levels of sweetness, so if you’re gungho, try a jug of the “Raw” version.
  3. Asana FoodsThey have lots of unique paleo options from granola to almond butters and are known for their killer acai bowl. We bought a jar of their cardamom goji berry almond “buddah”. They ship, too, so we can order online here.
  4. Happy Pantry – Best sauerkraut around. Fermented foods like sauerkraut (something I used to hate until about a year ago!) are excellent for our digestive health, skin, and overall immunity. We loved the variety of combinations and ended up with a jar of the Power Krautage. Bill loved the kimchi as well. Definitely check out this place. The people who work there are super friendly, too.
  5. B*tchin’ Bars & Dips – I’m not one to swear on this site, but that’s the name of the company! Their paleo-friendly bars, and gluten and dairy-free dips are OUT OF THIS WORLD. They’re made with almonds instead of beans, so people who have trouble with beans might want to try out this as an alternative. My favorites were the Pesto and Bombay curry flavors, but they are all amazing! You can’t help but laugh as the guys taking your order tell you to “have a b*tchin’ day.” Here’s to not taking life too seriously 🙂

Plumeria

4661 Park Boulevard, San Diego; 619-269-9989; www.myplumeria.com

plumeria

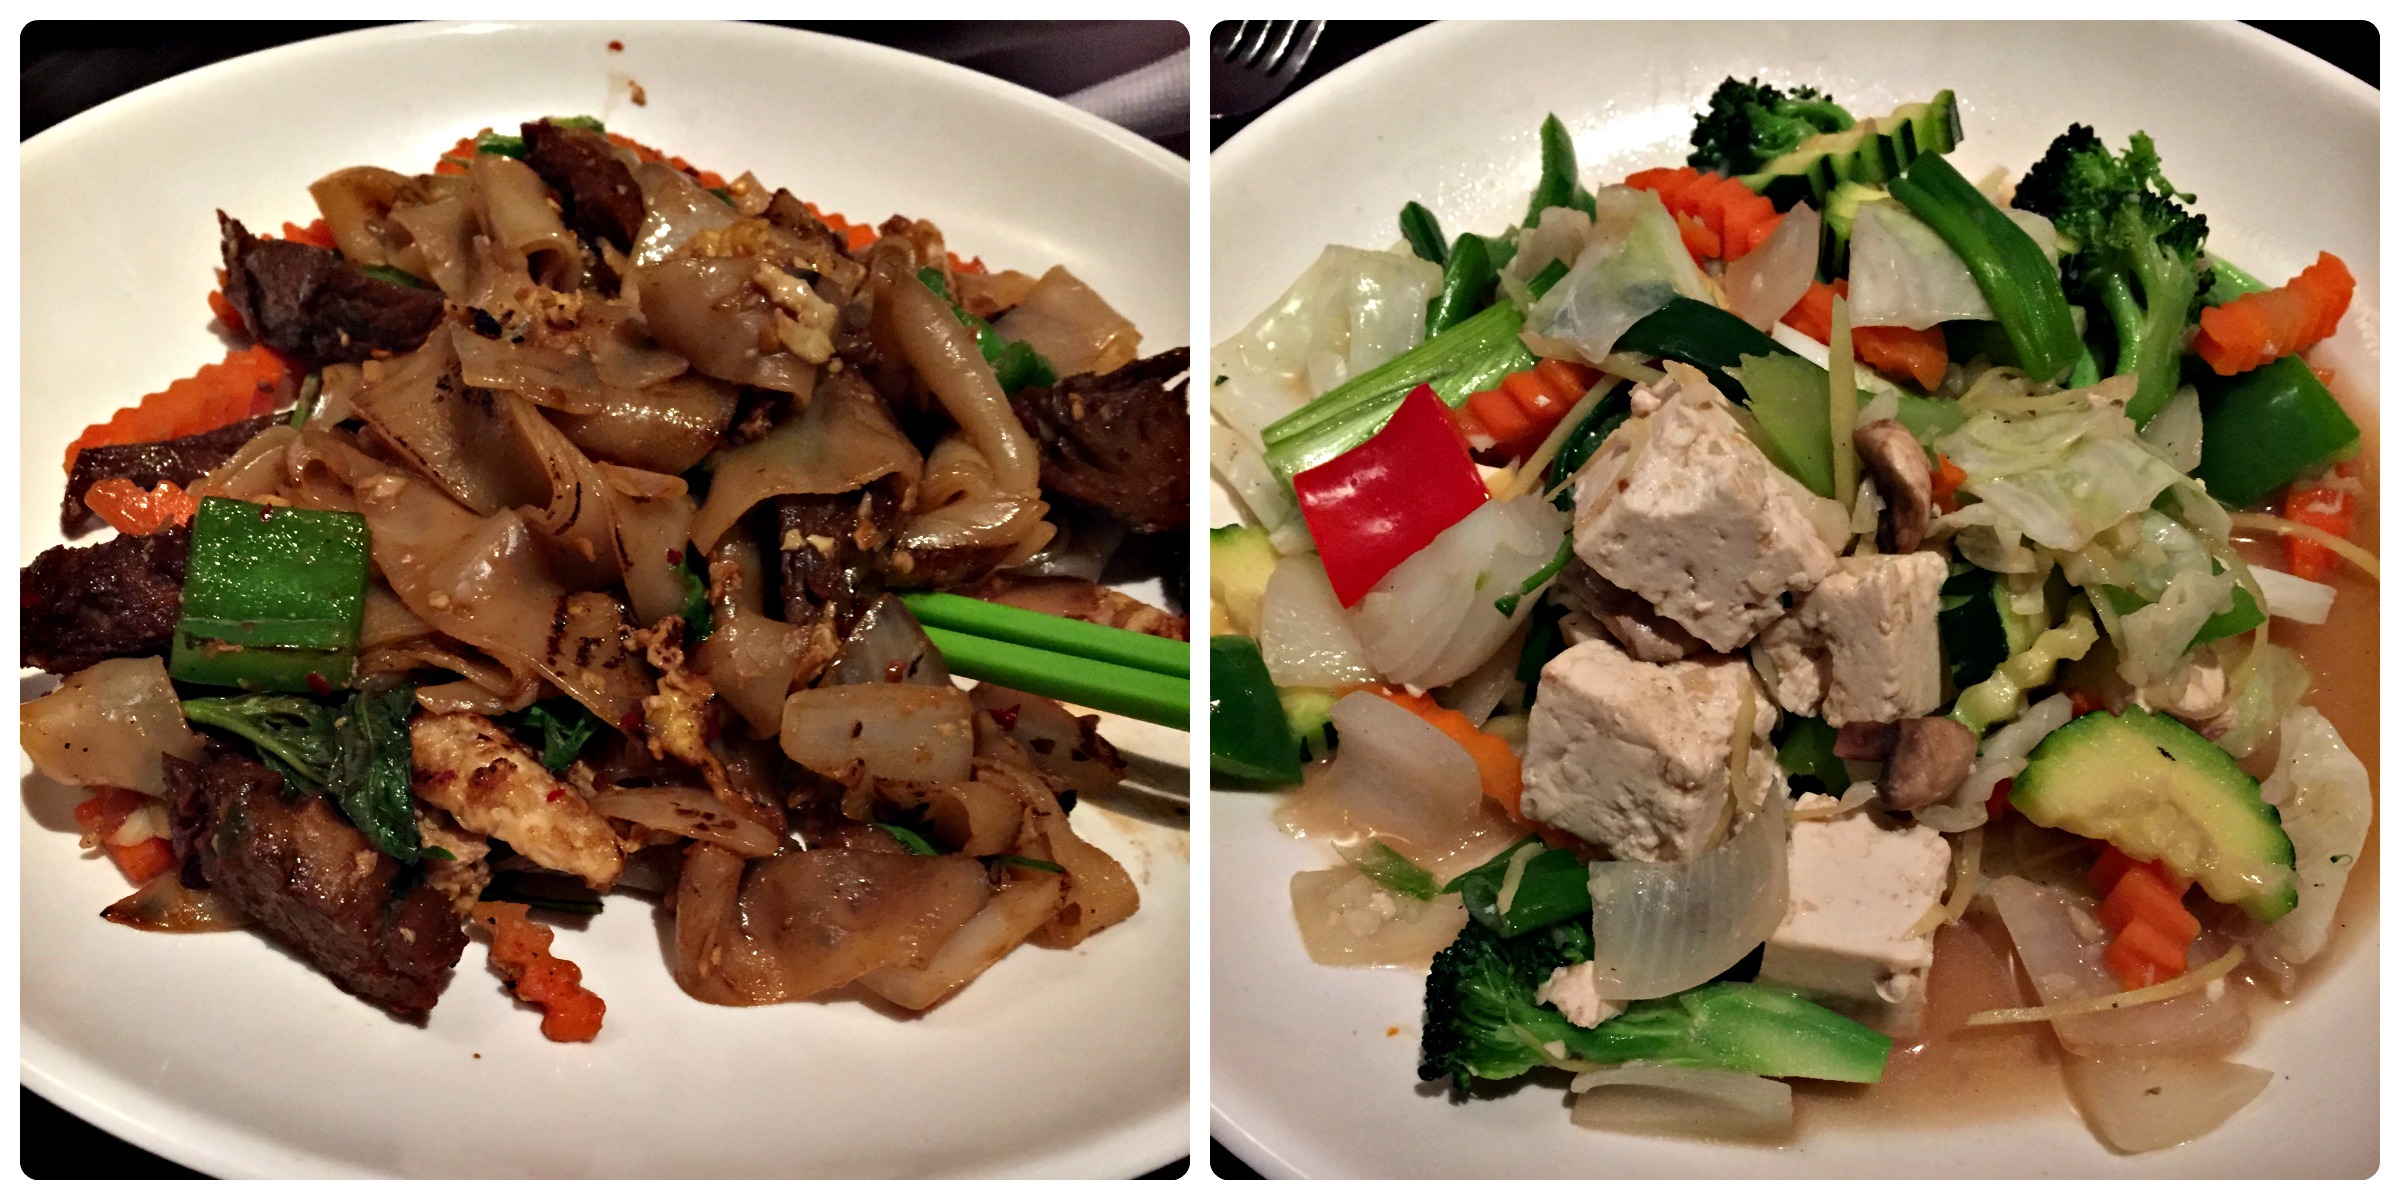
The Vibe: Described by Janna as her “favorite Thai restaurant in all of California,” we knew we had to check it out. On our last night in San Diego, we ventured to Hillcrest to check out this vegetarian restaurant. You don’t have to be a vegetarian to enjoy the food there though, so don’t let that stop you.

What We Ate

  • Spearmint Tea, Spicy Ginger Tea
  • Zen Soup
  • Ginger, Tofu & Vegetable Stir Fry
  • 5-Spice Duck Stir-Fry

You Have to TryZen Soup (one of the most delicious, flavor-packed dishes I’ve ever tried!)

Burger Lounge

Multiple Locations; Coronado Island, www.burgerlounge.com

burger lounge

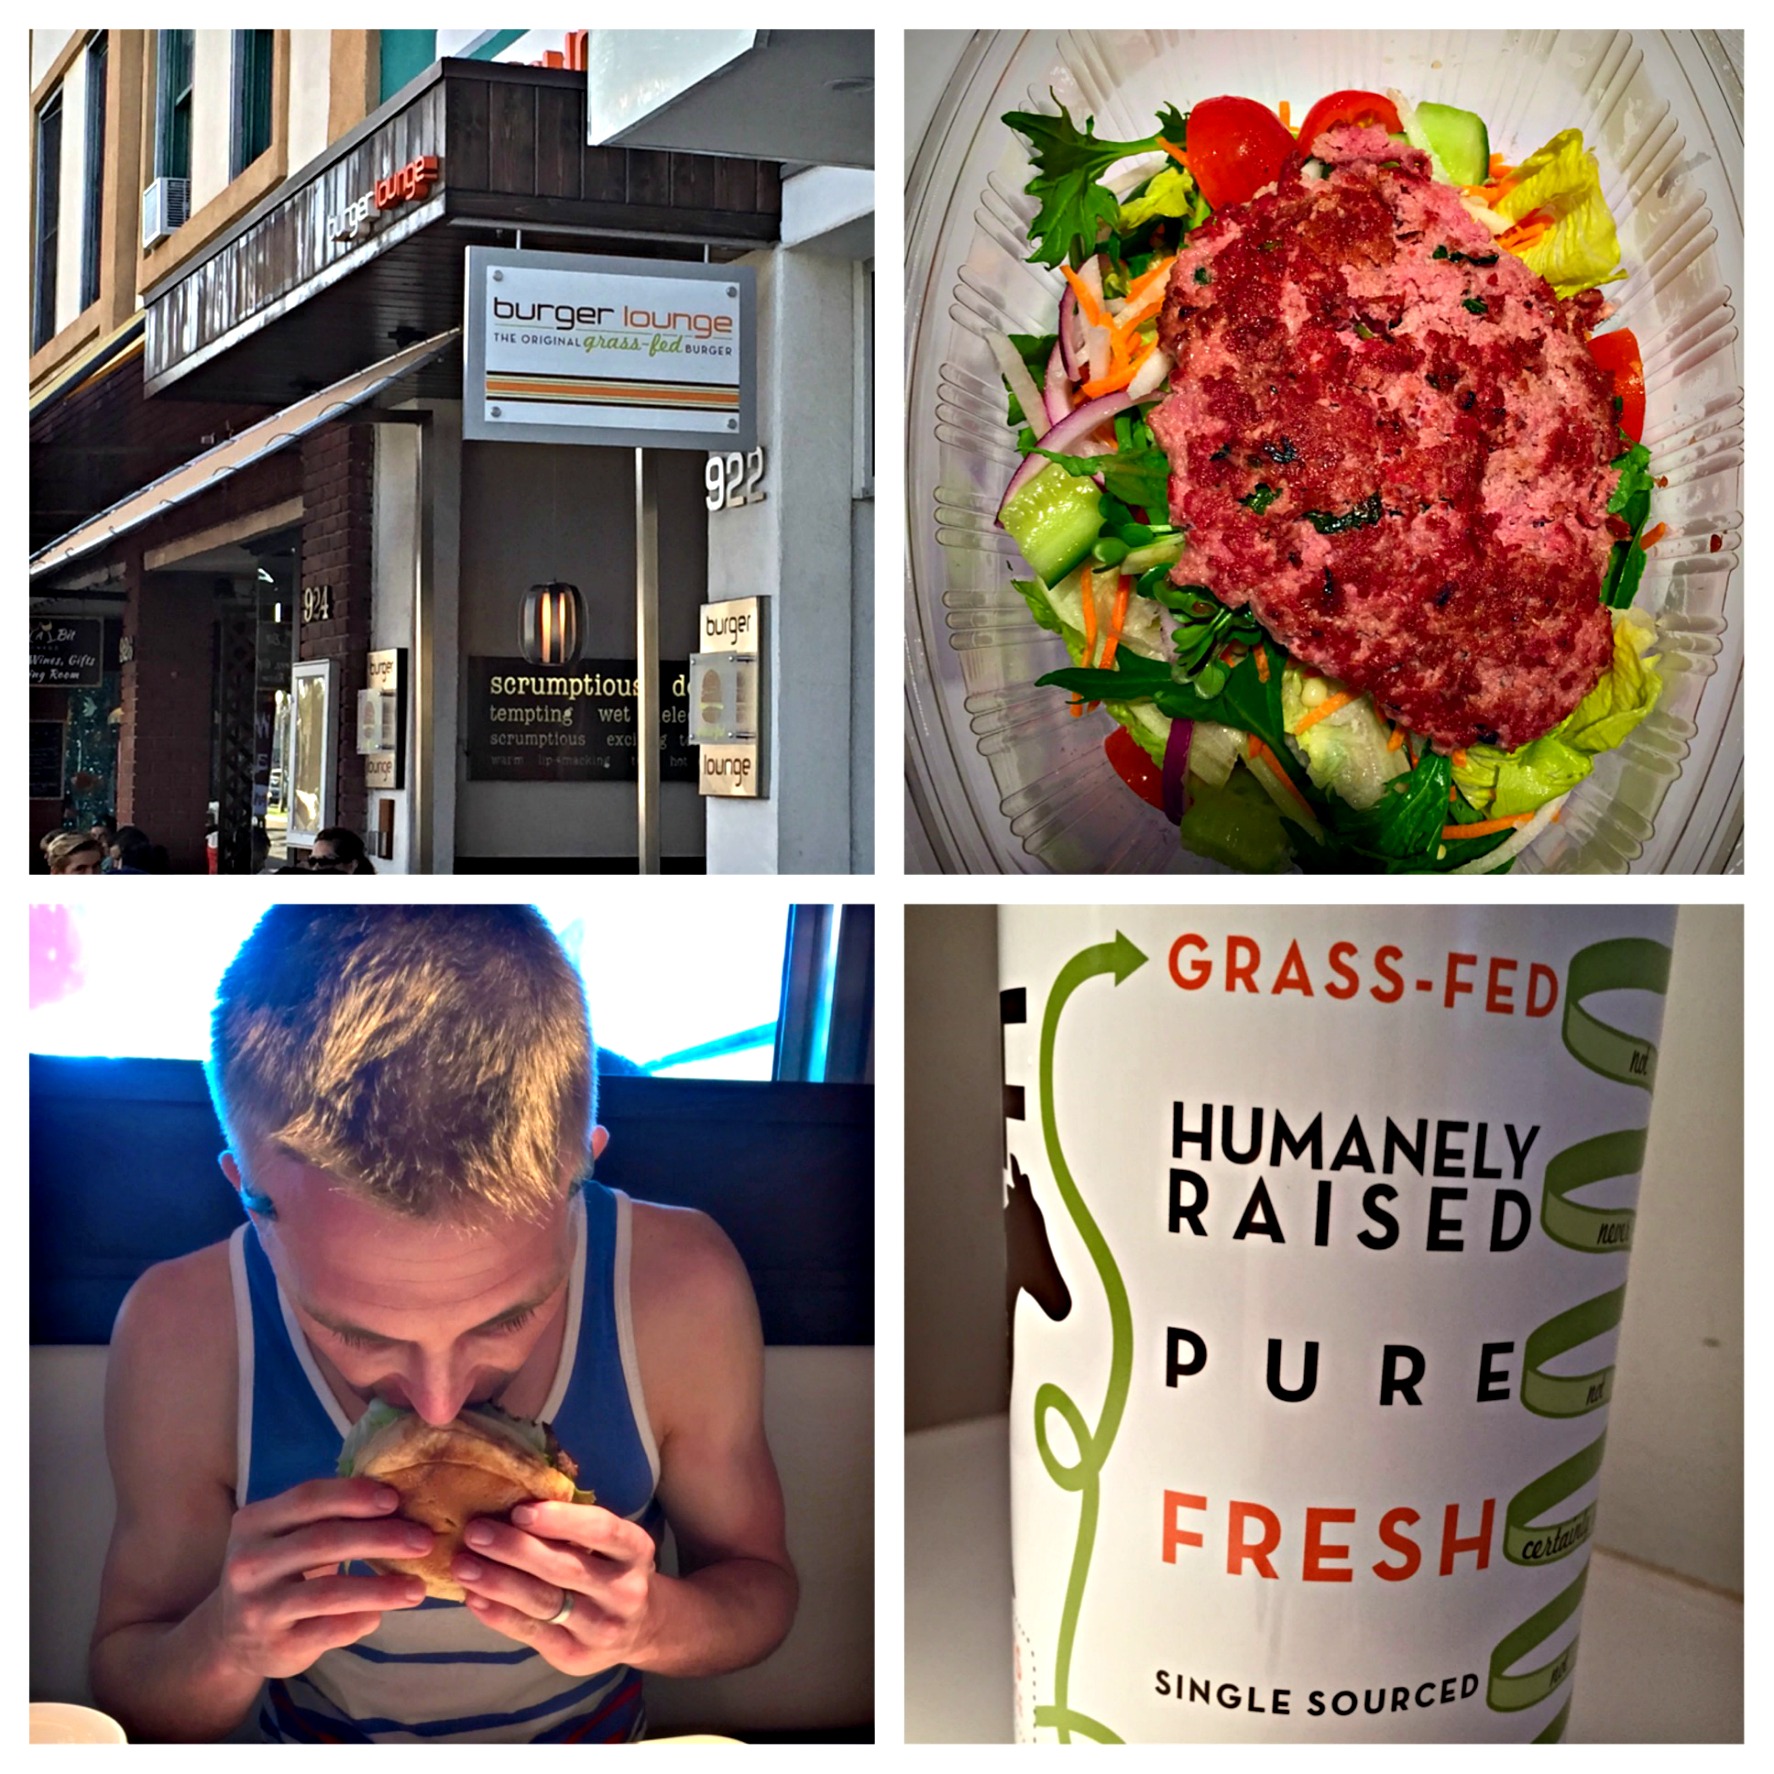
The Vibe: Before we left for San Diego, we asked people about “must-see” places, and almost everyone suggested Coronado Island. We spent the morning at the beach and wandering around the island and worked up an appetite. We were debating doing one of the famed San Diego whale watching trips but just ran out of time, which was gutting! When we saw the line in front of Burger Lounge and the signs for 100% grass-fed beef, we were sold. If only other fast casual chains would get on board with having higher integrity, quality ingredients that taste delicious like Burger Lounge. I’m hopeful it will happen the more we ask for it!

What We Ate

  • Turkey Burger on a Fresh Vegetable Salad with Basil Dressing
  • The Lounge Burger (100% Grass-fed Beef Burger)

You Have to Try…Turkey Burger with Basil Dressing (YUM!) The best turkey burger I’ve ever had. Period.

Jimbos Naturally!

4S Commons Town Center, 10511 Commons Drive, San Diego, www.jimbos.com

jimbo

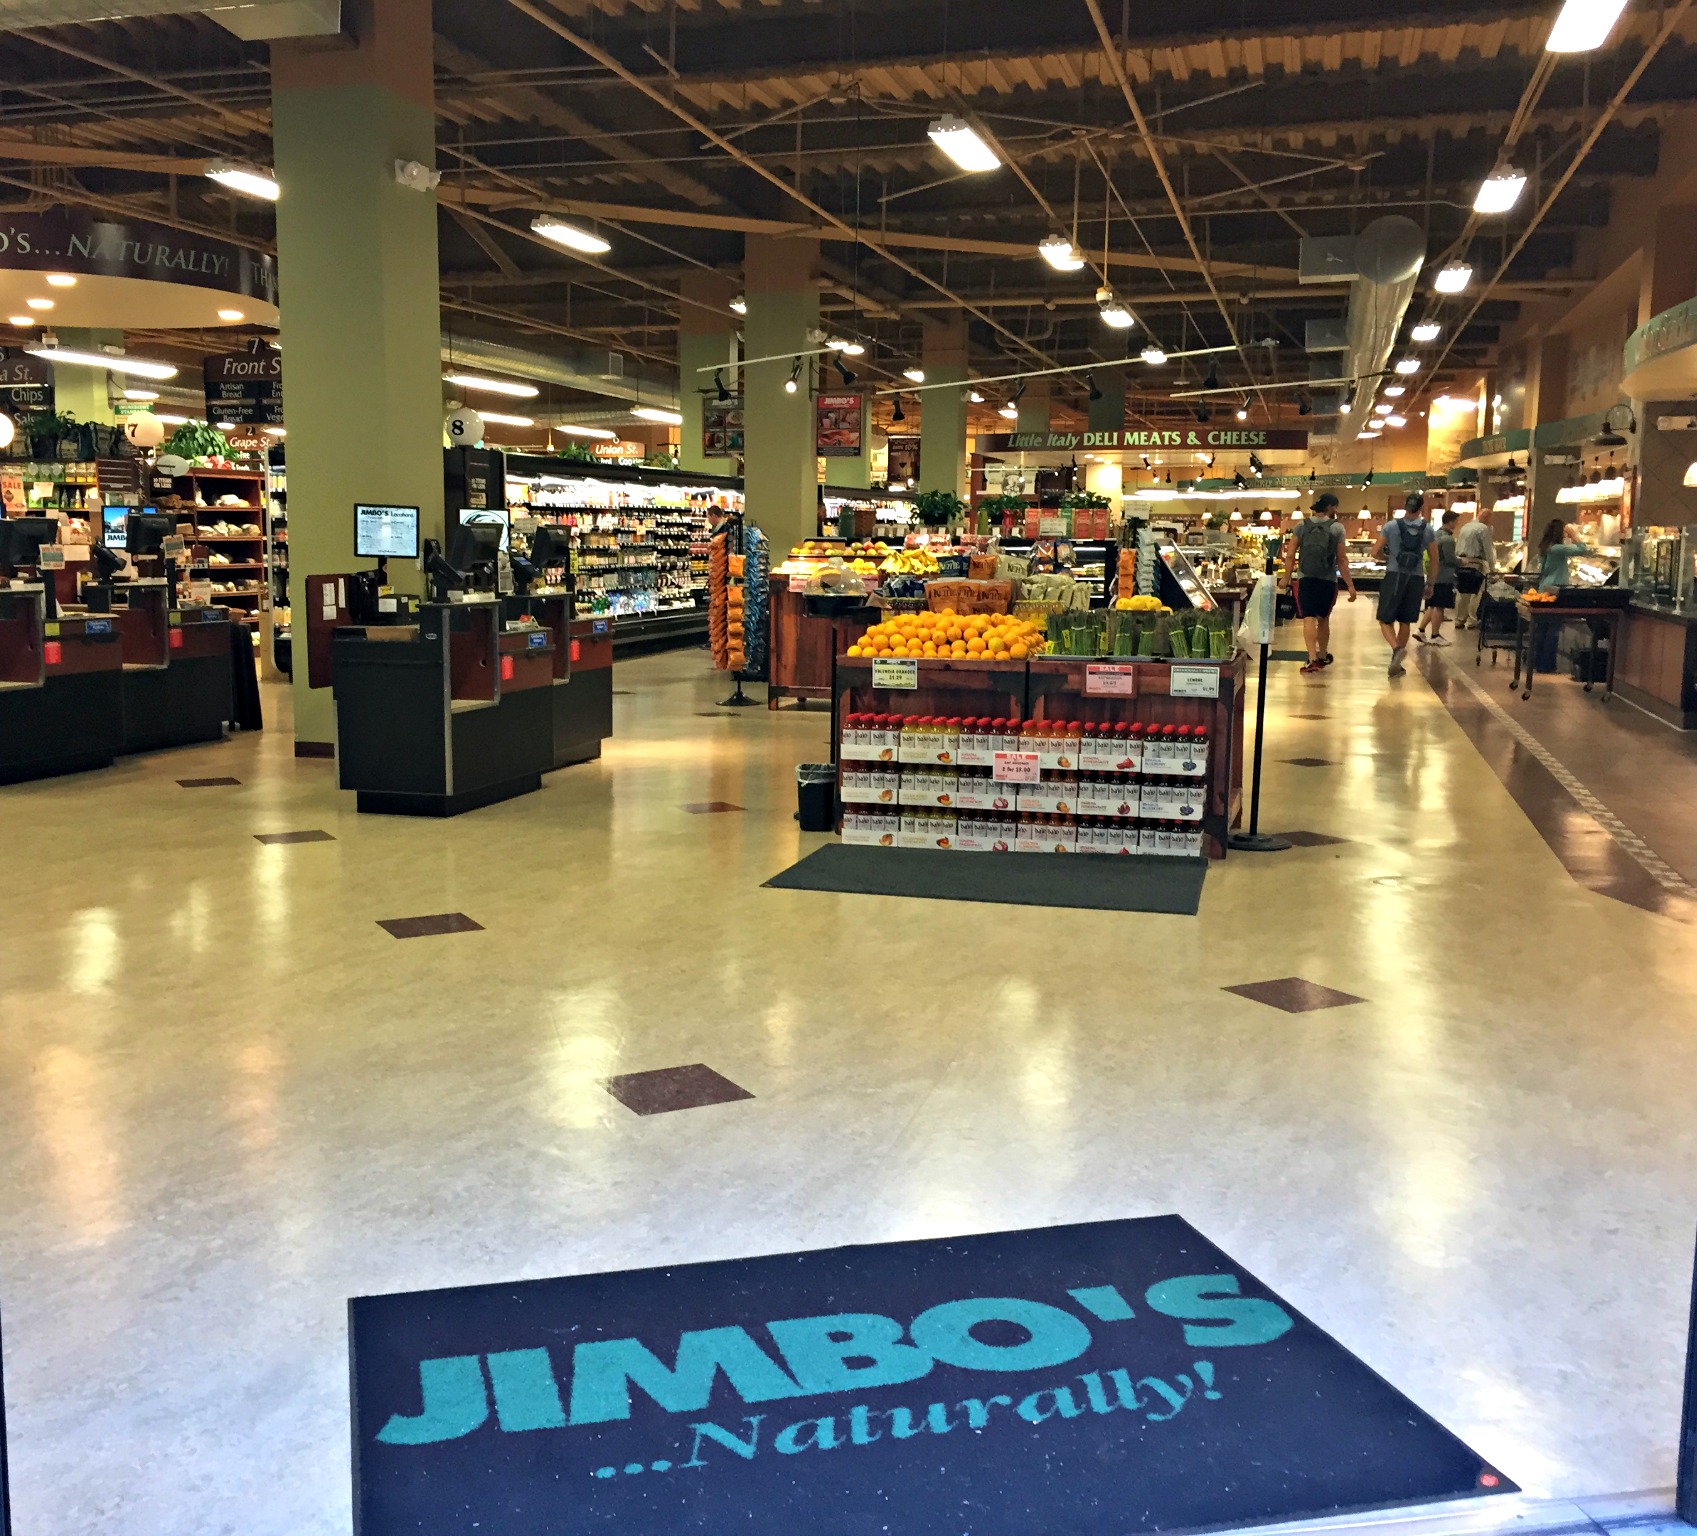
The Vibe & The Eats: Okay, so it’s not technically a restaurant, but I’m a sucker for cool grocery stores. I went to this place about every other day during the trip for drinks, snacks, immune booster packs (the time change wasn’t loving me), and even toiletries I had forgotten to bring.

It’s always nice to have a trusted grocery store to go to when you’re staying in a new place.

SOL CAL Café I just learned that this place has closed, unfortunately!

Check out Cafe Gratitude instead!

910 J Street, San Diego; 619-255-2927, www.solcal.com

solcal cafe

The Vibe: With a tagline of “Healthy. Happy. Yummy,” I knew this place was for me 🙂 They serve cleanse-focused juices, smoothies, elixirs and modern vegetarian eats in a cheerful, contemporary setting. One morning we ran there for breakfast and walked home. The free cucumber water was refreshing and thirst-quenching after our run.

What We Ate

  • Lively Liver Elixir (detoxifying combo of dandelion, burdock root, red clover and cinnamon)
  • Happy Greens Juice
  • Om Sweet Om Smoothie
  • Lean Green Smoothie
  • Kelp Pesto Noodles with Mushrooms & Sundried Tomatoes
  • Waffle with Berries & Cream. Deliciously dairy-free and gluten-free, Bill had these for morning one day. Don’t they look amazing?! He cleaned his plate.

We could have eaten every meal there for breakfast, lunch and dinner for two weeks and eaten something different every time. I would love to go back and try the Cacao Oatmeal, Loaded Baked Sweet Potato, and the Sol Kale Salad.

And last but not least, here are a few honorable mentions worth checking out!

Honorable Mentions

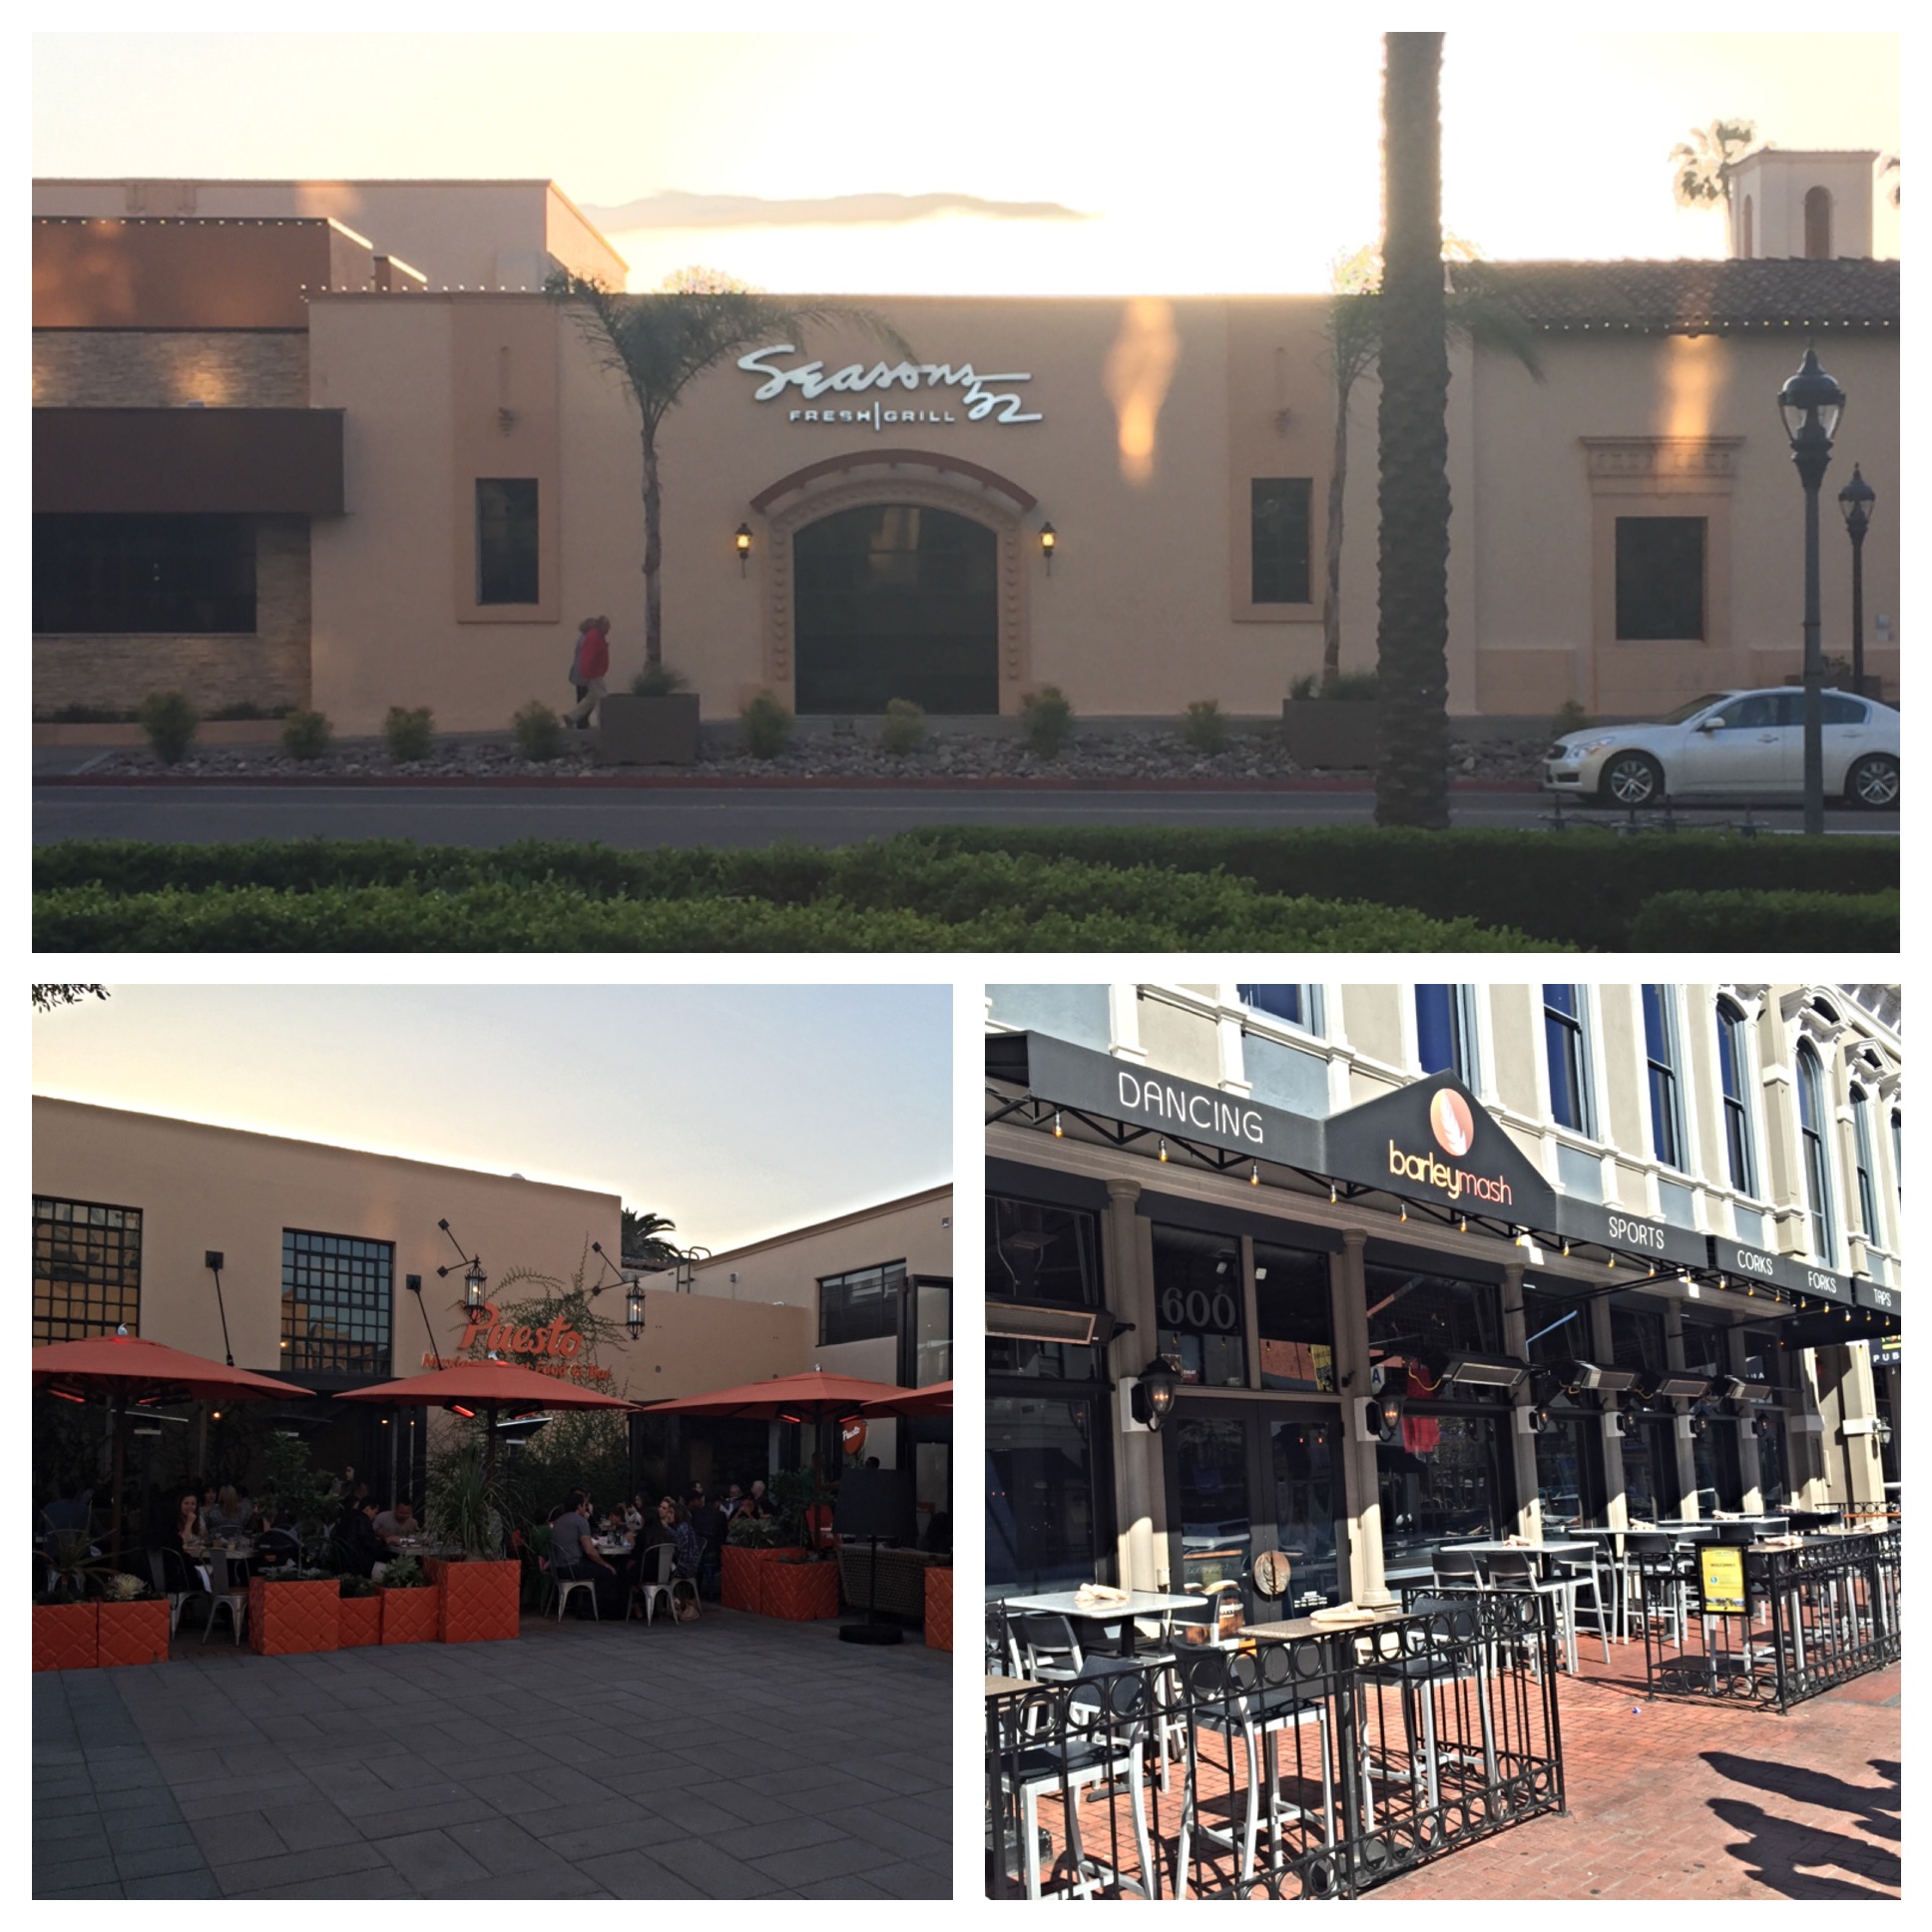
Seasons 52 (Focus on fresh, seasonal ingredients)

Cafe Gratitude (I have heard great things!)

Puesto (Bills favorite taco place. Amazing guac and yummy tacos)

BarleyMash (Not exactly known for their healthy food, but their baby kale salad with lemon vinaigrette and chicken on top was deeeelish!)

So, that’s my list! We went to a few other places, too, but those were my top 10. Have you been to San Diego? What are your favorite healthy places to eat? Feel free to leave a comment below! 🙂

Not-Just-for-Moms No-Bake Lactation Cookies {Gluten-Free, Dairy-Free}

The other day, Bill and I were hanging out with my brother, his wife and their two adorable kiddos, Braxton & Raleigh.

We are lucky to live so close to each other to be able to see our nephew and niece grow up.

IMG_8841

We had just finished eating this Better-than-Takeout Chicken “Fried” Rice dish for dinner before throwing together our favorite Snickerdoodle Cookie Dough Bites (which our nephew LOVED!).

He wanted to help us make them, too, so we propped him up on the counter next to the food processor and laughed as he watched the food processor whirl, mesmerized and totally focused on his newfound entertainment.

Braxton making Snickerdoodle bites

My sister-in-law, Layne mentioned that she’d heard a mom on a local radio station talk about Lactation Cookies that she used to stimulate milk production while she was nursing.

The only problem?

It costs $40 for one dozen cookies.

Not exactly something most of us could afford on a consistent basis, no matter how tasty or helpful they are.

Layne had also heard about the benefits of Mother’s Milk tea from Traditional Medicinals, which contains many of the lactogenic ingredients listed below.

mothers milk

Determined to find an alternative to the $40/dozen cookies, I went into nerdy food research mode and started looking online to learn more about lactogenic foods called galactagogues (ga-LAC-ta-goggs) – foods that are known to naturally increase milk production. I found a few different lists, but certain foods were consistent:

  • Flaxseed
  • Oats
  • Nuts, seeds and nut butters
  • Beans & legumes (lentils, peas, beans)
  • Leafy green vegetables (spinach, kale, broccoli, etc.)
  • Carrots
  • Stone fruits like papaya, dates, and apricots
  • Ginger
  • Garlic
  • Coconut & coconut milk
  • Brown rice
  • Herbs & spices like cumin seeds, anise, fennel seeds, fenugreek, alfalfa, milk thistle, and turmeric

As I was looking through the list, I noticed some common themes. They’re all whole, unprocessed, real foods, and many of them also have strong anti-inflammatory properties.

So whether you’re breastfeeding or not, these foods are nourishing! And, no, you won’t start lactating just because you’re eating lactation cookies. You have to be breastfeeding for that to happen 🙂

Check out the recipe below to make your OWN no-bake lactation cookies (much cheaper than $40/dozen!).  The key lactogenic ingredients are oats, flaxseed, dates, cinnamon, and coconut.

lacto cookies

A few notes about this recipe that will be helpful as you shop for ingredients:

  • We buy gluten-free oats from Trader Joe’s.
  • We use a coffee grinder to grind our flaxseeds, but you can also just buy milled flaxseed or flaxseed meal. You get the most nutrition from the seeds when you grind the whole seeds just before using them.
  • We always use raw honey because of its health benefits. Trader Joe’s, Wegmans, MOMs, Whole Foods, and any natural foods store sell raw honey.
  • You can use almond butter instead of peanut butter for a greater lactogenic effect. If you use almonds, use a total of two tablespoons of honey because almond butter is milder in flavor than peanut butter.
  • The shredded coconut is optional and doesn’t leave a coconut taste – it just adds another galactagogue! If you absolutely hate coconut (like my husband) or are allergic, you can leave it out. The peanut butter dominates the taste anyway, so Bill didn’t even notice the coconut 🙂

NB Lactation Cookies

No-Bake Lactation Cookies

These little bite combine a bunch of lactation-supportive ingredients that nourish both mama and baby.

  • 2/3 cup rolled oats (gluten-free)
  • 1/3 cup flaxseed (ground)
  • 1/2 cup shredded coconut
  • 1/4 teaspoon fine grain sea salt
  • 1/2 teaspoon cinnamon
  • 1/2 cup Medjool dates (pitted)
  • 1/2 cup sunflower seed butter (or almond or peanut butter (I prefer to make them allergen-free))
  • 2 tablespoons raw honey
  • 1.5 tablespoon vanilla extract
  1. Put the oats, ground flaxseeds, shredded coconut, salt and cinnamon in a food processor fitted with the S-blade, and run for about one minute until it reaches the consistency of a fine meal.

  2. Add the rest of the ingredients, and run the food processor for about 60-90 seconds or until everything is combined and starts to clump around the sides.

  3. Mold hunks of the dough about one tablespoon at a time into round balls. Store in the fridge in a glass container. We like taking them out a few minutes before eating so they soften up a bit.

I used to put chocolate chips in these, but babies are supposed to stay away from chocolate until about their first birthday because of the caffeine content, so if you’re not a nursing mama, feel free to add in 1/4 cup dark chocolate chips or cacao nibs before taking the dough out of the food processor!

If you’re not a huge fan of flax, cut the portion back to 1/4 cup.

If you’re a mom and want to learn more about how to increase your milk supply, boost your immunity, lift depression, lose weight, and even reduce colic and allergies, check out the book Mother Food by Hilary Jacobson. Please consult with your doctor or lactation consultant for further guidance.

Here are a few other recipes on my blog that are full of galactagogues. I’ve given you a link to the recipe and listed the lactogenic foods next to it:

curry

coconut chai bites

Mediterranean Chickpea & Sundried Tomato Kale Salad {Vegan}

I’ve been a kale lover for a few years now and have fun coming up with new ways to incorporate it into recipes.

I even found these super cool kale-lover clothing items at a small store called Simply Local in San Diego that reflect someone’s serious obsession with this leafy green veggie.

Kale Clothes SD

Today’s salad recipe has some Mediterranean inspirations with lemon, olive oil, garlic, tomatoes and chickpeas. It comes together in a matter of minutes and can be enjoyed for lunch or dinner.

From the kale and garlic to the hemp seeds and chickpeas, this delicious dish is LOADED with cancer-fighting and fat-storage fighting foods known as GBOMBS. Click here to learn more about GBOMBS and why we should eat them daily.

The key to this salad is massaging the lemon juice into the kale leaves to “cook” and soften the kale and break down its bitterness; it’s always important to give your raw kale a little massage.

Speaking of massage, when I was in college I considered going into massage therapy and even went so far as to buy a KISS (Keep It Simple, Stupid) guide-book to learn the basics. Clearly I didn’t pursue that route, so massaging kale will have to do! 🙂

Mediterranean Kale Salad

What I love about kale salads (one of the many things) is that they “keep” for a few days in the fridge.

Any other greens’ salads will wilt in a matter of hours once you put dressing on it, but kale salad holds up for about 3 days, so it’s something you can make ahead of time and enjoy for several meals.

Check out today’s recipe, and let me know what you think!

Med Kale Saladkale salad 2

Mediterranean Chickpea & Sundried Tomato Kale Salad

I love the Mediterranean-inspired flavors and ingredients in this salad. Feel free to add some chicken or fish on top, if you’d like, for a complete meal!

  • 1 bunch curly kale (destemmed, washed and dried)
  • 3 tablespoons fresh lemon juice (about one lemon)
  • 2 tablespoons extra virgin olive oil
  • 2 cloves garlic (crushed and finely minced (1 large clove or 2 small cloves))
  • 1/2 teaspoon coarse sea salt
  • 1/3 cup nutritional yeast
  • 1 15-ounce can chickpeas AKA garbanzo beans (drained and rinsed (I use the Eden brand))
  • 1/2 cup sundried tomatoes (chopped)
  • 2 tablespoons hemp seeds (hulled)
  • Black pepper (to taste)
  1. Tear kale leaves into pieces and put in large bowl.

  2. Add lemon juice, olive oil, garlic and sea salt, and massage everything into the kale leaves for 1-2 minutes, until the leaves are shiny, soft, and have reduced in volume by about half.

  3. Add the black pepper, nutritional yeast, chickpeas, sun-dried tomatoes, and hemp seeds and toss until evenly combined. Add more salt or pepper to taste. Enjoy!


My Trusted Health Providers & Top Resources to Help You Heal Your Body Naturally

If you missed it, be sure to check out my last post about the 8 Steps I Took to Heal My Heartburn and Acid Reflux Naturally after being on medication for almost ten years to suppress my symptoms.

Aligning myself with functional medicine practitioners has been the key to getting well and turning my health around. I truly believe that everyone can benefit from a more natual way of living that works alongside modern medicine. Finding natural ways to get rid of headaches, using big bongs and marijuana to help with stress and anxiety instead of pharmacutical medication, having a healthier diet and so much more can be done to help improve your lifestyle.

I have written about that aspect of my journey and functional medicine (including an awesome TED Talk!) in the past and offered this reflection in closing:

IMG_7791

I truly believe that because of what I’ve experienced in my own life.

As a follow-up to yesterday’s post about how I healed a decade of reflux, I wanted to share with you some excellent books, websites, and healthcare practitioners that have helped me and can help you move to the next phase of your healing journey.

1) Read a Book to Learn More

These are two of my favorite books on the topic of digestive health:

books

Think of Digestion Connection as more of a reference book than light Saturday morning reading material. Having said that, whether you’re dealing with reflux, diabetes or migraines, Digestion Connection is a great resource to have on hand to help you make sense of what’s really going on in your body and begin the healing process.

Dr. Lipski is one of the international experts on digestive health, and she is located right here in Maryland. Although she doesn’t take new patients anymore, she has a list of recommended nutritionists on her website that are spread out across the U.S. I’ve listed my favorite local (Baltimore-based) nutritionist below.

In Clean Gut, Dr. Junger explains digestive health, dysfunction and disease in a way that the average person can understand. He outlines how the digestive system works and how our digestive health is at the root of most illness and disease, even seemingly unrelated conditions like depression and asthma.

He offers guidelines for how to put yourself on an elimination diet and includes quite a few delicious recipes – several of which my husband Bill and I have tried and enjoyed.

Clean Gut's roasted kabocha and curried tahini sauce. SO good!

Clean Gut’s roasted kabocha and curried tahini sauce. SO good!

Another book that has influenced my thinking about disease and why we get sick in the first place is The Disease Delusion by Dr. Jeffrey Bland.

Every medical school should have this book as required reading. One of the underlying themes is a fundamentally different way of thinking about disease in the first place:

Our genetic inheritance tells us more about how we should live than about the chronic disease we are doomed to suffer. We are not doomed at all.

Dr. Bland’s approach focuses on taking away the things that are the problem (removing the tacks we’re sitting on!) and providing the things that are missing (giving our body what it needs to repair and heal).

diseasedelusion

2) Look Online

Here are some websites that contain great information about how to heal the “gut” naturally and address conditions like gastroesophageal reflux disease (GERD) as well as other chronic health concerns.

I’ve shared these links with dozens of other people who have come to me with questions about how I healed myself:

  1. Why You Have Reflux, Bloating, Gas and Burping and What To Do by Josh Gitalis
  2. 7 Steps to Reverse Acid Reflux by Dr. Mark Hyman
  3. 3 Simple Steps to Eliminate Heartburn & Acid Reflux by Dr. Mark Hyman
  4. 15 Natural Remedies for the Treatment of Acid Reflux and Ulcers by Dr. Joseph Mercola
  5. What Your Doctor Won’t Tell You About GERD by Dr. Amy Myers
  6. Get Rid of Heartburn and GERD Forever with 3 Simple Steps by Chris Kresser

3) Find a Doctor…& My Trusted Health Professionals!

If you want to find a healthcare provider who can help you consider ALL of the options for addressing reflux or whatever disease is troubling you and who can help you get to the ROOT of what’s going on in your body, search for a functional medicine practitioner near you using this link. Search by zip code vs. city. I find it works better.

Keep these things in mind:

  • Functional medicine practitioners may often recommend that you keep a Primary Care Physician (PCP) relationship for addressing other health needs, but they will be a fantastic complement to that doctor. Keeping your PCP within your health plan’s network can also help you order lab tests that may be covered through insurance but would otherwise cost more through an out-of-network provider.
  • Some participate with health insurance plans but some don’t, which means you will often have to do more than pay a $20 copay. Obviously, every health insurance plan is different – some of you may have a family plan, others may be in self funded health plans, the list goes on – so you will have to research what your policy covers and if your health provider participates or not. In other words, these practitioners are often “out of network.” I’ve found it to be cheaper to partner with them long-term, since I actually got answers and got better and, as a result, was able to stop seeing 5 other specialists who were very well-meaning but just helped me suppress symptoms. Call their office and ask if they participate with your insurance.
  • Ask what packages they offer. They may offer a certain number of sessions for a set fee, which often means not having to deal with insurance and have predictable payments. That can provide relief in and of itself.
  • Even if they are out of network, you can usually use FSA, HRA, HSA funds to pay for their services. You’ll just need to submit paperwork as you would for any other FSA/HRA claim.

top docs

Here’s my list of trusted professionals in the Baltimore area (pictured above in the order listed below):

  1. Dr. Mary Jo Fishburn (The first doctor I saw who did my nutrient testing and helped me on my healing journey. She is also an acupuncturist.)
  2. Dr. Janene Martin, Sunlight Natural Health (Naturopathic doctor who runs the clinic where my nutritionist, Kasia, works)
  3. Kasia Kines, Holistic Nutrition Naturally (My amazing nutritionist)
  4. Dr. Bill Rollow, University of Maryland Center for Integrative Medicine (My parents’ doctor)
  5. Dr. Gerard Mullin, AKA “The Food MD” (I’ve not yet met him but checked out his website and see that we align in our thinking about gut health.). He has written several books on digestive health that I want to check out, including The Inside Tract: Your Good Gut Guide to Great Digestive Health and has a new book coming out in June titled The Gut Balance Revolution.
  6. Nava Health & Vitality Center. Nava Centers are currently open in Columbia and Chevy Chase, Maryland and are opening soon in Rockville and downtown DC. Their approach combines the best of Eastern and Western medicine to help patients heal and optimize their health. Their leadership team and practitioners understand that the body is an interconnected system and take into account the WHOLE person, not just their overt symptoms. I’ve also been a guest blogger for them since last summer.

nava

There you have it! Those are the ways I’ve naturally healed my body and the additional resources I’d recommend you check out if you are tired of feeling frustrated about your health and about seemingly “normal” yet bothersome symptoms like reflux and want to start feeling better. Ultimately, having an excellent health insurance policy is a necessity as you never know when your health might take a bad turn. For this reason if you’re looking to compare insurance rates, it pays to shop around – visit Insurdinary.ca for details.

Disclaimer: I am not a medical doctor, and this information is not intended to diagnose, treat or cure any health condition. Rather it’s a reflection of what I have learned on my journey to heal my body. Never stop taking medication without consulting your doctor, as there can be negative side effects to doing so. If you have concerns about a particular health concern, including gastroesophageal reflux disease (GERD), I highly recommend seeing a health care provider who understands that there are and is open to trying alternative approaches to treating (and even reversing) reflux.

I want to hear from you! Have you had a physical healing experience that has transformed your health or life? Feel free to share your story below 🙂

Meal Planning Made Easy: Step 3…Get To It!

This is the third and final post in a series of three posts about how to make meal planning easy and doable. In case you missed the previous posts, here they are!

Step 1…Get Inspired

Step 2…Get Organized {Plus My #1 Meal Planning Tool!}

—————————————————————————————————————————————————

pinteresBy this point, we’re inspired and organized, so all that’s left for us to do is to “get to it” and get it done! 🙂

Check out my top tips below for how to make meal planning a reality!

1) Prep!

For starters, you can chop your fruits and vegetables when you get home BEFORE you put them away. Just think of it as an extension of your shopping trip. Since you already have your meal plan prepped, you know exactly what you need to do to each ingredient throughout the week. However, I realize chopping can be tedious and boring, especially if there’s a lot of fruit and veg to get through. Why not enlist the help of a vegetable chopper? It’ll save you plenty of prep time and saves you from boredom. If you’re unsure of what you’re looking for, check out what people are saying online about individual choppers, like this chopper review!

Making soup? Chop onions, celery and carrots.

Serving up a stir fry? Cook a pot of brown rice (set it and forget it!).

Having tacos on Tuesday? Brown your meat or cook your lentils if you’re going meatless.

Do you like smoothies? Measure out your dry ingredients (seeds, nuts, powders, dried fruit) at the beginning of the week, so you just have to dump them in the blender when you’re ready to whip up a nutrient-packed breakfast. Store them in the fridge.

Ingredients for everything from smoothies to snacks  prepped and ready for the week!

Ingredients for everything from smoothies to snacks prepped and ready for the week!

2) Pack & Store

This is where your mason jars come in handy. Once you’ve prepped and chopped all of your ingredients, grab a roll of masking tape and write what recipe that ingredient is for and stick it on the mason jar. Then, when it’s time to cook, the chopping is already done and you just have to dump it in!

We’re also fans of Pyrex bowls with lids and glass baking dishes. One of the prep and stores steps we take at the beginning of the week is chopping up a head of celery into stalks and a few carrots into sticks. Then, we put them in a 9 x 13 glass baking dish and fill the dish with water until the veggies are just about covered. We store it in the fridge for a week, so we have easy grab and go snacks.

Once the week wraps up, if we still have veggies left, we dump out the water, refill it and then enjoy the veggies for ANOTHER week. It’s a great way to extend the life of your produce 🙂

To pack and store food, we’re also fans of thermos’, since they can be used to keep food cold (like smoothies for breakfast) or hot (like soups for lunch). They’re not expensive.

If you don’t have one already, invest in an insulated lunch box to make it easier for you to transport healthy food with you no matter where you are.

3) Freeze It!

When it comes to meal planning and saving time and money, the freezer is your friend. Whether you’re prepping ingredients for crock pot meals ahead of time, storing leftover broth or soup, or using frozen fruit or vegetables, the freezer can come in handy. (BJs Wholesale Club has organic frozen fruits and veggies that we LOVE to use in our smoothies!)

If you’re storing liquids in the freezer in mason jars, just make sure you leave 2 inches of open space between the bottom of the lid and the top of your liquid, as the liquid will expand as it freezes. We don’t want broken glass jars or shards of glass in our freezer (although it has happened to me!).

Hearty Black Bean and Rice Stew that we froze and enjoyed over multiple weeks!

Hearty Black Bean and Rice Stew that we froze and enjoyed over multiple weeks!

Make a double batch of soup or stew or a casserole and throw it in the freezer. If you’re in a pinch one night or have a busy week it’s easy to just reheat it in the oven or on the stove.

4) Love Those Leftovers

This goes along with #3 above but uses up your fridge space, too! When you make a big batch of a casserole, soup, stew or other dish, store some in the fridge (what you know you’ll eat up in a few days) and freeze the rest.

Check out this page for a list of my soup and casserole recipes as well as a recipe for mini make-ahead frittatas – perfect for breakfast, lunch or dinner!

We love making batches of soup to have throughout the week, along with chopped veggies, energy bites, and paleo parmesan cheeze.

5) Make It Social

You can get really creative with this, but here are some ideas that have inspired me:

*Have a meal swap potluck party with neighbors or friends. Invite a small group of friends over (you could even do this with 1-2 other couples) and have each person prepare a dish or two. Then, bring your glass jars and containers, so you can take home a little bit of everything. It’s a great way to try new recipes and enjoy other people’s cooking.

*Use a meal planning tool like the one I shared in the second post in this series and plan meals together with coworkers, friends or family. I read on another blog that two moms did this while their daughters were at ballet lessons. They brought cookbooks and planned out the week’s meals together. It was a great way to bond and get stuff done!

My favorite meal planning tool!

My favorite meal planning tool!

*Have a crock pot party with a group of friends (everyone bring your crock pots together with the ingredients you need and then set it and forget it!). You could even make a day of it – prep in the morning, head out to do something fun and then come back to the mouthwatering smells emanating from your crock pots!

*Create a dinner party group and rotate who hosts the group. The host is responsible for the main dish and everyone else brings a simple side. Bring containers for leftovers!

6) Pump Up the Volume

I’ve always loved music, and rocking out in the kitchen to my favorite Pandora or other radio station is a great way to add some fun into a seemingly boring task…like chopping vegetables.

Working out is more fun with music (which is probably why I love Zumba so much), so why not apply the same way of thinking to cooking?! Time will fly, and you’ll have fun 🙂

7) Make Cooking Time Quality Time

Instead of cooking being something that “takes up time” or pulls you away from other ways you want to spend your time, make cooking time quality time – time to spend with your family and friends – with everyone having a task to do to help pull together a meal.

One of the easiest ways to make cooking time quality time is to pick a theme that makes it fun to be together. From Take Out Fake Out Thursday to Eat Like a Viking night, check out all of the ideas about how to “Get Inspired” from the first post of this series.

You can even host a cooking class at your house to bring friends and/or family together to learn new recipes and get inspired. Contact me here if you want to learn more about classes I can teach!

IMG_7040 (1)

8) Use a Meal Kit Service

If you like to cook but hate the idea of doing all of this prep, check out one of the meal planning kit services below! I also recommend taking a look at the benefits of home chef vs blue apron. You pay for the convenience of having everything done for you, but it may be worth it, even if just once a week. Meal prep and planning can be very tiring so a meal kit might be a great option for you if you have a busy lifestyle.

  1. BlueApron
  2. HelloFresh
  3. Plated

And, there you have it! Those are my 3 steps to make meal planning fun and time and money-saving. From getting inspired to getting organized and then finally “getting to it,” I hope you learned at least one new thing that will help you make meal planning easier!

Ok, now it’s your turn! Do you have any meal planning tips you’d like to share?What did you find MOST helpful from this series? Feel free to share below! I really do love hearing from you 🙂

Meal Planning Made Easy: Step 2…Get Organized

As I shared in my first post in this series, Meal Planning Made Easy: Step 1…Get Inspired!, meal planning doesn’t have to be a drag or feel like a chore…it can even be FUN once you start to get some creative ideas flowing 🙂

In today’s post, I’m going to tell you about my absolute FAVORITE meal planning tool. It makes meal planning and easy and even gives you the option to print a shopping list directly from the site!

Let’s take a look at my top 3 tips to Get Organized!

1) Tackle your toolbox.

I’m not talking hammers and nails here, but the truth is, if we want to plan and start cooking our meals, we have to have the right tools in our kitchen to make prepping and cooking easier and more efficient.

Here are my top 6 tools: (1) glass mason jars for food prep, storage and freezing; (2) a chef’s knife; (3) crock pot; (4) high-speed blender; (5) food processor; and (6) thermos (to transport hot & cold food!).

kitchen tools

The key to using these tools is to make them accessible. If they’re stowed away in a closet in your basement, you won’t use them. Trust me. Put them on the countertop or on a table in your kitchen or dining room. If they are easy to access, you will be much more likely to use them!

2) Clean out & restock your pantry.

I like to think of my approach to eating as “common sense nutrition,” so here’s a simple rule of thumb – If you keep healthy food in your house, you will eat healthy food. If you keep junk food in your house, you will eat junk food.

Start with a pantry clean out and toss anything that is expired or that you don’t use. (That would include your jar of sage from 2003 🙂) Ask yourself,

“Does this support my healthy goals? The person I want to be? How I want to feel?”

If the answer is “no,” toss it. Make it easier for yourself to make healthy choices!

I’ve shared my top 10 everyday pantry essentials and my top 11 sweet treat staples in previous posts, so check them out if you want to know some staples I always have on hand in addition to the basics like beans, lentils, peas, brown rice, and quinoa.

pantry staples text

3) Use a Meal Planning Tool!

My favorite is Plan to Eat. I introduced it to my coworkers a few weeks ago, and they LOVED it. Here’s why!

  1. Add Recipes: You can add your own recipes manually, use the Plan to Eat bookmark bar just like the Pinterest pin icon to automatically upload whatever recipe you’re viewing into your recipe book, or paste a URL from a recipe website into the box on the Recipes page using the Add Recipe button.
  2. Plan Using the Calendar: Drag and drop your recipes into the calendar and plan meals for a day, week or for several months!PTE
  3. Printable Shopping List: As you add recipes to your planner, the shopping list will update and add in all ingredients you need for each meal. You end up with an organized, easy to follow shopping list that you can print out and take with you to the store. You can check off items you already have and even add certain items to your grocery staples list.
  4. Add Stores: Do you shop at multiple stores? No problem! Add each store to your list and you can move items on your shopping list to the store where you buy them.
  5. Get Social: You can Add Friends, which lets you access each other’s recipes.

They don’t have an app, but the website is 100% mobile-enabled, so you can easily use it from any device.

You can sign up for a free 30-day trial to try it out yourself before you commit. They don’t take your credit card info ahead of time like other websites do, so it really is free. The cost for an annual membership is $39. Renew on Black Friday to get a year for $19!

Check out the quick video below to learn more about how Plan To Eat works and see it in action!

If you’re interested in checking out meal planning apps, take a look at MealBoard or Paprika. I can’t speak from experience on those, but they do have good reviews online.

In my final post of this series, I’ll be sharing some practical tips for how to actually “Get To It” and start putting the ideas in steps 1 and 2 into practice!

What’s your favorite meal planning tool? Do you have any tips you’d like to share?

Meal Planning Made Easy: Step 1…Get Inspired!

This is the first in a series of three posts about my top tips for meal planning. Planning our meals is one of the keys to eating healthy, saving time and money, and taking the stress out of mealtime!

—————————————————————————————————-

We have lots of priorities and commitments that demand our time, attention, and energy, but we only have so much we can do in one day.

It can be easy to let something like food slip into the lower level of those priorities, especially if we associate it with being stressful and having to do more work.

A recent study found that 85% of people said eating a healthy dinner was important to them, despite the fact that fewer than 50% were reaching that goal.

Easy healthy dinner idea!

Easy healthy dinner idea!

So, where’s the disconnect?

We’re not cooking...

But why?

Many people don’t cook because they don’t think they can, others rely on a partner who does all the cooking, some hate cleaning up the mess or say they don’t have time to cook, and most think going grocery shopping takes too much time.

guy fieri

Let’s talk about time.

In 2013, the average American, regardless of weekly earnings, watched 2-3 hours of TV per day.

Hear me out on this one.

This isn’t about guilt, blame, shame, or condemnation – I’m never about those things on this blog. And I like watching Jimmy Fallon, The Voice, and Top Chef as much as the next person.

This is about taking a step back and being honest with ourselves. Here’s the reality:

If we want to have ENERGY, feel GREAT and be HEALTHY, then we have to make food a priority.

It’s not about having time, it’s about making time. Each of us has 24 hours each day – no more, no less.

The idea of meal planning initially SEEMS time intensive, but trust me, once you make it a habit, you will be amazed by how much money (AND time) you save, how much healthier you eat, and how calm and unstressful mealtime can become.

Remember, if food is what fuels and nourishes us throughout the day, and we want to feel energized, then taking ownership over what we eat by planning and preparing our meals is the #1 way to get there.

Inspired by The Kitchn, an awesome website for all things cooking, food, and tips and tricks, I want to share with you 3 keys to get you excited about meal planning!

  1. Get Inspired
  2. Get Organized
  3. Get To It

*Get Inspired*

1) Grab a cookbook! If you want to take the intimidation factor of meal planning and cooking down a notch, just use ONE cookbook to pull recipes from instead of spending hours searching online. Five Below often has great deals on Paleo and other healthy cookbooks.

Take Action: Here’s a post I wrote about some of my top picks for healthy & delicious cookbooks.

IMG_6709

2) Use recipe templates. The Environmental Working Group and a grad student from NYU have created two handy guides that you can use to find healthy recipes for breakfast, lunch, dinner, and snacks. What I like about templates is that they give us flexibility and can take some of the stress out of cooking for fear we will “mess up.”

Take Action: Click here to go to the full post I wrote about eating healthy on a budget to access the 2 FREE guides or click on the links below:

Good Food on a Tight Budget Recipes

Eat Well on $4/Day: Good & Cheap Guide

3) Pin It! If you like Pinterest (it took me awhile to warm up to it), that can be a great place to go for inspiration and specific searches.

Some of my top words and phrases to search on Pinterest are: “paleo,” “dairy-free,” “vegan,” “gluten-free,” and “clean eating” plus whatever ingredient I want to use or cuisine I’m in the mood for (i.e., Mexican, Indian, Chinese, etc.). Anything that is paleo or vegan will, by definition, be dairy-free, too (except butter, the paleo way of eating includes grass-fed butter).

Take Action: Click here to follow my boards on Pinterest!

pinning recipes

4) Make It FUN and follow a theme. Meatless Monday, Taco Tuesday, Wacky Wednesday (Viking Night – eat with your hands!), Take Out Fake Out Thursday (stir fry, make your own healthy pizza station, make your own salad station), Fish or Fiesta Friday, Souper Saturday, and Casserole or Crockpot-Style Sunday are just a few ideas to get you started.

Take Action: Pick ONE theme idea that appeals to you. Try it out next week and see how you like it!

Come back tomorrow as I share my top tips to help you “Get Organized” as well as my FAVORITE meal planning tool and how you can get it free for 30 days! 

Which of these ideas is most helpful to you? I’d love to hear from you!

Page 4 of 7

Powered by WordPress & Theme by Anders Norén