Deprecated: Creation of dynamic property GD_SEV_Plugin::$__FILE__ is deprecated in /var/www/wp-content/plugins/search-engine-visibility/classes/plugin.php on line 19

Notice: Function _load_textdomain_just_in_time was called incorrectly. Translation loading for the social_sharing domain was triggered too early. This is usually an indicator for some code in the plugin or theme running too early. Translations should be loaded at the init action or later. Please see Debugging in WordPress for more information. (This message was added in version 6.7.0.) in /var/www/wp-includes/functions.php on line 6121

Deprecated: Creation of dynamic property SocialSharing_Projects_Controller::$models is deprecated in /var/www/wp-content/plugins/social-share-buttons-by-supsystic/vendor/Rsc/Mvc/Controller.php on line 28
Recipes Archives · Page 15 of 24 · Rachel's Nourishing Kitchen

Category: Recipes Page 15 of 24

Chai-Spiced Yogi Tea: How to Make It Yourself (SO EASY!)

I love tea.

There’s something calming and comforting about wrapping your hands around a warm cup of herbal tea, especially chai tea.

IMG_6853

I used to get chai tea and chai tea lattes from Starbucks this time of year, but my recipe assignment last week for the culinary nutrition program I’m taking gave me a chance to make it myself!

All I can say is WOW.

I had never made my own tea before, but this recipe is definitely a game changer, AND it was super EASY!

IMG_6844

First of all, the recipe makes 8 cups of tea, which is enough for at least half of a week for me. Here are a few more reasons to try this recipe for yourself at home:

  • The spices in this recipe and the ginger are cleansing, healing, comforting, and warming to the body – perfect for this time of year! For more information about the incredible health benefits of the spices in this tea, click here.
  • Cinnamon, ginger, cardamom, and cloves simmering on the stove smells AMAZING.
  • It’s cheaper than buying tea by the box!

If you’d like, you can also add in your favorite non-dairy milk, but I just drank it as is. Deeelicious!

I’ve already made it twice in two weeks and will be serving it t0 everyone attending my cooking class tonight.

Yogi Tea

Ingredients (8 cups)

  • 8 cups water
  • 6 cinnamon sticks
  • 2 tablespoons cardamom seeds (pop them out of the pods for stronger flavor (that’s what I recommend) or use whole pods for a milder flavor)
  • 2 tablespoons whole cloves
  • 2 inches fresh ginger root (sliced)
  • 1/4 cup raw honey
  • almond milk as desired

Here’s the full recipe from the awesome Meghan Telpner! Just make sure you strain it with a fine mesh strainer as shown above after simmering everything. We don’t want to be eating cinnamon sticks 🙂

*Helpful Hint: I buy my spices in the individual jars at MOMs Organic Market; you can also find them at Roots Market and other natural food stores. It’s MUCH cheaper than buying an entire jar of something when you only need 1 or 2 tablespoons or a few sticks. You can also order spices online, but a natural food store near you should have fresh spices in bulk if your grocery store doesn’t.

IMG_5712

My Husband Faces His Fears…And Celebrates with This No-Bake Peanut Butter Cup Pie {Vegan, Gluten-Free}

Sometimes we experience moments in our lives that are so profound, so impactful that we can’t help but be affected by them.

I experienced one of those moments today.

Bill and me

My husband, Bill, faced some of his biggest fears today as he humbly yet commandingly held the attention of a room full of people, sharing his story of growth through community over the past 6 years.

When our pastor and friend, Ryan, called Bill 3 weeks ago to ask if he would share his story at church, he stepped up to the challenge, despite his fears and reservations.

Like many people, Bill has had a lifelong fear of public speaking. And like most men, he wasn’t exactly jumping at the opportunity to share his thoughts and feelings with a room of over 100 people. When Bill was first asked, he panicked and decided he needed some proper training, so he spent the following twenty minutes googling public speaking courses. He found some good ones, but they were all UK based (Here’s some great public speaking courses to attend in London if these are of interest to you!). However, I managed to calm him down and he came round to the idea of no training and just practicing with me instead.

Being emotionally vulnerable isn’t something our culture encourages men to do, and those who do put their fragile egos at risk.

Bill opened up by highlighting the irony of how he can easily speak in front of a room of elementary school students in his job as a phys ed teacher, where conversations typically consist of debates over who did what, who likes whom or who has to go to the bathroom.

Speaking in front of a group of peers is an entirely different ballgame.

He shared how he used to be terrified of speaking in public. He would intentionally sit on the outskirts of a room full of people in our small group, sometimes dozing off as a result of the heat in the room, hoping to go unnoticed and not be asked to contribute to the discussion.

He talked about how he grew in his understanding of what it really means to be a man in a guys’ group he was a part of through our church as he studied the book The Way of the Wild Heart.

He got choked up as he shared how he felt years of emotional burdens lifted as he and the guys in that group shared their stories and struggles with each other.

He opened up about the impact of a retreat we went on last September on our ability to communicate more effectively and lovingly as a couple.

In Rhinebeck, New York for the Getting the Love You Want couples retreat

In Rhinebeck, New York for the Getting the Love You Want couples retreat

Sometimes what we are so afraid to share with other people is the very thing that will connect us to them, the very thing they are so frightened to unveil themselves.

Sometimes it just takes one person with the courage to be vulnerable.

I’m so proud of my husband for being that person.

I’m proud of the man Bill has become and the leader he is in our relationship, in his job, and in our church.

I’m proud of the example he sets for what it means to be a humble, teachable, gracious, forgiving, kind, caring and loving man.

I’m proud to be his wife.

Sometimes I wonder how I got so lucky.

I wanted to celebrate him and what this milestone means, so we grabbed brunch at one of our favorite places – Atwater’s – and I gave him a card letting him know how proud of him I am.

When we got home, I served him this pie. Bill and I both love the combo of peanut butter and chocolate, so we had eyed up this recipe before. I thought today would be the perfect day to make it for him.

If you like peanut butter and chocolate, you need to know about this pie. Talk about an indulgence! It’s chocolately, peanut buttery (trust me, it’s a word), and decadent.

no bakepeanut butter pie IMG_7936

Tempted to try it? Click here for the recipe**! I used cacao powder (not cocoa powder) because it has more health benefits! Click here to learn more about why CACAO is better than COCOA.

**I added 1/2 teaspoon of vanilla extract to the filling. For the crust I ground up 1.5 cups of whole almonds in my food processor until it was a fine consistency because I didn’t have any almond meal. Then, I just added the other crust ingredients to the food processor to combine them before pressing it into the bottom of the pie plate.

Sign Up for My First LIVE Cooking Demo on December 5th: Energy-Boosting & Inflammation-Busting Recipes!

I’m SUPER excited to share this post (and am pinching myself that this is actually happening!!). 🙂

I’m ready to kick off my FIRST event to share what I’ve learned about how to use food for energy and healing along with 6 yummy recipes that you’ll get to try and learn how to make yourself.

I wanted to make sure YOU, my loyal blog followers, knew about it before anyone else.

On Friday, December 5th from 7:00-9:00 pm, I will be hosting a LIVE 2-hour, interactive healthy cooking demo in the Overlea/Fullerton area in Baltimore. Check out the description below to see what you can expect if you come! I have space for 8 people, so make sure you sign up below if you want to be a part of it 🙂

Inflammation-Busting, Energy-Boosting Upgrades

IMG_7825

Creamy Alfredo sauce. Cheezy pesto. Chewy pecan pie bites.

What do all of these foods have in common?

#1 – They’re decadent and delicious.

#2 – They’re nourishing, satisfying, and anti-inflammatory.

#3 – They’re gluten-free and dairy-free.

#4 – You’ll learn how to make all of them (plus 3 more recipes!) if you join my cooking class on Friday, December 5th!

For many of us, inflammation is triggered by foods we eat every day and is one of the main reasons many of us are prone to getting sick or holding on to weight.  Symptoms we think are “normal” because they’re common – like asthma, allergies, pain, swelling, joint pain, reflux and even headaches – can often be linked back to inflammation, a “fire” inside our bodies.

From overcoming chronic bronchitis, acid reflux, and ear infections to achieving long-term weight loss, clear skin, and all-day energy, I’ve learned the secrets to eating in a way that helps the body “cool” the fire inside, and I want to share them with you!

Photo courtesy of Photography by Kat

Photo courtesy of Photography by Kat

Join me for this interactive, 2-hour workshop as we explore:

  • The top foods that trigger inflammation and keep us sick and overweight AND foods that fight or “cool” inflammation in our body
  • How to make a kale salad that will convert any kale hater into a lover
  • How easy it is to make your own noodles
out of zucchini!
  • The gadget I use to make mincing garlic a cinch and get rid of that lingering garlic smell on your fingers!
  • The secret ingredient in my creamy Alfredo sauce
  • A quick recipe that a recovering Parmesan cheese addict uses as a substitute
  • My favorite sweet treat that creates a caramel taste and texture
naturally!

**The cost is $40 per person and includes the demo, tastings, recipe packet, and handouts. The class can hold 8 people, so sign up below by noon on December 4th if you want to reserve your spot!**

Go back

Your message has been sent

Warning
Warning
Warning

Warning.

Pecan-Crusted Sweet Potato Casserole {Paleo, Vegan}

pecans

From butternut squash soup and roasted Brussels sprouts to pumpkin spiced anything to comforting chilis and stews, I LOVE fall food!

We had a Thanksgiving lunch at work this past week, and one of the dishes was a sweet potato casserole topped with pecans. That’s what inspired me to create this dish.

I’m a big fan of sweet potatoes and pecans, especially since both are so nourishing and fueling to our bodies.

IMG_6814

Sweet potatoes have lots of health benefits. They are…

And, the most unscientific benefit…

They are REALLY DELICIOUS 🙂

Mashed sweet potatoes + pecans = sweet, creamy, crunchy and satisfying…comfort food at its finest.

You don’t even need any super fancy gadgets to make this Pecan-Crusted Sweet Potato Casserole, just a basic hand mixer.

Sweet potatoes name

Pecan-Coated Sweet Potato Casserole

This dish is one of our family favorites at Thanksgiving or anytime you want to highlight the flavors, colors and textures of fall. 

Filling

  • 4 large sweet potatoes
  • 1 cup full-fat coconut milk (unsweetened)
  • 3 tablespoons pure maple syrup
  • 1/2 teaspoon vanilla extract
  • 1/2 tablespoon ground cinnamon
  • 1/8 teaspoon ground ginger
  • Pinch nutmeg
  • 1/4 teaspoon fine grain sea salt

Topping

  • 1 cup pecans (chopped)
  • 3/4 cup almond flour or almond meal
  • 1/2 teaspoon ground cinnamon
  • 3-4 tablespoons coconut oil (solid, so it crumbles)
  • 1/2 tablespoon pure maple syrup
  • Pinch sea salt
  1. Preheat oven to 400F.

  2. Poke holes in the sweet potatoes with a fork and place on a parchment or foil-lined baking sheet. Bake for 1 hour, or until fork tender. Allow to cool slightly then peel the skin off the sweet potatoes.

  3. Reduce oven temperature to 350F. 

  4. Place the sweet potato pulp, coconut milk, maple syrup, ground cinnamon, vanilla extract, ginger, nutmeg, and sea salt in a bowl and beat with an electric mixer or in the bowl of a stand mixer, until thoroughly combined and fluffy. Taste and adjust sweetness/spices if needed.

  5. Grease an 8×8 baking dish with coconut oil (or grass-fed butter or ghee) and pour sweet potato mixture into the dish.

  6. In a separate bowl combine the pecans, almond meal/flour, coconut oil, maple syrup, cinnamon and sea salt with your hands until it comes together as a crumble.

  7. Sprinkle pecan mixture on top of sweet potatoes and bake for 18-20 minutes or until the topping is lightly browned. Serve warm.

If you prefer to steam the potatoes instead of roasting them, use this method.

Do you have a favorite sweet potato recipe?

Feel free to share it below! I love hearing from you 🙂

Healthy Thanksgiving Recipes: Gluten Free, Dairy-Free, Paleo

Happy Thanksgiving, friends! It’s my favorite food holiday and a wonderful time to reflect on what matters most and what we value and appreciate.

I have a lot to be thankful for, including all of YOU who have been SO supportive of me and my continued work on this blogging adventure.

I am SUPER excited to spend most of the day in the kitchen Thursday preparing yummy and nourishing food for my family. I love them and want them to be well!

thanksgiving-1733126_1920

I love how colorful the Thanksgiving plate can be, how amazing our house smells as everything is cooking and all of the flavors are coming together, and taking the time to reflect on what matters most to me.

Here are a few of the recipes I’ve shared on the blog before (and some I haven’t!) that would be perfect for your Thanksgiving dinner 🙂 Just as a little reminder, all of these recipes are dairy-free and gluten-free, so just about anyone can enjoy them!

Thanksgiving Recipes

  1. Roasted Butternut Squash with Kale and Almond Parmesan
  2. Maple Roasted Brussels Sprouts
  3. Butternut Squash and Quinoa Harvest Salad
  4. Taste the Rainbow Kale Salad
  5. Pecan-Crusted Sweet Potato Casserole
  6. Paleo Pumpkin Cheesecake Squares
  7. Maple-Glazed Delicata Squash
  8. The Ultimate Gluten-Free Bread Stuffing {Paleo}
  9. Cran-Apple Quinoa Salad
  10. Paleo Pumpkin Muffins & Bread
  11. Shredded Brussels Sprouts Salad with Walnuts
  12. Stuffed Sweet Potatoes
  13. Green Beans Almondine
  14. Roasted Garlic Cauliflower Mash
  15. Brussels Sprouts with Shallots, Cranberries & Pecans
  16. Protein-Packed Pumpkin Spice Dip
  17. Melt In Your Mouth Apple Crisp
  18. How to Make Your Own Pumpkin Puree
brussels-salad-angle


Shredded Brussels Sprouts Salad with Walnuts

People often ask where I look for recipes when I’m trying to come up with ideas. Here are a few of the blogs I will be getting inspirations from this Thanksgiving. Check out the recipes and let me know if you end up trying out any of them!

Healthy & Gluten-Free Recipes from The Detoxinista

I love so many of her recipes and try out at least one of them every couple of weeks. I’m excited to try out her Clean Green Bean Casserole (cut back on the sodium – it’s a LOT!), No-Bake Pumpkin Pie Tarts, and Grain-Free Stuffing, but she highlights a full list of 10 of her favorites here, so be sure to check it out!

Grain-Free Thanksgiving from Against All Grain

I made a recipe for a dense, moist (everyone’s favorite word, right??) pumpkin bread that I saw blogger and author, Danielle Walker, post on Facebook and brought it to my church for our annual Thanksgiving dinner tonight. SO worth it!

Not only that, but Danielle is offering a completely grain-free Thanksgiving recipe ebook for sale on her website for less than $5! Many people who have digestive challenges feel better when they at least temporarily eliminate grains from their diet.

Against All Grain's Pumpkin Bread (Nut-Free, Grain-Free & Dairy-Free!)

Against All Grain’s Pumpkin Bread (Nut-Free, Grain-Free & Dairy-Free!)

Nourishing Meals by Tom Malterre

What caught my eye was this mouth-watering picture of an Apple Cider & Herb Brined Turkey. This Wild Rice Stuffing recipe with apples, cranberries, and sage looks (and sound tasty), too, so I may try it!

I also happen to think the two Nourishing Meals cookbooks are FANTASTIC, and I highly recommend them.

Our Paleo Thanksgiving by realfoodwithdana

I’ve been following Dana’s work on Instagram for the past few years and have gotten to meet her in person at the Natural Products Expo East several times. She focuses on paleo recipes (no beans, grains, dairy, refined sugar or processed foods), and she is fun and funny, too. If you’re not already following her on instagram, you can do that here.

In this post, she shares over 50 paleo-friendly, mouthwatering Thanksgiving recipes that you will definitely want to check out to upgrade your menu.

Nomtastic Thanksgiving Recipesfrom nomnompaleo

I love the playful vibe of this blog and appreciate how simple and fun their approach is. Their Roasted Garlic Autumn Root Vegetable Mash, Brussels Sprouts Chips (um, yes, please!!) and Cran-Cherry Sauce are all on my list of menu possibilities.

Vegan Thanksgiving Recipes from oh she glows

Angela posts amazing recipes (and beautiful photos). I made my own version of a sweet potato casserole tonight but think this one looks pretty awesome, too! This Gooey Pumpkin Spice Latte Chocolate Pudding Cake sounds as incredible as the pictures look and may be worth trying.

And now for a little gravy on top…

For whatever reason, I’ve never been a fan of gravy, but I know it’s most people’s favorite thing about the meal, so here is a recipe for a gluten-free gravy and another for a vegan mushroom gravy recipe to check out! Both have good reviews. Bon Appetit also wrote a simple post about how to make gluten-free gravy, and you can check it out here.

What’s YOUR favorite Thanksgiving dish? Feel free to leave a comment below 🙂

Zucchini Pasta with Cauli-fredo Sauce!

IMG_6721

The past two weeks have been a bit of a whirlwind.

I haven’t felt quite like myself because I’ve been stretching myself too thin.

All of the projects I’ve been working on have been amazing opportunities, but when I said, “yes” to them separately about 2-3 months ago, I didn’t realize they would ALL end up happening within the same week in November.

I have SO much I want to write about and a ton of new recipes to share, but a few wise friends and family members have suggested that I s-l-o-w d-o-w-n a bit and take a moment to breathe amidst this craziness.

That’s why you may notice fewer blog posts until things calm down and my schedule gets back to normal in the next 2 weeks or so.

One of the things I’m working on is a series of posts about “My Favorite Things,” where I’ll share my favorite gadgets, stocking stuffers and cookbooks, just in time for holiday shopping 🙂

I’m also working with a web designer to do some pretty cool things to this blog over the next few months, and I’m really excited to see what happens with that!

I can’t write this post without mentioning that my husband has been nothing short of a saint over the past few weeks in particular, and I’m so incredibly grateful for his support, encouragement and patience. I am very, very blessed.

IMG_6318

Although I’ve felt stretched and stressed lately, I’ve gotten to do some really fun and exciting things…many of which were milestones that I couldn’t have imagined happening a year ago!

  • I trained the staff of a local restaurant to understand the differences among some current dietary trends and types (like paleo, vegetarian, gluten-free, vegan)
  • I facilitated a documentary movie night at my church where a group of about 20 of us watched Food, Inc. and enjoyed some healthy snacks, including my favorite caramel apple dip and this kickin’ buffalo hummus
  • I taught my FIRST full cooking class in my friend’s kitchen for a party at her house. I showed the group how to make my favorite kale salad, caulifredo zucchini noodles (recipe below!) and hazelnut truffles.

IMG_7758

The process of planning out and prepping for a cooking demo is intense, and I have a new appreciation for anyone who has their own cooking show and what goes into making that happen.

Phew! It’s definitely a lot of work…but I LOVED having the opportunity to teach the group through hands on cooking.

The most rewarding part of the whole experience was hearing people say things like, “Oh my gosh, this is amazing!” and “I’m shocked by how good that tastes.” 

It’s so fun to see people get excited about eating nourishing food!

We got to play with my NEW favorite kitchen toy (a Paderno Spiralizer) during the demo as we made our own zucchini noodles in seconds. I’ve included a video below for how to use it.

https://www.youtube.com/watch?v=XbLHyAY_KRI&feature=youtu.be

Zucchini noodles are a great alternative to pasta because they don’t spike our blood sugar or contain gluten like most pasta. You’ll be AMAZED at how similar the texture is to pasta…you can still twirl it on your fork, too! The spiralizer is something you’ll want to add to your wish list.

We topped the zucchini noodles with this creamy cauliflower alfredo sauce. It’s a variation of a recipe I shared earlier this year, but I made some tweaks to improve it! I think you’ll love it.

Enjoy!

caulifredo

IMG_6721

Ingredients

  • 4 zucchini, spiralized using this awesome gadget! (You could also sub in your favorite gluten-free pasta of choice – we like the Tinkyada brown rice pasta)
  • 2 teaspoons coconut oil

Caulifredo Sauce

  • 3 cloves garlic, minced
  • 1 tablespoon coconut oil, ghee/clarified butter or grass-fed butter
  • 1 head cauliflower, chopped into florets (here’s how to break apart a head of cauliflower in seconds!)
  • 1 cup water
  • 1 teaspoon sea salt
  • œ teaspoon onion powder
  • 1 generous pinch of pepper, to taste
  • juice from 1/2 lemon (about 1.5 tablespoons)

Directions

  1. Sauté the minced garlic in coconut oil or butter in a medium saucepan over low heat. Allow to cook for a few minutes, until the garlic is tender and fragrant but not browned.
  2. Add the 1 cup of water to the saucepan, along with the cauliflower florets, and bring the water to a boil. (The water will not cover the cauliflower, but that’s okay.) Once the water is boiling, reduce the heat to a simmer and cover the pot for 12-15 minutes or until the cauliflower is fork-tender and very soft.
  3. Transfer the entire contents of the saucepan into a blender or food processor, and season with salt and pepper. Add in lemon juice and onion powder. Process until very smooth and creamy, with a texture similar to traditional cream sauce. (Always be careful when blending hot liquids– the steam pressure can blow the lid off your blender!).
  4. Season with additional salt and pepper, if desired, and serve hot. If it seems thick, add more water. If it seems dry, add a liberal drizzle of olive oil.
  5. Place spiralized zucchini in a medium-sized frying pan greased with coconut oil, and stir for 3-4 minutes or until zucchini takes on a cooked pasta texture, sort of wilted and soft. Be careful not to overcook.
  6. Transfer zucchini noodles (AKA “zoodles”) to a plate or bowl and pour sauce on top. Sprinkle this 3-ingredient paleo parmesan cheeze on top and start eating!

Rainbow Super Food Kale Salad {Paleo}

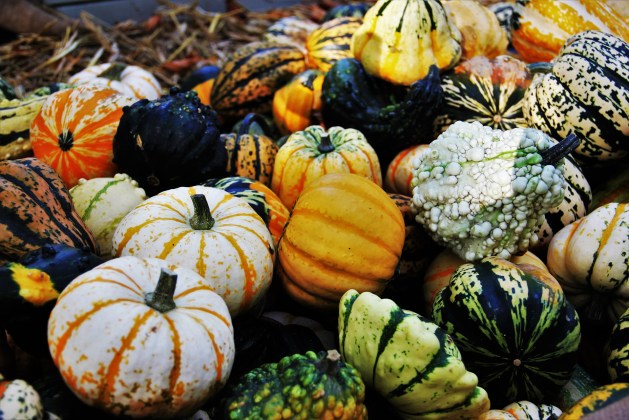
Today’s post is inspired by Skittles.

Skittles-Wrapper-Small

Whenever I hear the phrase, “Taste the Rainbow,” I always think of Skittles.

They were one of my favorite candies as a kid, especially the purple and red ones!

Not so fun when you reach a wet hand into a bag of Skittles after an hour of swimming at the pool in the summer though… 🙂

Okay, so this post isn’t exactly about Skittles, but this recipe and the chewy bite size candies do have one thing in common…

IMG_7825

They are both very colorful…and look like a rainbow!

I taught a group of a dozen coworkers how to make this kale salad last week and they LOVED it!

In fact, there wasn’t any left for me by the end of the demo – which is a good sign! Here’s what one of my coworkers said about the salad:

“I have a new appreciation for kale. I never eat it but the salad today was so good. I also want to start making my own dressings and that was fabulous.”

See what I mean?? You have to try this salad!

IMG_7833

So, what inspired this recipe?

I’m currently going through a certification program to become a Culinary Nutrition Expert, and one of our assignments has been to focus on a particular health condition and come up with recipes and meal plans that would help someone with that issue.

I chose inflammation.

If you’ve ever had any kind of “itis” (dermatitis, laryngitis, bronchitis, colitis, rhinitis, gastritis, arthritis, thyroiditis, etc.), you’ve dealt with inflammation.

Our body is really smart, and it’s naturally designed to protect us from harm.

At its most basic level, inflammation is the body’s response to an attack from a “foreign invader,” such as an injury, infection, bacteria, or virus. It’s designed to help us fight the bad guys, so we can stay healthy.

We want our body to respond with inflammation temporarily when we do something like sprain our ankle or scrape our knee. Inflammation brings a rush of blood, nutrients and fighter white blood cells to the area to start the repair and healing process.

IMG_7814

For many of us though, inflammation is driven in part by the food we eat (and don’t eat). Most of the Standard American Diet (abbreviated SAD) is full of pro-inflammatory processed, refined foods loaded with chemicals most of us can’t pronounce and would be more likely to find in a lab than a farmer’s market.

If we can reduce inflammation, we set ourselves up to be much better at preventing or delaying disease and even getting to a healthy weight. Dr. Mark Hyman has written extensively about inflammation and how to reduce it. Click here to learn more from him.

The key dietary recommendation to heal or “cool” inflammation is to consume an unrefined, whole food (ideally organic), high fiber, plant-rich diet, which naturally stabilizes our blood sugar (and energy levels!) – another key to keeping inflammation at bay.

When I was creating this recipe, I focused on making it an anti-inflammatory powerhouse, something that your body would love for you to eat…and that would taste amazing.

Crunchy, creamy, sweet, and the slightest bit salty, this salad has all of the flavors and textures we crave and love.

IMG_7819

I’m about to get a little nerdy here, but just go with it 🙂

The healing foods in this recipe contain anti-inflammatory compounds like antioxidants, polyphenols, and flavonoids that not only help us reduce inflammation but also boost our immune system, slow the aging process, sustain our energy, and regulate our weight.

Here are just a few reasons why you’ll want to upgrade your diet and add in this super nourishing salad that’s loaded with immune, beauty and energy-boosting ingredients!

  • Avocado, hemp seeds, tahini, pumpkin seeds, and extra virgin olive oil are excellent sources of anti-inflammatory fats that are not only good for our body but also for our brain (our brain is 60% fat!).
  • The sulfur-containing compounds in garlic are also anti-inflammatory and immune-boosting.
  • Leafy green vegetables like dino kale contain flavanoids and antioxidants that reduce inflammation in the body.
  • Isothiocyanates (eye-so-thio-CYA-nates), sulfur-containing phytochemicals found in red cabbage, regulate the body’s inflammatory response.
  • Turmeric contains over two dozen anti-inflammatory compounds, the most powerful of which is the antioxidant curcumin, which gives it its bright yellow color.

Ok, now that you’re super stoked about eating anti-inflammatory foods, here’s the recipe! Bring it to your next potluck or holiday party – it’ll be a hit!

taste the rainbow salad

IMG_7839


Taste the Rainbow Kale Salad

This is my #1 favorite salad of all time and is always a hit at parties and potlucks. Packed with anti-inflammatory ingredients and full of flavor, this salad will turn any kale hater into a fan in no time!

Creamy Lemon Tahini Dressing

  • 3 tablespoons tahini
  • 3 tablespoons fresh lemon juice
  • 1 tablespoon maple syrup (or raw honey)
  • 1 tablespoon tamari ((gluten-free soy sauce))
  • 1/2 teaspoon turmeric
  • 1 pinch crushed red pepper flakes
  • 2 garlic cloves (peeled and minced)
  • 1/4 cup olive oil (extra virgin)

Salad

  • 1 bunch kale (dino kale is best)
  • 1 cup purple cabbage (shredded)
  • 1 cup carrots (shredded)
  • 1/2 cup raw pumpkin seeds
  • 1 avocado (diced)
  • 1/4 cup hemp seeds (shelled)
  • 1/4 cup goji berries or dried cranberries
  1. Whisk all dressing ingredients together in a bowl OR place them in a blender for 30 seconds until smooth. Taste and make adjustments to dressing, if necessary. Add a few tablespoons of filtered water to thin it out if needed. I like mine thick.

  2. In a large bowl, place kale greens and add dressing. Massage dressing into kale leaves for about 2 minutes (until volume reduces by about 1/3). Add purple cabbage and toss to coat. Let sit for 15-30 minutes, so the dressing can continue breaking down the kale and cabbage.

  3. When ready to serve, add in shredded carrots, pumpkin seeds, avocado, hemp seeds, and goji berries (if using). Toss to combine.

This salad will stay good for about two days in the refrigerator. The heartiness of the kale greens prevents it from wilting like other salads would.

Double this recipe if you’re bringing it to a party!

You can add in any vegetables you like. Try this salad with some diced bell peppers, chopped broccoli, cooked sweet potato cubes or other vegetables. To make more of a complete meal, add in your favorite animal or plant-based proteins (chicken, salmon, lentils, beans, tempeh). Chickpeas or white cannellini beans would pair well with this salad.

5-Minute Chocolate Hazelnut “Nutella” Truffles {Vegan, Paleo}

truffle 2IMG_7697

I was always a little weirded out by the Ferrero Rocher candy, each piece individually wrapped in gold foil.

As a kid and teenager, I was more interested in things like Sour Patch Kids, Twix, and Peanut Butter M&Ms than some mysterious, fancy, gold-wrapped chocolates.

I’m pretty sure I didn’t know what a hazelnut was either.

I never knew if I was pronouncing it correctly either.

Apparently, I’m not alone. Over 20,000 people have watched the YouTube video for how to pronounce “Ferrero Rocher.”

Including me 🙂

Inspired by the concept of a hazelnut truffle and a recipe I found on the blog Running on Real Food, I decided to make my own chocolate hazelnut truffles.

I made these treats today for a group of a dozen of my co-workers as part of an “Upgrade Your Holiday Party Dishes” cooking demonstration at our office. They were a HIT!

In the demo, I showed the group how to make super simple Kickin’ Buffalo Hummus, an immune-boosting “Taste the Rainbow” Kale Salad (recipe to come!), and these fudgy Chocolate Hazelnut Truffles.

They take about 5 minutes to whip up, too. Try these at home, and bring them to an upcoming holiday party or event. I hope you enjoy them as much as we did!

truffle 2

IMG_7758 IMG_7764

Adapted from Running on Real Food

Ingredients

  • 2/3 cup hazelnuts
  • 10 Medjool dates, pitted and soaked in water 10 minutes
  • ÂŒ cup raw cacao powder
  • œ teaspoon ground cinnamon
  • ÂŒ cup unsweetened shredded coconut
  • 2-3 teaspoons 100% pure maple syrup
  • 1 teaspoon vanilla extract
  • 2 tablespoons coconut oil
  • 1/4 teaspoon fine grain sea salt (I’m sure it’ll work with the coarse kind, but I used fine)
  • 18-20 whole hazelnuts, lightly toasted – set aside (do not blend into dough)
  • Optional: 1/3 cup hemp seeds, chopped & toasted hazelnuts and/or toasted coconut for rolling/coating

Directions

  1. Drain water from dates.
  2. Add all ingredients from the hazelnuts through the sea salt to a food processor.
  3. Process until well mixed together but while there are still small pieces of hazelnuts. You may have to stop and scrape down the sides with a spatula or break up the ball that forms, so everything is blended.
  4. Roll dough into small balls, wrapping each ball around a whole, toasted hazelnut.
  5. Roll truffles in hemp seeds, chopped hazelnuts, or coconut or just leave them “as is!”
  6. Place in freezer for about 30 minutes or until firm.

Store in an airtight container in the freezer.

Quinoa Broccoli Salad with Tangy, Creamy Dressing {Vegan, Gluten-Free}

Did you know that broccoli is one of THE most healing, healthful foods we can eat?

Tom Malterre, one of my favorite nutritionists, has been so bold as to call it “The DNA Whisperer” in his fascinating TEDTalk.

IMG_6974

I’ve written about the incredible health benefits of broccoli in another blog post (which also features my favorite “crack” broccoli recipe – aptly named due to how addictive it is).

Click here for that recipe and to learn more about the cancer-fighting, immune boosting, detoxifying benefits of this tree-like vegetable.

Broccoli is coming in season locally, so I wanted to find some new and interesting ways to use it aside from the usual steaming it or tossing it in a salad.

Since removing dairy from my diet a few years ago, I’ve been especially driven to come up with creamy dressing recipes. This one uses tahini (sesame paste) and raw cashews to create creaminess, which paired nicely with the light and fluffy quinoa and roasted broccoli.

IMG_6926

The trick was making a big pot of quinoa at the beginning of the week, which we’ve since used for a southwest black bean salad, pumpkin breakfast cereal, and now this recipe.

It’s a big time saver to cook once and then use the ingredient 3 times. You can do that with any grain at the beginning of the week (brown rice, wild rice, quinoa, millet, buckwheat).

(In case you missed it, here’s how to cook quinoa 🙂 )

One of my colleagues who tried this recipe on her own had this to say about it:

“Whoa, Rachel! This salad was excellent! First, it was easy to make, which, as a non-cook, I totally appreciate. The flavor is what really impressed me. The sweetness of the cashews, the umami of the tamari, and a bit of heat from the crushed red pepper married so well together! I’ll definitely be adding this one to my personal recipe collection!”

Tangy creamy quinoa broccoli salad

IMG_6939 IMG_6944

 Salad

  • 4 cups broccoli florets
  • 1 tablespoon coconut oil, melted (coconut oil is my prefered oil for cooking since it’s more stable at high temperatures while olive oil is best for raw or low heat preparations)
  • 1 cup quinoa, cooked (Here’s how to cook perfect quinoa!)
  • Juice of 1 lemon
  • sea salt and black pepper
  • Optional: almond slices, lightly toasted

Dressing

  • 1 cup raw cashews, soaked for 4 hours in water (or overnight) then drained and rinsed
  • 3/4 cup water
  • 2 cloves garlic, peeled and chopped
  • 3 tablespoons tahini
  • 3 tablespoons fresh lemon juice
  • 1 tablespoon tamari (wheat-free soy sauce)
  • 1 tablespoon 100% pure maple syrup
  • 1/2 teaspoon crushed red pepper

Directions

  1. Preheat oven to 400 degrees F. Toss broccoli in oil and season with salt and pepper. Transfer to a baking sheet and roast until golden brown and softened slightly but still bright green, about 15 – 20 minutes.
  2. While broccoli is roasting, prepare dressing. Transfer the dressing ingredients to a blender and blend on high until creamy. Taste and adjust seasonings as needed.
  3. When broccoli is done, remove from oven and transfer to mixing bowl. Add quinoa, drizzle with lemon juice and toss to combine.
  4. Pour 1/2-2/3 cup dressing over the broccoli-quinoa mixture and stir until evenly coated.
  5. Top with toasted almond slices, if you prefer (for an extra crunch!).
  6. Serve immediately (for a warm salad) or chill in fridge for at least two hours.

Elevate Your Tailgate: Kickin’ Buffalo Dip!

IMG_7567

Buffalo sauce.

For whatever reason, it’s one of those flavors/foods that I’ve never liked. Just like I’ve historically avoided/been grossed out by cole slaw, creamy broccoli cheese soup, and  guacamole, I’ve always stayed away from anything coated with the vibrant orange sauce.

My earliest memories of buffalo sauce are around having cooking lessons with my elderly neighbor, Miss Muriel. When I was in grade school, she would invite me to her house and teach me to make things like pasta, paper thin sugar cookies, and cheesecake…100% from scratch.

While our creations were cooking or baking, she ordered lunch from Dominos, complete with pizza and buffalo wings. I never liked the taste of buffalo wings, but I didn’t want to be rude (I was a quiet kid), so I just ate a few anyway.

Fast forward about 20 years, and here I am trying to figure out ways to “UPgrade” common foods that most of us eat a lot.

I’ve asked some friends and co-workers, “What’s ONE food that you love that you’d like to have a healthier recipe for how to make?”

The most common answer?

IMG_7557

“Buffalo chicken dip.”

It’s been one of my husband’s favorite party dips as well. Loaded with cream cheese and either Ranch dressing or Bleu cheese, shredded chicken, and hot sauce, it’s not something that works with those of us who get sick from eating or drinking dairy.

So, off I went in search of some ideas and inspirations for how to UPgrade this dip recipe. I came across a post from one of my favorite bloggers, Angela Liddon over at oh she glows.

IMG_7539

Buffalo hummus.

I know, I know. It’s not the SAME, BUT this is my first attempt at making a buffalo dip, so we’re starting where I’m most familiar.

I brought this hummus to work, and my co-workers loved it! They are so great to serve as my taste testers for many of these recipes. I know I can trust them and that they will be honest with me if they don’t like something. Input from my co-worker and friend Michela was one of the reasons I made some tweaks to my original Protein-Packed Pumpkin Spice Dip recipe.

By the way, I’m still committed to finding a dairy-free version of buffalo chicken dip that is tailgate worthy, too. And when I do, I will share it with you 🙂

In the meantime, you should try this recipe. The “kick” comes from the optional addition of cayenne pepper. You can whip it up in less than 10 minutes, too!

buffalo hummus

Ingredients

Yield: 2 cups

  • 1 can (15-ounces) or 1 1/2 cups cooked chickpeas, drained and rinsed
  • 1/2 teaspoon ground cumin
  • 1/2 teaspoon smoked paprika
  • 1/2 teaspoon fine grain sea salt
  • 2 cloves garlic
  • 2 tablespoons tahini
  • 1 tablespoon hot sauce (You can use Frank’s Hot Sauce. I used Gator Ron’s Angel Wing Sauce from MOMs Organic Market. It’s made in nearby Bethesda!)
  • 1 tablespoon fresh lemon juice
  • 1/2 cup jarred roasted red pepper
  • 2 tablespoons extra virgin olive oil, liquid from beans can, OR water
  • Cayenne pepper, to taste, for serving

Click here for the full recipe from oh.she.glows!

Page 15 of 24

Powered by WordPress & Theme by Anders Norén