Notice: Function _load_textdomain_just_in_time was called incorrectly. Translation loading for the social_sharing domain was triggered too early. This is usually an indicator for some code in the plugin or theme running too early. Translations should be loaded at the init action or later. Please see Debugging in WordPress for more information. (This message was added in version 6.7.0.) in /var/www/wp-includes/functions.php on line 6114
Paleo Archives · Page 9 of 13 · Rachel's Nourishing Kitchen

Category: Paleo Page 9 of 13

Candied Maple-Cinnamon Delicata Squash {Easy, Vegan, Paleo}

mapledelicatat

This dish is ridiculously good.

Almost addictive.

And it’s easy to make.

It turned out to have a slightly crunchy, caramelized coating that’s almost candy-like. Let’s put it this way, you won’t have leftovers when you make this, so you might want to make a double batch!

I shared a post on another blog I write for last week about how to cut up and prepare delicata squash (WAY easier than pumpkin or butternut squash).

You can even eat the peel 🙂

IMG_7219

This dish combines the sweetness of maple syrup, subtle spiciness of ginger, hint of salt, and the butteryness (is that word??) of pecans.

The squash has a slight, candied crunch on the outside edges and is soft and comforting on the inside.

Hungry yet?

mapledelicatat

Adapted from this recipe.

Ingredients

  • 1 medium delicata squash, trimmed to 1/2-inch pieces (Here’s how to cut it up – it’s easy!)
  • 2 tablespoons coconut oil, melted
  • 1 teaspoon cinnamon
  • 3 teaspoons 100% pure maple syrup, separated (1 tsp before cooking, 2 teaspoons after)
  • 3/4 teaspoons ground ginger
  • 1/2 teaspoon sea salt, or to taste
  • 1/3 cup pecans, lightly toasted and chopped

Directions

  1. Preheat oven to 425F and line a baking sheet with parchment paper.
  2. Cut the squash into half moons and then cut in half again as shown in the picture above.
  3. Combine coconut oil, cinnamon, 1 tsp maple syrup, ginger, and sea salt in a bowl and toss the squash in the bowl to evenly distribute the coating.
  4. Arrange squash in a flat even layer on a baking tray, making sure the sides don’t touch (we don’t want them to steam, we want them to roast!).
  5. Bake for 18 minutes, then remove tray and flip pieces over on the other side. Continue roasting for 10-12 minutes or until squash can be pierced easily with a fork and is browned and caramelized.
  6. Remove squash from oven and toss with 2 more teaspoons of maple syrup and chopped pecans.
Creamy Broccoli Cheeze Soup {Vegan, Gluten-free, Paleo}

broccoli soup

I know it’s a lot of people’s “favorite things” at Panera (especially this time of year as the weather cools)…

But I’ve never been a fan of broccoli cheddar soup. 

I’m not sure if it’s the concept or the texture or the fact that I’ve always thought broccoli should stay whole and recognizable and not pulverized in a soup with cheese and cream.

Since I cut out milk and cheese over two years ago, I’ve been on the hunt for recipes that deliver on the rich and creamy factor we think can only come from dairy products, and I wanted to challenge myself to try something new.

(I’ll be writing a whole post about why I cut out dairy products, but the short version is they were triggering a lifetime of congestion, ear/sinus/respiratory infections, postnasal drip, allergies, adult acne, and indigestion. If you have any of those symptoms regularly, try cutting out dairy products for 2-3 weeks and notice how much better you feel! I never would’ve believed it if I hadn’t experienced it myself. It’s amazing how our bodies can heal when we remove foods that harm us and upgrade to foods that heal us. More on that later!)

IMG_7137

Back to the broccoli soup. 

Because I’m always encouraging people to “try new foods” and give foods they’ve previously sworn off a second chance, I thought I should practice what I preach.

So, I tried a recipe for a “healthified” broccoli cheeze soup.

The skeptic in Bill (and me) was not too confident about how this soup would turn out, so I totally get any reservations you might have about making this recipe…but that’s why we tried it!

And we’re glad we did.

Bill and were BOTH thrilled with how it turned out – rich, creamy and flavorful.

I had to stop myself from drinking it straight out of the mason jars, and we enjoyed it as part of our lunch for several days.

IMG_7099

Here are the UPGRADES in this recipe compared to standard broccoli cheddar soup:

  • Unsweetened almond milk (homemade, too!) instead of half and half (dairy-free)
  • Nooch instead of cheddar cheese
  • No flour (gluten-free!)
  • Way less salt

Not only that, but any excuse to eat more broccoli is a good one – broccoli is known as the DNA whisperer!

broccoli soup

Ingredients
  • 2 tablespoons coconut oil, melted* (I used coconut oil, which is a better oil to use for high heat. If you’re paleo but not vegan, you could use grass-fed butter or ghee instead.)
  • 1 medium red onion, diced
  • 3 cloves garlic, minced
  • 1 teaspoon dijon mustard
  • 2½ cups unsweetened almond milk (If store bought, avoid the ingredient “carrageenan”)
  • 2½ cups vegetable broth
  • 5 cups broccoli florets
  • 1 cup nutritional yeast (Wegmans, Whole Foods, MOMs, Amazon, and any natural food stores sell it!)
  • 1 tablespoon lemon juice
  • 1 teaspoon sea salt
  • 1 teaspoon black pepper

Don’t be deterred by the ingredient list or let that be an excuse to not try recipes. I used to do that all the time but found that having key pantry staples on hand made it SUPER easy to make recipes like this.

Most of the time half of the ingredients are things you have in your pantry anyway (i.e., herbs, spices, lemons, onions, and garlic).

Click here for the full recipe details from Running On Real Food!

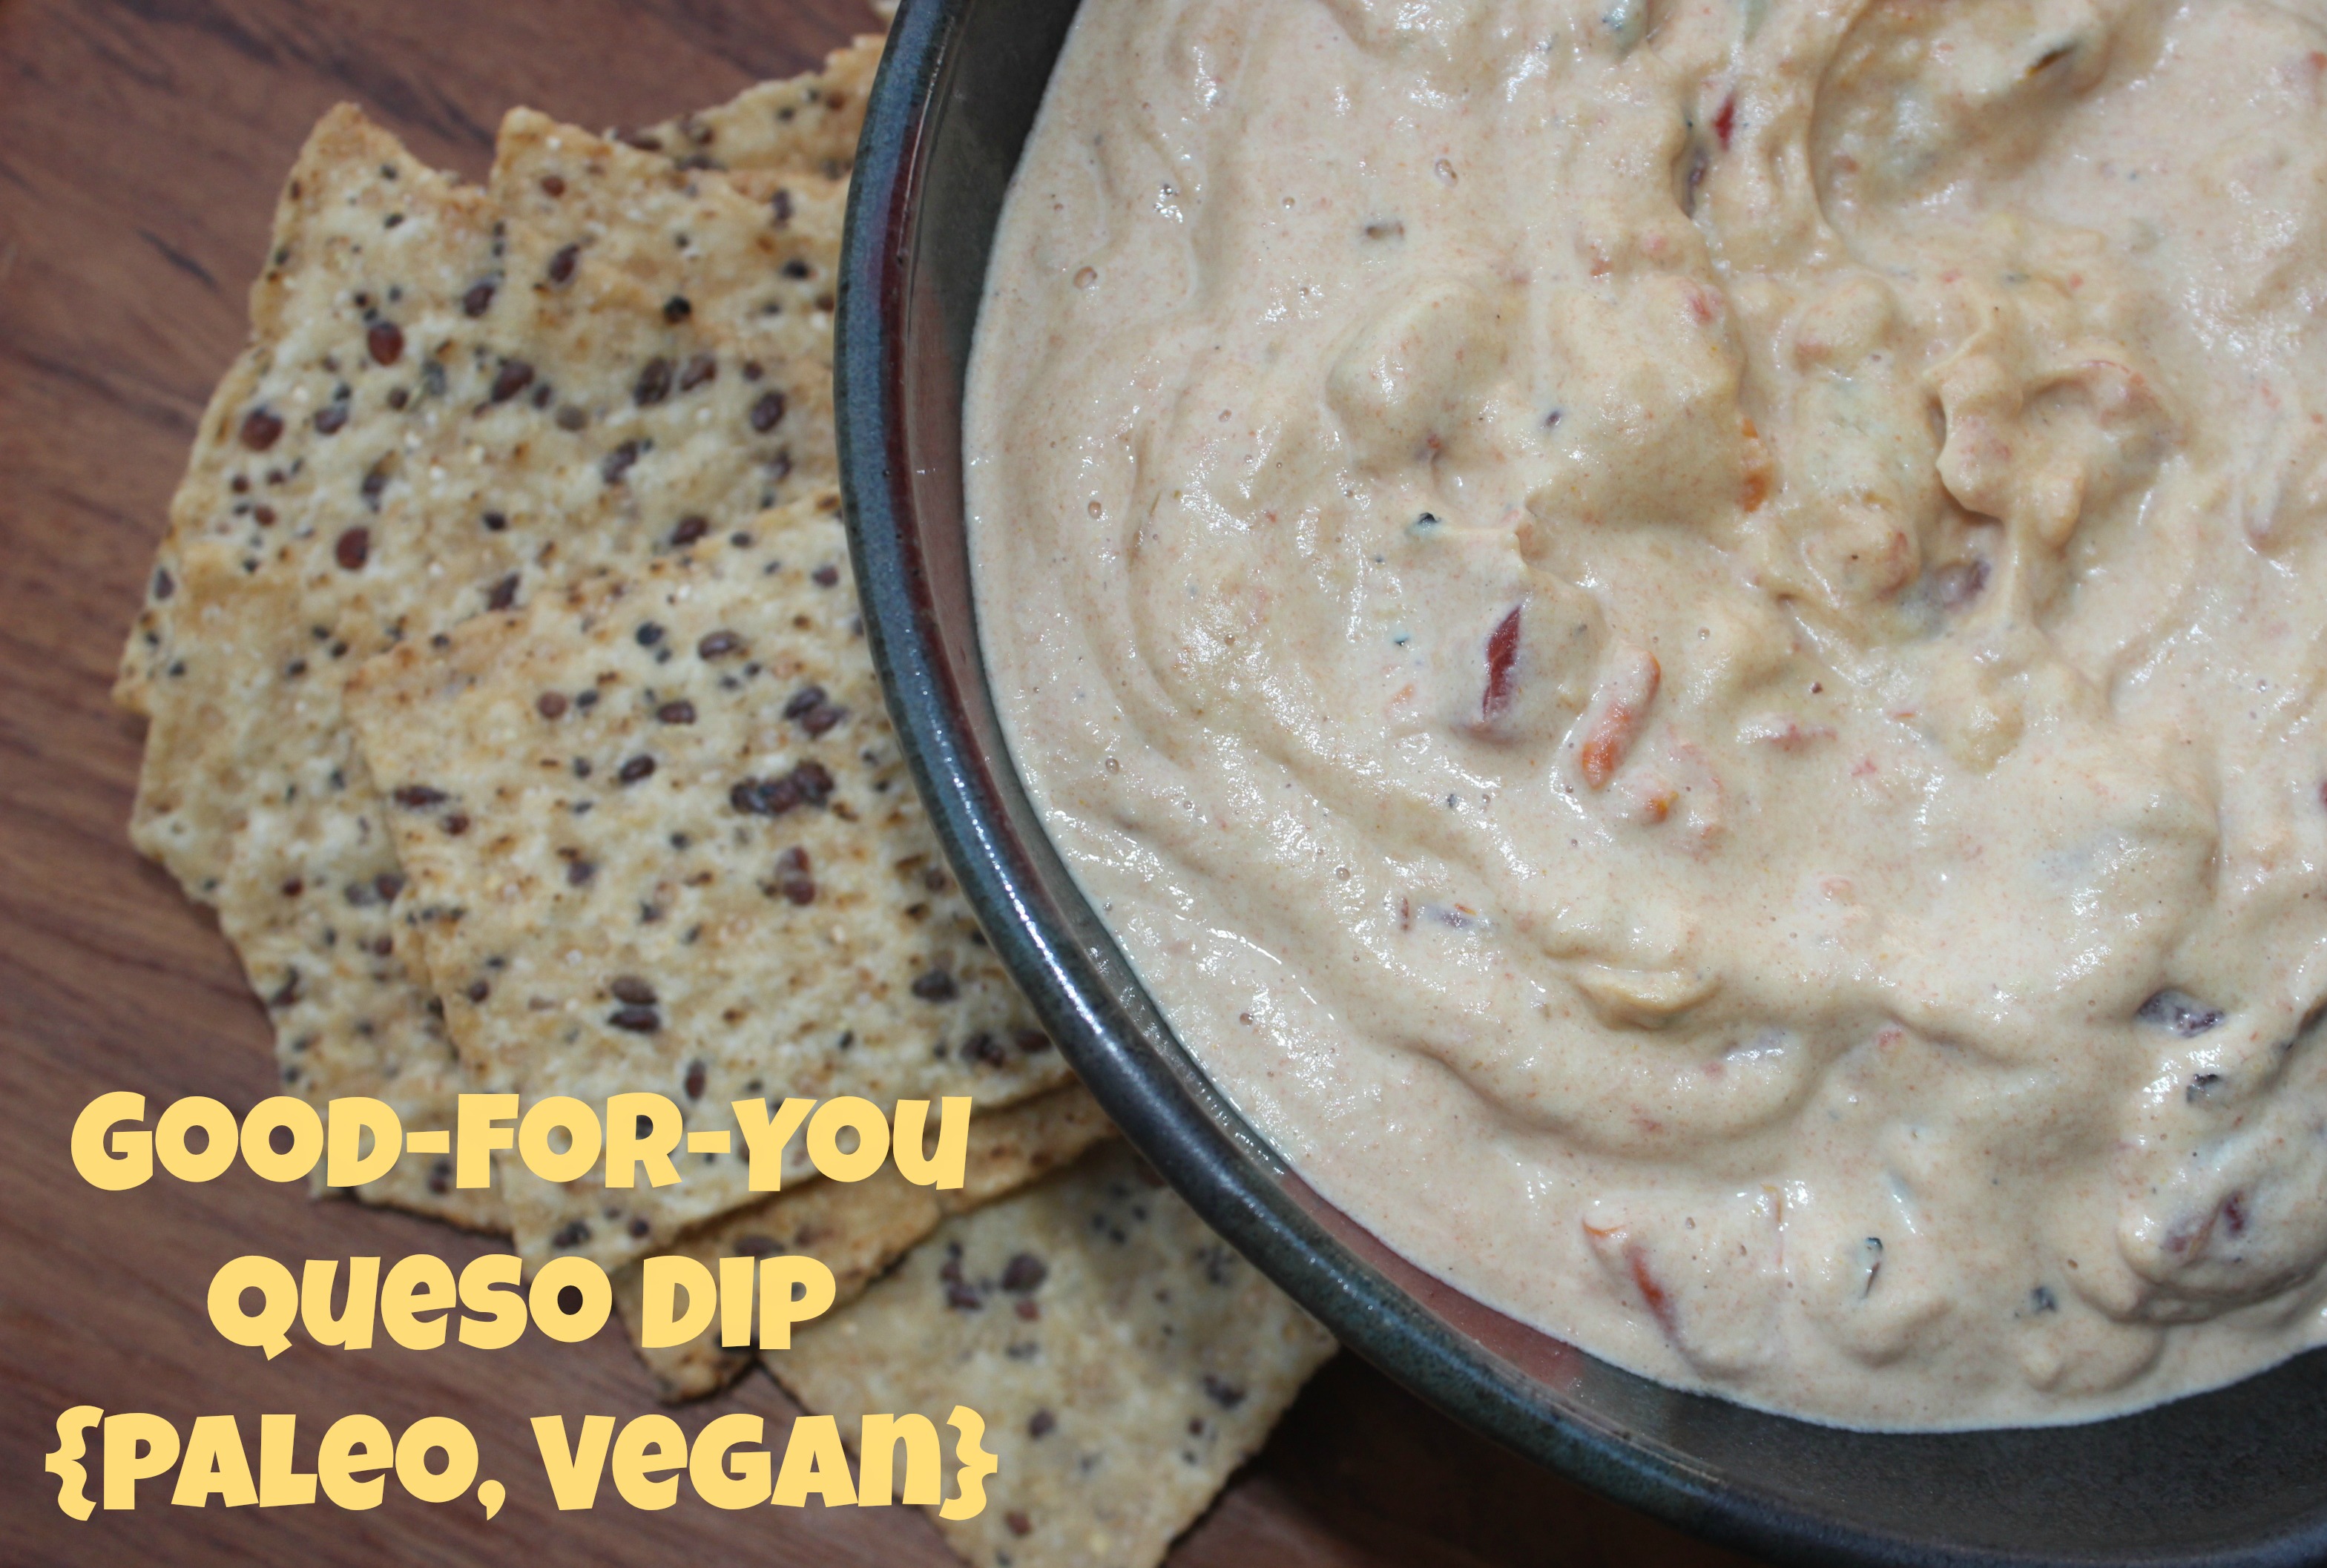
Elevate Your Tailgate: Queso Dip…That’s Good For You! {Dairy-Free}

queso dip

“How do you live without cheese??”

That’s one of the most common question I get when I tell people I don’t eat dairy products.

Trust me, if you had told me 5 years ago that I would enjoy food (more than I ever have before!) WITHOUT Parmesan, cheddar, mozzarella, or any other kind of cheese, I would have kindly nodded my head and continued dousing any unsuspecting vegetables and pasta with mounds of Parmesan cheese.

Thank you very much.

One of the things that excites me MOST about cooking and preparing new recipes is finding ways to make healthy, dairy-free alternatives to foods I loved when I ate and drank things like milk, cream and cheese.

Today’s recipe is one of those special alternatives that I will be adding to my “go to” party snack list!

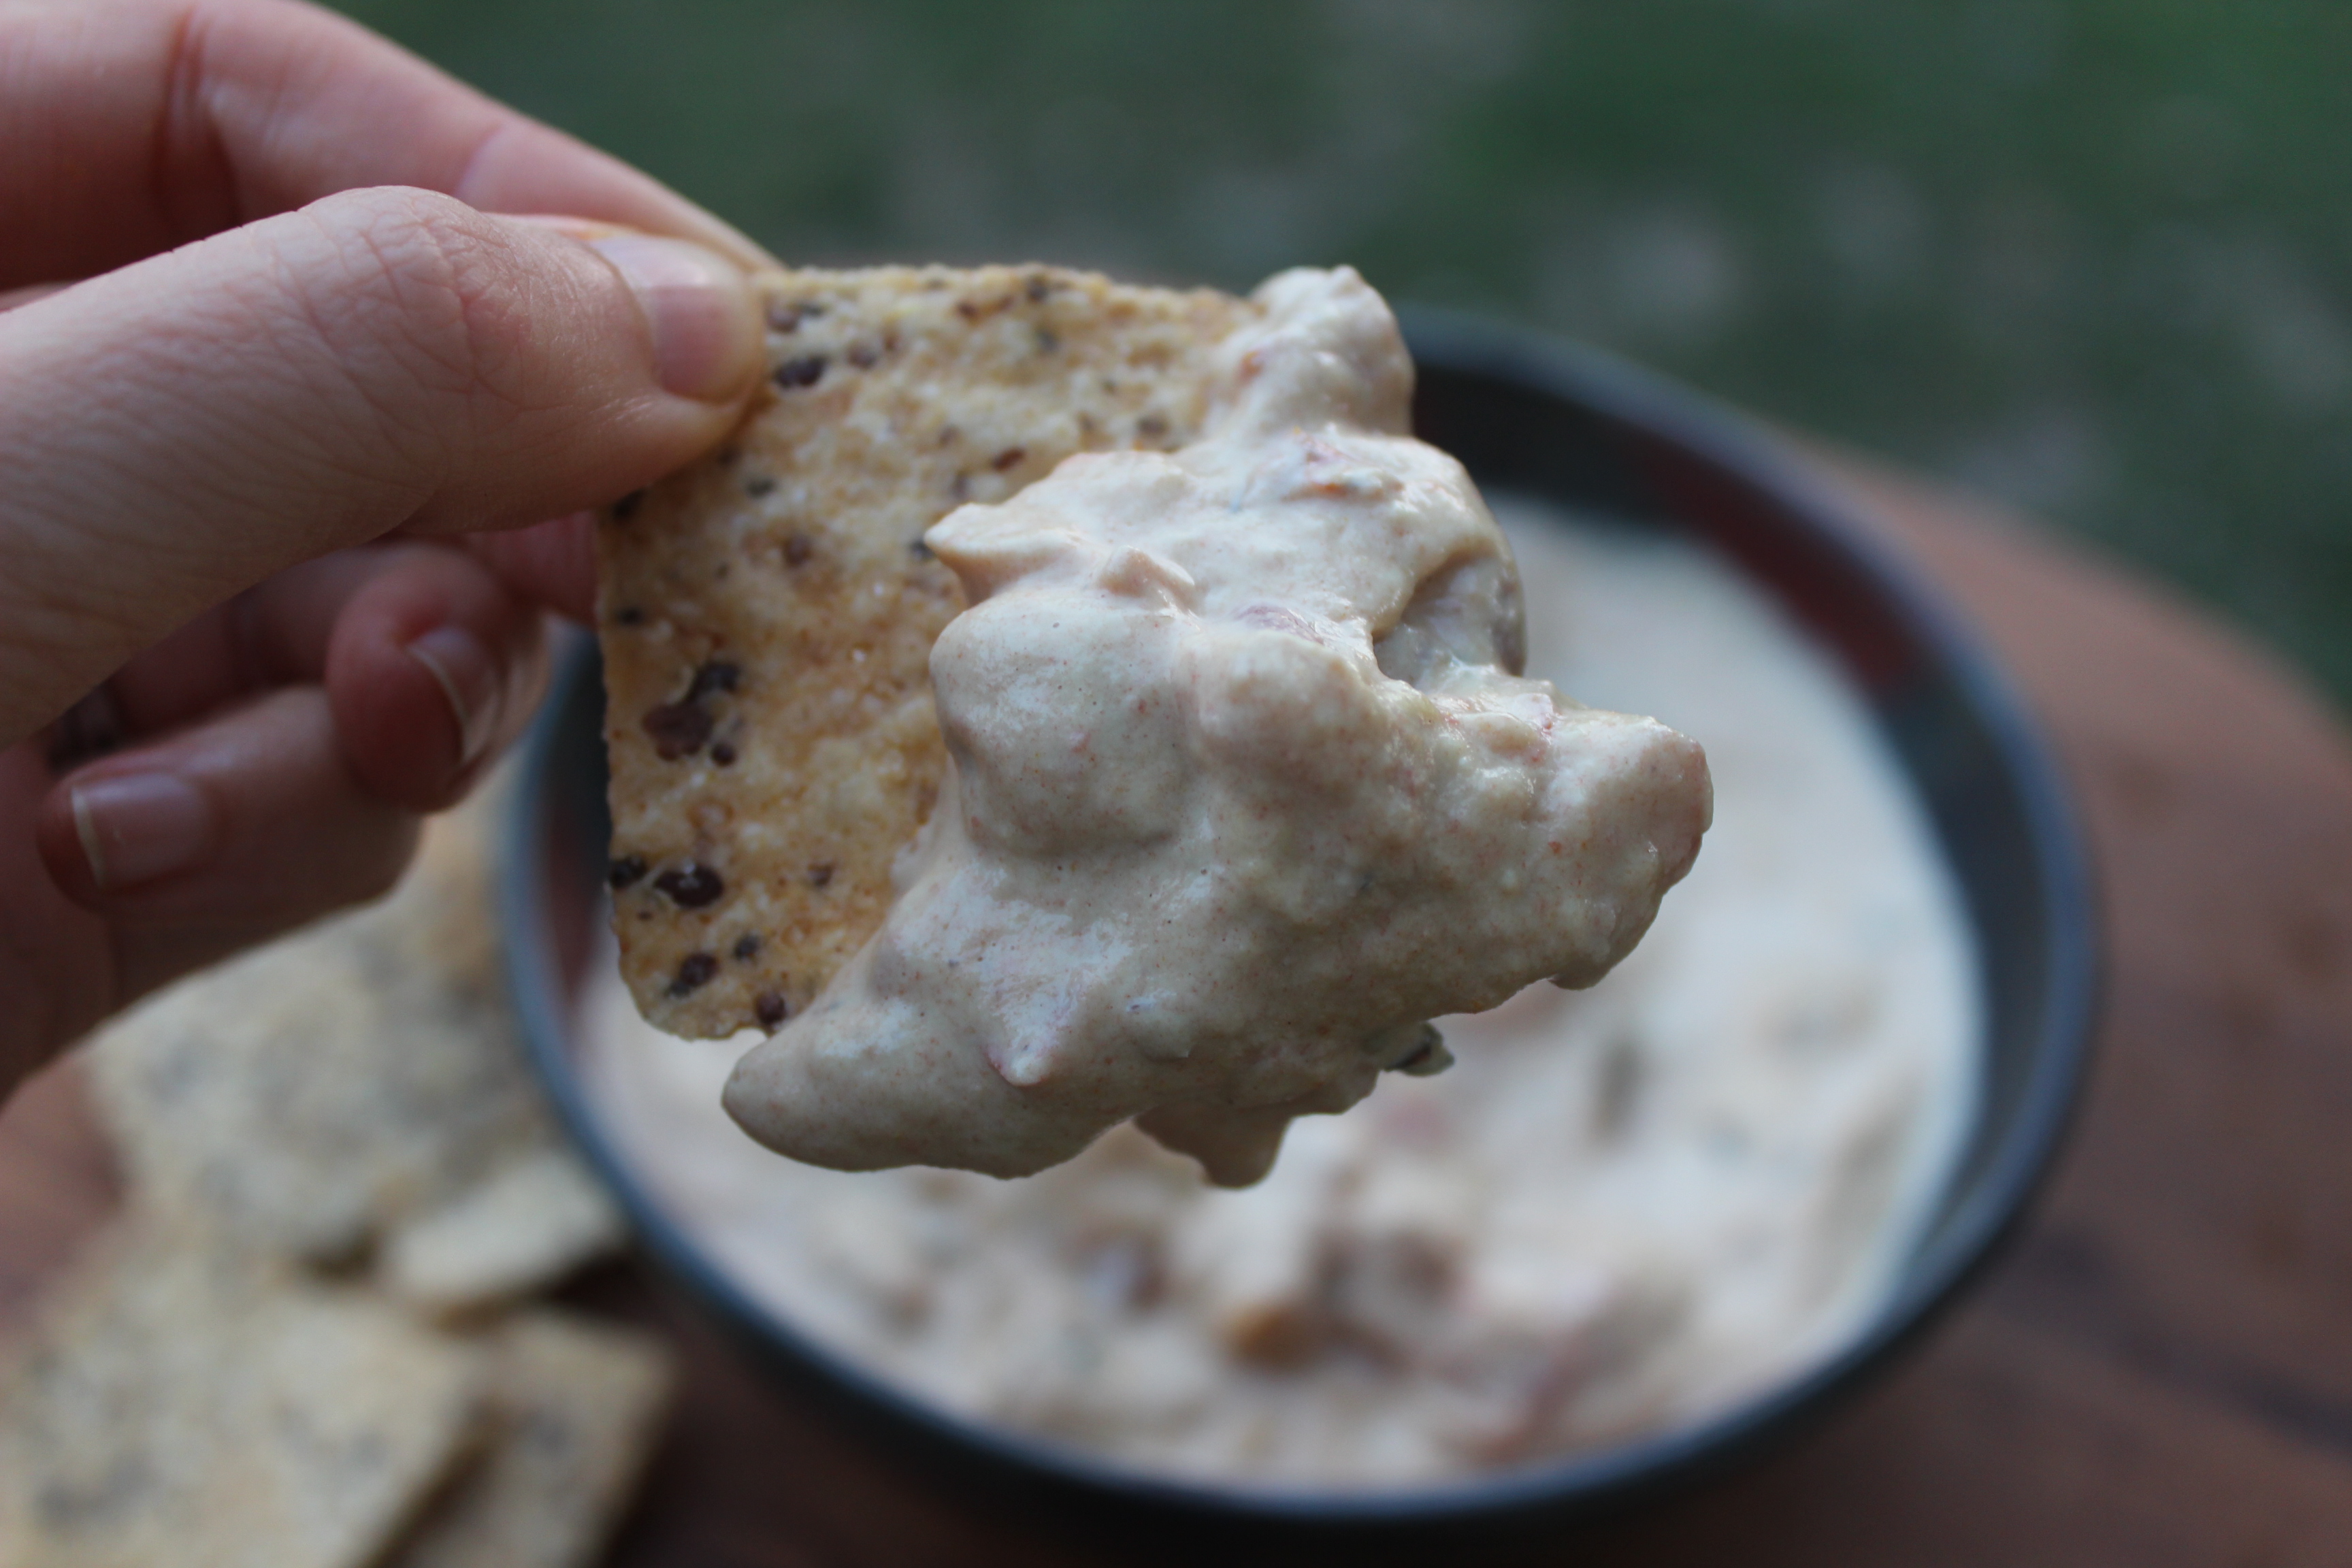
IMG_7364 IMG_7369

I think it’s safe to say that anyone who blogs regularly and spends a lot of time in the kitchen frequently looks to other people and other blogs for inspiration.

For me, one of those people is Megan, a fellow IIN graduate and health coach who writes the blog The Detoxinista.

I’ve made quite a few of her recipes in the past and always been pleased with the outcomes, so as a general rule, I trust her recipes.

That’s what I hope happens with my readers, too – that you will try the recipes I post, like (maybe love?!) them, and trust that future recipes I share will be delicious.

It saves you some time and guesswork 🙂

IMG_7366

I had been eyeing up her recipe for dairy-free queso dip but hadn’t taken the time to make it.

Queso dip is one of those foods that most of us wouldn’t imagine could be healthy.

Not only is this version healthy, but it’s also delicious…and just in time for football season!

We served it with our favorite chips – Way Better Chips.

I have a feeling we will be making this a lot over the next few months as football season swings into gear!

queso dip

Ingredients:

  • 1 cup raw cashews*, soaked for up to 4 hours and drained
  • 1/4 cup water
  • 1 teaspoon sea salt
  • juice of half a lemon (about 1 1/2 tablespoons)
  • 3 tablespoons nutritional yeast
  • 1/8 teaspoon turmeric
  • 14 oz. can diced tomatoes with green chiles (We used the Muir Glen Organic Diced Tomatoes, Fire Roasted with medium green chilies)

*Raw cashews have a very mild and neutral flavor that works well in this recipe. Try to avoid using roasted cashews, which have a stronger cashew flavor.

Please please PLEASE don’t let the “soak cashews” detail discourage you. I used to use it as a reason not to make certain recipes, but it’s SO easy. Seriously. Just put the cashews in a bowl, cover them with water, and go about your business. Come back in a few hours, and you’re good to go. You can even soak them overnight if that’s easier for you 🙂

Click here for the full recipe from The Detoxinista!

How to Cook Spaghetti Squash {Step-by-Step Photo Guide}

Spaghetti squash is one of those foods that a lot of us have heard about or seen at the grocery store or farmer’s market…but perhaps been a bit too intimidated or weirded out to try.

I’ve got good news for you!

spaghettisquash


Spaghetti squash is very easy to cook AND fun to play with 🙂  I’m always up for anything that makes cooking more fun, and this ingredient definitely does!

You can upgrade your pasta by swapping it out for spaghetti squash.

As its name implies, the inside of the squash can be scraped out to form spaghetti-like strands, so you can serve it just like you would spaghetti.  Top it with your favorite marinara or pesto sauce or sauté it with garlic, onions, spinach and some herbs. It’s tender but has a slight “crunch” to it.

It’s rich in fiber as well as beta-carotene, which is good for our vision, immune system, and healthy skin.

I’ll be sharing a recipe for a Tuscan spaghetti squash boat later this week, but in the meantime, here’s how you make spaghetti squash!

How to Cook Spaghetti Squash

Preheat oven to 400F while you prep the squash.

IMG_7017

Slice a line down the length of the spaghetti squash, about a half inch deep, but don’t cut it in half. It’s usually too hard to cut in half at this point, unless you have a really good knife.

IMG_7021

Turn the squash the other way and cut about 4 strokes into the squash, cross hatching the longer line you already cut. Cutting the squash this way allows it to steam in the oven and prevents it from exploding 🙂 Put the squash in a baking dish in the oven for 20 minutes, so it can soften enough to cut it in half.

IMG_7073

Remove squash from the oven and cut it in half. It should cut easily at this point.

IMG_7082

Wearing an oven mitt (the squash will be HOT), pry it open with your hands.

IMG_7083

IMG_7090

Scoop out the seeds with a spoon.

IMG_7094

Put the squash cut-side down in a 9×13 baking dish and fill the bottom of the dish with about 1/4-1/2 cup of water (enough to cover the bottom of the pan). Return squash to oven for 30-40 minutes or until the squash easily pulls away from the shell.

IMG_7117

Let the squash cool and then scrape out the inside with a fork. It should pull away easily into spaghetti-like strands!

IMG_7123

IMG_7154

Beautiful spaghetti squash ready to be used for your delicious kitchen creations!

Happy National Kale Day! {Plus a NEW Kale Salad Recipe to Try}

Happy National Kale Day!

In all honesty, I had no idea this was even a “thing” until I woke up this morning and saw it all over twitter.

We love kale and all of the amazing health benefits it provides. It’s a super versatile super food.

kale

Two weeks ago, I had the opportunity to attend the Natural Products Expo East in Baltimore and had the privilege of meeting Mr. Kale himself – Brad of Brad’s Raw Kale Chips

Total food nerd moment 🙂

brad

I’ve featured kale in several recipes on this blog in addition to the one I’m sharing today! I use it in everything from salads, soups and sautees to smoothies and frittatas.

To celebrate National Kale Day, try one of these recipes, the *new* salad below, or one of the others on the National Kale Day website:

  1. Taste the Rainbow Kale Salad
  2. Upgraded Kale Waldorf Salad
  3. Mediterranean Chickpea and Sundried Tomato Kale Salad
  4. Mini Kale & Mushroom Breakfast Frittatas
  5. Peachy Keen Kale Salad
  6. Tuscan Bean Soup (scroll to the bottom of the page next to the picture of the soup)
  7. Caribbean Island Breeze Smoothie
Kale leaves after being pulled off of the pretty purple stems

Kale leaves after being pulled off of the pretty purple stems

I was on Facebook the other day and was intrigued by the headline, “The Recipe That Will Make You Fall In Love With Kale All Over Again” on MindBodyGreen’s page.

Being the kale lover that I am, I had to click on it.

Reading through the ingredient list piqued my interest, so Bill and I made it for dinner using the purple kale that we had in our fridge. I’m so glad we did!

The lemon juice broke down the bitterness of the kale (as it always does!), and the combo of the sweetness from the dates, complex flavors of the curry powder, bite of the ginger, tanginess of the tahini and crunch of the pumpkin seeds was a real mouth party!

kale salad

Salad Ingredients

  • 1 big bunch of kale (any variety), thinly chopped (about 5 cups)

Dressing Ingredients

  • 2 tablespoons tahini (usually in the international section of the grocery store)
  • 1 tablespoon lemon juice
  • 1/2 teaspoon curry powder
  • 1 garlic clove, minced
  • 1 teaspoon ginger root, peeled and grated
  • 3 Medjool dates, pit removed and soaked in hot water for 10 minutes to soften them
  • 1/8 teaspoon sea salt
  • 1/4 cup water
  • pinch of cayenne pepper

We topped ours with some raw pumpkin seeds for an extra crunch 🙂

Click here for the full recipe from MindBodyGreen!

Ingredients for the salad. This is the best (and cheapest!) tahini we've found. We bought it at a Mediterranean grocery store/cafe nearby called Cedar Cafe

Ingredients for the salad. This is the best (and cheapest!) tahini we’ve found. We bought it at a Mediterranean grocery store/cafe nearby called Cedar Cafe

“The Best Thing You’ve EVER Made” {My Father Knows Best!}

I’m especially excited about this recipe because it marks a special point in my food journey.

As I shared in one of my first posts, I used to hate the main ingredient in this recipe…

IMG_6569

Eggplant.

The very idea of the funky-shaped purple vegetable weirded me out, and I had no desire to eat it…ever.

Fast forward to today, and I’ve come up with an eggplant recipe that I dare say would get ANYONE (even kids!) to like eggplant.

I made a similar version of these a few months ago in the form of eggplant fries, but the coating on these chips is absolutely to die for and makes them – as my dad AND husband said – “One of the best things you’ve EVER made.”

We liked them SO much that my sister, Jane, even requested that I make them for her 21st birthday dinner the other night. Everyone gobbled them up!

Almond & Rosemary-Crusted Eggplant Chips

IMG_6655

Ingredients

  • 1 large eggplant, cut into ¼” discs
  • 1-2 free-range eggs, whisked (I only needed 1, but depending on the size of your eggplant, you might need 2)
  • 1 cup raw almonds
  • 2 tablespoons arrowroot powder (sub in cornstarch if you don’t have arrowroot)
  • 1 heaping tablespoon fresh rosemary (or 1-2 tsps dried…fresh tastes best!)
  • 1 teaspoon garlic powder
  • 3/4 teaspoon sea salt
  • 1/2 teaspoon black pepper
  • Additional sea salt to sprinkle on the eggplant to draw out moisture

Directions

  1. Preheat oven to 425F.

    Place eggplant slices on a paper towel and sprinkle sea salt on top and let sit for 15-20 minutes. You’ll notice little pools of liquid forming on top of the slices. This helps draw the moisture out of the eggplant, so that it crisps up when baked. Use another paper towel to press any remaining moisture out of the eggplant slices, and shake off any excess salt.

    Place eggplant slices on a paper towel and sprinkle sea salt on top and let sit for 15-20 minutes. You’ll notice little pools of liquid forming on top of the slices. This helps draw the moisture out of the eggplant, so that it crisps up when baked. Use another paper towel to press any remaining moisture out of the eggplant slices, and shake off any excess salt.

IMG_5622

Grind the almonds, arrowroot powder, rosemary, garlic, pepper and sea salt in a food processor until small chunks remain. Pour almond coating onto a plate.

IMG_6615

Dip the eggplant slices one by one in the egg wash and shake off any excess egg. Then, coat both sides of each slice generously with the almond coating.

Place eggplant slices on a foil or parchment-lined baking sheet and bake for 20-25 minutes, flipping once at the 10-12 minute mark.

Place eggplant slices on a foil or parchment-lined baking sheet and bake for 20-25 minutes, flipping them over at the 10-12 minute mark.

IMG_6655

Remove from oven and enjoy by themselves or in a tomato dipping sauce linked below!

Crispy, crunchy, and savory with a hint of salt. No soggy eggplant here, folks!

They’re also incredibly addictive and DEEElicious!

You’ll enjoy them even more with this tomato dipping sauce on the side.

I guarantee you will eat the whole tray.

We did 🙂

How to Make Your Own Pumpkin Puree {Step-by-Step Guide!}

I’m a big advocate of eating food that is as fresh and unprocessed as possible.

Sometimes, for convenience sake, I opt for minimally processed versions of certain foods.

Like pumpkin puree.

Most of the time, it’s easier and quicker to buy a can of it to put into my smoothies, muffins, and overnight oats than to make it from scratch.

But last week I got this in my Hometown Harvest bag and knew it was time for me to figure out how to make my own.

The squash below is actually just an autumn squash, but you can follow the process I outline for autumn squash, butternut squash or pumpkin to make your own puree. 

IMG_6434

Roasting your own vegetables for this puree gives them a velvety smooth texture and deep flavor that definitely tastes better than the canned stuff!

Step-by-step instructions for how to make your own squash puree

Preheat the oven to 350F.

IMG_6624

For a round squash, cut off the top (including the stem) with a sharp knife and then cut the squash in half. For flatter squash, like the one I had, cut it in half with a sharp knife, cutting one side first and then the other on either side of the stem.

IMG_6625

Break it apart with your hands along the seam where you cut.

IMG_6629

Scoop out the seeds with a spoon. Save them to make your own toasted seeds (something I plan to do in the future).

IMG_6630

Cut the pumpkin into chunks. I cut along the existing creases.

Cut the squash into chunks. I cut along the existing creases.

Pumpkin chunks ready for roasting!

Squash chunks ready for roasting!

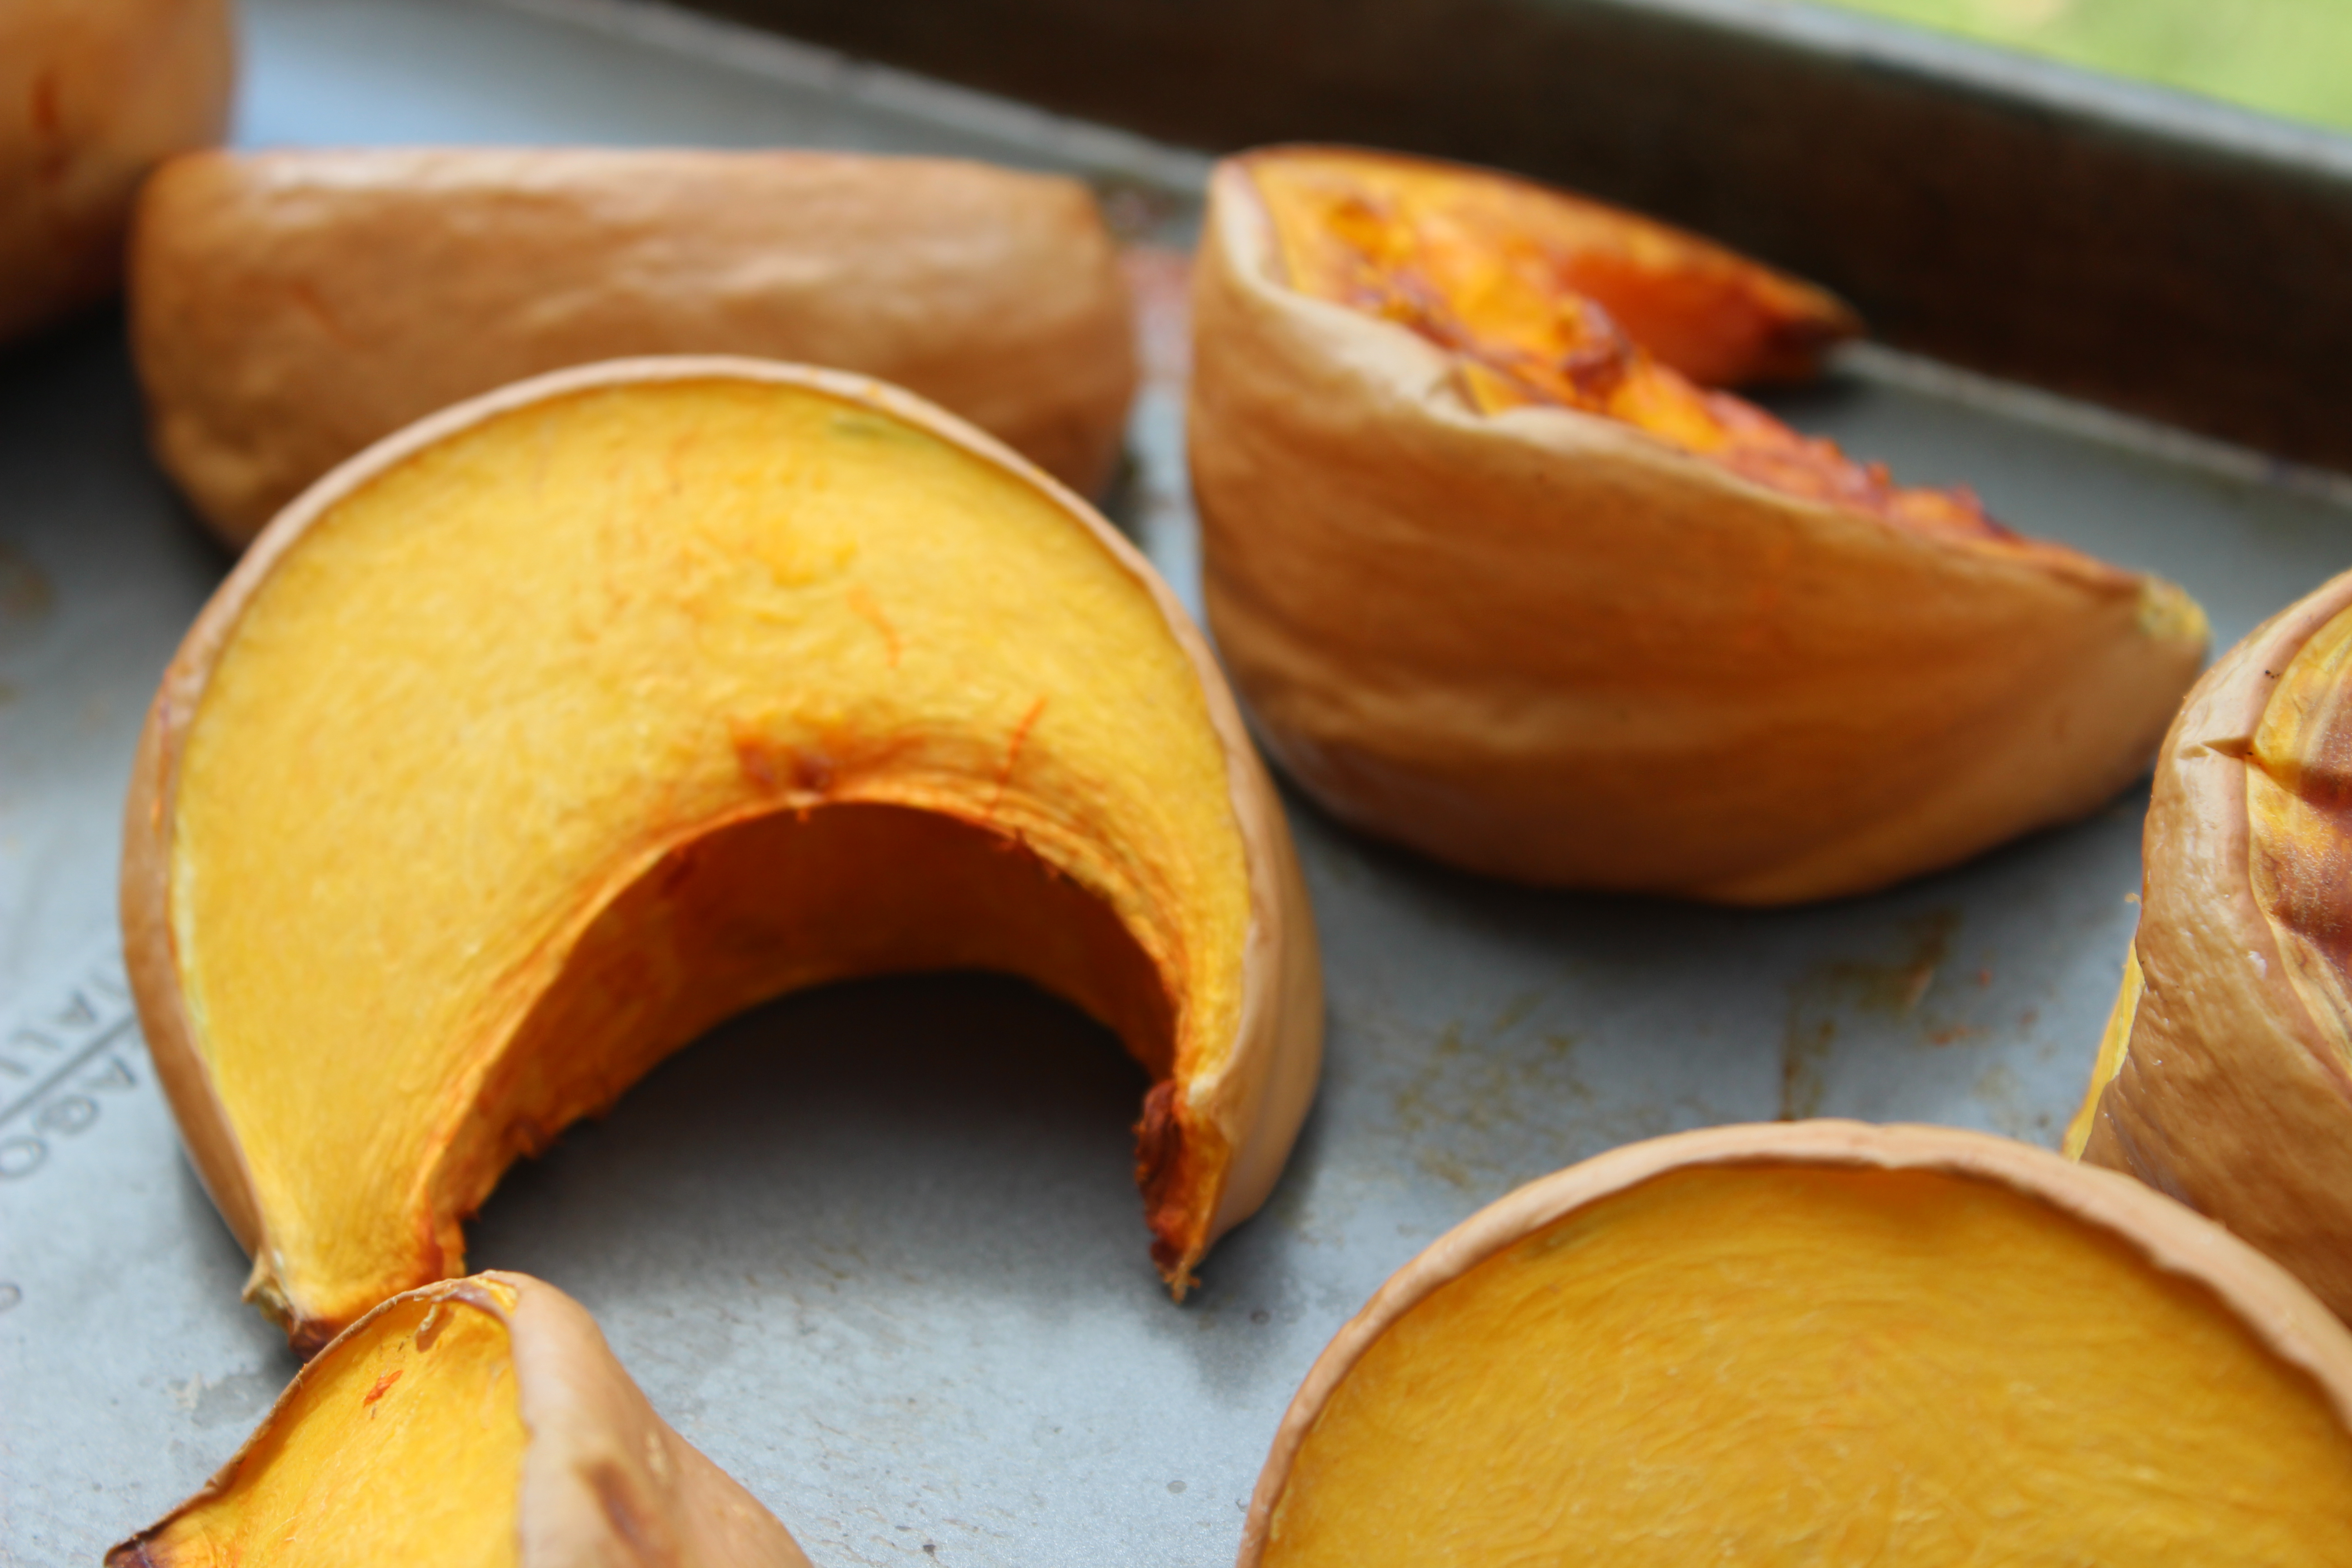
Put the pumpkin slices on a baking sheet and roast for 45-60 minutes or until you can easily pierce the pumpkin with a fork.

Put the squash slices on a baking sheet and roast in a 350F oven for 45-60 minutes oven or until you can easily pierce the squash with a fork.

Pumpkins are done roasting when they look like this.

Squash is done roasting when it looks like this.

Let the slices cool and then take a spoon and scoop out the “meat” from the rind.

Let the slices cool on a plate and then use a spoon and scoop out the “meat” from the rind.

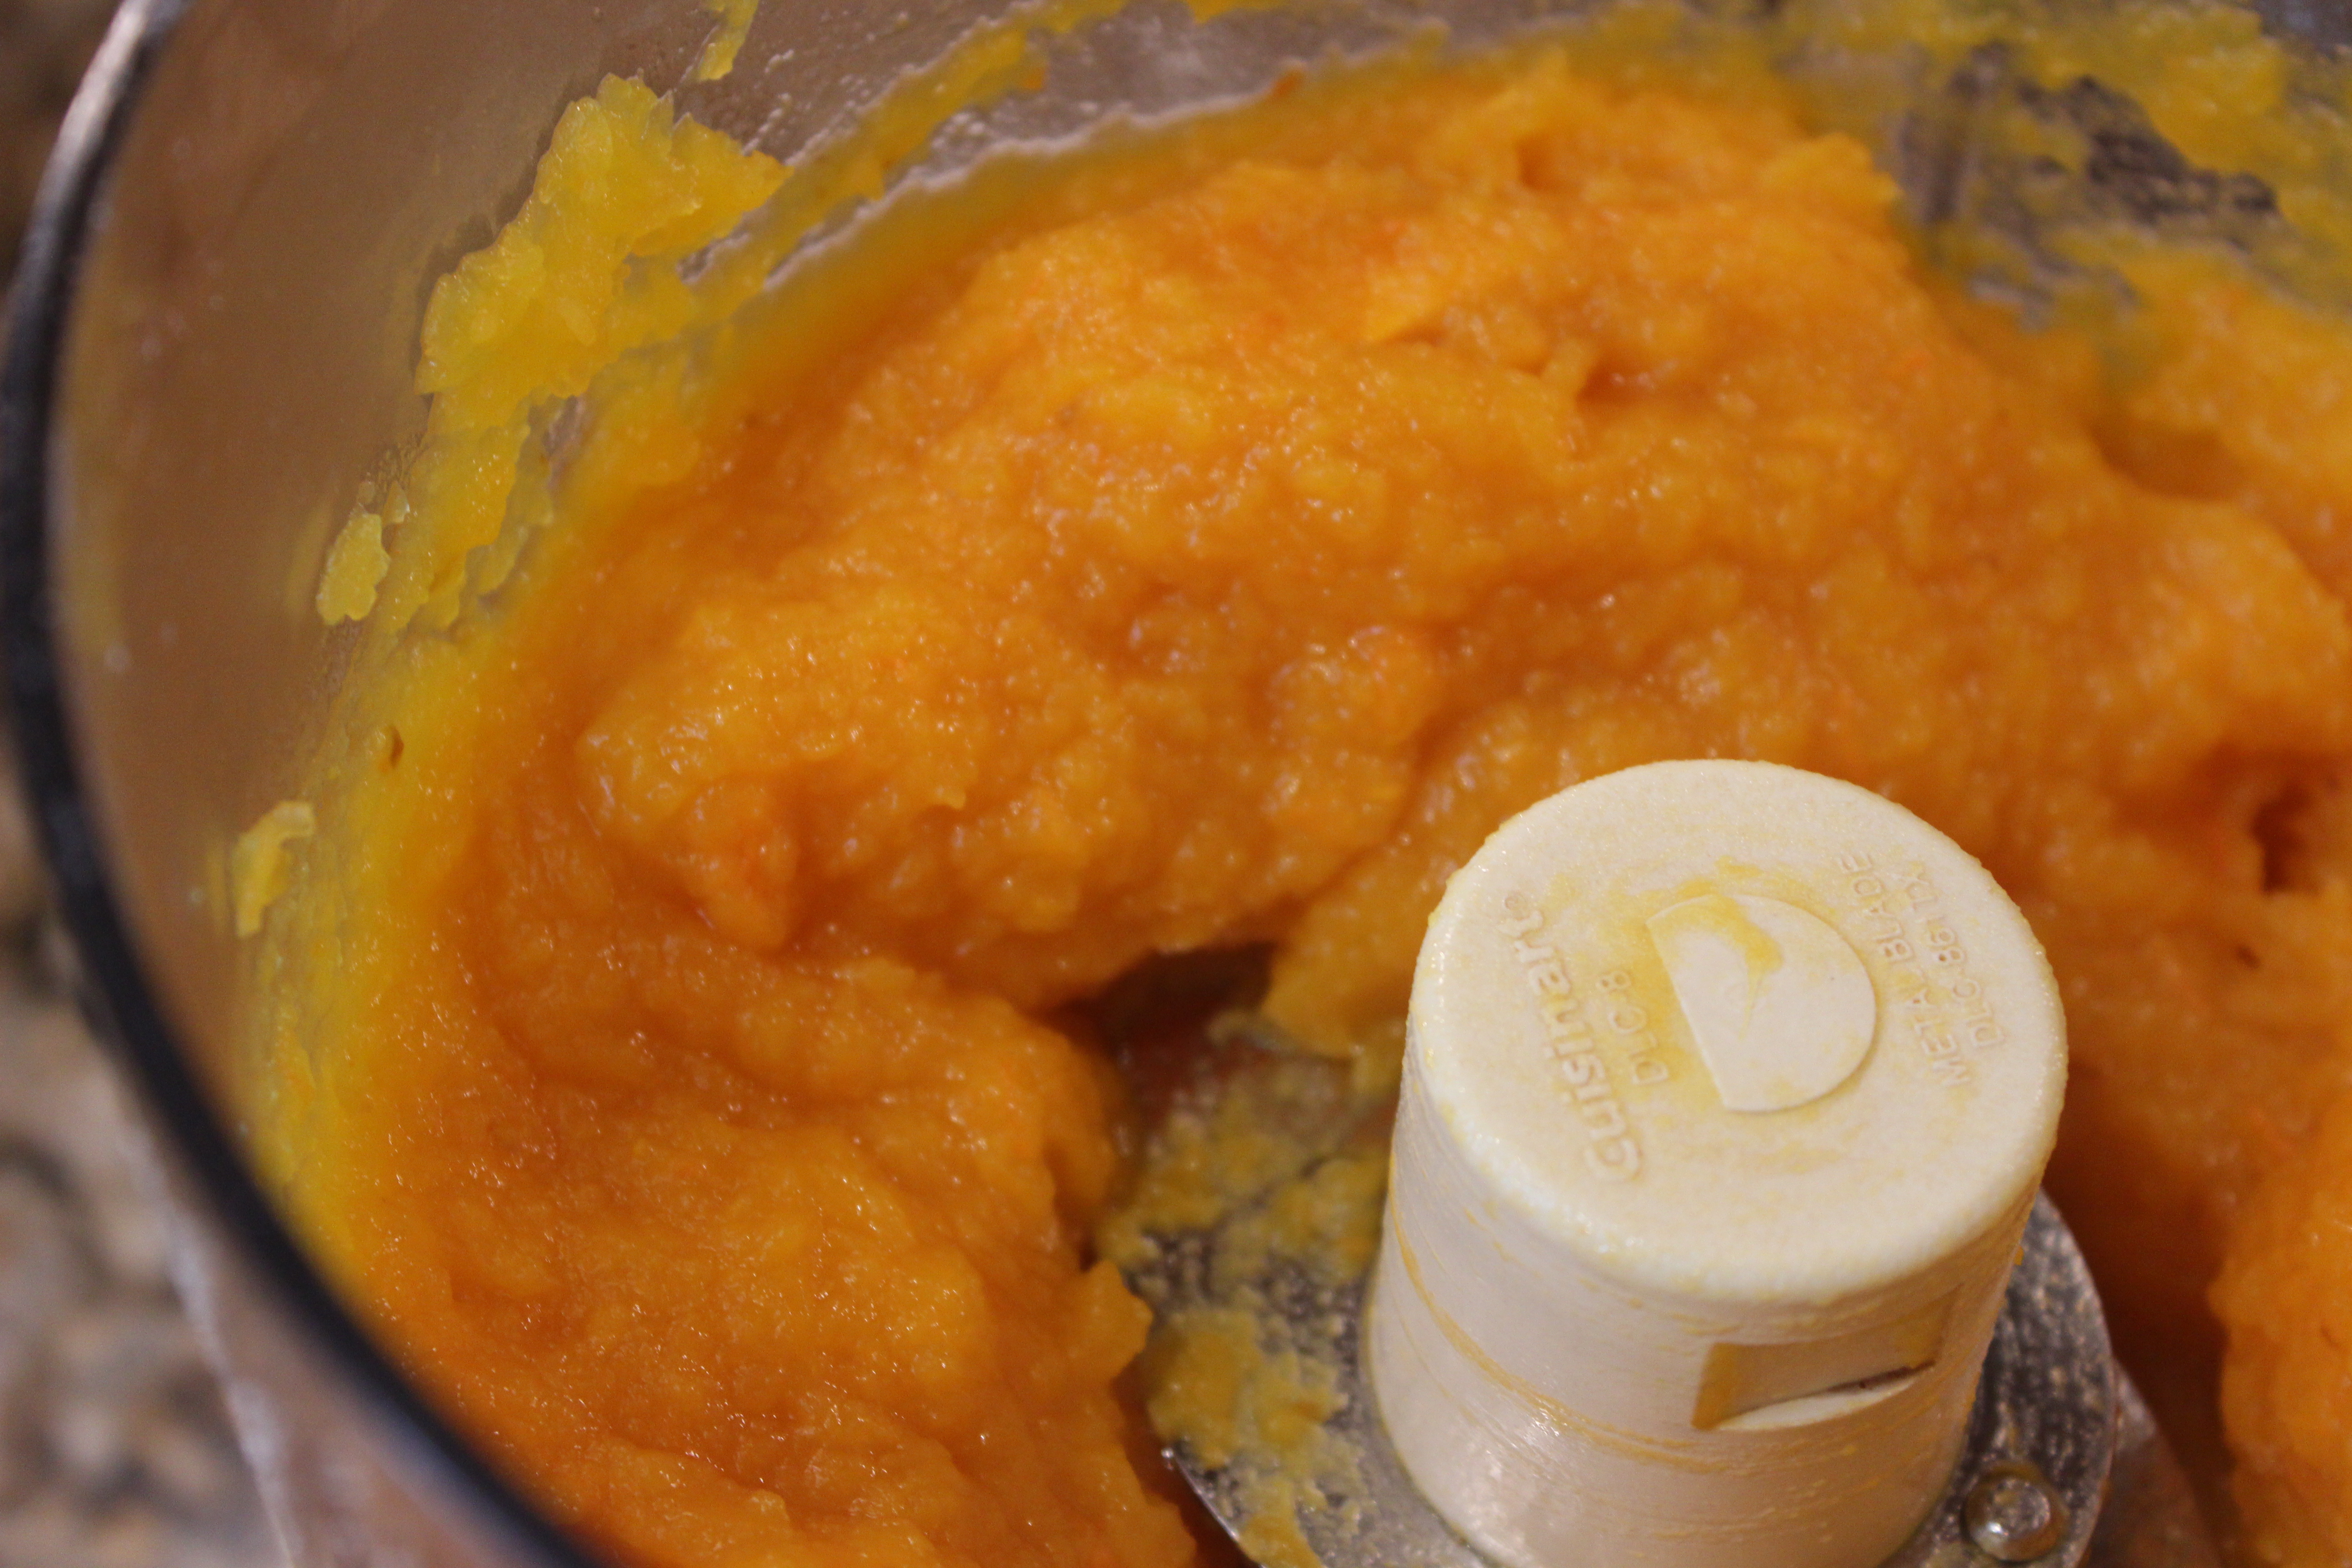
Puree all of the pumpkin in a food processor until smooth.

Puree all of the squash in a food processor until smooth.

IMG_6733

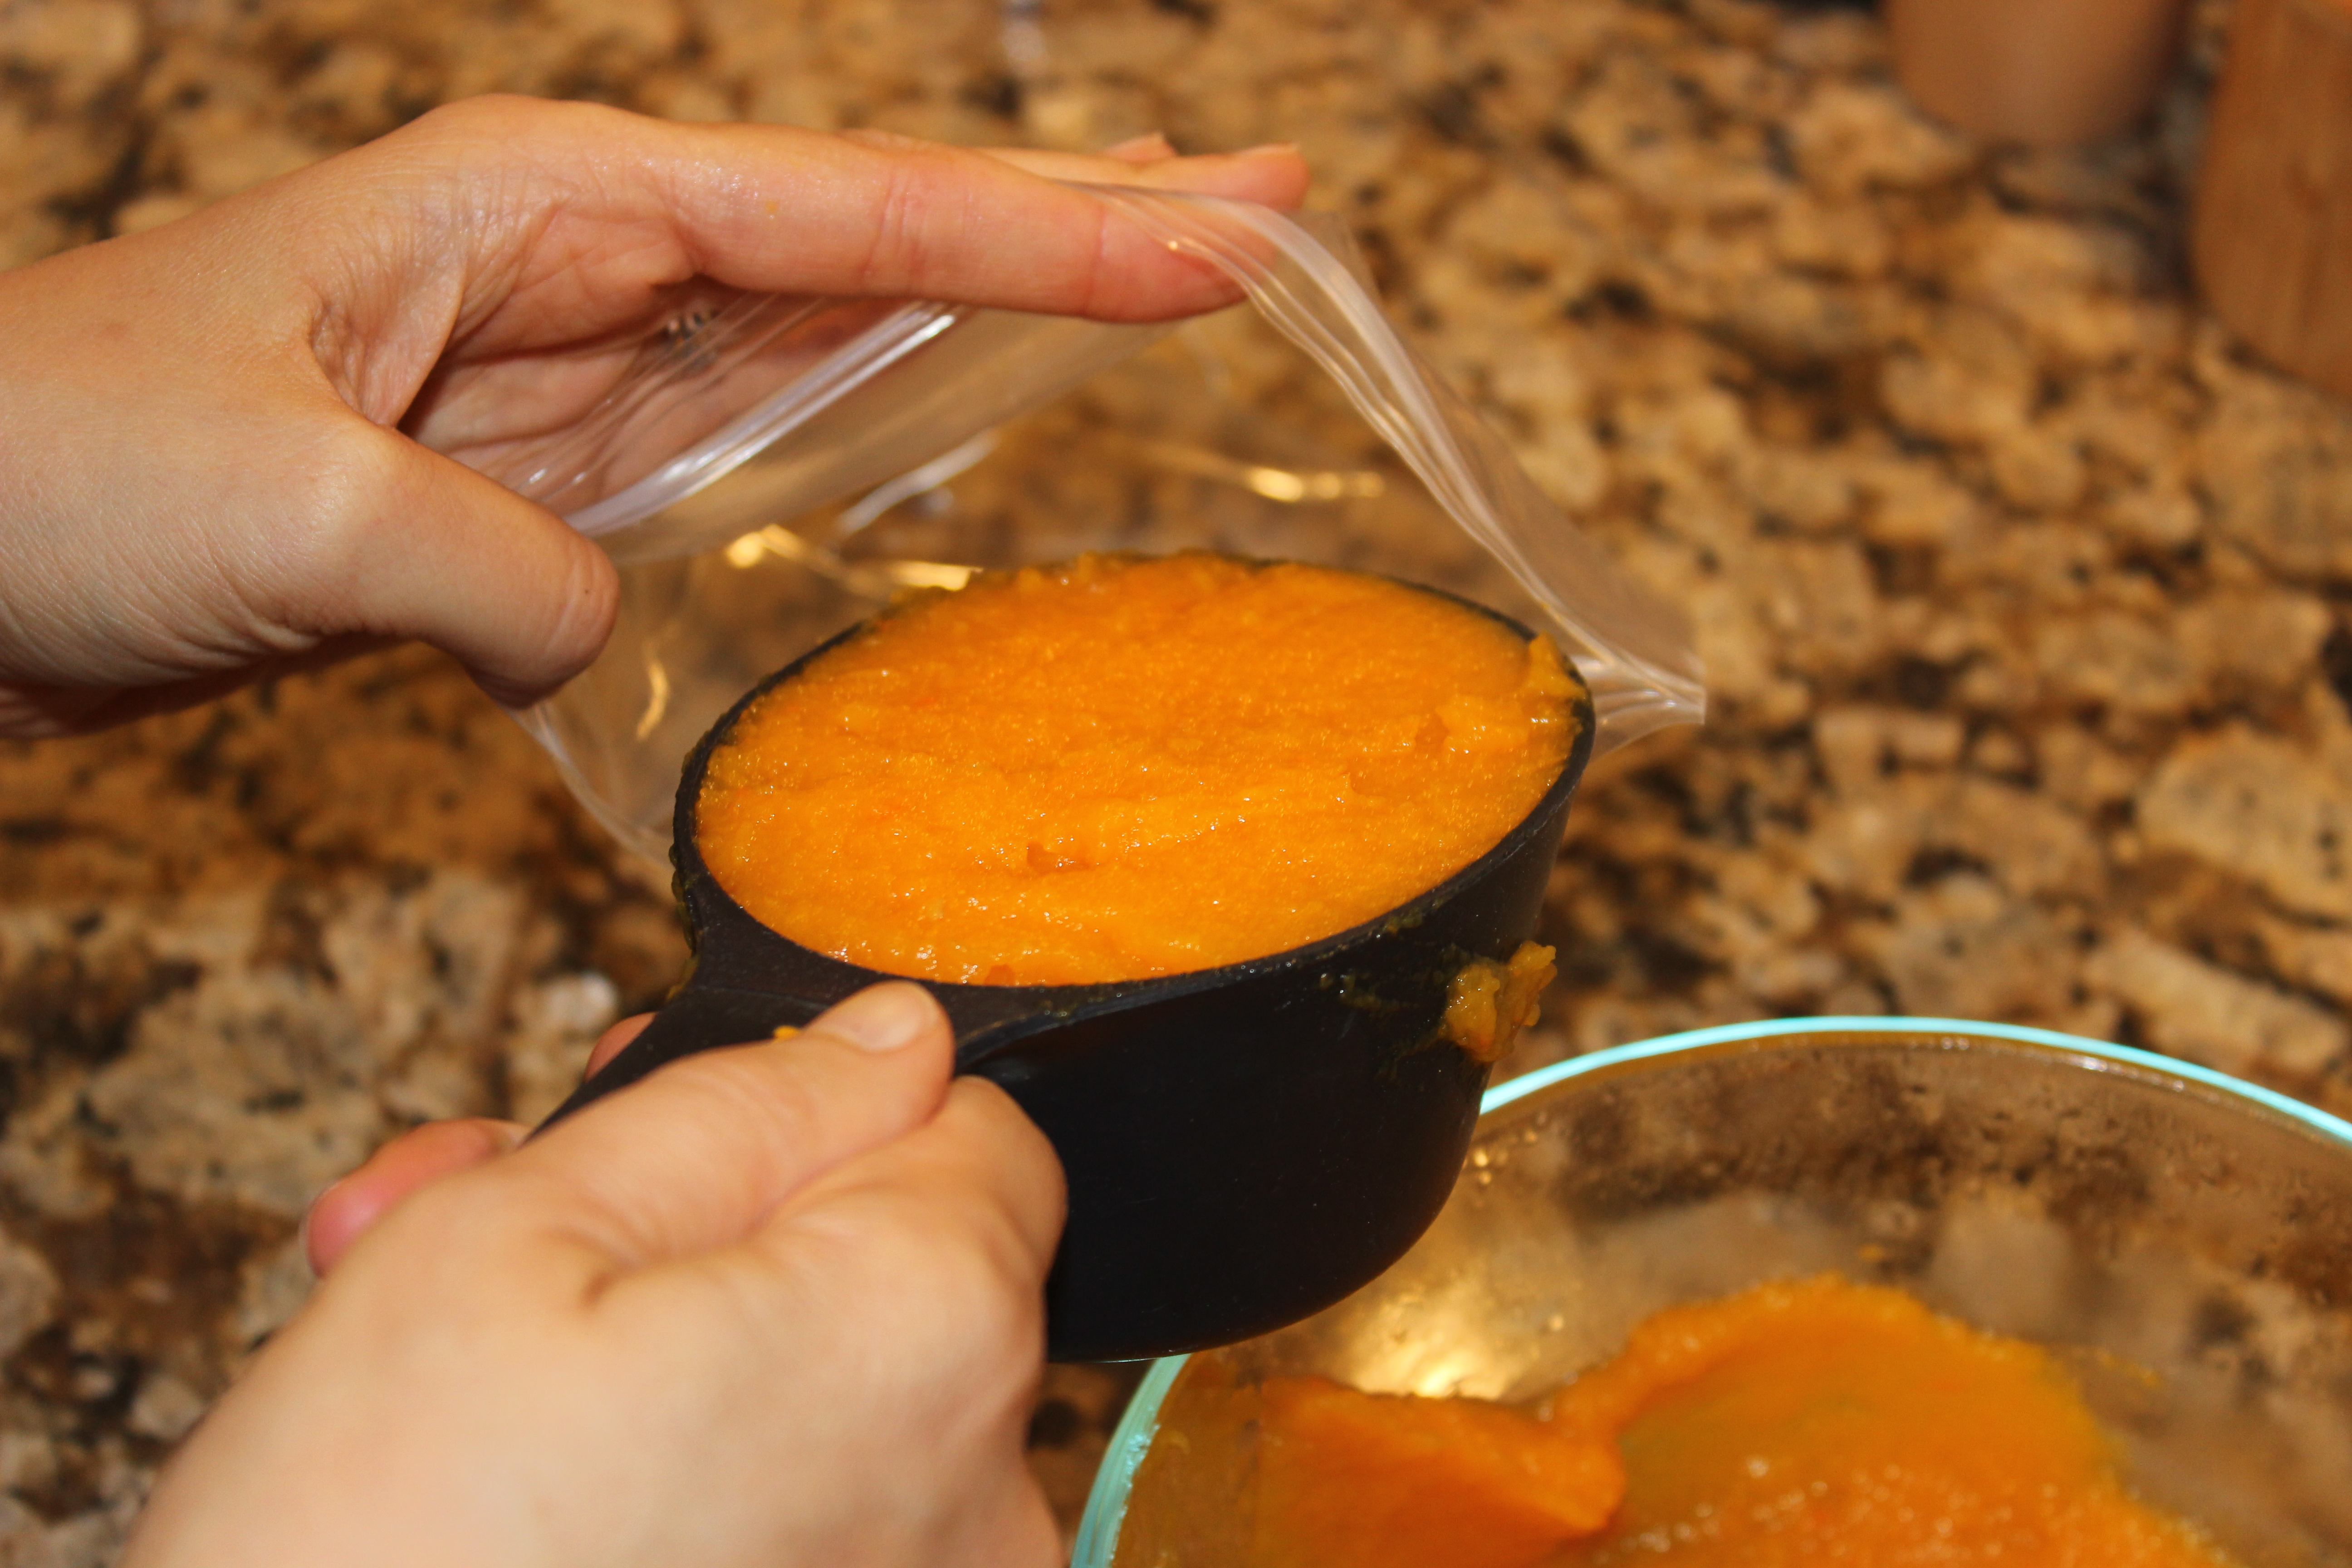
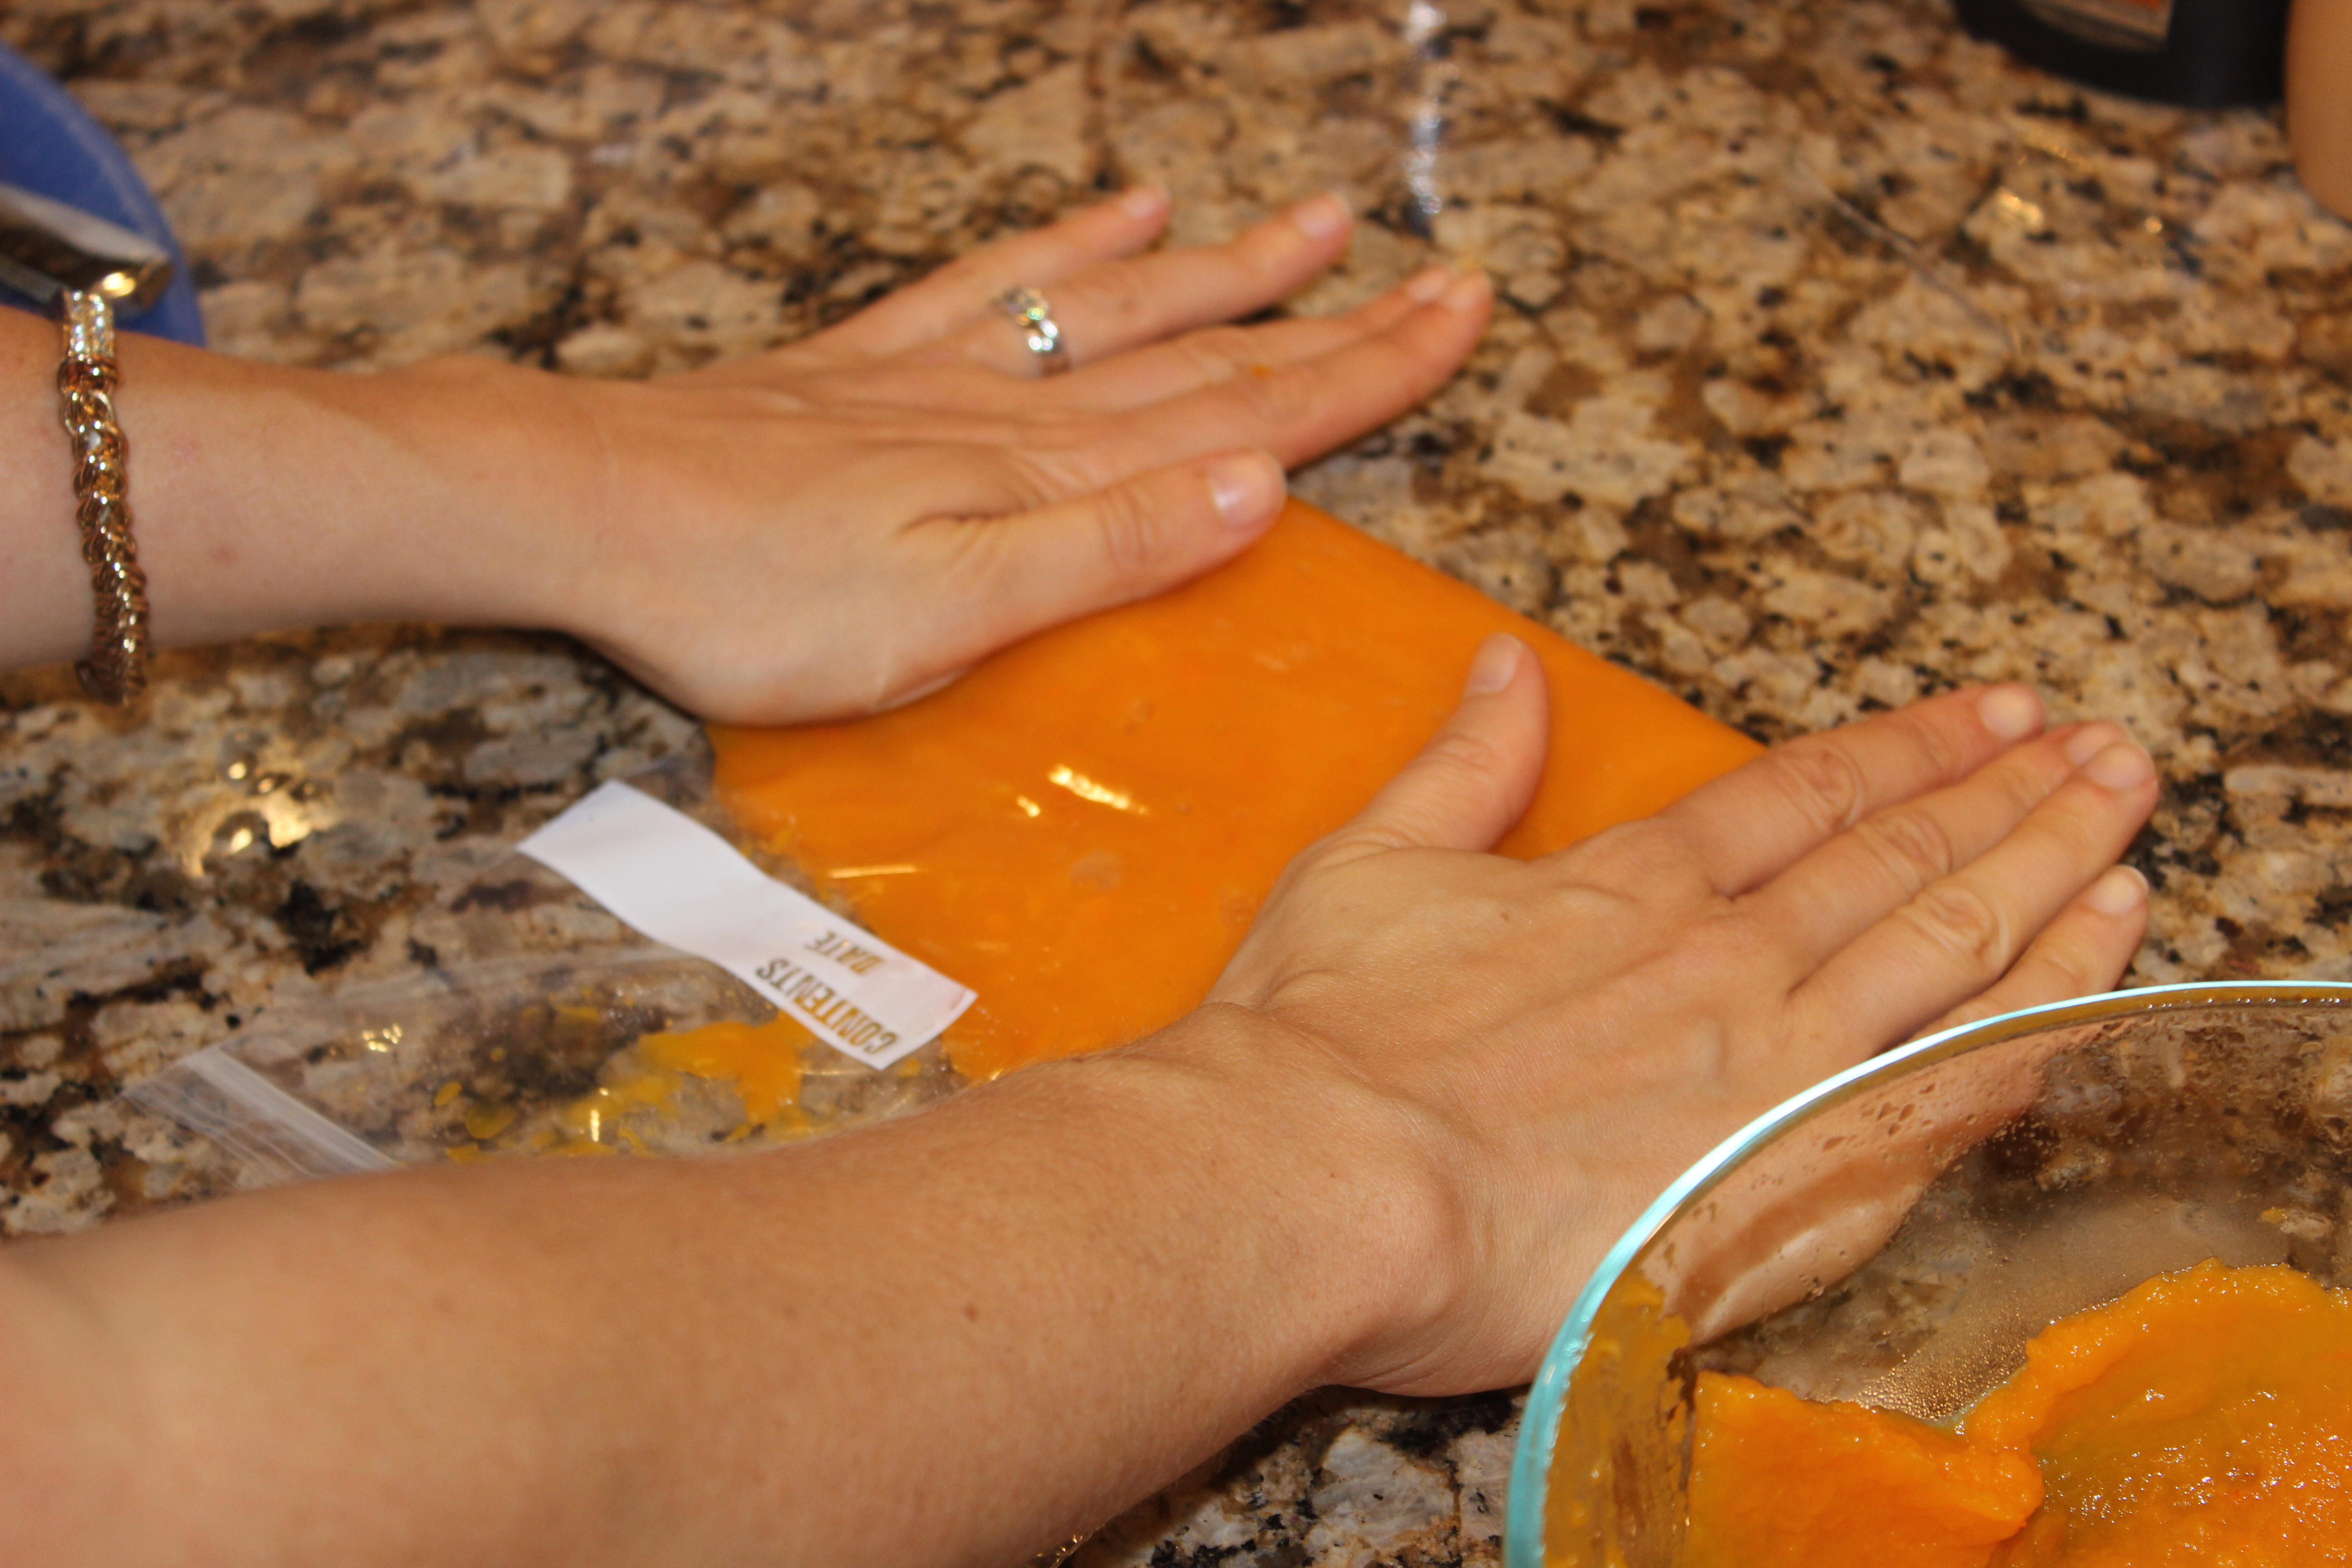
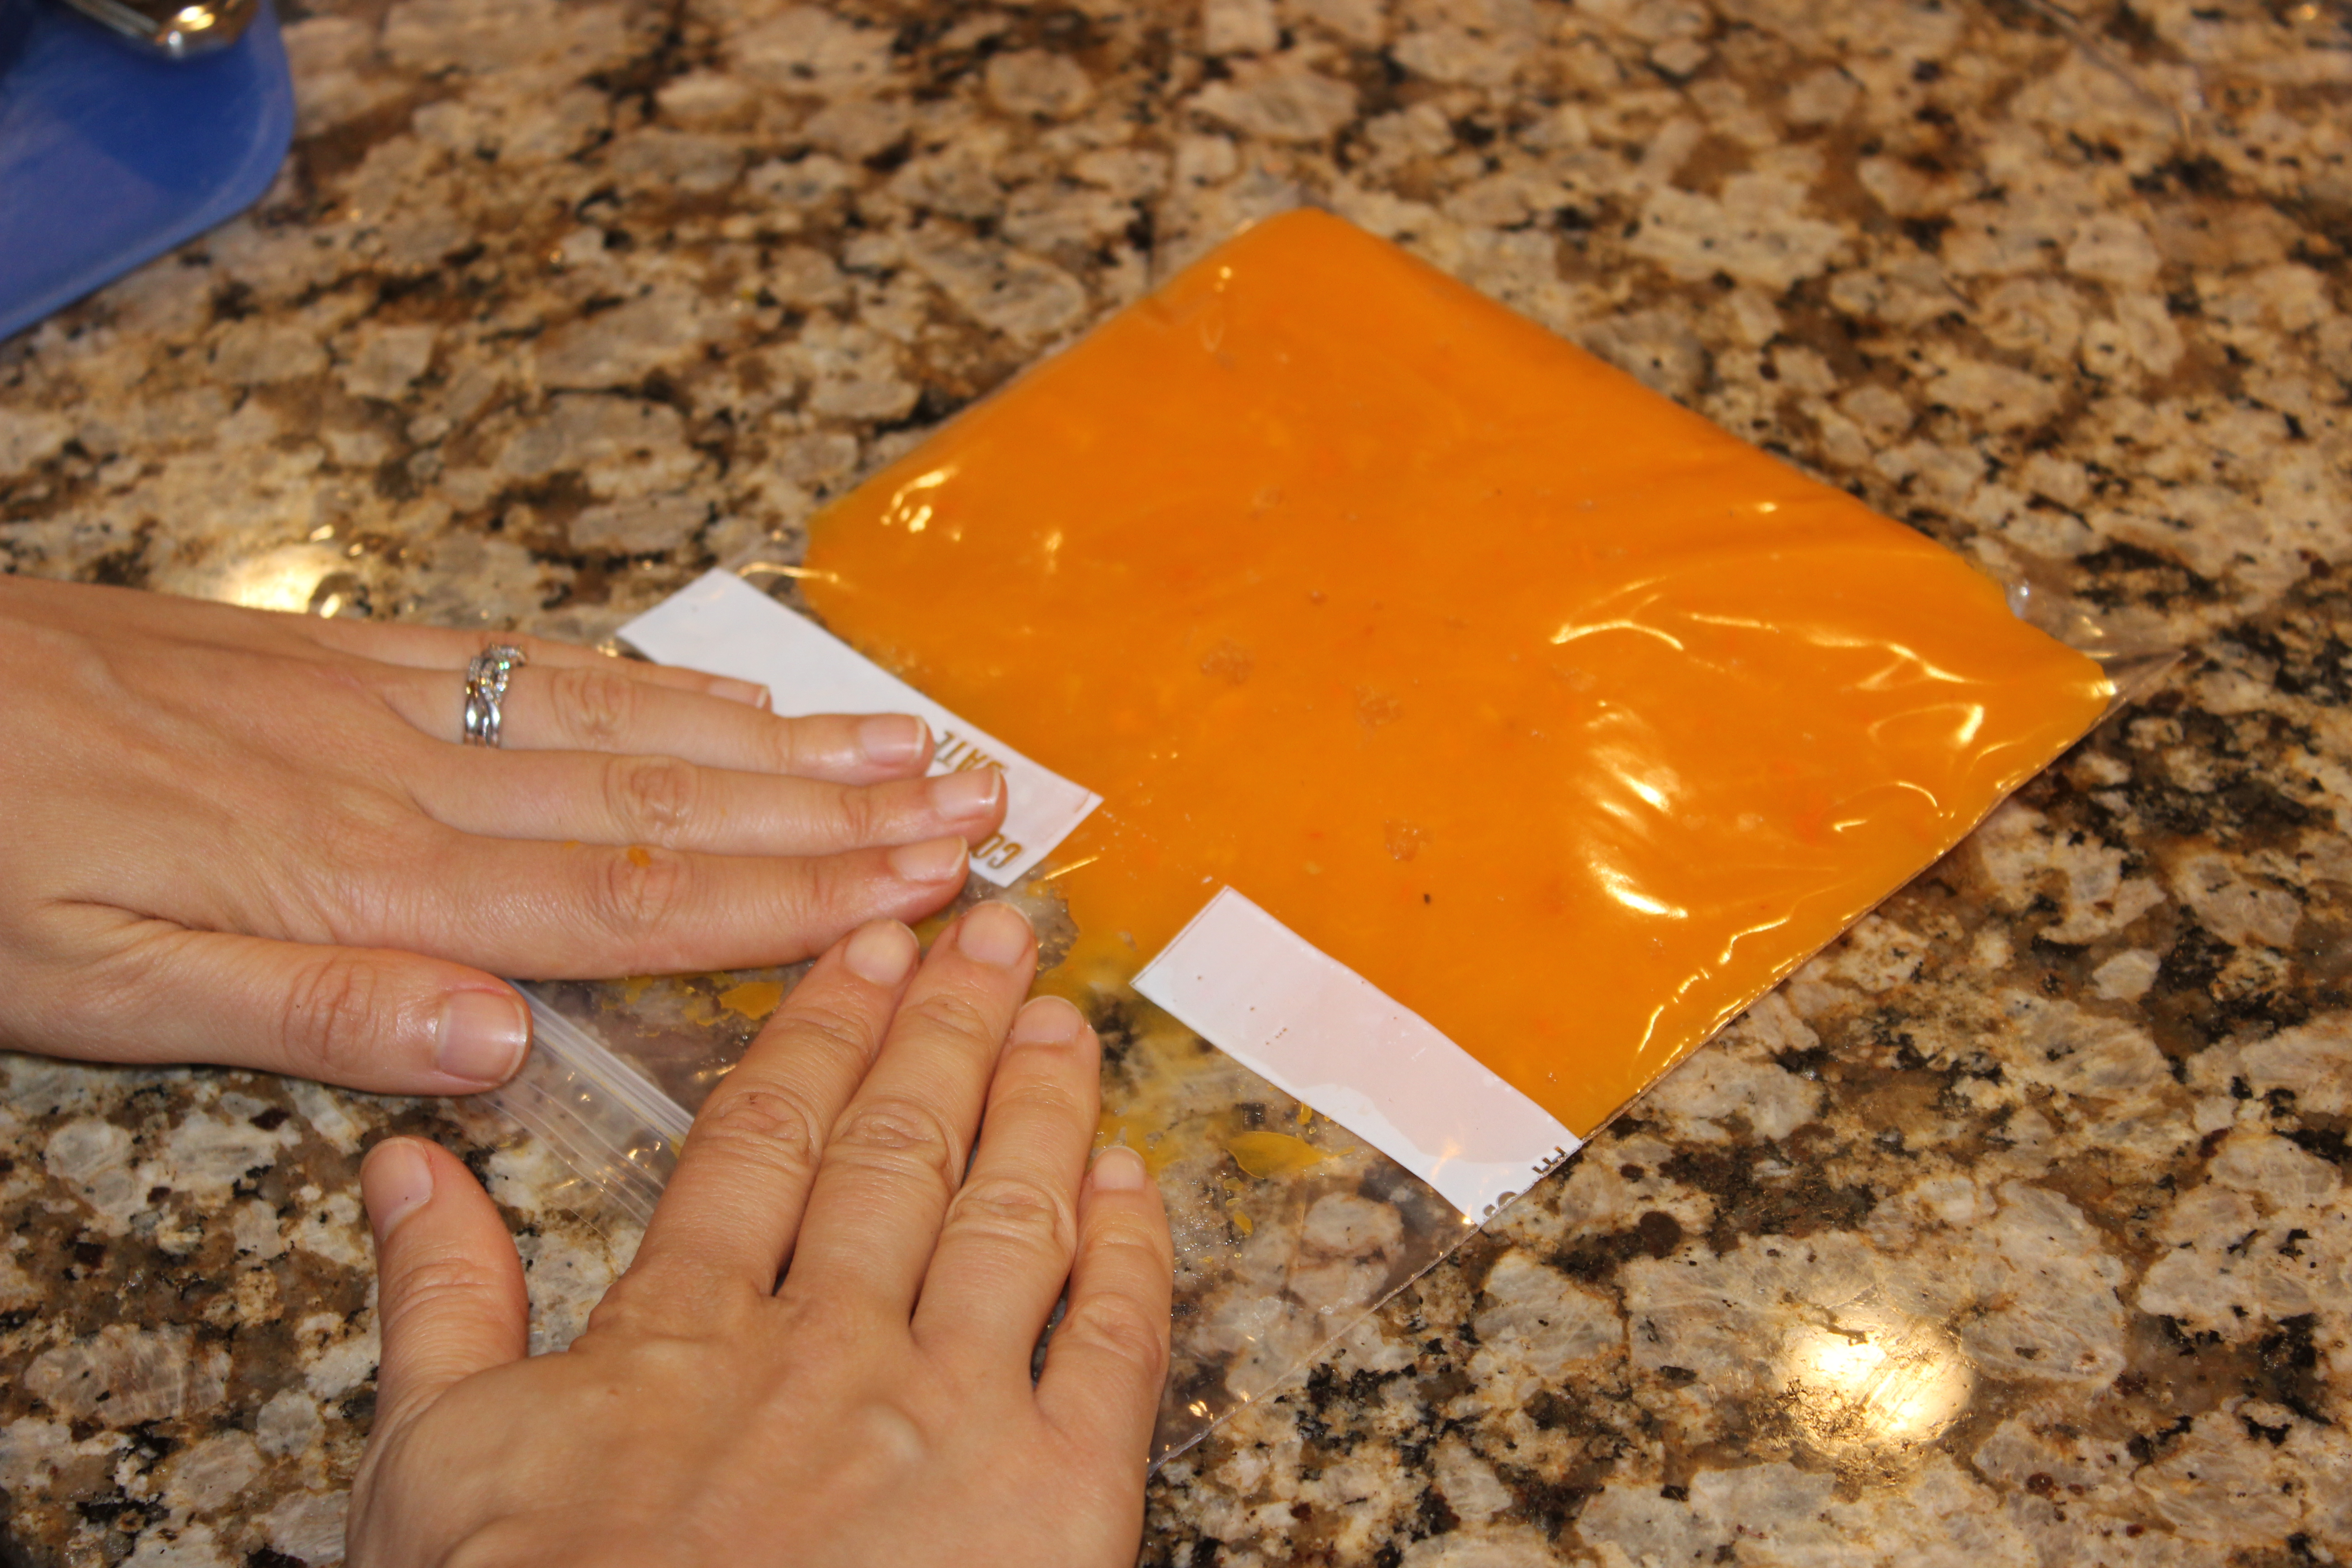
Use the puree immediately OR measure out 1-cup servings and put the puree in freezer bags, squeezing out all of the air, so it’s ready to use whenever you need squash in the future.

Follow the step-by-step process below!

IMG_6737 IMG_6740 IMG_6742 IMG_6744 IMG_6746

If you’re using pumpkins, once you have your puree ready, try using it in this Ultimate Pumpkin Pie Smoothie RecipePumpkin Pie Overnight Oats, or these Paleo Pumpkin Spice Muffins!

What’s your favorite way to use squash? Are you looking for any recipe ideas? Feel free to leave a comment below to let me know 🙂

Paleo Pumpkin Spice Muffins (GF)

paleopumpkinSpiceMuffins

“This is one of the best muffins I’ve ever had.” 

That’s what one of my co-workers said when she tried these the other day.

I served these pumpkin muffins at a client meeting, and one of my other coworkers, who is a meatball sub and Fritos-lover, went back for seconds.

That’s how I knew this recipe was a keeper!

If you’ve been following my blog for some time or are a newbie (welcome!), you’ll notice that all of the recipes are gluten-free and dairy-free, most are vegan (though I am not), and all focus on making “upgrades” to typical favorite recipes…all while nourishing our body!

Some of the recipes I make are also paleo-friendly (no refined or processed sugars or oils; grain-free, dairy-free; bean-free). It’s supposedly the way the cavemen ate.

(There are still disputes about what the cavemen actually ate, so if you’re interested in learning more about that, check out this TED Talk or this post.)

Many people who have health conditions like irritable bowel syndrome, acid reflux, thyroid issues, and even multiple sclerosis find they feel a lot better when they “eat paleo,” even if just for a trial period.

This recipe for pumpkin muffins happens to be paleo, so it should fit with most people’s health needs and concerns. 🙂

IMG_6707

Enough about paleo…let’s talk PUMPKINS!

Fall is my absolute favorite season, and pumpkins are one of my favorite things about fall.

Because I like to focus on WHY we should add in more good stuff (like pumpkin!) to crowd out the other stuff. I want to share just how nourishing pumpkin is for our bodies before we get into the recipe:

  • Fun facts: Pumpkins are actually fruits (not veggies) and are related to cantaloupes and cucumbers (Who knew??)
  • High in fill-you-up fiber, which keeps us “regular” (this is a good thing!) and keeps us feeling satisfied for hours
  • Excellent source of beta-carotene – a potent antioxidant and cancer-fighter that also happens to be good for our eyes and skin health
  • Loaded with lycopene and carotenoids that are known to help “diminish cancer cells, inhibit diabetes, hypertension, the signs of aging, and prevent macular degeneration”
  • Full of potassium, which helps restore our body’s electrolyte balance

I wrote a blog post the other day about some of my top “Sweet Treat Pantry Staples.” You’ll see some of them below (coconut flour, maple syrup), and I mentioned some of the others in my Top 10 Gluten-Free, Dairy-Free Everyday Pantry Essentials post (coconut oil, raw apple cider vinegar).

Paleo Pumpkin Muffins (Gluten-Free)

IMG_6703

IMG_6709

Ingredients

  • ½ cup coconut flour
  • 1 cup canned pumpkin puree (or fresh puree!)**
  • ¼ cup coconut oil
  • ¼ cup 100% pure maple syrup or raw honey (I used maple syrup and loved it!)
  • 4 eggs
  • ¾ tablespoon pumpkin pie spice
  • ½ teaspoon baking soda
  • ½ teaspoon raw apple cider vinegar (Bragg’s brand)
  • ¼ teaspoon sea salt
  • ¼ cup pecans, chopped (I added this ingredient)

I followed the directions in the original recipe but used 100% pure maple syrup instead of honey and sprinkled pecans on top before baking. I really liked the added crunch!

**Make sure you don’t buy pumpkin pie filling if you buy the canned stuff, by the way. It’s totally different from pumpkin puree!

I cooked them for a full 30 minutes. Coconut flour has a tendency to dry out, so make sure you don’t overcook them.

Click here for the full directions for how to make these yummy muffins 🙂

I love my silicone muffin holders!

I love my silicone muffin holders!

The Easiest Way to Roast Beets {A Simple How to Photo Guide}

Whenever I think of beets, I can’t help but think of The Office’s Dwight Schrute and his epic beet farm.

As well as Jim Halpert’s impersonation of Dwight and his ”Bears. Beets. Battlestar Galactica” line.

beets

Had to reminisce about that for a second 🙂

Now, let’s get to the beets!

Over the past few months, I’ve had several friends ask me how to roast beets.

To be honest, I had never had much success with it in the past, but I was determined to figure it out.

IMG_4922

Beets are one of those foods that, if we haven’t tried them before, can be a bit intimidating to prepare.

I hope to take that intimidation factor down a notch today and show you how easy it is to cook beets.

One of my goals when I cook and teach about food is to share how certain foods nourish our body, so I have to share some of the reasons beets are so good for us!

  • They contain a nutrient called betaine that fights inflammation (inflamed body = sick, overweight body), improves our heart health, and protects our cells and internal organs.
  • Like any deep-colored fruits and veggies, beets have anti-cancer properties, and some research has shown that beetroot extract reduced tumor formation in animal models.
  • They help our bodies detoxify (clean out!), helping to purify our blood and our liver, which is crucial to keeping weight off, feeling our best, and staying healthy.
  • They’re loaded with vitamin C, fill-you-up fiber, and minerals that are good for our bones, liver, kidneys, and healthy nerve and muscle function.

Now that we know how good for us these little crimson gems are, let’s talk about how to cook and peel them!

How to Roast & Peel Beets

IMG_6578

Step 1: Preheat the oven to 350F.

Step 2: Cut the tops (beet greens) and bottom “tail” off the beets, so they will sit upright in a pan. Save the beet greens. You can sautee them on the stove just like you would any other greens like kale or Swiss chard (more on how to do that in a future post!).

IMG_6575

Step 3: Place the beets in a covered baking dish as shown below. Cover the dish with an oven-proof lid. I used a Corningware dish and a glass lid.

IMG_6586

Step 4: Bake for 50-90 minutes, depending on how big the beets are. I used relatively small beets and they took almost an hour. You can check them for doneness by piercing them with a fork – they will be “fork tender” when they’re done.

Step 5: Let them cool.

IMG_6645

Step 6: Take a paper towel and rub/pull the skin off of the beets as shown in the pictures below. This minimizes stains on your fingers.

IMG_6658 IMG_6661 IMG_6663 IMG_6664 IMG_6665 IMG_6668 IMG_6671

The aftermath of another culinary adventure!

The aftermath of another culinary adventure!

Step 7: Once the beets are peeled, you can do whatever you want with them. They have an “earthy” and slightly sweet flavor. Nothing else really tastes like a beet, so you’ll just have to try it yourself to see how you like it!

I sliced them up and put them on a salad.

You could also eat them by themselves, throw in a few in a smoothie (they will make it VERY red!) or toss them in a vinaigrette. They pair well with balsamic vinaigrette as well as herbs like rosemary.

Here’s a recipe for a beet, pear and almond salad you can try 🙂

Simple salad of sliced beets, chopped pecans, and field greens

Simple salad of sliced beets, chopped pecans, and field greens

How do you like to use beets? Feel free to share your favorite recipes with us below!

Simply Slow Roasted Tomato Sauce

When I needed to figure out a creative way to use up the jumbo slicing tomatoes we had on our counter before leaving for vacation, this recipe was born!

Roasting the tomatoes before blending them gives this sauce a rich, deep flavor that you don’t get from the canned stuff.

We ended up putting it on top of some brown rice pasta, broccoli and sautéed eggplant, but you could also use it as a dipping sauce (like I plan to for the amazing eggplant “chips” we made this past week!

IMG_5525

Tomatoes are loaded with an antioxidant (antioxidant = anti-disease, anti-aging) called lycopene, which has been shown to have anti-cancerous properties. Lycopene is not naturally produced in our body, so it must be supplied through our diet.

The antioxidants and nutrients in tomatoes also contribute to our bone health and protect our heart and blood vessels.

It’s important to eat tomatoes with some fat (i.e., top them with a drizzle of an oil-based vinaigrette or enjoy them with avocado…something with fat!) since lycopene is what is known as a fat-soluble nutrient.  It has to be eaten with dietary fat in order to be properly absorbed by our body.

To read more about the awesome health benefits of tomatoes, click here or here.

The recipe is very simple to make and tastes delicious. Chances are, you already have all of the herbs and spices in your pantry!

Stay tuned for a recipe later this week for what my dad AND husband said is one of THE BEST things I’ve ever made…it’s pairs nicely with this tomato dipping sauce, too 🙂

Simply Slow Roasted Tomato Sauce

IMG_5624

Ingredients

  • 2 pounds tomatoes, quartered (see first pic above!)
  • 3 cloves garlic, minced
  • 1 cup yellow onion, chopped
  • 1/4-1/2 teaspoon sea salt, depending on your taste preference
  • 1 teaspoon dried oregano
  • 1 teaspoon dried basil
  • 1 teaspoon dried rosemary
  • Black pepper, to taste

Directions

  1. Preheat oven to 400F.
  2. Place the tomatoes on a foil-lined baking sheet, cut side down, and sprinkle 1/4 teaspoon of sea salt on top of the slices. Cook tomatoes in the oven for 60 minutes, flipping the tomatoes halfway for even roasting. Remove from oven and set aside to cool.
  3. While the tomatoes are cooling, saute onions and garlic in your choice of vegetable broth, cooking oil, ghee, or grass-fed butter until the onions and garlic have softened, about 10-15 minutes (Click here for info on why grass-fed butter may be tolerated just fine on a dairy-free diet, as I’ve found it to be for myself…everyone is different!).
  4. Puree the roasted tomatoes, sauteed onions and garlic, herbs, and pepper in a blender until smooth. Season with black pepper and salt, to taste. Adjust the amount of herbs based on your taste preference.
  5. Heat sauce on the stove in a medium saucepan until ready to serve.

Page 9 of 13

Powered by WordPress & Theme by Anders Norén