Notice: Function _load_textdomain_just_in_time was called incorrectly. Translation loading for the social_sharing domain was triggered too early. This is usually an indicator for some code in the plugin or theme running too early. Translations should be loaded at the init action or later. Please see Debugging in WordPress for more information. (This message was added in version 6.7.0.) in /var/www/wp-includes/functions.php on line 6121
Vegan Archives · Page 12 of 15 · Rachel's Nourishing Kitchen

Category: Vegan Page 12 of 15

How to Make Your Own Pumpkin Puree {Step-by-Step Guide!}

I’m a big advocate of eating food that is as fresh and unprocessed as possible.

Sometimes, for convenience sake, I opt for minimally processed versions of certain foods.

Like pumpkin puree.

Most of the time, it’s easier and quicker to buy a can of it to put into my smoothies, muffins, and overnight oats than to make it from scratch.

But last week I got this in my Hometown Harvest bag and knew it was time for me to figure out how to make my own.

The squash below is actually just an autumn squash, but you can follow the process I outline for autumn squash, butternut squash or pumpkin to make your own puree. 

IMG_6434

Roasting your own vegetables for this puree gives them a velvety smooth texture and deep flavor that definitely tastes better than the canned stuff!

Step-by-step instructions for how to make your own squash puree

Preheat the oven to 350F.

IMG_6624

For a round squash, cut off the top (including the stem) with a sharp knife and then cut the squash in half. For flatter squash, like the one I had, cut it in half with a sharp knife, cutting one side first and then the other on either side of the stem.

IMG_6625

Break it apart with your hands along the seam where you cut.

IMG_6629

Scoop out the seeds with a spoon. Save them to make your own toasted seeds (something I plan to do in the future).

IMG_6630

Cut the pumpkin into chunks. I cut along the existing creases.

Cut the squash into chunks. I cut along the existing creases.

Pumpkin chunks ready for roasting!

Squash chunks ready for roasting!

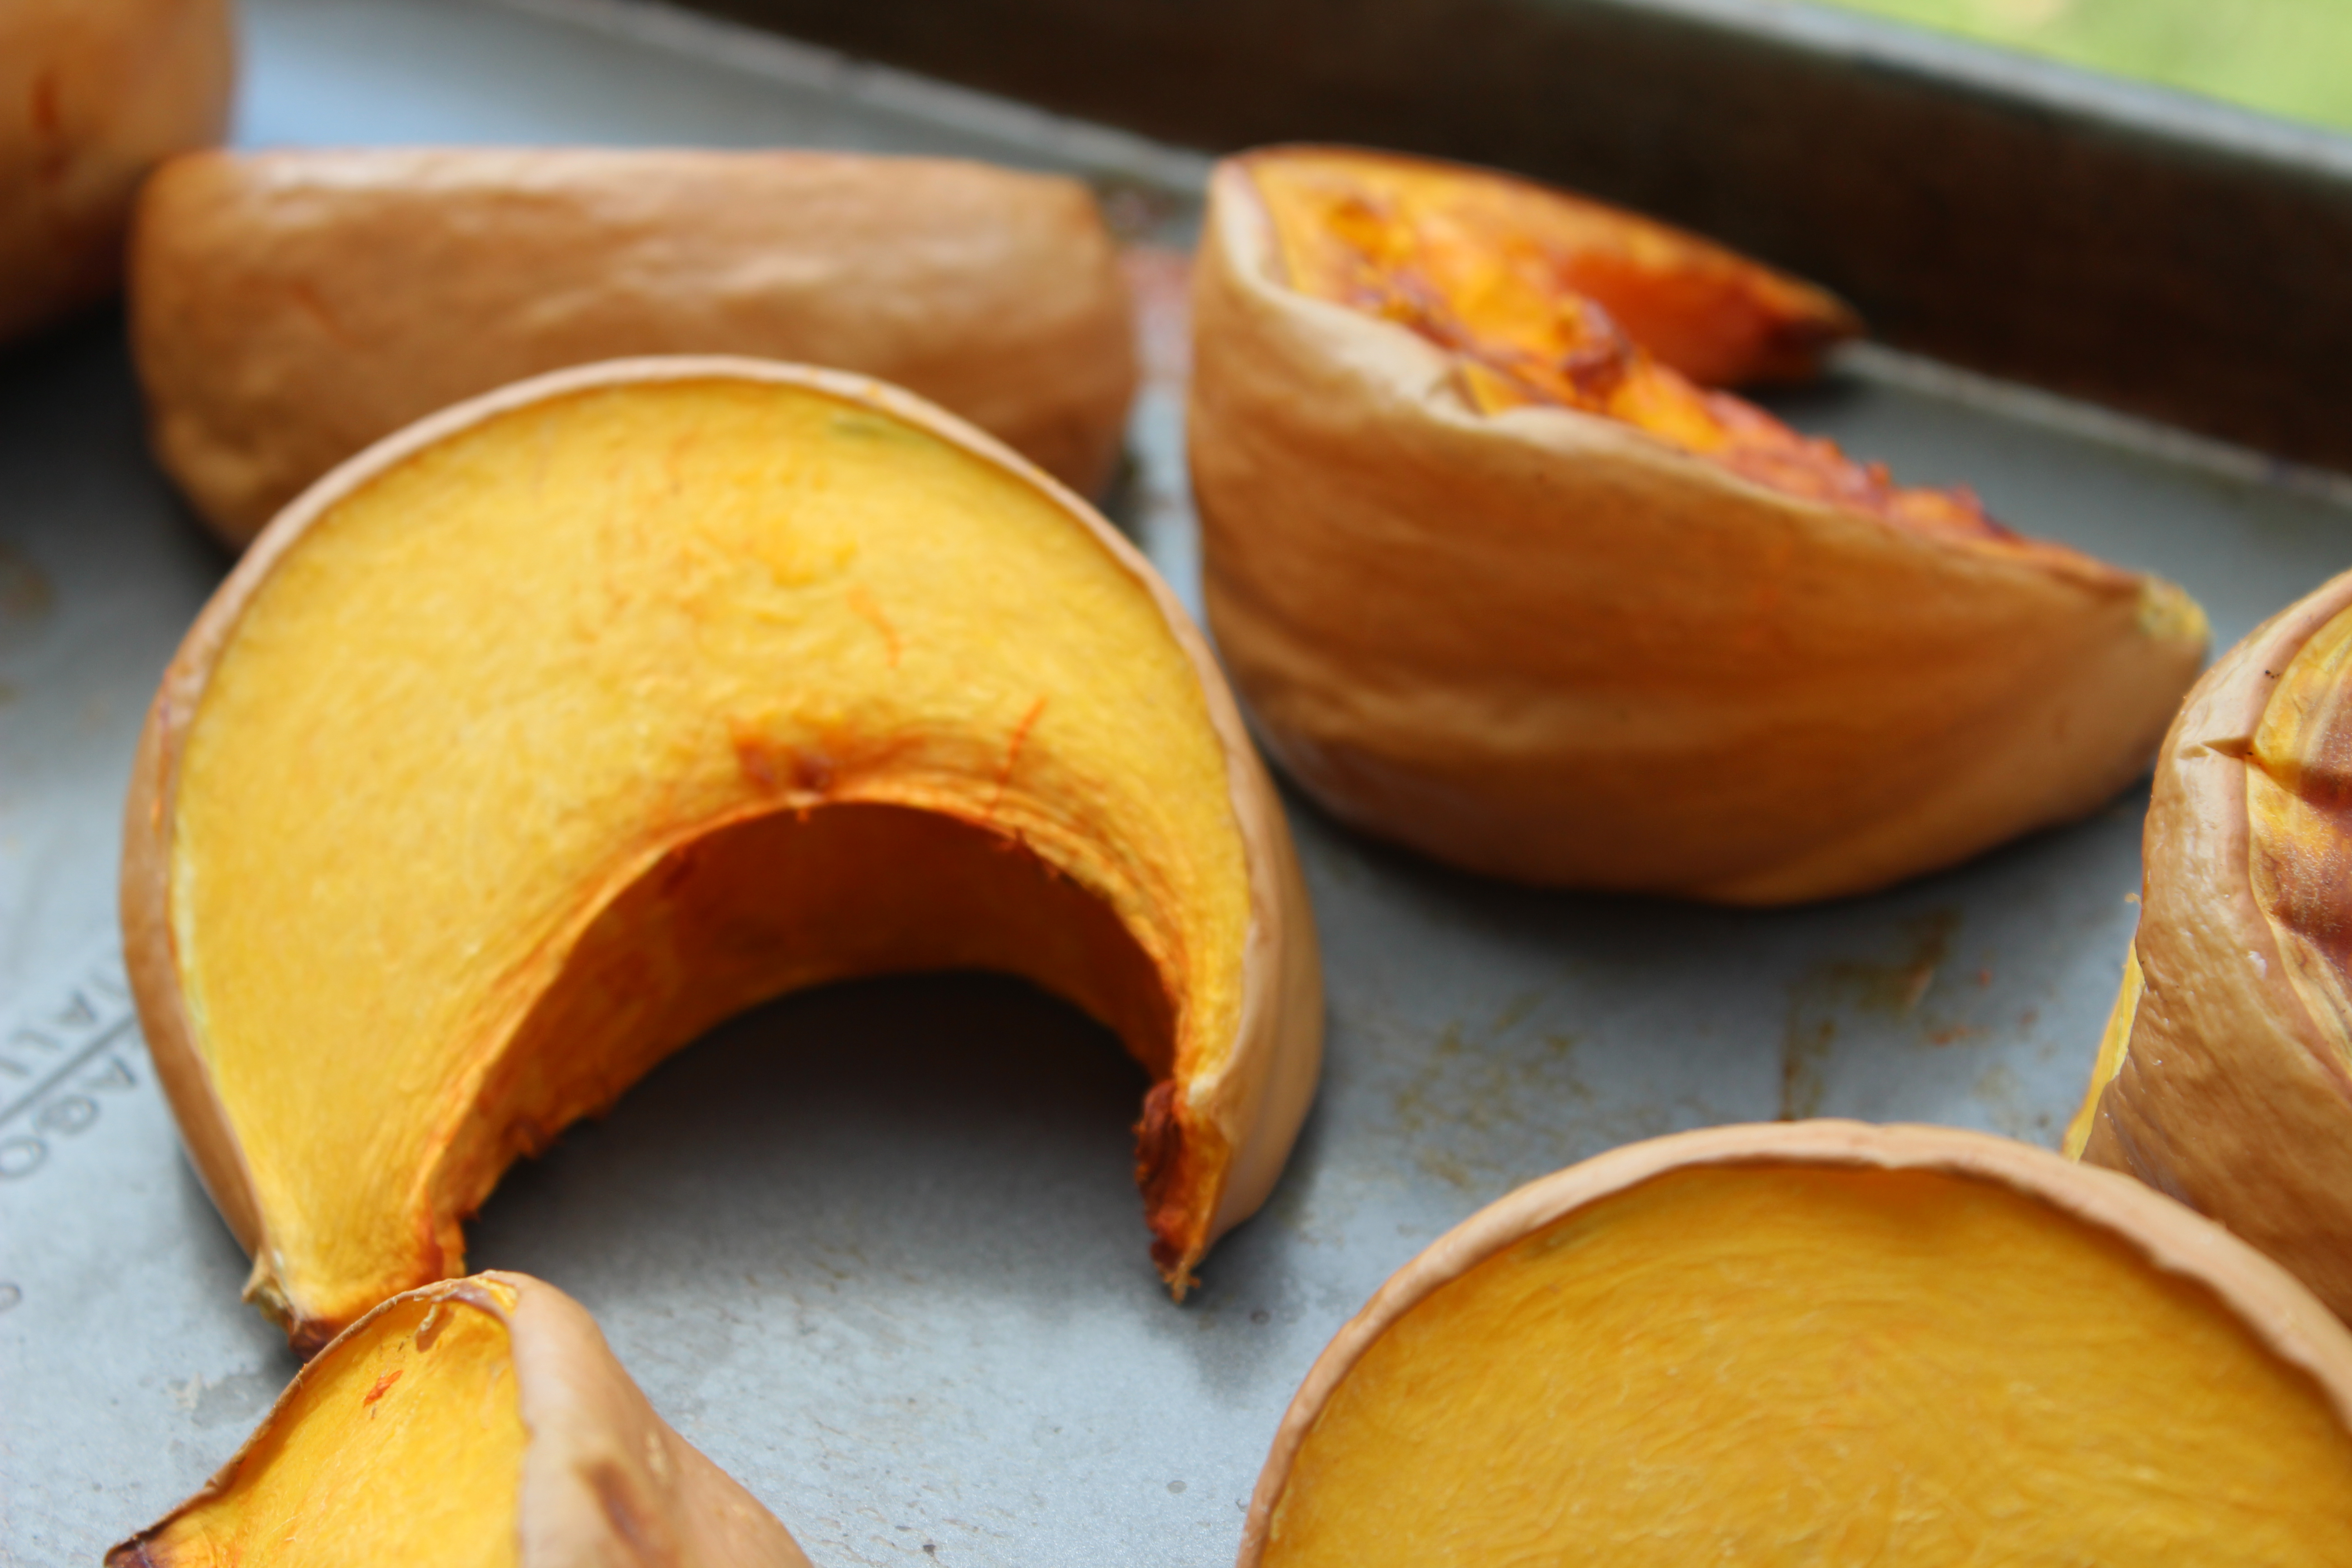
Put the pumpkin slices on a baking sheet and roast for 45-60 minutes or until you can easily pierce the pumpkin with a fork.

Put the squash slices on a baking sheet and roast in a 350F oven for 45-60 minutes oven or until you can easily pierce the squash with a fork.

Pumpkins are done roasting when they look like this.

Squash is done roasting when it looks like this.

Let the slices cool and then take a spoon and scoop out the “meat” from the rind.

Let the slices cool on a plate and then use a spoon and scoop out the “meat” from the rind.

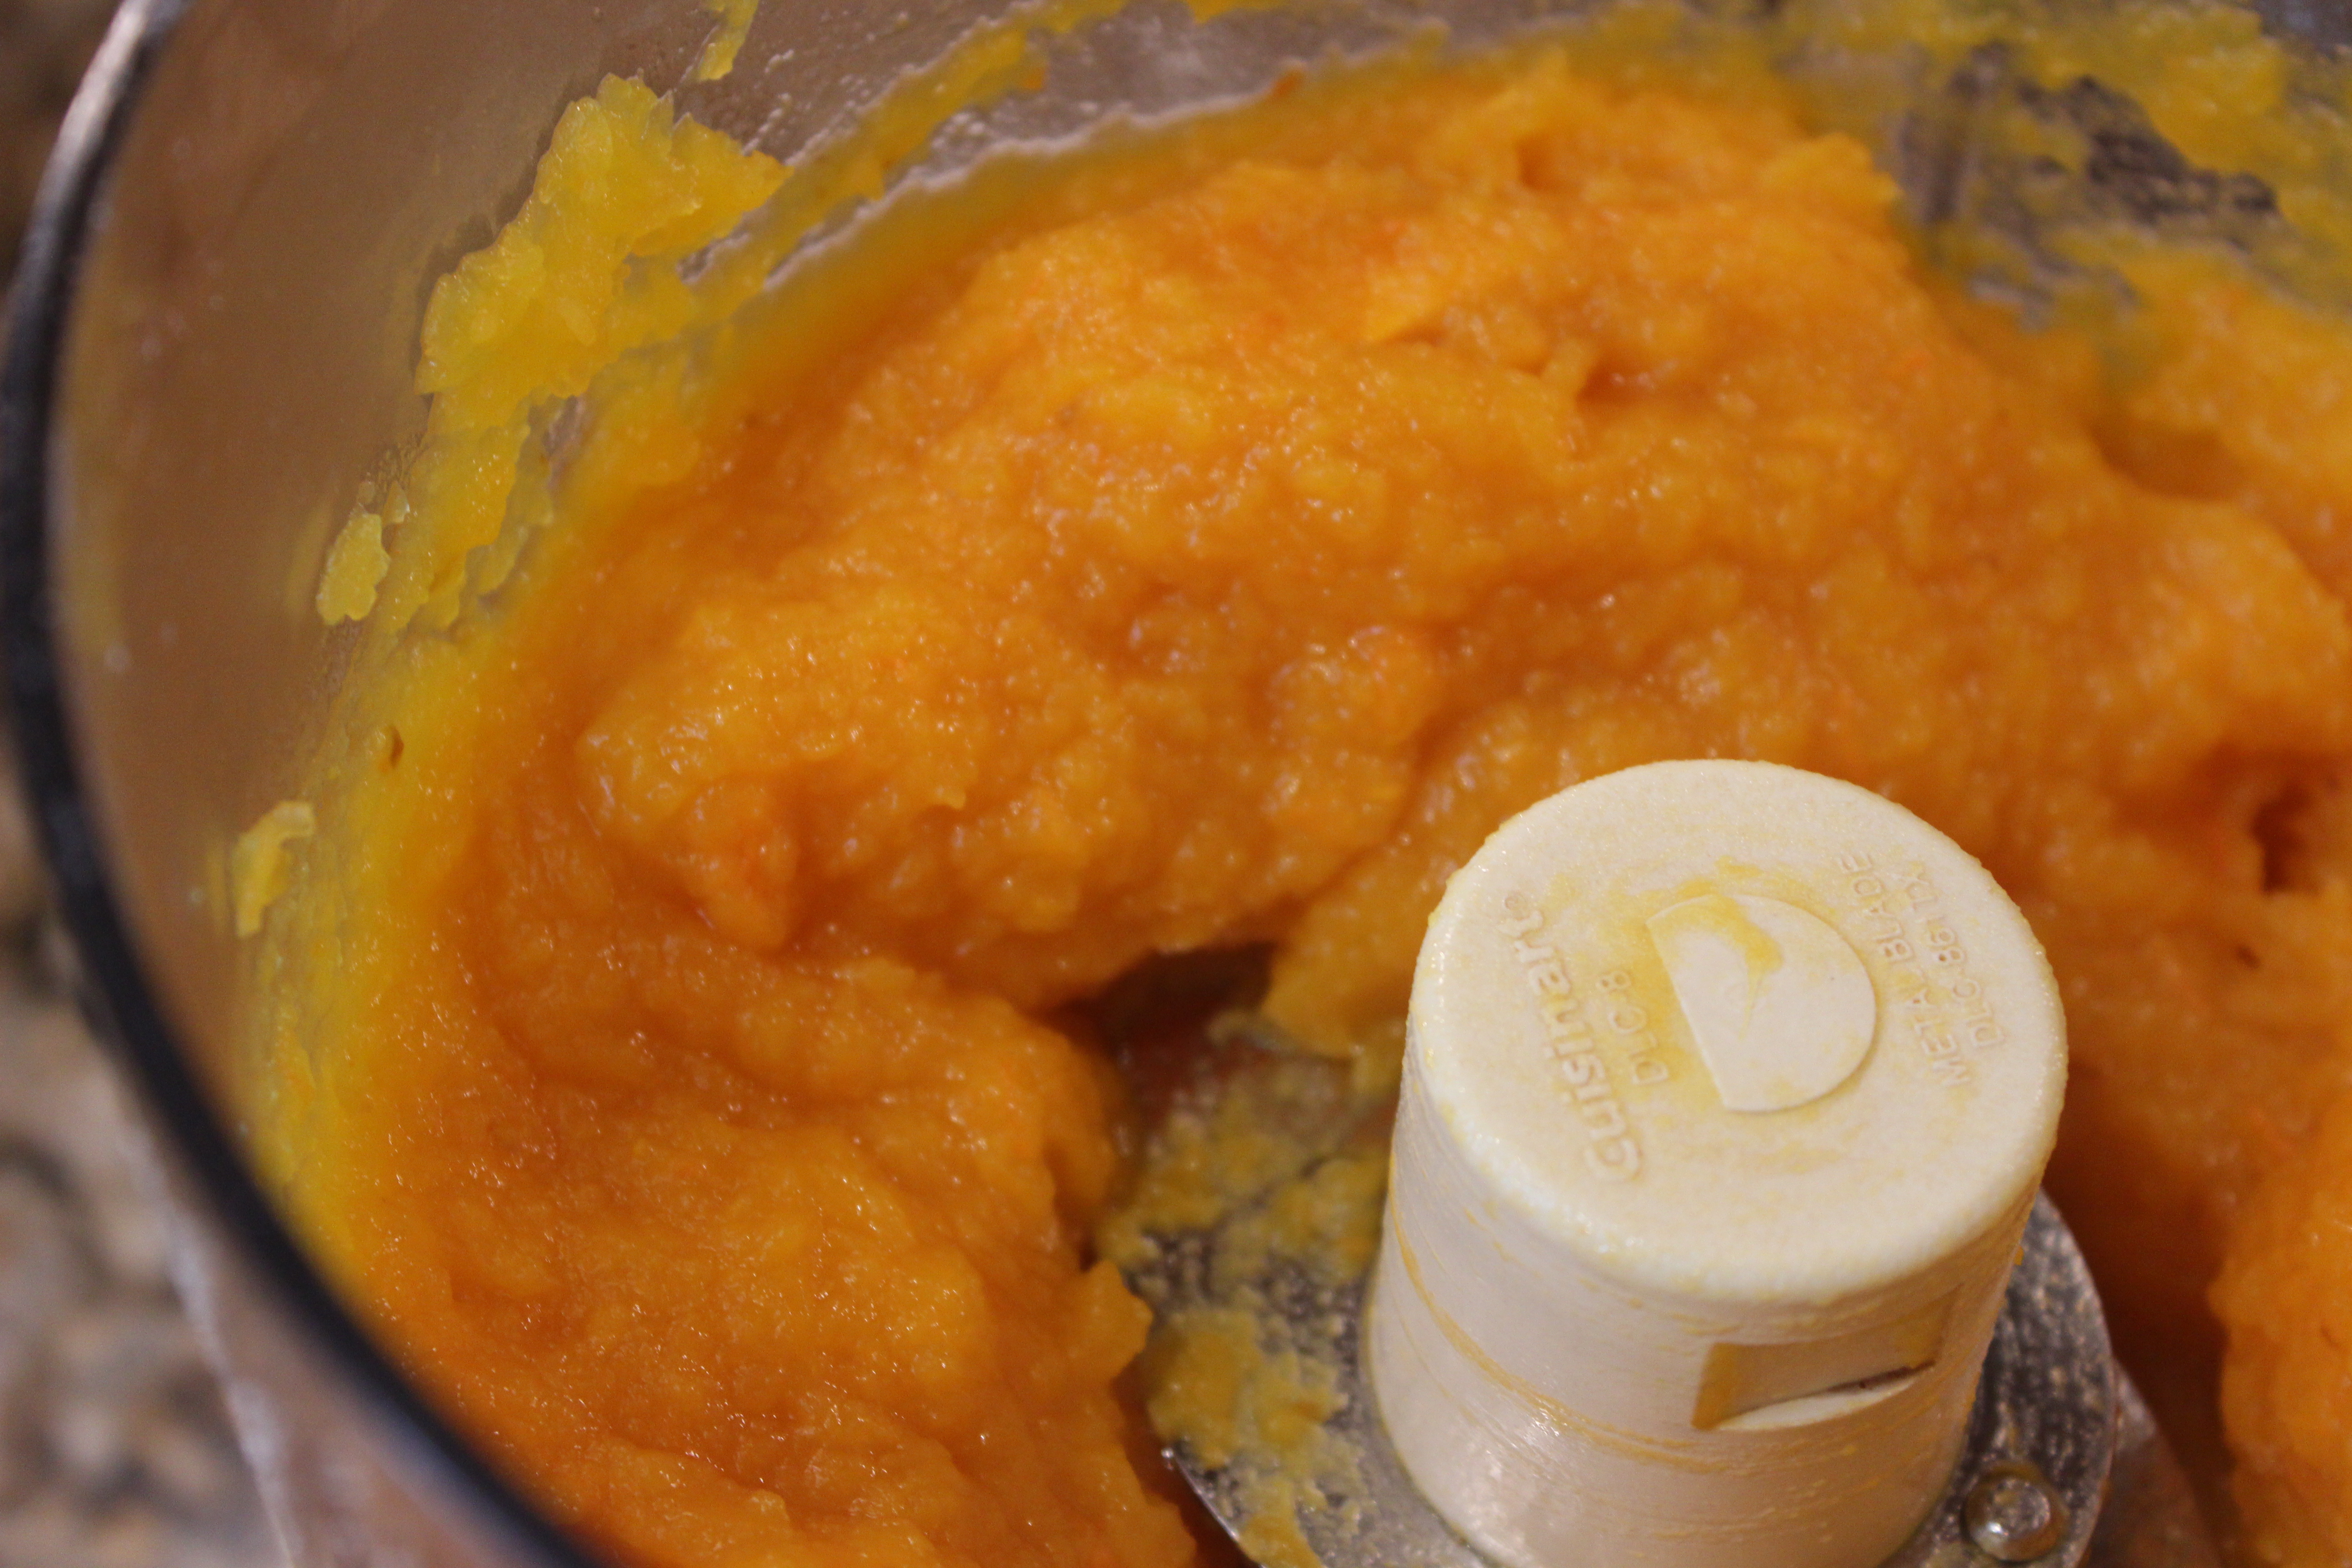
Puree all of the pumpkin in a food processor until smooth.

Puree all of the squash in a food processor until smooth.

IMG_6733

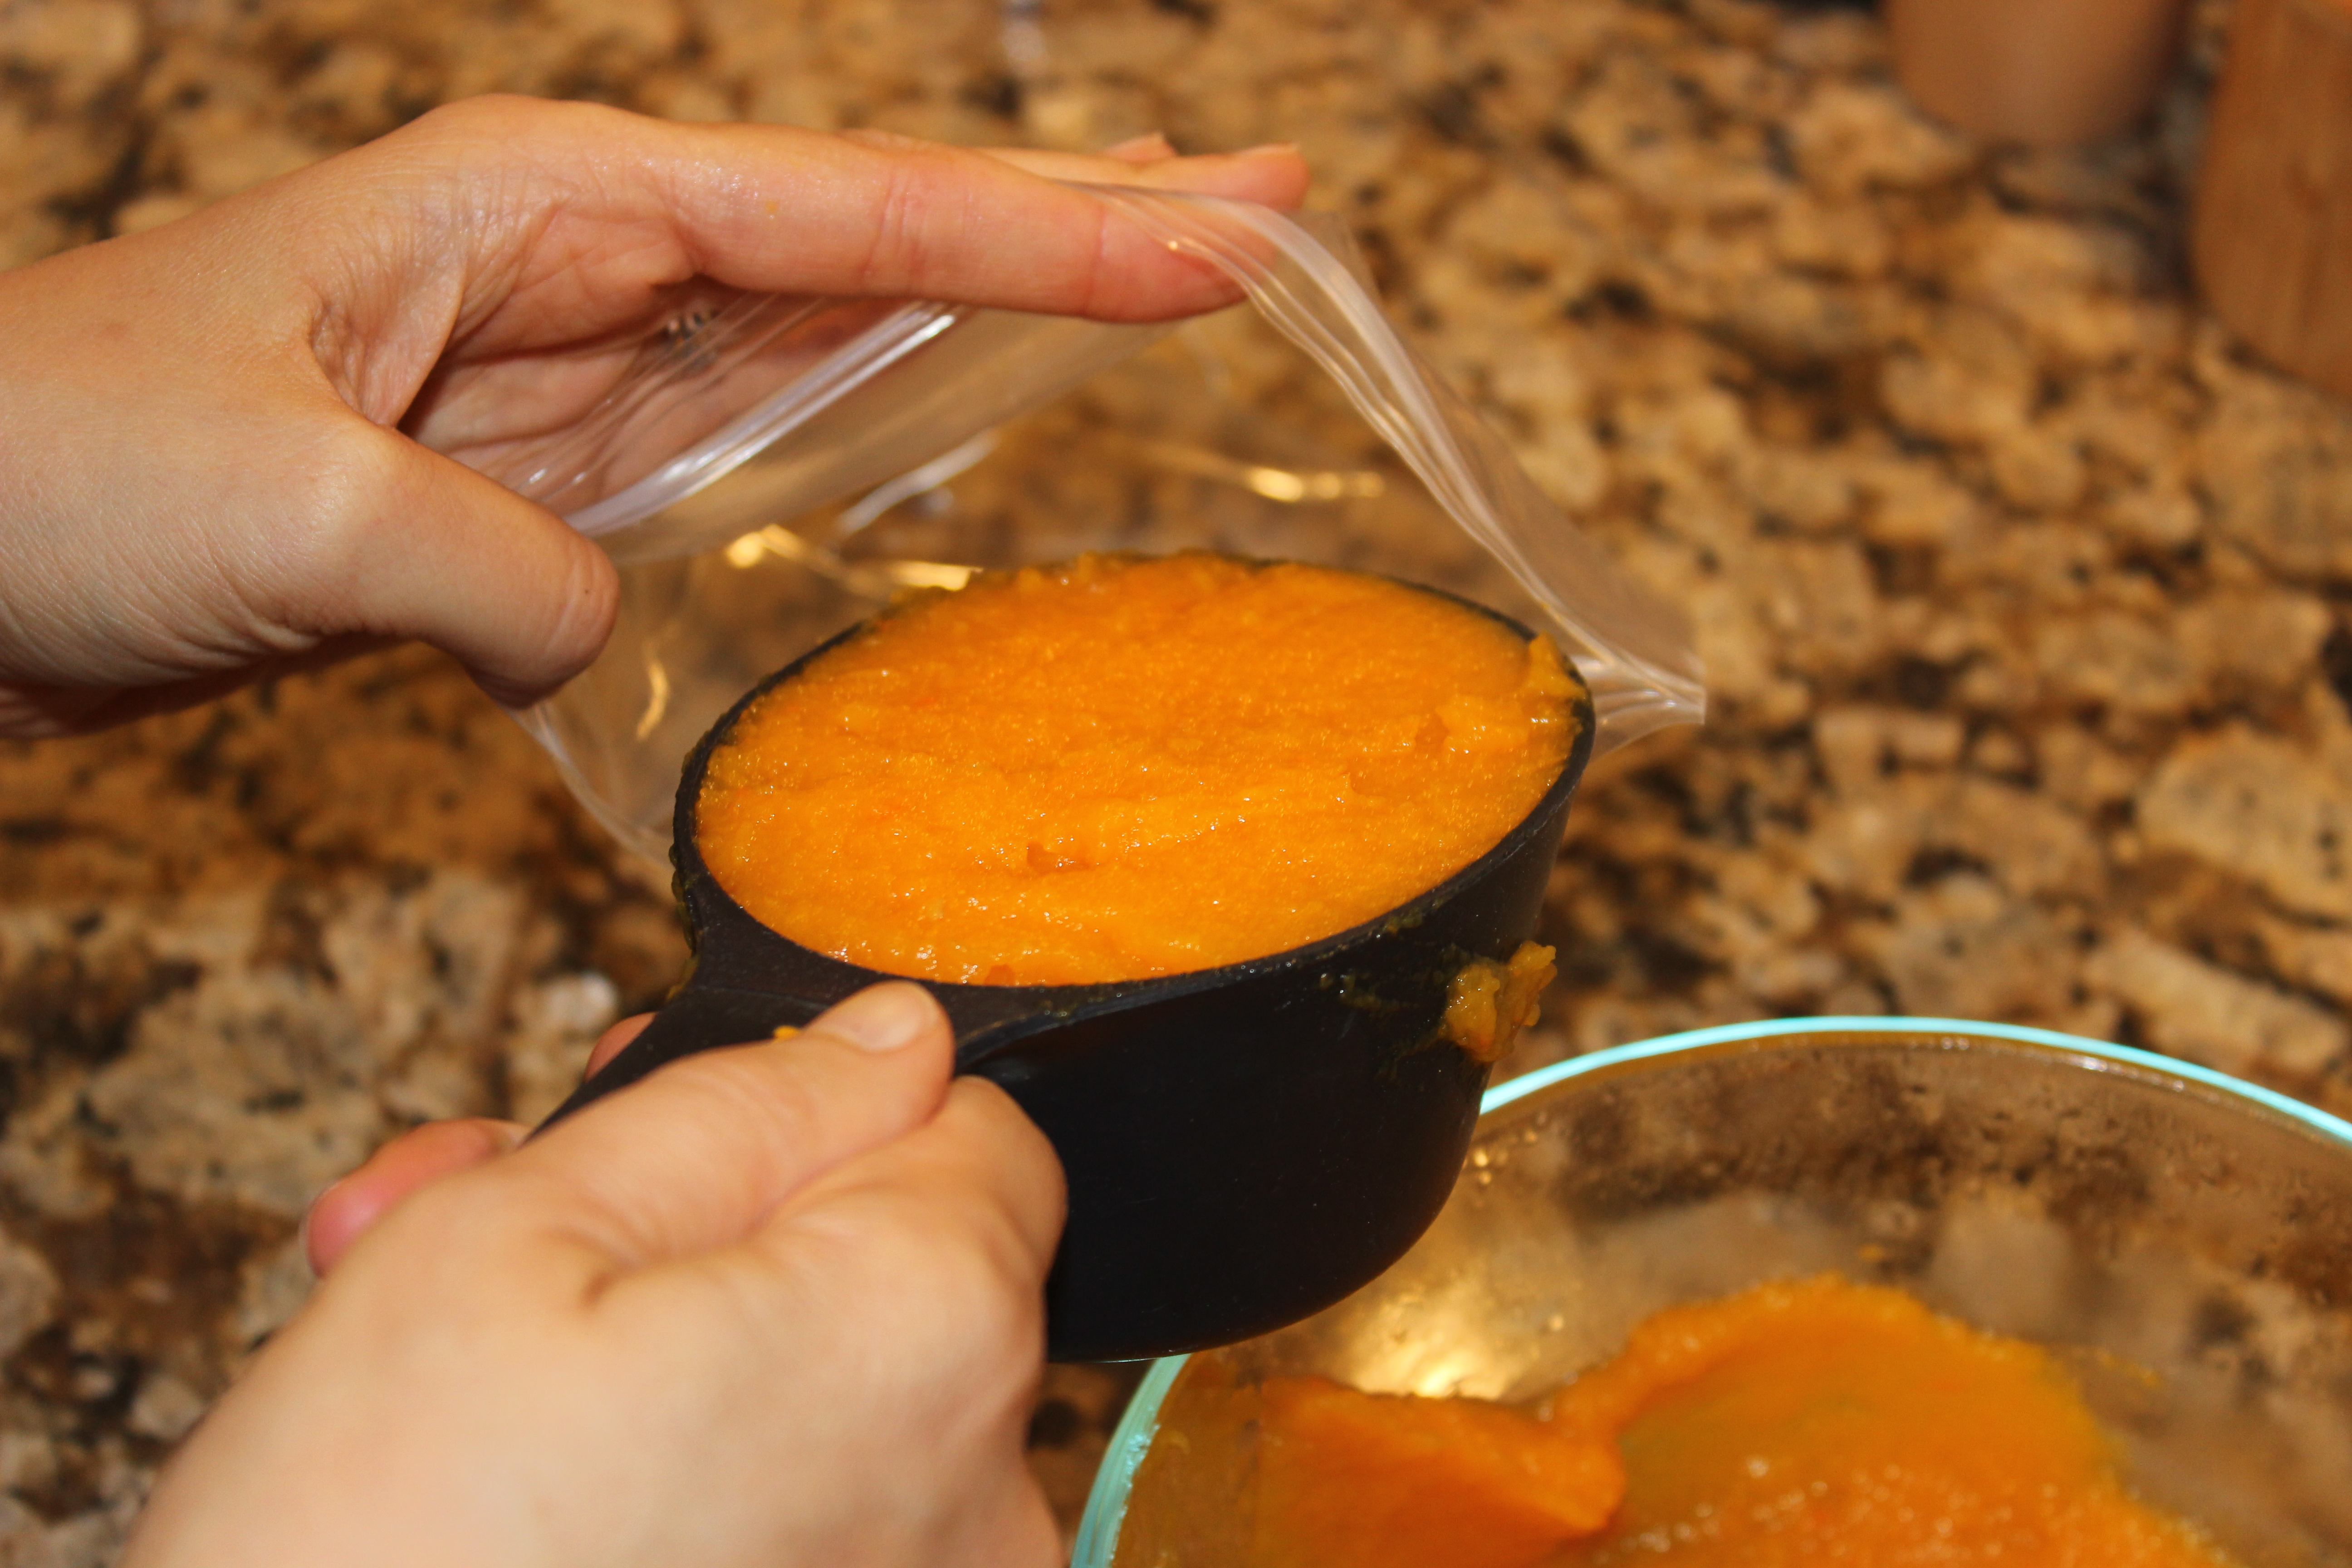
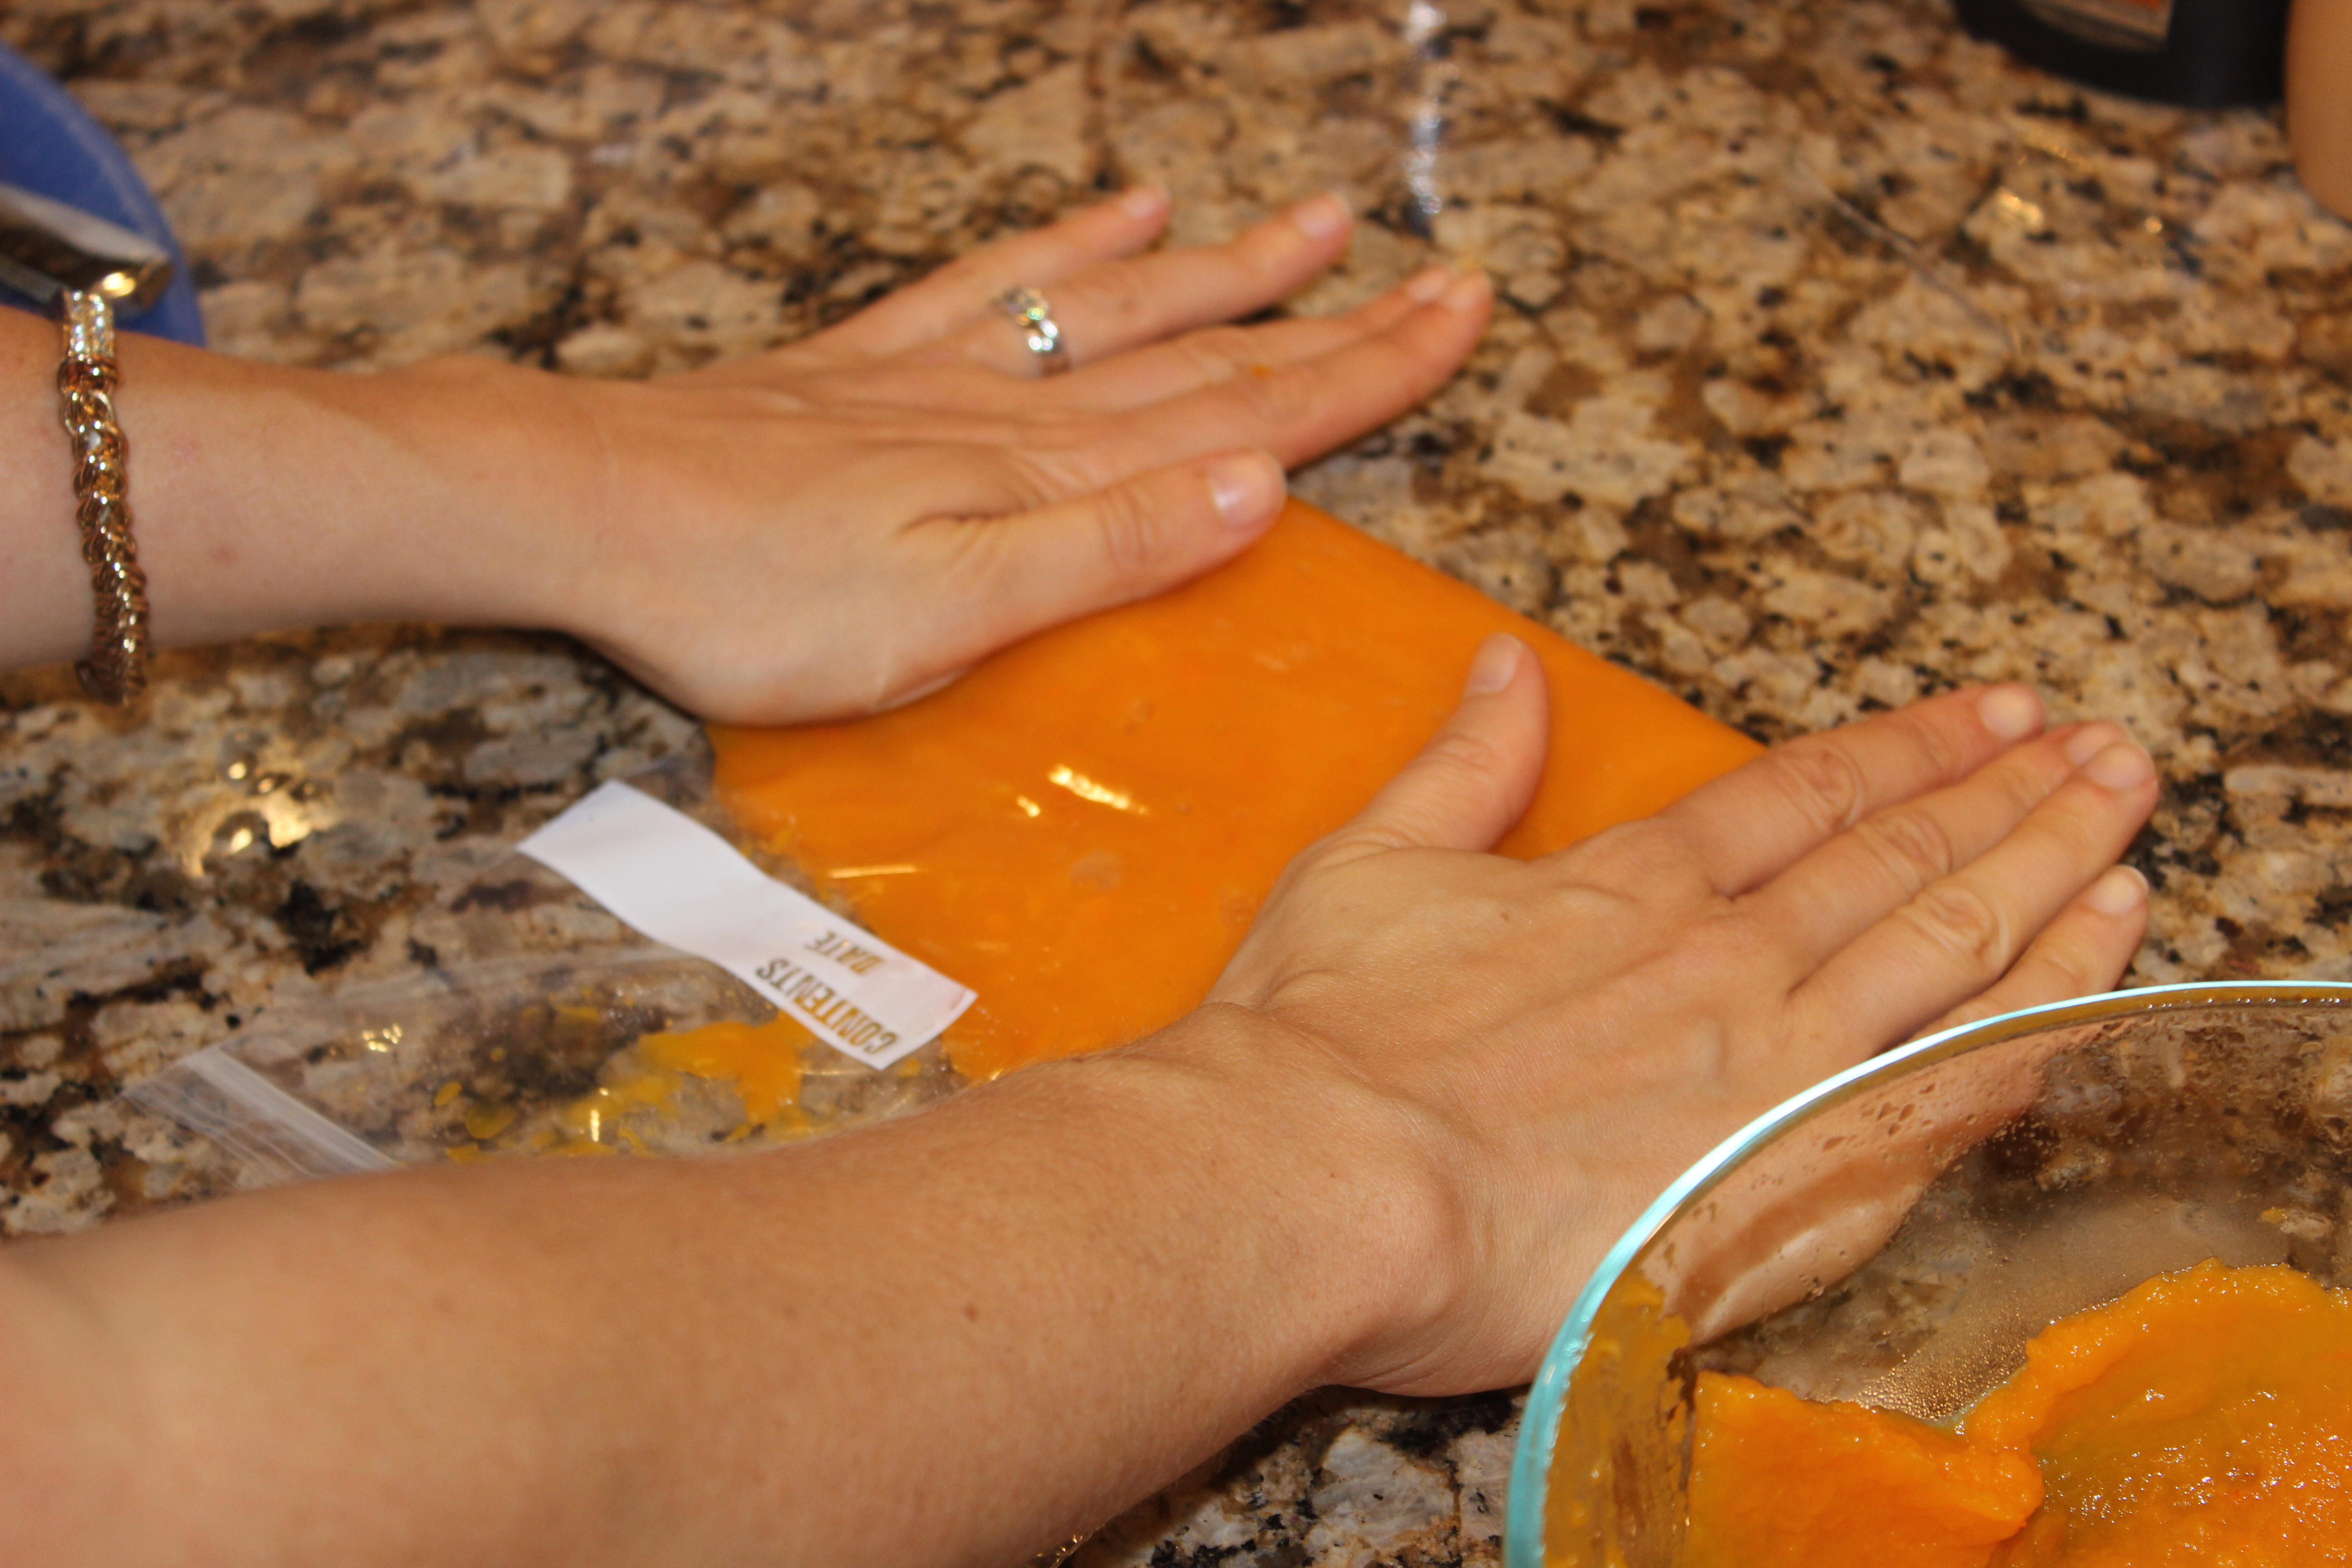
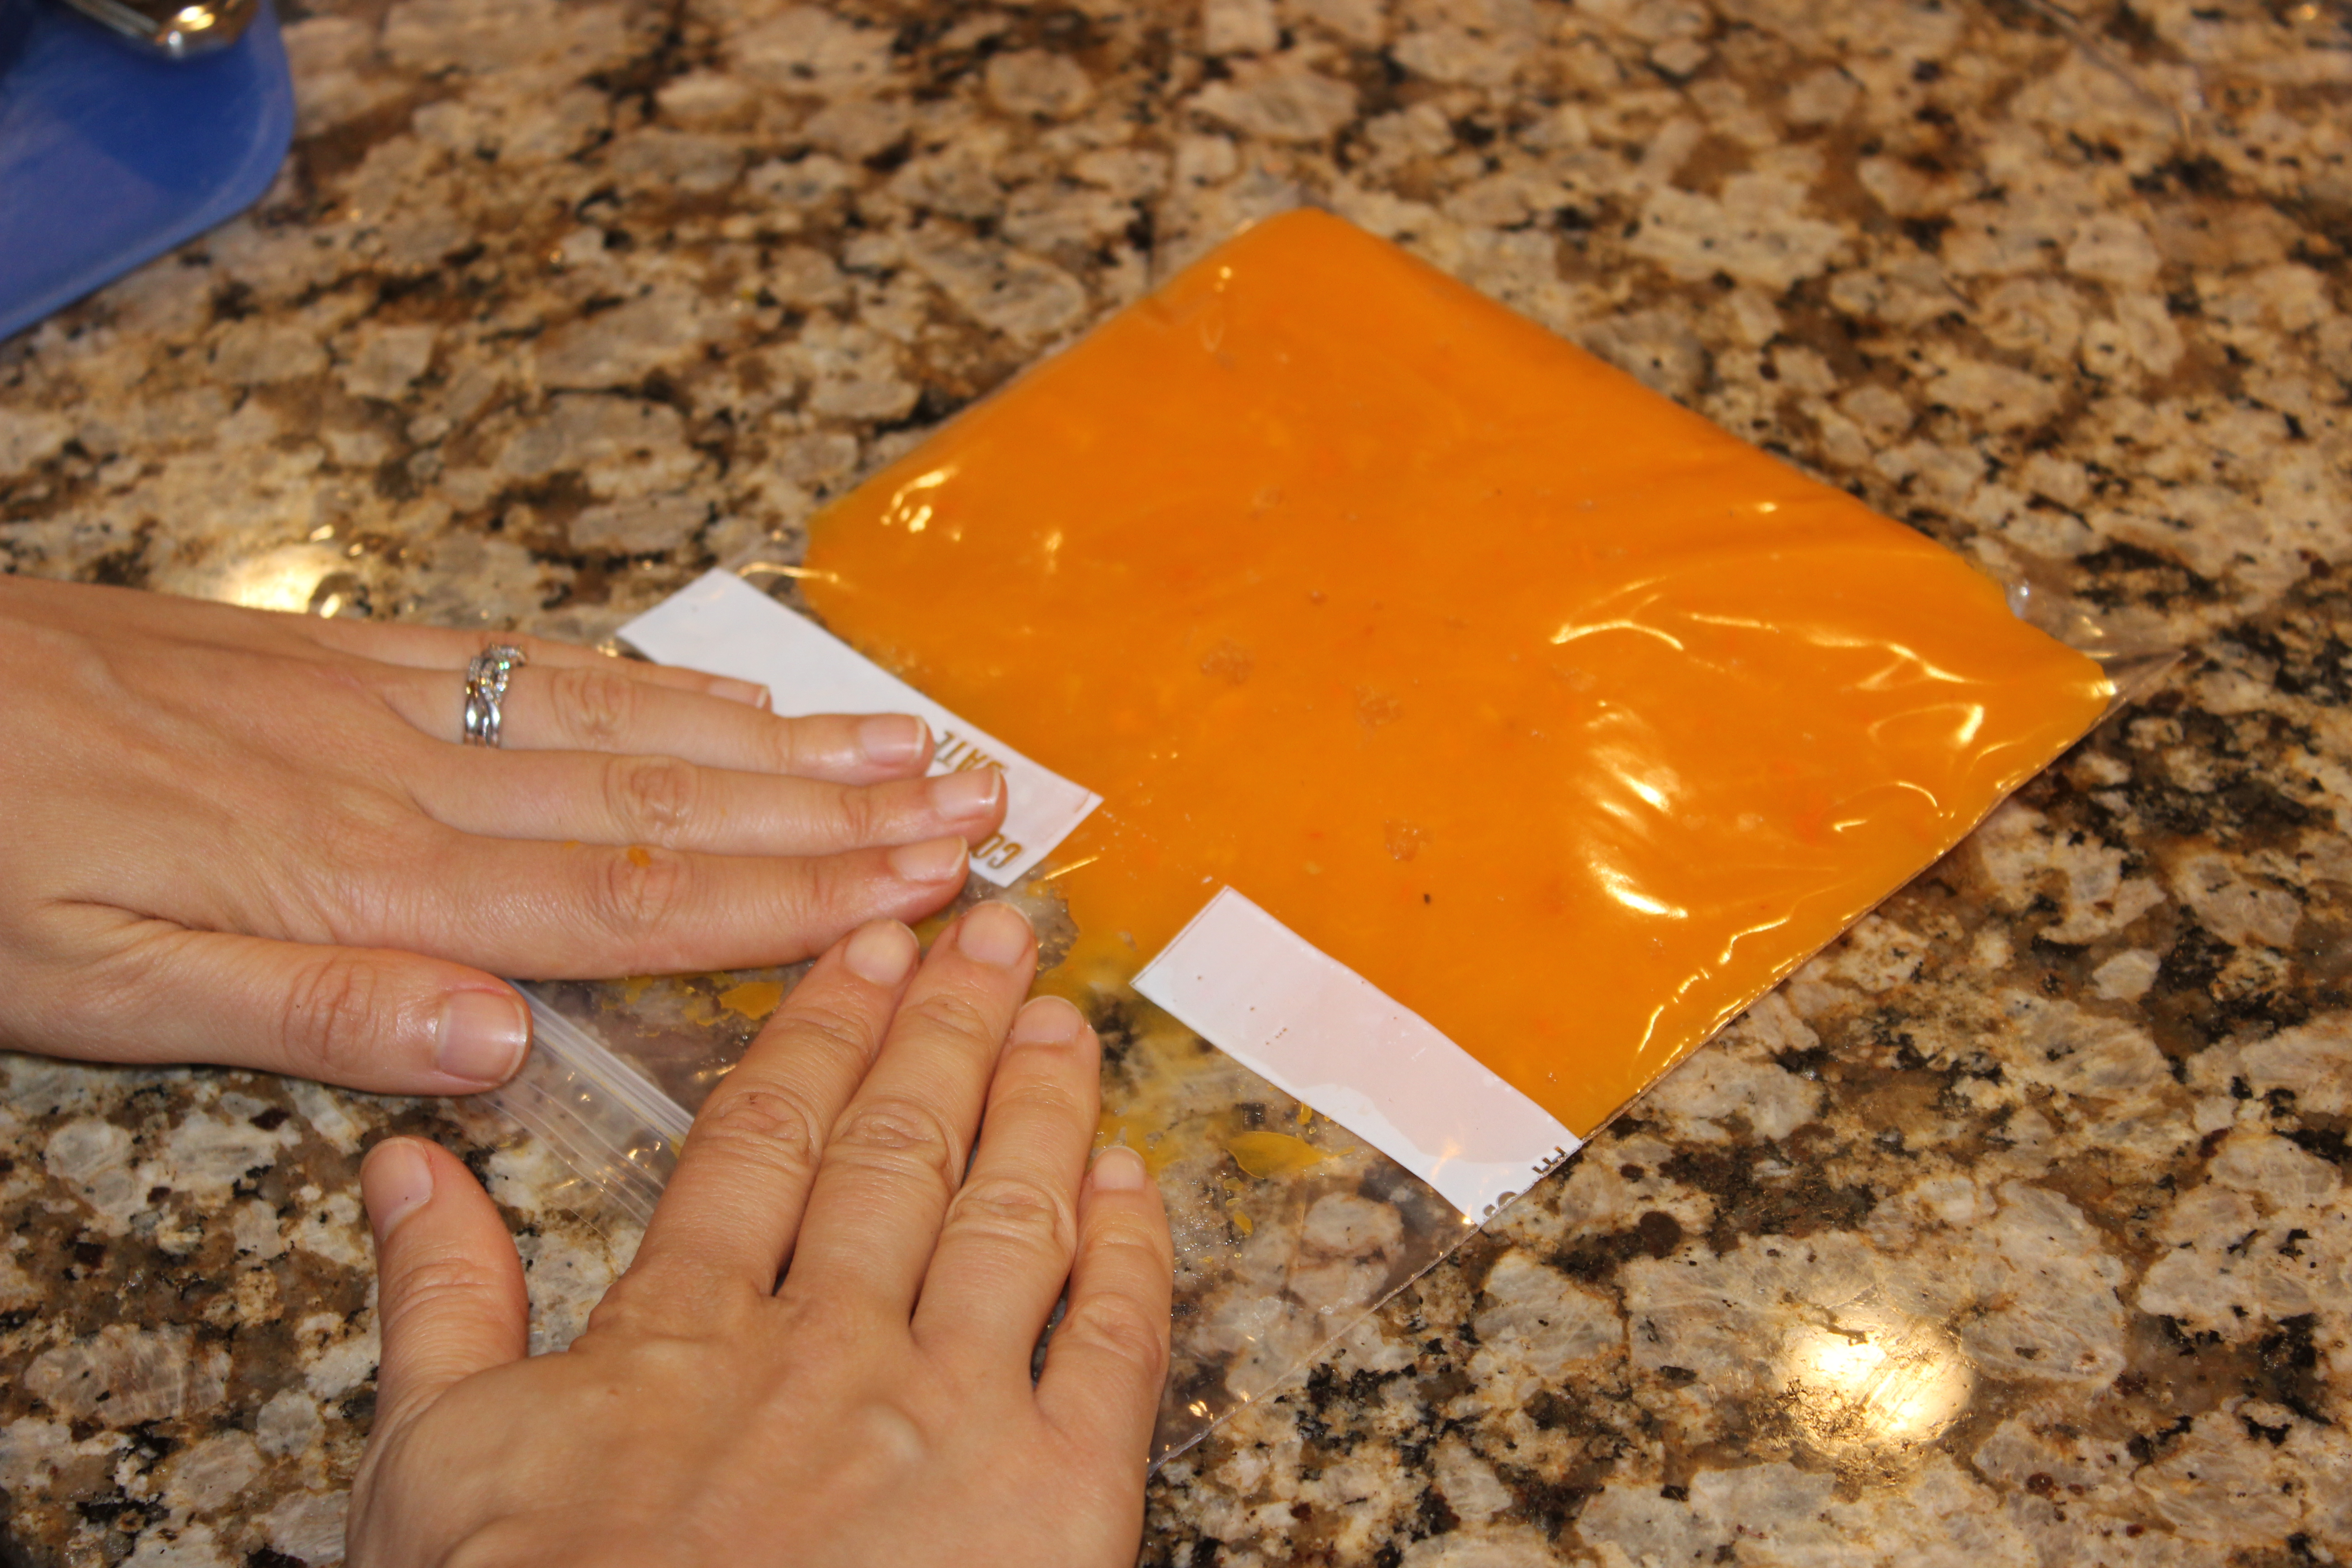
Use the puree immediately OR measure out 1-cup servings and put the puree in freezer bags, squeezing out all of the air, so it’s ready to use whenever you need squash in the future.

Follow the step-by-step process below!

IMG_6737 IMG_6740 IMG_6742 IMG_6744 IMG_6746

If you’re using pumpkins, once you have your puree ready, try using it in this Ultimate Pumpkin Pie Smoothie RecipePumpkin Pie Overnight Oats, or these Paleo Pumpkin Spice Muffins!

What’s your favorite way to use squash? Are you looking for any recipe ideas? Feel free to leave a comment below to let me know 🙂

The Easiest Way to Roast Beets {A Simple How to Photo Guide}

Whenever I think of beets, I can’t help but think of The Office’s Dwight Schrute and his epic beet farm.

As well as Jim Halpert’s impersonation of Dwight and his ”Bears. Beets. Battlestar Galactica” line.

beets

Had to reminisce about that for a second 🙂

Now, let’s get to the beets!

Over the past few months, I’ve had several friends ask me how to roast beets.

To be honest, I had never had much success with it in the past, but I was determined to figure it out.

IMG_4922

Beets are one of those foods that, if we haven’t tried them before, can be a bit intimidating to prepare.

I hope to take that intimidation factor down a notch today and show you how easy it is to cook beets.

One of my goals when I cook and teach about food is to share how certain foods nourish our body, so I have to share some of the reasons beets are so good for us!

  • They contain a nutrient called betaine that fights inflammation (inflamed body = sick, overweight body), improves our heart health, and protects our cells and internal organs.
  • Like any deep-colored fruits and veggies, beets have anti-cancer properties, and some research has shown that beetroot extract reduced tumor formation in animal models.
  • They help our bodies detoxify (clean out!), helping to purify our blood and our liver, which is crucial to keeping weight off, feeling our best, and staying healthy.
  • They’re loaded with vitamin C, fill-you-up fiber, and minerals that are good for our bones, liver, kidneys, and healthy nerve and muscle function.

Now that we know how good for us these little crimson gems are, let’s talk about how to cook and peel them!

How to Roast & Peel Beets

IMG_6578

Step 1: Preheat the oven to 350F.

Step 2: Cut the tops (beet greens) and bottom “tail” off the beets, so they will sit upright in a pan. Save the beet greens. You can sautee them on the stove just like you would any other greens like kale or Swiss chard (more on how to do that in a future post!).

IMG_6575

Step 3: Place the beets in a covered baking dish as shown below. Cover the dish with an oven-proof lid. I used a Corningware dish and a glass lid.

IMG_6586

Step 4: Bake for 50-90 minutes, depending on how big the beets are. I used relatively small beets and they took almost an hour. You can check them for doneness by piercing them with a fork – they will be “fork tender” when they’re done.

Step 5: Let them cool.

IMG_6645

Step 6: Take a paper towel and rub/pull the skin off of the beets as shown in the pictures below. This minimizes stains on your fingers.

IMG_6658 IMG_6661 IMG_6663 IMG_6664 IMG_6665 IMG_6668 IMG_6671

The aftermath of another culinary adventure!

The aftermath of another culinary adventure!

Step 7: Once the beets are peeled, you can do whatever you want with them. They have an “earthy” and slightly sweet flavor. Nothing else really tastes like a beet, so you’ll just have to try it yourself to see how you like it!

I sliced them up and put them on a salad.

You could also eat them by themselves, throw in a few in a smoothie (they will make it VERY red!) or toss them in a vinaigrette. They pair well with balsamic vinaigrette as well as herbs like rosemary.

Here’s a recipe for a beet, pear and almond salad you can try 🙂

Simple salad of sliced beets, chopped pecans, and field greens

Simple salad of sliced beets, chopped pecans, and field greens

How do you like to use beets? Feel free to share your favorite recipes with us below!

Simply Slow Roasted Tomato Sauce

When I needed to figure out a creative way to use up the jumbo slicing tomatoes we had on our counter before leaving for vacation, this recipe was born!

Roasting the tomatoes before blending them gives this sauce a rich, deep flavor that you don’t get from the canned stuff.

We ended up putting it on top of some brown rice pasta, broccoli and sautéed eggplant, but you could also use it as a dipping sauce (like I plan to for the amazing eggplant “chips” we made this past week!

IMG_5525

Tomatoes are loaded with an antioxidant (antioxidant = anti-disease, anti-aging) called lycopene, which has been shown to have anti-cancerous properties. Lycopene is not naturally produced in our body, so it must be supplied through our diet.

The antioxidants and nutrients in tomatoes also contribute to our bone health and protect our heart and blood vessels.

It’s important to eat tomatoes with some fat (i.e., top them with a drizzle of an oil-based vinaigrette or enjoy them with avocado…something with fat!) since lycopene is what is known as a fat-soluble nutrient.  It has to be eaten with dietary fat in order to be properly absorbed by our body.

To read more about the awesome health benefits of tomatoes, click here or here.

The recipe is very simple to make and tastes delicious. Chances are, you already have all of the herbs and spices in your pantry!

Stay tuned for a recipe later this week for what my dad AND husband said is one of THE BEST things I’ve ever made…it’s pairs nicely with this tomato dipping sauce, too 🙂

Simply Slow Roasted Tomato Sauce

IMG_5624

Ingredients

  • 2 pounds tomatoes, quartered (see first pic above!)
  • 3 cloves garlic, minced
  • 1 cup yellow onion, chopped
  • 1/4-1/2 teaspoon sea salt, depending on your taste preference
  • 1 teaspoon dried oregano
  • 1 teaspoon dried basil
  • 1 teaspoon dried rosemary
  • Black pepper, to taste

Directions

  1. Preheat oven to 400F.
  2. Place the tomatoes on a foil-lined baking sheet, cut side down, and sprinkle 1/4 teaspoon of sea salt on top of the slices. Cook tomatoes in the oven for 60 minutes, flipping the tomatoes halfway for even roasting. Remove from oven and set aside to cool.
  3. While the tomatoes are cooling, saute onions and garlic in your choice of vegetable broth, cooking oil, ghee, or grass-fed butter until the onions and garlic have softened, about 10-15 minutes (Click here for info on why grass-fed butter may be tolerated just fine on a dairy-free diet, as I’ve found it to be for myself…everyone is different!).
  4. Puree the roasted tomatoes, sauteed onions and garlic, herbs, and pepper in a blender until smooth. Season with black pepper and salt, to taste. Adjust the amount of herbs based on your taste preference.
  5. Heat sauce on the stove in a medium saucepan until ready to serve.

Pumpkin Pie Overnight Oats: Easy & Healthy Breakfast To Go! {GF, DF}

It’s almost fall…and you know what that means…

PUMPKINS!

pumpkin

I love just about anything made with pumpkin.

From my favorite creamy, “I can’t believe this is good for me” pumpkin pie smoothie shake that literally tastes like pumpkin pie in a glass to pumpkin pie, pumpkin tea, pumpkin muffins and a whole slew of pumpkin recipes I plan to try this fall…pumpkin rocks!

pumpkin-pie-shake

It’s gotten some not so positive press this year due to the FoodBabe’s investigation of the ingredients in Starbucks’ Pumpkin Spice Latte (but if those are your thing, at least there are healthier recipes out there for how to make them yourself!).

Because I like to focus on the positives when it comes to our health and what we eat, here are just a few reasons pumpkin is so good for us and we should eat more of it!

  • Loaded with the antioxidant beta carotene, which the body converts to Vitamin A for healthy, glowing skin, strong vision, and to boost our immune system.
  • Contains anti-inflammatory compounds that reduce the risk of developing diseases like heart disease and arthritis.
  • Great source of potassium, an essential mineral we need to keep our hearts and muscles working at their optimal levels.

A few weeks ago, I made some “berry” quick overnight oats, and due to all of the positive feedback you shared, I wanted to try round 2 and make pumpkin-based overnight oats.

If you like the flavor of pumpkin and all of the wonderful, warming spices of fall, then you have to try this recipe 🙂 The longer I let it sit in the fridge, the more the flavors melded together. Seriously guys, this stuff is deeelish!

This will keep in the fridge for 3-4 days, so you can make up a few ahead of time and enjoy them throughout the week!

IMG_6422

IMG_6442

Pumpkin Pie Overnight Oats

Ingredients

  • 1/3 cup canned pureed pumpkin, NOT pumpkin pie filling (I use this kind)
  • 2 teaspoons chia seeds
  • 1/2 teaspoon pumpkin pie spice (or 1/4 tsp cinnamon, 1/8th tsp nutmeg, 1/8th tsp ginger, pinch clove)
  • Pinch fine grain sea salt
  • 1 tablespoon pure maple syrup, divided
  • 1/4 teaspoon vanilla extract
  • 1/3 cup rolled oats, gluten-free
  • 1/2 cup almond milk, unsweetened
  • Optional toppings: chopped walnuts, almond butter, raisins, unsweetened shredded coconut

Directions

  1. In a pint-size (16 oz.) mason jar, combine pumpkin puree, chia seeds, spices, 1/2 tablespoon of maple syrup and vanilla extract and whisk until evenly combined.
  2. Add oats and almond milk and stir with the whisk or spoon for about 30 seconds, so it combines evenly.
  3. Cover with a lid and leave in fridge overnight or for at least 1 hour. Add remaining 1/2 tablespoon maple syrup and any additional toppings or mix-ins. A tablespoon of almond butter makes it even creamier!

The Recipe That Got My Husband to Like Green Beans

IMG_6333

Everyone dislikes certain foods.

For me, it’s olives.

My friend Sam loves olives and would probably put them on just about everything if she could.

I’m just not a fan.

I even lived in Spain when I was in college, and Spain is THE place for olives.

I remember one meal in particular that my Spanish host family served me – a tuna fish, olive, and hard-boiled egg salad.

At the time, those three foods by themselves were a no-go, so the trifecta totally grossed me out.

But I had to at least TRY it because it’s rude not to in Spain (even if you’re 100% sure you won’t like it). After forcing down one nausea-inducing bite, I smiled and politely said, “It’s not my favorite” and was off the hook for the evening. Phew!

For my husband, Bill, that “thanks, but no thanks” food was green beans. 

Until tonight.

IMG_6319

Sometimes, the reason we don’t like certain foods is because we’ve only had them prepared in ways that doesn’t make them taste very good.

When most people think of green beans, for instance, images of the precut, brownish-green, mushy beans that come in a can and are then boiled to death come to mind.

Maybe you’ve only ever had canned vegetables and have never tried those same vegetable prepared a different way – roasted, sauteed, or tossed into a chili or stew.

Consider giving them a second chance…like Bill did!

To put it bluntly, we housed this recipe. We couldn’t stop eating them. They were that good.

Cooked “al dente” (AKA still crispy and brightly colored!), the green beans were tossed in a mixture of garlic, lemon, slivered almonds and a touch of sea salt. They were downright addictive.

We were licking the bowl clean, scraping up the last bits of crunchy slivered almonds before finally putting the bare dish in the sink.

My husband is a green-bean-hater no more. Mission accomplished!

Garlicky Green Beans Almondine with Lemon

IMG_6334

Ingredients

  • Equal parts water and vegetable broth (see step 1 below)
  • 2 pounds green beans, ends cut off
  • 3/4 cup slivered raw almonds
  • 4 cloves fresh garlic, peeled & minced
  • 3 tablespoons fresh lemon juice
  • 2-3 tablespoons coconut oil (The original recipe called for cold pressed extra virgin olive oil, which you could also use. I use coconut oil because it holds up better than olive oil when it’s heated.)
  • ½ tsp finely grated lemon zest
  • sea salt, to taste

Directions

  1. Fill a large stock pot with half water, half vegetable broth and bring it to a boil. Make sure the amount of water/broth is at least twice as much as the amount of beans you intend to cook.
  2. Gently blanch the green beans (cook them in the boiling liquid for about 3 minutes until just al dente (brightly colored and crisp)). Drain beans in ice cold water (or put them in a bowl containing an ice water bath and set aside). This stops the cooking process.
  3. In a wok or large deep frying pan, heat the oil and garlic on medium heat for 2-3 minutes. Don’t let the garlic brown.
  4. Add in the almonds and stir for about a minute. Then mix in the lemon juice and finely grated lemon zest.
  5. Add the cooked beans to the stir fry mixture and toss to combine and coat. Add salt to taste (I added about 1/4-1/2 teaspoon of sea salt).
  6. Top the beans with additional lemon zest, if you prefer.

For more information about WHY green beans are so good for us (including building strong bones, filling us up, and being an anti-fat storage anti-cancer GBOMBS food according to Dr. Fuhrman) click here.

The recipe above is a variation of this recipe from Healthy Blender Girl.

Crispy Baked “Smokra” Bites (Incredibly Simple…and Hubby-Approved!) {Paleo, Vegan, Gluten-Free}

This is probably not the first vegetable you think to grab at the grocery store or farmer’s market.

Before this week, it wasn’t at the top of my list either.

In fact, I’d never bought it or cooked with it before, so all of us are in for a learning experience this week 🙂

IMG_6269

I write for another blog (Hometown Harvest), and depending on the week, my friend Kaitlyn who works for them will send me challenges for seasonal ingredients to use.

“Can you make anything with…eggplant?”

(I was less than thrilled, considering eggplant was, at the time, my least favorite vegetable.)

“I’ll see what I can do!” I replied.

The best part of getting requests like that is having to think beyond what’s familiar to me and do something I encourage other people to do all the time…try new foods (even ones we’ve sworn we despise!).

So, on another creative culinary journey I went. It turns out that I actually don’t mind eggplant, as long as it’s prepared certain ways.

Eggplant fries = the recipe that got me to like eggplant! Check it out here.

My challenge vegetable this week?

Okra.

IMG_6307

Prior to cooking okra for the first time this week, I knew two things about it:

1) It’s my dad’s least favorite vegetable, and

2) Stone Mill Bakery uses it in their ridiculously awesome vegetable soup (which, although a bit overpriced, is worth the splurge if you’re looking for a delicious lunch in Baltimore).

I can’t say I was super pumped about this one, considering how little I knew about how to prepare okra.

So, to Pinterest I went in search of a tasty way to cook up this less than popular veg…and ways to make it not slimy, since that was a common complaint among people trying to cook with it.

I also wanted to learn more about okra’s healthy claims to fame.

When I find out just how good something is for my body, I tend to be a lot more excited to try it!
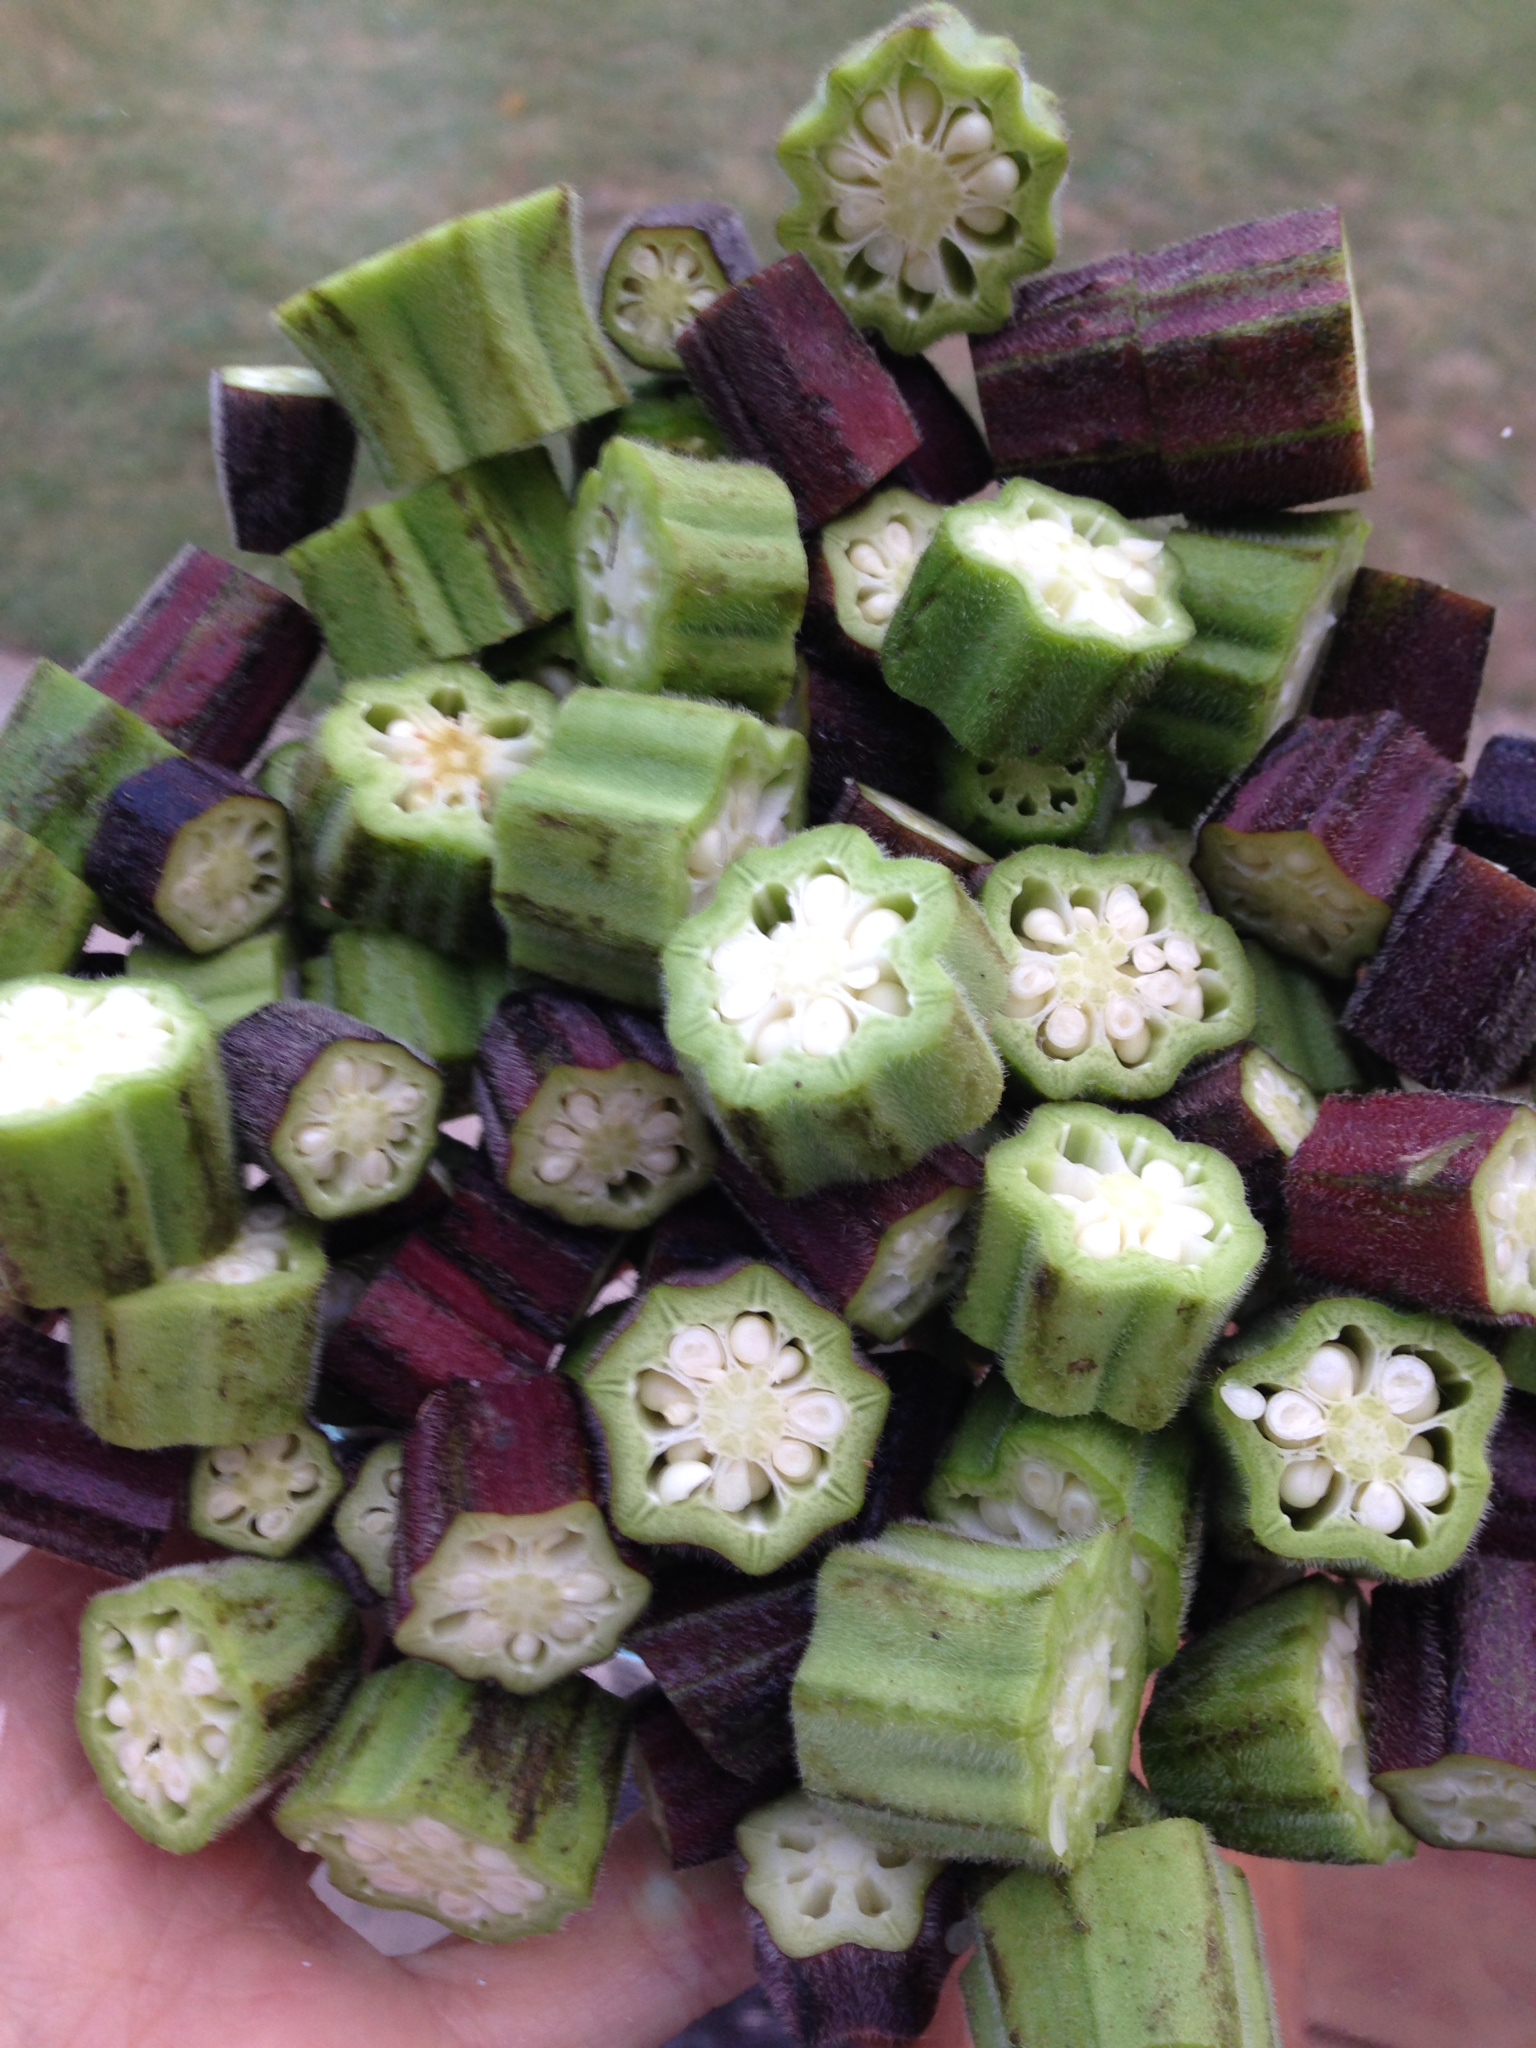
IMG_0018_2

Check out this blurb about all of the health benefits of okra from another blogger, Nourished & Grounded:

Okra is FULL of vitamins and minerals, especially vitamin C, A, K, Folate, Niacin, Thiamin, B6, magnesium, manganese, carotene, as well as lutein and zeazanthin [crucial for eye health].  It contains polysaccharides that improve blood circulation.  It contains numerous antioxidants such as epicatechin, catechin, rutin, procyanidin B1 and B2 and quercetin which help the body prevent damage from oxidative stress and environmental factors.  And what about that gooey liquid that gives it such a bad wrap?  Surprise, that’s the best part! The gel-like fiber (mucilage) soothes and coats the intestines, and a healthy gut is crucial for overall health.  This is the same stuff found in aloe vera and it’s SUPER healing.

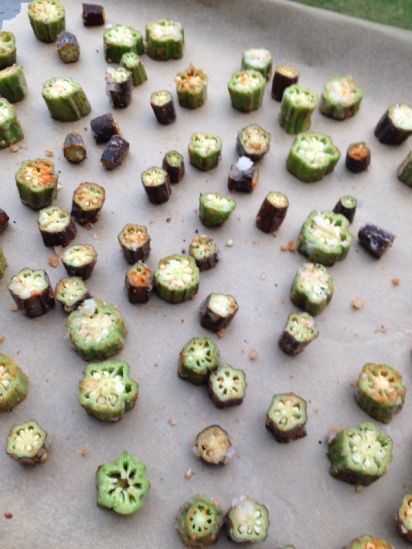
My favorite way to make just about any other vegetable is to roast it, so that’s what I did with okra. Prep time is under 5 minutes, and these little okra bites will be ready in about 20 minutes!

Even after I tried them and approved of their crunchy texture, mild flavor, and pleasant “pop” from the edible seeds, I wasn’t 100% sure my husband would like them.

To my surprise (and satisfaction!) he did 🙂

That makes these crispy little bites wife-tested and hubby-approved.

Crispy Baked Okra Bites: 2 Ways

IMG_6272

IMG_0021

Basic Ingredients

  • 1/2 pound okra, chopped into 1/2 inch discs (about 18 pods) – cut off the top and bottom stems
  • 1-2 tablespoons coconut oil, melted
  • 1/2 teaspoon sea salt, or to taste
  • 1/4 teaspoon black pepper, or to taste

**You can use any combination of spices you like on these. They taste great with just salt and pepper if you want to keep it simple, or try one of my favorite variations below:

Garlic Version: Add 1 teaspoon garlic powder.

Smokra Version: Add 1 teaspoon smoked paprika (also called “smoked sweet paprika” – This spice is AWESOME on everything from roasted veggies to soups to popcorn. Add it to your grocery list!).

IMG_0016

Directions

  1. Preheat oven to 450F.
  2. Toss okra with coconut oil and spices and spread out in a single layer on a foil or parchment-lined baking sheet.
  3. Roast for 20 minutes, stirring halfway through, until the bites are browned and crispy. Cook longer to crisp them up even more!
  4. Serve immediately.

IMG_0019

Crispy Baked "Smokra" Bites (Incredibly Simple…and Hubby-Approved!) {Paleo, Vegan, Gluten-Free}

This is probably not the first vegetable you think to grab at the grocery store or farmer’s market.

Before this week, it wasn’t at the top of my list either.

In fact, I’d never bought it or cooked with it before, so all of us are in for a learning experience this week 🙂

IMG_6269

I write for another blog (Hometown Harvest), and depending on the week, my friend Kaitlyn who works for them will send me challenges for seasonal ingredients to use.

“Can you make anything with…eggplant?”

(I was less than thrilled, considering eggplant was, at the time, my least favorite vegetable.)

“I’ll see what I can do!” I replied.

The best part of getting requests like that is having to think beyond what’s familiar to me and do something I encourage other people to do all the time…try new foods (even ones we’ve sworn we despise!).

So, on another creative culinary journey I went. It turns out that I actually don’t mind eggplant, as long as it’s prepared certain ways.

Eggplant fries = the recipe that got me to like eggplant! Check it out here.

My challenge vegetable this week?

Okra.

IMG_6307

Prior to cooking okra for the first time this week, I knew two things about it:

1) It’s my dad’s least favorite vegetable, and

2) Stone Mill Bakery uses it in their ridiculously awesome vegetable soup (which, although a bit overpriced, is worth the splurge if you’re looking for a delicious lunch in Baltimore).

I can’t say I was super pumped about this one, considering how little I knew about how to prepare okra.

So, to Pinterest I went in search of a tasty way to cook up this less than popular veg…and ways to make it not slimy, since that was a common complaint among people trying to cook with it.

I also wanted to learn more about okra’s healthy claims to fame.

When I find out just how good something is for my body, I tend to be a lot more excited to try it!

IMG_0018_2

Check out this blurb about all of the health benefits of okra from another blogger, Nourished & Grounded:

Okra is FULL of vitamins and minerals, especially vitamin C, A, K, Folate, Niacin, Thiamin, B6, magnesium, manganese, carotene, as well as lutein and zeazanthin [crucial for eye health].  It contains polysaccharides that improve blood circulation.  It contains numerous antioxidants such as epicatechin, catechin, rutin, procyanidin B1 and B2 and quercetin which help the body prevent damage from oxidative stress and environmental factors.  And what about that gooey liquid that gives it such a bad wrap?  Surprise, that’s the best part! The gel-like fiber (mucilage) soothes and coats the intestines, and a healthy gut is crucial for overall health.  This is the same stuff found in aloe vera and it’s SUPER healing.

My favorite way to make just about any other vegetable is to roast it, so that’s what I did with okra. Prep time is under 5 minutes, and these little okra bites will be ready in about 20 minutes!

Even after I tried them and approved of their crunchy texture, mild flavor, and pleasant “pop” from the edible seeds, I wasn’t 100% sure my husband would like them.

To my surprise (and satisfaction!) he did 🙂

That makes these crispy little bites wife-tested and hubby-approved.

Crispy Baked Okra Bites: 2 Ways

IMG_6272

IMG_0021

Basic Ingredients

  • 1/2 pound okra, chopped into 1/2 inch discs (about 18 pods) – cut off the top and bottom stems
  • 1-2 tablespoons coconut oil, melted
  • 1/2 teaspoon sea salt, or to taste
  • 1/4 teaspoon black pepper, or to taste

**You can use any combination of spices you like on these. They taste great with just salt and pepper if you want to keep it simple, or try one of my favorite variations below:

Garlic Version: Add 1 teaspoon garlic powder.

Smokra Version: Add 1 teaspoon smoked paprika (also called “smoked sweet paprika” – This spice is AWESOME on everything from roasted veggies to soups to popcorn. Add it to your grocery list!).

IMG_0016

Directions

  1. Preheat oven to 450F.
  2. Toss okra with coconut oil and spices and spread out in a single layer on a foil or parchment-lined baking sheet.
  3. Roast for 20 minutes, stirring halfway through, until the bites are browned and crispy. Cook longer to crisp them up even more!
  4. Serve immediately.

IMG_0019

Peaches ‘n Cream Smoothie (Orange Julius Style!)

The peaches this summer have been the sweetest and juiciest I’ve had in a long time!

Whether they’re donut peaches or ordinary yellow peaches, they have been super satisfying.

IMG_6147

Aside from eating them plain, I’ve been putting them in a lot recipes like this peachy keen kale salad and this farmer’s market salad.

I even glazed them with honey, baked them in the oven for the first time and ended up with a super healthy, melt-in-your-mouth dessert.

Even though I don’t eat dairy products, I really enjoy and am always looking for recipes for rich and creamy foods and drinks that remind me of the “mouthfeel” of ice cream, cheese, and milk, but are made without those ingredients.

Making dairy-free smoothies and milkshakes are one of the ways I like to do that.

Check out these cool "donut" peaches :)

Check out these cool “donut” peaches 🙂

When my sister tried this smoothie, she said it tasted like one of the smoothies from Orange Julius…but better!

This dairy-free, vegan recipe is quick and simple and doesn’t require any fancy ingredients. Blending the cashews with the liquid at the very beginning is what gives the smoothie its creamy texture without any milk, cream or yogurt!

I use raw cashews in lots of other recipes to make dips and even cheesecakes creamy.

You have to try this one for yourself – you will be amazed!

Peaches ‘n Cream Smoothie (Orange Julius Style)

IMG_6074

Serves 2

Ingredients

  • ¼ cup raw cashews* (these are cheapest at Trader Joe’s!)
  • 2 teaspoons vanilla extract
  • 2 cups water (you can use almond milk if you prefer an even creamier texture – I used 1 cup each of water and almond milk)
  • 3 cups peaches (sliced and frozen – or use fresh peaches for a “frothier” smoothie)
  • 1 cup ice
  • Optional (but tasteless!): 2 cups spinach

Click here for the full recipe from Girl Makes Food.

IMG_6102

Stuffed Rainbow Peppers {Vegan, Gluten-Free}

IMG_6214

Stuffed peppers are one of our go-to recipes to make when we have a lot of veggies to use up and want something delicious for dinner.

You can use any veggies you want and any grain that you like to stuff these peppers, so the possibilities are endless!

We opted for a few basics (carrots, onions, celery & garlic), fiber-filled and gluten-free brown rice and chickpeas, and some chunky tomato sauce to bring it all together.

This is a meal you will make again and again. It’s filling, delicious, comforting, and is a great alternative to meat as a meal. Try it for a Meatless Monday (or Tuesday!) meal. Believe it or not, something like this will often be cheaper than giving everyone at the table a full portion of meat!

I’m not a vegetarian but over the past few years have used meat more as the side dish and the veggies more as the star of the show. I eat high-quality (local, humanely raised, grass-fed/pasture-raised) animal-based foods (eggs, chicken, meat, seafood) a couple of times a week.

On the other days, I get my protein from vegetables, beans and lentils, grains like quinoa, and nuts and seeds. Despite what many of us have been led to believe, meat is not the only quality source of protein, so change up your proteins and try something new!

Veggie-Stuffed Rainbow Peppers

IMG_6220

Ingredients

  • 1/4-1/2 cup vegetable broth
  • 2-3 cups water (enough to fill the bottom of the pot you’re using for steaming – see instructions below)
  • 4 bell peppers, top cut off & seeds removed
  • 1 cup cooked brown rice (we use the steamable bags in the frozen aisle of the grocery store for convenience)
  • 1 medium onion, diced
  • 3 medium carrots, chopped
  • 1 cup celery, chopped
  • 3 cloves garlic, minced
  • 1 15-ounce can diced tomatoes, no salt added
  • 1 15-ounce can chickpeas/garbanzo beans, drained and rinsed (We use the Eden Organics brand)
  • 1 teaspoon chili powder
  • 1/4 teaspoon garlic powder
  • 1/2 teaspoon cinnamon
  • 1/4-1/2 teaspoon sea salt

Directions

  1. Preheat the oven to 350F and line a baking pan with aluminum foil.
  2. Fill a pot with enough water to steam the peppers and put the seeded peppers on top of a steamer basket. Bring the water to a boil, cover the pot with a lid and steam the peppers for 10 minutes. You want them to still be a bit firm so they stand up on their own. Steaming helps to partially cook them and make them easier to fill with the stuffing. IMG_6207
  3. Place peppers in the foil-lined baking dish. Do not leave them in the covered pot after steaming or they will overcook.
  4. While the peppers are steaming, saute the onions, garlic, carrots and celery in a few tablespoons of vegetable broth, adding more broth to prevent the onions from sticking.
  5. After about 10 minutes, add the diced tomatoes (with their juices!), brown rice, chickpeas, chili powder, garlic powder, cinnamon, and salt, stirring until everything is combined.IMG_5173
  6. Fill each pepper with the rice mixture, reserving about 1/2 cup of the mixture to top off the peppers. Roast peppers in the oven for 20 minutes. We roasted ours in the toaster oven.
  7. Remove from oven and top with 1-2 spoons of the extra rice mixture. Serve and enjoy!IMG_6209

We like to top ours with a few shakes of paleo parmesan cheeze!

It’s Peanut Butter Jelly {Smoothie} Time!

IMG_5958

Crust or no crust?

Jelly or jam?

Crunchy or creamy?

No matter which combo you like best, one thing is for sure…

Most of us love PB&J!

I was in the mood for a smoothie the other day and wanted to try out a new recipe that would remind me of the flavors, creaminess, and I-wanna-be-a-kid-again feeling of a peanut butter and jelly sandwich.

After making some tweaks and getting my trusty taste-testing husband, Bill, to give it a try, I came up with a recipe that you have to try!

This fiber-filled, protein-packed smoothie will tantalize your taste buds and hold off hunger until lunchtime 🙂

IMG_5968

PB&J Power Smoothie

This tasty recipe is a spin on a lunchtime classic, but it’s in a glass instead of on a sandwich! I’ll sometimes have it as an afternoon snack, if I know dinner is a long way off.

  • 1.5 cups dairy-free milk (unsweetened)
  • 2 tablespoons gluten-free oats
  • 1/2 teaspoon vanilla extract
  • 1.5 tablespoons natural peanut butter (no sugar added)
  • 1/2 carrot (coarsely chopped (yes, you read that right! It adds a hint of sweetness and is a great way to hide a veggie!))
  • 1 cup frozen strawberries or raspberries
  • 1/2 frozen banana (peeled)
  • 1 Medjool date (optional) (pitted)
  1. Combine first five ingredients in a blender in the order listed for about 30 seconds. Add frozen fruit and date, if you’d like some sweetness, and enjoy!

  • To up the protein count, I will sometimes add a scoop or two of Vital Proteins collagen peptides.
  • Trader Joe’s sells gluten free rolled oats in a big blue bag.
  • Dates add sweetness. If you don’t have dates, add about 2 tsp pure maple syrup or honey, but dates work best. Let me know how it turns out if you use maple syrup or honey!
  • The only ingredients in the peanut butter should be peanuts…and maybe salt. 2 tablespoons really seemed to do the trick, but you can always start with less and then add more!

PB&J goodness

PB&J goodness

Page 12 of 15

Powered by WordPress & Theme by Anders Norén