Tag: gluten free Page 2 of 3

Go From Nacho Cheese to “Nooch”o Cheese!

Despite the fact that I was a lifelong lover of dairy products like yogurt (ate it every day!), ice cream, string cheese, and Parmesan cheese, I cut out dairy products a couple of years ago.

It turns out that dairy products were triggering a number of health issues I had for most of my life – from allergies, congestion, sore throats, ear infections, indigestion and acid reflux to skin issues, gas and bloating. I used to get congested frequently, had chronic ear infections (which meant lots of antibiotics), and took Claritin and Zyrtec for seasonal allergies, along with reflux reducing meds like Prilosec (for 10 years!).

For me, cutting out dairy has been one of the keys to begin healing my body, not being sick so often (almost never!)…and getting off of those medications naturally. It’s been pretty amazing!

Check out my *NEW* Pinterest board – Deliciously Dairy Free – for additional articles on the topic as well as dozens of recipes for non-dairy alternatives to foods like cheese, cheesecake, ice cream, milkshakes, dips and dressings. I will be featuring many of them in upcoming blog posts, so stay tuned!

One of the questions people often ask me is, How do you live without cheese? I could never give up cheese.”  The short answer is there isn’t an “exact” match, BUT I’ve found some great options to use as replacements!

One of those foods is nutritional yeast (AKA “nooch”).

Nutritional yeast! I bought this kind at Wegmans, but you can also get it at Whole Foods, MOMs, or online

Nutritional yeast! I bought this kind at Wegmans, but you can also get it at Whole Foods, MOMs, Roots, or online at Amazon, Vitacost or other health food retailers.

A few years ago, I had never even heard of nutritional yeast and certainly wouldn’t have guessed it was something edible. This is kind of like the eggplant naming question…couldn’t they have picked a more appealing name??

Despite its odd name, this stuff has been a staple in our pantry for the past 3 years. You can find it online, or at Wegmans, MOMs, Whole Foods, Roots, or other natural food stores.

Here’s the 411 on why you might want to get yourself some “nooch”!

  • If you don’t eat dairy (or are trying to reduce it!), it’s a great substitute for cheese-based preparations. It has a “cheesy” smell and taste to it.
  • It’s a great source of protein and contains essential amino acids (protein building blocks!).
  • It’s loaded with vitamins, especially B vitamins, which are important in hundreds of your body’s processes, including staying energized and fighting stress.
  • It’s low in sodium.

If you can get past the weird name, it’s worth giving this stuff a shot. 

I will be posting my favorite “nooch” recipes in the coming weeks – check out the list below for a sneak peek of what I will be making and sharing!

This is what "nooch" looks like out of the container

This is what “nooch” looks like out of the container

  • Herby homemade popcorn
  • Salad dressings
  • Kale chips
  • “Cheezy” curly kale salad
  • Dairy-free “cheese” sauce for mac & cheese or nachos
  • Nutty rawmesan cheese (a substitute for my beloved Parm cheese!)

Want to learn more about nooch? Click here or here!

If you’re interested in going dairy-free and what it could look like for you, check out this 28-Day Dairy Free Challenge with Dr. Oz or this information on elimination diets from my favorite blog, Nourishing Meals!

Stay tuned for future recipe posts featuring this quirky but healthy ingredient!
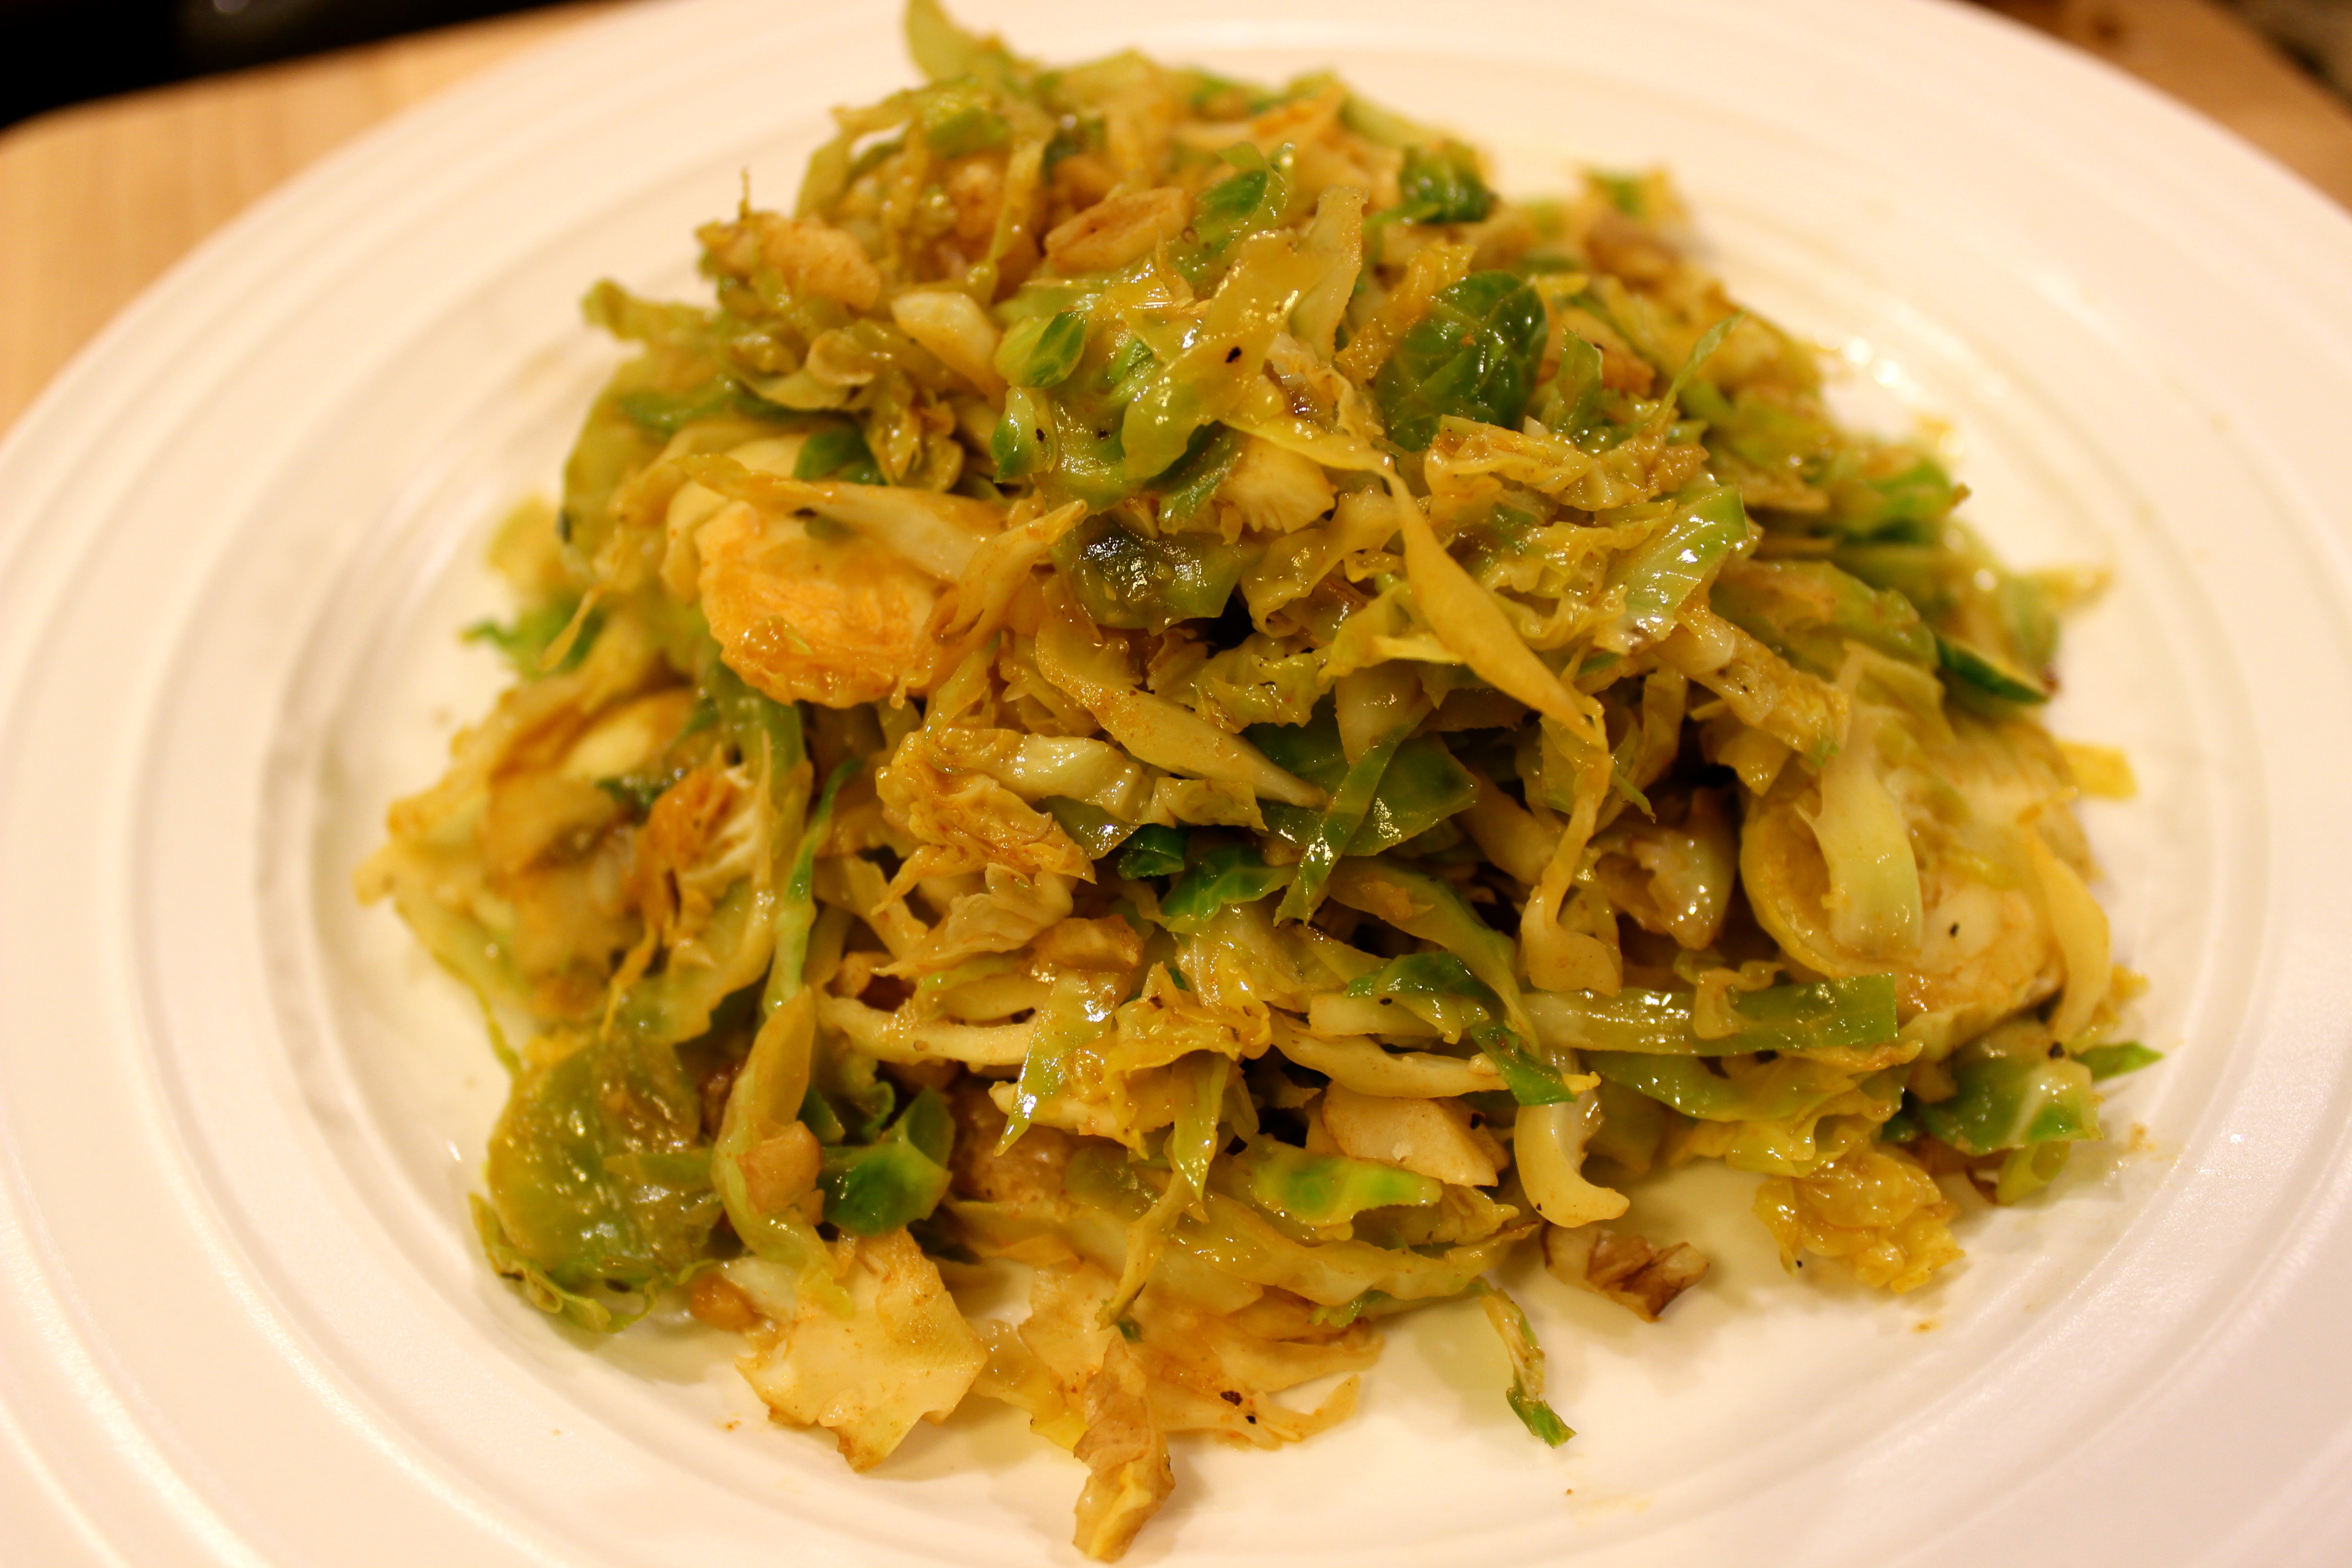
Sauteed Brussels Sprouts with Shallots, Cranberries & Pecans

Ingredients for this delicious dish :)

Ingredients for this delicious dish 🙂 I made half the recipe, since I didn’t have enough Brussels sprouts!

As I’ve mentioned before, I’m a big fan of Brussels sprouts…and I don’t mean the overly cooked, steamed or boiled kind. Roasting and sautéing these little cancer-fighting cabbages is the best way to make them taste absolutely delicious and turn haters into followers!

I tried a new recipe this week from my favorite blog, Nourishing Meals. It’s a variation of one that I’ve made roasted, but this time it was sautéed. This recipe has become another favorite of mine, as it includes Brussels sprouts, shallots, cranberries, and nuts, which are all anti-cancer, anti-fat storage GBOMBS foods.

The combination of the slightly bitter Brussels sprouts, sweet shallots, tart cranberries, buttery pecans and a hint of salt packs this dish with flavor!

Sauteed Brussels Sprouts with Shallots, Cranberries & Pecans

Sautéed Brussels Sprouts with Shallots, Cranberries & Pecans

This recipe takes less than 20 minutes from start to finish. I made a few modifications and used pecans instead of the sliced almonds and added some garlic because garlic makes everything taste better!

Ingredients

  • 2 tablespoons extra virgin olive oil
  • 4 shallots, thinly sliced
  • 1/2 cup chopped pecans
  • 3 cloves of garlic, thinly sliced (add these in when you add in the Brussels sprouts)
  • 2 pounds Brussels Sprouts, trimmed and halved lengthwise
  • 1 teaspoon Herbamare or sea salt (you can find Herbamare at any natural food store or online)
  • 1/2 cup dried cranberries, naturally sweetened if possible
  • 1/2 cup water
  • Freshly ground black pepper

Click here for the full recipe from Nourishing Meals!

Lemon Tahini Kale Salad Recipe {Vegan, Gluten-Free, Paleo}

love kale. 

Prior to about 4 years ago, I had never eaten kale, and, to be honest, I didn’t even know what it was. I had no idea that the leafy green garnishes I had seen at buffets or the “leaves” on Edible Arrangements were none other than…kale!

Saw this sign on a walk and DC and had to take a picture. It's so true!

Saw this sign on a walk and DC and had to take a picture. It’s so true!

Kale is an absolute nutritional powerhouse. It scores a whopping 1,000 points on the ANDI scale, which stands for “Aggregate Nutrient Density Index,” a scoring system that rates foods on a scale from 1 to 1,000 based on nutrient content. To give some context, blueberries (another super healthy food) receive a score of 132. Kale is cancer fighting, anti-inflammatory, detoxifying, and loaded with bone-building and brain-boosting nutrients. This leafy green is definitely a standout!

We use kale in everything from smoothies and salads to soups, stir-fries and sautees. It is super versatile and a great way to pack a nutritional punch at any meal. It’s also one of the “Dirty Dozen” veggies that is most likely to be contaminated with harmful pesticides, so it’s important to buy it organic.

A Christmas gift from my dad - 50 Shade of Kale cookbook!

A Christmas gift from my dad – 50 Shade of Kale cookbook!

A few years ago, I befriended two holistic health coaches, who were trained by the health coaching program I recently completed and were a big part of the reason I pursued it. They introduced me to their delicious 5-flavor kale salad…one that has now become my absolute favorite and a staple in our house!

I bring this salad to potlucks and parties and enjoy it probably once a week for dinner. It’s the way that I introduce friends, family and clients to kale when they’ve never had it before. I haven’t had anyone turn it down yet, and it’s now my dad’s favorite, go-to salad, too. He raves about it!

5-Flavor Kale Salad

Dressing ingredients & a head of dino kale for the 5-flavor kale salad

Dressing ingredients & a head of dino kale for the 5-flavor kale salad

Dressing:
1/4 cup olive oil
3 Tbsp. raw tahini (sesame paste)
3 Tbsp. lemon juice (add more to taste)
1 Tbsp. maple syrup (we use Grade B)
1 Tbsp. tamari (wheat-free soy sauce) OR coconut aminos
1/2 tsp. crushed red pepper flakes
2 cloves crushed raw or roasted garlic
dash of sea salt
1/4 tsp. black pepper

Salad:
1 large bunch curly kale or dino kale (stems removed), washed and chopped (dino kale is also called Tuscan Kale or Lacinato Kale and holds up best in this recipe)
2/3 cup Dressing
1/2 cup raw sunflower seeds
1/2 cup shredded carrots

Click here for the full recipe!

5-Flavor Kale Salad served with garlic ginger shrimp & quinoa and roasted zucchini

5-Flavor Kale Salad served with garlic ginger shrimp & quinoa and roasted zucchini

Healthy & Homemade Donut Holes! {Gluten-Free, Paleo, Vegan}

 “These satisfy my sweet tooth without eating Little Debbie Donut Bites!”

“These won’t make it home!”

And finally, “So, there’s no sugar in these?”

These were just a few of the comments made by a donut-loving friend last night as he was enjoying a new treat I prepared for our church small group that we host each Tuesday.

I had never made them before, so I didn’t know what to expect. They were a huge hit, so you can bet I will be making them again, given the response! I never thought they would be compared to donut holes in terms of taste and texture, but I’ll take it!

They are SO easy to make, too. They’ll become a new staple in your house, I’m sure!

Healthy & Homemade “Donut” Holes

Mmm delicious!

Mmm delicious!

The recipe is adapted from this one on the Nourishing Meals blog. Tom and Ali have some awesome gluten-free, dairy-free, soy-free recipes, so I will be featuring more of them in the future.

Ingredients (see notes below regarding substitutions & where to find ingredients*)

  • 1/2 cup raw almonds
  • 1/2 cup raw walnuts
  • 1 cup Medjool dates, pitted
  • 1/4 cup raisins
  • 1/4 teaspoon cinnamon
  • 1/4 teaspoon ground cardamom
  • 1/4 cup raw almond butter
  • 1/2 teaspoon vanilla extract
  • 1/4 teaspoon fine grain sea salt
  • unsweetened, shredded organic coconut

Directions

  1. In the food processor fitted with the “s” blade, grind the almonds and walnuts until finely ground.
  2. Add the dates, raisins, spices, and salt and grind to a fine meal.
  3. Add the almond butter and vanilla extract and process again until completely mixed.
  4. Form into balls and roll in shredded coconut.

I put mine in the fridge for about an hour, so they would firm up a little bit, but you can enjoy them right away, if you’d like!

Ground

Ground “meal” prior to rolling them into balls

*Ingredient & Substitution Notes

  • Can’t have walnuts or almonds? Use any other nuts or seeds in this recipe instead!
  • You find Medjool dates in the produce section of the grocery store OR online. We buy ours at BJs Wholesale club in a big container. Trader Joe’s also sells them.
  • If you don’t have cardamom, you can sub in ground ginger, more cinnamon or a combo of nutmeg and cinnamon instead.
  • The cheapest place I have found almond butter is at Trader Joe’s. If you can’t have almonds, sub in Sunbutter.
  • You can find unsweetened, shredded coconut in the baking aisle of most grocery stores or online here. We buy ours at MOMs in bulk.

How to Make Quinoa Taste Delicious: My Favorite Recipes!

In my post the other day, I shared the secret to cooking perfect quinoa every time. No more overcooked mush!

Knowing how to cook quinoa by itself is great, but for many of us, eating it plain has been our only experience with this little super seed. When we think of quinoa we think “bland, boring, and tasteless.”

It doesn’t have to be this way! Today I’m going to share how we make quinoa dishes taste delicious.

Quinoa with roasted red onions, carrots, white sweet potatoes and garlic with Swiss chard

Quinoa with roasted red onions, carrots, white sweet potatoes and garlic with Swiss chard

Here is my favorite way to prepare quinoa. It’s not super technical (i.e., no measurements – AHH!), but that’s okay. Part of the FUN of cooking is experimenting and giving yourself permission to not follow so many stinkin’ rules 🙂

  1. Cook one cup of it. It expands to 3-4 times its size so 1 cup dry = 3-4 cups cooked.
  2. Chop & roast some veggies (I love using red and vidalia onions, garlic, carrots and sweet potatoes or butternut squash, broccoli and cauliflower are great, too!). A few pinches of thyme, rosemary, and/or sage give roasted veggies great flavor. Use whatever veggies, herbs and spices YOU like!
  3. Chop up some greens (kale, Swiss chard, spinach, etc.).
  4. Put the quinoa and roasted veggies in a large skillet or saute pan on the stove and turn heat to medium-low.
  5. Add the greens. Toss everything together for a few minutes with tongs until the greens cook down but are still bright. Add a few splashes of water or veggie broth to prevent sticking/drying out.
  6. Remove from heat and squeeze the juice of 1/2 – 1 whole lemon or splash raw apple cider vinegar over the mixture and stir (acid = bite/flavor!).
  7. Top with toasted nuts/seeds (I like pecans, pumpkin seeds, walnuts and pine nuts), and for something sweet, dried cranberries or raisins.
  8. Add 1-2 tablespoons of olive oil (you may need more) as well as sea salt and pepper to your liking.
Quinoa with roasted butternut squash, yellow onion, and garlic with toasted pecans and kale

Quinoa with roasted butternut squash, yellow onion, and garlic with toasted pecans and kale

For anyone who likes to follow recipes with numbers in them, check out the yummy ideas below for some seasonal quinoa dishes! We made the first one this week for dinner 🙂

Roasted Sweet Potato, Kale & Quinoa Skillet – This is a perfect, warming winter dish. We cooked it in our cast iron skillet and made a few changes to the recipe. Roasting whole sweet potatoes in the oven took a long time, so next time, we’ll chop them up, toss them in some coconut oil, salt and pepper and roast them in the oven for 30-40 minutes at 400F. Also, we added a few squeezes of lemon juice and some toasted pumpkin seeds to the dish just before serving, and it was delicious!

Quinoa with Caramelized Butternut Squash & Roasted Brussels Sprouts – These are a few of my absolute favorite things 🙂

Quinoa Fried Rice – Bill and I prepare variations of this all the time. We throw in whatever veggies we have on hand, so don’t feel like you’re stuck with this recipe as is – modify it to include your favorites!

Super Simple Quinoa & Sweet Potato Chili – Is it time to change up your chili recipe? Give this one a try!

I have lots of other quinoa recipes on my Pinterest boards, so check them out!

Roasted sweet potato, quinoa and kale skillet

Roasted sweet potato, quinoa and kale skillet. Yum!

The Secrets to Cooking Perfect Quinoa…Revealed!

Quinoa is everywhere these days.

Popping up in funny Miller Lite commercials in the form of “queen-o” burgers.

Receiving props worldwide with 2013 being deemed “The International Year of Quinoa.” (Seriously, there is such a thing!)

And showing up on grocery store shelves in everything from cereals to snack foods.

All the while driving people crazy with its less than phonetic spelling!

Here are some fun facts about this hearty little seed:

  • It’s pronounced “KEEN-wah.”
  • It’s technically a seed or pseudocereal and is harvested from a plant related to beets and spinach.
  • It comes in a variety of colors (red, white, black, orange, brown, pink, pale yellow).
  • It’s a complete protein (contains all 9 essential amino acids) and is packed with nutrients like calcium, phosphorus, magnesium and iron.
  • There is a naturally occurring, bitter outer coating on quinoa called saponin that needs to be rinsed off prior to eating, otherwise it will be bitter.
  • It doesn’t contain gluten, the sticky protein found in barley, rye, wheat, and a few other grains, so it is safe for people with gluten sensitivities or intolerances.
  • Swap it out to replace rice or couscous to change up your recipes.

IMG_3428

Where do you buy quinoa?

I buy a big 4 pound bag for $10-$15 at BJs Wholesale Club, and it lasts for months. You can find it cheap at Trader Joe’s and in the bulk section of grocery stores like Wegmans and Whole Foods as well as in natural food stores like MOMs and Roots Market. All major grocery stores sell it these days, but it’s cheaper to buy it in bulk at the stores above or wholesale clubs than in a box at Safeway.

Want to know the secrets to cooking perfect quinoa every time? Follow these steps!

  • 1 cup quinoa
  • 2 cups water or low sodium vegetable stock (some people find using a little less liquid – 1.75 cups – works well, too, but I’ve always used two!)
  • Pinch of sea salt

Optional ingredient: Instead of sea salt, use a thumb-size piece of kombu (you find this seaweed online or at any of the stores listed above). When you add kombu to grains (and beans) while cooking them, it infuses them with minerals, makes the grain more digestible, and reduces acidity and gas!

  1. Rinse and drain the quinoa in a fine mesh strainer until the water runs clear. This gets rid of the bitter coating, so it is an important step!
  2. Put the rinsed quinoa, water and salt (or kombu, if using) in a pot.
  3. Cover and bring to a boil, then reduce the heat to a low simmer and cook for about 15 minutes.
  4. DO NOT STIR THE QUINOA WHILE IT IS COOKING. It will not cook properly if you do. If you want to check on it, just remove the lid and tilt the pot a little – if the water hasn’t been absorbed, keep simmering.
  5. When all the water is absorbed and the curly white tail “pops” off the quinoa, you know it’s done!
  6. Remove the pot from the heat, and discard the kombu (if using).
  7. Fluff quinoa with a fork. Let it cool slightly (10-15 minutes) before serving.

For the more visual learners, check out this one-minute video that shows you how to cook quinoa!

Unfortunately, many people’s first experience with this nutrient-packed seed is eating it plain, and they are often so scarred by that experience that they never to try it again.

I love quinoa, but I don’t like plain quinoa it’s boring and bland!

In my next post, I’ll be sharing my favorite way to prepare this super seed along with a few other delicious recipes, so stay tuned! Hooray for no more boring quinoa! 🙂

Not Your Mama’s Brussels Sprouts! 3 Recipes You Have to Try

On behalf of anyone who has ever subjected you to boiled, steamed, or otherwise overcooked Brussels sprouts…

I apologize.

Image

Many of us had traumatic experiences with certain foods while we were growing up and have written them off as adults, and rightfully so. Overcooked Brussels sprouts are often one of those foods, and when they are boiled to death, they do smell (and taste) pretty terrible!

Here’s the good news – Brussels sprouts have been reinvented and taste completely different than they did when we were kids. I promise. Those of us who have sworn off these stinky little cabbages since childhood are giving them a second chance as adults…and are loving them!

Not only are Brussels sprouts delicious, but they incredibly good for you! They are:

  • A source of over 20 essential vitamins and minerals our body needs to function at its best
  • Potent cancer fighters. Check out this post for more about the amazing cancer-fighting properties of green, cruciferous veggies like Brussels sprouts
  • Chock full of fiber. You know, that stuff that keeps us full, controls our blood sugar, and keeps us “regular”

Check out 3 of my favorite Brussels sprouts recipes below!

The first one, in particular, will convert even lifelong Brussels sprouts haters. I prepared it for Thanksgiving last year, and someone who had only had Brussels sprouts boiled tried them and LOVED them. He told his wife he would eat them if she prepared them this way. Happy Cooking 🙂

ImageMaple-Roasted Brussels Sprouts. This is my absolute favorite way to prepare Brussels sprouts. The recipe is super simple, too! Follow these tips/tricks for optimal results: flip Brussels sprouts over halfway through cooking time (at the 10 minute mark), so they cook 10 minutes per side. Do not overcook them – they should still be a brighter green (vs. a dull/muted green). These are SO good! You have to try them.

IMG_3345

Roasted Brussels Sprouts & Shallots. Inspired by the mini Brussels sprouts and shallots I received in my Hometown Harvest bag last week, I made up this recipe.

Ingredients & Directions: 2.5 cups Brussels sprouts, left whole (mini ones, if you can find them!); 2 shallots, sliced; 2 cloves of garlic, minced; 1-2 tablespoons of coconut oil, melted; sea salt & black pepper, to taste.

I mixed all of the ingredients together and then roasted them on a baking sheet in the oven at 400F for 18-20 minutes, tossing them around in the pan at the 10-minute mark. They were really tasty! The shallots added a subtle sweetness. Bill and I devoured the whole bowl at dinner.

Smoky Lemony Shredded Brussels Sprouts – Smoked paprika has a delicious, deep flavor and is something we just started using last month! It can be tricky to find, so you might have to order it online or find it at Whole Foods, Fresh Market, MOMs, or Wegmans. I modified a few things in the recipe (but feel free to follow it “as is”):

IMG_3374

  • Used coconut oil instead of olive oil since coconut oil is more heat stable
  • Added 1/4-1/3 cup low sodium vegetable broth to help the Brussels sprouts cook down. I did this after the Brussels sprouts had been cooking for a few minutes. Just add it in a few tablespoons at a time until the Brussels sprouts soften.
  • Used 2 cloves of garlic instead of 1 (I love garlic!)
  • Added in 1/4 cup of toasted, chopped walnuts for some crunch!
  • Added closer to 1 tablespoon of lemon juice instead of 2 teaspoons (3 teaspoons = 1 tablespoon)

What is your favorite way to prepare Brussels sprouts? Feel free to share your recipes below!

Not Your Mama's Brussels Sprouts! 3 Recipes You Have to Try

On behalf of anyone who has ever subjected you to boiled, steamed, or otherwise overcooked Brussels sprouts…

I apologize.

Image

Many of us had traumatic experiences with certain foods while we were growing up and have written them off as adults, and rightfully so. Overcooked Brussels sprouts are often one of those foods, and when they are boiled to death, they do smell (and taste) pretty terrible!

Here’s the good news – Brussels sprouts have been reinvented and taste completely different than they did when we were kids. I promise. Those of us who have sworn off these stinky little cabbages since childhood are giving them a second chance as adults…and are loving them!

Not only are Brussels sprouts delicious, but they incredibly good for you! They are:

  • A source of over 20 essential vitamins and minerals our body needs to function at its best
  • Potent cancer fighters. Check out this post for more about the amazing cancer-fighting properties of green, cruciferous veggies like Brussels sprouts
  • Chock full of fiber. You know, that stuff that keeps us full, controls our blood sugar, and keeps us “regular”

Check out 3 of my favorite Brussels sprouts recipes below!

The first one, in particular, will convert even lifelong Brussels sprouts haters. I prepared it for Thanksgiving last year, and someone who had only had Brussels sprouts boiled tried them and LOVED them. He told his wife he would eat them if she prepared them this way. Next year I may try it with some roasted purple brussels sprouts to change it up, but otherwise they’re a staple for sure now. Happy Cooking 🙂

ImageMaple-Roasted Brussels Sprouts. This is my absolute favorite way to prepare Brussels sprouts. The recipe is super simple, too! Follow these tips/tricks for optimal results: flip Brussels sprouts over halfway through cooking time (at the 10 minute mark), so they cook 10 minutes per side. Do not overcook them – they should still be a brighter green (vs. a dull/muted green). These are SO good! You have to try them.

IMG_3345

Roasted Brussels Sprouts & Shallots. Inspired by the mini Brussels sprouts and shallots I received in my Hometown Harvest bag last week, I made up this recipe.

Ingredients & Directions: 2.5 cups Brussels sprouts, left whole (mini ones, if you can find them!); 2 shallots, sliced; 2 cloves of garlic, minced; 1-2 tablespoons of coconut oil, melted; sea salt & black pepper, to taste.

I mixed all of the ingredients together and then roasted them on a baking sheet in the oven at 400F for 18-20 minutes, tossing them around in the pan at the 10-minute mark. They were really tasty! The shallots added a subtle sweetness. Bill and I devoured the whole bowl at dinner.

Smoky Lemony Shredded Brussels Sprouts – Smoked paprika has a delicious, deep flavor and is something we just started using last month! It can be tricky to find, so you might have to order it online or find it at Whole Foods, Fresh Market, MOMs, or Wegmans. I modified a few things in the recipe (but feel free to follow it “as is”):

IMG_3374

  • Used coconut oil instead of olive oil since coconut oil is more heat stable
  • Added 1/4-1/3 cup low sodium vegetable broth to help the Brussels sprouts cook down. I did this after the Brussels sprouts had been cooking for a few minutes. Just add it in a few tablespoons at a time until the Brussels sprouts soften.
  • Used 2 cloves of garlic instead of 1 (I love garlic!)
  • Added in 1/4 cup of toasted, chopped walnuts for some crunch!
  • Added closer to 1 tablespoon of lemon juice instead of 2 teaspoons (3 teaspoons = 1 tablespoon)

What is your favorite way to prepare Brussels sprouts? Feel free to share your recipes below!

It’s Taco Tuesday! Walnut Tacos & Dairy-Free Sour Cream {Vegan, Raw, Gluten-Free}

I originally wrote this post in February 2014, but since then I have made some tweaks to the recipes to make them my own and improve them. I served these at a workshop I did today, and my coworkers LOVED them. One person even said she likes them better than regular tacos 🙂

——————————————————————————————————-

My husband Bill and I saw The Lego Movie last week, which inspired me to bring a raw taco recipe to work this week for our Real Food Challenge and to celebrate Taco Tuesday!LEGO Taco Tuesday Guy Set 71004-12

When I think of tacos, I think of the crunchy, salty Old El Paso shells filled with seasoned ground beef and variety of other toppings, like cheese, salsa, and sour cream. Some of those toppings are healthy, but others aren’t. Instead of giving up tacos, why not put a new, healthier spin on them?!

One of the things I enjoy most about what I do is reinventing our favorite comfort foods, so they are healthier but just as (if not more!) delicious and flavorful.

I prepared the “meat” and “cream” for today’s Taco Tuesday lunch for my coworkers, and it was a HUGE hit! Skeptics and believers alike raved about these tacos and dairy-free sour cream, so I’m going to share with you the recipes for how to make them!

The secret ingredient in the “meat”? Walnuts!

raw walnut tacos taco meat closeup

Ingredients

  • 2 cups raw walnuts
  • 1 tablespoon ground cumin
  • 1 teaspoon chili powder
  • 1 teaspoon paprika
  • 1 teaspoon dried oregano
  • 1 teaspoon coriander
  • 1/2 teaspoon garlic powder
  • Pinch cayenne powder
  • 2 tablespoons tamari (wheat-free soy sauce) – You can find this in the Asian section of most grocery stores or online. Use coconut aminos to make this dish paleo.
  • 1 head of baby Romaine lettuce (use one leaf as the taco “shell”)

Add your own toppings, including but not limited to the following:

  • Dairy-free sour cream (below!)
  • Black or pinto beans
  • Brown rice
  • Diced onions
  • Salsa
  • Guacamole
  • Diced avocados
  • Diced tomatoes

Directions

Put all of the ingredients in a food processor and pulse until it resembles the size and texture of ground meat!

Now, on to the sour cream! 🙂

whole taco

Since I stopped consuming milk products a few years ago for health reasons, I’ve had to find alternatives to the creamy goodness of dairy, and I’ve been happy with the recipes and options I’ve tried. I will be devoting several blog posts in the future to some of my favorite deliciously dairy-free recipes, but for today, we’re going to spotlight a recipe for sour cream…without the cream.

The secret ingredient? Cashews!

Cashews can be used as a base for creamy, dairy-free sauces, dips, spreads, and even cheesecakes (Zia’s makes the best!). When you soak cashews overnight in water, they get really soft and can be blended together with savory ingredients to create a delicious, dairy-free alternative to sour cream.

words sourcream

Ingredients

  • 1 cup raw cashews, soaked overnight and then rinsed and drained
  • 2-3 tablespoons fresh-squeezed lemon juice (start with 2 T then taste and add a third if needed. I prefer just under 3 tablespoons)
  • 3 teaspoons raw apple cider vinegar
  • 1/4 teaspoon onion powder
  • 3/4 teaspoon sea salt
  • 1/4 cup water (or more for desired consistency)

Directions

Put all ingredients in the blender and blend until smooth. I had to use the tamper for my Vitamix to push it down.

**If you don’t have a high speed blender, you will likely need to stop a few times to scrape down the sides and might need to add a bit more water to thin it out.

The taco “meat” should be able to last a few days in the fridge, since there are no cooked ingredients in it, and the sour cream will likely be good for up to a week.

Enjoy!

Walnut Tacos with Dairy-Free Sour Cream

I originally wrote this post in February 2014, but since then I have made some tweaks to the recipes to make them my own and improve them. I served these at a workshop I did today, and my coworkers LOVED them. One person even said she likes them better than regular tacos 🙂

——————————————————————————————————-

My husband Bill and I saw The Lego Movie last week, which inspired me to bring a raw taco recipe to work this week for our Real Food Challenge and to celebrate Taco Tuesday!LEGO Taco Tuesday Guy Set 71004-12

When I think of tacos, I think of the crunchy, salty Old El Paso shells filled with seasoned ground beef and variety of other toppings, like cheese, salsa, and sour cream. Some of those toppings are healthy, but others aren’t. Instead of giving up tacos, why not put a new, healthier spin on them?!

One of the things I enjoy most about what I do is reinventing our favorite comfort foods, so they are healthier but just as (if not more!) delicious and flavorful.

I prepared the “meat” and “cream” for today’s Taco Tuesday lunch for my coworkers, and it was a HUGE hit! Skeptics and believers alike raved about these tacos and dairy-free sour cream, so I’m going to share with you the recipes for how to make them!

The secret ingredient in the “meat”? Walnuts!

raw walnut tacos taco meat closeup

Ingredients

  • 2 cups raw walnuts
  • 1 tablespoon ground cumin
  • 1 teaspoon chili powder
  • 1 teaspoon paprika
  • 1 teaspoon dried oregano
  • 1 teaspoon coriander
  • 1/2 teaspoon garlic powder
  • Pinch cayenne powder
  • 2 tablespoons tamari (wheat-free soy sauce) – You can find this in the Asian section of most grocery stores or online. Use coconut aminos to make this dish paleo.
  • 1 head of baby Romaine lettuce (use one leaf as the taco “shell”)

Add your own toppings, including but not limited to the following:

  • Dairy-free sour cream (below!)
  • Black or pinto beans
  • Brown rice
  • Diced onions
  • Salsa
  • Guacamole
  • Diced avocados
  • Diced tomatoes

Directions

Put all of the ingredients in a food processor and pulse until it resembles the size and texture of ground meat!

Now, on to the sour cream! 🙂

whole taco

Since I stopped consuming milk products a few years ago for health reasons, I’ve had to find alternatives to the creamy goodness of dairy, and I’ve been happy with the recipes and options I’ve tried. I will be devoting several blog posts in the future to some of my favorite deliciously dairy-free recipes, but for today, we’re going to spotlight a recipe for sour cream…without the cream.

The secret ingredient? Cashews!

Cashews can be used as a base for creamy, dairy-free sauces, dips, spreads, and even cheesecakes (Zia’s makes the best!). When you soak cashews overnight in water, they get really soft and can be blended together with savory ingredients to create a delicious, dairy-free alternative to sour cream.

words sourcream

Ingredients

  • 1 cup raw cashews, soaked overnight and then rinsed and drained
  • 3 tablespoons fresh-squeezed lemon juice
  • 1 tablespoon raw apple cider vinegar
  • 1/4 teaspoon onion powder
  • 3/4 teaspoon sea salt
  • 1/3 cup water

Directions

Put all ingredients in the blender and blend until smooth. I had to use the tamper for my Vitamix to push it down.

**If you don’t have a high speed blender, you will likely need to stop a few times to scrape down the sides and might need to add a bit more water to thin it out.

The taco “meat” should be able to last a few days in the fridge, since there are no cooked ingredients in it, and the sour cream will likely be good for up to a week.

Enjoy!

Page 2 of 3

Powered by WordPress & Theme by Anders Norén