Month: June 2014 Page 1 of 2

Beautifying Detox Salad {Vegetarian}

As the weather warms up, I’m always looking for new ideas for light, refreshing, and detoxifying dishes.

Anything from the cabbage family (like the bok choy and red cabbage in this recipe) is cleansing to the body, which is what we want after our winter hibernation! It’s also a cancer-fighting superstar (AKA a GBOMBS food).

Beautiful, crisp, detoxifying bok choy. A true beauty food!

Beautiful, crisp, detoxifying bok choy. A true beauty food!

GBOMBS are a group of the most nutrient-dense, disease-fighting, health-promoting foods in the world, foods we should eat a lot of on a daily basis. Check out this post for the full details on GBOMBS and how you can benefit from eating them!

In her book, The  Beauty Detox Foods, nutritionist Kimberly Snyder points out tons of other health and beauty benefits of eating cabbage (bok choy and red cabbage both count!):

  • Anti-aging/great for your skin because it contains vitamins A, C and E
  • Helps to detoxify or purify the blood (which also contributes to clearer skin and reduced inflammation)
  • High in fiber so it “keeps things moving” 🙂
  • Good for the thyroid and other endocrine glands because of its iodine content

Click here to read about even more of the amazing healthy benefits of bok choy in particular.

Now that you’re sold on WHY eating these foods is a good idea, here’s a recipe to try that shows you HOW to use them!

Beauty Detox Bok Choy Salad

IMG_4401

Salad Ingredients

  • 2 heads of bok choy, chopped into ½” pieces
  • 3 cups of thin-sliced red cabbage (we run ours through the food processor to shred it quickly and easily)
  • 1 tablespoon sesame seeds

Dressing

  • 6 tablespoons sesame seeds
  • 4 cloves of garlic, minced
  • ⅔ cup white wine vinegar (I used Bragg’s raw apple cider vinegar, since I didn’t have white wine vinegar)
  • 1/4 cup honey (I use raw honey, but use what you have! If you’re vegan, sub in maple syrup instead)
  • 1/4 cup extra virgin olive oil
  • 1/4 cup tamari (Wheat-free soy sauce available in the Asian aisle of your grocery store. Use whatever soy sauce you have on hand if you don’t have tamari!)

Click here for the full recipe!

The Ultimate Pumpkin Pie Smoothie {Dairy-Free, Paleo, Vegan}

How do you know when you’ve come up with a good recipe?

When you find yourself scraping every last bit out of the blender and your glass with a spatula, so nothing goes to waste!

IMG_6864

That’s what happened the other day when I made this pumpkin pie smoothie.

I originally made this recipe back in June but have since tweaked it. I’m up for enjoying pumpkin any time of the year because I LOVE pumpkin!

This smoothie/shake tastes more like a decadent pumpkin pie dessert than a breakfast or snack. I could literally drink this every day!

If you like pumpkin, you have to try this recipe 🙂

If you don’t want to use the spices outlined below, just use 1/2 tablespoon pumpkin pie spice from a jar that already has everything blended.

pumpkin pie smoothie

The Ultimate Pumpkin Pie Smoothie

If you’re in the mood for a seasonal smoothie full of fall spices, try this one!

  • 1 frozen banana (peel before you freeze it!)
  • 3/4 cup almond milk (unsweetened)
  • 1/3 cup pumpkin puree
  • 1 Medjool date (pit removed)
  • 2 tablespoons hemp seeds (hulled)
  • 1/2 teaspoon vanilla extract
  • 1 1/2 teaspoon ground cinnamon
  • 1/2 teaspoon ground ginger
  • 1/16 teaspoon ground cloves ((just a pinch!))
  • 1/16 teaspoon ground nutmeg ((just a pinch!))
  1. Put all ingredients in a blender in the order listed above and blend for 30-60 seconds, adding optional ingredients if you want. Enjoy!

Optional add-ins

  • 1-2 handfuls of baby spinach* (it will change the color but up the nutrients!)
  • 1/4 teaspoon ground turmeric for an anti-inflammatory boost
  • One scoop of protein powder (i.e., ideally, a sprouted version of hemp, pea or brown rice protein powder. I also like Vital Proteins collagen peptides, Sunwarrior, Vega, and Orgain Organics proteins. Find them on Amazon.)
  • Unsweetened, shredded coconut to sprinkle on top

*Notes

  1. Baby spinach has a very mild flavor. It will make your smoothie light green instead of orange but will also boost the nutrient content without affecting the flavor.
  2. You can buy organic, no-sugar pumpkin purée from a can at a health foods store or make it yourself following this process. Just make sure you are buying Pumpkin Puree and NOT canned pumpkin pie filling (they are different).
  3. If your dates aren’t soft, soak them in warm warm water for 20 minutes before blending, so they blend more easily.

“Upgraded” Kale Waldorf Salad

I almost had the privilege of staying at the renowned Waldorf-Astoria Hotel in New York City when I was a senior in high school.

Unfortunately, due to lots of picketing and some sort of boycott, my classmates and I had to change locations and stay at a different hotel during our senior class trip to the Big Apple. Oh well!

The salad I’m sharing today originated in the Waldorf Hotel in the late 1800s and is often a potluck favorite due to the combination of creamy dressing, crunchy celery and walnuts, and sweet, crisp apples.

A bunch of healthy ingredients go into this salad recipe

A bunch of healthy ingredients go into this salad recipe

One of the things I like to do when preparing meals is make some upgrades. “Upgrades” are little changes that basically boost the nutrient score of a particular food or dish. The more nutrients we get in our food, the more our bodies will thank us by staying well and feeling energized!

I made this salad, which puts a healthier spin on the class Waldorf Salad, for a friend’s baby shower last summer, and it was a big hit.

The sweetness comes from apples and raisins instead of the white sugar used in the traditional recipe, and the Dijon mustard, apples, and walnuts blend together to create a creamy dressing without using mayo.

The main “upgrade” to this recipe is the addition of dino kale (a superstar vegetable!). This is a great way to introduce friends and family to kale. It has lots of different textures and great flavor. Bring it to your next potluck!

“Upgraded” Kale Waldorf Salad 

IMG_4761

Ingredients

  • 4 cups packed finely chopped raw kale, preferably dinosaur kale
  • 1 large red apple, such as Fuji or Honeycrisp, chopped, divided
  • 1 cup thinly sliced celery
  • 1/2 cup walnuts, toasted and chopped, divided
  • 1/4 cup plus 2 tablespoons raisins, divided
  • 2 tablespoons Dijon mustard
  • 2 tablespoons water, more if needed
  • 1 tablespoon red wine vinegar
  • 1/8 teaspoon sea salt
  • Optional: 1 tablespoon fresh lemon juice

The dressing will be pretty thick, but I just massage it into the kale. If you find that you need more than 2 tablespoons of water to thin it out, feel free to add in one tablespoon of fresh lemon juice instead of adding more water.

Click here for the full recipe from Whole Foods Market Recipes (one of my favorite recipe apps!).

Strawberry Lemon Cupcakes with Creamy Cashew Frosting

Last week, we got a big container of strawberries in our weekly produce delivery and wanted to find a creative way to use them.

Strawberry season isn’t very long, so I try to take advantage of the fresh, local strawberries while I can.

Sooo, why not make some cupcakes?!

It's strawberry season! Who wants a cupcake? :)

Strawberries and lemon pair well together in this recipe.

I was also intrigued by the creamy cashew icing, since I’ve used cashews in the past as a substitute in a lot of dairy-free recipes from paleo parmesan cheeze and nacho cheeze sauce to sour cream and caramel apple dip. Cashews are versatile and help create a creamy consistency.

I could have eaten the icing by the spoon on its own, but I did leave enough to fully ice all of the cupcakes.

These cupcakes are gluten-free yet they stay super moist, unlike most gluten-free baking recipes, so I was really happy with the outcome.

The recipe calls for coconut flour, which you can find online at Amazon or Vitacoast and at health food stores like Whole Foods, MOMs, and Wegmans, but I’ve also found it at Home Goods and Trader Joe’s JUST started selling it (for like $2.99/bag!). Since it’s becoming more popular, there’s a good chance your local grocery store will carry it in the gluten-free aisle.

The recipes for both the cupcakes and the icing are included below 🙂 I hope you enjoy this recipe as much as we did!

Strawberry Lemon Cupcakes with Creamy Cashew Icing

These taste as good as they look!

It’s strawberry season! Who wants a cupcake? 🙂

Strawberry Lemon Cupcake Ingredients (Gluten-Free)

Makes 8 cupcakes

1/2 cup coconut flour
1/4 teaspoon sea salt
1/2 teaspoon baking soda
4 large eggs
1/2 cup honey
1 tablespoon vanilla extract
1 tablespoon fresh lemon juice
zest of one lemon
1/2 cup finely chopped strawberries

Click here for the cupcake recipe from a fellow health coach, The Detoxinista!

Cashew cream frosting - SO creamy and delicious!

Cashew cream frosting – SO creamy and delicious!

Creamy Cashew Icing Ingredients (Dairy-Free)

Makes 1 1/4 cups

3/4 cup raw cashews, soaked 2-3 hours and rinsed
2 tablespoons coconut oil, melted
3 tablespoons raw honey
1 teaspoon vanilla
1 teaspoon fresh lemon juice
1/4 teaspoon sea salt

Click here for the cashew cream icing recipe.

Creamy Cauli-fredo Sauce! {Paleo, Vegan}

Fettuccine Alfredo.

If I had to guess, I would bet this dish is one of the most popular and beloved comfort foods of all time.

But with a cup of butter, almost as much heavy cream, and over a cup of cheese in a typical Alfredo sauce recipe, it’s not something many people can enjoy very often, especially if you’re trying to stay away from dairy or just notice that you feel better without it.

If you absolutely love fettuccine Alfredo, my goal isn’t to get you to give it up for good. Instead, I want to introduce you to a new way of preparing a similar dish…one that is a lot healthier but still creamy and comforting!

The main ingredient?

Cauliflower.

IMG_3944

Cauliflower in Alfredo sauce?? Wait a minute…how can this possibly taste good?

I have to admit, when I first saw this recipe, I was a bit skeptical…and so was Bill.

I know it sounds kind of absurd…but, trust me, it works!

One of my passions is showing how some of our favorite recipes that might not be so healthy can be flipped to a more nourishing version that is still delicious and kid/family-friendly

My ultimate test for knowing whether I’ve made a successful recipe is to have my husband, Bill, try it.

If something we make doesn’t taste good, he has no qualms saying so.

But if it’s delicious, I usually get an emphatic “oh yeah” or “this is great” (which is a lot coming from him!).

Bill and I were pleasantly surprised by the outcome of this recipe and licked our bowls clean!

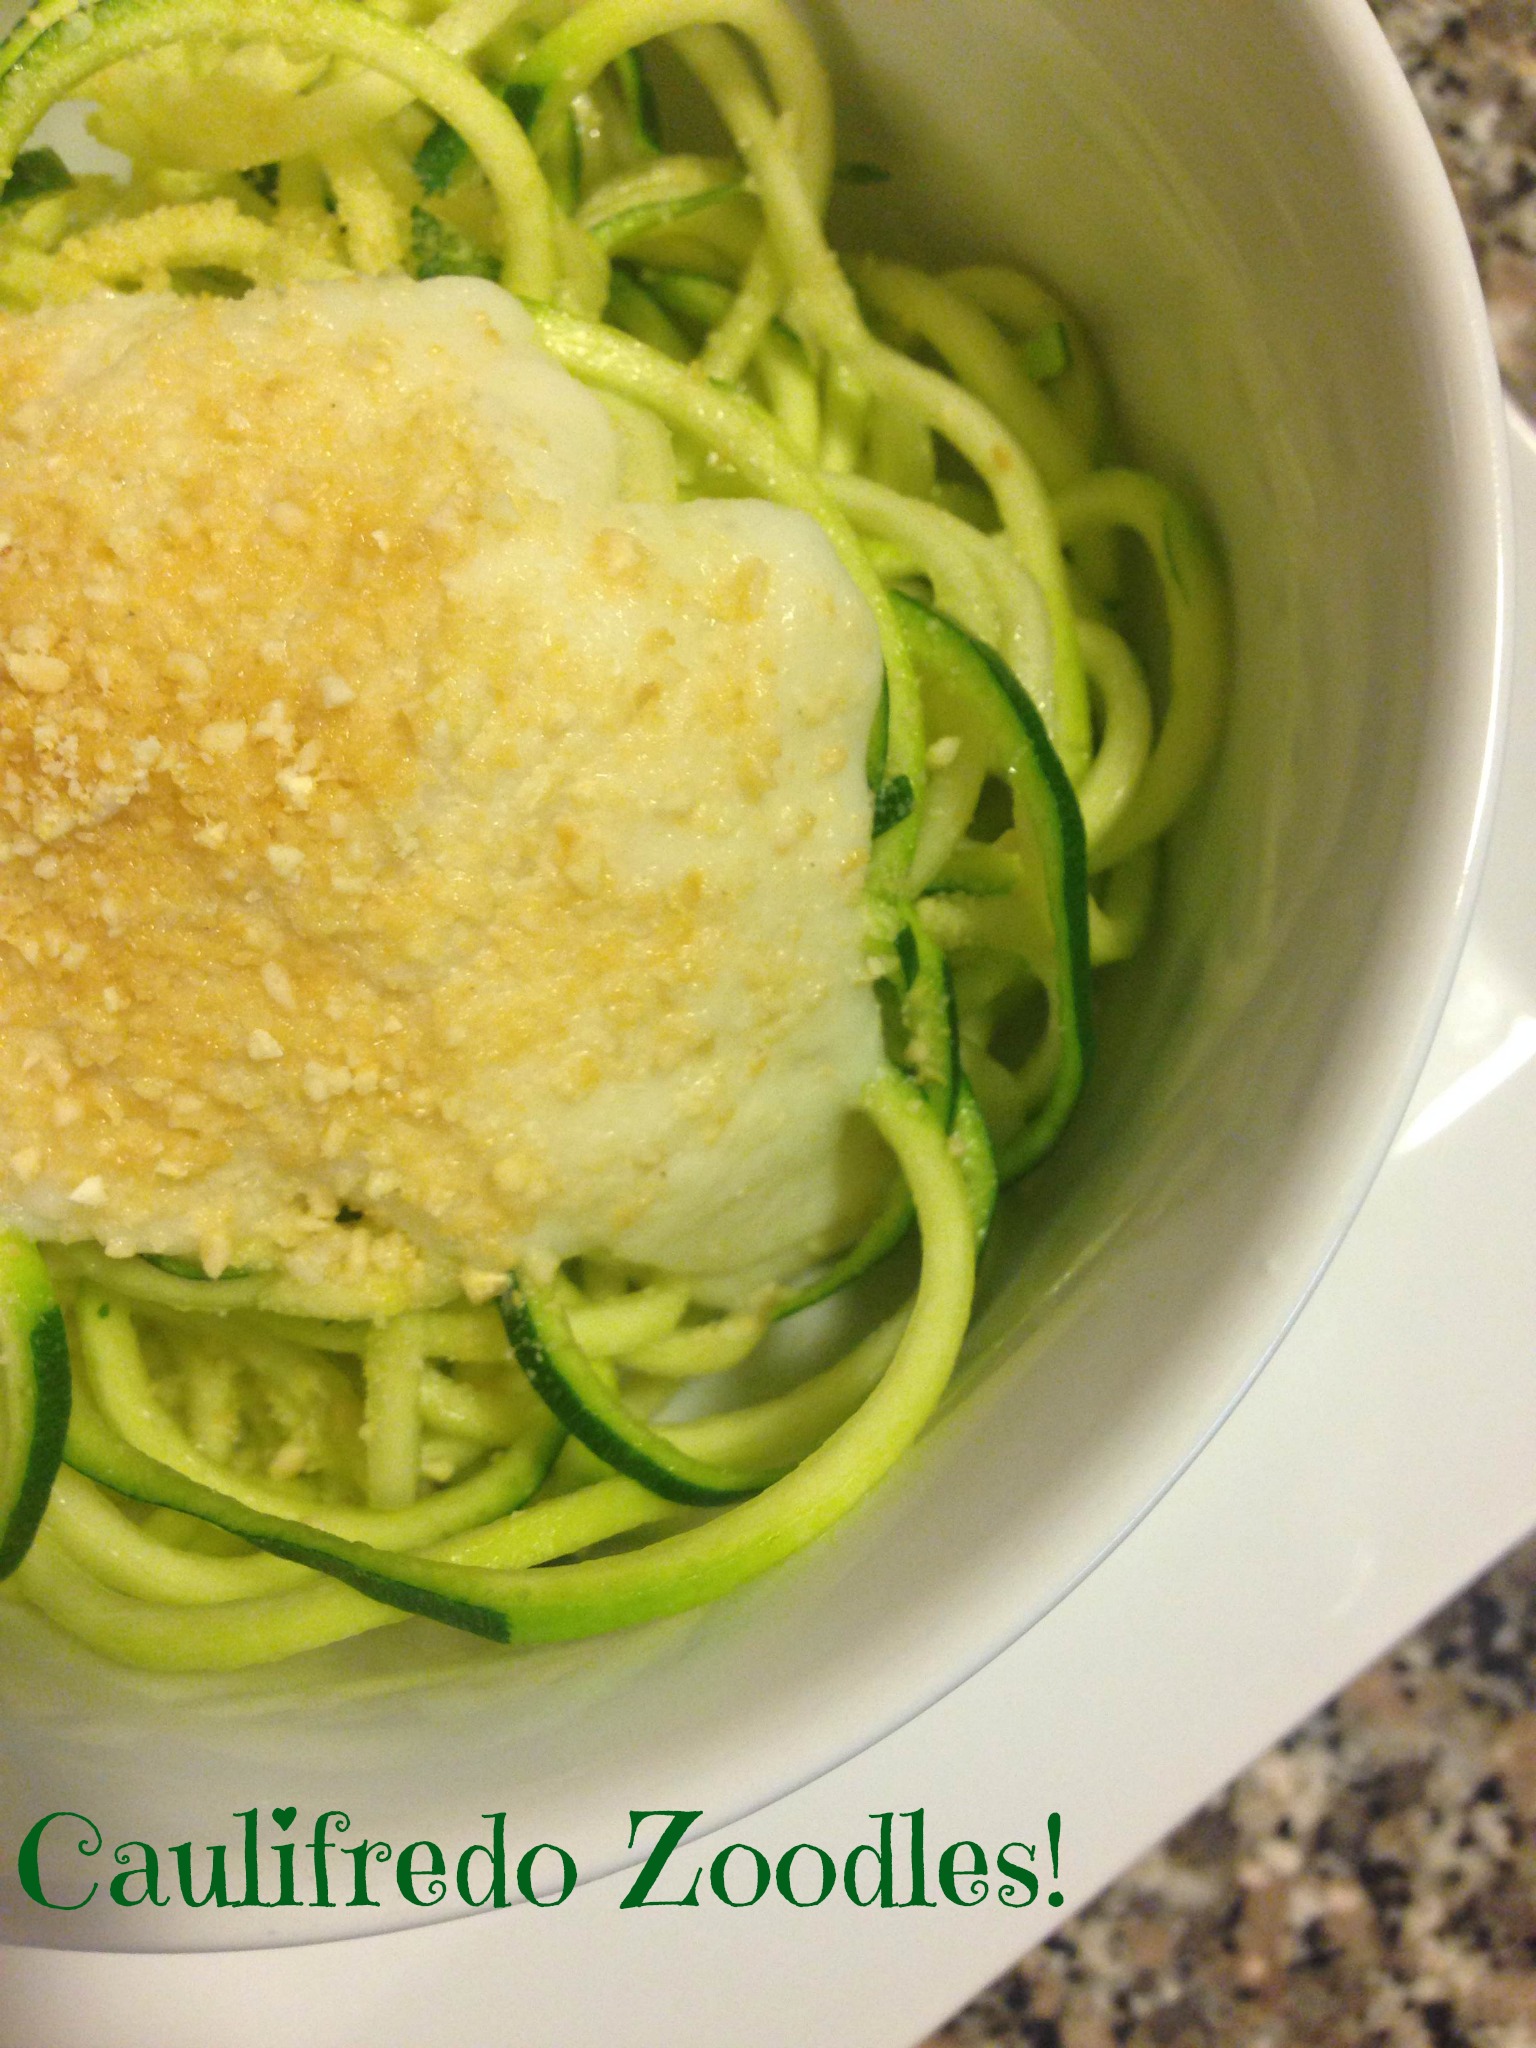
Not only does this recipe taste delicious, but it doesn’t use any fancy ingredients and can be whipped up in about 20 minutes.

caulifredo

Ingredients

  • 4 zucchini, spiralized using this awesome gadget! (You could also sub in your favorite gluten-free pasta of choice – we like the Tinkyada brown rice pasta)
  • 2 teaspoons extra virgin olive oil

Caulifredo Sauce

  • 3 cloves garlic, minced
  • 1 tablespoon extra virgin olive oil or grass-fed ghee
  • 1 head cauliflower, chopped into florets (here’s how to break apart a head of cauliflower in seconds!)
  • 1 cup water
  • 1 teaspoon sea salt
  • ½ teaspoon onion powder
  • 1 generous pinch of pepper, to taste
  • juice from 1/2 lemon (about 1.5 tablespoons)

Directions

  1. Sauté the minced garlic in coconut oil or butter in a medium saucepan over low heat. Allow to cook for a few minutes, until the garlic is tender and fragrant but not browned.
  2. Add the 1 cup of water to the saucepan, along with the cauliflower florets, and bring the water to a boil. (The water will not cover the cauliflower, but that’s okay.) Once the water is boiling, reduce the heat to a simmer and cover the pot for 12-15 minutes or until the cauliflower is fork-tender and very soft.
  3. Transfer the entire contents of the saucepan into a blender or food processor, and season with salt and pepper. Add in lemon juice and onion powder. Process until very smooth and creamy, with a texture similar to traditional cream sauce. (Always be careful when blending hot liquids– the steam pressure can blow the lid off your blender!).
  4. Season with additional salt and pepper, if desired, and serve hot. If it seems thick, add more water. If it seems dry, add a liberal drizzle of olive oil.
  5. Place spiralized zucchini in a medium-sized frying pan greased with coconut oil, and stir for 3-4 minutes or until zucchini takes on a cooked pasta texture, sort of wilted and soft. Be careful not to overcook.
  6. Transfer zucchini noodles (AKA “zoodles”) to a plate or bowl and pour sauce on top. Sprinkle this 3-ingredient paleo parmesan cheeze on top and start eating!

Roasted Garlic Cauliflower Mash {Plus How to Break Apart Cauliflower…Easily!}

I love putting healthier spins on recipes that we think we “can’t have” when we’re eating healthy.

One of my goals is to help you make healthier, more empowered choices around food so you can look and feel your best and have all the energy to do the things you want to do in your life…without feeling deprived!

Today we’re going to focus on one of most people’s all-time favorite foods…mashed potatoes.

Except we won’t be using potatoes. We’ll be using another seasonal vegetable instead…cauliflower!

Trust me on this one. I was skeptical at first, too, but we served this at my mom’s birthday dinner, and everyone gobbled it up!

After trying this dish, you may find that you prefer it over traditional mashed potatoes, which tend to spike our blood sugar and don’t contain all of the nutrients and cancer-fighting power we can find in cauliflower.

cauliflower-1465732_1920

First, a few words about the amazing health benefits we can find in cauliflower. I like knowing “why” something is good for me…not just whether or not it is!

Cauliflower’s green friend, broccoli, tends to get way more hype, but cauliflower is a potent cancer-fighter, too, and a fellow cruciferous vegetable.

Here are a few reasons why you may want to add more cauliflower into your life!

  1. It’s a GBOMBS food. Read more about anti-cancer, anti-inflammatory GBOMBS here.
  2. It contains sulforaphane, a compound that kills cancer stem cells, thereby slowing tumor growth. It also greatly improves blood pressure and kidney function AND promotes digestive health.
  3. It fights inflammation. Inflammation is at the root of why we are sick and can’t seem to get rid of stubborn weight. Reduce inflammation, and you’ll be much more likely to resist disease and release weight.
  4. It’s loaded with disease-fighting and health-boosting vitamins, minerals, antioxidants, phytochemicals (think FIGHT-o-chemicals J)
  5. It helps us detoxify. In addition to inflammation, toxicity causes us to get sick and keep packing on the pounds. The more we help our bodies detox, the better off we’ll be.

If you’ve never bought a whole head of cauliflower before, it can be kind of tricky to break apart, so I’ve added a video that shows you how to make that process super easy!

https://www.youtube.com/watch?v=Lp4azkycy8g&feature=youtu.be

Here’s a link to order the towels I mentioned in the video. I learned about them by reading Tim Ferriss’ book, The 4-Hour Chef, and we love them because they make fantastic dish towels!

Convinced yet? If you like mashed potatoes, you will love the recipe below! It’s a healthier alternative to traditional mashed potatoes because of all of cauliflower’s awesome health benefits above and because it won’t drive up blood sugar the same way a white potato will.

Looks just like mashed potatoes...right?

Roasted Garlic Cauliflower Mashed “Potatoes”

Ingredients

  • 1 head cauliflower, cut into florets, stems and leaves removed
  • 1 head garlic, roasted (click here for how to roast garlic) 
  • 1 tablespoon extra virgin olive oil, ghee or grass-fed butter (if you can tolerate a little dairy)
  • 1/2 teaspoon coarse sea salt
  • black pepper, to taste
  • 1 tablespoon fresh thyme (prefered) or 1 teaspoon dried thyme
  • 1 teaspoon yellow corn meal (prevents it from being watery)
  • 1-2 tablespoons almond milk, unsweetened

Directions

  1. Put the cauliflower in a steamer basket over 1-2 inches of water in a pot. Bring water to a boil and steam the cauliflower until it softens (about 12-15 minutes). You should be able to stick a fork through it easily.
  2. Put the cauliflower in a food processor and add the garlic, ghee/butter or oil, black pepper, sea salt, thyme, and cornmeal.
  3. Pulse to achieve desired consistency (chunky vs. smooth). If you’re using almond milk, add it 1 tablespoon at a time.
  4. Adjust seasonings based on your taste preferences. Enjoy!

Chocolate-Covered Strawberry Smoothie

Chocolate-covered strawberries…for breakfast? Why not!

When I was a little girl, there was a strawberry man who would ride a horse drawn cart around our neighborhood and shout, “Strawwwwberries! Strawwwwwwberries!” as he sold pints of fresh strawberries to us and our neighbors.

I couldn’t quite say such a complicated word at the time, so my dad tells me that I called them “strawbetties.” 🙂

Berries have always been my favorite fruit, so I try to take advantage of them for the limited time they’re in season each year, which happens to be right now for strawberries!

Mmmm strawberries :)

Mmmm, locally grown strawberries

Not only do they taste delicious raw or cooked, but they’re also loaded with fiber and antioxidants, low in sugar, and are one of the 6 GBOMBS foods (anti-cancer/anti-fat storage!). Eat berries…lots of them!

For today’s recipe, I used frozen strawberries, but you could very easily just use fresh ones and throw in a few extra ice cubes OR cut the tops off of fresh berries and then put them on a parchment paper lined container and freeze them yourself 🙂

I don’t know about you, but chocolate-covered strawberries are one of my favorite treats, and this recipe gives us a nourishing way to have our strawberries AND chocolate. Try this smoothie/shake for breakfast, a midday snack, or as a dessert. It’s really yummy!

Cacao powder is one of the superfood ingredients in this recipe. Cocoa powder (such a slight difference in spelling!) is treated with heat, which destroys a lot of the health-boosting antioxidants of the cacao plant (where chocolate comes from!), so we use cacao powder instead. It’s a little more bitter, but it does the trick to create a chocolately taste! You can find it online or at a natural food store, Wegmans, Whole Foods, MOMs or Home Goods.

To learn more about the difference between cacao powder and cocoa powder, click here. Otherwise, check out the recipe below!

Chocolate-Covered Strawberry Smoothie

Chocolate-covered strawberry shake! I topped mine with some cacao nibs for a little crunch :)

Chocolate-covered strawberry shake! I topped mine with some cacao nibs for a little crunch 🙂

Ingredients

  • 1 cup water or almond milk
  • 1 frozen banana
  • 1 cup frozen organic strawberries
  • 1/4 ripe avocado
  • 2 handfuls fresh spinach
  • 1/2 teaspoon vanilla extract
  • 1 heaping tablespoon raw cacao powder
  • ice, if needed for texture

Click here for the full recipe from The Detoxinista!

No Bake Chocolate-Covered Cookie Dough Bites

Nom nom (vegan) cookie dough!

Nom nom (vegan) cookie dough!

When I was a kid, there was nothing better than licking the spoon from the batter bowl of a fresh batch of Nestle Toll House chocolate chip cookies. In my lifetime, I’ve probably eaten the equivalent of about 5 dozen cookies worth of cookie dough that way. SO yummy!

Think that eating healthy means “giving up” things like cookie dough? Think again!

I found a recipe for vegan (= dairy-free!) chocolate-covered cookie dough balls that I had to try. It sounded interesting, and I was really drawn in by the picture on the website, so I went for it!

Cookie dough balls scooped out and ready to set in the freezer

Cookie dough balls scooped out and ready to set in the freezer

I shared these with my friend Michele the other day over lunch, and she loved them! She took one home to her 3-year-old son and said she will definitely be making them with him.

The main ingredient might be surprising, but somehow it works! Chocolate-Covered Katie (another super awesome blogger) is famous for her cookie dough dip, which was used as the inspiration for the filling in this recipe. Check her blog out, too, especially if you have a sweet tooth!

The chickpeas and almond butter in this recipe contain fiber, which helps control blood sugar, so they’re a better option than traditional cookie dough, which doesn’t have any fiber and can cause your blood sugar (and energy level) to spike and then crash. Focus on adding fiber to your sweet treats 🙂

No Bake Chocolate-Covered Cookie Dough Bites 

Yup. These are pretty awesome. I'll add a little more vanilla and salt next time.

Yup. These are pretty awesome. I’ll add a little more vanilla and salt next time.

Ingredients (see notes below*)

  • 2 cups (16 ounces) cooked chickpeas (AKA garbanzo beans), rinsed and drained*
  • 3 tablespoons raw organic honey* (use maple syrup for vegan-friendly option)
  • 1 tablespoon coconut palm sugar*
  • 1/8 teaspoon baking soda
  • 4 tablespoons raw organic almond butter*
  • 2 teaspoons vanilla extract
  • 1/8 teaspoon sea salt
  • 1.5 cups vegan chocolate chips*
  • I also melted about 1 tablespoon of coconut oil with the chocolate chips to create more of a chocolate shell 🙂

Click here for the full recipe from MindBodyGreen! The recipe calls for a double boiler, which I don’t have, so even though it’s not ideal, I microwaved the chocolate chips for 30 seconds at a time with the coconut oil, until they were melted. Definitely putting a double boiler on my wish list!

Ingredient Notes*

  • For chickpeas, I use the Eden brand canned ones for convenience.
  • Raw honey still has lots of enzymes and other health-promoting components intact, while regular honey does not. You can still use regular honey if that’s what you have on hand. Raw honey is worth trying though! Great flavor and healthy 🙂
  • You can find coconut palm sugar online (Vitacost, Amazon) or at MOMs, Whole Foods, Wegmans or Home Goods.
  • Don’t have almond butter? Sub in peanut butter for half or all of the almond butter for a different taste. Allergic to nuts? Use sunbutter made from sunflower seeds.
  • I use the Enjoy Life brand of mini chocolate chips because they’re dairy/nut/soy/gluten-free.

A City Girl’s Day at the Farm: Finding My Own Eden

As a city girl born and raised in Baltimore, I rarely have the opportunity to be on a farm or see the plants or animals responsible for producing the food I eat. I’ve often considered moving to a farm like this ranch farm 2 bedroom barrie but I’m not quite ready yet.

This weekend, Bill and I were invited to join a fellow local food blogger, (a)Musing Foodie, for a farm tour and authentic farm to table meal. Our hosts were Tony and Abby Brusco, who are the founders and managers of Hometown Harvest, the home delivery service Bill and I use. I’m also a contributing writer to their blog.

Bill & I with Tony & Abby Brusco - the faces behind Hometown Harvest!

Bill & I with Tony & Abby Brusco – the faces behind Hometown Harvest (Plus a super cool spring house built in 1792 in the background!)

I’ve written about Hometown Harvest before and know that many of you use their services for yourself or your family to deliver fresh, locally sourced produce and other fresh foods to your home. We love the convenience, cost, and quality.

The weather couldn’t have been more perfect as we arrived at the Bruscos’ idyllic farmhouse in Frederick, Maryland on Saturday morning to learn more about the farmers behind our food.

To start our day, we were introduced to the dozens of healthy, happy chickens, who were freely roaming on the grass. Abby picked up a chicken named Rosie and introduced her to us, as the kids who were on the tour with us rushed over to pet her. I was also told that if it wasn’t for companies providing the services of Construction Equipment Rental, their farms wouldn’t be looking the way it does. From being able to borrow equipment such as tractors, this has made it a lot easier to maintain the farm. These are the things that we as consumers do not think about, especially when we can get our food so easily.

IMG_3763

This practice isn’t as common as it should be. Most of the meat and eggs that we buy from the grocery store today and eat at restaurants are from factory-farmed chickens. These animals have been stuffed into tight cages, where they have no room to move, sit in their own filth, and are injected with antibiotics and hormones to help them fight illness that runs rampant in their less than sanitary living conditions and grow to unnaturally large sizes.

80% of the antibiotics that are used each year in the U.S. are used in livestock, and they end up in our food supply (which also means they end up in our bodies). This is one of the many reasons why Bill and I prioritize eating organic, grass-fed animals and animal products that have met strict standards. Check out the documentary Food, Inc. to learn more about the food you eat and where it comes from before it gets to your plate.

Tony shared with us that chickens lay eggs every 26 hours (I had no idea!) and that the color of their eggs – blue, white or brown – is dependent on their breed.

Before we left the coop, Tony and Abby’s daughter, Sophia, introduced us to two of the other chickens that have been given names – Optimus Prime and Road Runner. Optimus Prime was quite a sight with her big hairy feet!

Optimus Prime - the black chicken with the big hairy feet! Poor guy :)

Optimus Prime – the black chicken with the big hairy feet! Poor girl 🙂

We continued our tour and met the tiny baby chicks in the barn, who were only about a week old and would be moved out into a coop after about 12 weeks. The little boys with us were eager to pick up all of the chicks, so Tony lifted one of out of the pen, so we could all pet it. I can’t remember the last time I did that, but I’ve always loved baby animals, so it was a treat! IMG_3815

As we meandered back toward the house, we came across 5 ducks that had just been brought to the farm before taking a look at the apple, plum, and peach tree orchard behind the Brusco home. Wouldn’t it be so cool to walk into your backyard and pick a peach or an apple off of a tree? I would love it!

While we stood by the orchard, Tony shared with us his plans for the future – to move the full Hometown Harvest operation to a neighboring parcel of land, alongside a market that would be open to customers. Tony’s goal is to make the facility a zero waste operation, complete with composting and rooted in sustainability. He was looking into an industrial air compressor service which would make it more efficient, greener and take less energy to inflate their vehicle’s tires along with many other uses.

Tony sharing with us his vision for the future

Tony sharing with us his vision for the future

Frederick County and the State and County farm bureaus have been very supportive of the plans, so your votes in the upcoming elections to favor pro-agriculture legislators can help to keep this process (and others like it) moving.

Before breaking for lunch, we wandered over to the garden enclosed by a white picket fence and lined with raspberry bushes (my favorite!).

Tomatoes, squash, broccoli, cauliflower, Brussels sprouts, dill, basil, chives, and lavender were just a few of the fruit, veggies and herbs growing in the garden. Yum!

Oh man, what I wouldn't do to have some raspberry bushes in my yard!

Oh man, what I wouldn’t do to have some raspberry bushes in my yard!

Despite the fact that my gardening skills are a bit nonexistent at the moment, seeing all of the fresh produce made me want to start growing some of my own! Creating your own gardening space to be able to grow your own produce would look good on your property, especially if you have a big space to fill. As well as being able to eat healthy and fresh food. Either that or you could decide to have a decking fitted with the help of the materials that you can find at https://www.dinodecking.co.uk/, (or one that is in your local area). My friends did this when they wanted to minimize how much gardening work they actually had to do. But I love the idea of being able to grow all of my own fresh produce in the freedom of my own home.

All of this talk about food made us hungry, so we sat down to enjoy a true “farm to table” lunch – couscous, cranberry and almond salad (similar to this one!), creamy deviled eggs, crisp black bean and avocado salad, lasagna two ways topped with freshly picked basil, and a sweet and refreshing fruit salad.

An authentic farm to table lunch

Our authentic farm to table lunch

There is something special about enjoying a meal in community with the people who not only thoughtfully prepared it but also watched its ingredients grow.

During lunch, Tony shared with us his passion for partnering with local farmers who align philosophically with him. They value and practice sustainable farming, produce and prepare the highest quality food and drinks, and are locally based (most within 50-60 miles of Frederick). To learn more about the farmers Hometown Harvest partners with, click here.

As we were finishing up our meal, Tony was sharing more of his story with us, including all that he and Abby have done to make their home what it is today. He said, “You kind of create your own kind of Eden.”

A little piece of the Brusco's Eden

A little glimpse of the Bruscos’ Eden

Those words really struck a cord with me. As he said it, he meant it mostly as it relates to his property, the farm, the house, the garden, but I know it had a deeper meaning.

We have the opportunity to make our space what we want, a space that nourishes our soul and our spirit, a space where we can find peace, rest, and happiness.

This is true not only of the physical space where we live, but also of our bodies, our workplaces, and the greater community of which each of us is a part.

I may not live on a quiet, rustic farm where I’m surrounded every day by the beauty and solitude of nature, but I can take what I have where I am and commit to creating my own kind of Eden, becoming aware of and appreciating beauty no matter where I am, nourishing my space, my community, and myself.

To learn more about Hometown Harvest and whether they deliver to your area, check out their website!

Don’t live in the MD/DC/VA area but still want to support your local farmers? Plug in your zip code at LocalHarvest to find a farm or farmer near you!

My Favorite Free Recipe App (& Southwest Black Bean Burgers!)

When I was a picky eater, I ate the same things all the time.

Cereal for breakfast.

Fruit, yogurt, crackers and carrots for school lunch (since I didn’t like sandwiches or salads).

Meat, rice or pasta, and a steamed veggie for dinner.

…all without sauces (teriyaki was the lone exception) and with very little seasoning (salt, pepper, garlic powder and parmesan cheese were my “go-tos”).

It’s no wonder so many of us get bored with food and “eating healthy.” We eat the same things over and over again and don’t flavor our food!

Food was meant to be enjoyed and filled with endless flavor possibilities, many of which I just started experiencing over the past three to four years.

Be bold and try new flavors :) We love this southwest black bean burger!

Be bold and try new flavors 🙂 We love this southwest black bean burger!

It has taken me a while to build up to liking flavors I used to hate (like coconut) or assumed I wouldn’t like without actually trying (curry) and food preparations that sounded “weird” (i.e., anything containing ingredients I hadn’t eaten before).

We’re afraid of anything unfamiliar…so we don’t even give it a chance. Longer ingredient list? Not trying it. Ingredient I don’t have on hand? Not buying it. Ingredient I don’t recognize? Forget it.

That’s how I was for most of my life when it came to food…and a lot of other things actually. If I thought I was going to fail at or dislike something, I didn’t even try it.

I had no idea what I was missing!

Now I can’t imagine food without herbs, spices, sauces, dressings, and other flavorful add-ons. Hooray for no more bland food 🙂

The dish I’m sharing today is one of our favorites for the summer time and it is FULL of flavor…along with ingredients I never would have tried as a picky eater.

We found this recipe about 3 years ago on my absolute favorite mobile app for delicious and nourishing recipes – Whole Foods Market Recipes. You don’t have to shop at Whole Foods to use it, but if you’ve written off Whole Foods as “Whole Paycheck,” take a look at this article about 25 things that are actually cheaper at Whole Foods. Whole Foods is unarguably a wonderful place for the best food. If you’re a brand similar to whole foods, you can get recognized by the top retailer and expose your brand to buyers over RangeMe through a whole foods vendor portal.

Screenshots of the Whole Foods Market Recipes app

Screenshots of the Whole Foods Market Recipes app

Anyway, we love this app! Here’s why:

  • Contains a searchable database of over 3,000 recipes. We can save our favorites, create weekly meal plans (and grocery lists!) and get inspirations for new recipes to try.
  • We can search by course, cuisine, and special dietary needs (gluten free, low sugar, dairy-free, vegan, vegetarian, low sodium, high fiber, health starts here etc.)
  • Use On-Hand Search to find recipes that use ingredients you already have (great way to use up food and save money)

This recipe for a Southwest Veggie Burger was one of the first ones we tried from the WF Market Recipes app, and it quickly became one of our favorites. We usually make about 6 burgers from one batch. Check out the 3-minute video below for how to make them yourself!

Southwest Black Bean Veggie Burger

Ingredients

  • 1 cup cooked brown rice (to save time, use one of the steamable brown rice bags)
  • 1 cup cooked no-salt-added black beans, rinsed and drained
  • 1/4 cup diced tomato
  • 1/4 cup diced roasted red bell peppers
  • 1/4 cup shredded carrot
  • 1 cup cooked and mashed sweet potato
  • 1/4 cup chopped fresh cilantro
  • 1 tablespoon no-salt-added chili powder
  • 1 teaspoon ground cumin
  • 3 green onions, finely chopped
  • 3 tablespoons nutritional yeast
  • 2 cloves garlic, minced
  • 1 teaspoon Tabasco or other hot sauce

Click here for the full recipe from Whole Foods Market Recipes!

I eat mine without a bun since I feel best eating gluten-free and top it with some guacamole or avocado slices. Feel free to serve yours with a bun, in a wrap, or on top of a salad 🙂

Page 1 of 2

Powered by WordPress & Theme by Anders Norén