Category: How To

Meal Planning Made Easy: Step 2…Get Organized

As I shared in my first post in this series, Meal Planning Made Easy: Step 1…Get Inspired!, meal planning doesn’t have to be a drag or feel like a chore…it can even be FUN once you start to get some creative ideas flowing 🙂

In today’s post, I’m going to tell you about my absolute FAVORITE meal planning tool. It makes meal planning and easy and even gives you the option to print a shopping list directly from the site!

Let’s take a look at my top 3 tips to Get Organized!

1) Tackle your toolbox.

I’m not talking hammers and nails here, but the truth is, if we want to plan and start cooking our meals, we have to have the right tools in our kitchen to make prepping and cooking easier and more efficient.

Here are my top 6 tools: (1) glass mason jars for food prep, storage and freezing; (2) a chef’s knife; (3) crock pot; (4) high-speed blender; (5) food processor; and (6) thermos (to transport hot & cold food!).

kitchen tools

The key to using these tools is to make them accessible. If they’re stowed away in a closet in your basement, you won’t use them. Trust me. Put them on the countertop or on a table in your kitchen or dining room. If they are easy to access, you will be much more likely to use them!

2) Clean out & restock your pantry.

I like to think of my approach to eating as “common sense nutrition,” so here’s a simple rule of thumb – If you keep healthy food in your house, you will eat healthy food. If you keep junk food in your house, you will eat junk food.

Start with a pantry clean out and toss anything that is expired or that you don’t use. (That would include your jar of sage from 2003 🙂) Ask yourself,

“Does this support my healthy goals? The person I want to be? How I want to feel?”

If the answer is “no,” toss it. Make it easier for yourself to make healthy choices!

I’ve shared my top 10 everyday pantry essentials and my top 11 sweet treat staples in previous posts, so check them out if you want to know some staples I always have on hand in addition to the basics like beans, lentils, peas, brown rice, and quinoa.

pantry staples text

3) Use a Meal Planning Tool!

My favorite is Plan to Eat. I introduced it to my coworkers a few weeks ago, and they LOVED it. Here’s why!

  1. Add Recipes: You can add your own recipes manually, use the Plan to Eat bookmark bar just like the Pinterest pin icon to automatically upload whatever recipe you’re viewing into your recipe book, or paste a URL from a recipe website into the box on the Recipes page using the Add Recipe button.
  2. Plan Using the Calendar: Drag and drop your recipes into the calendar and plan meals for a day, week or for several months!PTE
  3. Printable Shopping List: As you add recipes to your planner, the shopping list will update and add in all ingredients you need for each meal. You end up with an organized, easy to follow shopping list that you can print out and take with you to the store. You can check off items you already have and even add certain items to your grocery staples list.
  4. Add Stores: Do you shop at multiple stores? No problem! Add each store to your list and you can move items on your shopping list to the store where you buy them.
  5. Get Social: You can Add Friends, which lets you access each other’s recipes.

They don’t have an app, but the website is 100% mobile-enabled, so you can easily use it from any device.

You can sign up for a free 30-day trial to try it out yourself before you commit. They don’t take your credit card info ahead of time like other websites do, so it really is free. The cost for an annual membership is $39. Renew on Black Friday to get a year for $19!

Check out the quick video below to learn more about how Plan To Eat works and see it in action!

If you’re interested in checking out meal planning apps, take a look at MealBoard or Paprika. I can’t speak from experience on those, but they do have good reviews online.

In my final post of this series, I’ll be sharing some practical tips for how to actually “Get To It” and start putting the ideas in steps 1 and 2 into practice!

What’s your favorite meal planning tool? Do you have any tips you’d like to share?

Meal Planning Made Easy: Step 1…Get Inspired!

This is the first in a series of three posts about my top tips for meal planning. Planning our meals is one of the keys to eating healthy, saving time and money, and taking the stress out of mealtime!

—————————————————————————————————-

We have lots of priorities and commitments that demand our time, attention, and energy, but we only have so much we can do in one day.

It can be easy to let something like food slip into the lower level of those priorities, especially if we associate it with being stressful and having to do more work.

A recent study found that 85% of people said eating a healthy dinner was important to them, despite the fact that fewer than 50% were reaching that goal.

Easy healthy dinner idea!

Easy healthy dinner idea!

So, where’s the disconnect?

We’re not cooking...

But why?

Many people don’t cook because they don’t think they can, others rely on a partner who does all the cooking, some hate cleaning up the mess or say they don’t have time to cook, and most think going grocery shopping takes too much time.

guy fieri

Let’s talk about time.

In 2013, the average American, regardless of weekly earnings, watched 2-3 hours of TV per day.

Hear me out on this one.

This isn’t about guilt, blame, shame, or condemnation – I’m never about those things on this blog. And I like watching Jimmy Fallon, The Voice, and Top Chef as much as the next person.

This is about taking a step back and being honest with ourselves. Here’s the reality:

If we want to have ENERGY, feel GREAT and be HEALTHY, then we have to make food a priority.

It’s not about having time, it’s about making time. Each of us has 24 hours each day – no more, no less.

The idea of meal planning initially SEEMS time intensive, but trust me, once you make it a habit, you will be amazed by how much money (AND time) you save, how much healthier you eat, and how calm and unstressful mealtime can become.

Remember, if food is what fuels and nourishes us throughout the day, and we want to feel energized, then taking ownership over what we eat by planning and preparing our meals is the #1 way to get there.

Inspired by The Kitchn, an awesome website for all things cooking, food, and tips and tricks, I want to share with you 3 keys to get you excited about meal planning!

  1. Get Inspired
  2. Get Organized
  3. Get To It

*Get Inspired*

1) Grab a cookbook! If you want to take the intimidation factor of meal planning and cooking down a notch, just use ONE cookbook to pull recipes from instead of spending hours searching online. Five Below often has great deals on Paleo and other healthy cookbooks.

Take Action: Here’s a post I wrote about some of my top picks for healthy & delicious cookbooks.

IMG_6709

2) Use recipe templates. The Environmental Working Group and a grad student from NYU have created two handy guides that you can use to find healthy recipes for breakfast, lunch, dinner, and snacks. What I like about templates is that they give us flexibility and can take some of the stress out of cooking for fear we will “mess up.”

Take Action: Click here to go to the full post I wrote about eating healthy on a budget to access the 2 FREE guides or click on the links below:

Good Food on a Tight Budget Recipes

Eat Well on $4/Day: Good & Cheap Guide

3) Pin It! If you like Pinterest (it took me awhile to warm up to it), that can be a great place to go for inspiration and specific searches.

Some of my top words and phrases to search on Pinterest are: “paleo,” “dairy-free,” “vegan,” “gluten-free,” and “clean eating” plus whatever ingredient I want to use or cuisine I’m in the mood for (i.e., Mexican, Indian, Chinese, etc.). Anything that is paleo or vegan will, by definition, be dairy-free, too (except butter, the paleo way of eating includes grass-fed butter).

Take Action: Click here to follow my boards on Pinterest!

pinning recipes

4) Make It FUN and follow a theme. Meatless Monday, Taco Tuesday, Wacky Wednesday (Viking Night – eat with your hands!), Take Out Fake Out Thursday (stir fry, make your own healthy pizza station, make your own salad station), Fish or Fiesta Friday, Souper Saturday, and Casserole or Crockpot-Style Sunday are just a few ideas to get you started.

Take Action: Pick ONE theme idea that appeals to you. Try it out next week and see how you like it!

Come back tomorrow as I share my top tips to help you “Get Organized” as well as my FAVORITE meal planning tool and how you can get it free for 30 days! 

Which of these ideas is most helpful to you? I’d love to hear from you!

My 5 Favorite Healthy Cookbooks…All Gluten-Free {And My Wish List!}

“The pictures looked so good online. I don’t know why it didn’t turn out that way when I made it!”

Entire articles are dedicated to capturing people’s Pinterest fails when it comes to attempting new recipe creations.

hilarious-pinterest-fails-25

It can be discouraging to put all of the effort into trying something new only to have it end up in the trash. It’s one of the reasons people don’t try new recipes.

“What if it doesn’t turn out right?”

“What if I ruin it?”

“I hate wasting food…and money on food.”

Yes, yes, yes! I’m with you on all three of those. I want my dishes to be tasty and delicious and to feel like buying the ingredients was money well spent.

One of the ways I’ve learned to give myself a better chance of making successful recipes over the years is using cookbooks. What I’ve found is if I like a few of someone’s recipes, I tend to be more confident that other dishes they’ve created will be good, too. And usually, I end up with a yummy meal.

Whether you’ve been cooking for years, are just getting started or are learning a new way to cook based on some health challenges or the way you want to feel, using a cookbook can be a great way to bring some excitement and variety to your kitchen.

Check out a few of my favorite go-to cookbooks when I’m feeling burnt out from Pinterest, am looking for inspiration, or just want to go old school and use an actual book instead of a website. I’ve also given you a list of the top cookbooks on my wish list. Any of these would make great Christmas gifts for yourself or the food lovers in your life!

IMG_6709

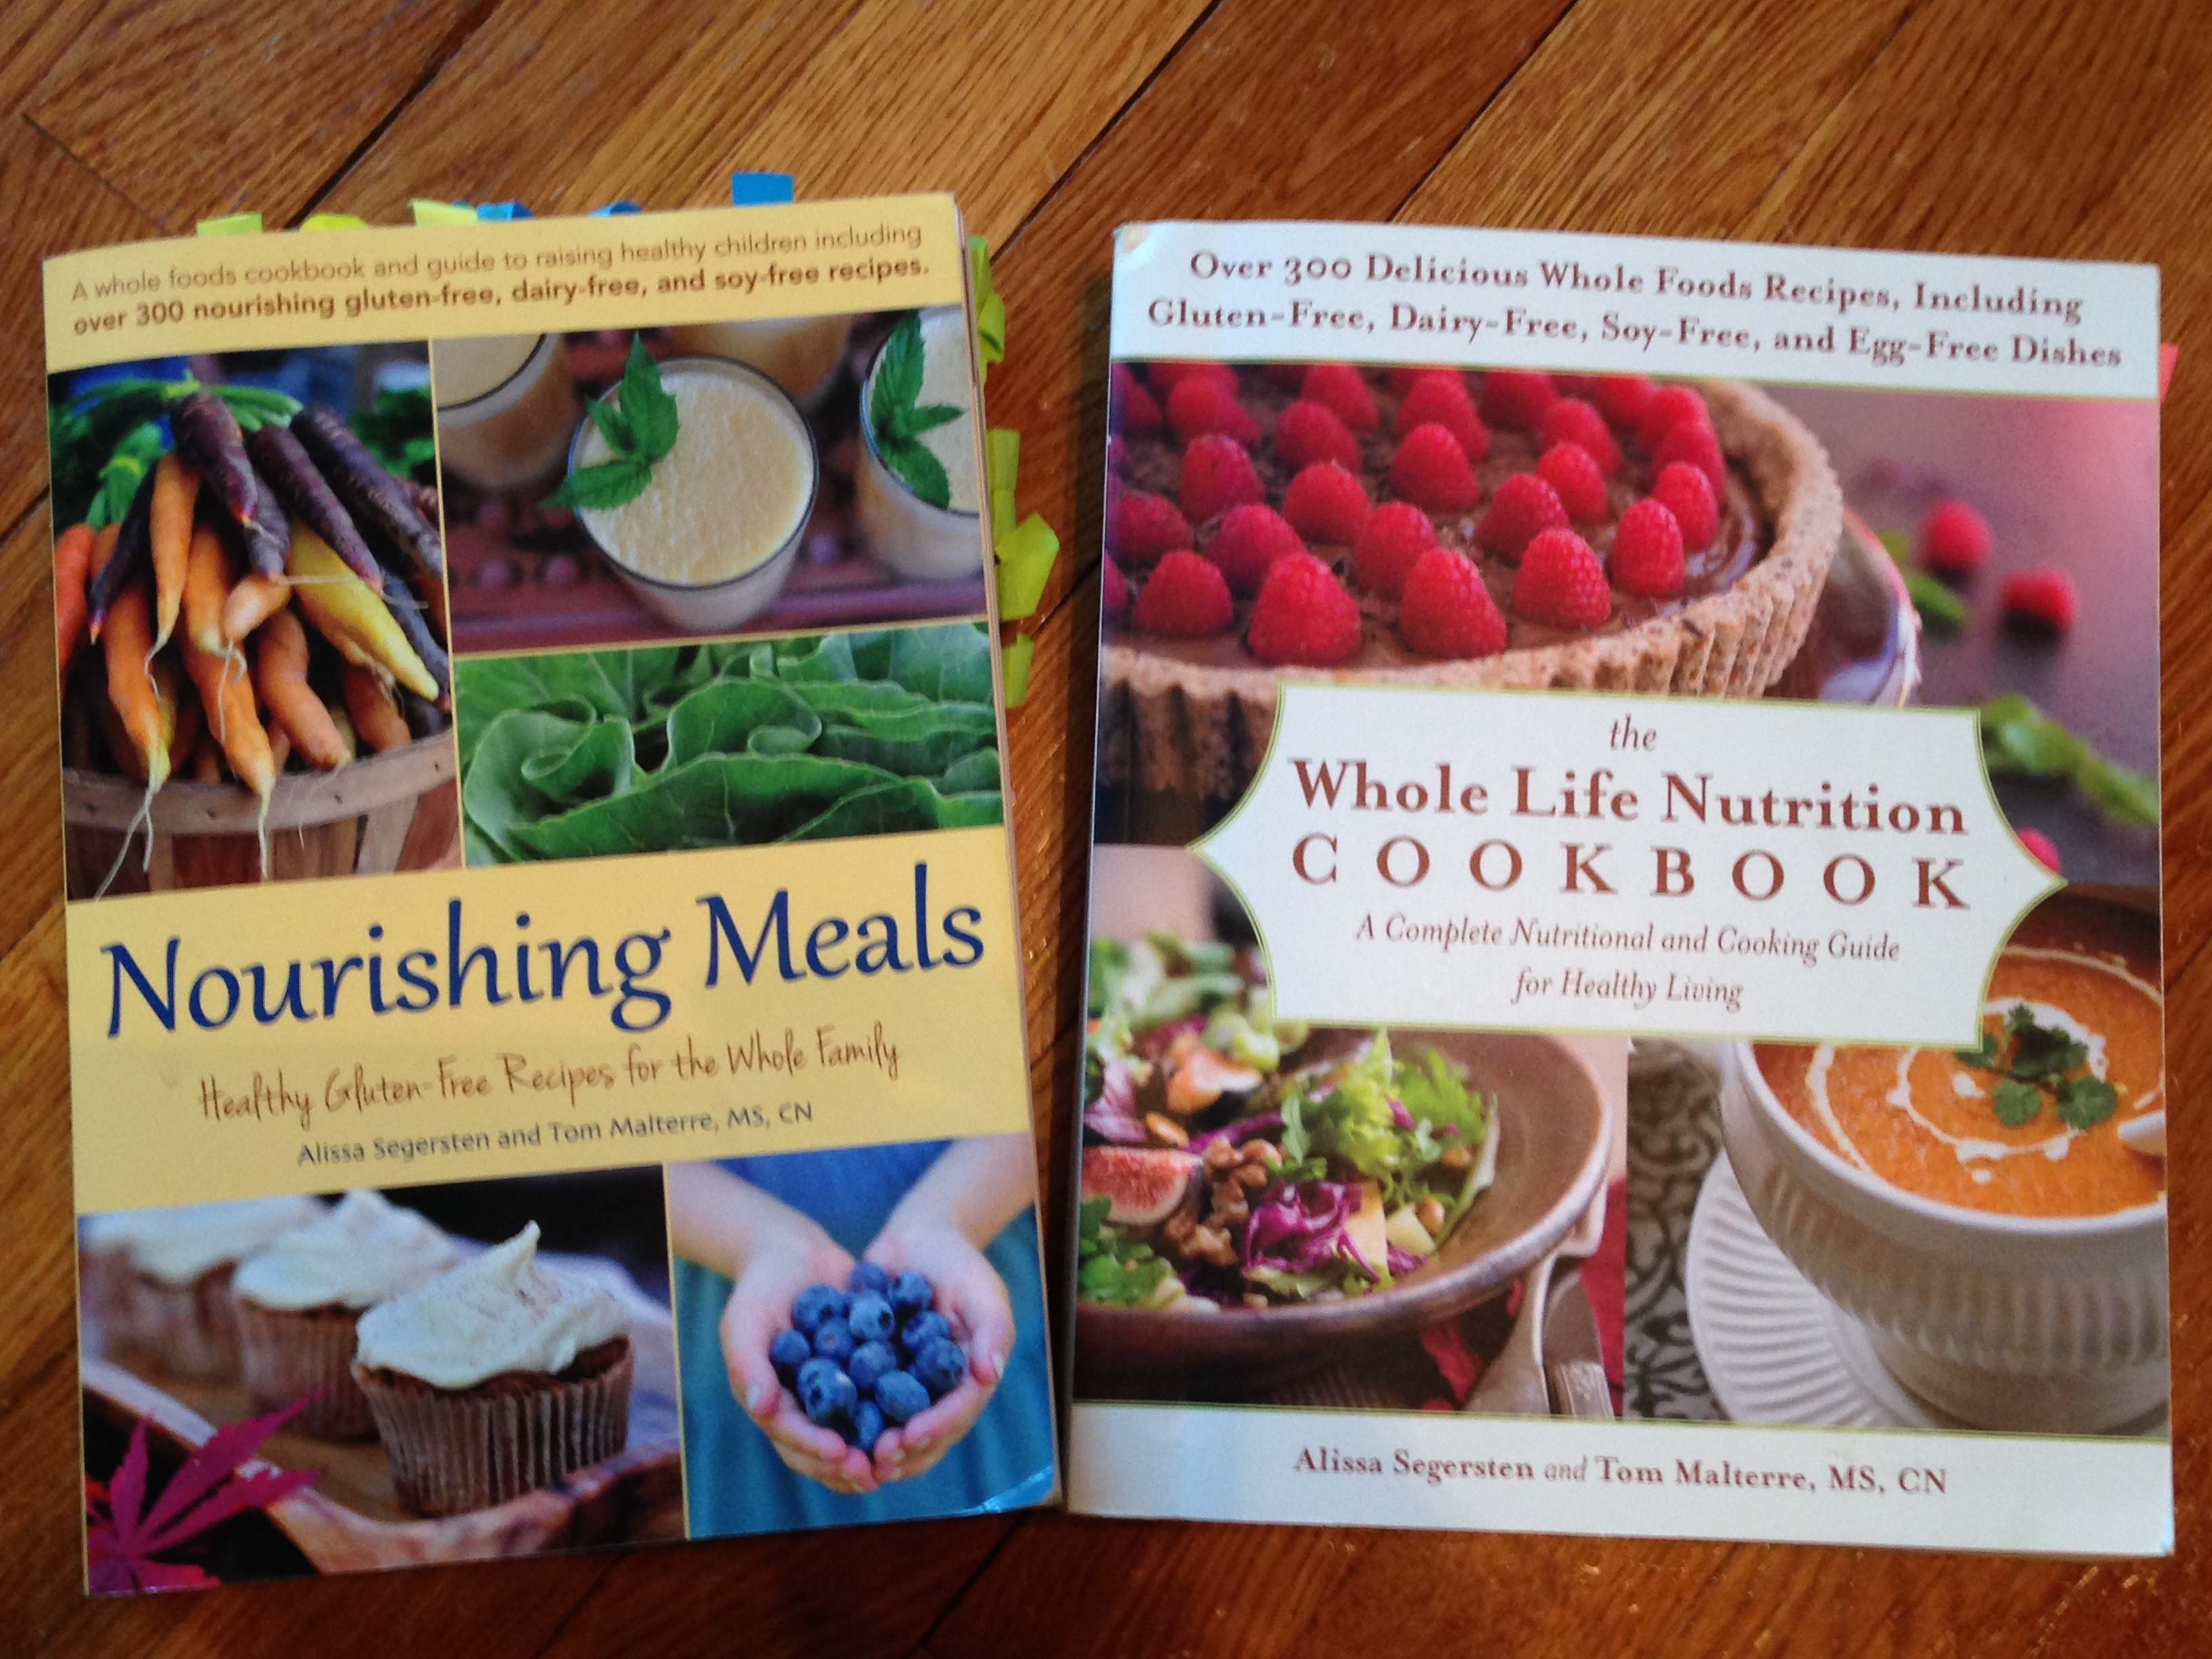
Nourishing Meals: Healthy Gluten-Free Recipes for the Whole Family by Alissa Segersten & Tom Malterre

You know a book has good recipes when you have about 100 Post-it flags sticking out of it of all of the recipes you have made or plan to make. My nutritionist raves about Tom Malterre, the co-author of this cookbook, citing him as one of the best nutrition experts out there. He and his wife, Alissa, have 5 kids and are incredibly knowledgeable about how to eat for health AND make kid-friendly meals and snacks.

Favorite Recipes: Asian Chicken Salad, Apple Cider Baked Beans, Cajun Red Beans and Quinoa, Chipotle Yam Fries, Chana Masala, Mint Chocolate Chip Ice Cream and Peanut Butter Monster Cookies. I could go on forever! This is hands-down one of our favorites.

The Whole Life Nutrition Cookbook by Alissa Segersten & Tom Malterre

In their newest cookbook, Alissa and Tom feature 300 Delicious, Whole Foods Recipes, including Gluten-free, Dairy-Free, Soy-Free, and Egg-Free Dishes. They don’t just share recipes for everything from smoothies and muffins to dressings, dips and desserts. They also teach some vital information about food sensitivities (we’re not just talkin’ peanuts), digestive health, how to stock your kitchen, and cooking techniques. Not only that, but the photos are stunning!

Favorite Recipes: Banana Almond Pancakes, Apple-Cranberry Oatmeal Muffins, Gingered Carrot Soup, Spiced Citrus Salmon, Superfood Fudge, and Chocolate-Raspberry Hazelnut Tart. Hungry yet?

3 Books

Clean Food by Terry Walters

Written by a graduate of my health coach training program, Clean Food, was a gift from my mother-in-law when I finished grad school. Chef Mario Batali said:

“Clean Food is the most exciting book based on fresh produce and simple produce I have used in years.”

He’s seen a lot of cookbooks, too! I love how Terry organizes the cookbook by season and promotes the use of whole, fresh ingredients. Also, for anyone who has food sensitivities or allergies to things like dairy and gluten, this cookbook will give you tons of new inspirations and alternatives, and you will not feel deprived or slighted in the least!

Favorite Recipes: Basic Balsamic Vinaigrette, Three-Bean Chili, Roasted Kabocha Squash, Ginger and Pear Crisp, and Banana Coconut Chocolate Chip Cookies

Undiet by Meghan Telpner

I’ve spent the past three months boosting my culinary nutrition skills and knowledge and being entertained by Meghan as she has taught me and dozens of other students the keys to culinary nutrition. Her book, Undiet, includes practical tips and guidelines for how to get yourself off the “diet” train so you can enjoy life, eat amazingly delicious and nourishing food, and thrive! Any recipe Meghan puts out there, whether it’s in the CNE program, through her blog, or in this book is a winner. She’s releasing her first full cookbook in October 2015, so stay tuned for when that happens. I will definitely be talking about it!

Favorite Recipes: Yogi Tea, Lemon Lentil Vegetable Soup, Sundried Tomato & Bean Hummus, Life-Affirming Chili, Veggie Rice Wraps with Almond Dipping Sauce, and Almond Power Cookies

The Beauty Detox Foods by Kimberly Snyder

I’m not entirely sure what prompted me to buy this book, but I’m glad I did! I use this book not only for the recipes but also for the guide that it includes to highlight which foods are best for which beauty and body goals. I often give this book to brides-to-be as part of a shower gift to help them beautify their bodies before the big day! Because it’s more of a detox-focused book, it’s not something I use every day, but I have found some staple recipes and have learned a lot about different foods and their beauty benefits, which has made this book worth it for me!

Favorite Recipes: Creamy Dijon–Tahini Dressing, Raw Purple Cabbage Slaw, and Raw Gorilla Taco Wraps

And now for a few cookbooks on MY Wish List 🙂

ohsheglows

The Oh She Glows Cookbook: Over 100 Vegan Recipes to Glow from the Inside Out by Angela Liddon

Don’t let the word “vegan” in this title scare you off. You’ll miss out if you do. One of the reasons I like vegan recipes is because they automatically nix dairy products (a trigger food for my history of health issues – and many other people’s as well!) and because they make plants the focal point of the dish. Most of us don’t eat enough plants, even though they are the most nutrient-dense, antioxidant-rich foods out there.

practical-paleo

Practical Paleo: A Customized Approach to Health & A Whole-Foods Lifestyle by Danielle Sanfilippo

I’ve heard from multiple people that this book is a must-have for anyone living a dairy-free, gluten-free, grain-free lifestyle. The cookbook includes 30-day meal plans, over 120 easy recipes, and even some handy tear-out guides.Danielle also writes for a paleo blog called Balanced Bites, which is definitely worth checking out!

blendergirl

The Blender Girl by Tess Masters

I’ve heard great things about this book (and the beautiful pictures in it) from one of my favorite people (and head of the CNE program I just finished), Meghan Telpner. She raved about this book, so I plan to get it! I’ve also checked out some recipes on Tess’s blog and love the variety, especially for smoothies. She even has a smoothie app now, too. The app lets you punch in what you feel (happy, sluggish, wired), need (a detox, to lose weight, to chill out), and crave (light and fruity, clean and green, an exotic ride) to find the right smoothie for that day. For great detox and weight loss smoothies, check out this list from Dherbs.

make-ahead-paleo

Make-Ahead Paleo: Healthy Gluten-, Grain- & Dairy-Free Recipes Ready When & Where You Are by Tammy Credicott

I was not familiar with this book, but a classmate from the Culinary Nutrition program I just finished suggested it as one of her “go to” cookbooks, so I thought I would add it to my list! Bill and I meal plan most weeks (as often as we can!) to make it easier and more affordable to eat the way we do – fresh, whole, unprocessed. Just this past week, we thawed out a vegetarian Shepherd’s Pie we had made in October and enjoyed it again for a few lunches this week. It saves so much time to have meals made ahead of time.

bittman

How to Cook Everything: Completely Revised 10th Anniversary Edition by Mark Bittman

As the title says, use this book as a guide to learn every basic (and not so basic) cooking technique you could ever imagine. Bittman explains in simple, how to steps with lots of pictures and has even given a really great TED Talk about food. I gave this book to one of my best friends, who doesn’t feel confident in her cooking skills, as part of her wedding gift this year.

What are some of YOUR favorite cookbooks? Feel free to comment below!

Candied Maple-Cinnamon Delicata Squash {Easy, Vegan, Paleo}

mapledelicatat

This dish is ridiculously good.

Almost addictive.

And it’s easy to make.

It turned out to have a slightly crunchy, caramelized coating that’s almost candy-like. Let’s put it this way, you won’t have leftovers when you make this, so you might want to make a double batch!

I shared a post on another blog I write for last week about how to cut up and prepare delicata squash (WAY easier than pumpkin or butternut squash).

You can even eat the peel 🙂

IMG_7219

This dish combines the sweetness of maple syrup, subtle spiciness of ginger, hint of salt, and the butteryness (is that word??) of pecans.

The squash has a slight, candied crunch on the outside edges and is soft and comforting on the inside.

Hungry yet?

mapledelicatat

Adapted from this recipe.

Ingredients

  • 1 medium delicata squash, trimmed to 1/2-inch pieces (Here’s how to cut it up – it’s easy!)
  • 2 tablespoons coconut oil, melted
  • 1 teaspoon cinnamon
  • 3 teaspoons 100% pure maple syrup, separated (1 tsp before cooking, 2 teaspoons after)
  • 3/4 teaspoons ground ginger
  • 1/2 teaspoon sea salt, or to taste
  • 1/3 cup pecans, lightly toasted and chopped

Directions

  1. Preheat oven to 425F and line a baking sheet with parchment paper.
  2. Cut the squash into half moons and then cut in half again as shown in the picture above.
  3. Combine coconut oil, cinnamon, 1 tsp maple syrup, ginger, and sea salt in a bowl and toss the squash in the bowl to evenly distribute the coating.
  4. Arrange squash in a flat even layer on a baking tray, making sure the sides don’t touch (we don’t want them to steam, we want them to roast!).
  5. Bake for 18 minutes, then remove tray and flip pieces over on the other side. Continue roasting for 10-12 minutes or until squash can be pierced easily with a fork and is browned and caramelized.
  6. Remove squash from oven and toss with 2 more teaspoons of maple syrup and chopped pecans.

Tuscan Spaghetti Squash Boats {Plus 3 Bonus Recipes!}

With all of the cooking and baking I’ve been doing lately, I’ve been getting lots of creative inspirations.

This dish was inspired by a meal I had at a restaurant called Food for Thought in Williamsburg when Bill and I went there to celebrate our 4-year dating anniversary.

IMG_1683Cool presentation of my spaghetti squash boat with tomatoes and pine nuts! yummy -)

After roasting some spaghetti squash the other day, I wanted to find a way to use it in a recipe along with a bunch of the veggies I had in my fridge and on my counter.

Inspired by my first spaghetti squash experience, I threw this dish together.

This meal is even better on the second and third days as the flavors kind of marinate together in the fridge. If you don’t have one of the veggies listed below, just try it with another one that you do have! Make it your own and have some fun with it 🙂

After all, cooking is meant to be fun!

**Also, it’s worth mentioning (as reassurance!) that almost half of the ingredients below are common herbs and spices, so the list may look “longer” but make note of how simple the ingredients are (you might already have all of them on hand!).**

tuscan squash

IMG_7197

Ingredients

  • 1 spaghetti squash, cooked and shredded (here’s how)
  • 2 cloves garlic, minced
  • 1 yellow onion, diced
  • 2 tablespoons coconut oil (or grass-fed butter or ghee if not vegan)
  • 2 cups grape tomatoes, halved
  • 2 cups broccoli florets
  • 1 can cannellini beans, drained and rinsed (look for a BPA-free can or tetra pack)
  • 1/2 cup water
  • 1 teaspoon dried oregano
  • 1 teaspoon dried basil
  • 1/2 teaspoon sea salt
  • 1/4 teaspoon pepper
  • 1/4 teaspoon crushed red pepper
  • 2 tablespoons olive oil
  • Optional: 1/4 cup pine nuts, lightly toasted (use chopped walnuts or almonds if you don’t have pine nuts)

Directions

  1. Roast one spaghetti squash in the oven following these simple steps. Save the spaghetti squash shell for serving (optional but it looks cool!).
  2. In a large skillet, saute onions on medium-high heat in 2 tablespoons coconut oil (or butter or ghee if not vegan) until they begin to soften, about 5-7 minutes. Add garlic and continue to saute another minute or two.
  3. Add broccoli and cook 2 minutes.
  4. Add water and tomatoes. Cover, reduce heat to medium, and cook 3-5 minutes.
  5. Add oregano, basil, sea salt, black pepper and crushed red pepper and cook uncovered 4 minutes or until broccoli is crisp-tender but still bright green.
  6. Add cannellini beans and spaghetti squash strands to pan and toss until heated through. Remove pan from heat.
  7. Meanwhile, lightly toast the pine nuts in the toaster oven being careful not to burn them.
  8. Drizzle 1-2 tablespoons olive oil over squash mixture and top with pine nuts.

Looking for other spaghetti squash recipes? Try one of these below!

  1. Spaghetti Squash with Kale & Chickpeas
  2. Spaghetti Squash with Cranberries & Sunflower Seeds
  3. Cheezy Spaghetti Squash Casserole (Vegan)

How to Cook Spaghetti Squash {Step-by-Step Photo Guide}

Spaghetti squash is one of those foods that a lot of us have heard about or seen at the grocery store or farmer’s market…but perhaps been a bit too intimidated or weirded out to try.

I’ve got good news for you!

spaghettisquash


Spaghetti squash is very easy to cook AND fun to play with 🙂  I’m always up for anything that makes cooking more fun, and this ingredient definitely does!

You can upgrade your pasta by swapping it out for spaghetti squash.

As its name implies, the inside of the squash can be scraped out to form spaghetti-like strands, so you can serve it just like you would spaghetti.  Top it with your favorite marinara or pesto sauce or sauté it with garlic, onions, spinach and some herbs. It’s tender but has a slight “crunch” to it.

It’s rich in fiber as well as beta-carotene, which is good for our vision, immune system, and healthy skin.

I’ll be sharing a recipe for a Tuscan spaghetti squash boat later this week, but in the meantime, here’s how you make spaghetti squash!

How to Cook Spaghetti Squash

Preheat oven to 400F while you prep the squash.

IMG_7017

Slice a line down the length of the spaghetti squash, about a half inch deep, but don’t cut it in half. It’s usually too hard to cut in half at this point, unless you have a really good knife.

IMG_7021

Turn the squash the other way and cut about 4 strokes into the squash, cross hatching the longer line you already cut. Cutting the squash this way allows it to steam in the oven and prevents it from exploding 🙂 Put the squash in a baking dish in the oven for 20 minutes, so it can soften enough to cut it in half.

IMG_7073

Remove squash from the oven and cut it in half. It should cut easily at this point.

IMG_7082

Wearing an oven mitt (the squash will be HOT), pry it open with your hands.

IMG_7083

IMG_7090

Scoop out the seeds with a spoon.

IMG_7094

Put the squash cut-side down in a 9×13 baking dish and fill the bottom of the dish with about 1/4-1/2 cup of water (enough to cover the bottom of the pan). Return squash to oven for 30-40 minutes or until the squash easily pulls away from the shell.

IMG_7117

Let the squash cool and then scrape out the inside with a fork. It should pull away easily into spaghetti-like strands!

IMG_7123

IMG_7154

Beautiful spaghetti squash ready to be used for your delicious kitchen creations!

“The Best Thing You’ve EVER Made” {My Father Knows Best!}

I’m especially excited about this recipe because it marks a special point in my food journey.

As I shared in one of my first posts, I used to hate the main ingredient in this recipe…

IMG_6569

Eggplant.

The very idea of the funky-shaped purple vegetable weirded me out, and I had no desire to eat it…ever.

Fast forward to today, and I’ve come up with an eggplant recipe that I dare say would get ANYONE (even kids!) to like eggplant.

I made a similar version of these a few months ago in the form of eggplant fries, but the coating on these chips is absolutely to die for and makes them – as my dad AND husband said – “One of the best things you’ve EVER made.”

We liked them SO much that my sister, Jane, even requested that I make them for her 21st birthday dinner the other night. Everyone gobbled them up!

Almond & Rosemary-Crusted Eggplant Chips

IMG_6655

Ingredients

  • 1 large eggplant, cut into ¼” discs
  • 1-2 free-range eggs, whisked (I only needed 1, but depending on the size of your eggplant, you might need 2)
  • 1 cup raw almonds
  • 2 tablespoons arrowroot powder (sub in cornstarch if you don’t have arrowroot)
  • 1 heaping tablespoon fresh rosemary (or 1-2 tsps dried…fresh tastes best!)
  • 1 teaspoon garlic powder
  • 3/4 teaspoon sea salt
  • 1/2 teaspoon black pepper
  • Additional sea salt to sprinkle on the eggplant to draw out moisture

Directions

  1. Preheat oven to 425F.

    Place eggplant slices on a paper towel and sprinkle sea salt on top and let sit for 15-20 minutes. You’ll notice little pools of liquid forming on top of the slices. This helps draw the moisture out of the eggplant, so that it crisps up when baked. Use another paper towel to press any remaining moisture out of the eggplant slices, and shake off any excess salt.

    Place eggplant slices on a paper towel and sprinkle sea salt on top and let sit for 15-20 minutes. You’ll notice little pools of liquid forming on top of the slices. This helps draw the moisture out of the eggplant, so that it crisps up when baked. Use another paper towel to press any remaining moisture out of the eggplant slices, and shake off any excess salt.

IMG_5622

Grind the almonds, arrowroot powder, rosemary, garlic, pepper and sea salt in a food processor until small chunks remain. Pour almond coating onto a plate.

IMG_6615

Dip the eggplant slices one by one in the egg wash and shake off any excess egg. Then, coat both sides of each slice generously with the almond coating.

Place eggplant slices on a foil or parchment-lined baking sheet and bake for 20-25 minutes, flipping once at the 10-12 minute mark.

Place eggplant slices on a foil or parchment-lined baking sheet and bake for 20-25 minutes, flipping them over at the 10-12 minute mark.

IMG_6655

Remove from oven and enjoy by themselves or in a tomato dipping sauce linked below!

Crispy, crunchy, and savory with a hint of salt. No soggy eggplant here, folks!

They’re also incredibly addictive and DEEElicious!

You’ll enjoy them even more with this tomato dipping sauce on the side.

I guarantee you will eat the whole tray.

We did 🙂

How to Make Your Own Pumpkin Puree {Step-by-Step Guide!}

I’m a big advocate of eating food that is as fresh and unprocessed as possible.

Sometimes, for convenience sake, I opt for minimally processed versions of certain foods.

Like pumpkin puree.

Most of the time, it’s easier and quicker to buy a can of it to put into my smoothies, muffins, and overnight oats than to make it from scratch.

But last week I got this in my Hometown Harvest bag and knew it was time for me to figure out how to make my own.

The squash below is actually just an autumn squash, but you can follow the process I outline for autumn squash, butternut squash or pumpkin to make your own puree. 

IMG_6434

Roasting your own vegetables for this puree gives them a velvety smooth texture and deep flavor that definitely tastes better than the canned stuff!

Step-by-step instructions for how to make your own squash puree

Preheat the oven to 350F.

IMG_6624

For a round squash, cut off the top (including the stem) with a sharp knife and then cut the squash in half. For flatter squash, like the one I had, cut it in half with a sharp knife, cutting one side first and then the other on either side of the stem.

IMG_6625

Break it apart with your hands along the seam where you cut.

IMG_6629

Scoop out the seeds with a spoon. Save them to make your own toasted seeds (something I plan to do in the future).

IMG_6630

Cut the pumpkin into chunks. I cut along the existing creases.

Cut the squash into chunks. I cut along the existing creases.

Pumpkin chunks ready for roasting!

Squash chunks ready for roasting!

Put the pumpkin slices on a baking sheet and roast for 45-60 minutes or until you can easily pierce the pumpkin with a fork.

Put the squash slices on a baking sheet and roast in a 350F oven for 45-60 minutes oven or until you can easily pierce the squash with a fork.

Pumpkins are done roasting when they look like this.

Squash is done roasting when it looks like this.

Let the slices cool and then take a spoon and scoop out the “meat” from the rind.

Let the slices cool on a plate and then use a spoon and scoop out the “meat” from the rind.

Puree all of the pumpkin in a food processor until smooth.

Puree all of the squash in a food processor until smooth.

IMG_6733

Use the puree immediately OR measure out 1-cup servings and put the puree in freezer bags, squeezing out all of the air, so it’s ready to use whenever you need squash in the future.

Follow the step-by-step process below!

IMG_6737 IMG_6740 IMG_6742 IMG_6744 IMG_6746

If you’re using pumpkins, once you have your puree ready, try using it in this Ultimate Pumpkin Pie Smoothie RecipePumpkin Pie Overnight Oats, or these Paleo Pumpkin Spice Muffins!

What’s your favorite way to use squash? Are you looking for any recipe ideas? Feel free to leave a comment below to let me know 🙂

The Easiest Way to Roast Beets {A Simple How to Photo Guide}

Whenever I think of beets, I can’t help but think of The Office’s Dwight Schrute and his epic beet farm.

As well as Jim Halpert’s impersonation of Dwight and his ”Bears. Beets. Battlestar Galactica” line.

beets

Had to reminisce about that for a second 🙂

Now, let’s get to the beets!

Over the past few months, I’ve had several friends ask me how to roast beets.

To be honest, I had never had much success with it in the past, but I was determined to figure it out.

IMG_4922

Beets are one of those foods that, if we haven’t tried them before, can be a bit intimidating to prepare.

I hope to take that intimidation factor down a notch today and show you how easy it is to cook beets.

One of my goals when I cook and teach about food is to share how certain foods nourish our body, so I have to share some of the reasons beets are so good for us!

  • They contain a nutrient called betaine that fights inflammation (inflamed body = sick, overweight body), improves our heart health, and protects our cells and internal organs.
  • Like any deep-colored fruits and veggies, beets have anti-cancer properties, and some research has shown that beetroot extract reduced tumor formation in animal models.
  • They help our bodies detoxify (clean out!), helping to purify our blood and our liver, which is crucial to keeping weight off, feeling our best, and staying healthy.
  • They’re loaded with vitamin C, fill-you-up fiber, and minerals that are good for our bones, liver, kidneys, and healthy nerve and muscle function.

Now that we know how good for us these little crimson gems are, let’s talk about how to cook and peel them!

How to Roast & Peel Beets

IMG_6578

Step 1: Preheat the oven to 350F.

Step 2: Cut the tops (beet greens) and bottom “tail” off the beets, so they will sit upright in a pan. Save the beet greens. You can sautee them on the stove just like you would any other greens like kale or Swiss chard (more on how to do that in a future post!).

IMG_6575

Step 3: Place the beets in a covered baking dish as shown below. Cover the dish with an oven-proof lid. I used a Corningware dish and a glass lid.

IMG_6586

Step 4: Bake for 50-90 minutes, depending on how big the beets are. I used relatively small beets and they took almost an hour. You can check them for doneness by piercing them with a fork – they will be “fork tender” when they’re done.

Step 5: Let them cool.

IMG_6645

Step 6: Take a paper towel and rub/pull the skin off of the beets as shown in the pictures below. This minimizes stains on your fingers.

IMG_6658 IMG_6661 IMG_6663 IMG_6664 IMG_6665 IMG_6668 IMG_6671

The aftermath of another culinary adventure!

The aftermath of another culinary adventure!

Step 7: Once the beets are peeled, you can do whatever you want with them. They have an “earthy” and slightly sweet flavor. Nothing else really tastes like a beet, so you’ll just have to try it yourself to see how you like it!

I sliced them up and put them on a salad.

You could also eat them by themselves, throw in a few in a smoothie (they will make it VERY red!) or toss them in a vinaigrette. They pair well with balsamic vinaigrette as well as herbs like rosemary.

Here’s a recipe for a beet, pear and almond salad you can try 🙂

Simple salad of sliced beets, chopped pecans, and field greens

Simple salad of sliced beets, chopped pecans, and field greens

How do you like to use beets? Feel free to share your favorite recipes with us below!

Page 3 of 3

Powered by WordPress & Theme by Anders Norén