Notice: Function _load_textdomain_just_in_time was called incorrectly. Translation loading for the social_sharing domain was triggered too early. This is usually an indicator for some code in the plugin or theme running too early. Translations should be loaded at the init action or later. Please see Debugging in WordPress for more information. (This message was added in version 6.7.0.) in /var/www/wp-includes/functions.php on line 6121
Products I Use Archives · Page 8 of 11 · Rachel's Nourishing Kitchen

Category: Products I Use Page 8 of 11

Rachel’s Healthy Holiday Gift Guide: Part 1 {My Budget Friendly Favorites & Seasonal Splurges!}

In the spirit of transparency, I wanted to let you know I am promoting these items because I regularly use them in my house and can personally attest to their quality and usefulness. I am not being paid by any of these companies to promote their products. The links I’ve included below are simply to make it easier for you to find the product, but you can shop around for the best deals, especially on Black Friday & Cyber Monday! I find that Amazon tends to have the best deals, so a lot of the links are to Amazon. 🙂

————————————————————————————————————————-

One of the keys to eating healthy, nourishing food is to make being in the kitchen FUN. With all of the toys and gadgets I get to use while I’m cooking, I have a blast in my (small) kitchen and make quite a mess :).

If you’re looking for some fun, health promoting gift ideas, you’ve come to the right place! Now, photo socks are one of the most versatile gifts you can get as you can put any images you like on them, so this could be a pretty affordable idea if you’re on a budget; you can just choose food themed pictures! In fact any custom gift ideas would be a good path to go down, anything wins when it is unique to the recipient! But if it’s cooking equipment in particular that you want, I’ve got you covered there too. I took a look around my house and pulled out the kitchen gadgets and cookbooks I use and like the most and wanted to share them with you. I’ve accumulated these over the past few years – many were gifts, others we bought ourselves.

We order most of our kitchen equipment and super foods from Amazon because they really do have the best deals, and we get free 2-day shipping with our Amazon Prime Membership but other retailers may have better buys for Black Friday and Cyber Monday.

For today’s post, I’m sharing my Budget-Friendly Favorites ($25-$50) and Super Splurge Staples (>$100) gift/wish list ideas. Next week I’ll share ideas for stocking stuffers and great gifts under $20 as well as some of my favorite cookbooks!

My Budget Friendly Favorites (<$50)

  1. Paderno Spiral Slicer
  2. Cuisinart Hand Stick Immersion Blender
  3. Lodge Cast Iron Skillet
  4. Cuisinart Mini Food Processor
  5. Thermos
  6. Rival Crockpot
  7. Cuisinart Ice Cream Maker
  8. Pyrex Glass Bowls
  9. Corningware Cookware/Bakeware
  10. Food Network Magnetic Measuring Spoons

IMG_6678

Paderno Spiral Slicer. This is a game changer. AND it’s less than $40! 🙂 If you have cut out or are trying to cut down on eating things like pasta, this gadget is a must have. In our house, we cook gluten-free, so our go-to option for pasta is usually brown rice pasta (made from brown rice and water) OR this new kind made from beans and lentils (only ONE ingredient!).

But pasta can be SO much more fun when you make it out of things like zucchini, yellow squash, and other veggies. You can still use your favorite sauces, whether you like marinara, pesto, or caulifredo AND you get at least one extra serving of veggies to boot. Not a bad deal! I used to use a spiral slicer made by Joyce Chen, but this one by Paderno took over the #1 spot for me.

IMG_6686

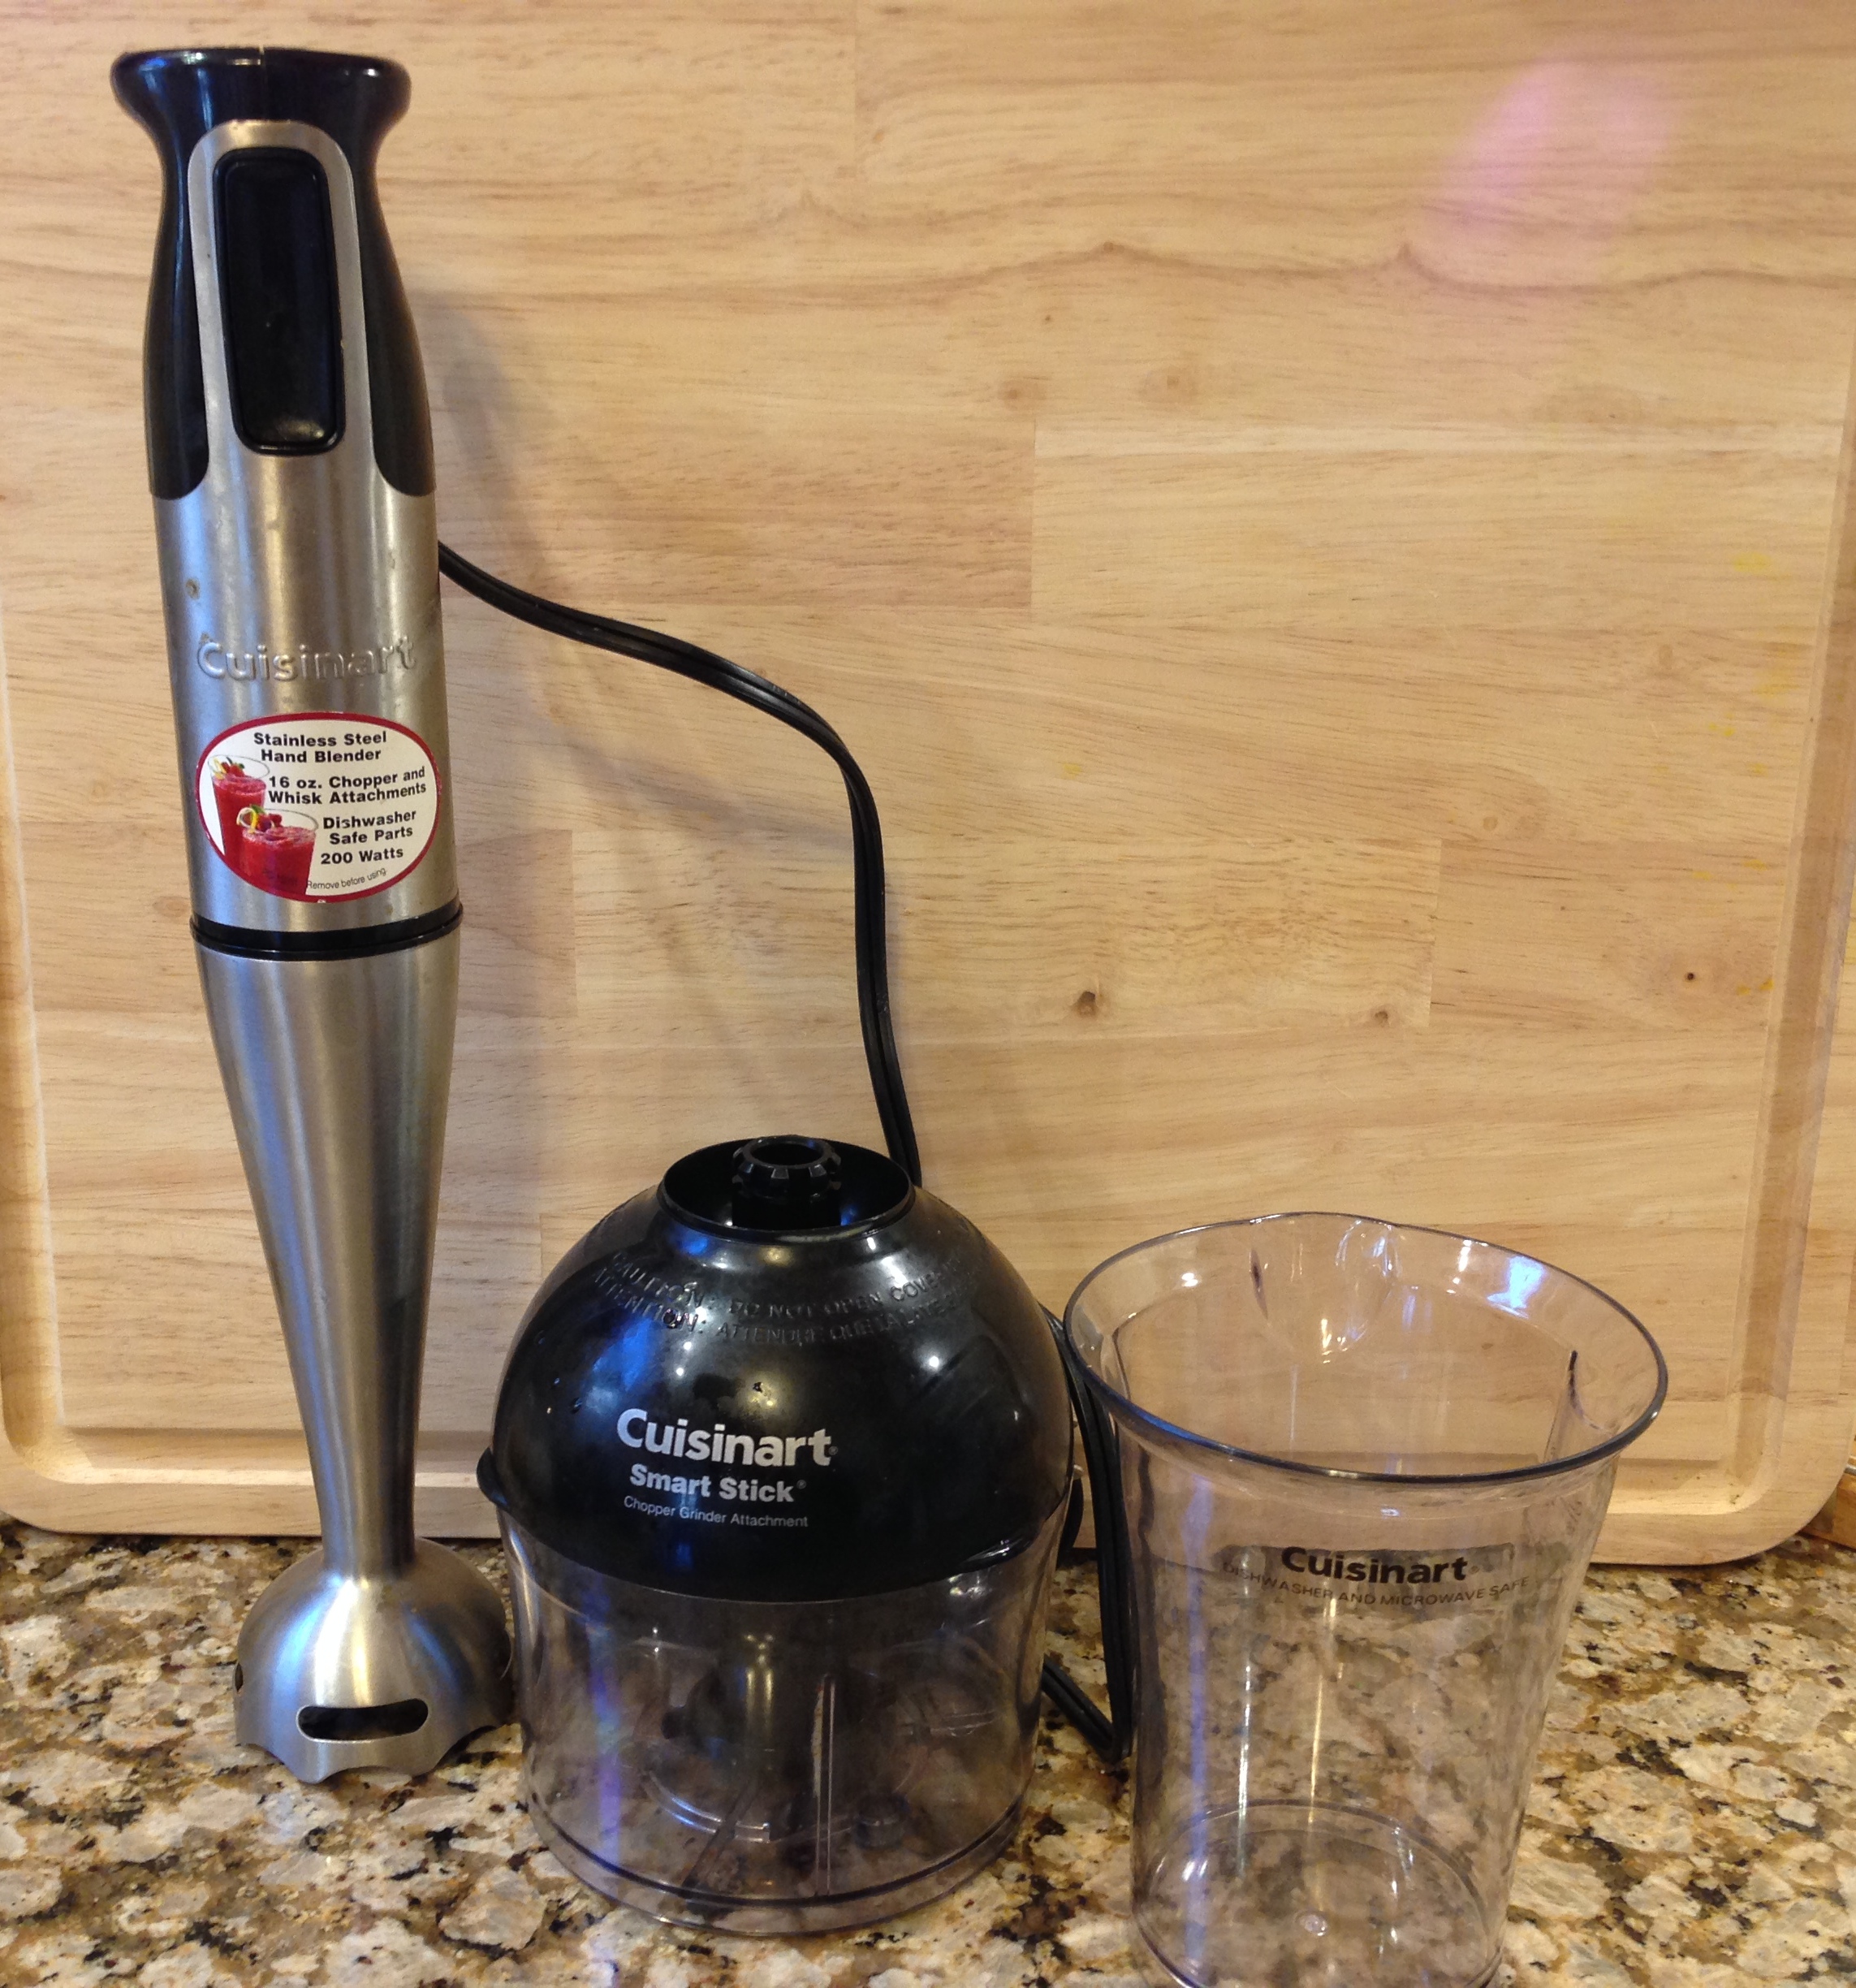
Cuisinart Hand Stick Immersion Blender. I love to make soup. This gadget is clutch if you like to make soups (and dips, spreads, pesto, dressings, etc.).

I remember the first time I tried making pumpkin soup about 4 years ago, I ended up with a very unhappy blender and soup ALL OVER THE COUNTER, cabinets…and me. I had to pour it in the blender in small batches, so it wouldn’t blow off the top. This gadget is GREAT for making blended soups that need to be pureed. Simply cook the soup as you normally would in a pot on the stove and then put the stick blender attachment in the soup and pulse away! After about a minute, your soup will be blended together and you won’t have to deal with the mess that I did.

IMG_6700

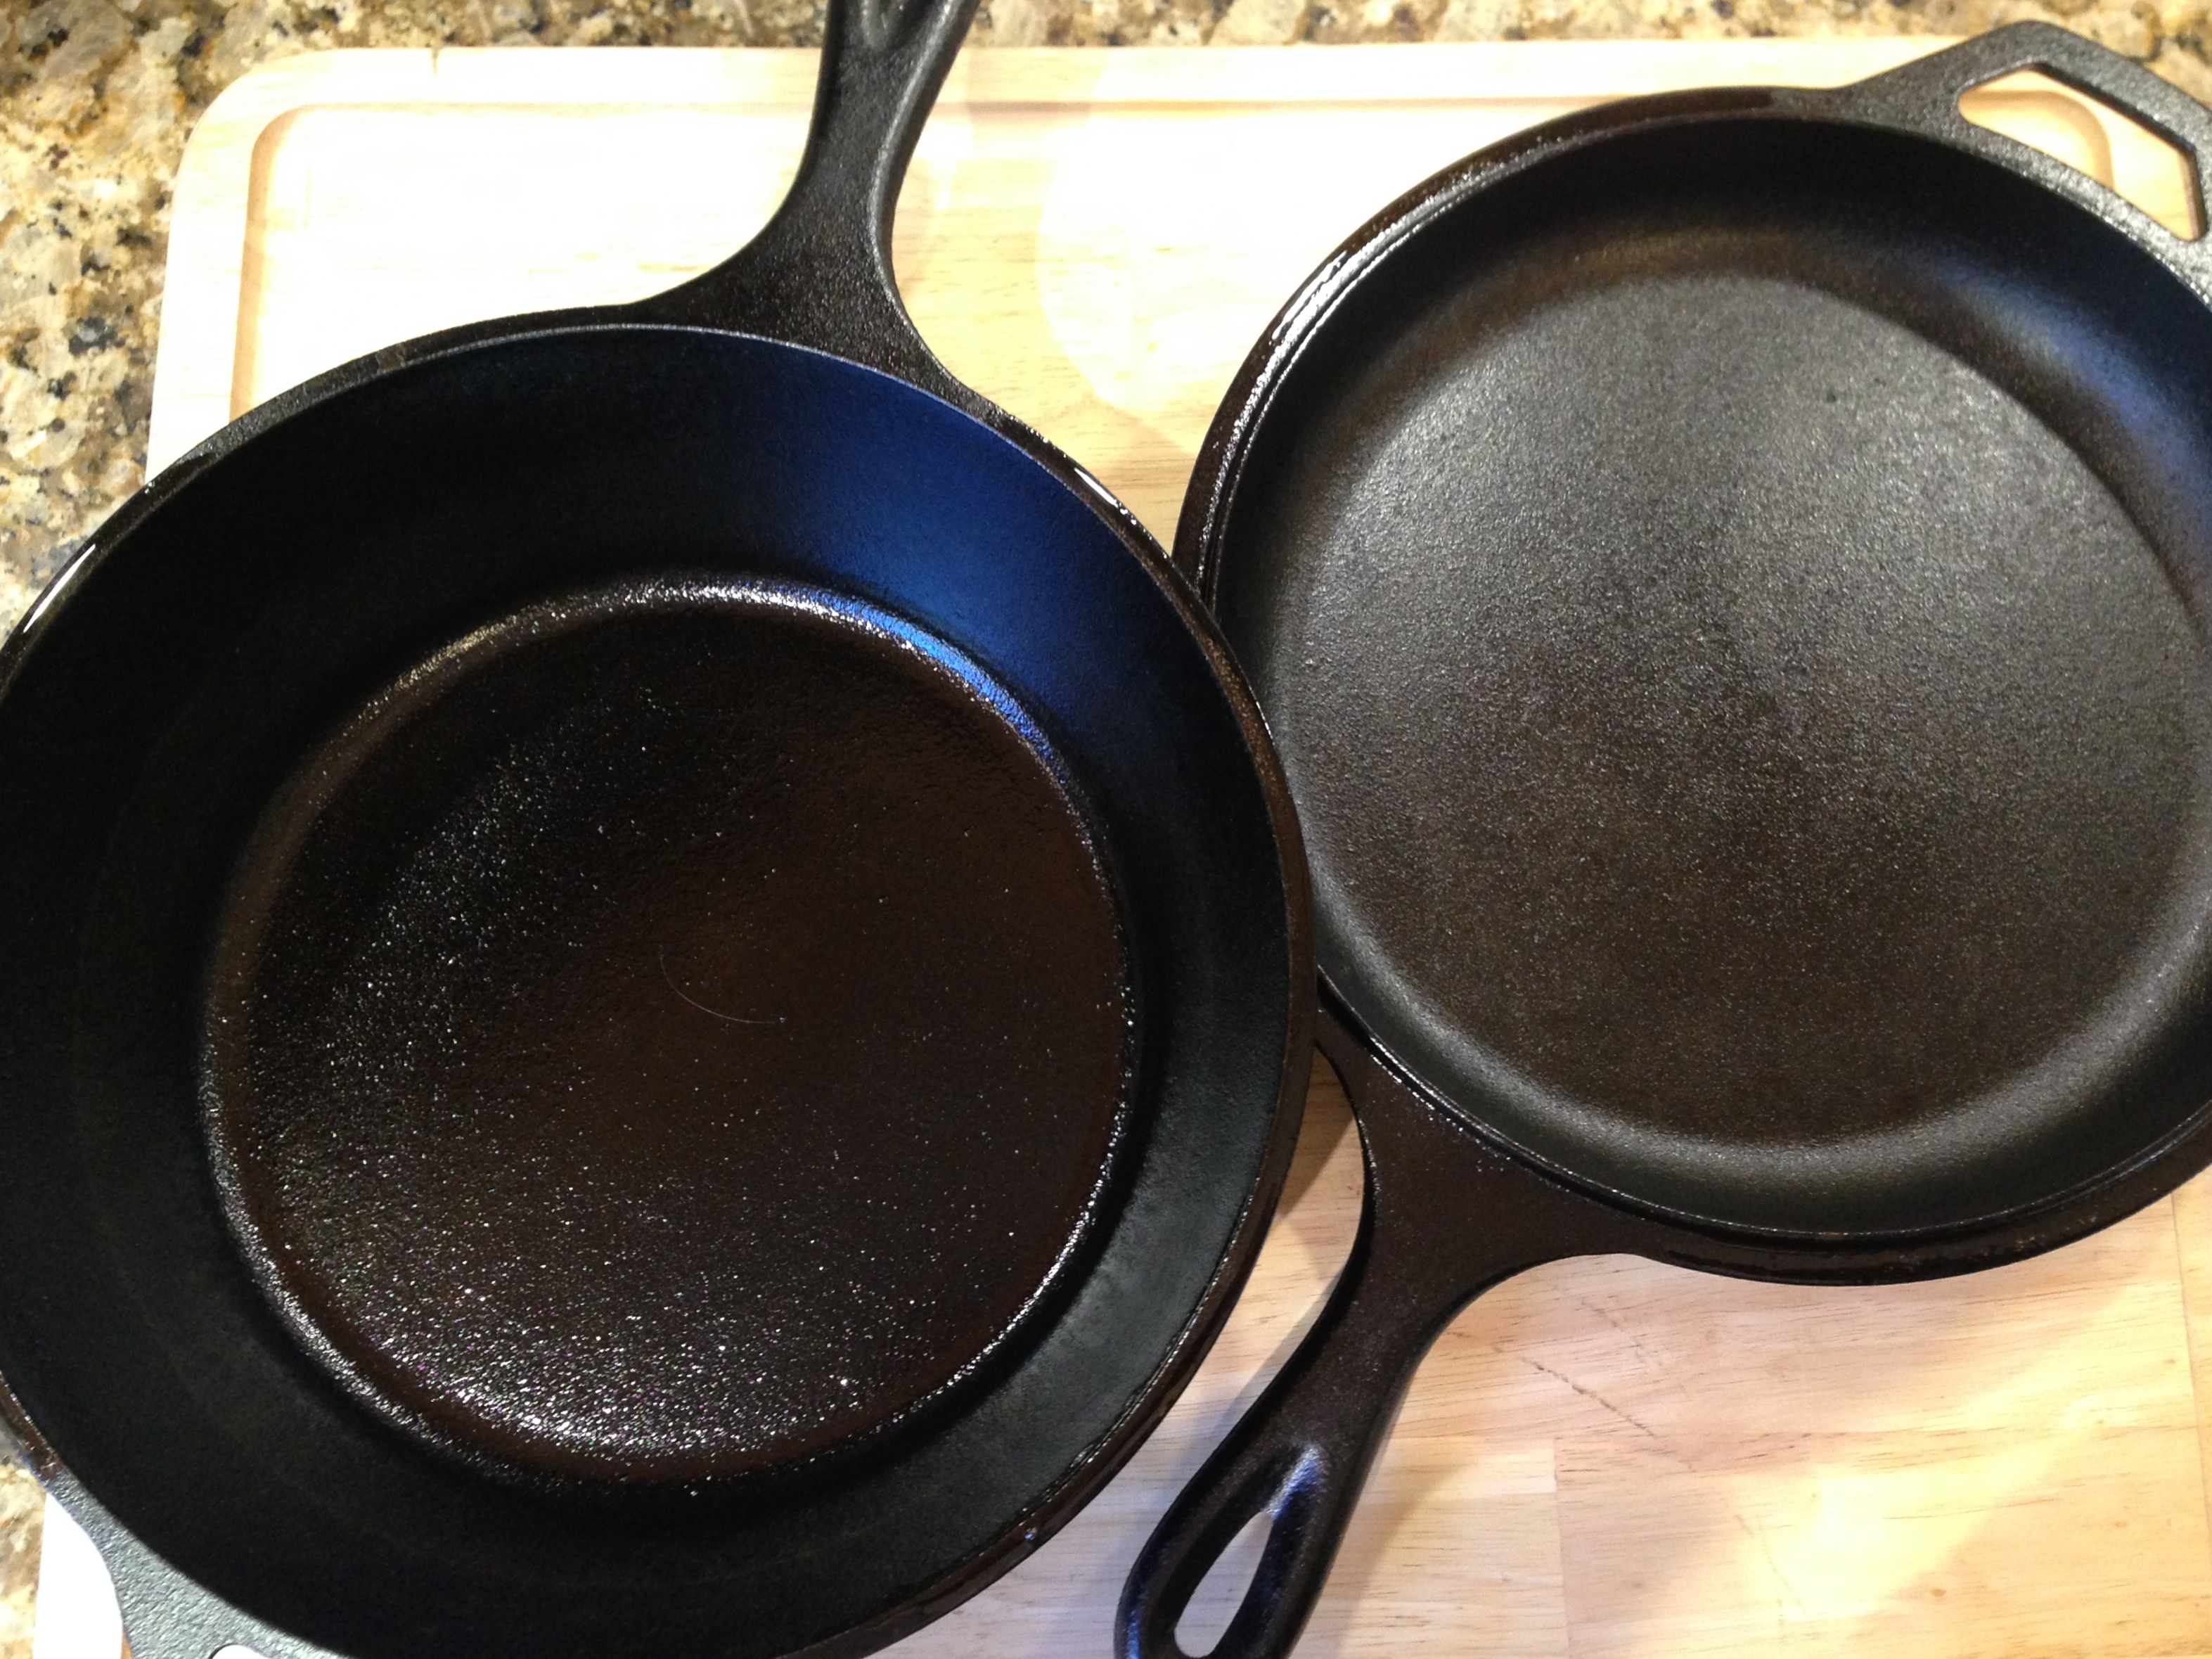
Lodge Cast Iron Skillet. It took us a while to buy one of these because we didn’t want to have to spend the time “seasoning” it in the oven before its first use. Looking back, that was a bit of a lame excuse because this skillet makes food taste AMAZING!

Whether we are searing a chicken breast to lock in the juices and flavors, sautéing onions and greens for our mini frittatas, or making a sweet potato hash, we LOVE this skillet. Cast iron skillets come in all sorts of shapes and sizes, but we have the 3-quart combo from Lodge. It’s surprisingly affordable, too.

IMG_6685

Cuisinart Mini Food Processor. I bought mine at Home Goods for under $30, but you can find these on Amazon, too. Or maybe as a Black Friday deal 🙂 This gadget is handy for making smaller batches of things that need to be processed without pulling out the 11-cup food processor. It makes it easy to chop small batches of onions, garlic, nuts and seeds, single servings of 2-minute banana ice cream, and my go-to paleo parmesan cheeze.

IMG_6705

Thermos. So, remember back in grade school when everyone had matching plastic lunch box and thermos sets? Well, good news! They make adult versions. The thermos is one of the BEST tools Bill has to squeeze a hot lunch in to his sometimes 10-minute lunch breaks as a teacher. He simply heats up the food at our house in the morning and pours it into the thermos. Four or five hours later when lunchtime rolls around, he has HOT food. No microwave needed. It also keeps food cold, so sometimes he uses it to transport smoothies instead. We both have one and wish we’d thought to get one sooner!

IMG_6765

Rival Crockpot. This is a great tool for “set it and forget it” meals. From chilis and stews to homemade applesauce and oatmeal, this device is one of the cheaper options and makes meal prep EASY and pretty mindless. You can prep a meal the night before and when you wake up, everything is magically cooked! I will be sharing a recipe for a crockpot lentil chili soon, so stay tuned!

Cuisinart Ice Cream Maker. I loved ice cream as a kid…and had it every year for my birthday cake through my late 20s when I found out that dairy products were the culprit of nearly 2 decades of sickness. The good news is that I didn’t have to “give up” ice cream entirely…just dairy-based varieties. Making your own ice cream when you have one of these things is surprisingly simple. You just blend the ingredients in your blender, pour it in the ice cream maker, and let it do its thing!

Pyrex Bowls & Corningware Cookware/Bakeware. I thought I would lump these two together, since I use the Pyrex bowls to prep and store food and the Corningware dishes to cook or bake it. These are almost ALWAYS on sale on Black Friday at either Macy’s or Kohl’s, so that’s the time to snag them. Unlike plastic, which can leach harmful chemicals into our food, glass won’t take on the taste or color of whatever foods you store inside of it. You can also more quickly identify what the foods are inside of your fridge when you use clear glass containers. We’re big fans of both of these and highly recommend them for any kitchen!

IMG_6702

Food Network Magnetic Measuring Spoons. I am a bit of a messy chef (Bill can attest to this big time!), and one of things that tends to get lost in the shuffle in a cluttered, tiny kitchen are measuring spoons. That’s why I love these little guys. There’s a magnet in the middle that keeps them all stuck together. The other great thing is that there are two sides to each spoon – one that is rounded and another that is oblong, making it easier to reach into any jar, regardless of the shape of its opening. They are a little pricy, but I got them at Kohl’s when I had some Kohl’s cash lying around 🙂

Super Splurge Staples (>$100)

  1. Vitamix Blender or Blendtec
  2. Cuisinart Food Processor
  3. Breville (or Hurom or Omega) Juicer
  4. Nesco Food Dehydrator or Excaliber

IMG_6682

**The Joy of Blending Blog wrote a post about where to get the best Black Friday deals on these blenders…check out the post here!**

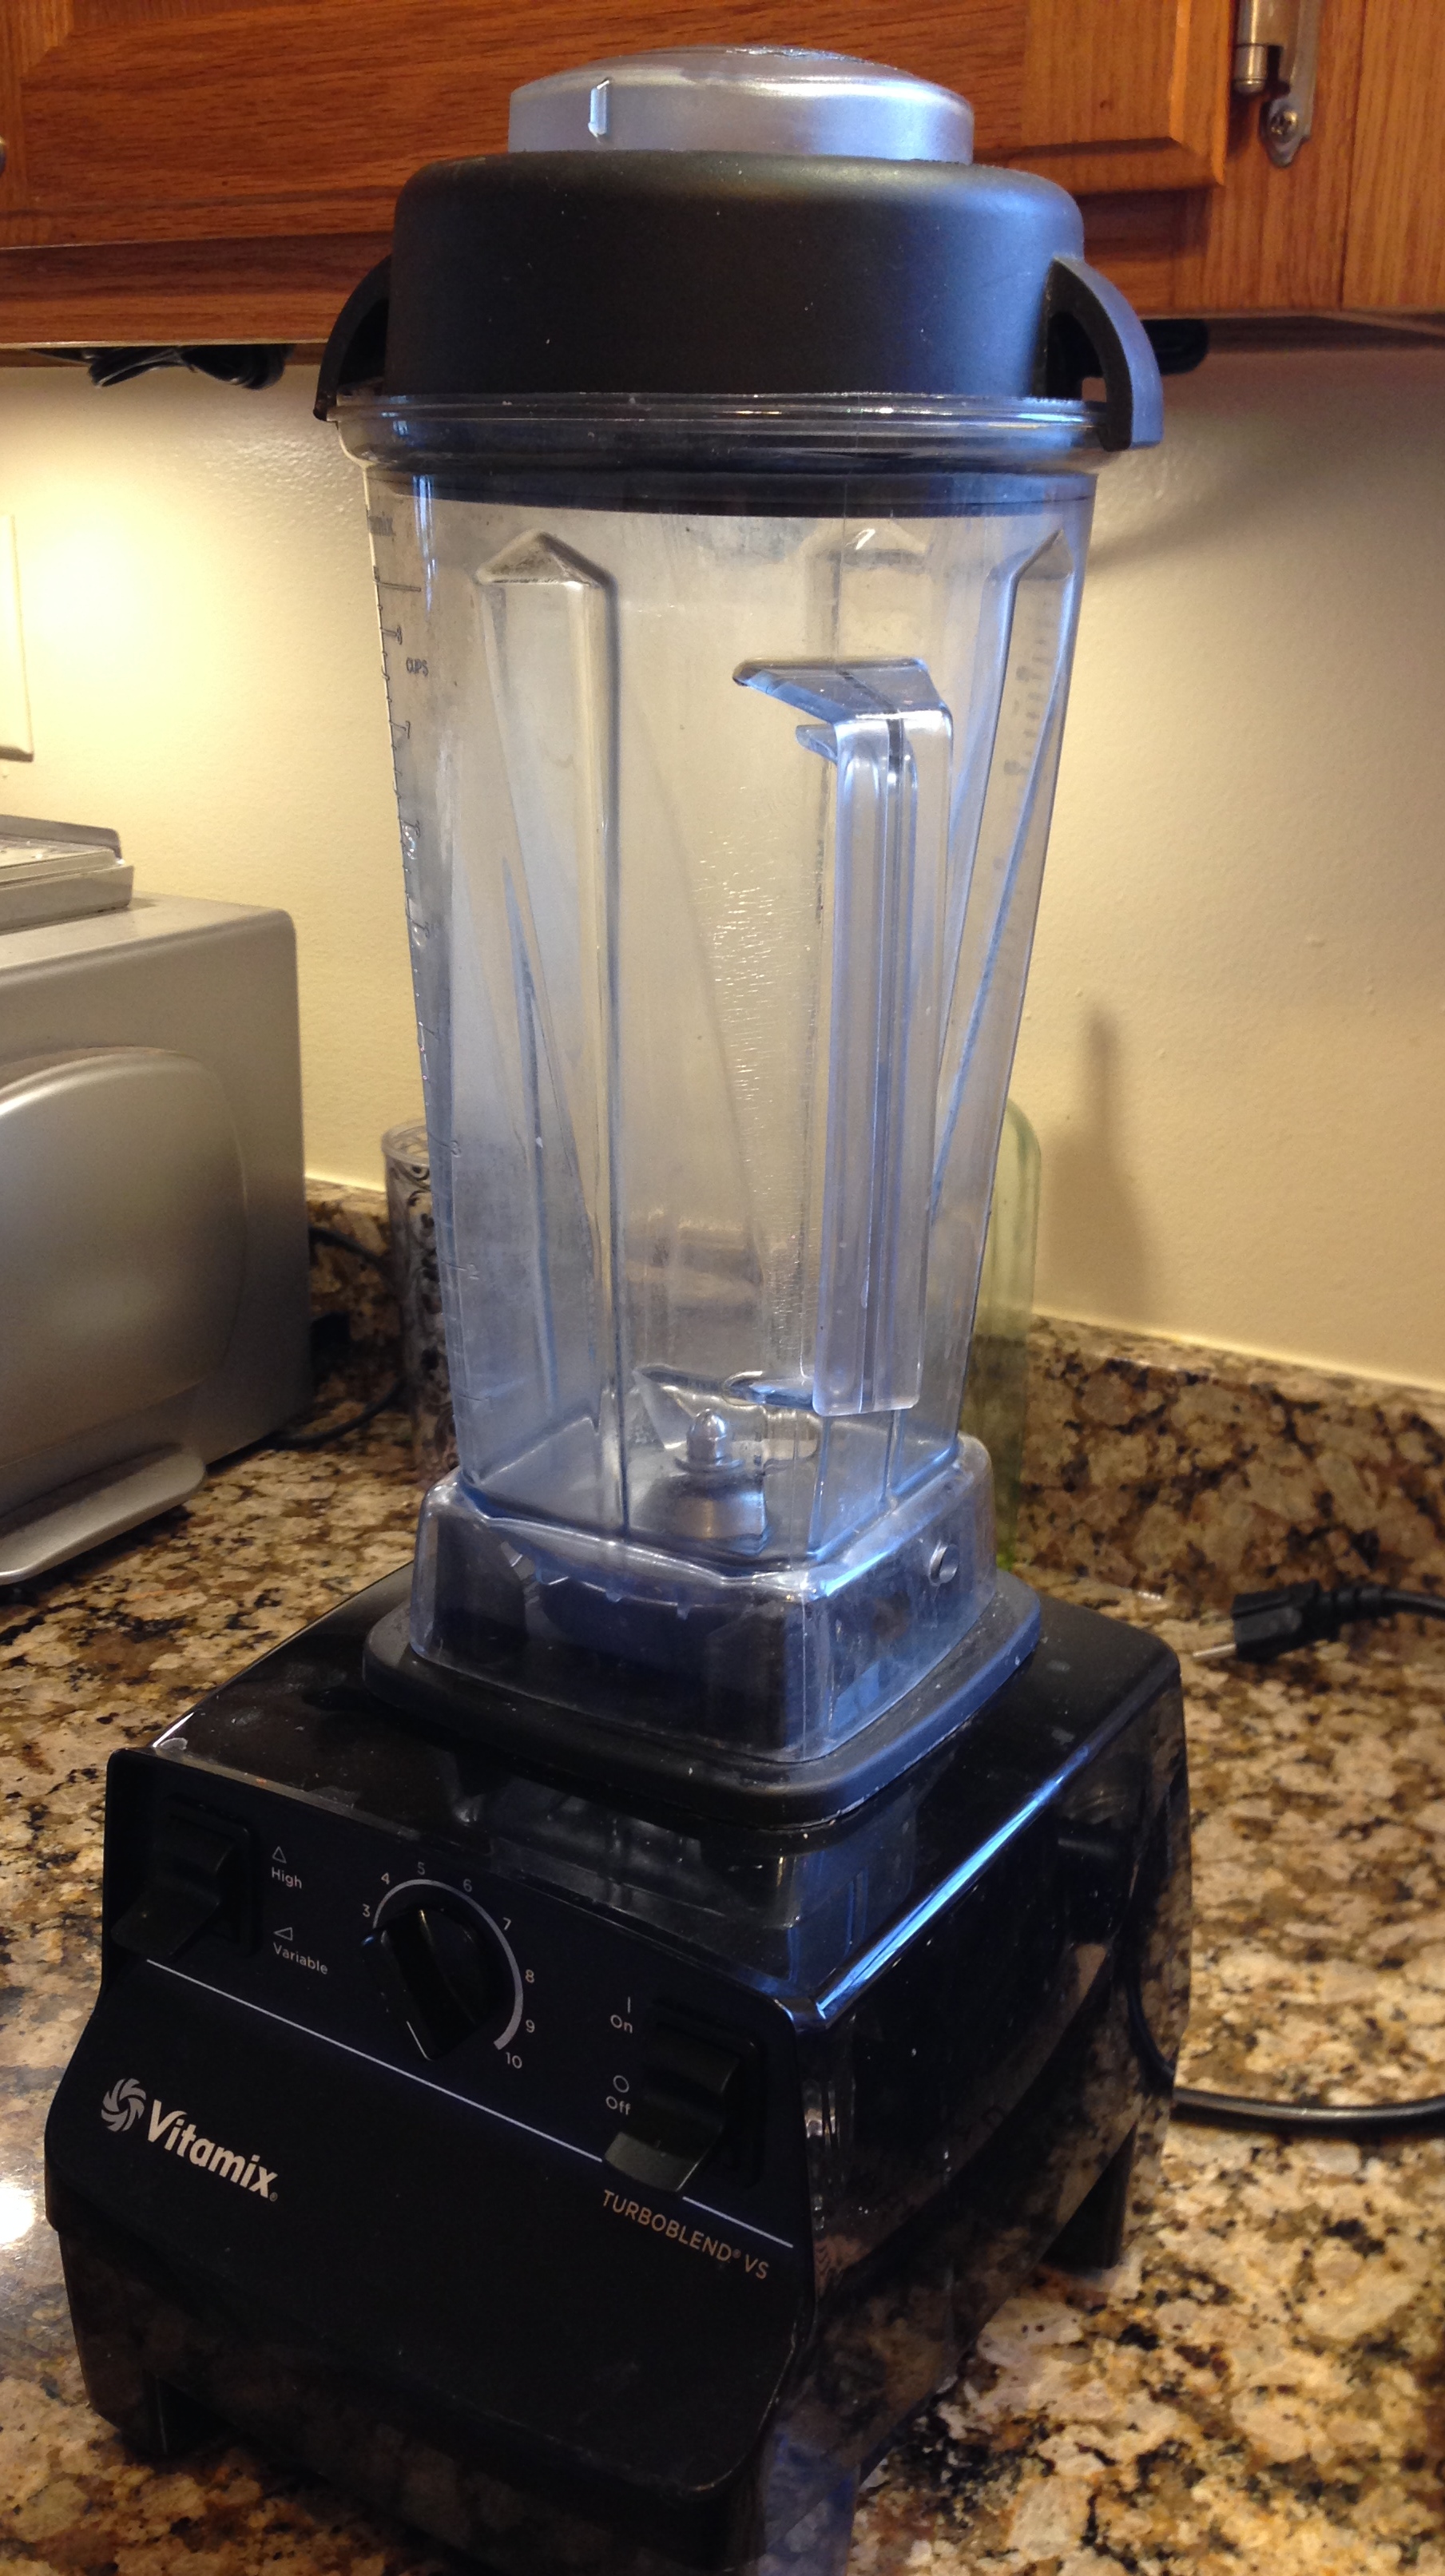
Vitamix Blender. Yup, I’m on the bandwagon. This is my #1 favorite kitchen gadget. Everything they say about this blender is true. It is SO worth it. Even if it means setting aside some money every month (or putting it on your wish list!), a high-powered blender like a Vitamix or Blendtec will become your favorite kitchen appliance.

Whether you’re blending smoothies (no more green chunks!) or dips or making your own soups, ice cream, or almond milk, a high-powered blender is KEY for creating a smooth, creamy consistency. Smoothies have never been better, and I can put all sorts of fruits, veggies, nuts, seeds and super foods in them, knowing they will all be pulverized! I have the TurboBlend VS (variable speed) version. I definitely recommend it over the 2-speed option. You can buy one a lot cheaper by getting a refurbished version from Vitamix. We got ours as a gift last Christmas, and it was ordered from Amazon.

I know people who also swear by Blendtec blenders (similar concept but with more automated settings than the Vitamix), so here is a link to check out those if you’re interested.

IMG_6679

Cuisinart Food Processor. I got the Cuisinart 11-Cup Food processor as a gift about 5 years ago. At the time, I didn’t cook much, so it sat in its original box for about…2 years 🙂 Oops!

I had no idea what I was missing. I use my food processor weekly to make everything from homemade donut holes and kickin’ buffalo dip to homemade Rolos, cauliflower mashed potatoes and chocolate hazelnut Nutella truffles. I use the shredding attachments to effortlessly shred cabbage, carrots, apples, zucchini, and Brussels sprouts. Go for the biggest cup size you can fit in your kitchen 🙂

IMG_6766

Breville (or Hurom or Omega) Juicer. I got this as a birthday gift a few years ago, and I love it! For the price, it’s a decent juicer, although you will get more juice out of your fruits and veggies if you buy a higher end one like a Hurom or Omega. Reason being, they are “masticating” juicers that squeeze the juice out more slowly (otherwise known as a slow juicer) vs. pulverizing/shredding the produce like this (centrifugal) Breville one does. If you can afford the Hurom or Omega, go for it; otherwise, try the Breville. When I feel something coming on, especially this time of year, I whip up a juice with greens, celery, lemons and fresh ginger and down it, and it helps me boost my immune system and flood my bloodstream with health-boosting nutrients.

Nesco Food Dehydrator. This was a birthday gift from my hubby. You can use it to make everything from kale chips and crunchy seeds and nuts to fruit roll-ups and jerky. Dehydrating food allows you to keep it “uncooked” (below 115F) while removing the water, so it is crunchy and tastes just like it was baked. By keeping some of our food raw, we keep the enzymes and nutrients intact that are often lost or greatly reduced by cooking. If you have your sights set on the BEST dehydrator and think you will be using it a lot, this Excaliber one is top of the line.
What’s on your holiday wish list?

Zucchini Pasta with Cauli-fredo Sauce!

IMG_6721

The past two weeks have been a bit of a whirlwind.

I haven’t felt quite like myself because I’ve been stretching myself too thin.

All of the projects I’ve been working on have been amazing opportunities, but when I said, “yes” to them separately about 2-3 months ago, I didn’t realize they would ALL end up happening within the same week in November.

I have SO much I want to write about and a ton of new recipes to share, but a few wise friends and family members have suggested that I s-l-o-w d-o-w-n a bit and take a moment to breathe amidst this craziness.

That’s why you may notice fewer blog posts until things calm down and my schedule gets back to normal in the next 2 weeks or so.

One of the things I’m working on is a series of posts about “My Favorite Things,” where I’ll share my favorite gadgets, stocking stuffers and cookbooks, just in time for holiday shopping 🙂

I’m also working with a web designer to do some pretty cool things to this blog over the next few months, and I’m really excited to see what happens with that!

I can’t write this post without mentioning that my husband has been nothing short of a saint over the past few weeks in particular, and I’m so incredibly grateful for his support, encouragement and patience. I am very, very blessed.

IMG_6318

Although I’ve felt stretched and stressed lately, I’ve gotten to do some really fun and exciting things…many of which were milestones that I couldn’t have imagined happening a year ago!

  • I trained the staff of a local restaurant to understand the differences among some current dietary trends and types (like paleo, vegetarian, gluten-free, vegan)
  • I facilitated a documentary movie night at my church where a group of about 20 of us watched Food, Inc. and enjoyed some healthy snacks, including my favorite caramel apple dip and this kickin’ buffalo hummus
  • I taught my FIRST full cooking class in my friend’s kitchen for a party at her house. I showed the group how to make my favorite kale salad, caulifredo zucchini noodles (recipe below!) and hazelnut truffles.

IMG_7758

The process of planning out and prepping for a cooking demo is intense, and I have a new appreciation for anyone who has their own cooking show and what goes into making that happen.

Phew! It’s definitely a lot of work…but I LOVED having the opportunity to teach the group through hands on cooking.

The most rewarding part of the whole experience was hearing people say things like, “Oh my gosh, this is amazing!” and “I’m shocked by how good that tastes.” 

It’s so fun to see people get excited about eating nourishing food!

We got to play with my NEW favorite kitchen toy (a Paderno Spiralizer) during the demo as we made our own zucchini noodles in seconds. I’ve included a video below for how to use it.

https://www.youtube.com/watch?v=XbLHyAY_KRI&feature=youtu.be

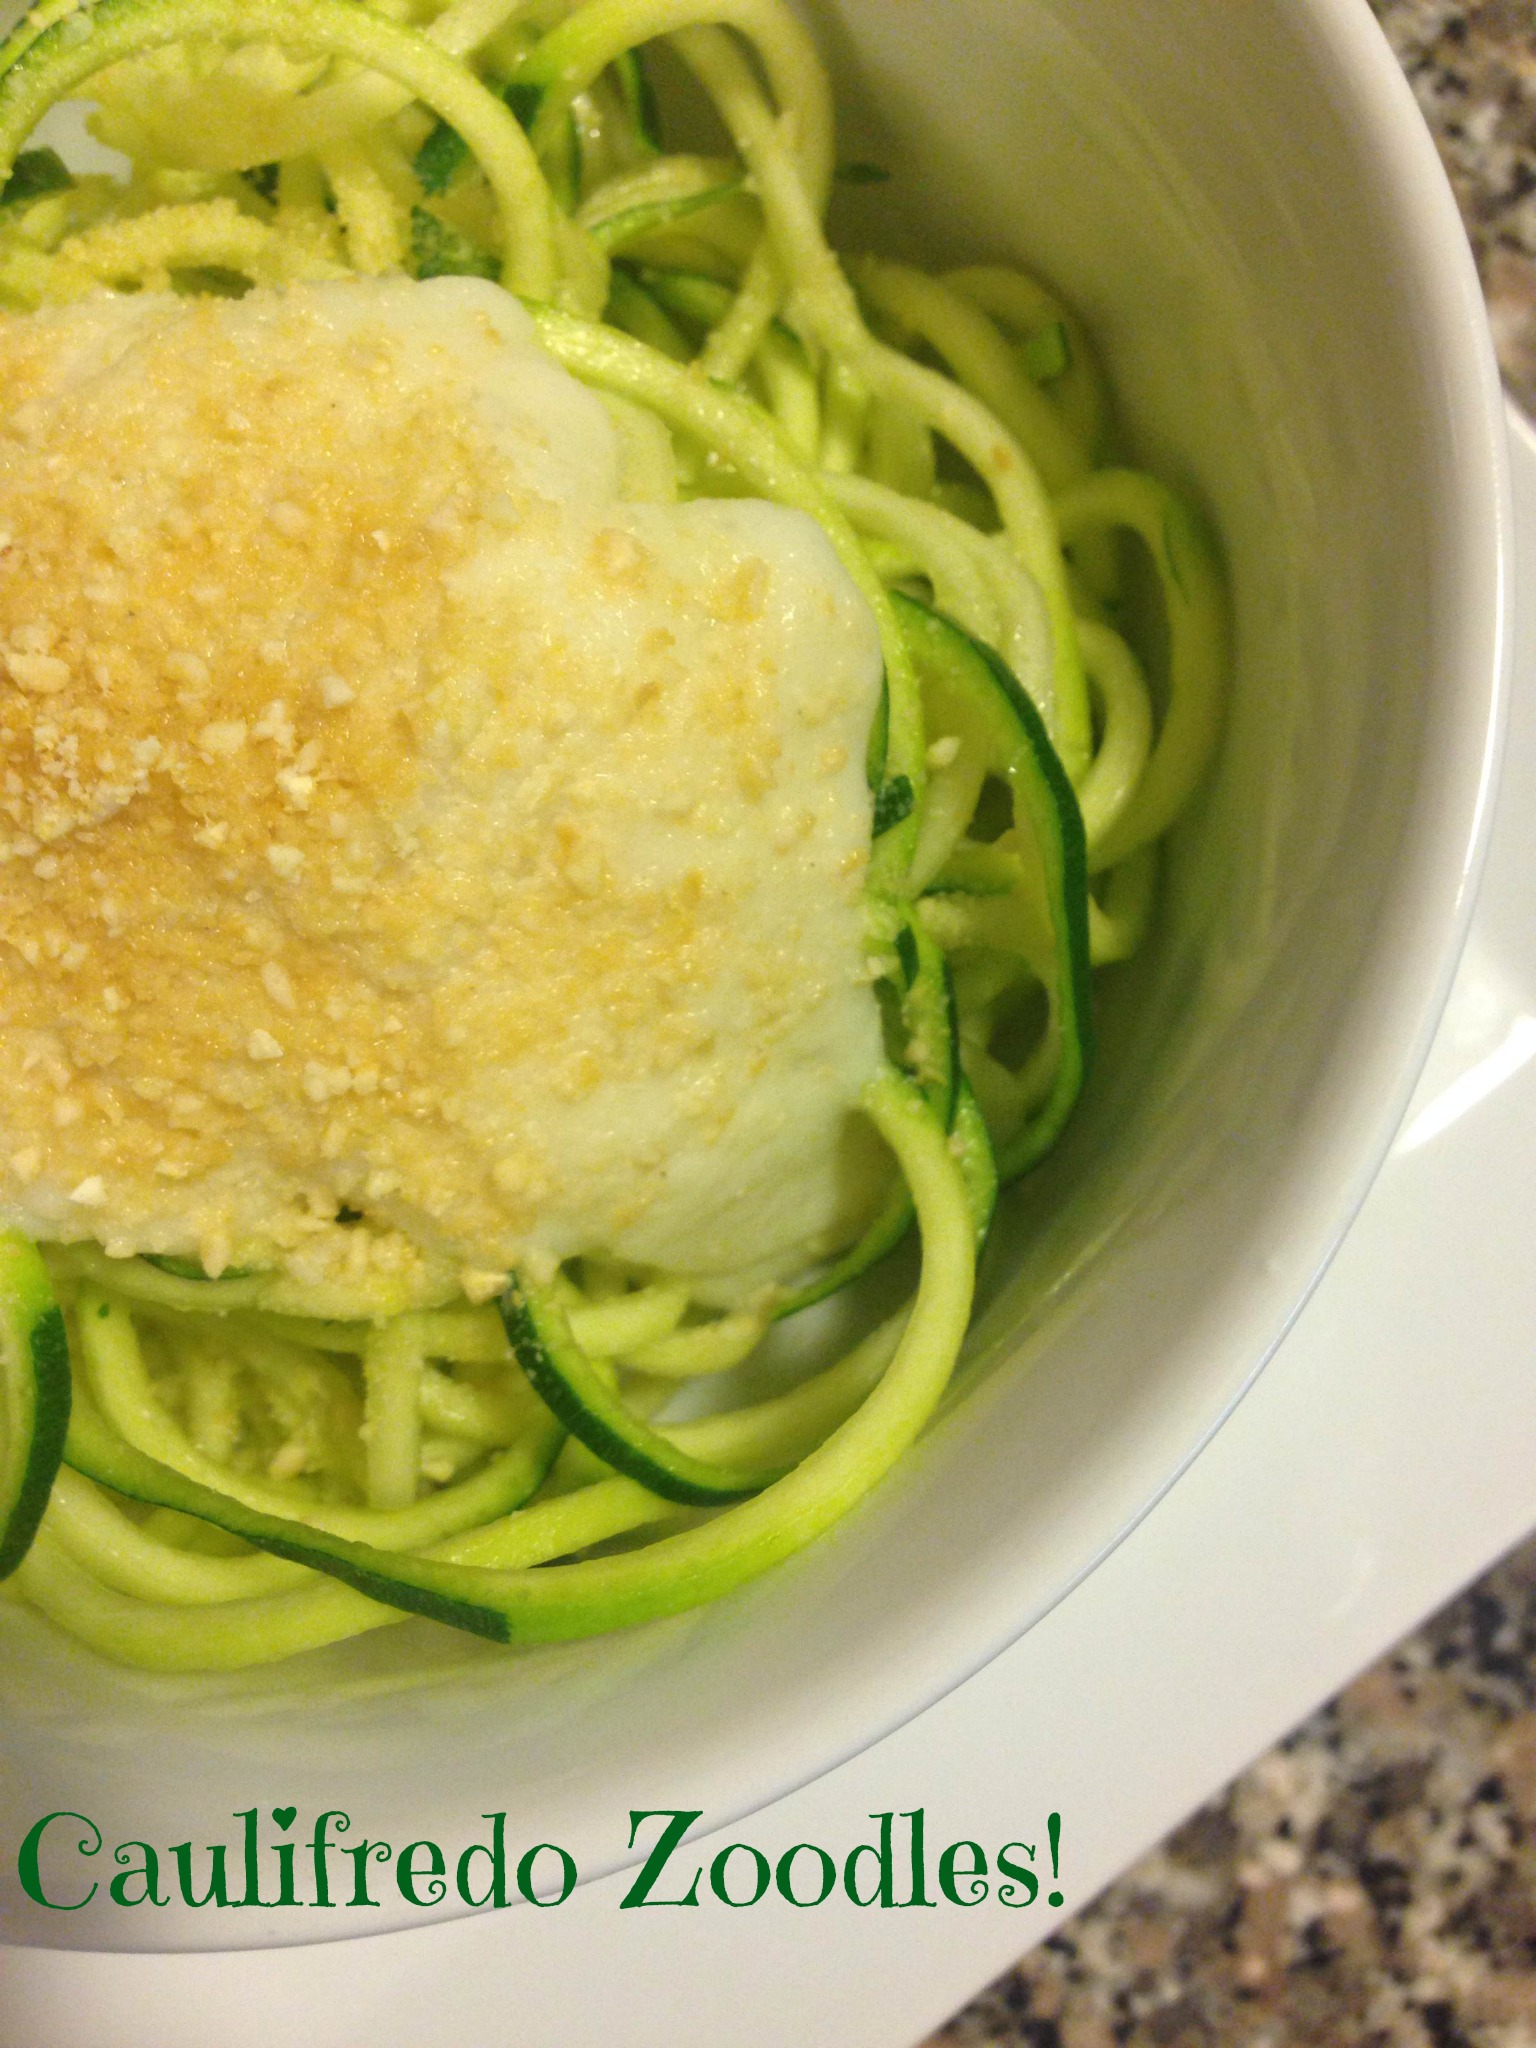
Zucchini noodles are a great alternative to pasta because they don’t spike our blood sugar or contain gluten like most pasta. You’ll be AMAZED at how similar the texture is to pasta…you can still twirl it on your fork, too! The spiralizer is something you’ll want to add to your wish list.

We topped the zucchini noodles with this creamy cauliflower alfredo sauce. It’s a variation of a recipe I shared earlier this year, but I made some tweaks to improve it! I think you’ll love it.

Enjoy!

caulifredo

IMG_6721

Ingredients

  • 4 zucchini, spiralized using this awesome gadget! (You could also sub in your favorite gluten-free pasta of choice – we like the Tinkyada brown rice pasta)
  • 2 teaspoons coconut oil

Caulifredo Sauce

  • 3 cloves garlic, minced
  • 1 tablespoon coconut oil, ghee/clarified butter or grass-fed butter
  • 1 head cauliflower, chopped into florets (here’s how to break apart a head of cauliflower in seconds!)
  • 1 cup water
  • 1 teaspoon sea salt
  • ½ teaspoon onion powder
  • 1 generous pinch of pepper, to taste
  • juice from 1/2 lemon (about 1.5 tablespoons)

Directions

  1. Sauté the minced garlic in coconut oil or butter in a medium saucepan over low heat. Allow to cook for a few minutes, until the garlic is tender and fragrant but not browned.
  2. Add the 1 cup of water to the saucepan, along with the cauliflower florets, and bring the water to a boil. (The water will not cover the cauliflower, but that’s okay.) Once the water is boiling, reduce the heat to a simmer and cover the pot for 12-15 minutes or until the cauliflower is fork-tender and very soft.
  3. Transfer the entire contents of the saucepan into a blender or food processor, and season with salt and pepper. Add in lemon juice and onion powder. Process until very smooth and creamy, with a texture similar to traditional cream sauce. (Always be careful when blending hot liquids– the steam pressure can blow the lid off your blender!).
  4. Season with additional salt and pepper, if desired, and serve hot. If it seems thick, add more water. If it seems dry, add a liberal drizzle of olive oil.
  5. Place spiralized zucchini in a medium-sized frying pan greased with coconut oil, and stir for 3-4 minutes or until zucchini takes on a cooked pasta texture, sort of wilted and soft. Be careful not to overcook.
  6. Transfer zucchini noodles (AKA “zoodles”) to a plate or bowl and pour sauce on top. Sprinkle this 3-ingredient paleo parmesan cheeze on top and start eating!

Elevate Your Tailgate: Kickin’ Buffalo Dip!

IMG_7567

Buffalo sauce.

For whatever reason, it’s one of those flavors/foods that I’ve never liked. Just like I’ve historically avoided/been grossed out by cole slaw, creamy broccoli cheese soup, and  guacamole, I’ve always stayed away from anything coated with the vibrant orange sauce.

My earliest memories of buffalo sauce are around having cooking lessons with my elderly neighbor, Miss Muriel. When I was in grade school, she would invite me to her house and teach me to make things like pasta, paper thin sugar cookies, and cheesecake…100% from scratch.

While our creations were cooking or baking, she ordered lunch from Dominos, complete with pizza and buffalo wings. I never liked the taste of buffalo wings, but I didn’t want to be rude (I was a quiet kid), so I just ate a few anyway.

Fast forward about 20 years, and here I am trying to figure out ways to “UPgrade” common foods that most of us eat a lot.

I’ve asked some friends and co-workers, “What’s ONE food that you love that you’d like to have a healthier recipe for how to make?”

The most common answer?

IMG_7557

“Buffalo chicken dip.”

It’s been one of my husband’s favorite party dips as well. Loaded with cream cheese and either Ranch dressing or Bleu cheese, shredded chicken, and hot sauce, it’s not something that works with those of us who get sick from eating or drinking dairy.

So, off I went in search of some ideas and inspirations for how to UPgrade this dip recipe. I came across a post from one of my favorite bloggers, Angela Liddon over at oh she glows.

IMG_7539

Buffalo hummus.

I know, I know. It’s not the SAME, BUT this is my first attempt at making a buffalo dip, so we’re starting where I’m most familiar.

I brought this hummus to work, and my co-workers loved it! They are so great to serve as my taste testers for many of these recipes. I know I can trust them and that they will be honest with me if they don’t like something. Input from my co-worker and friend Michela was one of the reasons I made some tweaks to my original Protein-Packed Pumpkin Spice Dip recipe.

By the way, I’m still committed to finding a dairy-free version of buffalo chicken dip that is tailgate worthy, too. And when I do, I will share it with you 🙂

In the meantime, you should try this recipe. The “kick” comes from the optional addition of cayenne pepper. You can whip it up in less than 10 minutes, too!

buffalo hummus

Ingredients

Yield: 2 cups

  • 1 can (15-ounces) or 1 1/2 cups cooked chickpeas, drained and rinsed
  • 1/2 teaspoon ground cumin
  • 1/2 teaspoon smoked paprika
  • 1/2 teaspoon fine grain sea salt
  • 2 cloves garlic
  • 2 tablespoons tahini
  • 1 tablespoon hot sauce (You can use Frank’s Hot Sauce. I used Gator Ron’s Angel Wing Sauce from MOMs Organic Market. It’s made in nearby Bethesda!)
  • 1 tablespoon fresh lemon juice
  • 1/2 cup jarred roasted red pepper
  • 2 tablespoons extra virgin olive oil, liquid from beans can, OR water
  • Cayenne pepper, to taste, for serving

Click here for the full recipe from oh.she.glows!

Beautifying Raw Purple Cabbage Slaw {Breast Cancer Prevention Month Recipe}

beautifyslaw

October is breast cancer awareness month.

I know several women who have survived and others who have lost their battle with this terrible disease. Chances are, you or someone you love has been affected. Cancer is a complex disease, so I don’t pretend to have all of the answers or solutions for how to fix or heal it.

Because this blog and my overall food philosophy focus on empowering you to nourish your body and transform your health, today’s post features a recipe that is full of beautifying, anticancer nutrients.

As many of you know, I strive to “upgrade” my diet and “add in” more of what is healing, nourishing and energizing…so we’re going to flip our focus today to breast cancer prevention.

All of us are aware that breast cancer exists and know that we don’t want to have it, but what have we learned about how to prevent it?

What can we do proactively to give our body the best chance to be well and protect ourselves against diseases like cancer in the first place? 

I’ve learned a lot from some incredible doctors, researchers and nutritionists over the years about what we can do help our body’s chances of staying well by eating a nutrient-rich diet.

Dr. Fuhrman, whose focus on anti-cancer nutrition has influenced how I eat, outlined his top tips for breast cancer prevention here.

One of his tips is to eat more foods like the ones outlined in this recipe, especially cabbage.
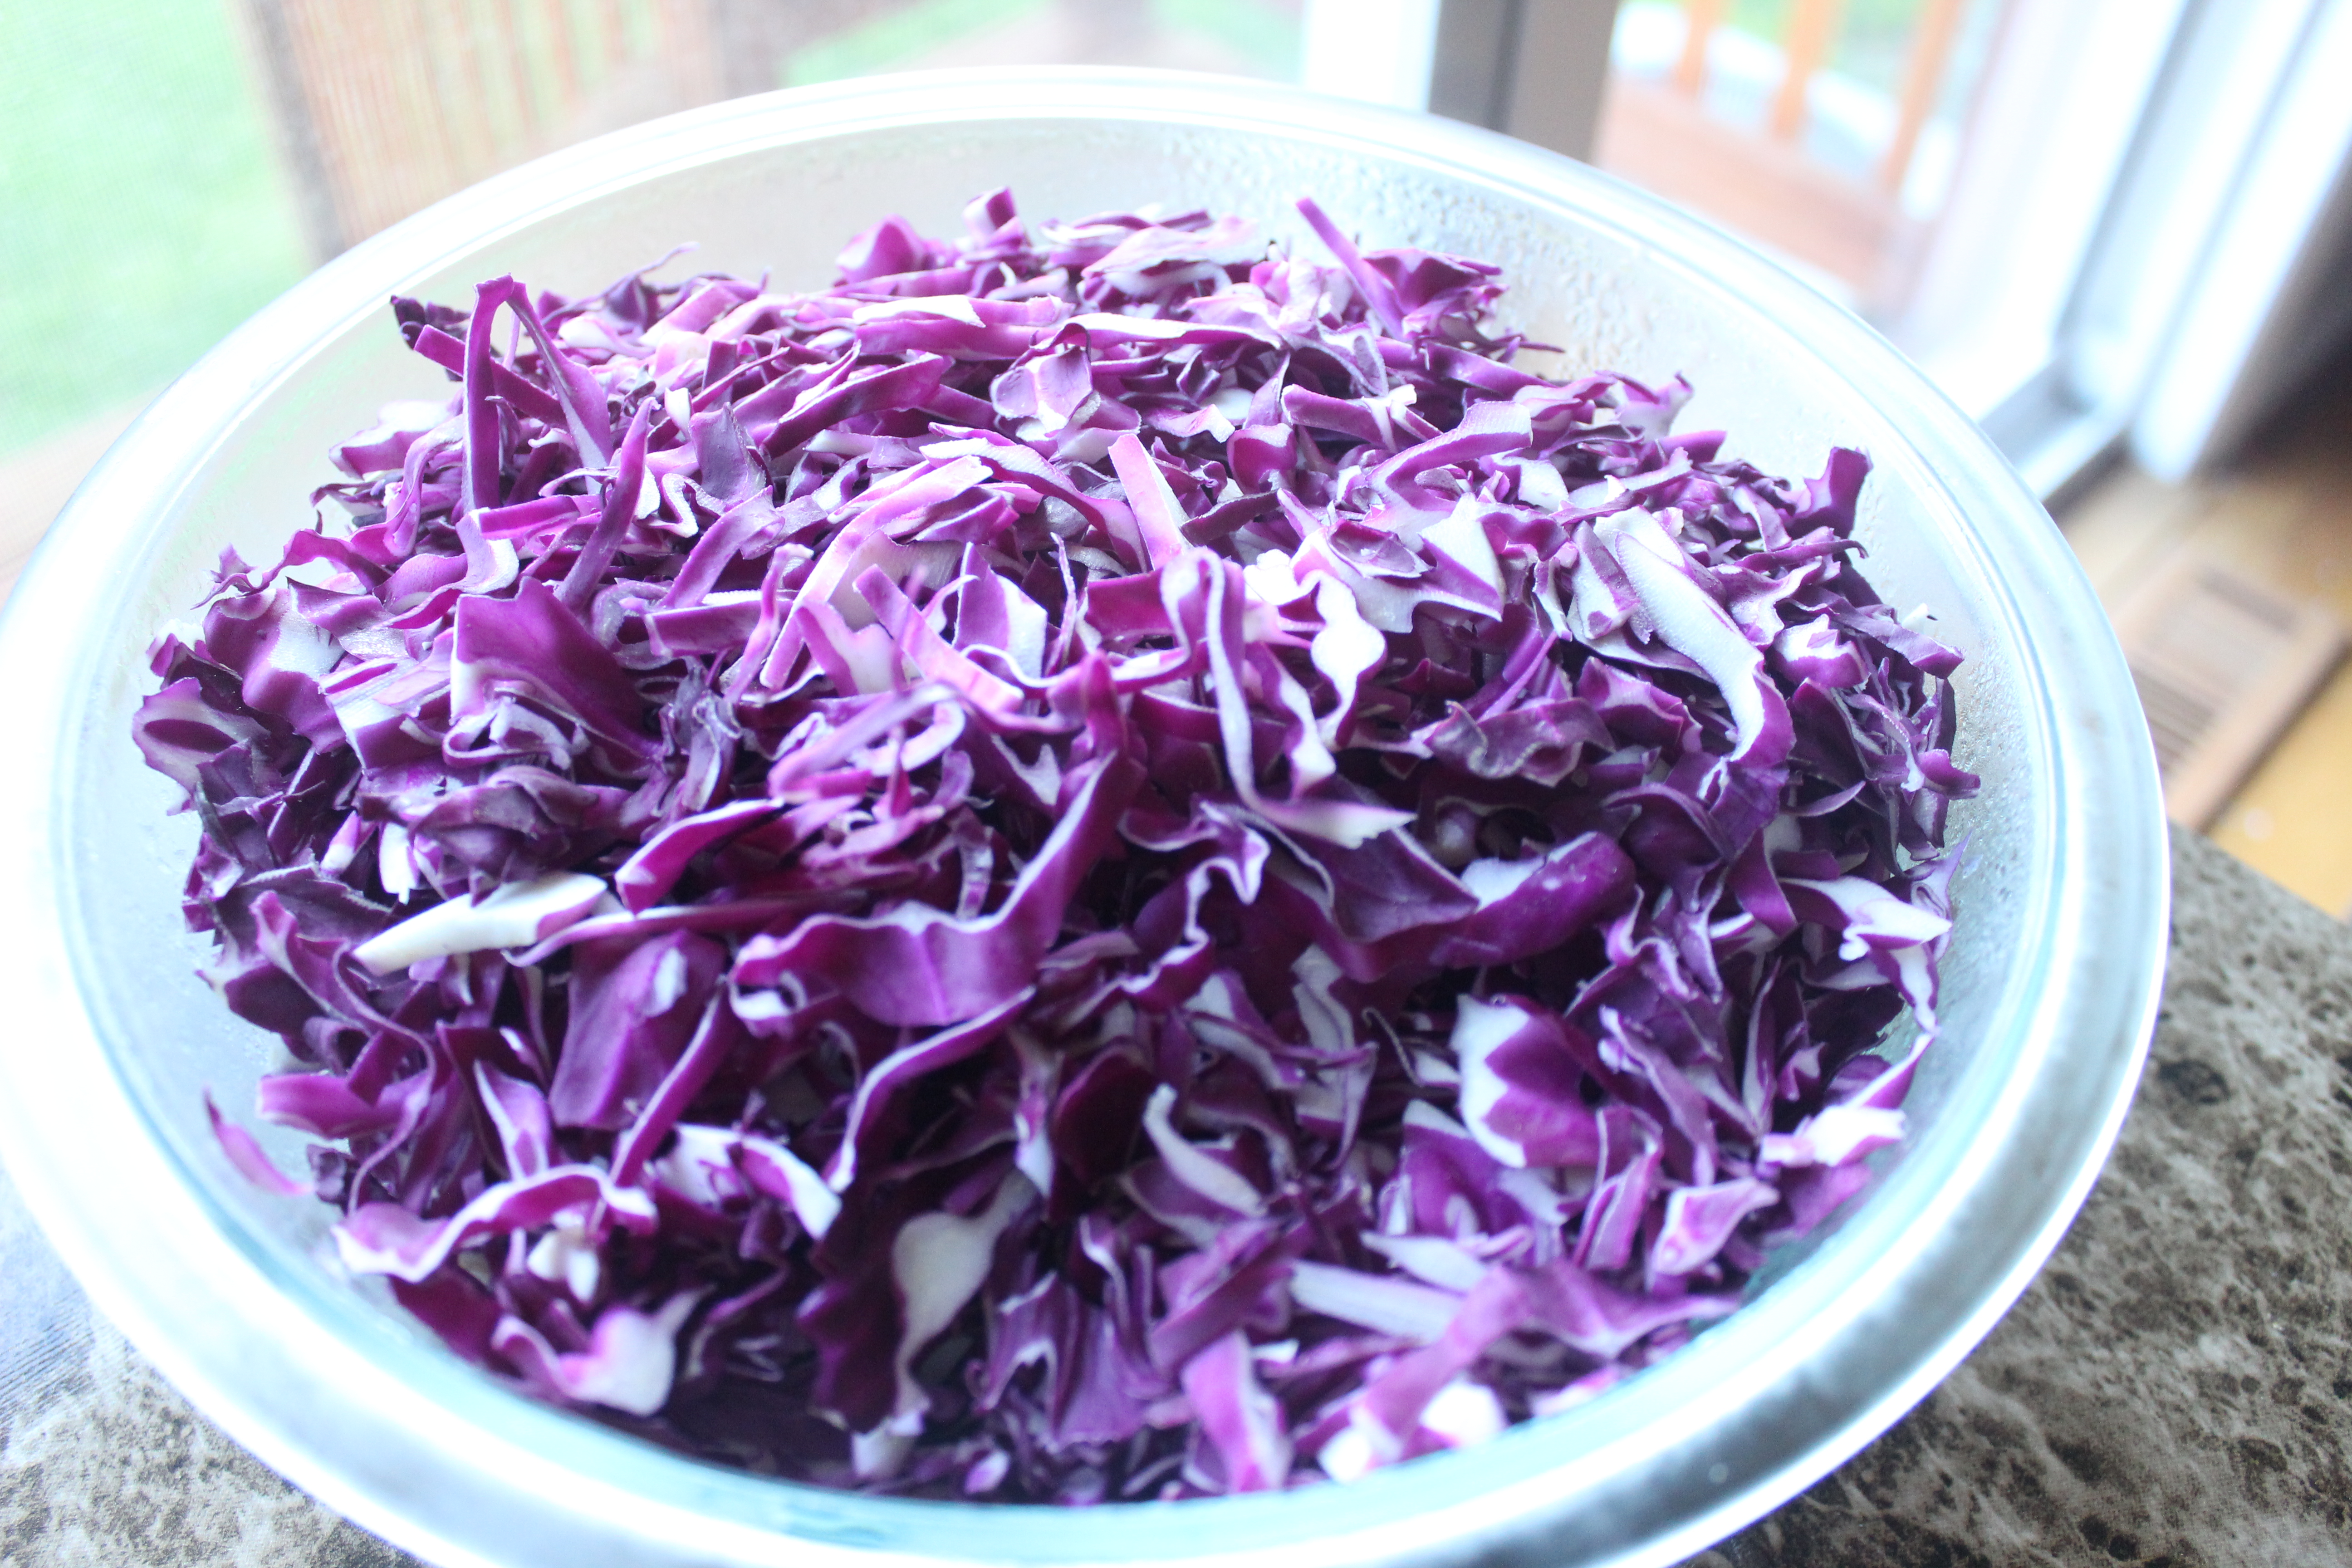
IMG_4355

Up until about a year ago, I had never bought purple cabbage and certainly hadn’t cooked with it.

I had tasted it sprinkled in to salad mixes before but never thought much about it until reading The Beauty Detox book by Kimberly Snyder and being introduced to this recipe, which Kimberly spins as a way to reduce crow’s feet.

Red cabbage is one of Dr. Fuhrman’s anti-cancer, anti-fat storage foods called GBOMBS. It contains powerful nutrients that help our body reduce inflammation and detoxify (get rid of harmful toxins that build up).

Those two processes are the SECRETS to losing weight, having clear and beautiful skin, and not getting sick. The more inflammation-fighting, detoxifying foods we eat, the better off we will be.

This recipe is also a much healthier option than most mayo-loaded slaws that we’re used to eating 🙂

And it’s really easy to prepare. Just like this paleo cole slaw I featured a few weeks ago that was a hit!

beautifyslaw

**If you’ve been reading this blog for some time, you should have all of the main ingredients below (ACV, tamari, tahini and nutritional yeast or “nooch”). If not, check out this point where I covered what they are, why they’re good for us, and where we can buy them. Stocking a healthy pantry is KEY to eating well.**

Ingredients (Organic, when possible)

Optional Ingredients

  • ¼ cup pumpkin seeds or sunflower seeds
  • ½ cup finely chopped fresh parsley
  • A few avocado slices
  • ¼ cup chopped pitted black olives

Click here for the full recipe from Kimberly Snyder’s website and here to read all about nutritional yeast!

Creamy Broccoli Cheeze Soup {Vegan, Gluten-free, Paleo}

broccoli soup

I know it’s a lot of people’s “favorite things” at Panera (especially this time of year as the weather cools)…

But I’ve never been a fan of broccoli cheddar soup. 

I’m not sure if it’s the concept or the texture or the fact that I’ve always thought broccoli should stay whole and recognizable and not pulverized in a soup with cheese and cream.

Since I cut out milk and cheese over two years ago, I’ve been on the hunt for recipes that deliver on the rich and creamy factor we think can only come from dairy products, and I wanted to challenge myself to try something new.

(I’ll be writing a whole post about why I cut out dairy products, but the short version is they were triggering a lifetime of congestion, ear/sinus/respiratory infections, postnasal drip, allergies, adult acne, and indigestion. If you have any of those symptoms regularly, try cutting out dairy products for 2-3 weeks and notice how much better you feel! I never would’ve believed it if I hadn’t experienced it myself. It’s amazing how our bodies can heal when we remove foods that harm us and upgrade to foods that heal us. More on that later!)

IMG_7137

Back to the broccoli soup. 

Because I’m always encouraging people to “try new foods” and give foods they’ve previously sworn off a second chance, I thought I should practice what I preach.

So, I tried a recipe for a “healthified” broccoli cheeze soup.

The skeptic in Bill (and me) was not too confident about how this soup would turn out, so I totally get any reservations you might have about making this recipe…but that’s why we tried it!

And we’re glad we did.

Bill and were BOTH thrilled with how it turned out – rich, creamy and flavorful.

I had to stop myself from drinking it straight out of the mason jars, and we enjoyed it as part of our lunch for several days.

IMG_7099

Here are the UPGRADES in this recipe compared to standard broccoli cheddar soup:

  • Unsweetened almond milk (homemade, too!) instead of half and half (dairy-free)
  • Nooch instead of cheddar cheese
  • No flour (gluten-free!)
  • Way less salt

Not only that, but any excuse to eat more broccoli is a good one – broccoli is known as the DNA whisperer!

broccoli soup

Ingredients
  • 2 tablespoons coconut oil, melted* (I used coconut oil, which is a better oil to use for high heat. If you’re paleo but not vegan, you could use grass-fed butter or ghee instead.)
  • 1 medium red onion, diced
  • 3 cloves garlic, minced
  • 1 teaspoon dijon mustard
  • 2½ cups unsweetened almond milk (If store bought, avoid the ingredient “carrageenan”)
  • 2½ cups vegetable broth
  • 5 cups broccoli florets
  • 1 cup nutritional yeast (Wegmans, Whole Foods, MOMs, Amazon, and any natural food stores sell it!)
  • 1 tablespoon lemon juice
  • 1 teaspoon sea salt
  • 1 teaspoon black pepper

Don’t be deterred by the ingredient list or let that be an excuse to not try recipes. I used to do that all the time but found that having key pantry staples on hand made it SUPER easy to make recipes like this.

Most of the time half of the ingredients are things you have in your pantry anyway (i.e., herbs, spices, lemons, onions, and garlic).

Click here for the full recipe details from Running On Real Food!

Elevate Your Tailgate: Queso Dip…That’s Good For You! {Dairy-Free}

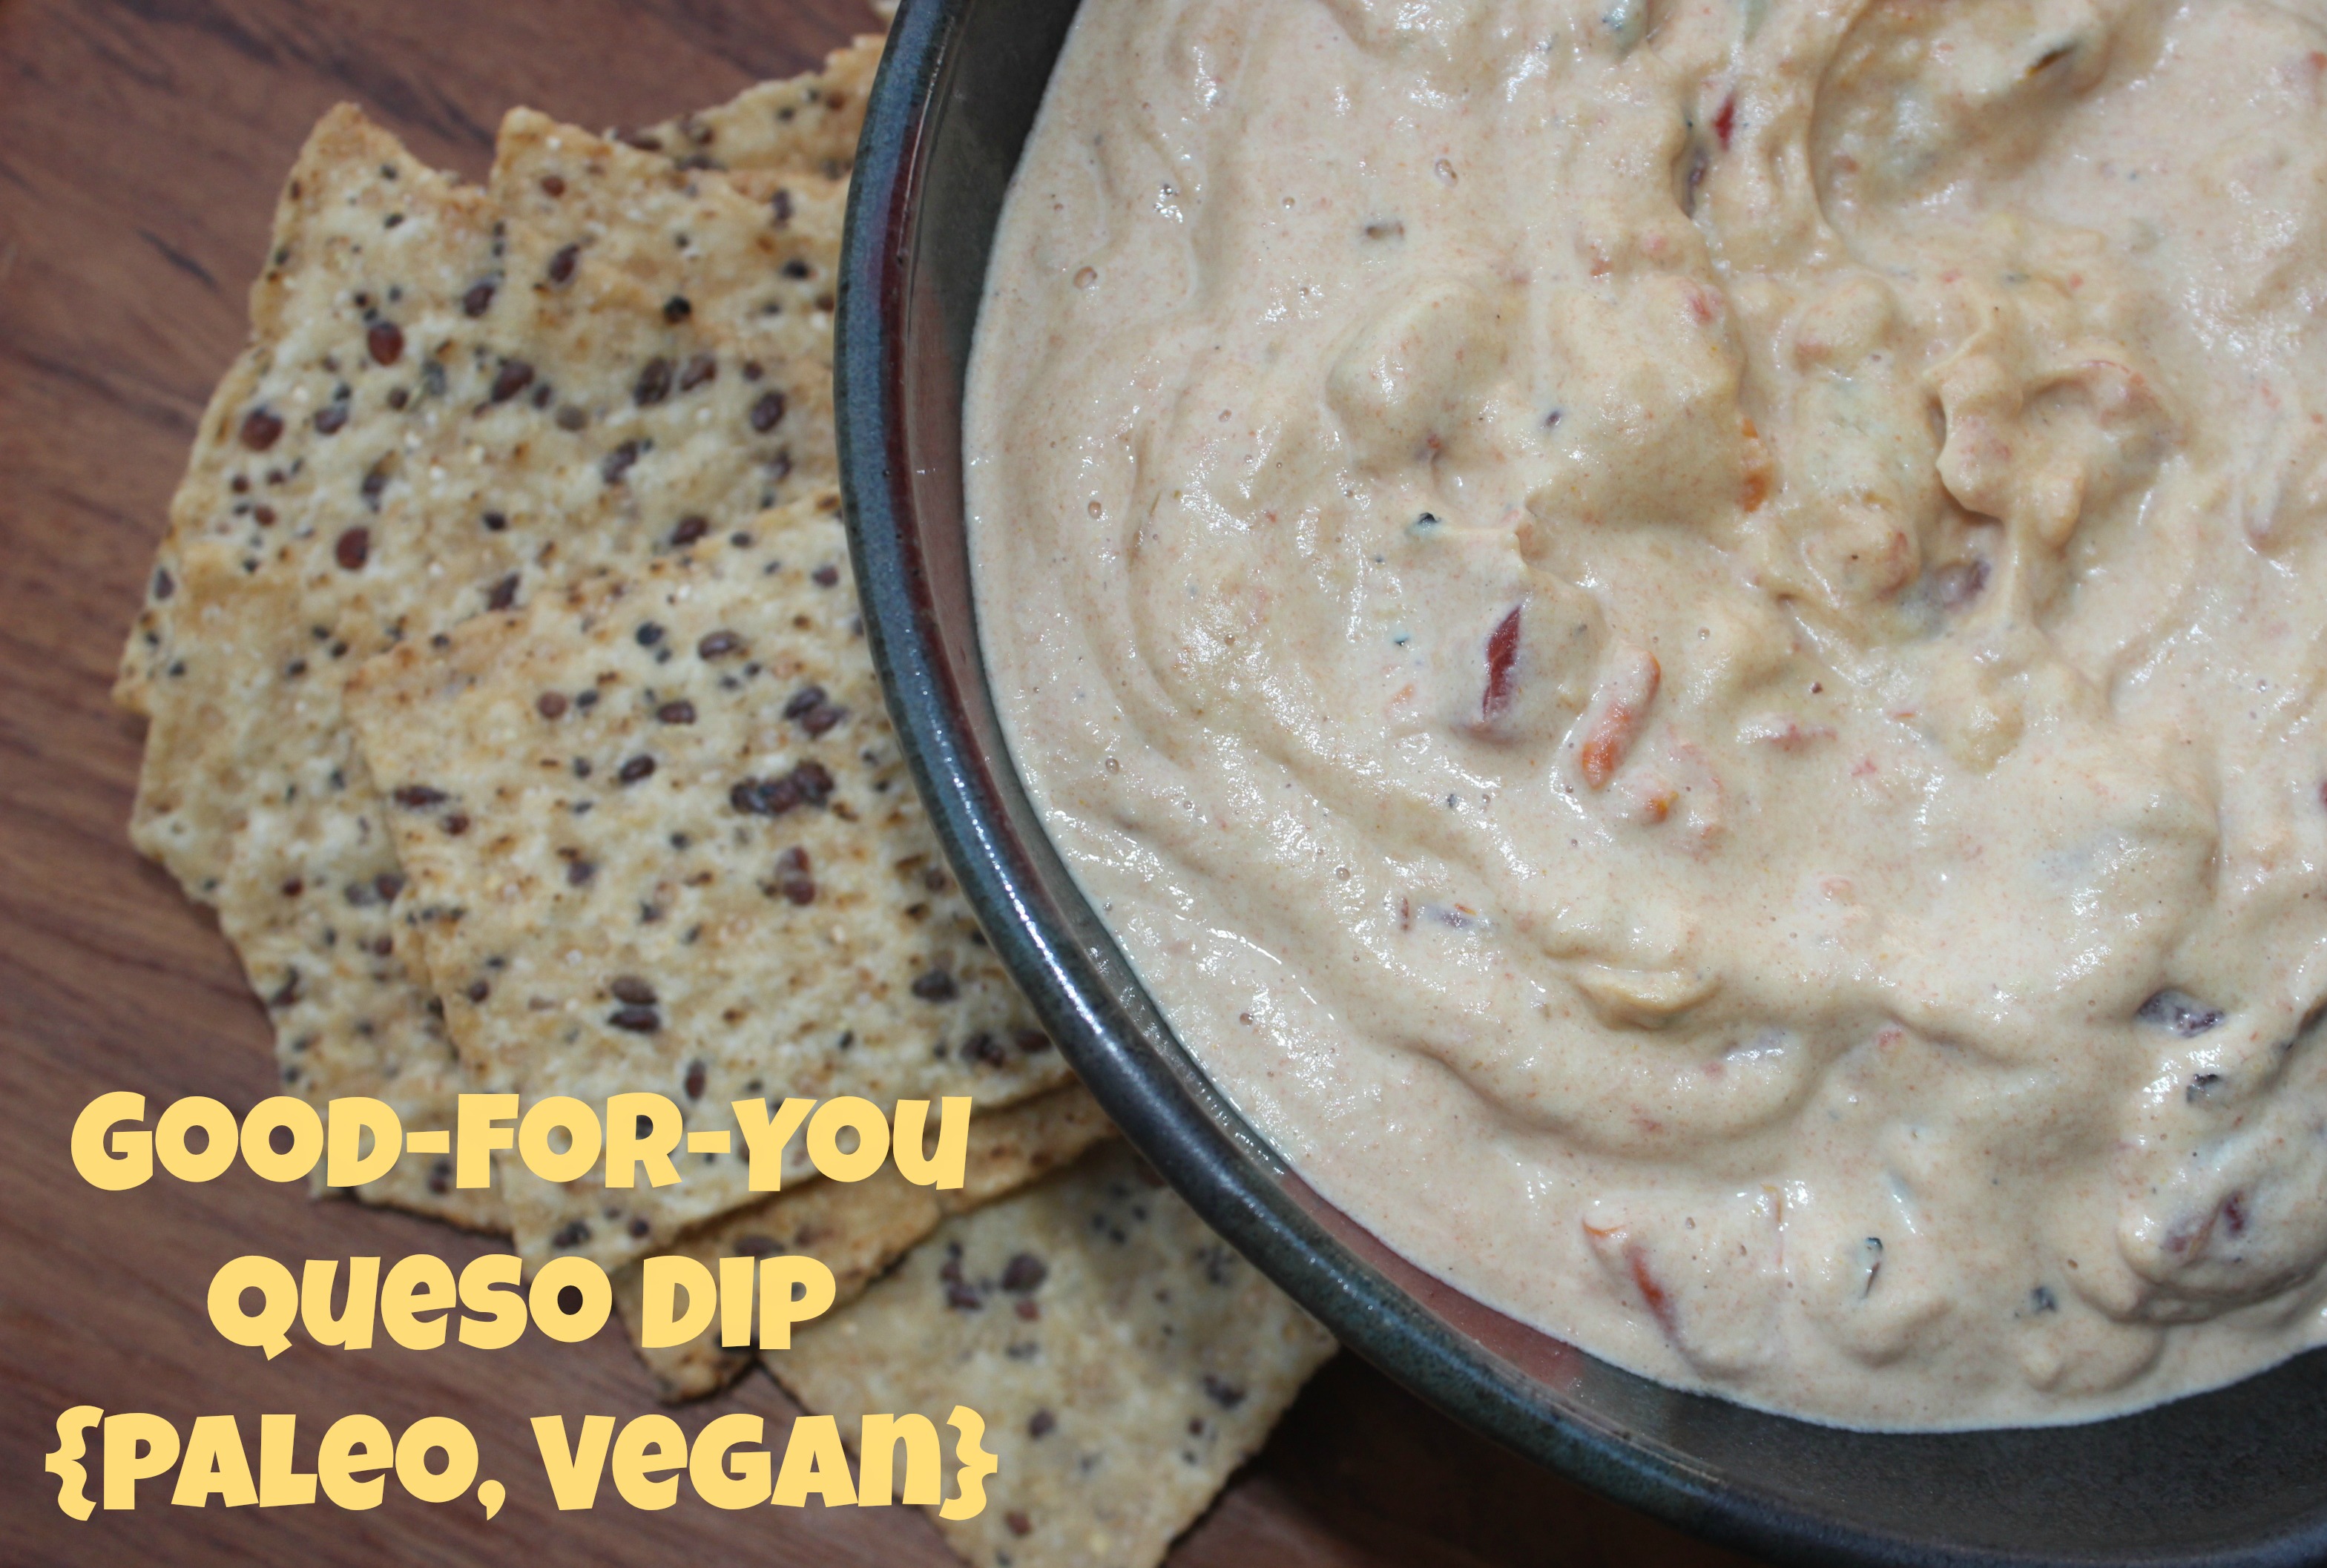
queso dip

“How do you live without cheese??”

That’s one of the most common question I get when I tell people I don’t eat dairy products.

Trust me, if you had told me 5 years ago that I would enjoy food (more than I ever have before!) WITHOUT Parmesan, cheddar, mozzarella, or any other kind of cheese, I would have kindly nodded my head and continued dousing any unsuspecting vegetables and pasta with mounds of Parmesan cheese.

Thank you very much.

One of the things that excites me MOST about cooking and preparing new recipes is finding ways to make healthy, dairy-free alternatives to foods I loved when I ate and drank things like milk, cream and cheese.

Today’s recipe is one of those special alternatives that I will be adding to my “go to” party snack list!

IMG_7364 IMG_7369

I think it’s safe to say that anyone who blogs regularly and spends a lot of time in the kitchen frequently looks to other people and other blogs for inspiration.

For me, one of those people is Megan, a fellow IIN graduate and health coach who writes the blog The Detoxinista.

I’ve made quite a few of her recipes in the past and always been pleased with the outcomes, so as a general rule, I trust her recipes.

That’s what I hope happens with my readers, too – that you will try the recipes I post, like (maybe love?!) them, and trust that future recipes I share will be delicious.

It saves you some time and guesswork 🙂

IMG_7366

I had been eyeing up her recipe for dairy-free queso dip but hadn’t taken the time to make it.

Queso dip is one of those foods that most of us wouldn’t imagine could be healthy.

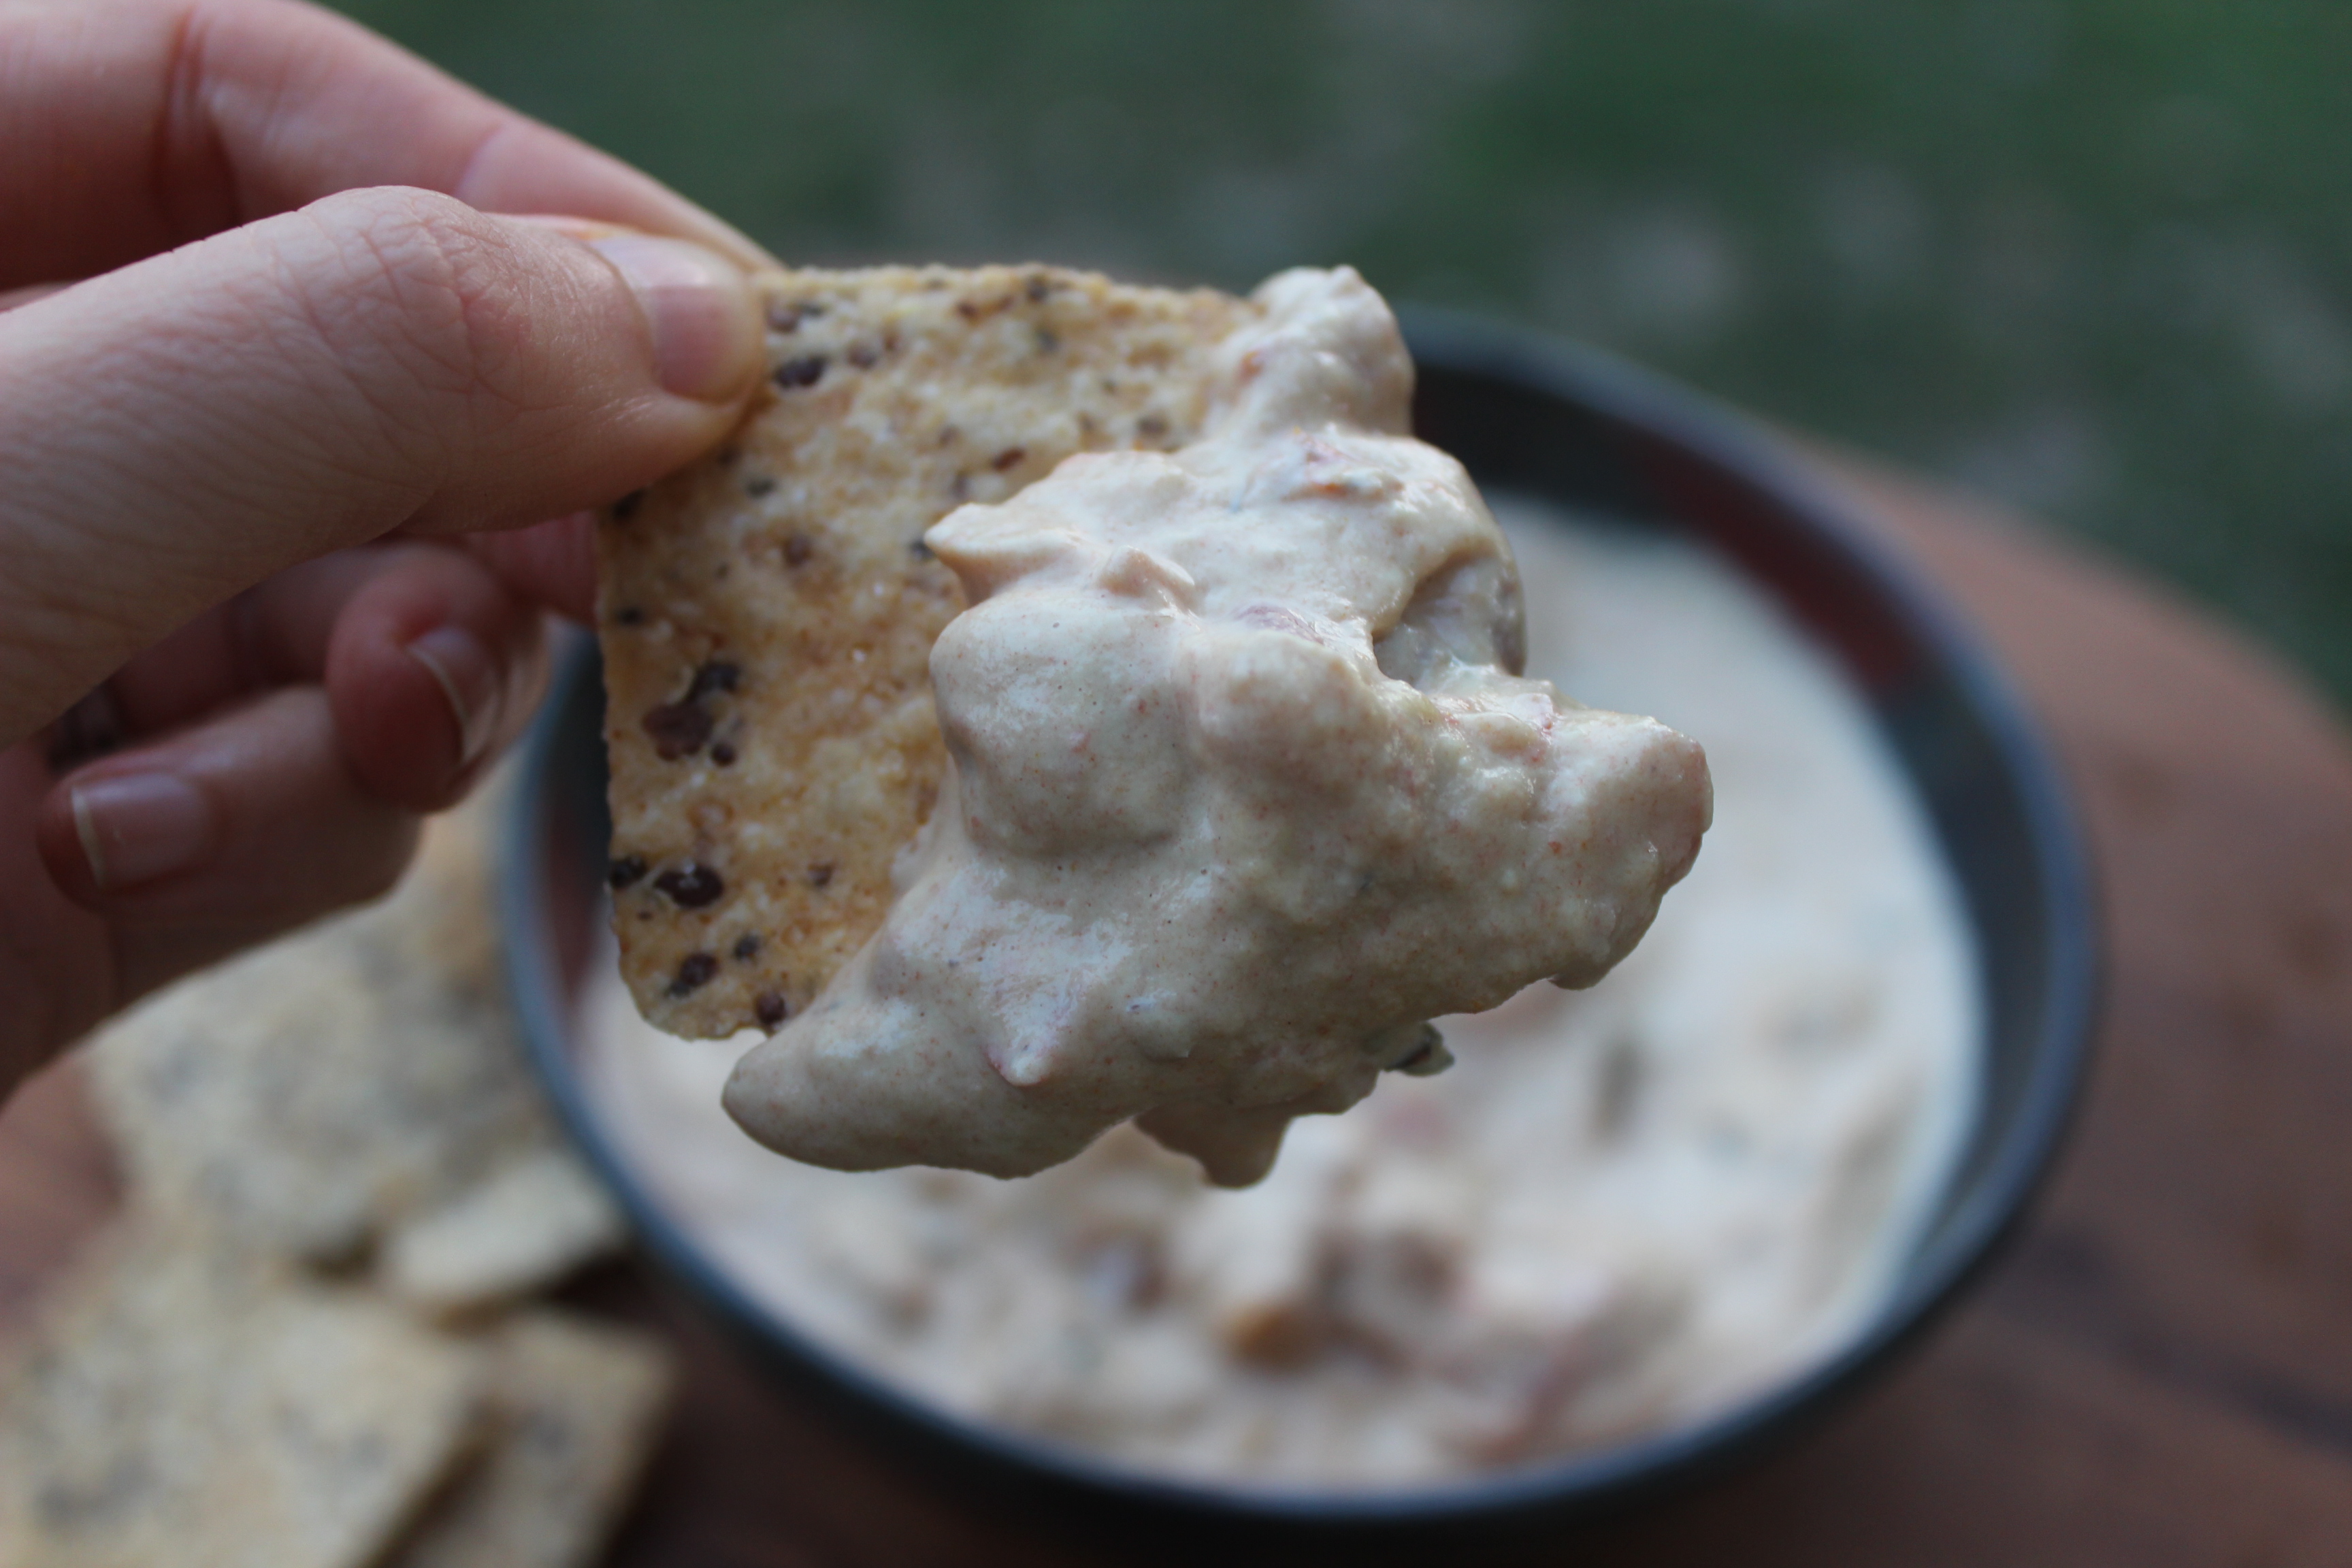
Not only is this version healthy, but it’s also delicious…and just in time for football season!

We served it with our favorite chips – Way Better Chips.

I have a feeling we will be making this a lot over the next few months as football season swings into gear!

queso dip

Ingredients:

  • 1 cup raw cashews*, soaked for up to 4 hours and drained
  • 1/4 cup water
  • 1 teaspoon sea salt
  • juice of half a lemon (about 1 1/2 tablespoons)
  • 3 tablespoons nutritional yeast
  • 1/8 teaspoon turmeric
  • 14 oz. can diced tomatoes with green chiles (We used the Muir Glen Organic Diced Tomatoes, Fire Roasted with medium green chilies)

*Raw cashews have a very mild and neutral flavor that works well in this recipe. Try to avoid using roasted cashews, which have a stronger cashew flavor.

Please please PLEASE don’t let the “soak cashews” detail discourage you. I used to use it as a reason not to make certain recipes, but it’s SO easy. Seriously. Just put the cashews in a bowl, cover them with water, and go about your business. Come back in a few hours, and you’re good to go. You can even soak them overnight if that’s easier for you 🙂

Click here for the full recipe from The Detoxinista!

Happy National Kale Day! {Plus a NEW Kale Salad Recipe to Try}

Happy National Kale Day!

In all honesty, I had no idea this was even a “thing” until I woke up this morning and saw it all over twitter.

We love kale and all of the amazing health benefits it provides. It’s a super versatile super food.

kale

Two weeks ago, I had the opportunity to attend the Natural Products Expo East in Baltimore and had the privilege of meeting Mr. Kale himself – Brad of Brad’s Raw Kale Chips

Total food nerd moment 🙂

brad

I’ve featured kale in several recipes on this blog in addition to the one I’m sharing today! I use it in everything from salads, soups and sautees to smoothies and frittatas.

To celebrate National Kale Day, try one of these recipes, the *new* salad below, or one of the others on the National Kale Day website:

  1. Taste the Rainbow Kale Salad
  2. Upgraded Kale Waldorf Salad
  3. Mediterranean Chickpea and Sundried Tomato Kale Salad
  4. Mini Kale & Mushroom Breakfast Frittatas
  5. Peachy Keen Kale Salad
  6. Tuscan Bean Soup (scroll to the bottom of the page next to the picture of the soup)
  7. Caribbean Island Breeze Smoothie
Kale leaves after being pulled off of the pretty purple stems

Kale leaves after being pulled off of the pretty purple stems

I was on Facebook the other day and was intrigued by the headline, “The Recipe That Will Make You Fall In Love With Kale All Over Again” on MindBodyGreen’s page.

Being the kale lover that I am, I had to click on it.

Reading through the ingredient list piqued my interest, so Bill and I made it for dinner using the purple kale that we had in our fridge. I’m so glad we did!

The lemon juice broke down the bitterness of the kale (as it always does!), and the combo of the sweetness from the dates, complex flavors of the curry powder, bite of the ginger, tanginess of the tahini and crunch of the pumpkin seeds was a real mouth party!

kale salad

Salad Ingredients

  • 1 big bunch of kale (any variety), thinly chopped (about 5 cups)

Dressing Ingredients

  • 2 tablespoons tahini (usually in the international section of the grocery store)
  • 1 tablespoon lemon juice
  • 1/2 teaspoon curry powder
  • 1 garlic clove, minced
  • 1 teaspoon ginger root, peeled and grated
  • 3 Medjool dates, pit removed and soaked in hot water for 10 minutes to soften them
  • 1/8 teaspoon sea salt
  • 1/4 cup water
  • pinch of cayenne pepper

We topped ours with some raw pumpkin seeds for an extra crunch 🙂

Click here for the full recipe from MindBodyGreen!

Ingredients for the salad. This is the best (and cheapest!) tahini we've found. We bought it at a Mediterranean grocery store/cafe nearby called Cedar Cafe

Ingredients for the salad. This is the best (and cheapest!) tahini we’ve found. We bought it at a Mediterranean grocery store/cafe nearby called Cedar Cafe

Paleo Pumpkin Spice Muffins (GF)

paleopumpkinSpiceMuffins

“This is one of the best muffins I’ve ever had.” 

That’s what one of my co-workers said when she tried these the other day.

I served these pumpkin muffins at a client meeting, and one of my other coworkers, who is a meatball sub and Fritos-lover, went back for seconds.

That’s how I knew this recipe was a keeper!

If you’ve been following my blog for some time or are a newbie (welcome!), you’ll notice that all of the recipes are gluten-free and dairy-free, most are vegan (though I am not), and all focus on making “upgrades” to typical favorite recipes…all while nourishing our body!

Some of the recipes I make are also paleo-friendly (no refined or processed sugars or oils; grain-free, dairy-free; bean-free). It’s supposedly the way the cavemen ate.

(There are still disputes about what the cavemen actually ate, so if you’re interested in learning more about that, check out this TED Talk or this post.)

Many people who have health conditions like irritable bowel syndrome, acid reflux, thyroid issues, and even multiple sclerosis find they feel a lot better when they “eat paleo,” even if just for a trial period.

This recipe for pumpkin muffins happens to be paleo, so it should fit with most people’s health needs and concerns. 🙂

IMG_6707

Enough about paleo…let’s talk PUMPKINS!

Fall is my absolute favorite season, and pumpkins are one of my favorite things about fall.

Because I like to focus on WHY we should add in more good stuff (like pumpkin!) to crowd out the other stuff. I want to share just how nourishing pumpkin is for our bodies before we get into the recipe:

  • Fun facts: Pumpkins are actually fruits (not veggies) and are related to cantaloupes and cucumbers (Who knew??)
  • High in fill-you-up fiber, which keeps us “regular” (this is a good thing!) and keeps us feeling satisfied for hours
  • Excellent source of beta-carotene – a potent antioxidant and cancer-fighter that also happens to be good for our eyes and skin health
  • Loaded with lycopene and carotenoids that are known to help “diminish cancer cells, inhibit diabetes, hypertension, the signs of aging, and prevent macular degeneration”
  • Full of potassium, which helps restore our body’s electrolyte balance

I wrote a blog post the other day about some of my top “Sweet Treat Pantry Staples.” You’ll see some of them below (coconut flour, maple syrup), and I mentioned some of the others in my Top 10 Gluten-Free, Dairy-Free Everyday Pantry Essentials post (coconut oil, raw apple cider vinegar).

Paleo Pumpkin Muffins (Gluten-Free)

IMG_6703

IMG_6709

Ingredients

  • ½ cup coconut flour
  • 1 cup canned pumpkin puree (or fresh puree!)**
  • ¼ cup coconut oil
  • ¼ cup 100% pure maple syrup or raw honey (I used maple syrup and loved it!)
  • 4 eggs
  • ¾ tablespoon pumpkin pie spice
  • ½ teaspoon baking soda
  • ½ teaspoon raw apple cider vinegar (Bragg’s brand)
  • ¼ teaspoon sea salt
  • ¼ cup pecans, chopped (I added this ingredient)

I followed the directions in the original recipe but used 100% pure maple syrup instead of honey and sprinkled pecans on top before baking. I really liked the added crunch!

**Make sure you don’t buy pumpkin pie filling if you buy the canned stuff, by the way. It’s totally different from pumpkin puree!

I cooked them for a full 30 minutes. Coconut flour has a tendency to dry out, so make sure you don’t overcook them.

Click here for the full directions for how to make these yummy muffins 🙂

I love my silicone muffin holders!

I love my silicone muffin holders!

How To Stock A Healthy Pantry: 11 Sweet Treat Staples & Baking Basics (Gluten-Free & Dairy-Free)

Nom nom seductive raw chocolate fudge...one of my many yummy sweet treats!

Nom nom seductive raw chocolate fudge…one of my many yummy sweet treats!

When we think of “eating healthy,” images of carrot sticks and rice cakes often come to mind.

I hope that through reading this blog, you’ve come to expand your view of healthy food and how delicious, fun and exciting it can be!

One of the philosophies that shapes my approach to eating, cooking, and baking is the concept of “upgrading and crowding out.” By eating more of the good stuff that nourishes, energizes and heals us, we naturally have less room for the stuff that doesn’t.

In today’s post I want to share some of the staples we always have on hand for all of the sweet treat recipes I prepare (that my hubby loves oh so much!).

As I mentioned in my previous post about my top 10 (gluten-free, dairy-free) pantry essentials, don’t feel like you have to go out and get ALL of these tomorrow.

Just try one at a time – maybe pick a recipe that sounds good that you’ve never made before using that ingredient and see how you like it! You won’t know until you try 🙂

My Top 11 Gluten-free, Dairy-free Sweet Treat Staples & Baking Basics

IMG_5532

Medjool Dates

Why I Love Them: They’re loaded with “keep it movin’ & fill-you-up” fiber as well as dozens of healing, protective, anti-aging, anti-cancer vitamins and minerals (click here for the full scoop on their health benefits!). Not to be confused with “Deglet” dates, which are waxier in texture, Medjool dates are more versatile and flavorful. Dates have become my primary way to sweeten most recipes, as they give sweets a caramel-like texture and flavor…and I LOVE caramel anything. Deglet dates (the ones you’re most likely familiar with) don’t have the same caramelizing effect.

How I Use Them: First and foremost, make sure you remove the pit! All Medjool dates have pits, so squeeze them open, and take it out before using or eating them. I use dates in a lot of recipes: caramel apple dip, healthy donut holes, homemade fudgesicles, dairy-free cheesecakes, chocolate avocado mousse, and almost every smoothie.

One of my favorite snacks is to take a date, split it in half and stuff it with almond butter or peanut butter. You don’t know what you’re missing if you haven’t tried this little bite of caramel bliss!

Where to Find Them: I get a big container of Medjool dates from BJs Wholesale Club, as I’ve found that to be cheapest route to go. Trader Joe’s sells them at a pretty decent price, too. You can also get a good deal on them from Nuts.com (worth ordering something JUST to get the super cool, catchy and creative packaging they use!). Most grocery stores carry them, too – some in the dried fruit section and other stores in the produce section.

IMG_5533

Cacao Powder

Why I Love It: It has more antioxidants than any other food…and gives many of my desserts their chocolate taste! Cacao powder isn’t treated by heat (and therefore damaged) like the more familiar cocoa powder, so its supercharged, health-boosting, disease-fighting antioxidant properties remain intact. Buy it raw and, ideally, organic.

How I Use It: Great in raw or cooked desserts. Try my hubby’s favorite Peanut Butter Cup smoothie or Chocolate-Covered Strawberry smoothie, Chocolate Avocado Mousse, Fudgesicles, Divine Chocolate Peanut Butter Dip, No-Bake Chocolate Fudge, Homemade Rolos, or 2-minute peanut butter chocolate ice cream.

Where to Find It: Wegmans, Whole Foods, and any natural food store like MOMs Organic Market. We get ours online through Amazon Prime. I’ve found that it’s cheaper to buy it on Amazon or Vitacost instead of at the store, unless it’s on sale. This is another product that Home Goods has sometimes, so check out their pantry section the next time you’re there to see if they have it.

IMG_5528

Flaxseed/Flaxseed Meal

Why I Love Them: Known for their anti-inflammatory, disease-preventing, and fat-fighting (AKA GBOMBS!) properties, flaxseeds keep our brain, heart, and joints healthy due to their Omega-3 fatty acid content. Since our body doesn’t produce Omega-3 fatty acids on its own, we need to make sure we’re incorporating them into our diet. Flaxseeds have a nutty flavor and are loaded with fiber, which helps regulate blood sugar (a key to staying energized!), keeps us feeling fuller, and promotes healthy digestion. Flaxseeds are also a great anti-PMS food because of the lignans they contain, which help balance our hormones.

If you buy the whole seeds make sure you grind the seeds before eating them or they will pass through your body undigested.

How I Use Them: You can create something called a flax egg and use it as a substitute for whole eggs in certain recipes. I put a couple of teaspoons of flaxseeds in my morning smoothies, including this seasonal Pumpkin Pie Smoothie and Peanut Butter Cup Smoothie Shake and use it in other sweet treat recipes, including Chocolate Chip Cookies, Chocolate Walnut Brownies, and No-Bake Fig Newton Bites. Remember, all of these recipes are also gluten-free and dairy-free!

Where to Find Them: Most of the major grocery stores, every health food store, Trader Joe’s, Whole Foods, and Wegmans all sell flaxseed. I’ve also had luck finding them in the food section of Home GoodsAmazon, Vitacost and Nuts.com are always options as well!

IMG_6173

Raw Nuts (especially Walnuts, Almonds & Cashews)

Why I Love Them: Dr. Joel Fuhrman, one of the most respected nutrition experts in the world, classifies nuts as one of his GBOMBS foods (the second “S” stands for seeds and nuts) for their anti-inflammatory, anti-fat storage, disease-fighting compounds. They are a great source of heart, brain & joint health-supporting fats and contain fiber and protein to keep us feeling full and satisfied. Buy them raw/unroasted because they take on different flavor when roasted that changes the taste of a dish (especially cashews) .

How I Use Them: In a LOT of recipes! You can toss a few teaspoons in to your morning smoothie, sprinkle them on top of a salad or a jar of overnight oats, toast them and add them to sautéed vegetables or greens. If you have trouble digesting nuts, try soaking them in water overnight before adding them in to dishes, as that makes them easier to digest.

Here are links to recipes on the blog that uses each kind of nuts:

Cashews: These are one of my MAIN sources of making desserts, smoothies, and even cheesecake taste creamy, decadent and satisfying without using dairy! The key is buying raw cashews and usually soaking them in water overnight. Try these recipes: My FAVE parmesan cheese substitute – Paleo Parmesan Cheese, Caramel Apple Dip, Dairy-Free Nacho Cheese Sauce, Mini-Cheesecakes (DECADENT alert!), and Peaches ‘n Cream Smoothie.

Walnuts: Seductive Raw Chocolate Walnut Fudge, Homemade Donut Holes, Simply Amazing Chocolate Walnut Brownies, Upgrade Kale Waldorf Salad, Zucchini Basil Pesto, and No-Bake Fig Newton Bites.

Almonds: Quinoa Almond & Apple Potluck Salad, Garlicky Lemon Green Beans, Ooey Gooey Berry Peach Crisp, Dairy-Free Cheesecake Crust, Donut Holes and Fig-Newton Bites.

Where to Find Them: All grocery stores sell them, but Trader Joe’s and Nuts.com appear to sell them cheapest. Wegmans also sells big containers of raw nuts, and I just got a giant container of raw cashews there that will last awhile! I store all of my seeds and nuts in glass jars in the fridge to prevent the oils in them from going bad.

IMG_5327

100% Pure Maple Syrup (Grade B)

Why I Love It: We’re not talking about the super processed Log Cabin or Aunt Jemima stuff you grew up pouring on pancakes. Those maple-flavored syrups contain lots of highly processed sugar called high fructose corn syrup (HFCS) and other chemical additives as well…basically not real food ingredients. 100% pure maple syrup has a darker color and richer flavor but also has some minerals and antioxidants intact. Keep in mind that it’s still sugar, which is something we should limit our intake of, but on a scale of “good, better, best,” it’s a better choice than pure white table sugar. Click here for the full scoop on maple syrup from Authority Nutrition.

How I Use It: In addition to raw honey, we use maple syrup as our primary sweetener in sweet and savory recipes. It has turned a Brussels sprouts hater into a lover with this recipe, and I’ve used it to sweeten everything from decadent chocolate mousse and Peanut Butter Bliss balls to the sweet and tangy dressing for my favorite kale salad.

Where to Find It: Every grocery store sells 100% maple syrup, but I’ve had to look a little harder to find the good Grade B kind, which is deepest in color and flavor and best for baking. I usually buy a 32-ounce jar at MOMs for about $14 (see picture above!). It lasts for several months, so I don’t mind spending the money. Trader Joe’s also sells Grade B syrup.

IMG_5536

Coconut Milk (Unsweetened, Canned)

Why I Love It: Since cutting out dairy, I’ve had to find alternatives to cow’s milk, and this stuff is a great option. Coconut milk is rich, creamy, and incredibly satisfying. It’s high in saturated fatty acids and medium-chain triglycerides (MCT), which are both easily burned by the body as fuel. MCTs are especially beneficial because bile acids (which we usually need to break down fats) aren’t needed to digest them.

How I Use It: In SO many recipes from one of YOUR favorite recipes, the Set-It-And-Forget-It Comfort Food Casserole, to fudgesicles, frittatas, dairy-free cheesecakes, and coconut whipped cream. Coconut milk gives food a really deep, rich flavor and adds a nice creamy texture to any dish. We always have a few cans in our pantry!

Where to Find It: Every grocery store sells coconut milk, and you can find it at stores likes Target, too. It’s usually in the international foods aisle or in the natural foods section. Buy the canned stuff (not the coconut milk in the refrigerated section of the store). The best brand to buy is Native Forest because their cans are BPA-free. BPA is a chemical found in the lining of canned foods that makes its way into the food, so whenever you buy canned goods look for the words “BPA-free.” Also, buy the full fat kind. You can always thin it out yourself with water if you prefer it thinner. Check out this post by Chris Kresser for more info on coconut milk…even how to make it yourself!

IMG_5538

Shredded Coconut AND Coconut Flakes (Unsweetened)

Why I Love It: I should start by saying I used to HATE coconut. Yup, whenever I got those little Almond Joys or Mounds in my trick-or-treat bag as a kid, into the trash they went. It’s only been in the past 3-4 years or so that I’ve taken to coconut in all forms, but I use it in lots of recipes. See the info in the coconut milk blurb above, but also know that shredded, unsweetened coconut is a healthy, natural sweetener to use in recipes because it won’t spike your blood sugar like white sugar will. Coconut also contains high amounts of two fatty acids that have anti-viral, anti-bacterial, anti-septic and anti-fungal properties.

How I Use It: Simple ways to use shredded or flaked coconut are to toss it in with some homemade trail mix, onto your overnight oats, or into your morning smoothie, or even toast it and toss it onto a salad. I use shredded coconut in my kid-friendly healthy donut holes and Caribbean island breeze smoothie.

Where to Find It: The brand I recommend is “Let’s Do Organic.” You can find it at Wegmans, Whole Foods, MOMs Organic Market, any natural food store, or online at Amazon, Vitacost, and Nuts.com. They sell shredded coconut at every grocery store (usually in the baking aisle or health food aisle) and also at places like Target – just make sure you buy the unsweetened kind!

IMG_5534

Raw Almond Butter (Creamy, Unsalted)

Why I Love It: This has been a staple in our pantry for years, and we always keep several jars on hand. Almonds are a great source of protein, healthy fats (food for our brain, skin, heart, and joints!), as well as several other vitamins and minerals like magnesium, vitamin E, and manganese. It’s best to buy almond butter in its RAW form, which means it hasn’t been heat-treated to high temps and is closest to its natural form (AKA blended almonds).

How I Use It: I love this stuff! I’ll add a tablespoon to my morning smoothies for some creaminess, use it in my Gluten-free Dark Chocolate Chip Cookies, No-bake Chocolate-covered Cookie Dough Bites, Healthy Donut Holes, Berry Quick Overnight Oats, and Raw Almond Butter Cups. To avoid the oil-dripping-over-the-sides-headache when you first open it, store the jar upside down when you first bring it home. When you’re ready to use it, open the jar and stir – the oil will already be partially blended, which will save you from a giant mess!

Where to Find It: By far, the BEST place to buy raw almond butter at the lowest price is Trader Joe’s. About a year ago, I got word that they were discontinuing it and switching manufacturers…and subsequently bought 8 jars of it, thinking they would be my last. Fortunately, they didn’t discontinue it! Yay! Trader Joe’s raw almond butter sells for $3-$7 less PER JAR than almost any other raw almond butter out there. In other words, it’s worth the trip to TJs to get this stuff.

IMG_5537

Rolled Oats

Why I Love Them: Oats are most known for their high fiber content and its ability to help remove cholesterol from our digestive system that would otherwise end up in our bloodstream. The fiber content in oats also helps stabilize blood sugar, which directly translates into how energized we are (stable blood sugar = stable energy). Oats also contain a wide range of vitamins and minerals that give our body the nutrients it needs. For all of those reasons, oats have been tied to healthier hearts, reduced risk of disease like diabetes and cancer, and more stable energy. For information about all of the health benefits of oats, click here.

How I Use Them: I use oats most commonly in breakfast foods like these berry and pumpkin pie overnight oats as well as to thicken drinks like this PB&J smoothie, make a crust for this berry peach crisp, or in these decadent Peanut Butter Granola Bars.

Where to Find Them: I buy a big bag of gluten-free rolled oats at Trader Joe’s and they last me a long time. Oats have a high likelihood of being “cross-contaminated” by wheat because of where they’re processed, so be careful when selecting oats if you’re sensitive or allergic to wheat. You can find rolled oats (NOT instant or quick oats) at any grocery store or online at Amazon or Vitacost.

IMG_5535

Coconut Flour

Why I Love It: Since we cook and bake without using gluten (found in traditional white and wheat flours), this stuff really comes in handy. Not only is coconut flour gluten-free, it’s also a good source of dietary fiber, safe for diabetics (won’t spike your blood sugar!), high in healthy fats and packed with protein. For even more info about why you should get to know this ingredient, check out this article from Food Matters about the Health Benefits of Baking with Coconut Flour.

How I Use It: In baking recipes. It’s NOT a 1:1 substitution for regular flour, so be sure to follow recipes when you start using it. Most paleo recipes (i.e., no beans, grains, dairy, or refined foods) use it as the primary baking flour in addition to almond flour (another great choice for your pantry!). I used it in these Strawberry Lemon Cupcakes, these decadent Chocolate Peanut Butter Bliss Balls and in a pumpkin muffin recipe I will be posting later this week!

Where to Find it: This stuff is popping up at more stores each day. Trader Joe’s sells organic coconut flour for $2.99/bag, so that’s where I’ve been getting mine. Whole Foods, Wegmans and MOMs or Roots will carry it, as will any natural food store. I’ve started seeing it in the more mainstream grocery stores in the gluten-free aisle. You can also order it online at Amazon, Vitacost, or Nuts.com. I’m also a big fan of having almond flour on hand, so check out those same places to buy almond flour.

IMG_5323

Enjoy Life Chocolate Chips

Why I Love Them: These are one of the most “processed” foods we keep around the house. I like them because they’re 1) allergy-friendly (no wheat/gluten, dairy, peanuts, soy, eggs, tree nuts), 2) not genetically modified, and 3) don’t have artificial anything. The only ingredients are unsweetened chocolate and cane sugar (yay for 2 ingredients!) vs. Nestle morsels, which contain Sugar, Chocolate Cocoa Butter, Milkfat, Soy Lecithin, Natural Flavors. I’m all about “upgrading” recipes and finding better alternatives to common foods that we love.

How I Use Them: I might use them in a recipe once a month – again, sparingly – but it’s nice to have an option when a recipe calls for chocolate chips 🙂 I used them in just about every recipe featured in my 5 Favorite Sweet Treats post as well as in Chocolate Peanut Butter Bliss Balls, No-Bake Cookie Dough Bites, the Easiest Chocolate Chip Cookies You’ll Ever Make, AND in one of the best recipes I’ve ever made – Mini Deliciously Dairy-Free Cheesecakes!

Where to Find Them: In the gluten-free or baking section of Wegmans, Target, MOMs and Whole Foods. I’ve found them cheapest at Wegmans or at MOMs if they are on sale or I have a coupon. Use this link on their website to find which stores sell them near you.

Did you like this post? Find it helpful?

I love hearing from you and knowing what you think, so feel free to leave a comment below and share this with your family, friends and Facebook!

Page 8 of 11

Powered by WordPress & Theme by Anders Norén