Notice: Function _load_textdomain_just_in_time was called incorrectly. Translation loading for the social_sharing domain was triggered too early. This is usually an indicator for some code in the plugin or theme running too early. Translations should be loaded at the init action or later. Please see Debugging in WordPress for more information. (This message was added in version 6.7.0.) in /var/www/wp-includes/functions.php on line 6121
Paleo Archives · Page 12 of 13 · Rachel's Nourishing Kitchen

Category: Paleo Page 12 of 13

The Ultimate Pumpkin Pie Smoothie {Dairy-Free, Paleo, Vegan}

How do you know when you’ve come up with a good recipe?

When you find yourself scraping every last bit out of the blender and your glass with a spatula, so nothing goes to waste!

IMG_6864

That’s what happened the other day when I made this pumpkin pie smoothie.

I originally made this recipe back in June but have since tweaked it. I’m up for enjoying pumpkin any time of the year because I LOVE pumpkin!

This smoothie/shake tastes more like a decadent pumpkin pie dessert than a breakfast or snack. I could literally drink this every day!

If you like pumpkin, you have to try this recipe 🙂

If you don’t want to use the spices outlined below, just use 1/2 tablespoon pumpkin pie spice from a jar that already has everything blended.

pumpkin pie smoothie

The Ultimate Pumpkin Pie Smoothie

If you’re in the mood for a seasonal smoothie full of fall spices, try this one!

  • 1 frozen banana (peel before you freeze it!)
  • 3/4 cup almond milk (unsweetened)
  • 1/3 cup pumpkin puree
  • 1 Medjool date (pit removed)
  • 2 tablespoons hemp seeds (hulled)
  • 1/2 teaspoon vanilla extract
  • 1 1/2 teaspoon ground cinnamon
  • 1/2 teaspoon ground ginger
  • 1/16 teaspoon ground cloves ((just a pinch!))
  • 1/16 teaspoon ground nutmeg ((just a pinch!))
  1. Put all ingredients in a blender in the order listed above and blend for 30-60 seconds, adding optional ingredients if you want. Enjoy!

Optional add-ins

  • 1-2 handfuls of baby spinach* (it will change the color but up the nutrients!)
  • 1/4 teaspoon ground turmeric for an anti-inflammatory boost
  • One scoop of protein powder (i.e., ideally, a sprouted version of hemp, pea or brown rice protein powder. I also like Vital Proteins collagen peptides, Sunwarrior, Vega, and Orgain Organics proteins. Find them on Amazon.)
  • Unsweetened, shredded coconut to sprinkle on top

*Notes

  1. Baby spinach has a very mild flavor. It will make your smoothie light green instead of orange but will also boost the nutrient content without affecting the flavor.
  2. You can buy organic, no-sugar pumpkin purée from a can at a health foods store or make it yourself following this process. Just make sure you are buying Pumpkin Puree and NOT canned pumpkin pie filling (they are different).
  3. If your dates aren’t soft, soak them in warm warm water for 20 minutes before blending, so they blend more easily.
“Upgraded” Kale Waldorf Salad

I almost had the privilege of staying at the renowned Waldorf-Astoria Hotel in New York City when I was a senior in high school.

Unfortunately, due to lots of picketing and some sort of boycott, my classmates and I had to change locations and stay at a different hotel during our senior class trip to the Big Apple. Oh well!

The salad I’m sharing today originated in the Waldorf Hotel in the late 1800s and is often a potluck favorite due to the combination of creamy dressing, crunchy celery and walnuts, and sweet, crisp apples.

A bunch of healthy ingredients go into this salad recipe

A bunch of healthy ingredients go into this salad recipe

One of the things I like to do when preparing meals is make some upgrades. “Upgrades” are little changes that basically boost the nutrient score of a particular food or dish. The more nutrients we get in our food, the more our bodies will thank us by staying well and feeling energized!

I made this salad, which puts a healthier spin on the class Waldorf Salad, for a friend’s baby shower last summer, and it was a big hit.

The sweetness comes from apples and raisins instead of the white sugar used in the traditional recipe, and the Dijon mustard, apples, and walnuts blend together to create a creamy dressing without using mayo.

The main “upgrade” to this recipe is the addition of dino kale (a superstar vegetable!). This is a great way to introduce friends and family to kale. It has lots of different textures and great flavor. Bring it to your next potluck!

“Upgraded” Kale Waldorf Salad 

IMG_4761

Ingredients

  • 4 cups packed finely chopped raw kale, preferably dinosaur kale
  • 1 large red apple, such as Fuji or Honeycrisp, chopped, divided
  • 1 cup thinly sliced celery
  • 1/2 cup walnuts, toasted and chopped, divided
  • 1/4 cup plus 2 tablespoons raisins, divided
  • 2 tablespoons Dijon mustard
  • 2 tablespoons water, more if needed
  • 1 tablespoon red wine vinegar
  • 1/8 teaspoon sea salt
  • Optional: 1 tablespoon fresh lemon juice

The dressing will be pretty thick, but I just massage it into the kale. If you find that you need more than 2 tablespoons of water to thin it out, feel free to add in one tablespoon of fresh lemon juice instead of adding more water.

Click here for the full recipe from Whole Foods Market Recipes (one of my favorite recipe apps!).

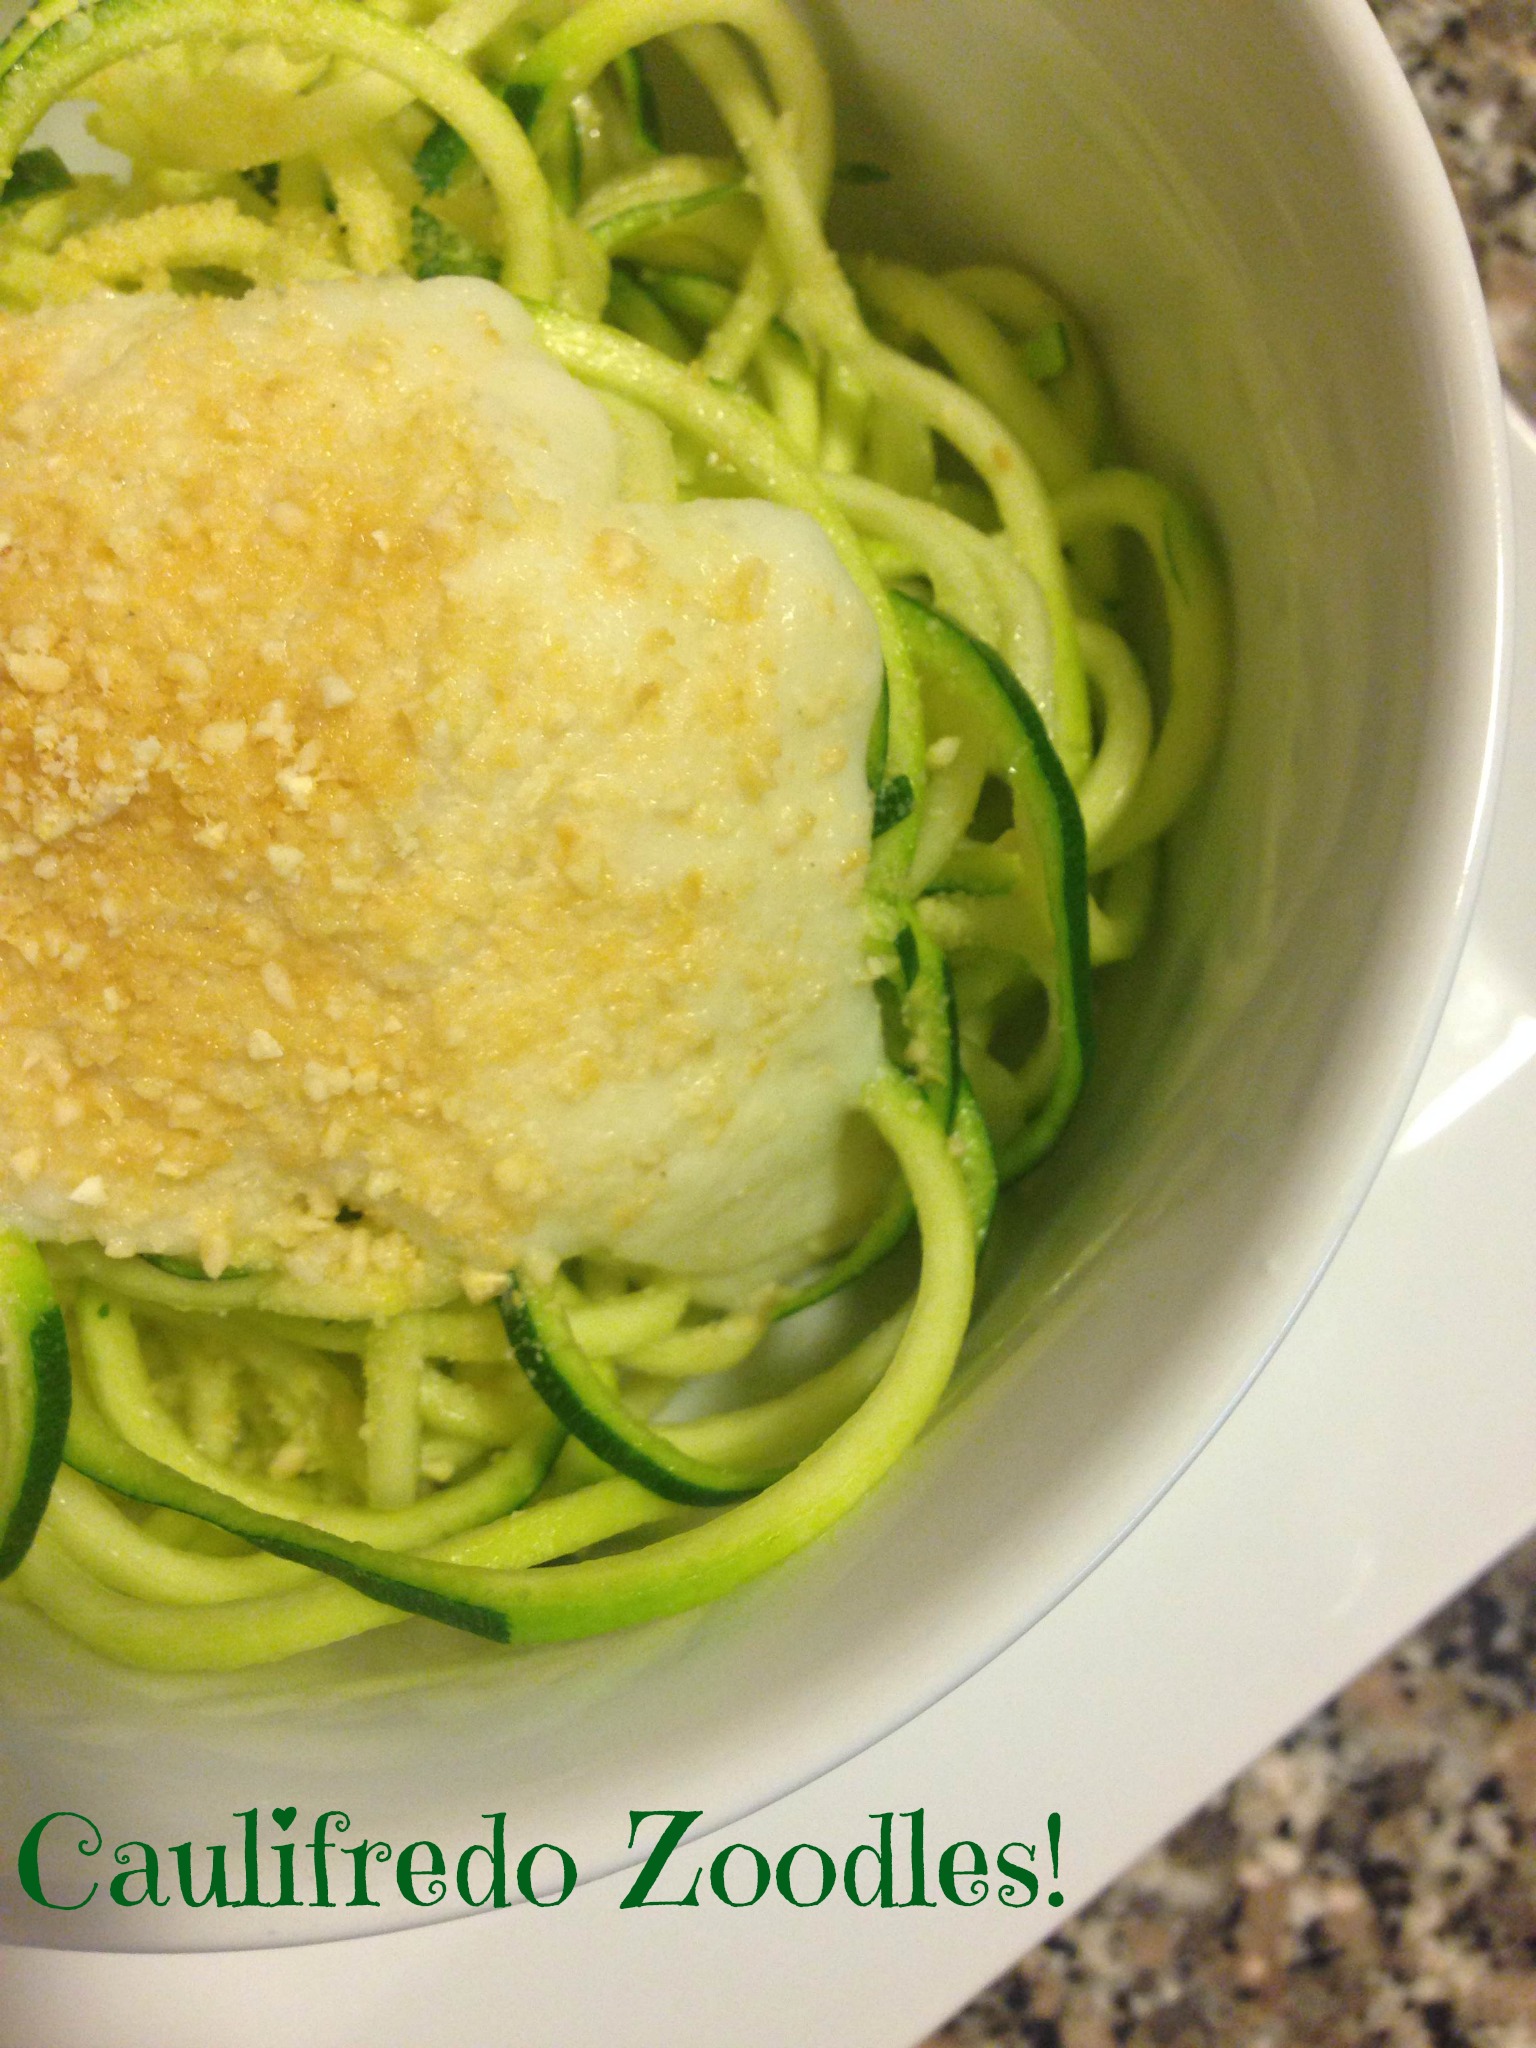
Creamy Cauli-fredo Sauce! {Paleo, Vegan}

Fettuccine Alfredo.

If I had to guess, I would bet this dish is one of the most popular and beloved comfort foods of all time.

But with a cup of butter, almost as much heavy cream, and over a cup of cheese in a typical Alfredo sauce recipe, it’s not something many people can enjoy very often, especially if you’re trying to stay away from dairy or just notice that you feel better without it.

If you absolutely love fettuccine Alfredo, my goal isn’t to get you to give it up for good. Instead, I want to introduce you to a new way of preparing a similar dish…one that is a lot healthier but still creamy and comforting!

The main ingredient?

Cauliflower.

IMG_3944

Cauliflower in Alfredo sauce?? Wait a minute…how can this possibly taste good?

I have to admit, when I first saw this recipe, I was a bit skeptical…and so was Bill.

I know it sounds kind of absurd…but, trust me, it works!

One of my passions is showing how some of our favorite recipes that might not be so healthy can be flipped to a more nourishing version that is still delicious and kid/family-friendly

My ultimate test for knowing whether I’ve made a successful recipe is to have my husband, Bill, try it.

If something we make doesn’t taste good, he has no qualms saying so.

But if it’s delicious, I usually get an emphatic “oh yeah” or “this is great” (which is a lot coming from him!).

Bill and I were pleasantly surprised by the outcome of this recipe and licked our bowls clean!

Not only does this recipe taste delicious, but it doesn’t use any fancy ingredients and can be whipped up in about 20 minutes.

caulifredo

Ingredients

  • 4 zucchini, spiralized using this awesome gadget! (You could also sub in your favorite gluten-free pasta of choice – we like the Tinkyada brown rice pasta)
  • 2 teaspoons extra virgin olive oil

Caulifredo Sauce

  • 3 cloves garlic, minced
  • 1 tablespoon extra virgin olive oil or grass-fed ghee
  • 1 head cauliflower, chopped into florets (here’s how to break apart a head of cauliflower in seconds!)
  • 1 cup water
  • 1 teaspoon sea salt
  • ½ teaspoon onion powder
  • 1 generous pinch of pepper, to taste
  • juice from 1/2 lemon (about 1.5 tablespoons)

Directions

  1. Sauté the minced garlic in coconut oil or butter in a medium saucepan over low heat. Allow to cook for a few minutes, until the garlic is tender and fragrant but not browned.
  2. Add the 1 cup of water to the saucepan, along with the cauliflower florets, and bring the water to a boil. (The water will not cover the cauliflower, but that’s okay.) Once the water is boiling, reduce the heat to a simmer and cover the pot for 12-15 minutes or until the cauliflower is fork-tender and very soft.
  3. Transfer the entire contents of the saucepan into a blender or food processor, and season with salt and pepper. Add in lemon juice and onion powder. Process until very smooth and creamy, with a texture similar to traditional cream sauce. (Always be careful when blending hot liquids– the steam pressure can blow the lid off your blender!).
  4. Season with additional salt and pepper, if desired, and serve hot. If it seems thick, add more water. If it seems dry, add a liberal drizzle of olive oil.
  5. Place spiralized zucchini in a medium-sized frying pan greased with coconut oil, and stir for 3-4 minutes or until zucchini takes on a cooked pasta texture, sort of wilted and soft. Be careful not to overcook.
  6. Transfer zucchini noodles (AKA “zoodles”) to a plate or bowl and pour sauce on top. Sprinkle this 3-ingredient paleo parmesan cheeze on top and start eating!

Roasted Garlic Cauliflower Mash {Plus How to Break Apart Cauliflower…Easily!}

I love putting healthier spins on recipes that we think we “can’t have” when we’re eating healthy.

One of my goals is to help you make healthier, more empowered choices around food so you can look and feel your best and have all the energy to do the things you want to do in your life…without feeling deprived!

Today we’re going to focus on one of most people’s all-time favorite foods…mashed potatoes.

Except we won’t be using potatoes. We’ll be using another seasonal vegetable instead…cauliflower!

Trust me on this one. I was skeptical at first, too, but we served this at my mom’s birthday dinner, and everyone gobbled it up!

After trying this dish, you may find that you prefer it over traditional mashed potatoes, which tend to spike our blood sugar and don’t contain all of the nutrients and cancer-fighting power we can find in cauliflower.

cauliflower-1465732_1920

First, a few words about the amazing health benefits we can find in cauliflower. I like knowing “why” something is good for me…not just whether or not it is!

Cauliflower’s green friend, broccoli, tends to get way more hype, but cauliflower is a potent cancer-fighter, too, and a fellow cruciferous vegetable.

Here are a few reasons why you may want to add more cauliflower into your life!

  1. It’s a GBOMBS food. Read more about anti-cancer, anti-inflammatory GBOMBS here.
  2. It contains sulforaphane, a compound that kills cancer stem cells, thereby slowing tumor growth. It also greatly improves blood pressure and kidney function AND promotes digestive health.
  3. It fights inflammation. Inflammation is at the root of why we are sick and can’t seem to get rid of stubborn weight. Reduce inflammation, and you’ll be much more likely to resist disease and release weight.
  4. It’s loaded with disease-fighting and health-boosting vitamins, minerals, antioxidants, phytochemicals (think FIGHT-o-chemicals J)
  5. It helps us detoxify. In addition to inflammation, toxicity causes us to get sick and keep packing on the pounds. The more we help our bodies detox, the better off we’ll be.

If you’ve never bought a whole head of cauliflower before, it can be kind of tricky to break apart, so I’ve added a video that shows you how to make that process super easy!

https://www.youtube.com/watch?v=Lp4azkycy8g&feature=youtu.be

Here’s a link to order the towels I mentioned in the video. I learned about them by reading Tim Ferriss’ book, The 4-Hour Chef, and we love them because they make fantastic dish towels!

Convinced yet? If you like mashed potatoes, you will love the recipe below! It’s a healthier alternative to traditional mashed potatoes because of all of cauliflower’s awesome health benefits above and because it won’t drive up blood sugar the same way a white potato will.

Looks just like mashed potatoes...right?

Roasted Garlic Cauliflower Mashed “Potatoes”

Ingredients

  • 1 head cauliflower, cut into florets, stems and leaves removed
  • 1 head garlic, roasted (click here for how to roast garlic) 
  • 1 tablespoon extra virgin olive oil, ghee or grass-fed butter (if you can tolerate a little dairy)
  • 1/2 teaspoon coarse sea salt
  • black pepper, to taste
  • 1 tablespoon fresh thyme (prefered) or 1 teaspoon dried thyme
  • 1 teaspoon yellow corn meal (prevents it from being watery)
  • 1-2 tablespoons almond milk, unsweetened

Directions

  1. Put the cauliflower in a steamer basket over 1-2 inches of water in a pot. Bring water to a boil and steam the cauliflower until it softens (about 12-15 minutes). You should be able to stick a fork through it easily.
  2. Put the cauliflower in a food processor and add the garlic, ghee/butter or oil, black pepper, sea salt, thyme, and cornmeal.
  3. Pulse to achieve desired consistency (chunky vs. smooth). If you’re using almond milk, add it 1 tablespoon at a time.
  4. Adjust seasonings based on your taste preferences. Enjoy!

Chocolate-Covered Strawberry Smoothie

Chocolate-covered strawberries…for breakfast? Why not!

When I was a little girl, there was a strawberry man who would ride a horse drawn cart around our neighborhood and shout, “Strawwwwberries! Strawwwwwwberries!” as he sold pints of fresh strawberries to us and our neighbors.

I couldn’t quite say such a complicated word at the time, so my dad tells me that I called them “strawbetties.” 🙂

Berries have always been my favorite fruit, so I try to take advantage of them for the limited time they’re in season each year, which happens to be right now for strawberries!

Mmmm strawberries :)

Mmmm, locally grown strawberries

Not only do they taste delicious raw or cooked, but they’re also loaded with fiber and antioxidants, low in sugar, and are one of the 6 GBOMBS foods (anti-cancer/anti-fat storage!). Eat berries…lots of them!

For today’s recipe, I used frozen strawberries, but you could very easily just use fresh ones and throw in a few extra ice cubes OR cut the tops off of fresh berries and then put them on a parchment paper lined container and freeze them yourself 🙂

I don’t know about you, but chocolate-covered strawberries are one of my favorite treats, and this recipe gives us a nourishing way to have our strawberries AND chocolate. Try this smoothie/shake for breakfast, a midday snack, or as a dessert. It’s really yummy!

Cacao powder is one of the superfood ingredients in this recipe. Cocoa powder (such a slight difference in spelling!) is treated with heat, which destroys a lot of the health-boosting antioxidants of the cacao plant (where chocolate comes from!), so we use cacao powder instead. It’s a little more bitter, but it does the trick to create a chocolately taste! You can find it online or at a natural food store, Wegmans, Whole Foods, MOMs or Home Goods.

To learn more about the difference between cacao powder and cocoa powder, click here. Otherwise, check out the recipe below!

Chocolate-Covered Strawberry Smoothie

Chocolate-covered strawberry shake! I topped mine with some cacao nibs for a little crunch :)

Chocolate-covered strawberry shake! I topped mine with some cacao nibs for a little crunch 🙂

Ingredients

  • 1 cup water or almond milk
  • 1 frozen banana
  • 1 cup frozen organic strawberries
  • 1/4 ripe avocado
  • 2 handfuls fresh spinach
  • 1/2 teaspoon vanilla extract
  • 1 heaping tablespoon raw cacao powder
  • ice, if needed for texture

Click here for the full recipe from The Detoxinista!

Breakfast To Go: Mini Make-Ahead Frittatas! {Paleo, Gluten-Free}

Many of us are looking for simple solutions to make meals that are quick, affordable, delicious…and, if possible, healthy.

This recipe for mini frittatas will become a staple at your house if you’re looking for any of those things! It’s great for breakfast or brunch and is super kid-friendly, too.

Loving all of our fresh ingredients!

Loving all of our fresh ingredients!

This recipe includes a variety of super healthy foods, including kale, mushrooms and shallots. As I’ve written before, kale is a superstar vegetable and one of the healthiest foods we can eat. Mushrooms and shallots also have tons of health benefits, including being potent cancer fighters, like other anti-cancer, anti-fat storage GBOMBS foods.

We get our eggs from Hometown Harvest, and they’re from pasture-raised chickens that aren’t crammed in pens and injected with a bunch of antibiotics like most chickens. The eggs are delicious!

I ended up with 12 mini egg frittatas (make a double batch to save time if you want!). You could easily make this on a Sunday and have them for the week for meals.

These should keep in the fridge for 3-4 days, or you can wrap each one individually in plastic wrap and foil and store them in the freezer for a few weeks. I find that reheating them in the oven or toaster oven works best so they don’t get rubbery, but you can try reheating in the microwave, too. From frozen, try 30-60 seconds and from the fridge, try 15-20.

Mini Make-Ahead Frittatas

YUM! These mini egg muffins are bursting with flavor and SO yummy

YUM! These mini egg muffins are bursting with flavor and SO yummy!

Ready for breakfast!

Ready for breakfast!

Ingredients

  • 8 eggs (we get ours pasture-raised from Hometown Harvest)
  • 3 shallots, diced
  • 4 cloves of garlic, minced
  • 1 1/2 cups cremini mushrooms, chopped
  • 1 teaspoon fresh rosemary, finely chopped
  • 1 teaspoon fresh thyme, finely chopped
  • 2 cups kale, chopped and tightly packed
  • 1/2 cup coconut milk (we use the unsweetened full fat version)
  • 1-2 teaspoons coconut oil
  • 1/4 teaspoon sea salt
  • freshly ground black pepper

Directions

  1. Preheat oven to 375F and coat the muffin tins with a thin layer of coconut oil to prevent sticking.
  2. In a medium skillet (we used a cast iron skillet), saute the shallots until translucent. Then, add in the garlic, mushrooms and herbs, and saute until the mushrooms start to shrink (4-6 minutes). Add in the kale, tossing it until it starts to wilt. Turn off the heat and set veggies aside to cool for about 10 minutes.
  3. Whisk the eggs together in a medium bowl with the coconut milk, salt and pepper.
  4. Stir the cooked veggies in with the eggs and pour the mixture into muffin tins, filling each about 75% of the way to allow room for puffing up.
  5. Cook for 20 minutes, flipping and rotating the tray halfway through, until the muffin edges turn golden.
  6. Let cool before serving. They will puff up during cooking and shrink down once cooled. ENJOY!

Feel free to change it up by adding YOUR favorite veggies! Try any combination of the following vegetables, or make up your own combo. I like using broccoli, onions, peppers, scallions, sundried tomatoes, diced tomatoes, spinach, asparagus, or even Swiss chard. Get creative with it 🙂

Minty Watermelon Mojito Salad

Mojitos are my favorite cocktail.  The combo of tart lime and smooth mint is so cooling and refreshing and perfect for summer!

Mmm, fresh mint, limes, and seedless cucumber

Mmm, fresh mint, limes, and seedless cucumber

I remember my first mojito experience.  

I had just come home from a semester abroad in Granada, Spain and was really into everything about the Hispanic culture from the food to the music and dancing. I loved their energy, vitality and enthusiasm for life!

When my friend Allyson invited me to go with her and some friends to The Latin Palace in Fells Point shortly after returning from my trip, I was all in. I had a blast as I was led through all sorts of Latin dances for hours!

When it was time to take a break from dancing, I was introduced to what would become my favorite mixed drink – mojitos.

WOW!

It’s been almost 10 years, and I still don’t think I’ve had a mojito that was as perfectly prepared as my first.

As I was looking for recipes to prepare today for a Memorial Day cookout, I stumbled across this one for a minty watermelon mojito salad.

How could I resist?? 

Watermelon + mint + lime + cucumber = the ultimate warm weather refresher.

It’s DELICIOUS and was really simple to prepare, too. This will be a hit at any cookout, picnic or party, and I guarantee kids will love it, too!

Minty Watermelon Mojito Salad

Ridiculously refreshing minty mojito watermelon salad

Ridiculously refreshing minty watermelon mojito salad

Ingredients

  • 3 cups seedless watermelon, cubed (here’s how to pick a perfect watermelon)
  • 1.5 cups seedless cucumber, cubed
  • 2 tablespoons fresh mint leaves, sliced thin (“chiffonade” if we’re being fancy about it)
  • 1/4 cup fresh lime juice (about 2 limes)
  • Zest from two limes (here’s the zester I use)
  • 1 tablespoon extra virgin olive oil
  • Pinch of sea salt
  • Pinch of black pepper

Click here for the full recipe from one of my new favorite blogs – Stupid Easy Paleo!

Thank you to all of the men and women who selflessly serve our country, especially our friend, Joe, who recently left for a multi-year tour in Germany!

2-Minute Peanut Butter Banana Ice Cream!

I scream, you scream, we all scream for (peanut butter) ICE CREAM!

I grew up loving ice cream and had an ice cream cake for every birthday, but since I’ve cut out dairy products, I’ve had to come up with other options.

With the weather getting warmer (finally!) and summer on its way, I wanted to share this recipe to give you a healthier option for ice cream! You can make it in the best ice cream maker you have, or use the method I have planned out below!

Today’s recipe for peanut butter banana ice cream is incredibly simple, kidfriendly, and deliciously dairyfree.

It turns out JUST LIKE soft serve ice cream in texture and consistency, so I know it will become one of your new favorites!

Even the ingredients are simple. In fact, you probably already have all of them on hand! Not only that, but this is a GREAT way to use up bananas that have seen better days rather than throwing them away 🙂 Just peel and then freeze them so you’re always prepared to make banana ice cream!

pb-ice-cream-scoop

Ingredients

  • 2 ripe bananas, peeled, frozenm and cut into 1/2″ discs
  • 2-3 tablespoons natural peanut butter
  • 1/2 teaspoon vanilla extract
  • pinch of sea salt
  • Optional: 1/4 avocado for extra creaminess

Chocolate Peanut Butter variation: Add 1-2 tablespoons cacao powder (to make peanut butter chocolate ice cream!)

Directions

Banana discs and peanut butter ready to go!

Step 1: Frozen banana discs and peanut butter ready to go!

Step 2: Put the bananas in the food processor (we used a mini one)

Step 2: Put the frozen bananas in the food processor (we used a mini one)

This is the big food processor we use and this is the mini one. You can make the banana ice cream in either one. We bought our mini one at Home Goods for about $28!

Step 3: Grind the bananas until they resemble this gravel-like consistency

Step 3: Grind the bananas until they resemble this gravel-like consistency

Step 4: Keep pulsing until the bananas resemble this consistency and then add in the peanut butter, vanilla extract and salt

Step 4: Keep pulsing until the bananas resemble this consistency and then add in the peanut butter, vanilla extract and salt. If making chocolate peanut butter ice cream, add the cacao powder at this point, too.

Tada! Peanut butter banana ice cream!

Tada! Peanut butter banana ice cream!

Super Simple Asparagus Spears

Asparagus is in season, so I couldn’t wait to make one of my favorite, super simple springtime recipes starring this beauty detox vegetable. Check out all the cool things asparagus helps your body do!

  • Create the proper electrolyte balance (and reduce puffiness) because of its potassium content
  • Cleanse the digestive system and get rid of toxins because of its high fiber content
  • Better absorb calcium
  • Prevent urinary tract infections and kidney stones

To prep asparagus spears, you’ll first need to snap off the “tough” bottom part. Hold the spear with both hands and bend until the bottom snaps off. It will naturally break off where the tender portion ends and the tough, woody part begins. Use one spear as a guide for where to cut the rest of the bunch.

One of the tastiest ways to prepare asparagus is to roast it, but I also enjoy it in salads and soups. If you prefer, you could grill this recipe, too!

Super Simple Asparagus Spears

Perfect for the spring!

Perfect for the spring!

Ingredients

  • 1 bunch of asparagus
  • 1-2 tablespoons of extra virgin olive oil
  • zest of 1 lemon
  • fresh-squeezed lemon juice
  • sea salt and pepper, to taste
  • Optional: toasted almond slices

Directions

  1. Preheat the oven to 400F.
  2. Toss asparagus in the oil and sprinkle with sea salt and pepper. Place stalks on a foil-lined baking sheet, so they’re not touching, and roast for 8-10 minutes. (Well-cooked spears are tender when pierced with a fork but still bright green in color. Be careful not to overcook. We don’t want limp and dull green asparagus!)
  3. Remove the asparagus from the oven and dust with lemon zest. Add more salt and pepper to taste.
  4. Squeeze a little lemon juice on top for extra flavor, and top with toasted almond slices for some crunch!

Is it your first time trying asparagus? You might notice that your pee smells funny when you go to the bathroom after eating asparagus, but that’s totally normal!

Make Your Own Zucchini Pasta…In 5 Minutes or Less!

Growing up, I LOVED pasta, especially angel hair pasta. I ate it multiple times a week with butter, garlic powder and heaps of parmesan cheese. It was my go to meal, even in college.

Since removing gluten from my diet a few years ago, I’ve tried alternatives like lentil and brown rice pasta (that are delish!), but sometimes I want something even lighter.

If you’re looking for some creative alternatives to pasta that are packed with nutrients, won’t weight you down and are perfect for warmer weather, you have to try…zucchini noodles.

AKA Zoodles!


Meet, the spiralizer. This gadget will open a whole new world of food possibilities for you. You can use it with zucchini, carrots, beets, cabbage, and a range of other fruits and veggies. Better yet, if you have kids and you’re trying to introduce them to certain veggies, let them use this gadget and I bet they will be a little more tempted to try what they spiralize!

I’ve included a video below for how to use it.

https://www.youtube.com/watch?v=XbLHyAY_KRI&feature=youtu.be

Zucchini noodles are a great alternative to pasta because they don’t spike our blood sugar or contain gluten like most pasta. You’ll be AMAZED at how similar the texture is to pasta…you can still twirl it on your fork, too!

Zucchini Pasta with Roasted Red Pepper Pesto

IMG_3471

Ingredients

  • 2 zucchini
  • 1 roasted red pepper
  • 1/3 cup walnuts
  • 2 garlic cloves
  • dash of sea salt and freshly ground black pepper
  • paleo parmesan cheeze

Directions

  1. Here’s the fun part…spiralize the zucchini! Watch the video below to learn how. (Then, cut the the strands in chunks with scissors, otherwise you will end up with one very long strand of pasta!)
  2. To make the pesto, put the red pepper, walnuts, garlic, and sea salt in a food processor (we used a mini one), and pulse until blended but still a bit chunky.
  3. Top the zucchini pasta with one or two spoonfuls of pesto and some paleo parmesan cheeze and enjoy!

http://youtu.be/tMcXmQghv64

Page 12 of 13

Powered by WordPress & Theme by Anders Norén