Tag: Side Dish

Simply Sautéed Mushrooms {& Cauliflower Mash}

Jenna, one of the participants from a recent cooking class I taught about healing foods, had this to say about today’s recipe:

Everyone in my family thought the cauliflower mash was potatoes!!!! They were super creamy.”

Jenna is in high school but is going to be doing big things in the healing foods space in the coming years, as she pursues studies in nutrition in college. Keep your eye out for her!

rachel-jennaI’ve shared the base of this recipe before in this post for Roasted Garlic Cauliflower Mash but put a new spin on it by topping it with mushrooms, a food often used as a stand-in for meat because of their chewy texture.

Mushrooms are immune-boosting, cancer-fighting powerhouses and don’t get nearly enough love in our kitchens and on our plates.

mushrooms-solo

I hated mushrooms for most of my life because I was too grossed out by what they looked like to even be open to trying them. Now, I’m a big fan, whether they are chopped up in a soup or stew, roasted, or served sautéed like they are in this dish.

You can serve this up as a Thanksgiving side dish. It’s a great way to upgrade your plate without sacrificing flavor. With a whole head of roasted garlic and a tablespoon of fresh thyme in the potatoes along with a generous sprinkling of oregano on the mushrooms, no one will complain that this dish lacks flavor.

Next step? Come up with a sauce to top it off 🙂

mushroom-mash-angle mushrooms-mash-closeup

Simply Sautéed Mushrooms 

Ingredients

1 (8-ounce) package cremini (baby Portobello) mushrooms, wiped clean and sliced
2 tablespoons avocado oil, coconut oil, or extra virgin olive oil
1/2 tsp sea salt
Black pepper, to taste
1⁄2 tsp dried oregano

Directions

  1. Heat oil in a large skillet over medium high heat until oil shimmers.
  2. Add mushrooms to pan, evenly coating them with oil. Spread into a single layer and let cook for 5-6 minutes.
  3. Add salt and pepper, stir and cook 5-6 minute more, until mushrooms begin to brown and soften. Toss with oregano and serve.

Serve as a side dish or on top of some roasted garlic cauliflower mash.

Easy Sauteed Greens & Onions {Paleo, Vegan}

As often as I share recipes for sweet treats and snacks, you might think that’s all I eat!

Fortunately, that’s not the case.

In fact, I’m a huge fan of vegetables and I eat LOTS of them. I eat vegetables at almost every meal and am a big fan of what Michael Pollan has to say about them:

IMG_2198-0

He goes on to say:

THAT, more or less, is the short answer to the supposedly incredibly complicated and confusing question of what we humans should eat in order to be maximally healthy.

Pollan’s advice is something that everyone in the nutrition community can 100% agree on, which is a rare thing these days.

Most of us spend so much time pitting one diet against another that we lose sight of the basic, universal truths all of us believe and know to be true about food and want people to know.

That’s why I wanted to share this recipe with you today. It’s loaded with plant-based goodness.

I’ve been cooking this dish for over 5 years and, for whatever reason, had never taken the time to share it with you!

greens onions

What prompted me to do it was hosting a table at two client health fairs in the past week and sharing my passion for G-BOMBS. G-BOMBS is an acronym coined by Dr. Joel Fuhrman, who wanted to come up with a simple way to remember the most nutrient-rich, anti-aging, immune-boosting, disease-preventive, protective foods on the planet.

You can read more about G-BOMBS in this blog post (which happens to be the most often read post on this blog!), but to sum it up here, it stands for:
Greens
Beans
Onions
Mushrooms
Berries
Seeds

This dish uses 4 of the 6 GBOMBS, but I’ve made a version of it with all 6 and will share that in another post.

A stack of Swiss chard at the farmer's market!

A stack of Swiss chard at the farmer’s market!

In this recipe, I’m using Swiss chard, a leafy green vegetable that often has colorful stems (rainbow chard) or white stems (regular chard). It’s a softer green than kale or collard greens, and it works really well in this recipe and in frittatas.

It’s packed with anti-aging antioxidants, anti-inflammatory compounds, supports bone health because of its high vitamin K and magnesium content, and has even been found to benefit blood sugar regulation – a KEY to having sustained energy and maintaining a healthy weight. Read more about this super star veggie here.

It comes together in about 20 minutes and is great for breakfast, lunch or dinner. We use it as a side dish and can easily split the whole thing between the two of us. It’s versatile, too.

Don’t have Swiss chard? Use kale.
No pumpkin seeds? Try sunflower seeds.
Out of red onions? Use yellow.

Just make the dish. It’s delicious, packed with nutrients and flavor and is simply prepared. Simple is doable, and simple is often best 🙂 Enjoy!

greens saute words greens plate

Servings: 4 people

Ingredients
1 tablespoon coconut oil or ghee (clarified butter)
1 red onion, thinly sliced into half moons
3 garlic cloves, minced
1/3 cup water
1 1/2 bunches Swiss chard
1 1/2 tablespoons raw apple cider vinegar or fresh lemon juice (about 1/2 of a large lemon)
1/4 cup lightly toasted pumpkin seeds or sunflower seeds
1/4 cup dried cranberries or goji berries (optional)
Scant 1/2 teaspoon coarse sea salt
Freshly ground black pepper

Directions

  1. Cut off stems at base of chard and compost or toss it. Chop chard leaves into 1/2 inch strips and set aside.
  2. In a large skillet over medium heat, melt oil/ghee. Add onions and cook about 10 minutes or until soft and translucent.
  3. Add the garlic and cook until soft, but not browned (it turns bitter when it browns). Add 1-2 tablespoons water to prevent sticking, if needed.
  4. Turn heat to medium-high and add greens and remaining water and toss with tongs to combine. Cover with a lid and cook for 4-5 minutes until greens are wilted but still BRIGHT green.
  5. Remove from heat and toss greens with cider vinegar (or lemon juice), pumpkin seeds, cranberries and sea salt and pepper, to taste, until everything is evenly coated and combined.

A New Veggie Recipe to Try (Plus Natural Heartburn Relief!)

Bill and I love going out to new restaurants to eat, but doing that more than a couple times a month can really add up!

Sometimes, we choose to create our own meals at home for a fraction of what we would have paid at a restaurant.

Plus, we don’t have to worry about tacking on a tip to the meal or running late (which never happens… 🙂 )

Out to dinner at Woodberry Kitchen, one of our favorite restaurants, for our one-year anniversary

Out to dinner at Woodberry Kitchen, one of our favorite restaurants, for our one-year anniversary

When we were figuring out what to make for dinner the other night, we decided to try a new vegetable. It keeps the meal exciting and makes it more like a true restaurant experience.

Not only that, but the vegetable we used has some serious medicinal/healing properties that help our digestive system work better (bonus!).

As I’ve been working on healing my digestion over the past few years (it’s a process!), I’ve learned a thing or two about what foods make it work best. After years of going from doctor to doctor, surgery to surgery and pill to pill to “fix” me, I finally feel like I have some answers…and let me tell you, it has been a really empowering experience and confidence-booster!

Apparently, the combination of all of the antibiotics I took as a kid and the 10 years of daily acid reducers as an adult, along with the lifetime impact of eating lots of processed, packaged foods and what turned out to be problem foods for me (dairy and wheat) did a number on my digestive system.

I didn’t know it at the time, but they were also some of the reasons I used to get sick so often, struggled with 15-20 pounds that just wouldn’t budge, and why I had lots of bloating, gas, and other digestive frustrations. Sounds like a party, right?

I had no idea that 70-80% of my immune system was located in and around my digestive tract, mainly my intestines. By healing my digestion, I would start to heal (and energize!) my entire body. Who knew??

The main reason I’m such a fan of this lesser known veggie is because of how healing it is for the stomach and rest of the digestive system.

It’s also a potent cancer fighter.

Fennel bulbs

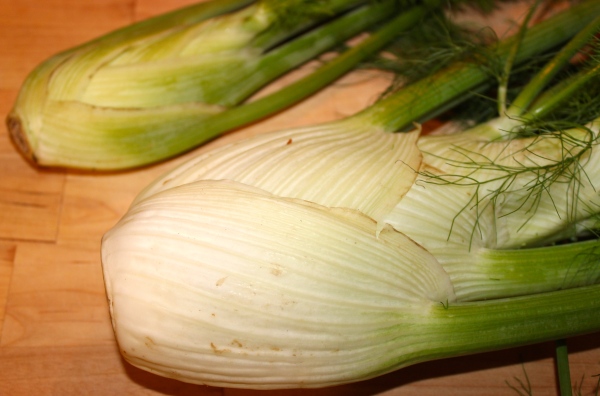
Funky-looking fennel bulbs!

Meet fennel.

Fennel is a plant that most of us have heard of but few of us have actually bought/prepared/eaten. It has a very mild licorice flavor and is subtly sweet.

You’ve probably walked by it at the grocery store, given it an odd look, and thought, “What the heck is that, and what do I do with it??” I’m here today to tell you!

Fennel and licorice are both known as digestive soothers, and many people (especially those with reflux/heartburn/indigestion) find that drinking fennel tea, and taking either digestive enzymes containing fennel or DGL (deglycyrrhizinated licorice) tablets before a meal promotes improved digestion. My mom now swears by DGL tablets, and I’ve had lots of success taking them myself.

DGL tablets create a soothing coating that lines your digestive system prior to eating, which calms and soothes your digestive tract and reduces the likelihood you’ll have to deal with indigestion, gas and bloating. Pretty cool, right?

Click this link or this one to order DGL tablets and learn more about them. Talk to your doctor or to a functional medicine doctor about whether these could be a good option for you.

Now, back to the veg!

Fennel tastes delicious when roasted, so that’s how we prepared it today.

We served the roasted fennel with some local, grass-fed beef tenderloin along with broccoli that was lightly steamed and then sautéed with roasted red pepper flakes, garlic, and some sea salt and pepper. It was a very tasty meal!

There you have it. Now you no longer have an excuse to ignore fennel at the grocery store or farmer’s market...and have lots of reasons to try this super healthy, medicinal veggie!

Easy Oven-Roasted Fennel

Roasted fennel with beautiful caramelization!

Roasted fennel with beautiful caramelization!

Ingredients

  • 1 pound fennel, quartered lengthwise (I used 2 bulbs)
  • 1-2 tablespoons of extra virgin olive oil or coconut oil
  • 1/2 teaspoon of sea salt, more to taste
  • freshly ground black pepper, to taste
  • juice from 1/2 lemon
  • Optional: sprinkle some freshly chopped rosemary on top before roasting

Directions

  1. Preheat oven to 475F.
  2. Follow the step-by-step pictures below to prep and quarter the fennel.  Cut off the green stalks and a 1/2″ disc from the bottom of the bulb, and remove any discolored outer leaves from the bulb, so you’re just left with the white/light-green fennel bulb to quarter and roast.
  3. In a medium bowl, toss the fennel quarters with your choice of oil, sea salt and black pepper.
  4. Put the fennel on a parchment or foil-lined baking sheet, cut-side down, so they’re evenly spaced out. Roast for 15 minutes, or until the edges begin to brown. Flip the fennel to the other side and continue roasting until they are browned, about 10  more minutes.
  5. Place the fennel back in the bowl you tossed them with and squeeze the juice of half a lemon on top of the fennel. Toss to coat evenly.
Chop off the bottom tough disc - about 1/2"

Chop off the bottom tough disc – about 1/2″

Chop off the tougher green parts. You can save them and throw them into soups as you would celery. You can save the fuzzy parts (AKA fronds) and use them as decoration like you would dill.

Chop off the green stalks. You can save them and throw them into soups as you would celery. You can save the fuzzy parts (AKA fronds) and use them as decoration like you would dill.

Chop the white bulb into quarters

Chop the white bulb into quarters

This is what the bulb looks like inside once you've quartered it

This is what the bulb looks like inside once you’ve quartered it

Give it a nice drizzle of coconut or olive oil along with some sea salt and black pepper before putting it in the oven to roast!

Give it a nice drizzle of coconut or olive oil along with some sea salt and black pepper before putting it in the oven to roast!

Powered by WordPress & Theme by Anders Norén