Category: Dairy-Free Page 5 of 20

Bill’s Chocolate Peanut Butter Energy Bites

My husband, Bill, is in the process of preparing his mind and body for an epic life event – his first Ironman triathlon in Lake Placid, New York this summer.

With only one triathlon under his belt, he knows what he is about to do in a few short months is no small feat, but he is determined to make it happen.

He’s training with my dad, who has completed five Ironman races since starting at the age of 56, and will be competing in his sixth Ironman with Bill at the age of 66.

Dad Bill Columbia

Bill has been diligent about his training, putting to use the discipline he’s learned as a lifelong athlete.  His training schedule is rigorous and requires activities like four-hour bike rides on a Saturday morning and 5:00 a.m. swims at the gym in order to be guaranteed an open lane.

People often ask me, “Are you going to do one?” (Translation: Are you going to swim 2.4 miles in a lake, bike 112 miles through the mountains, and then run a marathon (26.2 miles)?)

Hmmm, let me think about that…probably not 🙂 It doesn’t appeal to me in the least!

What does appeal to me and what I do enjoy is making sure Bill is well fueled and nourished. Eating well is an often overlooked aspect of athletic training. It’s critical for ensuring your body has enough energy and strength to endure long training hours and essential for speeding up the recovery process.

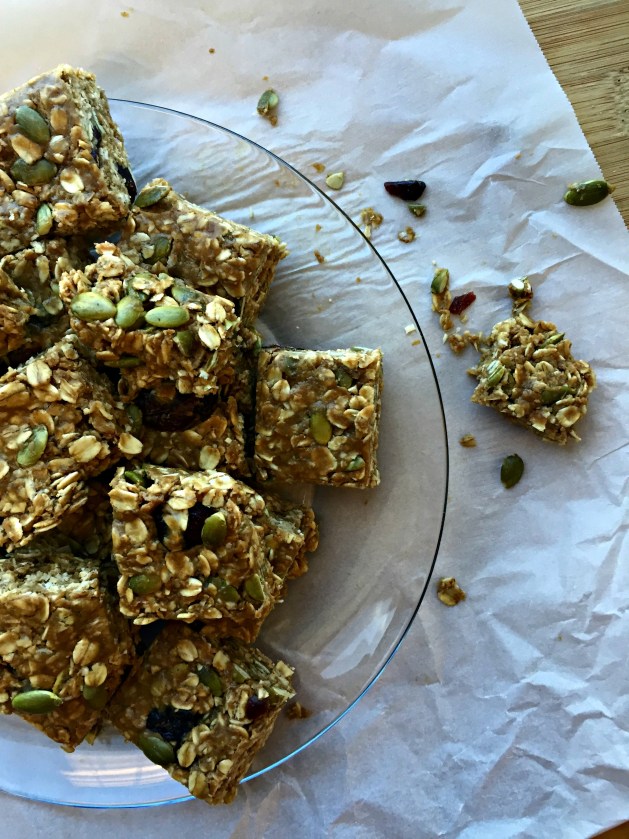
By modifying his diet over the years, Bill has connected why and what he eats with how he feels and functions. We eat as Michael Pollan suggests – real food, not too much, mostly plants – so our diet is packed with nutrient-dense foods. He eats the way he does to fuel and nourish himself, so he can perform physically at the highest level. One of his favorite fueling snacks, especially on the days of early morning workouts, are these chocolate peanut butter energy bites. PB Choco Bites

Packed with healthy fats, fiber and protein, these little no-bake bites are energy-dense, meaning a little goes a long way.

For someone like Bill, popping a few of these before, during or after all of those hours of training stokes his fire, since he’s burning a lot of energy. But for the rest of us, one or two a day will do.

Like most of my other no-bake bites, these tasty treats require a food processor, so if you don’t have one yet, I would highly recommend adding it to your wish list. They’re not super expensive but are incredibly versatile. We have a Cuisinart one and use ours just about every other day!

PB Choco Bites Title

Ingredients

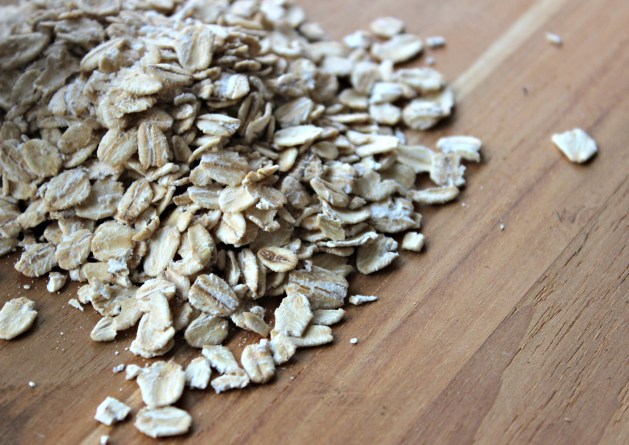
  • 1 cup old-fashioned rolled oats (I love Bob’s Red Mill gluten-free oats or Trader Joe’s)
  • 1/2 cup shredded coconut
  • 1.5 cups Medjool dates, pitted (find these in the produce section of the grocery store)
  • 2/3 cup natural peanut butter
  • 1/2 cup raw cacao powder
  • 1/4 teaspoon fine grain sea salt (add 1/4 tsp more if your peanut butter is unsalted)
  • 1 teaspoon vanilla extract

Directions

  1. Put oats and shredded coconut in the food processor fitted with the S-blade and run until it reaches a fine meal, about 45-60 seconds.
  2. Add the remaining ingredients and process until everything is evenly combined.
  3. Form dough into 1-inch balls with your hands and roll gently between your palms to even out the edges. Store in the fridge or freezer.

Cheezy Cauliflower Nachos {Dairy-Free, Gluten-Free}

We’re in the FINAL stages of our kitchen renovation, and I can’t wait to show you all the before and after pics! It took so long to find the right styles and materials, and we spent so long looking through different kitchen designers melbourne for some inspiration (we heard they were really good)! So I am finally excited to see our before and after pics to see how far we have really come. I’m waiting for some frames to arrive to hang up artwork, and then I’ll reveal the final look. It’s been very exciting! 🙂

On Thursday night, we decided that we’d had enough of eating dinner in our basement. We brought most of our kitchen stuff upstairs and started putting food, cups, plates, bowls and other accessories in their new homes. For the first time in my life, I have a pantry and soft close drawers and doors! It’s the little things.

We decided to break in the kitchen by making our first dinner in the new space that night. And we shared some pretty nasty champagne to celebrate! Me and Bill Cheers

Inspired by a recent visit to the AWESOME MOMs Organic Market and cafe in Hamdpen, I decided to take a stab at making vegan cauliflower nachos, a dish they had on their menu at the Naked Lunch cafe. My friend Katie and I split it the other day when we met up for lunch, and it was delicious!

As a kid I never ate beans, brown rice, avocados or scallions, so everything in this dish represents quite a few transformations along my food journey. Our taste buds are highly adaptable, so give foods you’ve previously sworn off a second chance!

Since removing dairy products from my diet (here’s why I did), I’ve missed some of the creamy goodness dairy-based foods provide. But, because my body feels and functions so much better without them, I don’t consider it a struggle to be without them. And that’s what motivates me to find alternatives like the cheese-y sauce used in this recipe.

The “cheese” sauce has a bit of a kick to it (back off the cayenne if you want less).

Cheese Sauce CloseupIt’s creaminess comes from the cashews and tahini, two ingredients I use in a lot of my recipes that you can find at just about any grocery store (find tahini in the natural food aisle or international aisle in the Mediterranean section).

We haven’t made this cheese sauce in over two years, and Bill liked it so much that he said, “We need to make a batch of this stuff every week!”

From start to finish, this recipe comes together pretty quickly, as the cauliflower takes very little time to roast and the cheese sauce can be whipped up in a matter of minutes in the blender.

Vegan nachos pic

Ingredients

  • 1 head cauliflower, cut into bite-size pieces
  • 2 tablespoons extra virgin olive oil
  • 2 cups cooked brown rice
  • 1 15-ounce can no sodium added black beans, drained and rinsed (Eden Organic or Field Day Organic are our go-tos)
  • 1 avocado, diced
  • 2 scallions, chopped
  • Sea salt and black pepper to taste
  • 1 batch noocho cheese sauce

To learn more about the ingredients in the noocho cheese sauce, check out this blog post I wrote about it previously.

Directions

  1. Preheat oven to 400F.
  2. Toss cauliflower with olive oil and a few pinches of sea salt and pepper. Roast on a baking sheet for 10-12 minutes or until golden brown and a fork pierces through easily. Remove from oven and set aside.
  3. Add rice and beans to a medium bowl and stir to combine. Top with roasted cauliflower, avocado, scallions, and noocho cheese sauce.

Ginger Lemon Energy Bites {Gluten-Free, Paleo}

We’re approaching the final week of construction on our kitchen (YAY!), which has been going on for almost two months. I’m excited to get back in my kitchen so I can come up with more delicious, nourishing recipes to share with you!

One piece of equipment I’ve had access to throughout the remodel process is my food processor. It is one of the most versatile and useful tools in our kitchen. We use it to shred cabbage and carrots and to whip up hummus, pesto, and chocolate avocado pudding.

But we use our food processor most often to make raw, no-bake energy bites, including these Cherry Chocolate Brownie Bites, Coconut Chai Almond Butter Bites, and Snickerdoodle Donut Holes.

I wanted to come up with a new no-bake bite recipe to celebrate my friend Jinji’s birthday. She makes our favorite chocolate treats that I slowly savor on a weekly basis, so I thought I’d check with her to see what flavor combinations she might like. Lettuce Party Card

Citrus

Coconut

Ginger…LOTS of ginger.

Ginger for Jinji 🙂

I took her inspiration and combined a few tastes and textures that I thought would complement each other and came up with my newest no-bake recipe!

The bite from the ginger, zing from the lemon zest, tartness of the cranberries and a pinch of salt come together in a special way in these energy bites. For more energy bite recipes, check out this page.

Ginger Lemon Bite Closeup Ginger Lemon Bites TrioGinger Lemon Bite Wrapper

Ingredients

  • 1 cup raw cashews
  • 1/2 cup shredded coconut, unsweetened
  • 2/3 cup Medjool dates, pits removed
  • 1/2 cup dried cranberries
  • 1 tablespoon ginger root, peeled and grated
  • 1/2 teaspoon lemon zest
  • 1/4 teaspoon fine grain sea salt

Directions

  1. Process cashews and coconut in a food processor until it reaches the consistency of a fine meal/flour.
  2. Add the rest of the ingredients and process until the ingredients start sticking together.
  3. Shape dough into a small ball with your hands and roll to smooth them out. Store in the fridge or freezer.

Cran-Apple Quinoa Salad {Gluten-Free}

I love this time of year.

After coming out of the East Coast winter that never seemed to end, I’m excited to see the blossoms blooming, hear birds chirping as I wake up, get back into running and hiking, and lighten up my meals.

As the weather warms up, I find my body craving lighter, more refreshing foods. I love my soups, stews and winter squashes (see you in the fall, butternut!), but the bright colors of springtime foods draw me in!

Today’s salad is a new take on a salad I first tried about two years ago. I swapped out a few ingredients and ended up with a colorful bowl of tart, crunchy, sweet, and citrus-y goodness.

I hope you enjoy it! 🙂

cran apple quinoa salad

Ingredients

  • 1 cup quinoa, rinsed until water runs clear
  • 2 cups water
  • 1 thumb-size piece kombu (optional!)
  • 1 teaspoon honey (I use raw honey)
  • 1/3 cup lemon juice
  • 1/2 teaspoon coarse sea salt
  • ¼ cup extra virgin olive oil
  • 1 cup diced tart apple, such as Granny Smith
  • 1 cup finely chopped celery
  • 1/4 cup finely chopped parsley
  • 1/4 cup of thinly sliced scallions
  • 1/3 cup dried cranberries
  • 1/2 cup coarsely chopped almonds, lightly toasted
  • Coarse sea salt and pepper

Directions

  1. Rinse quinoa in a fine mesh strainer until water runs clear. Fill medium saucepan with 2 cups water and add quinoa and kombu. Bring to a boil then cover with a lid and reduce heat to simmer for 10-12 minutes. Once water is just barely absorbed, remove from heat and leave covered for 5-7 minutes. Remove lid and fluff quinoa with a fork. Spread quinoa on a parchment-lined baking sheet to cool and prevent it from clumping together. This last step is optional but really helps!
  2. Whisk honey, lemon juice, salt and olive oil together in a small jar. Set aside.
  3. Put cooled quinoa in a large bowl and add apples, celery, cranberries, parsley, scallions and chopped almonds. Pour dressing over salad and toss to combine evenly. Add more sea salt and pepper to taste.

10 Cauliflower-Powered Recipes {Vegan, Paleo}

I was teaching a workshop about Eating for Energy last week at a company, and one of the employees said she would love some creative ideas for how to use cauliflower, so I thought I’d dedicate an entire post to it.

This one is for you, Deb!

For starters, cauliflower is one of the most nutrient-packed yet under appreciated veggies out there. This less colorful cousin of our beloved broccoli happens to be one of the best foods we can eat, yet very few of us eat it!

mash

Cauliflower is one of Dr. Fuhrman’s GBOMBS, which are the most powerful, nutrient-packed, antioxidant-rich, anti-inflammatory, immune-boosting, disease-fighting foods on the planet! Most of what we eat on a daily basis are GBOMBS. To learn more about them, click here.

Here are just a few more reasons why you’ll want to add more of this cruciferous vegetable to your life:

  • Packed with vitamin C and other powerful antioxidants that helps our cells protect and repair themselves from damage, which is essential for optimizing our health
  • Contains sulforaphane, a compound that has been shown to kill cancer stem cells, thereby slowing tumor growth, AND improve blood pressure
  • Source of potent antiinflammatory nutrients. Chronic inflammation (caused by stress, what we eat, lack of movement, etc.) can significantly increase our risk of cancers and other chronic diseases, so we want to do anything we can to reduce inflammation!
  • Supports our body’s detoxification (“clean up”) process, which is important because we are exposed to so many environmental and dietary toxins on a daily basis

To learn more about the awesomeness of cauliflower, click here or here.

Most of us are familiar with eating raw or steamed cauliflower, but there SO many other ways to use this versatile veggie that taste amazing!

Why not try something a little more exciting? 🙂

You can roast it, make a substitute for mashed potatoes out of it, turn it into a pizza crust, whip up a batch of cauli-fredo fettuccine sauce (don’t knock it ’til you’ve tried it!), and use it to make soups creamy.

Check out the links below to 10 recipes that will make you fall in love with cauliflower.cauli collage.jpg

Roasted Buddha Bowl by oh she glows

Roasted Cauliflower in Lemon Tahini Sauce by Vegetarian Times

Easy Cauliflower Rice by All Recipes

Smoky Roasted Cauliflower by Tori AveySmoky-Roasted-Cauliflower-5-640x480

Fancy Pants Curried Cauliflower Steaks & Mash by RNKcauli2name

Caulifredo Sauce with Zoodles by RNKcaulifredo

Cauliflower Pizza Crust by The Detoxinista

Detoxinista Pizza Crust

Photo Credit: The Detoxinista. Used with permission.

Roasted Garlic Cauliflower Mash by RNKcauli mash cover.jpg

Creamy Rosemary Sweet Potato Soup by RNKIMG_8875Soupbanner

Garlic & Red Pepper Cauliflower Hummus by Our Fifth House

garlic-red-pepper-cauliflower-hummus

Photo Credit: Our Fifth House. Used with permission

What are your favorite cauliflower recipes?

Feel free to leave a comment below with a link!

I love hearing from you 🙂

Sunny Cran-ola Bars {No-Bake, Nut-Free, Gluten-Free}

One of my coworkers has peanut, tree nut and coconut allergies, so I challenged myself to make something she could enjoy along with everyone else for a cooking demo I taught today at work.

That’s how these bars came to be.

They’re slightly sweet, salty, tart, crunch and chewy – lots of tastes and textures to keep your taste buds happy!

bars on plate

The main ingredient is sunflower seed butter, which is where this recipe gets its “sunny” name. I’ve written about Sunbutter in a previous post here. You can find it at any grocery store (often in the natural food aisle) and at Target and Walmart. Target sells it in single serve to go packets, which is super convenient.

I shared a variation of this recipe back in the fall for a healthy snacks for kids cooking class but changed it up a little bit, so you wouldn’t need a food processor to make it. I also swapped out cranberries for raisins and used less sweetener overall.

This recipe comes together in about 5-7 minutes, so it’s easy to make in a pinch for an energizing snack!

cran cover

Yield: 20-24 squares

Ingredients

  • 3 cups whole rolled oats (I love Bob’s Red Mill Gluten-Free brand)
  • 2 teaspoons cinnamon
  • Heaping 1/4 teaspoon fine grain sea salt
  • 1/2 cup pumpkin seeds
  • 1/3 cup dried cranberries
  • 1 cup sunflower seed butter (or peanut butter)
  • 1/3 cup + 1 tablespoon honey (add more if you want sweeter)
  • 1 teaspoon vanilla extract
  • Water, as needed

Directions

  1. Line an 8 x 8 pan with parchment paper. Combine oats, cinnamon, sea salt, pumpkin seeds and cranberries in a medium bowl and set aside.
  2. In a small saucepan, heat sunflower seed butter and honey on medium-low, stirring until smooth. Remove from heat and stir in vanilla.
  3. Pour liquid over oats and stir with a spoon or your hands to combine. If it’s too try, add water, 1 tablespoon at a time until it sticks. Once everything comes together, press mixture into lined pan, using the back of a spatula or excess parchment paper to press it down and flatten the top.
  4. Refrigerate for at least an hour to set. Lift parchment from pan and cut into squares. Store in the refrigerator.

Charm City Cooks: YumUniverse Potluck {5 Plant-Powered Recipes}

The first potluck I can remember going to was in the large fellowship hall of the Presbyterian Church I attended as a kid. Though there was more food than there were people to eat it, I have such positive memories of coming together with community to share a meal.

Last year, my friend, fellow health coach and culinary nutrition expert, Katie Hussong, and I decided to start a local potluck group called Charm City Cooks. Our goal was to bring people together regularly to share nourishing and delicious meals and create a safe space to build community.

Our first potluck was centered around recipes in The Undiet Cookbook, written by our culinary nutrition instructor, Meghan Telpner.

We had so much fun, we decided to do it again, even though winter weather postponed our plans…twice! On a beautiful, cool and crisp, spring-like Friday evening, we came together to share recipes from the blog, YumUniverse.

IMG_4190

I love trying recipes from other bloggers and introducing you to those wonderful people as well, so you can expand your recipe bank and find new sources of cooking inspiration.

YumUniverse invites their readers to do this:

Discover the infinite possibilities for a plant-inspired, gluten-free lifestyle with veggie junkie, author and recipe developer, Heather Crosby

I’ve experienced so much vitality along with health and beauty benefits since boosting my intake of plant-based foods about five years ago. I believe the life in food gives us life and that colorful, vibrant foods help to build vibrant bodies. That’s why I center most of what I eat around plant-based foods.

YumUniverse has hundreds of beautiful and tempting recipes on their site, so it was hard to choose what to make, but these are the recipes we picked for our potluck:

IMG_4202

Each of us had a little of everything and commented how delicious it was.

As we sat around the table sharing stories, dreams, smiles and laughter, I reflected on how special it is to connect with food and people in a way that nourishes us on so many levels.

This is how we were meant to experience food to its fullest – in community. 

As someone who hasn’t always felt like I “fit in,” being part of tribes like this one has been so healing for me. I love that I can “be me” and be surrounded by other women who are brave enough to do the same.

We’re already planning the next gathering and look forward to what dish each person will be inspired to bring. If you’re looking for something fun to do with your friends or family and want to try new recipes and build community, plan your own cookbook potluck party!

YumUniverse Group

The Charm City Cooks crew after our YumUniverse meal!

How to Make Your Own Granola {Video}

Let’s get back to basics.

With all of the talk and media buzz about the latest and greatest superfoods, sometimes we lose sight of how amazing some of the most basic and familiar foods are.

That’s why today is all about OATS!

oats

Whether you know them by oatmeal raisin cookies, a bowl of oatmeal for breakfast or as a common ingredient in granola, there’s a pretty good chance that you’ve eaten oats before. The oats I recommend buying are whole rolled oats (rather than the packets or “quick oats.”). If I want a chewier texture, I’ll change it up and use steel cut oats.

Oats are PACKED with some pretty awesome body and brain-boosting benefits:

  • With more soluble fiber than any other grain, oats help us stabilize our blood sugar, energy and mood AND help slow digestion and increase feelings of fullness
  • The contain compounds that help lower our cholesterol, which is why they are commonly recommended as a heart healthy food.
  • Second only to quinoa in protein content, oats contain a variety of amino acids, which serve as the building blocks to everything from our skin, hair and nails to our enzymes, hormones and neurotransmitters
  • Oats are rich in antiinflammatory and antioxidantrich compounds that protect our body and our brain

Oats are the star of today’s video that shows you how easy it is to make your own granola using everyday ingredients. It takes less than 5 minutes to assemble and only about 30 minutes to cook. Once you see how simple it is to do yourself, you won’t want the store-bought stuff!

Check out these other posts about two more granola recipes I’ve shared before:

granola closeup

Easy Trail Mix Granola

Ingredients

  • 4 cups rolled oats
  • 1 cup raw walnuts, chopped
  • 1 cup raw sunflower seeds
  • 1 cup shaved coconut
  • 2 teaspoons ground cinnamon
  • 3/4 teaspoon fine grain sea salt
  • 1 teaspoon vanilla extract
  • 1/2 cup honey or 100% pure maple syrup (or a combo of both!)
  • 1/2 cup coconut oil, melted
  • 1 cup dried cranberries, raisins or goji berries

Directions

  1. Preheat oven to 300F.
  2. Combine dry ingredients in a large mixing bowl. Add cinnamon and sea salt and stir to combine. Add honey, coconut oil and vanilla and combine with a large spoon or your hands until all of the pieces are coated and begin to stick together.
  3. Press granola onto a lined baking sheet and cook in the oven for 30-35 minutes, removing the pan to turn the granola with a spatula every 10-12 minutes. For more clumps, firmly press granola onto sheet with the back of your spatula or spoon after you toss it for the first time and don’t toss it again.
  4. When granola begins to smell fragrant and is starting to turn golden, remove it from the oven to cool. Once cool, add dried fruit and toss to combine. Store in a glass jar in the fridge.

If you want granola that clumps together more, substitute 2-4 tablespoons of whisked egg whites in place of some of the oil. 

Easy Peanut Butter Oat Energy Bites {Video}

My coworkers are the best taste testers. When I’m experimenting with new recipes, they are the brave ones who often try them out and give me feedback before I post them on here.

So far, this is the feedback I’ve gotten about these tasty bites:

YUMMMMMM

Delicious

Such a good treat 🙂

Sooooooo good!

PB Bite

Making these Peanut Butter Oat Energy Bites is super simple, fun (and messy!), and they are easy to take and eat on the go. You can enjoy these as part of breakfast, a snack or even dessert!

Most oat energy bites have coconut in them, and I know a lot of people aren’t the biggest fans of coconut, so I thought I would do some tinkering to make this recipe coconut-free.

The subtle saltiness from the peanut butter, sweetness from the maple syrup, nuttiness from the flax seed and crunch from the cacao nibs make these treats fun to eat.

I made this video to show you exactly how to make them!

Because you really need to get in there and get your hands sticky and messy, if you have kids (or just want to feel like one!), this is a recipe you’ll want to try.

For the full list of ingredients (and more mouthwatering pics), see below.

PB Oat Bites CoverPB Oat Bite

No-Bake Peanut Butter Oat Balls

These delicious peanut butter oat balls make a great snack or part of your breakfast! I use cacao nibs instead of chocolate chips to keep the sugar content down, but you could also use mini chocolate chips if you’d like!

  • 2 cups rolled oats (gluten-free)
  • 1/2 cup hemp seeds
  • 1/2 cup ground flax seed
  • 1 cup natural peanut butter
  • 2/3 cup honey (You can use 1/2 cup for a lower sugar count!)
  • 2 teaspoons vanilla extract
  • 1/2 cup raw cacao nibs (or mini dark chocolate chips)
  • Pinch fine grain sea salt
  1. Set the peanut butter and honey at room temperature for about 15 minutes to warm up and for the PB to soften. If the peanut butter is too hard, you can also soften it by gently heating it in a small pot on the stove top with the honey.

  2. Mix all ingredients in a bowl and stir with your hands to combine. It will be messy (but fun!).

  3. To help the mixture “set,” put the dough in the fridge about an hour, so it is easier to work with. It’ll seem too wet, but don’t worry, that will make it easier to work with once it’s had time to come together. It’s easiest to start making the bites using a cookie scooper, but you can also shape them into balls using your hands and then gently roll them. Store them in a glass container in your fridge or freezer.

I use raw cacao nibs instead of chocolate chips because they add a nice crunch and don’t have all the sugar from chocolate chips.

GBOMBS Spaghetti Squash Saute + How-To Video {Gluten-Free, Paleo}

I’ve been on a squash kick lately! From roasted butternut squash to creamy kabocha squash soup and even squash “pasta,” winter squash is one of my favorite foods because it’s versatile, delicious and nourishing.

Today we’re going to take a look at a squash that many of us have heard of before but might have been too intimidated to try making ourselves – spaghetti squash!

As someone who loved twirling pasta on my fork as a kid, this is a food that is fun to eat and play with…and it has lots of body-boosting benefits, too!

IMG_7154

Winter squash is packed with antioxidants that support our body from the inside out – vitamin A for our skin and eyes, vitamin C for antioxidant protection, fiber for fullness, and folate, a B vitamin that supports our body’s production of mood-boosting neurotransmitters.

For more info about the awesomeness of spaghetti squash, click here.

Now, I’m not going to lie to you and say that it tastes just like spaghetti (because it doesn’t…it’s a bit crunchier and a tad sweeter), BUT it does give you a similar experience and is basic enough to be paired with a variety of sauces – from pesto and marinara to pad Thai.

Check out my video below for the step-by-step instructions for how to prepare spaghetti squash and then buy some for yourself, so you can make one of the recipes below! It’s easier than you think 🙂 If you’re more of a picture person, check out this post I wrote for step-by-step pictures and directions.

I’ve included a recipe below for a winter veggie saute full of GBOMBS like shallots, garlic, dino kale, beans, berries and pumpkin seeds. Here are a few additional spaghetti squash recipes for you to try:

Spaghetti Squash Saute.jpg

Ingredients

1 large spaghetti squash
1/2 cup water
1 tablespoon ghee (clarified butter) or coconut oil
3 cloves garlic, minced
3 shallots, sliced
1 bunch dino kale (AKA lacinato or Tuscan kale), destemmed and chopped
1/4 cups water
1 15-oz can no-salt added cannellini beans, drained and rinsed
1/3 cup dried cranberries
1/3 cup pumpkin seeds, lightly toasted
1 tablespoon raw apple cider vinegar
Freshly cracked black pepper and sea salt to taste

Directions

1. Preheat oven to 400F.
2. Slice a line down the length of the spaghetti squash, about a half-inch deep or make several slits round the squash to allow steam to release. It’s usually too hard to cut in half at this point unless you have a really good knife.
3. Put the squash in a 9 x 13 baking dish in the oven for 25 minutes, so it can soften enough to easily cut it in half. Remove squash from the oven and let it cool enough to handle it. Cut it in half lengthwise. Scoop out the seeds with a spoon.
5. Put the squash cut-side down in the baking dish and fill the bottom of the dish with 1/2 cup water. Return squash to oven for about 30 minutes or until the squash easily pulls away from the shell. Let the squash cool and then scrape out the inside into strands with a fork.
6. In a large sauté pan over medium heat, sauté shallots in ghee (or oil) until fragrant, about 4-6 minutes. Add garlic and sauté 30-60 seconds. Add spaghetti squash, dino kale and 1/4 cup water and toss until the kale is wilted but bright green. Add beans and toss until heated through then add cranberries and pumpkin seeds. Remove from heat and sprinkle with 1 1⁄2 tablespoons apple cider vinegar.

Page 5 of 20

Powered by WordPress & Theme by Anders Norén