Category: Recipes Page 2 of 24

Spring Farmer’s Market Salad with Tangy Apple Cider Vinaigrette

I had the opportunity to spend time with one of my favorite companies this past week for a cooking demo about how to supercharge our salads. We talked about the importance of using lots of deeply and brightly colored ingredients and combining a variety of textures to keep salads exciting and delicious!

In preparation for the class, I came up with a new salad that combines some of my favorite ingredients that are perfect for spring and in season right now. Fruit and vegetables taste best and are most flavorful when they are locally grown and in season, so I wanted to take advantage of that.

This salad combines a variety of colors and textures and is packed full of nutrient-rich ingredients, and so did the other two salads we made that day:

One of the coolest parts of the class included a demo of a simple way to slice grape tomatoes easily and quickly. Check out the video below for how to slice a pint of tomatoes in under a minute!

https://www.youtube.com/watch?v=ruwJi94Wb5E&t=13s

This farmer’s market salad introduces sprouts – an ingredient I haven’t used on the blog before – so I wanted to tell you why I’ve been so jazzed about incorporating them into my salads! Broccoli sprouts, in particular, are one of the BEST additions you can make to your diet. Dr. Mercola wrote a post about all of the science-backed benefits of broccoli sprouts here, but I thought I’d share a few with you now.

Broccoli sprouts are even MORE supercharged than broccoli and have been linked to preventing a number of health issues, including:

  • High blood pressure
  • Cancer
  • Heart disease
  • Allergies
  • Detoxification
  • Diabetes

My favorite brand at the moment is the Potomac Sprout Company, and I buy them at MOMs Organic Market. You can also grow your own sprouts using seeds at home using this method from No Meat Athlete.

Now, for the recipe 🙂 I think you’re going to enjoy this one!

Spring Farmer's Market Salad

This salad is an upgrade to a basic salad and combines some of the best vegetables of spring!

Salad

  • 1/2 pound spring mix (organic)
  • 1 pint grape tomatoes (sliced in half)
  • 1 bunch scallions (chopped)
  • 1 English cucumber (diced)
  • 1 container broccoli sprouts (Potomac Sprouts Company is my favorite!)
  • 1/2 cup roasted chickpeas (Saffron Road or Chickpeatos brand)
  • 1/2 cup pistachio meat

Tangy Apple Cider Vinaigrette

  • 1/2 cup raw apple cider vinegar (with "The Mother")
  • 2 cloves garlic (peeled and minced)
  • 1 tablespoon Dijon mustard
  • 1/2 teaspoon raw honey
  • 1/4 teaspoon sea salt
  • 2 teaspoon fresh thyme
  • 1 cup olive oil (extra virgin)
  1. Combine all salad ingredients in a bowl

  2. Toss with 1/2 cup dressing and enjoy!

Apple Cinnamon Quinoa Breakfast Bowl

I just finished up teaching a two-part series about Healthy Meal Planning Made Easy at the Institute for Integrative Health. We had a great time and made some tasty recipes. I love showing how eating well can be easier, more fun, and delicious, and these classes are the perfect opportunity for me to do that.

I summed up my top healthy meal planning tips from week #1 in this post and shared links to over a dozen simple recipes, including the mason jar salad and tropical-inspired smoothie we made and sampled during the session.

In class #2, we focused on batch cooking, my favorite gadgets, the ultimate food storage guide, and my top tips for eating healthy on the go. Batch cooking is a technique of preparing larger quantities of simple foods that can be mixed and matched throughout the week. I love what Nutrition Stripped has to say about strategies for how do this in her Batch Cooking 101 blog post.

We kicked off the class with a sample of one of my favorite new packaged foods – Swapples – which is a new spin on a traditional waffle. Swapples are gluten-free, vegan, and paleo and can be used as the base of or topping for just about any meal. We tried the Tomato Pizza version, which I’d recommend dipping into marinara sauce!  For the “eating on the go” part of class, we also sampled one of my favorite real food snack bars – an Almond Cranberry Everbar.

We had fun playing with our food and making this easy 10-minute white bean, tomato and zucchini noodle saute. Two brave volunteers came up to help me spiralize the zucchini into noodles and did a great job! Want to get your own spiralizer? Check out this one.

Since one of the main concepts I wanted to introduce was batch cooking, we talked about how to use quinoa two different ways – one savory preparation and one sweet. If you prepare a big pot of plain quinoa (let’s say you cook 4 cups) at the beginning of the week, you can use it for a number of different dishes. If you’ve ever made a mistake cooking a batch of quinoa and ended up with a giant mass or unevenly cooked pieces, read this post that reveals the SECRET to cooking perfect quinoa…every time!

You can use it as the base of grain bowl like this Sweet Potato, Edamame & Quinoa Bowl that was a BIG hit. You could substitute it rice in a stir fry, toss it into a soup or stew or on top of a salad, or use it to make a breakfast bowl. Think of the quinoa as a substitute for oatmeal. Since it’s already cooked, this is a great way to save time in the morning. I’m going to experiment with other versions of this recipe that combine different ingredients, but this is a simple one to start with, so I hope you’ll give it a try!

Apple Cinnamon Quinoa Breakfast Bowl

This tasty and easy breakfast is a great way to use leftover plain quinoa.

  • 1 cup cooked quinoa
  • 1/2 cup almond milk
  • 1/2 cup unsweetened applesauce
  • 1/2 teaspoon cinnamon
  • 1 pinch ground ginger
  • 1/2 teaspoon vanilla extract
  • 1/8 teaspoon fine grain sea salt
  • 2 tablespoons almond butter
  • 1 tablespoon 100% pure maple syrup
  • 1/2 apple (diced)
  • 1/4 cup walnuts (chopped)
  1. Combine all ingredients except apple and walnuts in a small saucepan on the stove over medium low heat, stirring until heated through and quinoa begins to thicken, about 8-10 minutes.

  2. Pour into bowls and top with chopped apple, walnuts, and, if needed, a light drizzle of maple syrup.

You can also top this dish with pumpkin seeds, sunflower seeds, chopped almonds or hemp seeds.

White Bean, Tomato & Zucchini Noodle Saute

Pasta was my favorite food group growing up.

Whether it was Spaghettios, Beefaroni, or buttered egg noodles or angel hair, I LOVED all things pasta. I’ve come to upgrade my preferences these days and prefer protein and fiber-packed lentil pasta, brown rice pasta, or the easiest and most nourishing choice out there…

Zucchini noodles!

AKA “zoodles.” 🙂

You can buy zucchini noodles at a lot of grocery stores for convenience, BUT it’s so much cheaper (and way more fun!) to make them yourself. The simple gadget you use to make them is called a spiralizer.

I did a video about how to use a spiralizer when I JUST started making videos a few years, so don’t mind the less than stellar quality! I plan to update this with a better version soon, but it makes the point, so I’m keeping this one here for now.

https://youtu.be/XbLHyAY_KRI

You can eat the zoodles raw or lightly saute them, which is what I did for today’s recipe. If you eat them raw, I find that it helps to let them “sweat” on a paper towel for about 10 minutes before adding them to a salad, so they stay crunchy.

I had some garlic, cherry tomatoes and leftover cannellini beans that I wanted to use up, so I decided to toss all of them together to come up with this dish. Something like this takes just a few minutes to put together, so it’s convenient if you’re in a time crunch. Using fun kitchen toys like a spiralizer is also a great way to include your kiddos in the meal-making process. If you make cooking fun, they (and you!) will be more likely to want to do it instead of feel like you have to do it.

You can modify this recipe based on other ingredients you have on hand. Adding asparagus would be a great idea this time of year, since that is in season. Even though I didn’t use it this time around, I’m going to add some fresh basil the next time I make this dish because I think it will really make it pop and add another layer of flavor and color. I add leafy greens to my meals as often as possible!

White Bean, Tomato & Zucchini Noodle Saute

This quick and easy dish comes together in minutes and is a great way to highlight spring and summer veggies!

  • 2 zucchini (spiralized)
  • 2 tablespoons olive oil (extra virgin)
  • 2 cloves garlic (minced)
  • 1 cup cherry tomatoes (sliced in half)
  • 1 cup cannellini beans (drained and rinsed)
  • Pinch sea salt (to taste)
  • 1/2 teaspoon lemon zest (optional)
  • 1/4 cup fresh basil leaves (torn)
  1. Use your spiralizer to make zucchini noodles with your zucchini. Cut them with scissors, so you don’t have one long noodle.

  2. In a large saute pan, add olive oil over medium high heat. Add garlic and saute for 30 seconds or until fragrant. 

  3. Add cherry tomatoes, cannellini beans, and a pinch or two of salt and saute for about 5 minutes. Add zucchini noodles and saute for 2 more minutes or until heated through. Taste and add additional salt, if needed.

  4. Pour contents of pan into two bowls and top with basil leaves and lemon zest. 

I like to top any kind of pasta with my favorite paleo parmesan cheeze made with cashews and nutritional yeast. Here is the 3-ingredient recipe for that!

Meet Crunchy Kat: Living Well Made Easy

For the past three and a half years, I’ve written every single post on this blog. I love sharing what I’m learning and creating, but I also have a desire to build community in a more intentional way. For that reason, I’m going to start introducing you to some amazing people I’ve connected with along my journey, so you can get to know them and what they have to offer, too. These are people I align with philosophically and people who bring hope, light, nourishment and passion to the world with the goal of making it a better place.

My hope is that you will connect with these great people, too, and follow their work to learn about different aspects of health, wellbeing and nutrition that I may not cover. We’re better together 🙂

I’m excited to introduce you to my friend and fellow blogger, Kat Downs from Crunchy Kat. I think you’ll really love her and will be inspired to check out the cool work she is doing, too. Here she is!

I first met Rachel at a Swapfoods Swapple tasting back in February, and I could immediately tell she was someone I wanted to get to know. So when she asked if I wanted to write a guest post for her blog, I was pumped!

In getting to know Rachel, it’s clear we have a lot in common. I love Rachel’s post on her food philosophy because mine is almost exactly the same!

I launched Crunchy Kat in August 2016, but I’ve been learning about health and wellness for more than five years. I’ve always had an interest in food and nutrition, even though I’m not a Registered Dietitian or Nutritionist. I’m an average person and a former athlete, and by all accounts, I was a fairly healthy person. But I’ve noticed that I feel so much better when I feed my body real food.
I didn’t always used to be like this though.

I’ve always loved food, but it’s taken me awhile to refine my eating habits, and it’s still a work in process. I’ve realized that I feel better when I eat a mostly gluten-free, dairy-free diet, but it’s sometimes hard to make those choices.

I’m the first one to admit that I like to streamline things in the kitchen.I believe food and cooking shouldn’t be complicated, so on Crunchy Kat I talk a lot about eating real food with simple ingredients. You’ll never find me whipping up a 12-course meal all day on a Saturday. That’s just not my thing! I’m all about simple, healthful recipes that are quick and easy. Click the picture below for some of my favorite salad dressing recipes!

I love thinking about where our food comes from and how it sustains us. I also love researching information about what’s in the products we put in our bodies and on our skin. I’d been spending so much of my free time finding better food and beauty products that I decided to share what I was learning with others.
My goal is to take the work out of it for you and offer solutions I’ve found. I know how confusing and overwhelming it can be to eat well, so I want to bring healthy products and options to people who don’t have time to do the research themselves. I want to help people make good choices when it comes to food.

One of my favorite things is to do is grocery shop or visit a farmer’s market. I love exploring the grocery aisles for new products and dreaming about how I can incorporate them into my next meal.

I like offering easy-to-follow recipes for people who may not have the energy to think about their next meal. Because of that, experimentation in the kitchen is something that excites me, but I know not everyone has time for that. That’s one of the reasons I started Crunchy Kat.

Some of my favorite things to experiment with are smoothies (like this cherry banana almond butter smoothie), energy bites (like these coffee cacao bites), easy weeknight meals (like this cauliflower fried rice), and homemade dairy-free milks (like this coconut milk). And you can always find me posting impromptu recipes on my Instagram account.

Would you try any of these recipes? I’d love to know which ones you might like to try! Thanks for letting me hang out with you today! 🙂

Vegan Carrot Cake Smoothie

Since I’ve been feeling better, I’ve been back in the kitchen experimenting with recipes. My most recent hit was this vegan, gluten-free carrot cake muffin topped with creamy cashew icing. If you haven’t already tried it, you totally should!

It’s been a while since I posted a new smoothie recipe, but since I was already tinkering with the ingredient profile for carrot cake, I thought I’d try coming up with a carrot cake smoothie.

Some recipes come together easily, and after one or two attempts, it ends up tasting good. This smoothie took about six attempts before I came up with something that I really liked! I have to give a shout out to my friend, Kat Downs, who writes the awesome blog, Crunchy Kat, for being willing to be a recipe tester for me! She will be featured in my next blog post, so I’m really excited for you guys to meet her.

In the meantime, give this tasty carrot cake smoothie recipe a try. You might be surprised to find that it contains a secret ingredient you won’t even taste that will give you an extra serving of vegetables. When I think of upgrading what I eat, this is one of the easiest ways to do it!

Vegan Carrot Cake Smoothie

If you like all the flavors of carrot cake as much as I do, you’re going to love this creamy, dreamy smoothie!

  • 1/2 cup carrots (peeled and chopped)
  • 1/2 zucchini (peeled and chopped)
  • 2 tablespoons raw cashews
  • 1 Medjool date (pit removed)
  • 1/2 teaspoon cinnamon
  • 1/4 teaspoon ground ginger
  • 1 pinch nutmeg
  • 1 pinch sea salt
  • 1/4 teaspoon vanilla extract
  • 3/4 cup unsweetened almond milk
  • 1 piece frozen or fresh pineapple (Trust me, this makes a difference!)
  • 1 frozen banana
  1. Add all ingredients through almond milk to the blender and blend until smooth.

  2. Add frozen fruit and blend until creamy. 

For some reason, I find that the smoothie turns out a bit creamier when you combine all ingredients besides the frozen fruit FIRST and then add it, but you can totally just blend everything at once. That’s just my preference 🙂

Vegan Carrot Cake Muffins {Gluten-Free}

Carrot cake is my JAM.

I love everything about it. From the moist texture of the cake with a hint of spice and a crunch of walnuts to the rich and creamy icing, carrot cake is in a league of its own. I always have a piece on my birthday! My go to place for gluten-free, dairy-free carrot cake is Great Sage, a vegan restaurant in the little town of Clarksville, Maryland. It’s one of our top places to eat, and the staff there are wonderful, too! You should definitely check it out, if you haven’t been already.

Speaking of plant-based food, I recently discovered an AMAZING blueberry muffin recipe from the Forks Over Knives Cookbook, which is one of my favorite cookbooks. Since it turned out so well, I figured I would use the same base and then tinker with the other ingredients to make a carrot cake muffin version.

And that’s exactly what happened! After three attempts at combining ingredients in just the right way, I came up with a winner.

This recipe is vegan and gluten-free and can be made nut-free if you use a different type of yogurt. I opted to use my favorite dairy-free yogurt made by Forager Project, which I reviewed earlier this year in this post. You can easily make your own oat flour by grinding up gluten-free rolled oats in your food processor until they reach a fine texture. I added some spices to enhance the flavor and jazz them up a bit.

I’m happy to report that they turned out tasting great! Bill gave them two thumbs up, and they were a hit at a brunch I brought them to this weekend. They are great for breakfast with a little smear of nut butter, or you can enjoy them with one of my favorite blogger’s creamy cashew icing. I HIGHLY recommend doing that!


OPTIONAL but recommended: Top these muffins with a smear of this delicious creamy cashew icing from the Detoxinista!

Vegan Carrot Cake Muffins

These gluten-free, vegan muffins are moist, flavorful and perfect for breakfast, a snack or dessert!

  • 2 1/4 cups oat flour (process rolled oats in a food processor until fine)
  • 1 tablespoon baking powder
  • 3/4 teaspoon fine grain sea salt
  • 1/2 cup coconut sugar
  • 1 tablespoon cinnamon
  • 1/2 teaspoon ground ginger
  • 1/8 teaspoon nutmeg
  • 2/3 cup unsweetened almond milk
  • 1/2 cup unsweetened applesauce
  • 1/2 cup non-dairy plain yogurt (I used Forager Project's unsweetened plain cashewgurt)
  • 1/2 tablespoon vanilla extract
  • 1 cup shredded carrots
  • 1/2 cup raisins
  • 1/4 cup crushed pineapple
  • 1/3 cup walnuts (chopped)
  1. Preheat oven to 350F. In a large mixing bowl, whisk together oat flour, baking powder, salt, sugar, cinnamon, ginger and nutmeg.

  2. Make a well in the center of the dry ingredients and add the milk, applesauce, yogurt, and vanilla and whisk them together before mixing everything in the bowl together, until just combined. Fold in the carrots, raisins, pineapple, and walnuts until just combined.

  3. In a silicone muffin pan or regular muffin pan lined with silicone liners, use an ice cream scoop to scoop muffin mix into each slot. Bake for 20-22 minutes or until a toothpick inserted in the center of a muffin comes out clean. Don’t over bake, or they will become dry.

What We Eat: A Peek at Our Weekly Menu

I’ve had people ask time and time again what a typical week of eating looks like for me and Bill. Every week is different, but I thought I’d give you a glimpse of what last week and the upcoming week consisted of for our meals.

I tend to make a combination of my own recipes from this blog and often look to the Nourishing Meals Cookbook, The Undiet CookbookForks Over Knives: The Cookbook or one of Rebecca Katz’s many healing cookbooks, with a recent focus on The Longevity Kitchen Cookbook

We pretty much follow Michael Pollan’s advice to “Eat food, not too much, mostly plants.” Sometimes I’m a little off on the “not too much” part, if I’m being completely honest, but we prioritize eating real food made from ingredients we recognize and can pronounce. The vast majority of what we eat, especially for me, consists of plant-based foods like veggies, fruit, beans, grains, nuts and seeds, and we load up on herbs and spices for flavor. I do eat some animal proteins a couple of times a week, usually wild caught fish or pasture-raised chicken or eggs.

My husband Bill’s German heritage demands a higher animal protein ratio than what I eat. He just feels better eating a bit more of it than me! That’s why I’m such a huge advocate of listening to your body and paying attention to what gives you energy and what takes it away. I encourage you to experiment with different foods to see which ones make you feel best. For more on my philosophy around food and eating, check out this recent post.

Okay, now let’s get back to the food. Want to know what a week of breakfast, lunch and dinner looks like for us? Check out the list below!

Breakfast

Because I’m on a healing foods protocol through my nutritionist, as I’m restoring my body from Epstein-Barr Virus, I’m not eating certain things that Bill eats on a regular basis, like eggs. He loves making breakfast and puts in a lot of work each morning. A typical breakfast for him consists of roasted sweet potatoes, sautéed onions and tomatoes or peppers, and an egg, usually served on or with a Swapple, which is one of my favorite freezer staples as well. We also like Bilinski’s casing-free, real food chicken sausage, especially the kale balsamic version!

I usually have a smoothie because it’s the easiest way to pack a lot of goodness into one glass (or smoothie bowl!). I’ve been opting for blueberries as my main fruit because of how antioxidant-packed they are. I alternate which fats I use, including coconut butter, chia seeds, flax seeds, hemp seeds and avocado. I usually throw in a handful of baby spinach or baby kale and round out everything with a scoop of protein powder or an extra sprinkle of hemp seeds.

I’ll have to share the smoothie I’ve been making lately, so you have the recipe, but this Blueberry Blast Smoothie is pretty similar!

I absolutely LOVE the Oat Berry Yogurt Muffin recipe from the Forks Over Knives Cookbook and have been serving that with Trader Joe’s mixed nut butter. I also tried the Detoxinista’s Vegan Almond Flour Banana Bread. It’s RICH and pretty hearty, since it’s made with almonds as the base, but I really liked the flavors!

Lunch & Dinner

To be honest, lunch and dinner don’t look that different for us. I almost always have a big salad for lunch as my base and often serve up leftovers from dinner for lunch because it makes things easier and saves us time. I’m a big advocate of making grain or salad bowls, which basically consists of throwing together some cooked and raw veggies (focus on leafy greens!), some source of protein (usually beans), something crunchy like nuts or seeds, and a grain like quinoa or brown rice if I’m making a grain bowl. I top it all off with a dressing and toss everything together.

As much as I love to cook, sometimes I need something nourishing when I haven’t planned ahead and packed. When I’m on the go, some of my favorite places to hit up are Stall11 at RHouse, sweetgreen, Harmony Bakery, the Naked Lunch Cafe, and Whole Foods Market hot bar and salad bar. I link to all of those places and others in my healthy foodie dining guide to Baltimore.

Here’s what we’ve been cooking up lately!

That’s a look at some of what we’ve been cooking up in our kitchen lately. We stick with some of our favorite familiar staples and try a few new ones here and there.

How about you? What’s on your menu? Try anything new lately? Feel free to share in the comments below! I love trying new recipes 🙂

Mediterranean Spring Salad with Easy Avocado Dressing

As someone who used to hate salads and didn’t eat them until midway through college, I’ve come to love them and enjoy them as a regular part of my meals. What I love about salads is how many nutrients and colors you can mix together at one time and how versatile they are!

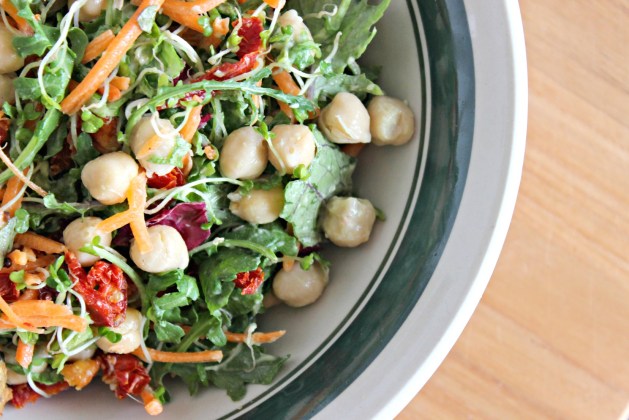
I tend to put my salads together based on whatever I happen to have in the fridge at the time. I start with a base of greens, add in chopped or shredded veggies, toss in some source of protein, and add something crunchy like nuts or seeds…or in this case – crunchy Mediterranean veggie patties!

Most veggie burgers I’ve tried have been pretty nasty and full of ingredients that I wouldn’t find in my pantry, so I stayed away from them for most of my life.

That was true until I tried Hilary’s Eat Well Burgers at the Natural Products Expo in Baltimore in 2015.

I’ve been a huge fan ever since, and we always have them stocked in our freezer. What I love about these burgers is that they are free from gluten, dairy, soy, nuts, and eggs, and they are made with real food ingredients – nothing weird. Oh, and their taste and texture are SO good! I’ve even heard someone describe them as a healthier hush puppy.

They have a bunch of different varieties of burgers, including the following: Root Veggie, Hemp & Greens, Adzuki Bean, Kimchi, Curry, Spicy Thai, Black Bean, and the “World’s Best Veggie Burger” Original flavor, which is their best seller. We buy them at MOMs Organic Market and Wegmans. To find where they are sold near you, click the Find It Here Link beneath the product on this page.

The dressing came to be when I opened my fridge and saw an avocado and a lemon and decided to put them together to see what would happen. It was a success!

This salad is packed with anti-inflammatory, nourishing, plant-powered ingredients and is full of flavor and a variety of textures to keep your taste buds and your tummy happy 🙂

Mediterranean Spring Salad with Avocado Dressing

Servings: 2

Ingredients

Salad
6 cups leafy greens (I used a greens and radicchio blend)
1 cup shredded carrots
1/4 cup sundried tomatoes, chopped
1/2 cup broccoli or other sprouts
1 small handful fresh basil, chopped
1 cup cooked chickpeas, drained and rinsed
6 mini Hilary’s Eat Well Mediterranean veggie burger patties, cooked according to package instructions

Dressing
1 garlic clove, peeled and chopped
Flesh of 1 avocado
1.5 tablespoons lemon juice
3 tablespoons water
1/4 tsp plus a pinch sea salt
Fresh black pepper, to taste

Directions
1. Toss all salad ingredients together in a bowl and set aside, except burgers.
2. In a mini food processor, pulse the garlic until finely minced then add remaining dressing ingredients and process until smooth. You may have to scrape down the sides and repeat. Alternatively, you can try to mash the avocado and whisk ingredients in a small mixing bowl by hand, but it won’t be as smooth.
3. Toss dressing with salad (it’ll be thick) and top with veggie burgers. Feel free to chop them up to the size of croutons!

3 Beautiful Smoothie Bowl Recipes to Try

If you’ve recently bought yourself a blender after reading reviews similar to https://allgreatappliances.com/oster-pro-1200-blender-review/, then I imagine you are trying to find ways to use it. INTRODUCING; the smoothie. Smoothies are great, and I’ve been a fan of smoothies for years because of how many nutrients you can pack into one meal. But I’ve also noticed something you may find to be true as well.

I tend to drink them fast. Like, under two minutes fast.

That’s a lot of food entering your stomach at an unnaturally fast rate, which can lead to things like bloating, gas, indigestion, and overeating. You can drink fruits and vegetables at a rate of about two cups per minute when you get them through a smoothie. This can undermine your body’s capacity to recognize that you’re full because the body needs about 20 minutes to register that you’re satiated once you start eating.

So, what’s one idea for slowing down your smoothie drinking pace?

Put it in a bowl!

Yup, make a smoothie bowl.

It’s not that complicated either. All you’re really doing is using slightly less liquid (1/4-1/2 cup less than usual), so you end up with a thicker consistency that can be poured into a bowl instead of into a glass. It’s also important to use thickening ingredients like chia seeds, avocado, frozen banana, soaked raw cashews, and even peeled zucchini to reach your desired consistency.

Now, I do have a few words of caution and something you’ll want to keep in mind when going this route. Smoothie bowls are often topped with heaps of granola, honey, maple syrup, nuts, a whole banana, etc., which makes for a pretty picture. But, on top of all of the ingredients that are already in a smoothie, this can be overkill, so use your toppings sparingly. Try not to overdo it. Notice how your body feels and adjust accordingly! Less is more 🙂 You will still need to use the same equipment like a blender. If you don’t have a blender you might want to go to Juice Buff For more information on Smoothie Blenders.

Check out the three smoothie bowl recipes below that I’ve previously posted on my instagram page. If you’re looking for even more smoothie bowl inspiration, here is a list of nine smoothie bowls from Greatist and 11 from Buzzfeed!

Berry Good Smoothie Bowl

Ingredients

1 tsp flax seeds or flax meal
2 teaspoons hemp seeds
2 teaspoons chia seeds
1 teaspoon coconut butter (optional but tasty!)
1 teaspoon vanilla powder or extract
1/2 tsp raw honey
1 cup baby spinach
1-1.5 cups almond milk (start with one cup for a thicker bowl)
1 cup frozen blueberries
1/2 cup frozen raspberries

Directions: Blend all ingredients, except the berries, in a high-speed blender for about 15-20 seconds. Then, add berries and blend until smooth, adding additional almond milk, as needed, until it reaches your desired thickness. Pour into a bowl and top with additional berries and a sprinkle of hemp seeds.

Shrek Smoothie Bowl

Ingredients

1/2 cup frozen mango
1/2 cup frozen pineapple
1 tsp fresh ginger root
1 tablespoon fresh lime juice
1/2 small avocado
1 cup baby spinach
1 scoop unflavored protein powder (I like Vital Proteins and Bulletproof Collagen Protein because they are flavorless!)
1/2 tsp raw honey
1-1.5 cups water (start with 1 cup and add more as needed)

Directions: Blend everything together until you reach a smooth, thick consistency. Pour into bowl, sprinkle with shredded coconut, and serve with a spoon!

Berry Chocolate Smoothie Bowl

Ingredients

1 cup frozen mixed berries (strawberries and raspberries)
2 tablespoons chia seeds
1.5 tablespoons raw cacao powder
1/2 tsp vanilla extract
1 Medjool date, pitted
1 scoop unflavored protein powder (I used Vital Proteins)

1 – 1.5 cups dairy-free milk (start with 1 cup and add more 1/4 cup at a time)

Directions: Put everything in a blender and blend for about a minute or until smooth. Pour into bowl and sprinkle with goji berries and cacao nibs.

So, what about you? Are you a fan of smoothie bowls? Do you have any favorite recipes? Feel free to share them below!

Coconut Chocolate Brownie Bites {Paleo, Vegan}

It’s been a while since I’ve poster a new no-bake bite recipe for you to try, so I’m excited to share today’s recipe for coconut chocolate brownie bites!

A few weeks ago, I was at a women in business event with a group of consultants, human resources professionals and business owners. Before the session, Susan, a friend and fan who attends my cooking classes in the community, walked in. She was holding a bag of Emmy’s Cookies that she had bought at Starbucks that morning. Knowing what I do, she came up to me and said, “These are so expensive! I bet you know how to make them at home!”

Since I’m always up for a challenge, I started experimenting! What I’m sharing with you today is the final outcome of playing in the kitchen to come up with my own version of those chocolate coconut no-bake cookies. Like most of my no-bake bites, they start with a base of nuts and dates. They’re a great option for a snack or a sweet treat and are perfect for someone who is on the go (kids love them, too!).

I had a few coworkers sample them today for me to give me feedback, and everyone loved the sweet and salty combo paired with the rich chocolatey taste. As someone who used to h-a-t-e coconut anything, I really love these, and so does my husband, who isn’t much of a coconut fan either.

One of the fun, new things I’ve started doing with no-bake recipes like this is experimenting with vanilla powder instead of vanilla extract. I find that the taste isn’t as bitter, but you can totally use vanilla extract in this recipe if you prefer.  If you use the powder, it’s a 1-1 substitution for the extract. I buy the Nielsen-Massey brand of vanilla powder at MOMs Organic Market. Most natural food stores and Whole Foods carry vanilla powder, in case you’re interested!

I have a feeling these are going to become one of your new favorites, so let me know if you give them a try 🙂 They’re gluten-free, dairy-free, vegan, paleo, and raw, in case that helps you decide!

Coconut Chocolate Brownie Bites

Yield: ~24 bites

Ingredients

2 cups raw walnuts
1/2 teaspoon fine grain sea salt
1/3 cup raw cacao powder
1 1/3 cups Medjool dates, pits removed
1 teaspoon vanilla extract or vanilla powder
2 teaspoons pure maple syrup
1 cup shredded, unsweetened coconut

Directions

  1. In a food processor fitted with the S-blade, process walnuts and salt for about 15 seconds. Add cacao powder and pulse to combine.
  2. Add dates, vanilla, and maple syrup, and process until a dough begins to form.
  3. Add coconut and pulse several times until just combined. Shape into 1-inch balls and roll between your palms. Toss balls in shredded coconut (optional) and store in a glass container in your fridge.

Page 2 of 24

Powered by WordPress & Theme by Anders Norén