Category: Gluten-Free Page 3 of 5

The Best of Broccoli: 10 Awesome Recipes to Try

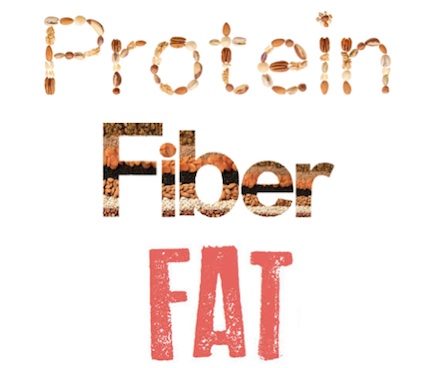
There’s a lot of talk about “superfoods” these days.

It’s easy to become overwhelmed when we hear about all the nutrient-packed foods we “should” add to our diet like maca powder, goji berries, and spirulina. Given what I do for a living and because I like experimenting with food, I often have these foods in my pantry. They’re fun to add in to desserts, smoothies, chocolate bark and even trail mixes.

BUT, do you have to stock up on specialty superfoods like these in order to be well nourished? 

Nope!

There are so many amazing everyday foods we can eat that don’t cost a lot of money, are easily accessible, and, in most cases, are already familiar to you.

I’m going to be focusing on highlighting some of these simple superfoods over the next few months to encourage you to take different spins on how to make them more exciting. Whenever I get into the mode of experimenting with new ways of cooking the same food, it makes me want to eat it more often.

The first food has always been my favorite vegetable.
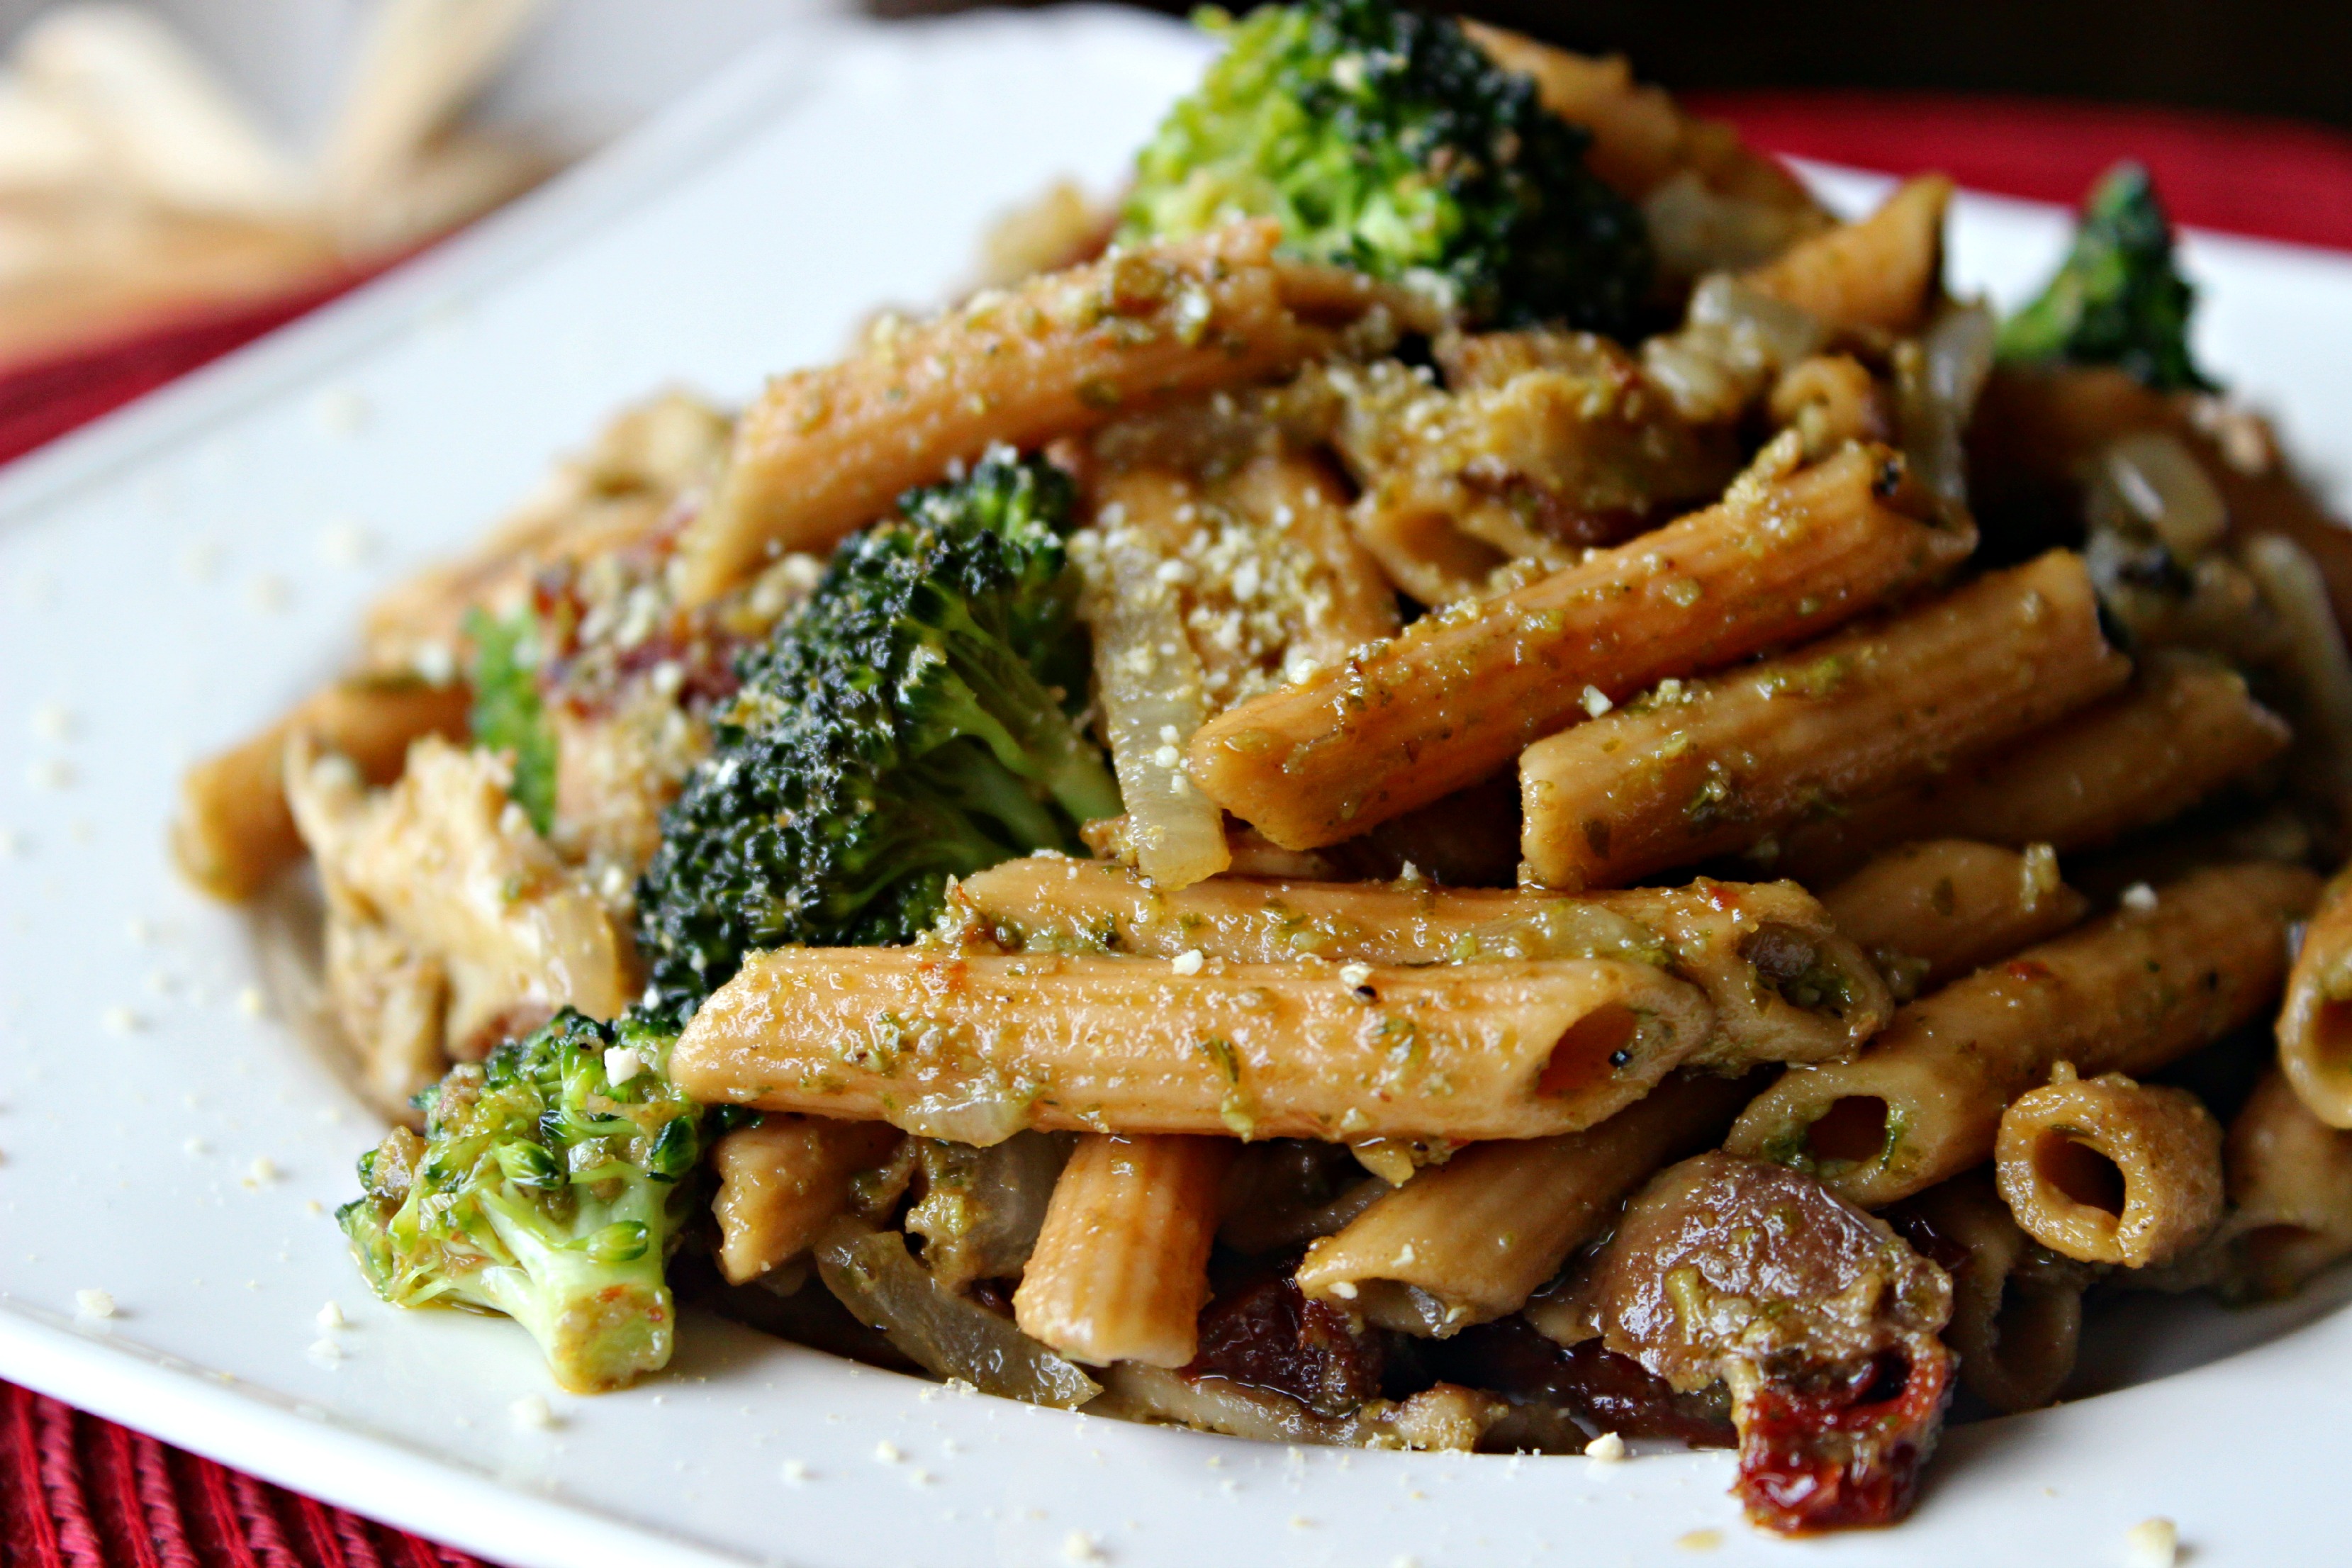
Broccoli!

Loaded with fiber, bone-building calcium, and immune-boostingcancer-preventive, anti-inflammatory, and detoxifying compounds, broccoli is one of the most nourishing foods we can eat. Fortunately, there are so many amazingly delicious ways to prepare it.

The recipes below showcase this nutrient-packed super star in a number of ways – in soups, lightly steamed, sauteed, and my favorite way…roasted!

Roasted broccoli is quite possibly one of the most delicious foods on the planet, especially in recipe #9 for Garlicky Roasted Broccoli and in recipe #6 as a pop of color and texture in THE BEST dairy-free mac and cheese.

broccoli collage

Here are ten of my favorite broccoli recipes. Add one or two to next week’s meal plan!

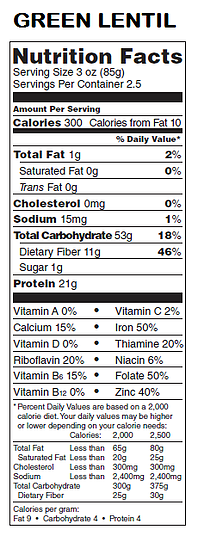
Lemon Lentil Vegetable Soup by Meghan Telpner (easy and delicious soup, especially with avocado slices on top!)

Broccoli, Avocado & Lime Salad by Deliciously Ella

Roasted Buddha Bowl by oh she glows

skilletgoodbroccoli soup

Tangy creamy quinoa broccoli salad

IMG_3284

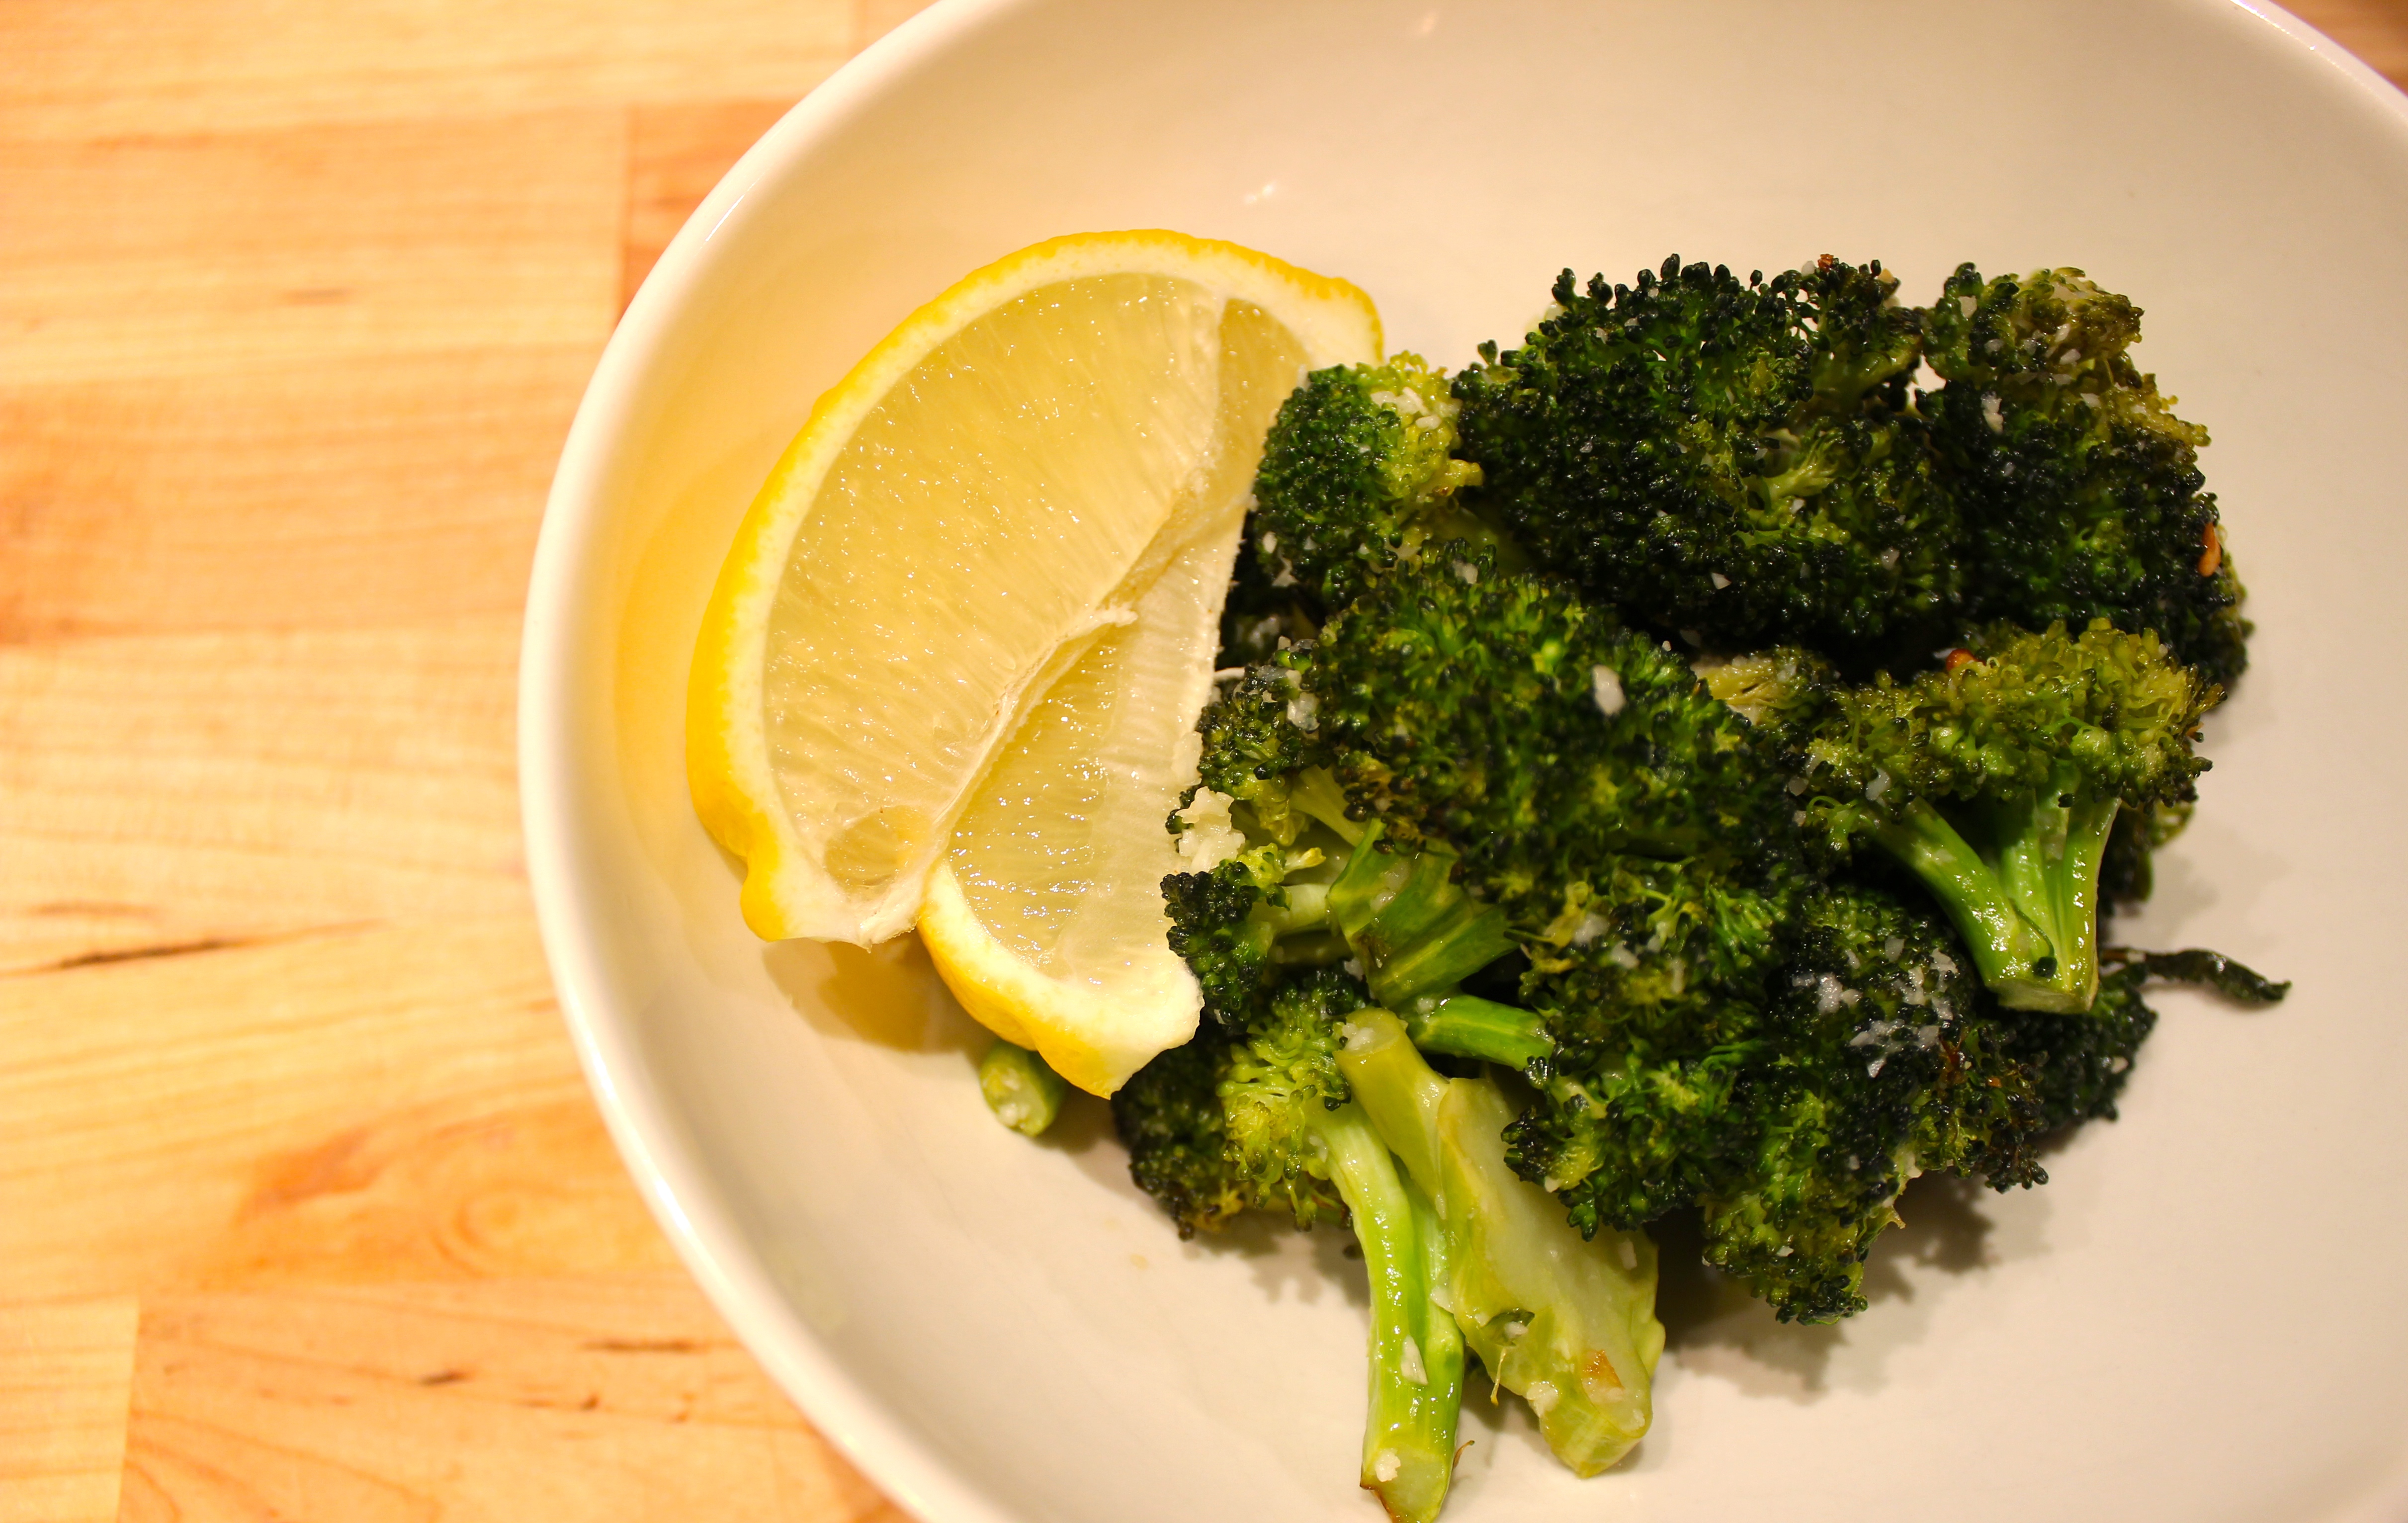
Garlicky Roasted Broccoli (AKA Crack Broccoli) by The Kitchn (use 1/2 tsp salt not 1 tsp!)
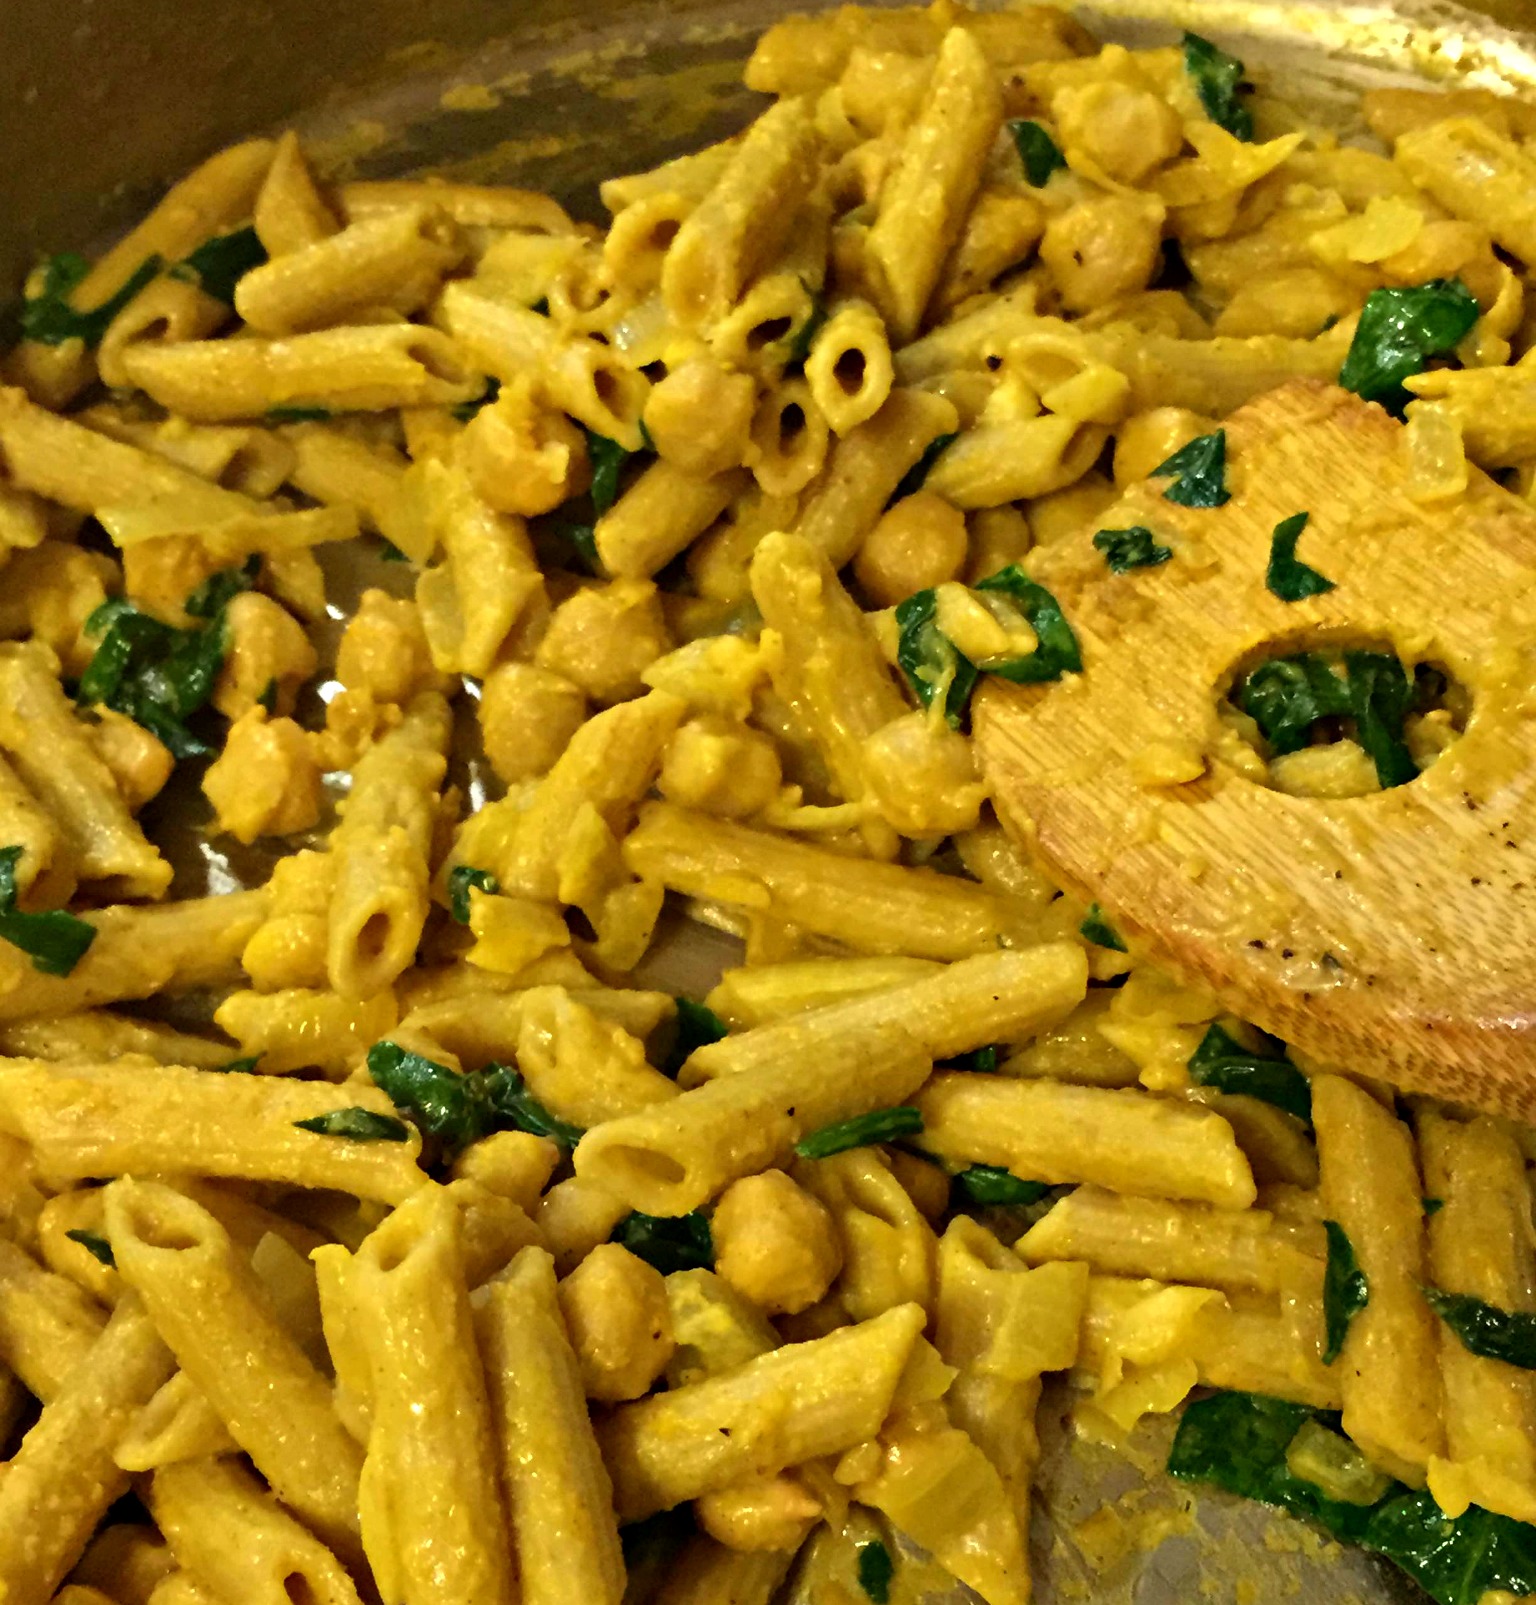
Curb Cravings with Crunchy Cacao Nibs {Plus 7 Recipes to Try!}

For the video version of this post, check out my Facebook page!

Either way, make sure you hit up the awesome recipes at the bottom 🙂

——————————————————————————————–

Let’s pretend it’s 3:00 in the afternoon.

What’s something a lot of people crave right about now?

Nibs

Did you say CHOCOLATE?

The reason why might surprise you!

Many of us start to notice a dip in our energy levels and attention spans and the cumulative impact of stress throughout the day by mid-afternoon. Why not give our body a boost in energy, feel good chemicals and relaxation at the time we need it most? Why not enjoy some chocolate?

High quality dark chocolate that contains a high percentage of cacao (ka-KOW) is packed with magnesium.

Magnesium is known as the relaxation and anti-anxiety mineraland most of us are deficient in it. Not only that, but in times of stress and high demands, our body needs it more than ever. Sources of magnesium include spinach, oats, beans, pumpkin seeds, leafy greens, sesame seeds.

And…CHOCOLATE! 🙂

The key is to use QUALITY chocolate. I’ve written before here about why I became a qualitarian and what it means to be one. As the word suggests, I encourage you to focus on eating the highest quality food you can, especially when it comes to things like chocolate – the darker and purer, the better.

One of the purest forms of chocolate we can eat is cacao nibs.

IMG_0529

These bitter, crunchy chocolate bits are peeled and crumbled from dried, whole cacao beans. They are PACKED with nourishing, fueling goodness! When we hear about chocolate being good for us, these little guys take the prize. One ounce (about 1/4 cup) of cacao nibs contains:

  • 35% of the recommended daily value of relaxing magnesium
  • 6 GRAMS of fiber, which fills us up and keeps things moving in our digestive system. Only about 3% of the population eats the adequate minimum intake of fiber, even though it is one of the main disease fighters, blood sugar regulators, and energy stabilizers out there
  • 4 grams of satiating protein
  • Over HALF of the recommended daily value of copper and manganese, trace minerals that help us with formation of tissues (like bones and skin), energy production, and blood sugar balance.

You can find them in the natural food aisle of your grocery store, but I find the best deals at HomeGoods or online at Amazon or Vitacost. Wegmans, Whole Foods, and MOMs Organic Market carry them as well.

You can enjoy cacao nibs in trail mix, cookies, chocolate bark, brownie bites, sprinkled on top of smoothies or avocado pudding (recipe coming!), and as a topping for my chocolate walnut brownies.

Check out SEVEN of my favorite cacao nib recipes below!

Click the picture to get to the recipe.

PB Oat Bites CoverIMG_2208Mint Choco Chip Bday Ballssuper food trail mixcherry choco biteschococherrybanner2barkmain

Celeriac: Give This Ugly Vegetable a Chance

Avocado. Eggplant. Sauerkraut.

Most of us can think of certain foods that we don’t like or refused to try at one point. As a recovering picky eater, I was often afraid to try new foods, especially foods that looked or sounded “weird” to me.

Sauerkraut, eggplant and avocado were all foods that I wouldn’t even try at one point in my life but have learned to like, and, in the case of avocados, LOVE.

We’re told not to judge something without getting to know it, but, let’s be honest, most of us do. One vegetable that I had seen multiple times and was curious but afraid to try because of how strange it looked was this…

celeriac

Celeriac (say, sa-LAIR-ee-ac) also known as celery root.

It’s a relative of parsnips, carrots and parsley, and its taste resembles celery but is slightly sweeter, nuttier and milder. It’s a great source of filling fiber and also contains quite a bit of vitamin K, which supports heart and bone health.

This root vegetable isn’t always easy to find here in the U.S. (I get mine at MOMs Organic Market or Whole Foods), but if you can find it, it’s worth trying! It can be served the same way as a potato (mashed, roasted, sliced into fries, steamed, and as a component in soups and stews), so it’s really versatile.

Check out the video below to learn how easy it is to get the skin off of this less than beautiful root veggie and for a few more tips about how to prepare it!

Then, try one of the celeriac-centered recipes below:

Smashed Celeriac by Jamie Oliver

Celeriac Mash by Paleo Leap. This is the recipe I made, but I added about 1 tablespoon of fresh thyme, used 4 cloves of garlic, and used veggie broth instead of chicken stock.

celeriac puree.jpg

Autumn Celeriac Puree by food52

Cauliflower Celeriac Soup by Cook Eat Paleo

Easy Celery Root Fries by The Spunky Coconut

Rosemary Roasted Celery Root & Carrots by Everyday Health

Roasted Root Vegetables with Tomatoes and Kale by Simply Recipes

roasted-root-vegetables-tomatoes-kale-vertical-a2-1200

Photo used with permission from SimplyRecipes


Which recipe do you want to try? Do you have another you’d like to share? Feel free to leave a comment below!


GBOMBS Spaghetti Squash Saute + How-To Video {Gluten-Free, Paleo}

I’ve been on a squash kick lately! From roasted butternut squash to creamy kabocha squash soup and even squash “pasta,” winter squash is one of my favorite foods because it’s versatile, delicious and nourishing.

Today we’re going to take a look at a squash that many of us have heard of before but might have been too intimidated to try making ourselves – spaghetti squash!

As someone who loved twirling pasta on my fork as a kid, this is a food that is fun to eat and play with…and it has lots of body-boosting benefits, too!

IMG_7154

Winter squash is packed with antioxidants that support our body from the inside out – vitamin A for our skin and eyes, vitamin C for antioxidant protection, fiber for fullness, and folate, a B vitamin that supports our body’s production of mood-boosting neurotransmitters.

For more info about the awesomeness of spaghetti squash, click here.

Now, I’m not going to lie to you and say that it tastes just like spaghetti (because it doesn’t…it’s a bit crunchier and a tad sweeter), BUT it does give you a similar experience and is basic enough to be paired with a variety of sauces – from pesto and marinara to pad Thai.

Check out my video below for the step-by-step instructions for how to prepare spaghetti squash and then buy some for yourself, so you can make one of the recipes below! It’s easier than you think 🙂 If you’re more of a picture person, check out this post I wrote for step-by-step pictures and directions.

I’ve included a recipe below for a winter veggie saute full of GBOMBS like shallots, garlic, dino kale, beans, berries and pumpkin seeds. Here are a few additional spaghetti squash recipes for you to try:

Spaghetti Squash Saute.jpg

Ingredients

1 large spaghetti squash
1/2 cup water
1 tablespoon ghee (clarified butter) or coconut oil
3 cloves garlic, minced
3 shallots, sliced
1 bunch dino kale (AKA lacinato or Tuscan kale), destemmed and chopped
1/4 cups water
1 15-oz can no-salt added cannellini beans, drained and rinsed
1/3 cup dried cranberries
1/3 cup pumpkin seeds, lightly toasted
1 tablespoon raw apple cider vinegar
Freshly cracked black pepper and sea salt to taste

Directions

1. Preheat oven to 400F.
2. Slice a line down the length of the spaghetti squash, about a half-inch deep or make several slits round the squash to allow steam to release. It’s usually too hard to cut in half at this point unless you have a really good knife.
3. Put the squash in a 9 x 13 baking dish in the oven for 25 minutes, so it can soften enough to easily cut it in half. Remove squash from the oven and let it cool enough to handle it. Cut it in half lengthwise. Scoop out the seeds with a spoon.
5. Put the squash cut-side down in the baking dish and fill the bottom of the dish with 1/2 cup water. Return squash to oven for about 30 minutes or until the squash easily pulls away from the shell. Let the squash cool and then scrape out the inside into strands with a fork.
6. In a large sauté pan over medium heat, sauté shallots in ghee (or oil) until fragrant, about 4-6 minutes. Add garlic and sauté 30-60 seconds. Add spaghetti squash, dino kale and 1/4 cup water and toss until the kale is wilted but bright green. Add beans and toss until heated through then add cranberries and pumpkin seeds. Remove from heat and sprinkle with 1 1⁄2 tablespoons apple cider vinegar.

Yay for Tempeh! Why We Love This Plant-Based Protein

I had never heard of tempeh until about two years ago when I was about to enroll in a Culinary Nutrition program.

One of the recipes my instructor, Meghan Telpner, had on her blog that I was curious to try was for Orange Maple Tempeh.

orange maple

I had never heard of tempeh (say TEM-pay).

I had no idea what it was.

And I wasn’t exactly jumping to try it because it sounded and looked, well…weird. I haven’t always been one to try “weird” foods, but I had gotten to a point in my food journey that I was more open than ever before.

What’s the worst that could happen? I wouldn’t like it? I was okay with that.

The rest of the ingredients in the recipe sounded so good that we decided to gave it a shot.

I’m so glad we did! It’s now one of our FAVORITE dishes…including my meat-eater husband, Bill. This is one of his go-to meals. If we had only five meals in our rotation for the rest of our lives, this would be one both of us would pick.

So, what exactly IS tempeh?

Tempeh is made from fermented soybeans (keep reading!) and is an excellent source of easily digestible, plant-based protein (15 grams per 3 ounce serving!) and fill-you-up fiber. Tempeh is a probiotic food, so it helps our digestive system (AKA our “gut”) produce healthy bacteria.

Having a healthy, well-fed gut is important for a strong immune system, so we want to make sure we’re including probiotic-rich foods in our diet. As I’ve shared before, 70-80% of our IMMUNE SYSTEM sits in and around our digestive system, so what we eat is critically important to our overall health, well-being and feeling good.

Tempeh has a “meatier” and denser texture than tofu and a mild, nutty taste, so it feels more like meat in a recipe than tofu does. If you’re a tofu hater (I’m not a huge fan of it), then give tempeh a shot. Tempeh can be baked, sauteed, grilled, and chopped up to be added to things like chili, salads, and stews. It can be a little tricky to figure out how to work with it the first time, but this post from onegreenplanet breaks it down into 5 easy tips:

5 Tips for Making Amazing Tempeh Dishes

Another perk is that tempeh is also a LOT cheaper than meat. One block of tempeh at my local market (MOMs) is $3.00. Not a bad deal for something that can serve as the main dish of a meal. We always make sure to buy organic tempeh, since the majority of soy crops these days are genetically modified. You’ll find tempeh in the refrigerated section of your grocery store next to the tofu.

Ready to give this lesser known protein a try? Here are our top two most favorite tempeh recipes (and great places to start for first-timers!). Click the picture to get the recipe.

orange maple.jpg

BalsMapleTempeh

And here are a few more tempeh recipes that we want to try.

Have you ever tried tempeh? Have you found any recipes you like that you want to share? Feel free to leave a comment or question below!

Apple Cinnamon Overnight Oats

When it comes to convenience, versatility and eating for energy, it doesn’t get much easier than overnight oats in a jar!

This is one of my go-to breakfast options and is perfect for busy mornings. Here are just a few more reasons I’m such a fan of overnight oats:

  • Change it up based on what you have on hand and what’s in season
  • Inexpensive ingredients that are pantry staples in our house
  • Eat them right out of the jar or heat them up on the stovetop, if you’d prefer something a little warmer
  • Make them a few days ahead of time for a ready-to-go breakfast
  • Involve your kids and let them get creative with toppings!

I’ve shared recipes for overnight oats before, including these Pumpkin Spice Overnight Oats and these “Berry” Quick Overnight Oats, but today’s recipe is for Apple Cinnamon Overnight Oats!

Oats aerial

I used some of my favorite seasonal ingredients, including crisp apples, warming cinnamon and crunchy walnuts. I used apples two ways – applesauce as the base and chopped apples as the topping. The chia seeds are filling and soak up some of the almond milk, helping everything come together…without cooking it!

I love the combination of apples and cinnamon, especially during the colder months, so that’s what inspired this particular combination.

Apple OatsOats aerialI had some fun making a video “how-to” in case you’re a more visual person and want to hear more about the benefits of each ingredient.

The full recipe is listed below, so check it out and give it a try!

Apple Cinnamon Overnight Oats

This is a quick and easy breakfast option for the busy person on the go! Make 2-3 ahead of time so you can prep once and eat multiple meals. It’s a time saver!

  • 1/4 cup unsweetened applesauce
  • 2 teaspoons chia seeds
  • 1/2-1 teaspoon cinnamon
  • 1/2 teaspoon vanilla extract
  • Pinch ginger
  • Pinch nutmeg
  • Pinch fine grain sea salt
  • 1/3 cup whole rolled oats (I use gluten-free)
  • 1/2 cup almond milk
  • 1/4 apple (chopped)
  • 4 walnuts (chopped)
  1. Stir applesauce, chia seeds, cinnamon, ginger, nutmeg, vanilla, and sea salt in the bottom of a mason jar.

  2. Add the oats and almond milk and stir everything together to combine. Cover with a lid and store in your fridge for at least 30 minutes, ideally overnight.

  3. Remove from fridge and stir in toppings. Eat directly from the jar or warm on the stove. Enjoy!

Optional toppings: 1 tablespoon nut butter, toasted coconut, hemp seeds, pumpkin seeds, 100% pure maple syrup, to taste

Like this:

Rachel D’s 30-Minute Meals: Veggie Pasta UNrecipe!

I’m usually a bit more on top of the whole Christmas shopping thing, but with all that has been on my plate this year, I really fell behind and started doing the bulk of my shopping on Friday.

Some people love the adrenaline rush of waiting until the last minute…I’m definitely not one of them!

After spending a few hours shopping on Friday with all the crazies, Bill and I were hungry and ready for dinner. Since we’d just spent money on gifts, I didn’t want to spend more money on food, so I was determined to make something using what was already in our fridge and pantry.

That’s how this (under) 30-minute meal came to be!

We had a box of Tolerant Foods’ red lentil rotini pasta, so I threw together a bunch of veggies from our fridge and a few simple add-ons like lemon juice, sea salt, and olive oil to give the dish some flavor.

tolerant rotiniTa da! Dinner is served 🙂

When I posted the picture on instagram and Facebook, a friend of mine asked the question, “Where’s the recipe??”

Short answer?

There isn’t one!

IMG_3337

Consider this an “un”recipe (you know, just like those “un”birthdays in Alice in Wonderland?!).

This is one of those dishes that I literally pieced together based on a template that works no matter what you have on hand. Check out the basic process below.

<30-Minute Meal Basic Ingredient List

  • Base: Quality, gluten-free pasta of choice (We use Tolerant Foods pasta because it’s packed with fiber and protein or brown rice pasta. Both are gluten-free and contain only ONE ingredient, which is ideal!)
  • Cooking Broth or Fat: Veggie broth, ghee, olive oil, coconut oil, or grass-fed butter
  • Aromatic Veggies: Onion (red, yellow or shallots), Garlic (2-4 cloves)
  • Simple Seasonings: Sea salt (coarse grain), Black pepper
  • Flavor Burst: Lemon
  • Finishing Fat: Extra virgin olive oil
  • LOTS OF VEGGIES! (cherry tomatoes, broccoli, bell peppers, squash, kale, spinach – add leafy greens at the very end)
  • Any add-ons like chickpeas, cannellini beans, chicken, fish, etc.
  • Top with fresh herbs like basil, parsley, rosemary, thyme, etc. And if you like other herbs and spices, add them in along the way!

Here’s the foolproof process to follow:

Cook the pasta – saute the veggies – blanch the broccoli – toss everything together – top with lemon juice and zest, olive oil, sea salt and pepper.

And for those of you who like more detail…here you go!

  1. Bring water to a boil in a medium pot. Add the pasta and cook according to package directions. During the last 90 seconds of cooking, add the broccoli florets to blanch them (quickly cook!).
  2. While you’re waiting for the pasta water to boil, heat a large skillet to medium-high heat. Cut onions into thin half-moon slices. Add a few tablespoons of veggie broth or cooking fat of choice to the skillet. Add onions and saute 5-7 minutes until they soften. Add more veggie broth as needed to prevent sticking. Add tomatoes and garlic and saute until you can smell the garlic.
  3. Once pasta is cooked and broccoli is still bright green, drain the water in a strainer and add the broccoli and pasta to the veggie skillet.
  4. Add sea salt and black pepper to taste and finish with the zest of one lemon and the juice of one lemon. I used half a lemon to start and added more as I tasted. Finish it off with a few drizzles of olive oil.

We topped ours with some paleo parmesan cheese 🙂 The combination possibilities are endless, so HAVE FUN with it…and get cookin’!

25 Energizing Breakfast Recipes {Gluten-Free, Dairy-Free}

For most of my life, the back of the cereal box was the highlight of my first meal of the day.

As much as I enjoyed starting my day that way, I’ve learned that typical breakfast cereals and other breakfast foods like donuts, bagels and granola bars are not the most filling or nourishing choices.

We’ve heard that breakfast is an important meal, and it’s true.

Eating breakfast helps us stabilize our blood sugar levels throughout the day, which affects things like our energy, alertness, and mood.

Not hungry when you wake up? You might have eaten too late the night before and spent your night digesting instead of repairing and resting. Another possibility is that you might not have gotten enough quality sleep and could still have some stress hormones floating around that are dampening your appetite.

When we grab something to “break the fast,” the key is to make sure we’re eating the most filling and satisfying combination of food to keep us going throughout the day. The secret to lasting energy and feeling satisfied after a meal is eating a combination of…

PFF

Fiber only comes from plants, so that would mean we want to include something that was growing in nature at some point. Protein can be plant-based or animal-based. Examples of healthy fats include things like nuts, seeds, avocado, wild caught salmon, and coconut.

Remember, breakfast is a time of day, not a group of foods. Anything is fair game!

Check out this video I put together that walks through some of my favorite breakfast ideas. Then, take a look at the links below that direct you to a bunch of the recipes I mention in the video!

Smoothies

Smoothies are a great way to jam pack nutrition in a glass, but drink them slowwwwly instead of downing them in 90 seconds, as I have a tendency to do. Smoothies are so easy to make as well and can be done in minutes with the help of the Best Juicer! Getting nutrients from veg and fruit has never been so easy.

Make sure you follow the guidelines of the PFF combo – protein, fiber AND some healthy fat in each smoothie. Most of the time when we make smoothies, we put in lots of fruit and juice and very little protein or healthy fats, so we spike our blood sugar and end up feeling hungry a couple hours later.

My basic formula for making smoothies looks like this: ~2 cups veggies (spinach, baby kale, lettuce, cabbage), 1 cup fruit (berries are best!), 1 -1.5 cups liquid, 2 tablespoons protein (nut butter, hemp seeds, protein powder) and then some add-ins like coconut oil, flax seeds, chia seeds, dates, cinnamon, or cacao powder. My preferred protein in smoothies are hemp seeds, sprouted pea protein, or sprouted brown rice protein (you can get all of them on Amazon). Sun Warrior and Vega are two good brands.

These are some of my favorite smoothie recipes, especially the Ultimate Pumpkin Pie Smoothie, Chocolate-Covered Cherry Smoothie, Caribbean Island Breeze, and this Snickerdoodle Smoothie.

Whip up a smoothie in the morning and put it in a thermos. It should stay cold for about four hours.

smoothie bannerIMG_6864

You can also find lots of free smoothie recipes here at Simple Green Smoothies.

Here’s a link to an awesome and FREE downloadable smoothie guide from the Academy for Culinary Nutrition that you can print out and put on your fridge.

I like smoothies, but I don’t drink them every day. Sometimes my body wants something warm or something a bit more savory like a frittata, so I pay attention to my cravings and eat accordingly!

Gluten-Free Grains

Sugary cereals aren’t the only bowl-based option for breakfast. Check out some of my favorite hot and cold cereal recipes below. I serve them with some almond milk or coconut milk. Yum!

PS Oatmeal Banner

Granola Aerial

No-Bake Bites

Enjoy these as a side to some fruit and/or veggies or oatmeal. If you make a lighter smoothie based mostly on veggies or fruit without fat, try these as a side to that, too. They also make a great snack!

coconut chai biteslacto cookies

Egg-Based Dishes

For more savory options, the dishes below are some of my absolute favorites. As the weather gets cooler, my body tends to crave these warmer, veggie-packed, nutrient-dense meals.

Beet Shakshuka Recipe from Two Moms in the Raw cookbookMexican Black Bean Scramble

Leftovers

Who says breakfast has to be a boring bowl of cereal? Have some leftovers from the night before? Heat them up for breakfast!

currycrock pot chili

Curry-Lime Chickpea & Protein-Packed Pasta {Gluten-Free}

After getting back from a long weekend away for Thanksgiving and my sister-in-law’s wedding (which was SO fun!), we hadn’t thought much about what we’d be eating for dinner this week.

So, when I got home from work tonight, I checked the pantry and fridge and used a few things we had on hand to whip up this recipe. That’s the value of having a well stocked pantry – even when you have no time and no plans, you can create a delicious dish pretty quickly without making a trip to the store.

This meal came together in about 20 minutes and was filling, delicious and nourishing (the trifecta of food awesomeness!). It showcases GBOMBS – some of the most anti-inflammatory, disease-fighting, immune-boosting, health-promoting foods we can eat!

If you’re not eating pasta because of the gluten or refined flours, keep reading! I have a solution for you 🙂

Meet, Tolerant Foods pasta.

Tolerant Green Pasta

I first tried their pasta last fall at the Natural Products Expo East in Baltimore. At the time, the only pasta I ate was brown rice pasta (ingredients = brown rice + water), but I was curious to try Tolerant’s pasta because it was made from one ingredient.

Beans.

Or, in this case, lentils.

We had tried the black bean variety and the red lentil version, but this year I was introduced to the latest and greatest addition – green lentil pasta.

Here’s why this pasta is so awesome.

Unlike regular highly processed pasta that’s usually made from enriched flours that can send our blood sugar (and energy levels and weight) on a roller coaster, Tolerant’s pasta is PACKED with satiating protein and fill-you-up fiber. 

Just over 1/3 of a box of the green lentil pasta has a whopping 21 grams of protein and 11 grams of fiber. It’s also full of energizing B-vitamins, iron and zinc. It’s also made with non-GMO, organic ingredients.

Green lentil label

What’s not to like??

The pasta cooks up in 8 minutes, making it a great option for a quick dinner. And because of its pale green color, it looks more like pasta than the red lentil or black bean pasta, so it would be an easier sell with kiddos or bean-based pasta skeptics.

It’s sold at a higher price point than a box of Barilla, but I focus more on nutrients/dollar than calories/dollar, so it’s worth it to me.

MOMs and Whole Foods sell Tolerant pasta (sometimes on sale!), but you can also buy their stuff online at Vitacost or Amazon. Check out this link to use the store locator to find where Tolerant sells their products near you.

Then, make this recipe 🙂 (And don’t mind the less than stellar pics taken from my iPhone without daylight!)

Curry Lime Chickpea PastaChickpea Pasta Pan

Ingredients

  • 1 tablespoon ghee (clarified butter) or coconut oil
  • 1 8-ounce box Tolerant pasta (or other gluten-free or bean-based pasta)
  • 1 medium onion, diced
  • 3 cloves garlic, minced
  • 1 tablespoon fresh ginger root, peeled and minced
  • 2 teaspoons curry powder
  • 1 15-ounce can chickpeas, no salt added, drained and rinsed
  • 1 cup full fat coconut milk
  • 4 cups fresh baby spinach, chopped
  • 1 1/2 tablespoons fresh lime juice
  • Coarse sea salt and pepper to taste

Directions

  1. Cook pasta according to package directions. Set aside 1/3 cup pasta water. Strain pasta and leave in strainer.
  2. Heat ghee or oil in large skillet over medium-high heat.
  3. Add onions and saute 5-7 minutes or until they start to soften. Add ginger, garlic, and curry powder and saute another minute or so. Add pasta water and stir to loosen up anything stuck to the pan.
  4. Add chickpeas, coconut milk and pasta and reduce heat to medium. Stir to combine. Add spinach and toss until coated and slightly wilted. Add lime juice and stir to combine.

I added some sea salt throughout, probably about 1/2 teaspoon total. How do you know when you have enough? If your food tastes flat or bland, add a little salt at a time to increase the flavor. The acidity from the lime juice, fat from the coconut milk, and spice in the curry powder give this dish a lot of flavor, so just add salt to your liking 🙂

Pumpkin Cheesecake Squares {Paleo, Vegan}

As we’ve been gearing up for Thanksgiving and experimenting with different dishes, I’ve been trying some new desserts.

Inspired by the textures of Meghan Telpner’s Rawmazing Key Lime Pie, I thought I’d infuse the flavors of fall into a melt-in-your-mouth, coat-your-tongue, creamy, no-bake cheesecake.

And I wanted an excuse to use pumpkin.

Pumpkin

Because I love pumpkin.

All things pumpkin.

Especially when it’s mixed with sweet maple syrup, creamy cashews, and warming cinnamon and ginger.

It’s my new go-to for a Thanksgiving dessert.

Cheesecake StackPSquare Closeup

Pumpkin Cheesecake Squares.

I’m going to keep it short and sweet here today because this recipe is that good, but all you need to know is it’s easy to make, doesn’t require baking, and is so addictive you’ll want to eat multiple squares at a time.

The creaminess comes from the raw cashews (don’t knock it ’til you’ve tried it), and the slight hint of tartness we’d usually get from cheese comes from a spoonful of lemon juice.

Happy Thanksgiving!

cheesecake banner

Ingredients

Base

  • 1 cup raw pecans
  • 1/2 cup raw walnuts
  • 1 cup Medjool dates, pitted (make sure they’re soft)
  • 1 tablespoon coconut oil, melted
  • 1/4 teaspoon cinnamon
  • Pinch fine grain sea salt

Filling

  • 2 cups raw cashews, soaked in water 2-4 hours then drained and rinsed
  • 3/4 cup pumpkin puree
  • 1/2 cup pure maple syrup
  • 1/3 cup coconut oil, melted
  • 1 tablespoon lemon juice
  • 2 teaspoons ground cinnamon
  • 1 teaspoon ground ginger
  • 1/4 teaspoon ground nutmeg
  • 1/8 teaspoon ground clove
  • 1 1/2 teaspoons vanilla extract

Directions

  1. Put all the crust ingredients into a food processor, and process until the ingredients stick together. Stop and scrape down the sides as needed. Press the crust mixture into the bottom of a square baking dish.
  2. Put all filling ingredients in your blender or food processor (high-speed blenders like a Vitamix or Blendtec work best) and blend until smooth and creamy. You may have to stop to scrape down the sides. I had to use the tamper for my Vitamix to get it to be smooth and creamy.
  3. Pour the filling evenly over the base and smooth with a spatula. Cover the dish and place it in the freezer to set for 4-6 hours.
  4. Let the dish sit at room temperature for 10-15 minutes and then cut into squares. I sprinkled a thin layer of cinnamon on top before serving.

Page 3 of 5

Powered by WordPress & Theme by Anders Norén