Deprecated: Creation of dynamic property GD_SEV_Plugin::$__FILE__ is deprecated in /var/www/wp-content/plugins/search-engine-visibility/classes/plugin.php on line 19

Notice: Function _load_textdomain_just_in_time was called incorrectly. Translation loading for the social_sharing domain was triggered too early. This is usually an indicator for some code in the plugin or theme running too early. Translations should be loaded at the init action or later. Please see Debugging in WordPress for more information. (This message was added in version 6.7.0.) in /var/www/wp-includes/functions.php on line 6121

Deprecated: Creation of dynamic property SocialSharing_Projects_Controller::$models is deprecated in /var/www/wp-content/plugins/social-share-buttons-by-supsystic/vendor/Rsc/Mvc/Controller.php on line 28
Products I Use Archives · Page 9 of 11 · Rachel's Nourishing Kitchen

Category: Products I Use Page 9 of 11

How to Stock a Healthy Pantry: My Top 10 Everyday Essentials! {Dairy-Free, Gluten-Free}

This post has been a long time coming, so I’m super excited to finally publish it!

A few of you have asked if I could put together a list of pantry items that I always have on hand and use frequently in recipes.

I’m going to be doing this a few times over the next few weeks starting off with two rounds of Everyday Essentials as well as Baking Basics, Smoothie Staples, and Herb & Spice It Up. All of these items will be gluten-free and dairy-free because that’s how I cook, and when I eat that way, my body feels its best and my skin glows 🙂

I could just give you a simple list of 10 items, but one of my goals is to get back to WHY eating these things is so good for us, rather than just “telling” you what to buy, so for each item, I’ll share:

  1. Why I love it
  2. How I use it (including all the recipes I’ve posted using that ingredient)
  3. Where you can find it

You don’t have to go out and buy all of these things tomorrow. Maybe add one or two a week to your grocery list and work up to having most or all of them on hand.

Remember, the health journey is a marathon, not a sprint!

I would love to hear your feedback about this post, so please take a moment to comment if you find this to be helpful!

IMG_5322

Raw Apple Cider Vinegar (ACV)

Why I Love It: I dedicated an entire post to ACV, so you can head over there to learn all the details about why I love this ingredient so much. In general, it supports healthy digestion, clear skin, and knocks out just about any incoming cold. My dad calls it “the concoction” and uses this detox drink at the first sign of a sniffle.

How I Use It: I use it as a staple ingredient in this salad dressing and this one, as a “splash” to cut the bitterness of sautéed greens like kale, collards, spinach or just drink it with a straw in a detox drink. One of my college professors now swears by the ACV detox drink for her family. I had the privilege of doing lots of research with her as an undergrad and she really encouraged me to pursue my passion for nutrition.

Where to Find It: The kind you buy is VERY important. You want to buy Bragg’s Raw Apple Cider Vinegar with “The Mother.” It has all the tummy-friendly enzymes in it that we want that the heat-treated, pasteurized versions of ACV lack. Most grocery stores sell Bragg’s ACV these days (I saw it at Safeway the other day), but I find it cheapest at MOMs Organic Market. You can also find it at Whole Foods, Wegmans, any natural food store, Health Food Online from Wholesome Hub or online at Vitacost and Amazon.

IMG_0015

Tahini

Why I Love It: Tahini is basically just a fancy name for sesame seed butter. It’s one of the main ingredients in hummus and makes salad dressings creamy. It’s a rich source of key minerals and healthy fats that our body needs to maintain healthy skin and muscle tone, and it’s higher in protein than most nuts. Check out this article about the top 10 reasons to add tahini to your diet.

How I Use It: Whenever we want to make a creamy salad dressing, we use tahini. It’s one of the key ingredients in our favorite kale salad and in this beautifying detox salad. You also use it to make hummus.

Where to Find It: You can usually find it in the international aisle at your grocery store. Otherwise, check out an ethnic grocery store near you or go to Wegmans, MOMs or Whole Foods. They all carry it. It’s also available online (like everything else these days!), so check out Amazon or Vitacost. We get ours from a little Mediterranean Café in Towson called Cedar Cafe because it’s cheapest there AND tastes the best (the one in the picture above).

IMG_5291

Tamari

Why I Love It: It’s a gluten-free alternative to soy sauce, so it typically does not contain wheat. Check out another blogger’s post about the differences between soy sauce and tamari. Gluten is a sticky protein found in wheat, barley and rye that is often found in condiments, so if you’re eating gluten-free, you can still have the flavor of soy sauce by using tamari. Even if you don’t have a gluten allergy or intolerance, you may find that you have fewer issues with bloating and other digestive annoyances when you remove gluten. Check out this blog post from one of the world’s top nutrition experts about going gluten-free. To avoid soy AND gluten, you can also use Coconut Aminos instead of tamari (surprisingly, they don’t taste like coconut!).

How I Use It: Whenever you would usually use soy sauce. We use it in salad dressings (including our favorite kale salad) along with these other recipes: Beautifying Detox Salad, The Ultimate “Noocho” Cheese Sauce!, and in these walnut tacos. We also use it whenever we make stir fries, so stay tuned for a simple stir fry recipe in the next 2 weeks!

Where to Find It: In the Asian food section of the grocery store, sometimes in the international aisle. Every grocery store I’ve been to sells it. If you opt for coconut aminos instead, you can find them at any natural food/health food store, Wegmans, Whole Foods, or online at Vitacost or Amazon.

IMG_5306

Coconut Oil

Why I Love It: For years, it has gotten a bad rap because of its high saturated fat content, but coconut oil contains a different kind of fatty acid that your body is more likely to burn as energy (without spiking your blood sugar) vs. store as fat like most other oils. It also has a higher smoke point and is heat stable, so you don’t have to worry about things like “does coconut oil go bad“, as this makes it a better option for cooking (we use it instead of olive oil, which is more delicate and heat-sensitive). Not only that, but the lauric acid in coconut oil can kill bacteria, viruses and fungi, helping to prevent infections and illness. Check out this post about coconut oil’s benefits from Kimberly Snyder, one of my favorite nutritionists.

How I Use It: Coconut oil is one of the most versatile items in our pantry. Whether I’m using it to saute or roast vegetables, make a crumble topping for a fruit crisp, glazed roasted peaches, firm up seductive raw chocolate fudge, create a chocolate shell for raw cookie dough bites OR moisturize my skin or lips, coconut oil is a must-have in our kitchen (and bathroom!). Read this article from Wellness Mama about 101 uses for coconut oil.

Where to Find It: We buy ours either online at Vitacost or Amazon OR wait for the sales at Whole Foods or MOMs Organic Market. I’ve also had some great coconut oil finds at Home Goods in their pantry section. Most grocery stores sell it these days, and I’ve even seen it at BJs Wholesale Club, so check out any of the stores above or your wholesale club for the best deal on coconut oil! Look for organic, unrefined, extra virgin, cold-pressed as keywords for the highest quality coconut oil.

IMG_5324

Raw Honey

Why I Love It: Raw honey is not treated by heat (which is why it is solid vs. runny and amber-colored), so it contains lots of health-promoting, illness-preventing, beauty-boosting nutrients that the commercial bottled bear honey lacks. In addition, locally produced raw honey often contains little bits of local pollen that can actually help with your seasonal allergies!

How I Use It: From salad dressings and cupcakes to raspberry lime popsicles, chia jams, and honey mustard sauce, we use this ingredient a lot! I try to use it most often in raw (uncooked) preparations because exposing it to high heat destroys a lot of the enzymes. I just find that I like the taste of raw honey better than the bottled bear stuff, so it’s become my go-to for honey in general. Here is a link to all my recipes that use raw honey.

Where to Find It: You can find raw honey at any natural food store, Wegmans, Whole Foods, MOMs and sometimes at farmer’s markets as well as online. If you are looking at manuka honey for sale, a lot of e-stores like Steens Honey and similar others sell raw, unpasteurized honey straight from mother nature herself. It is a fact that honey is beneficial for both our skin and body, the demand for raw honey, thus, tends to be very high.This is the kind we buy (pictured above).
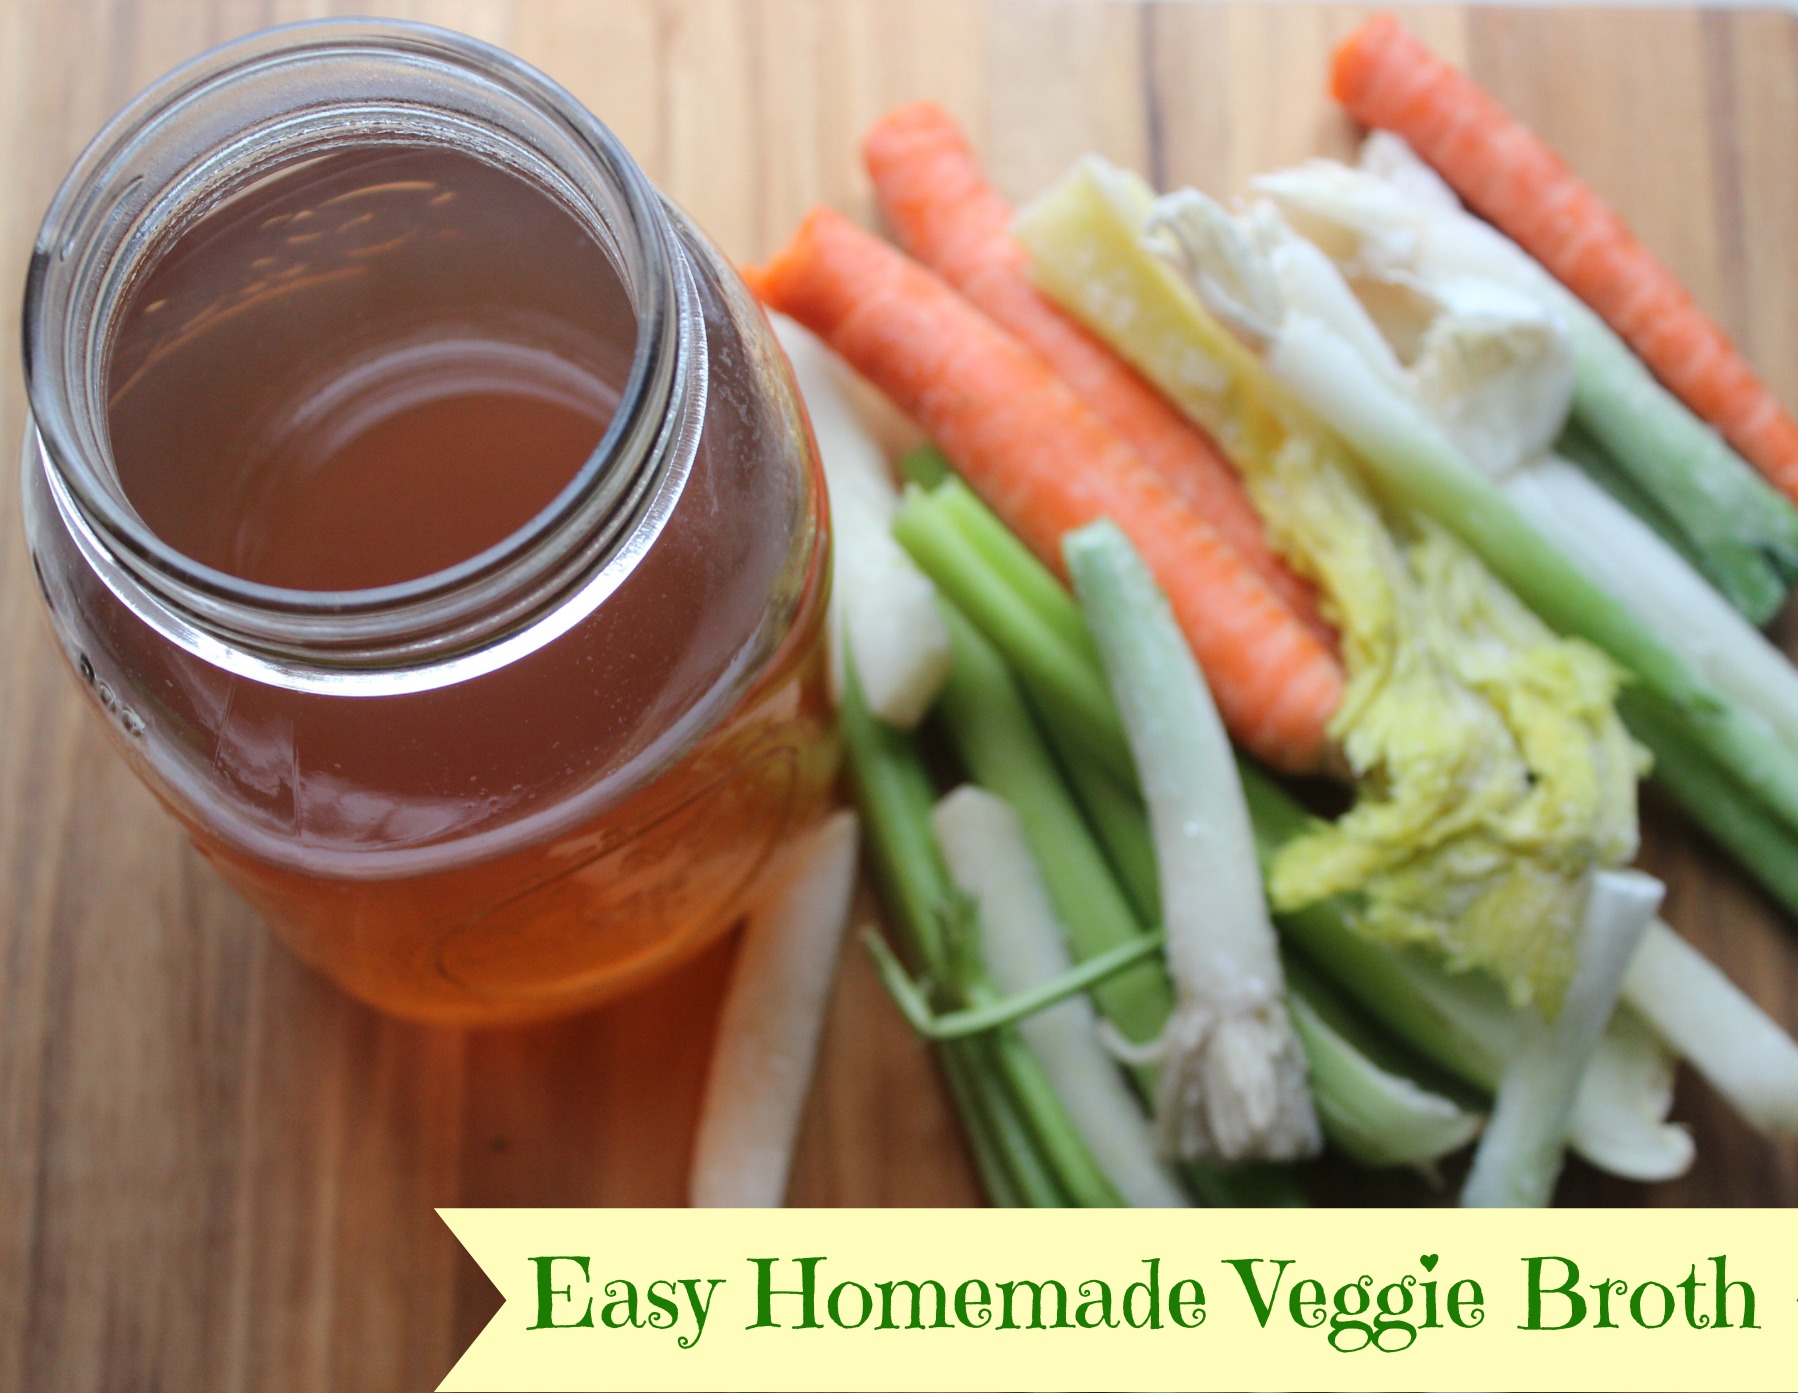
IMG_5289veggie broth banner

Vegetable Broth

Why I Love It: It’s a great way to add flavor to food and is something we always have on hand in the fall, since we like to make soup, especially when we have veggies to use up and nothing else to do with them. It’s versatile and flavorful.

How I Use It: I use it as the base for most soups (can’t wait to share soup recipes this fall and winter!). I also use it as an oil-free way to sauté or cook down vegetables on the stove. You can use it as an alternative to butter or oil but need to add enough to prevent your food from sticking to the pan, so add as you go. I also add a few splashes of it in with greens (kale, Swiss Chard, spinach) when I’m sautéing them on the stovetop to help them cook down.

Where to Find It: UPDATE! I’ve found that it is SO much easier and A LOT cheaper to make my own vegetable broth from vegetable scraps I would have otherwise thrown away. Check out the simple process here for how to make your own vegetable broth.

IMG_5326

Lemons/Bottled Lemon Juice (Santa Cruz)

Why I Love It: In an ideal world, I would buy 5 pounds of lemons every week and squeeze out the juice as I go, since I use it in so many recipes. But, sometimes convenience prevails, and that is definitely the case with bottled lemon juice, which is always always in our fridge.

**I used to buy the lemon juice in the green bottle AKA “Real Lemon” but it turns out there are way more ingredients in it than just lemon juice, so I stopped buying it. It’s not the same as squeezing juice from a lemon, so opt for the Santa Cruz bottled kind instead if you’re making a recipe that calls for fresh lemons (or use the whole lemon!).

How I Use It: Mixed in with slightly warm water and a pinch of cayenne to get things moving in my morning detox drink, in smoothies (it helps break down oxalates in greens like kale, which get in the way of calcium absorption), and in everything from salad dressings and frosting to creamy, dairy-free cheesecakes and homemade pesto.

Where to Find It: In the bottled juice section of specialty food stores like Wegmans, MOMs, Whole Foods, and other natural food stores. Or just buy whole lemons. Every grocery store sells those!

IMG_5321

Nutritional Yeast

Why I Love It: Aside from its pretty awful name (can we opt to change it to “Nooch”?), this stuff is great. Since removing things like cheese, milk and cream from my diet, this ingredient, which is loaded with energy-boosting B vitamins, has been a lifesaver for me when I want to give foods a cheesy taste without using cheese. I wrote an entire blog post dedicated to nutritional yeast, so check that out for the 411.

How I Use It: Sprinkle it on popcorn, use it to make the BEST paleo parmesan cheese substitute (coming from someone who used to buy parm cheese by the family-sized container), noocho cheese sauce, pesto, and one of my favorite beauty detox salads.

Where to Find It: Every health food store sells this stuff, as do Whole Foods and Wegmans. You can also find it online at Vitacost or Amazon. I bought it the first time in a jar (above) and now I just get refills from the bulk foods section at MOMs Organic Market. It’s super cheap!

IMG_5325

Beans

Why I Love It: Beans are one of Dr. Fuhrman’s GBOMBS foods, making them one of the top anti-fat, anti-cancer foods we can eat. They are full of soluble fiber that keeps us energized and full for a long time (lentils fill me up longer than any other food!). According to one of my favorite nutrition experts, they “act as an anti-diabetes and weight-loss food because they are digested slowly, having a stabilizing effect on blood sugar, which promotes satiety (fullness) and helps to prevent food cravings.”

While it’s best (and cheapest!) to cook dried beans yourself, this is another situation when convenience wins out, so we usually opt for the Eden Organics line of canned beans. We always have black beans, garbanzo beans (chickpeas), kidney beans, and pinto beans on hand. Eden’s Aduki beans tend to be more easily digested than other beans, so they’re a good one to start with if you don’t eat a lot of beans now.

How I Use It: We put beans in lots of recipes! From soups, salads, and burgers to no-bake cookie dough bites (seriously!) and burrito bowls, beans are a staple at our house. Change up your beans and try different ones each week. Here is a link to all of my bean recipes.

Where to Find It: You can buy dried beans at any grocery store. We buy the canned Eden Organics beans at Wegmans, MOMs, or Whole Foods, but Amazon now sells them in their Amazon Pantry section, so check that out if you don’t live or work near a store that sells them. If you buy another brand of canned beans, make sure the cans don’t contain the chemical BPA (should say “BPA-free” on the label).

IMG_5287

Dijon Mustard

Why I Love It: I have to start by saying I used to HATE mustard. Well, I was so picky I actually didn’t eat any condiments until college (truth be told!). Unlike other condiments that tend to be loaded with chemicals and sugar, mustard tends to have a very simple and short ingredient list, and there are lots of varieties depending on your taste. I like Dijon the best.

How I Use It: It’s a great ingredient to have on hand for making your own simple salad dressings. You can combine it with lemon juice, olive oil and whatever herbs and spices you like for a tasty, healthy dressing that beats a bottle of store-bought dressing any day! I used it in this kale waldorf salad, crunchy chicken tenders, and easy honey mustard sauce.

Where to Find It: In the condiment aisle of the grocery store. We like the Organicville brand, which you can find at Wegmans, Whole Foods, MOMs, Fresh Market or a health food store. You might also be able to find it in the organic section of your grocery store.

So, what did you think? Was this helpful? Useful? Drop me a line and let me know!

Farmer's Market Salad with Better-Than-Kraft Raspberry Vinaigrette

Water, Sugar, Vegetable Oil (Soybean Oil, Canola Oil, Extra Virgin Olive Oil), Red Wine Vinegar, Vinegar, Contains Less Than 2% of Salt, Red Raspberry Juice Concentrate, Xanthan Gum, Citric Acid, Dried Onions, Spice, Poppy Seeds, Natural Flavor, Oleoresin Paprika, Potassium Sorbate And Calcium Disodium Edta (to Protect Freshness). Contains: Poppy Seed.

Those are the ingredients in a bottle of Kraft’s Lite Raspberry Vinaigrette.

Tasty, huh?

Most salad dressings we buy in the store contain lots of preservatives and chemicals, and as you can see above, very little (less than 2% each!) of real, whole food ingredients we’d expect to see in a salad dressing.

What’s most shocking?

Kraft’s raspberry vinaigrette doesn’t even contain raspberries!

Now there’s a head scratcher.

Homemade salad dressings are one of the easiest upgrades you can make to your diet. They take very little time to make and, in most cases, require either a whisk or a blender to mix everything together.

IMG_6178

That’s why I wanted to try a recipe for a homemade raspberry vinaigrette that tastes 100 times better than the bottled stuff…and actually contains raspberries! 🙂

I served it on top of a summer salad, whose recipe is below, but feel free to put it on any salad you like.

The dressing is inspired by this recipe, but I made several tweaks.

Farmer’s Market Salad with Raspberry Vinaigrette

IMG_6191

Dressing

  • 1/4 cup water
  • 1/4 cup raw apple cider vinegar (Bragg’s is the brand we use! Make sure it contains “The Mother”)
  • 3/4 teaspoon sea salt
  • 2 tablespoons honey (I used raw honey)
  • 1 teaspoon dried basil
  • 2/3 cup raspberries, fresh or frozen, thawed
  • 2/3 cup extra virgin olive oil

Salad (All veggies are ideally organic! Check out this post for how to save money on organic food.)

  • 1 head of lettuce of your choice or 6-8 cups of salad greens
  • 2 peaches, thinly sliced
  • 2 avocados, pitted, peeled and thinly sliced
  • 1 pint cherry tomatoes, cut in half lengthwise
  • 1/3 cup sliced almond, toasted
  • Optional: 1/4 cup fresh basil, thinly sliced into thin ribbons

Directions

  1. Combine all dressing ingredients in a blender for 30-60 seconds and liquify. If you have a Vitamix, follow these directions.
  2. Assemble salad and toss ingredients together, leaving almonds aside.
  3. Drizzle dressing on salad and sprinkle almonds on top. Toss to combine.
  4. Optional: Top salad with chicken or fish, or serve with a side of soup!

Heirloom Tomato & Chickpea Summer Salad

I used to hate tomatoes. 

I don’t know what it was specifically that fueled my aversion, but unless they were blended together in pizza sauce or in my can of Spaghettios or Beefaroni, I wanted nothing to do with them.

IMG_5520

Fortunately, over the years as I’ve opened myself up to foods and giving them a second chance rather than immediately writing them off, I’ve found that I really like tomatoes.

Especially heirloom tomatoes.

If you want to learn all about heirloom tomatoes, check out this link by a guy who has an entire website devoted to tomatoes!

I also pulled this little bit of info off of Hometown Harvest’s website. I’ve met the owners, Tony and Abby, and respect and admire their approach to food and the fresh, local products they source to their customers, which is why Bill and I switched from a different produce delivery company to Hometown Harvest.

An heirloom tomato is an open-pollinated tomato whose seed grows “true to type”—meaning, if you plant Cherokee Purple seed, you’re going to get Cherokee Purple plants. From generation to generation, that seed will stay true. Some heirloom tomatoes have, in fact, stayed within one family and so are heirlooms in the truest sense of the word. Other heirloom tomatoes circulate widely.

Beautiful heirloom tomatoes

Beautiful heirloom tomatoes

Heirloom tomatoes also tend to have a thinner skin and are more prone to bruising and puncturing, so it’s important to handle them carefully. Their flavor is second to none, and they come in lots of different colors, so they spruce up the plate!

I made this recipe using heirloom tomatoes for the first time last summer and LOVED it.

Oh my goodness it is so tasty!  It was the perfect way to use the heirloom tomatoes we got in our Hometown Harvest bag this week and at the farmer’s market in Easton, Maryland on Saturday morning.

If you like to “go downy ocean, hun,” you should plan to stop by Easton’s farmer’s market on your way to or from the beach.

We’ll be making this dish tomorrow night for Meatless Monday. Give it a whirl if you’re looking for something new to try. Enjoy! 🙂

Heirloom Tomatoes & Chickpea Summer Salad

IMG_2704 - Version 2

Ingredients

Serves 6

Base

  • 2 large heirloom tomatoes, sliced into 1/2 inch discs (or whatever thickness you like!)
  • 1-2 handfuls of fresh greens or lettuce of your choice

Chickpea Medley

  • 5.5-6 cups cooked (~ 3 15-ounce cans) garbanzo beans (chickpeas), drained and rinsed (We like Eden brand!)
  • 5 ounce baby spinach
  • 1.5 cups cilantro, large stems removed (or parsley if you don’t like cilantro or want a milder taste)
  • 3/4 cup red onion, chopped finely

Dressing

  • 1/4 cup fresh lime juice
  • 2 tablespoons extra virgin olive oil
  • 2 garlic cloves, minced
  • 1 teaspoon ground cumin
  • 1 teaspoon 100% pure maple syrup (or other liquid sweetener)
  • 3/4 teaspoon sea salt + ground pepper

Arrange the tomato slices on top of the greens and then follow this link to the full recipe for the medley and dressing from one of my favorite vegan bloggers over at oh she glows (she makes veggies taste fantastic!).

A New Veggie Recipe to Try (Plus Natural Heartburn Relief!)

Bill and I love going out to new restaurants to eat, but doing that more than a couple times a month can really add up!

Sometimes, we choose to create our own meals at home for a fraction of what we would have paid at a restaurant.

Plus, we don’t have to worry about tacking on a tip to the meal or running late (which never happens… 🙂 )

Out to dinner at Woodberry Kitchen, one of our favorite restaurants, for our one-year anniversary

Out to dinner at Woodberry Kitchen, one of our favorite restaurants, for our one-year anniversary

When we were figuring out what to make for dinner the other night, we decided to try a new vegetable. It keeps the meal exciting and makes it more like a true restaurant experience.

Not only that, but the vegetable we used has some serious medicinal/healing properties that help our digestive system work better (bonus!).

As I’ve been working on healing my digestion over the past few years (it’s a process!), I’ve learned a thing or two about what foods make it work best. After years of going from doctor to doctor, surgery to surgery and pill to pill to “fix” me, I finally feel like I have some answers…and let me tell you, it has been a really empowering experience and confidence-booster!

Apparently, the combination of all of the antibiotics I took as a kid and the 10 years of daily acid reducers as an adult, along with the lifetime impact of eating lots of processed, packaged foods and what turned out to be problem foods for me (dairy and wheat) did a number on my digestive system.

I didn’t know it at the time, but they were also some of the reasons I used to get sick so often, struggled with 15-20 pounds that just wouldn’t budge, and why I had lots of bloating, gas, and other digestive frustrations. Sounds like a party, right?

I had no idea that 70-80% of my immune system was located in and around my digestive tract, mainly my intestines. By healing my digestion, I would start to heal (and energize!) my entire body. Who knew??

The main reason I’m such a fan of this lesser known veggie is because of how healing it is for the stomach and rest of the digestive system.

It’s also a potent cancer fighter.

Fennel bulbs

Funky-looking fennel bulbs!

Meet fennel.

Fennel is a plant that most of us have heard of but few of us have actually bought/prepared/eaten. It has a very mild licorice flavor and is subtly sweet.

You’ve probably walked by it at the grocery store, given it an odd look, and thought, “What the heck is that, and what do I do with it??” I’m here today to tell you!

Fennel and licorice are both known as digestive soothers, and many people (especially those with reflux/heartburn/indigestion) find that drinking fennel tea, and taking either digestive enzymes containing fennel or DGL (deglycyrrhizinated licorice) tablets before a meal promotes improved digestion. My mom now swears by DGL tablets, and I’ve had lots of success taking them myself.

DGL tablets create a soothing coating that lines your digestive system prior to eating, which calms and soothes your digestive tract and reduces the likelihood you’ll have to deal with indigestion, gas and bloating. Pretty cool, right?

Click this link or this one to order DGL tablets and learn more about them. Talk to your doctor or to a functional medicine doctor about whether these could be a good option for you.

Now, back to the veg!

Fennel tastes delicious when roasted, so that’s how we prepared it today.

We served the roasted fennel with some local, grass-fed beef tenderloin along with broccoli that was lightly steamed and then sautéed with roasted red pepper flakes, garlic, and some sea salt and pepper. It was a very tasty meal!

There you have it. Now you no longer have an excuse to ignore fennel at the grocery store or farmer’s market...and have lots of reasons to try this super healthy, medicinal veggie!

Easy Oven-Roasted Fennel

Roasted fennel with beautiful caramelization!

Roasted fennel with beautiful caramelization!

Ingredients

  • 1 pound fennel, quartered lengthwise (I used 2 bulbs)
  • 1-2 tablespoons of extra virgin olive oil or coconut oil
  • 1/2 teaspoon of sea salt, more to taste
  • freshly ground black pepper, to taste
  • juice from 1/2 lemon
  • Optional: sprinkle some freshly chopped rosemary on top before roasting

Directions

  1. Preheat oven to 475F.
  2. Follow the step-by-step pictures below to prep and quarter the fennel.  Cut off the green stalks and a 1/2″ disc from the bottom of the bulb, and remove any discolored outer leaves from the bulb, so you’re just left with the white/light-green fennel bulb to quarter and roast.
  3. In a medium bowl, toss the fennel quarters with your choice of oil, sea salt and black pepper.
  4. Put the fennel on a parchment or foil-lined baking sheet, cut-side down, so they’re evenly spaced out. Roast for 15 minutes, or until the edges begin to brown. Flip the fennel to the other side and continue roasting until they are browned, about 10  more minutes.
  5. Place the fennel back in the bowl you tossed them with and squeeze the juice of half a lemon on top of the fennel. Toss to coat evenly.
Chop off the bottom tough disc - about 1/2"

Chop off the bottom tough disc – about 1/2″

Chop off the tougher green parts. You can save them and throw them into soups as you would celery. You can save the fuzzy parts (AKA fronds) and use them as decoration like you would dill.

Chop off the green stalks. You can save them and throw them into soups as you would celery. You can save the fuzzy parts (AKA fronds) and use them as decoration like you would dill.

Chop the white bulb into quarters

Chop the white bulb into quarters

This is what the bulb looks like inside once you've quartered it

This is what the bulb looks like inside once you’ve quartered it

Give it a nice drizzle of coconut or olive oil along with some sea salt and black pepper before putting it in the oven to roast!

Give it a nice drizzle of coconut or olive oil along with some sea salt and black pepper before putting it in the oven to roast!

Chunky Monkey Peanut Butter Chocolate Milkshake (Dairy-Free)

If you…

Are a chocohalic craving healthier sweet treats.

Love the taste of peanut butter and chocolate, especially in cool, creamy desserts.

Don’t want to deal with the bloating and tummy ache that usually follows a thick, dairy-based milkshake…

Then you have to try this chunky monkey peanut butter chocolate milkshake!

IMG_5106

Peanut butter + chocolate is one of my absolute favorite food combinations, and they come together wonderfully in this recipe.

I was inspired by a recipe I found on The Detoxinista’s website for a Chocolate Peanut Butter Shake and put my own spin on it to come up with what is now one of my favorite smoothie shakes.

I subbed in raw cacao powder for the cocoa powder. Raw cacao powder is loaded with disease-fighting, anti-aging antioxidants along with tons of other vitamins and minerals.

Because it’s not heat-treated like traditional cocoa powder, cacao powder has more nutrients intact. It’s our go-to add-in to give smoothies, shakes and desserts a chocolatety tasteThis is where we buy cacao powder, but you can find it at any health food store, Wegmans, and even at Home Goods.

This smoothie shake tastes so creamy, rich and decadent that you won’t believe it’s healthy. Like all of my recipes, it’s dairy-free, so it’s easier on your stomach and digestion than milk/yogurt/ice cream-based shakes.

Goodbye, tummyache…hello, tasty shake! 🙂

Chunky Monkey Peanut Butter Chocolate Milkshake (Dairy-Free)

Peanut butter chocolatey goodness!

Peanut butter chocolatey goodness!

Servings: 2 (cut recipe in half for a single serving)

Ingredients* (see notes below)

  • 1 1/2 cups almond milk, homemade or store-bought
  • 2 frozen bananas (Make sure you peel them before freezing them. We keep a stash in our freezer)
  • 2 tablespoons raw cacao powder
  • 1 teaspoon pure vanilla extract
  • 2 tablespoons ground flaxseed/flax meal
  • 3-4 tablespoons natural peanut butter
  • 3 large Medjool dates, pitted
  • 1-2 handfuls baby spinach (you won’t taste it, I promise!)
  • Optional: 1 tablespoon raw cacao nibs

Directions

  1. Put all ingredients in a blender for 30-60 seconds, starting with the liquid first.
  2. Sprinkle some raw cacao nibs on top for a little extra crunch!

A few notes about the ingredients:

  1. We buy Silk Vanilla Unsweetened almond milk when we don’t make it ourselves. Making it is surprisingly easy though!
  2. The fiber and omega-3 fats from the flaxseed help to fill you up and give your body a dose of brain and heart healthy fats.
  3. When we buy peanut butter, we buy brands that have no added sugars, oils or salt. Ideally, the only ingredient on the ingredient list will be “peanuts.”
  4. If your dates are hard, soak them in warm water for 10 minutes to soften them up before blending. It will make it easier.

The Easiest Chocolate Chip Cookies You'll Ever Make (Gluten-Free, Too!)

IMG_5301

Who doesn’t love chocolate chip cookies?

I have lots of memories baking with my mom as a kid and eating gobs of Nestle Tollhouse cookie dough by the spoonful with my brother.

When I found today’s recipe and saw how simple it was (and how basic the ingredients were!), I had to give it a try. I welcomed the addition of peanut butter into the mix because peanut butter makes just about everything taste even better 🙂

The dough is free of refined white sugar, the usual 2 sticks of butter, and white flour in a traditional chocolate chip cookie recipe, but make no mistake, even without those ingredients, these cookies are DELICIOUS, and I bet you already have ALL of the ingredients in your pantry!

I gave a fresh just-out-of-the-oven cookie to Bill, and he took one bite, gave me a look that said “holy cow these are awesome” and then proceeded to finish off the rest of cookie in a single bite! We will be making these simple cookies again and again, and I guarantee you (and your kids) will love them.

Gluten-Free Peanut Butter Chocolate Chip Cookies

IMG_5308

Servings: Our batch made about 18 cookies

Ingredients

1 cup creamy peanut butter, unsalted (preferably organic)
1/3 cup honey or maple syrup (we used honey)
1 whole egg, or a flax egg
1/2 teaspoon baking soda
1/2 teaspoon sea salt
3/4 tsp vanilla extract* (I added this ingredient to the original recipe)
1/2 cup dark chocolate chips (We use Enjoy Life dark chocolate morsels since they are free of dairy, gluten, and soy and contain only 2 ingredients)

*As you’ll see where I starred above, I added about 3/4 tsp of vanilla extract (what cookie is complete without vanilla?!), and I think that helped to further enhance the flavor. Click here for the full recipe from The Detoxinista!

Tart & Tangy Raspberry Lime Popsicles

Growing up, I was always jealous of the kids who went to the beach for vacation.

Despite the fact that I’ve lived in Baltimore my whole life, the first time I ever went to Ocean City, Maryland in the summer was for “Senior Week” after graduating from high school.

When I was a kid, I went on vacation with my family to the Adirondack Mountains of Upstate New York, where my mom spent her summers as a kid.

As an adult, I truly appreciate the Adirondacks and still spend a week of every summer up there with my husband and family. I now look forward to the beauty, solitude and slower pace of mountain life.

A beautiful view from an Adirondack mountaintop

A beautiful view from an Adirondack mountaintop

But when I was a kid, the mountains weren’t exactly “the place to be” in the summer.

It wasn’t cool to have to drive 8+ hours to get to our vacation spot when all of our friends and classmates had a 3 hour drive to the beach. As a 14-year-old, spending 1-2 weeks in a cabin in the woods with no friends wasn’t as appealing as walking around on the boardwalk, playing in the ocean and sand, or laying out on a towel at the beach.

Though I didn’t always appreciate the awesomeness of the mountains as a kid, there’s one thing I always loved about being “Up North.”

Wild raspberries.

Can't get enough of these berries!

Ever since I was a little girl, I have loved raspberries.

To this day, I still can’t find anything that matches the taste of freshly picked wild raspberries from bushes lining the mountain roads. Maybe it’s the clean, crisp, cool mountain air. Whatever it is, I can’t get enough of them.

For today’s super simple, kid-friendly recipe, I used black raspberries, but feel free to use red raspberries instead! Either one will work.

Black raspberries give these popsicles their bright pink color. So pretty!

Black raspberries give these popsicles their bright pink color. So pretty!

Berries are one of the anti-cancer, anti-fat storage GBOMBS foods. They are also lower in sugar than almost any fruit, especially raspberries, which contain a mere 5 grams of naturally occurring sugar in a one cup serving.

Raspberries are high in filling fiber and are supercharged with disease-fighting, anti-aging antioxidants. Click here to read even more about the amazing health benefits of raspberries!

The pairing of

Ingredients

  • 1.5 cups fresh raspberries (I used black raspberries for this recipe, but you could use either kind or combine them!)
  • 1 can full fat coconut milk
  • Juice of one lime
  • 2 teaspoons pure vanilla extract
  • 1/4 cup pure maple syrup or honey (I used raw honey when I made them but plan to try the maple syrup option next time!) 

Directions

  1. Put all ingredients into a high-speed blender and blend until smooth.
  2. Pour mixture into popsicle molds and freeze until solid.
  3. Gently remove the popsicles from the mold by running the mold under warm water until the popsicle pops out.
  4. Enjoy!

tart raspberries with tangy lime juice and creamy coconut milk makes for a refreshing sweet treat that you and your kids will love!

As always, these popsicles are dairy-free, so everyone can enjoy them. 🙂

Tart & Tangy Black Raspberry & Lime Popsicles

IMG_5217

Ingredients

  • 1.5 cups fresh raspberries (I used black raspberries for this recipe, but you could use either kind or combine them!)
  • 1 can full fat coconut milk
  • Juice of one lime
  • 2 teaspoons pure vanilla extract
  • 1/4 cup pure maple syrup or honey (I used raw honey when I made them but plan to try the maple syrup option next time!) 

Directions

  1. Put all ingredients into a high-speed blender and blend until smooth.
  2. Pour mixture into popsicle molds and freeze until solid.
  3. Gently remove the popsicles from the mold by running the mold under warm water until the popsicle pops out.
  4. Enjoy!

No Bake Chocolate-Covered Cookie Dough Bites

Nom nom (vegan) cookie dough!

Nom nom (vegan) cookie dough!

When I was a kid, there was nothing better than licking the spoon from the batter bowl of a fresh batch of Nestle Toll House chocolate chip cookies. In my lifetime, I’ve probably eaten the equivalent of about 5 dozen cookies worth of cookie dough that way. SO yummy!

Think that eating healthy means “giving up” things like cookie dough? Think again!

I found a recipe for vegan (= dairy-free!) chocolate-covered cookie dough balls that I had to try. It sounded interesting, and I was really drawn in by the picture on the website, so I went for it!

Cookie dough balls scooped out and ready to set in the freezer

Cookie dough balls scooped out and ready to set in the freezer

I shared these with my friend Michele the other day over lunch, and she loved them! She took one home to her 3-year-old son and said she will definitely be making them with him.

The main ingredient might be surprising, but somehow it works! Chocolate-Covered Katie (another super awesome blogger) is famous for her cookie dough dip, which was used as the inspiration for the filling in this recipe. Check her blog out, too, especially if you have a sweet tooth!

The chickpeas and almond butter in this recipe contain fiber, which helps control blood sugar, so they’re a better option than traditional cookie dough, which doesn’t have any fiber and can cause your blood sugar (and energy level) to spike and then crash. Focus on adding fiber to your sweet treats 🙂

No Bake Chocolate-Covered Cookie Dough Bites 

Yup. These are pretty awesome. I'll add a little more vanilla and salt next time.

Yup. These are pretty awesome. I’ll add a little more vanilla and salt next time.

Ingredients (see notes below*)

  • 2 cups (16 ounces) cooked chickpeas (AKA garbanzo beans), rinsed and drained*
  • 3 tablespoons raw organic honey* (use maple syrup for vegan-friendly option)
  • 1 tablespoon coconut palm sugar*
  • 1/8 teaspoon baking soda
  • 4 tablespoons raw organic almond butter*
  • 2 teaspoons vanilla extract
  • 1/8 teaspoon sea salt
  • 1.5 cups vegan chocolate chips*
  • I also melted about 1 tablespoon of coconut oil with the chocolate chips to create more of a chocolate shell 🙂

Click here for the full recipe from MindBodyGreen! The recipe calls for a double boiler, which I don’t have, so even though it’s not ideal, I microwaved the chocolate chips for 30 seconds at a time with the coconut oil, until they were melted. Definitely putting a double boiler on my wish list!

Ingredient Notes*

  • For chickpeas, I use the Eden brand canned ones for convenience.
  • Raw honey still has lots of enzymes and other health-promoting components intact, while regular honey does not. You can still use regular honey if that’s what you have on hand. Raw honey is worth trying though! Great flavor and healthy 🙂
  • You can find coconut palm sugar online (Vitacost, Amazon) or at MOMs, Whole Foods, Wegmans or Home Goods.
  • Don’t have almond butter? Sub in peanut butter for half or all of the almond butter for a different taste. Allergic to nuts? Use sunbutter made from sunflower seeds.
  • I use the Enjoy Life brand of mini chocolate chips because they’re dairy/nut/soy/gluten-free.

MYO Chipotle-Style Bean Burrito Bowl {Vegetarian, Gluten-Free}

One of the questions I’m often asked is:

How can I eat healthy without going broke or spending hours in the kitchen?

My kitchen is my happy place, and I love spending lots of time there, but I know that time and patience to cook tend to be on the short side for most people.

That’s why I’m sharing a SUPER simple recipe with you today. It’s cheap, easy, quick AND delicious! You can have dinner on the table in less than 20 minutes. 🙂

When I finished making this dish for the first time, my husband Bill said, “You’re done already?”

Yup! It was that quick!

After his first bite, he gave me an “Oh yeah” and said this is one of his new favorite dishes. Success!

If you like Chipotle or Qdoba but don’t want to spend $8/person on a meal, this could be a new “go to” recipe for you. I bet it will become one of your favorites!

Chipotle Bowl 2

Here are a few keys to keep in mind when making your own quick and healthy meals, which served as the motivation to test out this recipe!

  • Cook more, dine out less. You will almost always pay more to dine out than to make a meal yourself. On average, a McDonald’s dinner for a family of four costs almost $7/person compared to a dinner based on rice and beans, like this one, which costs less than $2.50/person.
  • Make some of your meals meatless. Meat and dairy products and processed foods tend to be some of the most costly items on a grocery bill. Swapping out meat with beans – even one day a week – can help you save money…and time!
  • Eat vegan before 6:00 p.m. Mark Bittman was given the choice to either go on medication or adopt a vegan diet. He didn’t want to do either, so he started eating vegan before 6:00 and then having smaller portions of high quality animal products at dinnertime. He lost 35 pounds and didn’t have to go on medication. Click here to learn more about his story and book. In the meantime, check out this awesome recipe!

RNK Chipotle Burrito Bowl

Chipotle-Style Bean Burrito Bowl

This is one of the most popular recipes on my blog and is always a crowd pleaser, even for people who claim to dislike beans and avocado! It’s also one of the cheapest meals you can make for a group!

Base Ingredients

  • 1 29-ounce can (about 3 cups) black beans or pinto beans (drained and rinsed (I use Eden brand))
  • 2 cups cooked brown rice (heat up a precooked frozen bag!)
  • 4 cups romaine lettuce (chopped)
  • 1 jar salsa
  • 2 avocados (diced)

Cilantro Lime Vinaigrette

  • 1/3 cup fresh lime juice
  • 1/3 cup cilantro (chopped)
  • 2 cloves garlic (minced)
  • 1 teaspoon honey
  • 1/2 teaspoon coarse sea salt
  • 1/4 cup extra virgin olive oil
  • Black pepper (to taste)
  • Pinch cayenne pepper ((if you like some heat!))
  1. Whisk vinaigrette ingredients together.

  2. In a large bowl, combine rice, beans, salsa, avocado, and lettuce. Pour the vinaigrette on top, and toss all ingredients together to combine. Serve immediately.

If you want to save this for 2-3 days, add the lettuce and avocado when ready to serve to prevent browning and preserve freshness.

Optional add-ons: grilled or sautéed meat or seafood and/or sautéed veggies (onions, peppers…whatever you like!)

Optional topping: dairy-free sour cream


2-Minute Peanut Butter Banana Ice Cream!

I scream, you scream, we all scream for (peanut butter) ICE CREAM!

I grew up loving ice cream and had an ice cream cake for every birthday, but since I’ve cut out dairy products, I’ve had to come up with other options.

With the weather getting warmer (finally!) and summer on its way, I wanted to share this recipe to give you a healthier option for ice cream! You can make it in the best ice cream maker you have, or use the method I have planned out below!

Today’s recipe for peanut butter banana ice cream is incredibly simple, kidfriendly, and deliciously dairyfree.

It turns out JUST LIKE soft serve ice cream in texture and consistency, so I know it will become one of your new favorites!

Even the ingredients are simple. In fact, you probably already have all of them on hand! Not only that, but this is a GREAT way to use up bananas that have seen better days rather than throwing them away 🙂 Just peel and then freeze them so you’re always prepared to make banana ice cream!

pb-ice-cream-scoop

Ingredients

  • 2 ripe bananas, peeled, frozenm and cut into 1/2″ discs
  • 2-3 tablespoons natural peanut butter
  • 1/2 teaspoon vanilla extract
  • pinch of sea salt
  • Optional: 1/4 avocado for extra creaminess

Chocolate Peanut Butter variation: Add 1-2 tablespoons cacao powder (to make peanut butter chocolate ice cream!)

Directions

Banana discs and peanut butter ready to go!

Step 1: Frozen banana discs and peanut butter ready to go!

Step 2: Put the bananas in the food processor (we used a mini one)

Step 2: Put the frozen bananas in the food processor (we used a mini one)

This is the big food processor we use and this is the mini one. You can make the banana ice cream in either one. We bought our mini one at Home Goods for about $28!

Step 3: Grind the bananas until they resemble this gravel-like consistency

Step 3: Grind the bananas until they resemble this gravel-like consistency

Step 4: Keep pulsing until the bananas resemble this consistency and then add in the peanut butter, vanilla extract and salt

Step 4: Keep pulsing until the bananas resemble this consistency and then add in the peanut butter, vanilla extract and salt. If making chocolate peanut butter ice cream, add the cacao powder at this point, too.

Tada! Peanut butter banana ice cream!

Tada! Peanut butter banana ice cream!

Page 9 of 11

Powered by WordPress & Theme by Anders Norén