Category: Dairy-Free Page 2 of 20

Apple Cinnamon Quinoa Breakfast Bowl

I just finished up teaching a two-part series about Healthy Meal Planning Made Easy at the Institute for Integrative Health. We had a great time and made some tasty recipes. I love showing how eating well can be easier, more fun, and delicious, and these classes are the perfect opportunity for me to do that.

I summed up my top healthy meal planning tips from week #1 in this post and shared links to over a dozen simple recipes, including the mason jar salad and tropical-inspired smoothie we made and sampled during the session.

In class #2, we focused on batch cooking, my favorite gadgets, the ultimate food storage guide, and my top tips for eating healthy on the go. Batch cooking is a technique of preparing larger quantities of simple foods that can be mixed and matched throughout the week. I love what Nutrition Stripped has to say about strategies for how do this in her Batch Cooking 101 blog post.

We kicked off the class with a sample of one of my favorite new packaged foods – Swapples – which is a new spin on a traditional waffle. Swapples are gluten-free, vegan, and paleo and can be used as the base of or topping for just about any meal. We tried the Tomato Pizza version, which I’d recommend dipping into marinara sauce!  For the “eating on the go” part of class, we also sampled one of my favorite real food snack bars – an Almond Cranberry Everbar.

We had fun playing with our food and making this easy 10-minute white bean, tomato and zucchini noodle saute. Two brave volunteers came up to help me spiralize the zucchini into noodles and did a great job! Want to get your own spiralizer? Check out this one.

Since one of the main concepts I wanted to introduce was batch cooking, we talked about how to use quinoa two different ways – one savory preparation and one sweet. If you prepare a big pot of plain quinoa (let’s say you cook 4 cups) at the beginning of the week, you can use it for a number of different dishes. If you’ve ever made a mistake cooking a batch of quinoa and ended up with a giant mass or unevenly cooked pieces, read this post that reveals the SECRET to cooking perfect quinoa…every time!

You can use it as the base of grain bowl like this Sweet Potato, Edamame & Quinoa Bowl that was a BIG hit. You could substitute it rice in a stir fry, toss it into a soup or stew or on top of a salad, or use it to make a breakfast bowl. Think of the quinoa as a substitute for oatmeal. Since it’s already cooked, this is a great way to save time in the morning. I’m going to experiment with other versions of this recipe that combine different ingredients, but this is a simple one to start with, so I hope you’ll give it a try!

Apple Cinnamon Quinoa Breakfast Bowl

This tasty and easy breakfast is a great way to use leftover plain quinoa.

  • 1 cup cooked quinoa
  • 1/2 cup almond milk
  • 1/2 cup unsweetened applesauce
  • 1/2 teaspoon cinnamon
  • 1 pinch ground ginger
  • 1/2 teaspoon vanilla extract
  • 1/8 teaspoon fine grain sea salt
  • 2 tablespoons almond butter
  • 1 tablespoon 100% pure maple syrup
  • 1/2 apple (diced)
  • 1/4 cup walnuts (chopped)
  1. Combine all ingredients except apple and walnuts in a small saucepan on the stove over medium low heat, stirring until heated through and quinoa begins to thicken, about 8-10 minutes.

  2. Pour into bowls and top with chopped apple, walnuts, and, if needed, a light drizzle of maple syrup.

You can also top this dish with pumpkin seeds, sunflower seeds, chopped almonds or hemp seeds.

White Bean, Tomato & Zucchini Noodle Saute

Pasta was my favorite food group growing up.

Whether it was Spaghettios, Beefaroni, or buttered egg noodles or angel hair, I LOVED all things pasta. I’ve come to upgrade my preferences these days and prefer protein and fiber-packed lentil pasta, brown rice pasta, or the easiest and most nourishing choice out there…

Zucchini noodles!

AKA “zoodles.” 🙂

You can buy zucchini noodles at a lot of grocery stores for convenience, BUT it’s so much cheaper (and way more fun!) to make them yourself. The simple gadget you use to make them is called a spiralizer.

I did a video about how to use a spiralizer when I JUST started making videos a few years, so don’t mind the less than stellar quality! I plan to update this with a better version soon, but it makes the point, so I’m keeping this one here for now.

You can eat the zoodles raw or lightly saute them, which is what I did for today’s recipe. If you eat them raw, I find that it helps to let them “sweat” on a paper towel for about 10 minutes before adding them to a salad, so they stay crunchy.

I had some garlic, cherry tomatoes and leftover cannellini beans that I wanted to use up, so I decided to toss all of them together to come up with this dish. Something like this takes just a few minutes to put together, so it’s convenient if you’re in a time crunch. Using fun kitchen toys like a spiralizer is also a great way to include your kiddos in the meal-making process. If you make cooking fun, they (and you!) will be more likely to want to do it instead of feel like you have to do it.

You can modify this recipe based on other ingredients you have on hand. Adding asparagus would be a great idea this time of year, since that is in season. Even though I didn’t use it this time around, I’m going to add some fresh basil the next time I make this dish because I think it will really make it pop and add another layer of flavor and color. I add leafy greens to my meals as often as possible!

White Bean, Tomato & Zucchini Noodle Saute

This quick and easy dish comes together in minutes and is a great way to highlight spring and summer veggies!

  • 2 zucchini (spiralized)
  • 2 tablespoons olive oil (extra virgin)
  • 2 cloves garlic (minced)
  • 1 cup cherry tomatoes (sliced in half)
  • 1 cup cannellini beans (drained and rinsed)
  • Pinch sea salt (to taste)
  • 1/2 teaspoon lemon zest (optional)
  • 1/4 cup fresh basil leaves (torn)
  1. Use your spiralizer to make zucchini noodles with your zucchini. Cut them with scissors, so you don’t have one long noodle.

  2. In a large saute pan, add olive oil over medium high heat. Add garlic and saute for 30 seconds or until fragrant. 

  3. Add cherry tomatoes, cannellini beans, and a pinch or two of salt and saute for about 5 minutes. Add zucchini noodles and saute for 2 more minutes or until heated through. Taste and add additional salt, if needed.

  4. Pour contents of pan into two bowls and top with basil leaves and lemon zest. 

I like to top any kind of pasta with my favorite paleo parmesan cheeze made with cashews and nutritional yeast. Here is the 3-ingredient recipe for that!

Vegan Carrot Cake Smoothie

Since I’ve been feeling better, I’ve been back in the kitchen experimenting with recipes. My most recent hit was this vegan, gluten-free carrot cake muffin topped with creamy cashew icing. If you haven’t already tried it, you totally should!

It’s been a while since I posted a new smoothie recipe, but since I was already tinkering with the ingredient profile for carrot cake, I thought I’d try coming up with a carrot cake smoothie.

Some recipes come together easily, and after one or two attempts, it ends up tasting good. This smoothie took about six attempts before I came up with something that I really liked! I have to give a shout out to my friend, Kat Downs, who writes the awesome blog, Crunchy Kat, for being willing to be a recipe tester for me! She will be featured in my next blog post, so I’m really excited for you guys to meet her.

In the meantime, give this tasty carrot cake smoothie recipe a try. You might be surprised to find that it contains a secret ingredient you won’t even taste that will give you an extra serving of vegetables. When I think of upgrading what I eat, this is one of the easiest ways to do it!

Vegan Carrot Cake Smoothie

If you like all the flavors of carrot cake as much as I do, you’re going to love this creamy, dreamy smoothie!

  • 1/2 cup carrots (peeled and chopped)
  • 1/2 zucchini (peeled and chopped)
  • 2 tablespoons raw cashews
  • 1 Medjool date (pit removed)
  • 1/2 teaspoon cinnamon
  • 1/4 teaspoon ground ginger
  • 1 pinch nutmeg
  • 1 pinch sea salt
  • 1/4 teaspoon vanilla extract
  • 3/4 cup unsweetened almond milk
  • 1 piece frozen or fresh pineapple (Trust me, this makes a difference!)
  • 1 frozen banana
  1. Add all ingredients through almond milk to the blender and blend until smooth.

  2. Add frozen fruit and blend until creamy. 

For some reason, I find that the smoothie turns out a bit creamier when you combine all ingredients besides the frozen fruit FIRST and then add it, but you can totally just blend everything at once. That’s just my preference 🙂

Vegan Carrot Cake Muffins {Gluten-Free}

Carrot cake is my JAM.

I love everything about it. From the moist texture of the cake with a hint of spice and a crunch of walnuts to the rich and creamy icing, carrot cake is in a league of its own. I always have a piece on my birthday! My go to place for gluten-free, dairy-free carrot cake is Great Sage, a vegan restaurant in the little town of Clarksville, Maryland. It’s one of our top places to eat, and the staff there are wonderful, too! You should definitely check it out, if you haven’t been already.

Speaking of plant-based food, I recently discovered an AMAZING blueberry muffin recipe from the Forks Over Knives Cookbook, which is one of my favorite cookbooks. Since it turned out so well, I figured I would use the same base and then tinker with the other ingredients to make a carrot cake muffin version.

And that’s exactly what happened! After three attempts at combining ingredients in just the right way, I came up with a winner.

This recipe is vegan and gluten-free and can be made nut-free if you use a different type of yogurt. I opted to use my favorite dairy-free yogurt made by Forager Project, which I reviewed earlier this year in this post. You can easily make your own oat flour by grinding up gluten-free rolled oats in your food processor until they reach a fine texture. I added some spices to enhance the flavor and jazz them up a bit.

I’m happy to report that they turned out tasting great! Bill gave them two thumbs up, and they were a hit at a brunch I brought them to this weekend. They are great for breakfast with a little smear of nut butter, or you can enjoy them with one of my favorite blogger’s creamy cashew icing. I HIGHLY recommend doing that!


OPTIONAL but recommended: Top these muffins with a smear of this delicious creamy cashew icing from the Detoxinista!

Vegan Carrot Cake Muffins

These gluten-free, vegan muffins are moist, flavorful and perfect for breakfast, a snack or dessert!

  • 2 1/4 cups oat flour (process rolled oats in a food processor until fine)
  • 1 tablespoon baking powder
  • 3/4 teaspoon fine grain sea salt
  • 1/2 cup coconut sugar
  • 1 tablespoon cinnamon
  • 1/2 teaspoon ground ginger
  • 1/8 teaspoon nutmeg
  • 2/3 cup unsweetened almond milk
  • 1/2 cup unsweetened applesauce
  • 1/2 cup non-dairy plain yogurt (I used Forager Project's unsweetened plain cashewgurt)
  • 1/2 tablespoon vanilla extract
  • 1 cup shredded carrots
  • 1/2 cup raisins
  • 1/4 cup crushed pineapple
  • 1/3 cup walnuts (chopped)
  1. Preheat oven to 350F. In a large mixing bowl, whisk together oat flour, baking powder, salt, sugar, cinnamon, ginger and nutmeg.

  2. Make a well in the center of the dry ingredients and add the milk, applesauce, yogurt, and vanilla and whisk them together before mixing everything in the bowl together, until just combined. Fold in the carrots, raisins, pineapple, and walnuts until just combined.

  3. In a silicone muffin pan or regular muffin pan lined with silicone liners, use an ice cream scoop to scoop muffin mix into each slot. Bake for 20-22 minutes or until a toothpick inserted in the center of a muffin comes out clean. Don’t over bake, or they will become dry.

What We Eat: A Peek at Our Weekly Menu

I’ve had people ask time and time again what a typical week of eating looks like for me and Bill. Every week is different, but I thought I’d give you a glimpse of what last week and the upcoming week consisted of for our meals.

I tend to make a combination of my own recipes from this blog and often look to the Nourishing Meals Cookbook, The Undiet CookbookForks Over Knives: The Cookbook or one of Rebecca Katz’s many healing cookbooks, with a recent focus on The Longevity Kitchen Cookbook

We pretty much follow Michael Pollan’s advice to “Eat food, not too much, mostly plants.” Sometimes I’m a little off on the “not too much” part, if I’m being completely honest, but we prioritize eating real food made from ingredients we recognize and can pronounce. The vast majority of what we eat, especially for me, consists of plant-based foods like veggies, fruit, beans, grains, nuts and seeds, and we load up on herbs and spices for flavor. I do eat some animal proteins a couple of times a week, usually wild caught fish or pasture-raised chicken or eggs.

My husband Bill’s German heritage demands a higher animal protein ratio than what I eat. He just feels better eating a bit more of it than me! That’s why I’m such a huge advocate of listening to your body and paying attention to what gives you energy and what takes it away. I encourage you to experiment with different foods to see which ones make you feel best. For more on my philosophy around food and eating, check out this recent post.

Okay, now let’s get back to the food. Want to know what a week of breakfast, lunch and dinner looks like for us? Check out the list below!

Breakfast

Because I’m on a healing foods protocol through my nutritionist, as I’m restoring my body from Epstein-Barr Virus, I’m not eating certain things that Bill eats on a regular basis, like eggs. He loves making breakfast and puts in a lot of work each morning. A typical breakfast for him consists of roasted sweet potatoes, sautéed onions and tomatoes or peppers, and an egg, usually served on or with a Swapple, which is one of my favorite freezer staples as well. We also like Bilinski’s casing-free, real food chicken sausage, especially the kale balsamic version!

I usually have a smoothie because it’s the easiest way to pack a lot of goodness into one glass (or smoothie bowl!). I’ve been opting for blueberries as my main fruit because of how antioxidant-packed they are. I alternate which fats I use, including coconut butter, chia seeds, flax seeds, hemp seeds and avocado. I usually throw in a handful of baby spinach or baby kale and round out everything with a scoop of protein powder or an extra sprinkle of hemp seeds.

I’ll have to share the smoothie I’ve been making lately, so you have the recipe, but this Blueberry Blast Smoothie is pretty similar!

I absolutely LOVE the Oat Berry Yogurt Muffin recipe from the Forks Over Knives Cookbook and have been serving that with Trader Joe’s mixed nut butter. I also tried the Detoxinista’s Vegan Almond Flour Banana Bread. It’s RICH and pretty hearty, since it’s made with almonds as the base, but I really liked the flavors!

Lunch & Dinner

To be honest, lunch and dinner don’t look that different for us. I almost always have a big salad for lunch as my base and often serve up leftovers from dinner for lunch because it makes things easier and saves us time. I’m a big advocate of making grain or salad bowls, which basically consists of throwing together some cooked and raw veggies (focus on leafy greens!), some source of protein (usually beans), something crunchy like nuts or seeds, and a grain like quinoa or brown rice if I’m making a grain bowl. I top it all off with a dressing and toss everything together.

As much as I love to cook, sometimes I need something nourishing when I haven’t planned ahead and packed. When I’m on the go, some of my favorite places to hit up are Stall11 at RHouse, sweetgreen, Harmony Bakery, the Naked Lunch Cafe, and Whole Foods Market hot bar and salad bar. I link to all of those places and others in my healthy foodie dining guide to Baltimore.

Here’s what we’ve been cooking up lately!

That’s a look at some of what we’ve been cooking up in our kitchen lately. We stick with some of our favorite familiar staples and try a few new ones here and there.

How about you? What’s on your menu? Try anything new lately? Feel free to share in the comments below! I love trying new recipes 🙂

Mediterranean Spring Salad with Easy Avocado Dressing

As someone who used to hate salads and didn’t eat them until midway through college, I’ve come to love them and enjoy them as a regular part of my meals. What I love about salads is how many nutrients and colors you can mix together at one time and how versatile they are!

I tend to put my salads together based on whatever I happen to have in the fridge at the time. I start with a base of greens, add in chopped or shredded veggies, toss in some source of protein, and add something crunchy like nuts or seeds…or in this case – crunchy Mediterranean veggie patties!

Most veggie burgers I’ve tried have been pretty nasty and full of ingredients that I wouldn’t find in my pantry, so I stayed away from them for most of my life.

That was true until I tried Hilary’s Eat Well Burgers at the Natural Products Expo in Baltimore in 2015.

I’ve been a huge fan ever since, and we always have them stocked in our freezer. What I love about these burgers is that they are free from gluten, dairy, soy, nuts, and eggs, and they are made with real food ingredients – nothing weird. Oh, and their taste and texture are SO good! I’ve even heard someone describe them as a healthier hush puppy.

They have a bunch of different varieties of burgers, including the following: Root Veggie, Hemp & Greens, Adzuki Bean, Kimchi, Curry, Spicy Thai, Black Bean, and the “World’s Best Veggie Burger” Original flavor, which is their best seller. We buy them at MOMs Organic Market and Wegmans. To find where they are sold near you, click the Find It Here Link beneath the product on this page.

The dressing came to be when I opened my fridge and saw an avocado and a lemon and decided to put them together to see what would happen. It was a success!

This salad is packed with anti-inflammatory, nourishing, plant-powered ingredients and is full of flavor and a variety of textures to keep your taste buds and your tummy happy 🙂

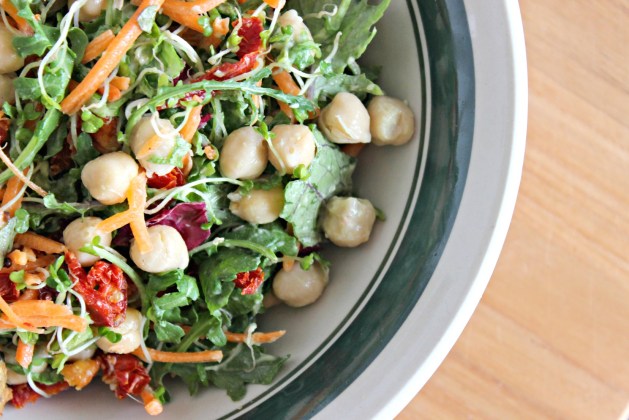
Mediterranean Spring Salad with Avocado Dressing

Servings: 2

Ingredients

Salad
6 cups leafy greens (I used a greens and radicchio blend)
1 cup shredded carrots
1/4 cup sundried tomatoes, chopped
1/2 cup broccoli or other sprouts
1 small handful fresh basil, chopped
1 cup cooked chickpeas, drained and rinsed
6 mini Hilary’s Eat Well Mediterranean veggie burger patties, cooked according to package instructions

Dressing
1 garlic clove, peeled and chopped
Flesh of 1 avocado
1.5 tablespoons lemon juice
3 tablespoons water
1/4 tsp plus a pinch sea salt
Fresh black pepper, to taste

Directions
1. Toss all salad ingredients together in a bowl and set aside, except burgers.
2. In a mini food processor, pulse the garlic until finely minced then add remaining dressing ingredients and process until smooth. You may have to scrape down the sides and repeat. Alternatively, you can try to mash the avocado and whisk ingredients in a small mixing bowl by hand, but it won’t be as smooth.
3. Toss dressing with salad (it’ll be thick) and top with veggie burgers. Feel free to chop them up to the size of croutons!

Coconut Chocolate Brownie Bites {Paleo, Vegan}

It’s been a while since I’ve poster a new no-bake bite recipe for you to try, so I’m excited to share today’s recipe for coconut chocolate brownie bites!

A few weeks ago, I was at a women in business event with a group of consultants, human resources professionals and business owners. Before the session, Susan, a friend and fan who attends my cooking classes in the community, walked in. She was holding a bag of Emmy’s Cookies that she had bought at Starbucks that morning. Knowing what I do, she came up to me and said, “These are so expensive! I bet you know how to make them at home!”

Since I’m always up for a challenge, I started experimenting! What I’m sharing with you today is the final outcome of playing in the kitchen to come up with my own version of those chocolate coconut no-bake cookies. Like most of my no-bake bites, they start with a base of nuts and dates. They’re a great option for a snack or a sweet treat and are perfect for someone who is on the go (kids love them, too!).

I had a few coworkers sample them today for me to give me feedback, and everyone loved the sweet and salty combo paired with the rich chocolatey taste. As someone who used to h-a-t-e coconut anything, I really love these, and so does my husband, who isn’t much of a coconut fan either.

One of the fun, new things I’ve started doing with no-bake recipes like this is experimenting with vanilla powder instead of vanilla extract. I find that the taste isn’t as bitter, but you can totally use vanilla extract in this recipe if you prefer.  If you use the powder, it’s a 1-1 substitution for the extract. I buy the Nielsen-Massey brand of vanilla powder at MOMs Organic Market. Most natural food stores and Whole Foods carry vanilla powder, in case you’re interested!

I have a feeling these are going to become one of your new favorites, so let me know if you give them a try 🙂 They’re gluten-free, dairy-free, vegan, paleo, and raw, in case that helps you decide!

Coconut Chocolate Brownie Bites

Yield: ~24 bites

Ingredients

2 cups raw walnuts
1/2 teaspoon fine grain sea salt
1/3 cup raw cacao powder
1 1/3 cups Medjool dates, pits removed
1 teaspoon vanilla extract or vanilla powder
2 teaspoons pure maple syrup
1 cup shredded, unsweetened coconut

Directions

  1. In a food processor fitted with the S-blade, process walnuts and salt for about 15 seconds. Add cacao powder and pulse to combine.
  2. Add dates, vanilla, and maple syrup, and process until a dough begins to form.
  3. Add coconut and pulse several times until just combined. Shape into 1-inch balls and roll between your palms. Toss balls in shredded coconut (optional) and store in a glass container in your fridge.

14 Valentine’s Day Sweet Treat Recipes {Gluten-Free, Dairy-Free}

Bill and I love holidays and find ways to make them special. My family always did that growing up, so it’s a tradition I’ve carried into my marriage.

This past week, I thought it would be neat to buy a card and a treat for Bill for each day leading up to Valentine’s Day.

I put a card and a treat in a brown paper bag with “Happy <3 Week” written on it and put it in his backpack each day.

heartweek

It was fun for me to do and I know it will be at least one bright spot in the midst of his hectic days as an elementary school phys ed teacher. I’m not sure what he has planned for this weekend, but I’m looking forward to it!

When it comes to Valentine’s Day, one thing is for sure – BOTH of us love chocolate.

We are fans and followers of our favorite Baltimore-based chocolatier, Jinji, and know that Valentine’s Day is not complete unless we are eating some of her amazingly delicious chocolate creations. It’s seriously the purest, richest chocolate I’ve ever tasted.

truffles

Truffles galore! They’re always so creative and decadent.

If you can’t make it out to your favorite chocolate shop, or you just want to make a delicious sweet treat at home, try one of these 14 Valentine’s Day-worthy recipes below.

They are all dairy-free, gluten-free, and made without refined sugar. Many of them are paleo-friendly as well, so give at least one of them a try!Vday Collage.jpg

The first recipe holds a special place in my heart because dark chocolate caramels are pretty much the best thing ever.

Homemade Rolos by oh she glows

homemade-rolos-7159.jpg

Photo Credit: Angela Liddon. Used with permission.

Oatmeal Heart Cookies by Nourishing Meals

oat heart cookies71

Photo Credit: Nourishing Meals. Used with permission.

Sweet & Salty Super Food Chocolate Bark by RNK

Superfood Bark

Cherry Dark Chocolate Chip Almond Butter Cookies by RNK

cherry choco chip cookies

Two Layer Raw Chocolate Brownies by oh she glows

Brownies.JPG

Photo credit: Angela Liddon. Used with permission.

Cacao Mousse & Raspberry Parfaits by Begin Within Nutrition

mousse

Photo Credit: Begin Within Nutrition. Used with permission.

Cherry Chocolate Brownie Bites by RNK

cherry choco bites

Seductive Raw Chocolate Walnut Fudge by oh she glows

fudge2.jpg

Photo Credit: Angela Liddon. Used with permission.

Easy Strawberry Cheesecake by Kasia Kines (my nutritionist!)

Chocolate Hazelnut Truffles by RNK

Dark Chocolate Berry Cups by Yuri Elkaim

Healthy Valentines Berry Cups

Photo Credit: Yuri Elkaim. Used with permission.

Peanut Better Balls by oh she glows

PB Balls.JPG

Photo Credit: Angela Liddon. Used with permission.

Mint Chocolate Crunch Bliss Balls by RNK

Mint Chocolate Chip Bliss Balls

Peanut Butter Cup Pie by The Detoxinista

no bake

What are your favorite sweet treat recipes?

Feel free to leave a comment below and share!


Simple Vegetable & Chickpea Soup

Nothing hits the spot on a cold winter day like a warm and cozy bowl of soup. This recipe has quickly become one of our favorites and is one we’ll be making again soon.

About five years ago, I was trying to get to the bottom of years of acid reflux, frequent colds and congestion and seasonal bronchitis, so I removed certain foods from my diet for about 10 days. It was during that time and in the months that followed, that I discovered dairy products to be the #1 trigger of my sinus and respiratory issues. Once I removed dairy, my health issues practically disappeared.

It was amazing.

I had been learning about the health benefits of food for years at that point. But I never realized how connected my diet was to why I got sick so often and wasn’t feeling my best.

Since that time, I’ve continued to “clean up” my diet with the goal of feeling as good as possible as often as possible. I take supplements and probiotics to repair and restore my health after taking years of antibiotics and acid reducers. In addition, I’ve found that foods containing gluten trigger me as well, so I steer clear of them.

For the past few weeks, I’ve been taking my body through an experiment. It’s kind of like an investigation to better understand why I’ve been feeling a little “off” for the past few months. Because I wanted to get to the root of what my body is trying to tell me, I’ve been following the protocol in the book The Elimination Diet. It’s written by renowned nutritionist, Tom Malterre, and his wife, Ali Segersten, who also authored the Nourishing Meals cookbook.

One of the recipes I tried was for a simple vegetable soup. I used the concept behind the soup as my guide and created my own version of it, which I’m sharing with you today.

It’s full of nourishing, calming, anti-inflammatory ingredients that promote healing and a sense of warmth and comfort. It makes enough to feed 8-10 people, so we like to make it at the beginning of the week to take care of 4-5 meals for both of us. You can enjoy it for breakfast, lunch or dinner, and serving it with a few hunks of avocado on top is especially delicious!

Veggie Lover Chickpea Soup

Ingredients

Veggie Lover Chickpea Soup

If you’re looking for a comforting, nourishing hug in a bowl, try this soup!

  • 1 tablespoon olive oil (extra virgin)
  • 1 medium yellow onion (diced)
  • 3 cloves garlic (minced)
  • 2 cups celery (chopped)
  • 2 cups carrots (chopped)
  • 2 cups cremini mushrooms (cleaned and chopped)
  • 2 cups sweet potatoes (peeled and chopped)
  • 2 15-ounce cans chickpeas (garbanzo beans) (drained and rinsed)
  • 1 tablespoon fresh thyme (or 1 tsp dried thyme)
  • 8 cups low-sodium vegetable broth
  • 3 cups kale (destemmed and chopped)
  • 1/2 cup parsley (chopped)
  • 1 teaspoon sea salt (or 2 tsp Herbamare)
  • Freshly ground black pepper (to taste)
  1. Heat the oil in a 4 to 6-quart pot over medium heat. Add the onion and saute for about 5 minutes.

  2. Add the remaining chopped vegetables, beans, thyme (if you have it) and vegetable stock. Cover and simmer for 20-25 minutes or until vegetables are tender.

  3. Add kale, parsley, salt and pepper, and simmer for 5 more minutes.

This soup serves about 8-10 people.

We store it in glass mason jars. If you are going to freeze it, leave about 2 inches of room at the top of the jar to allow for expansion in the freezer.

The Easiest Kale Salad Ever

I’ve been making this salad recipe for OVER FIVE YEARS and can’t believe I’ve never shared this recipe with all of you before!

It’s the simplest recipe and the first way I ever tried eating kale.

If you’ve ever been turned off to eating kale because it tasted bitter or was difficult to chew, give this recipe a try. I bet it will change your mind!

Most of us don’t crave salads this time of year because the weather has gotten colder for many of us. As a result, we tend to be drawn to more warming, grounding foods like soups, stews and chilis. Because I tend to eat seasonally, I’m more apt to saute or steam green veggies or throw them into soups, stews, or frittatas instead of having cold salads everyday.

When I do want a salad, I opt for heartier greens like kale, Swiss chard, or peppery arugula in my salads instead of lighter, more watery greens like romaine or Bibb lettuce.

Another benefit to eating a salad like this in the winter is that it is packed with immune-boosting ingredients. Since 70% of our immune system is located in and around our digestive system, what we eat really does matter!

  • Kale is a cruciferous vegetable, which have antiviral and antibacterial effects. Their pungent, bitter flavors are health-promoting and detoxifying.
  • Lemons have antiviral and antimicrobial activity
  • Garlic may help the immune system function better during times of need such as in cancer
  • Chickpeas are packed with protein and fiber that keep us feeling full and our blood sugar balanced, which helps keep inflammation at bay

Not only is this salad loaded with ingredients to keep your immune system strong, but it will stay fresh in the fridge for at least two days! Check out the recipe below, and feel free to change it up by adding your favorite toppings.

Easiest Kale Salad Ever

The trick to not having bitter kale? Massage the leaves with lemon juice, olive oil, and sea salt for about 1-2 minute to break down the bitterness!

  • 1 bunch curly kale (stems removed and leaves torn into pieces)
  • 1 lemon (juice only)
  • 2 tablespoons olive oil (extra virgin)
  • 1/4 teaspoon coarse sea salt (add more, to taste)
  • pinch black pepper
  • 1 garlic clove (peeled and minced)
  1. In a large bowl, massage lemon juice, olive oil, salt, pepper and garlic into kale leaves with your hands until they start to turn dark green and shrink by about 1/3 in size. 

    If you’re using nutritional yeast, toss it in with the greens. Store salad in fridge for about 30 minutes to allow lemon juice to break down bitterness in greens.

  2. Add chickpeas and sunflower seeds and enjoy!

Optional add-ins

  • 2-3 tablespoons nutritional yeast
  • 1 can chickpeas, drained and rinsed
  • 1/4 cup sunflower seeds

Page 2 of 20

Powered by WordPress & Theme by Anders Norén