Notice: Function _load_textdomain_just_in_time was called incorrectly. Translation loading for the social_sharing domain was triggered too early. This is usually an indicator for some code in the plugin or theme running too early. Translations should be loaded at the init action or later. Please see Debugging in WordPress for more information. (This message was added in version 6.7.0.) in /var/www/wp-includes/functions.php on line 6114
Vegan Archives · Page 6 of 15 · Rachel's Nourishing Kitchen

Category: Vegan Page 6 of 15

Immune-Boosting Magic Mineral Broth

On one of my morning walks, I was listening to an interview that Evelyne Lambrecht of Elevate Your Energy did with “Author, Educator, and Culinary Translator,” Rebecca Katz.

The topic was Eat Well for a Healthy Mind and Longer Life, and Rebecca’s playful, positive approach and style intrigued me.

I love finding other people in this field who are out to make the world a better place through food, health and healing and who do it in a positive, build-you-up way. It’s what I aim to do as well!

Rebecca says this about her work:

I teach people how to connect the dots between foodbig flavor…& vibrant health!

She invented the term “Culinary Translator” to describe what she does, which is essentially translating nutritional science to the plate. She got to this place in life after a stressed-out career in the business world led her to seek a more nourishing life.

She’s an expert on eating for health and healing, especially for when it comes to boosting immunity, protecting the body and brain from chronic conditions (especially cancer), and living longer.

You can find her cookbooks here on Amazon.
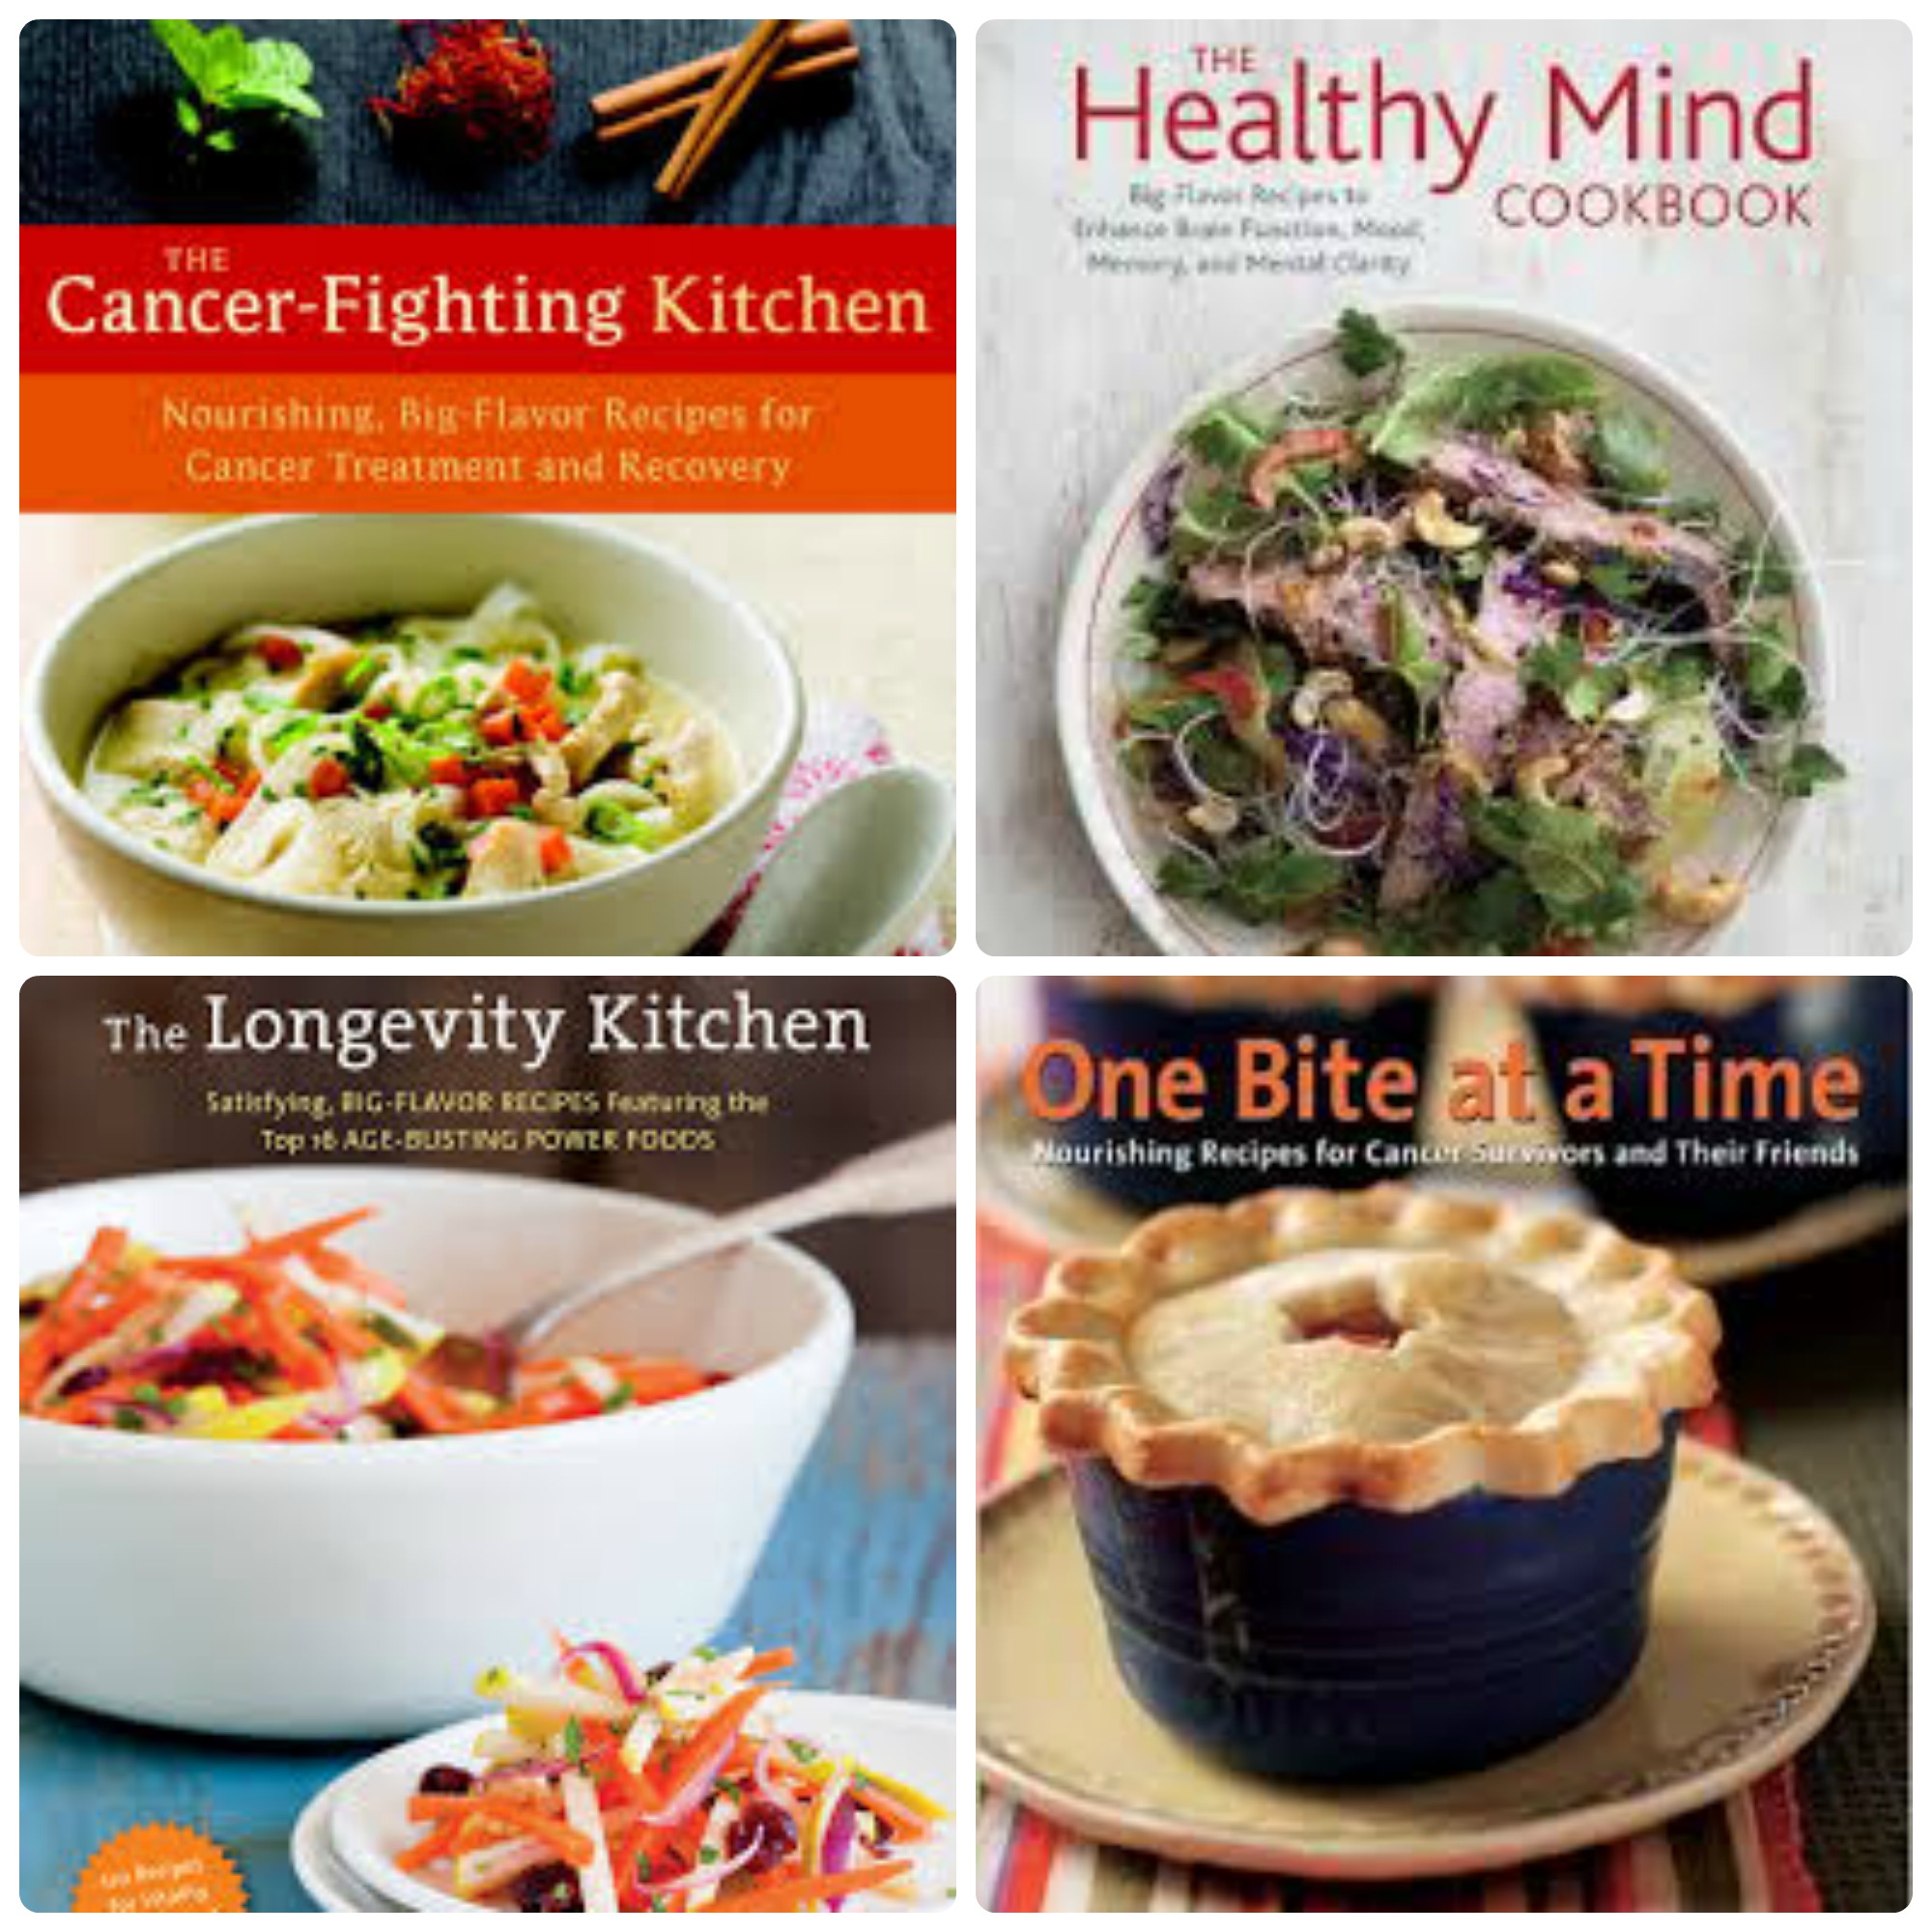
Katz Books

We’ve made some of her recipes over the past few weeks and have not been disappointed!

The base of many of her soup recipes starts with her Magic Mineral Broth. Here’s what she has to say about this nourishing, immune-boosting staple:

This rejuvenating liquid, chock-full of magnesium, potassium, and sodium, allows the body to refresh and restore itself. I think of it as a tonic, designed to keep you in tip-top shape.

I’ve made my own vegetable broth before using scraps from things like celery, carrots, onions, scallions and other veggies (find that recipe here), but I wanted to give this one a try.

It’s loaded with healing, nutrient-dense, mineral-rich ingredients like garlic, celery, leeks, onions, sweet potatoes, and kombu (a seaweed that has been a pantry staple of ours for years!).
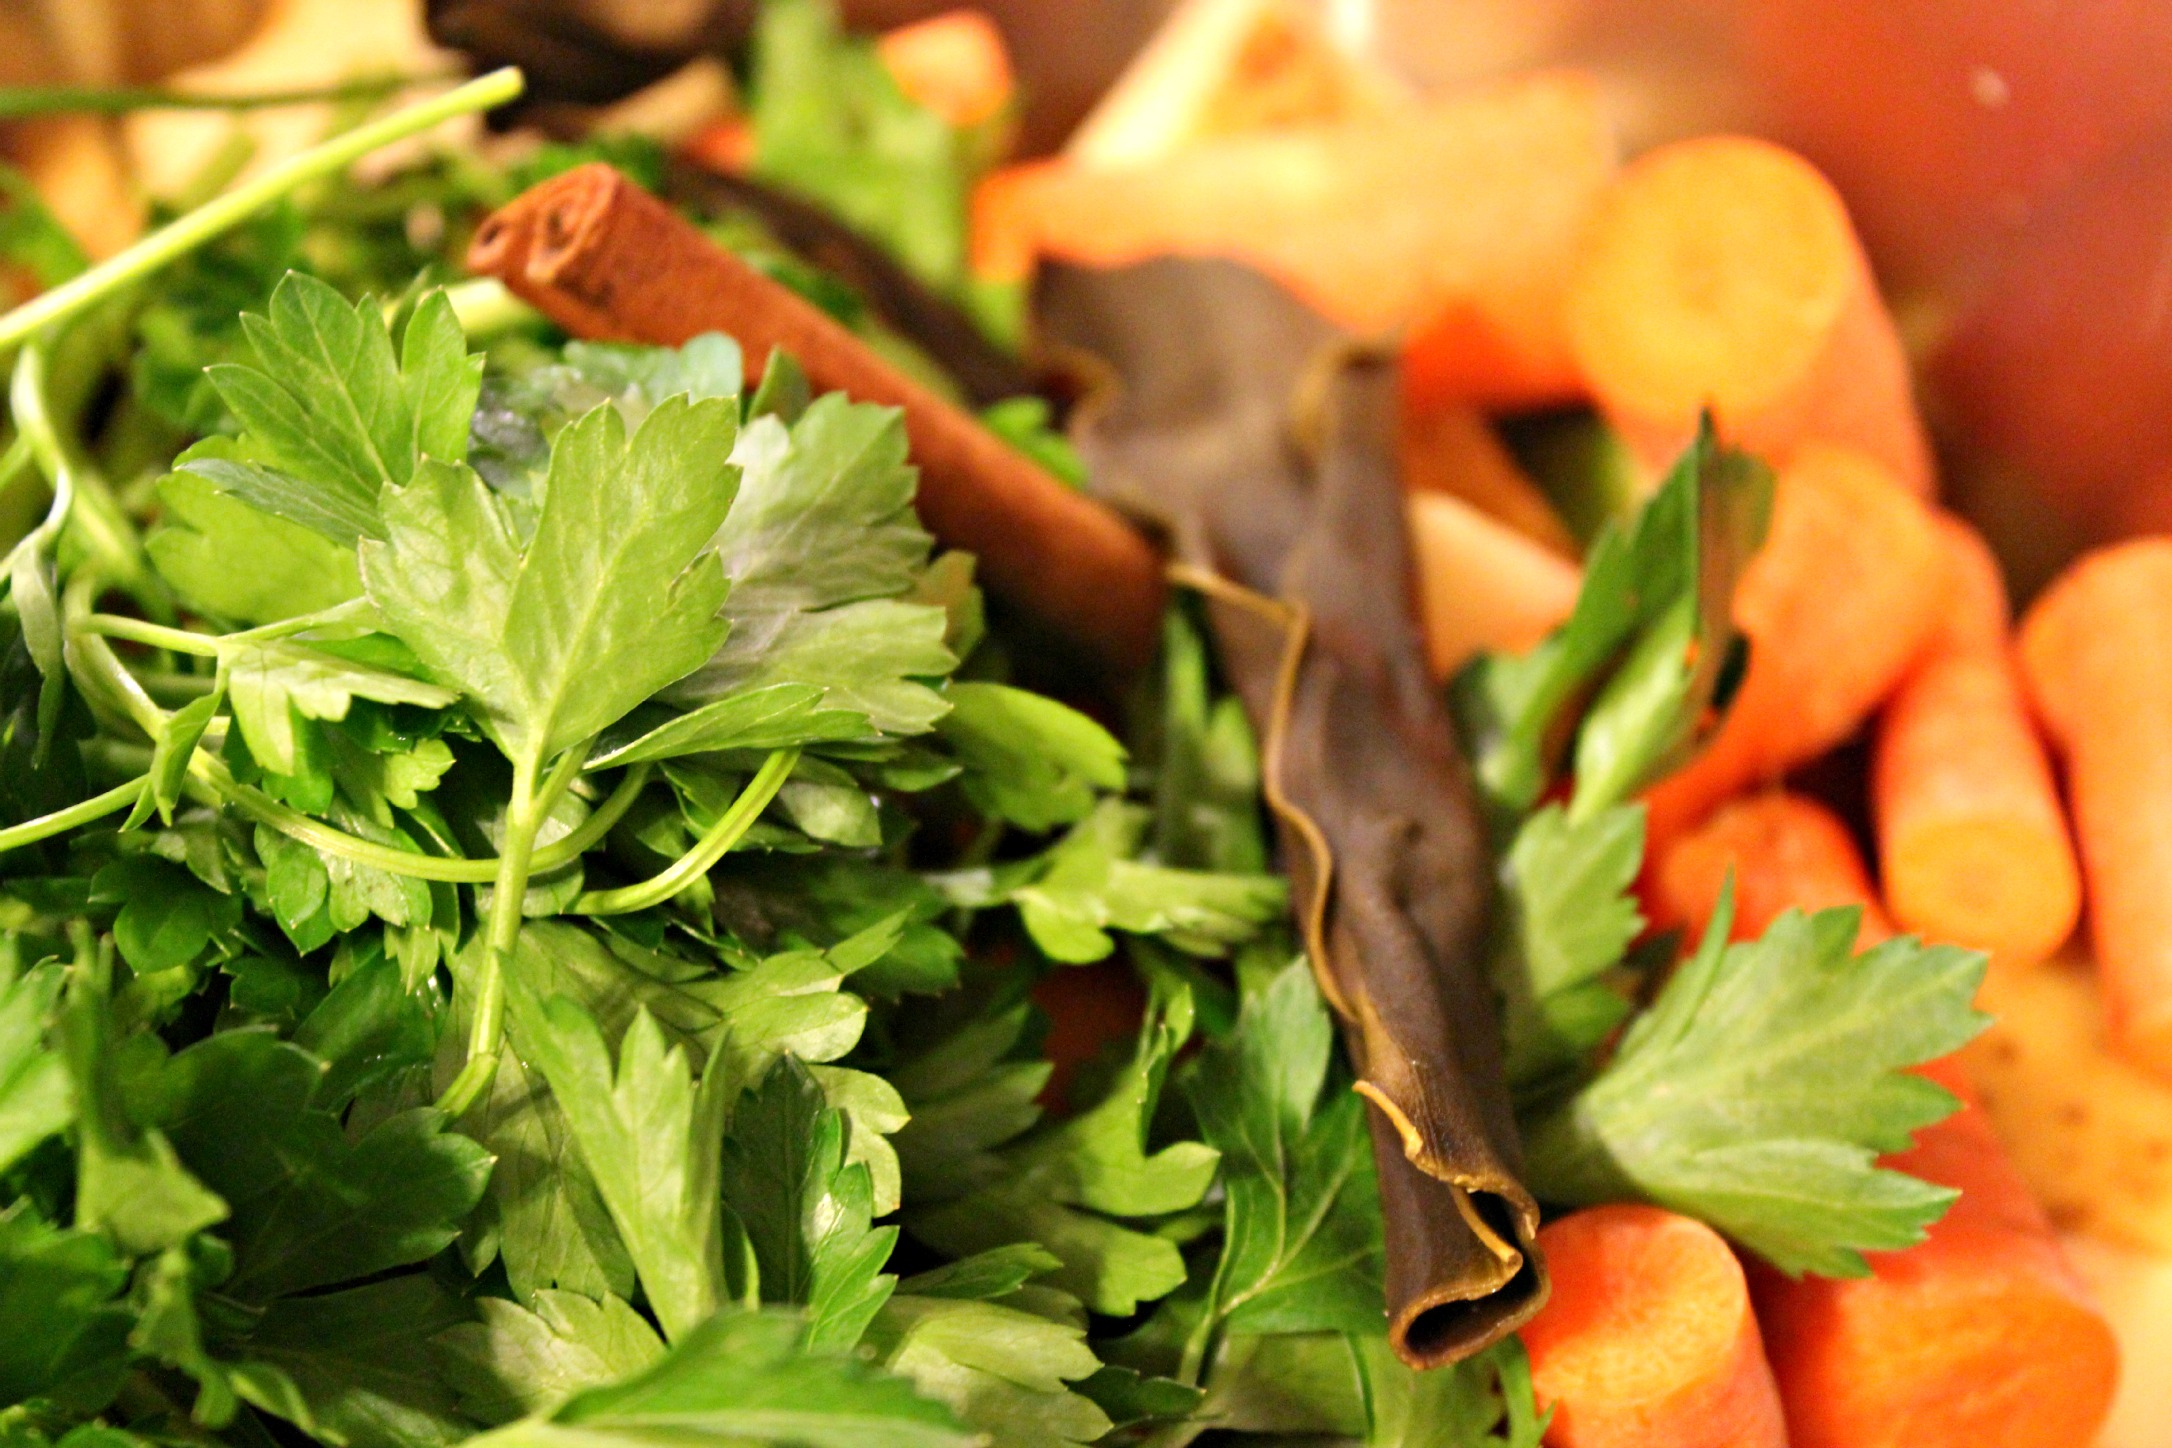
MMB Ingredients

You can sip this broth on its own, especially when you are feeling a bit run down and want a mineral boost, and you can also use it as the base for any soup recipe that calls for vegetable broth.

We used this broth to make a few of her soups, and I will post about them this weekend, so you can have some new ideas for soups to try this fall and winter.

Click the picture below or click here to get the full recipe for Rebecca’s amazing broth!
Broth

Butternut Squash & Quinoa Harvest Salad {Gluten-Free}

One of the coolest concepts I learned about in my health coach training was food energetics.

Steve Gagne, an expert on the topic and author of the book Food Energetics: The Spiritual, Emotional, and Nutrition Power of What We Eat, taught us about the energetic properties of certain foods.

Now before you start thinking I’m going a little out there on you, listen up!

You may have already noticed this without even thinking about it based on how your food preferences change seasonally.

In the warmer months, we often crave lighter foods – salads, smoothies, raw fruits and vegetables, and chilled soups like gazpacho. These foods are naturally cooling, support our body’s detoxification processes and keep us feeling light during the hot and humid months.

As the fall approaches, we naturally turn to more warming comfort foods – things like hot soups, stews, chilis and squashes. We crave warming spices like cinnamon and ginger. We look forward to holding a piping hot mug of cocoa or tea.

IMG_2662

In other words, during the warmer months we crave lighter, cooling foods. During the colder months, we naturally go for grounding, warming foods and drinks.

Squash is one of those grounding fall foods and happens to be one of my favorites. There are so many varieties of squash that you could have a different one every day for weeks and not get bored!

Today’s recipe pulls in one of my absolute favorite squash and the one most of us are familiar with and have tried before – butternut squash.

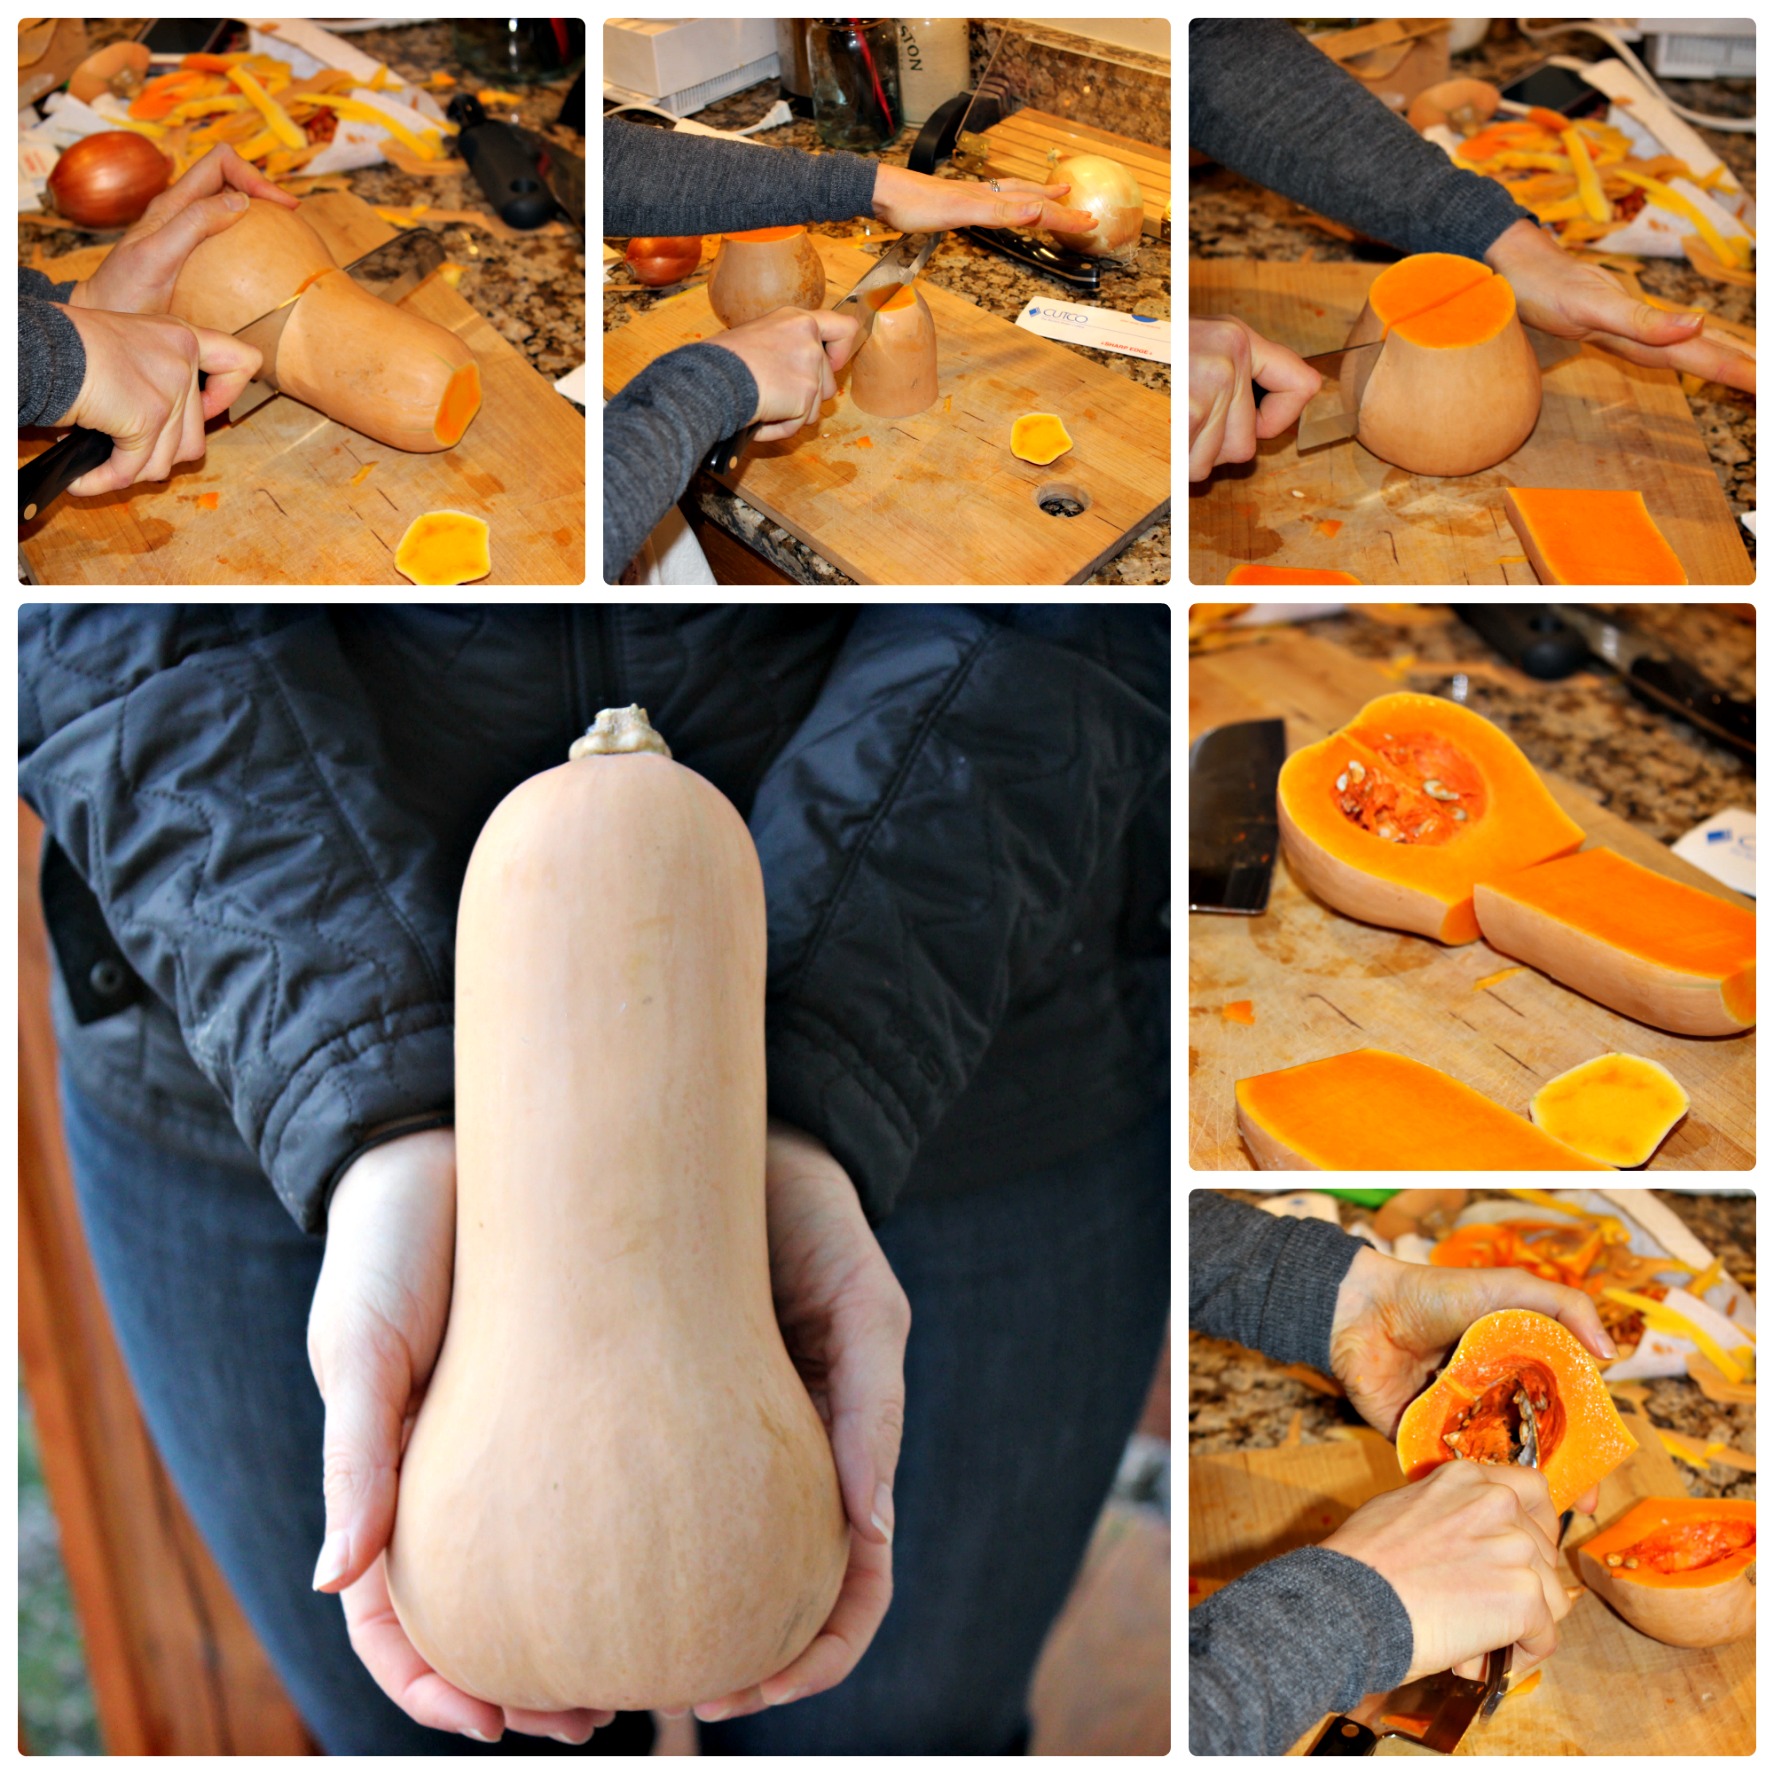
In case you want a little how-to about how to cut up this vegetable, check out the guide below. I find that it helps to peel it with a good quality vegetable peeler BEFORE cutting it up, but it works either way. Once you’ve cut it up, then dice it into cubes for this dish. 

Butternut squash how to

I made this recipe for my Going Gluten-Free without Going Crazy workshop in October and it was one of the most liked dishes I served all night!

We combine the roasted butternut squash with my #1 herb of all time – rosemary – and toss it with some dried tart cherries, toasted pecans, and a simple apple cider vinegar Dijon dressing. To add some lightness and a bit of peppery spice, we mix in a bunch of arugula, one of the tastiest salad greens out there.

We’ve since made it multiple times, so it’s quickly become one of our fall staples. It would make the perfect side for Thanksgiving dinner or for any fall or winter meal.

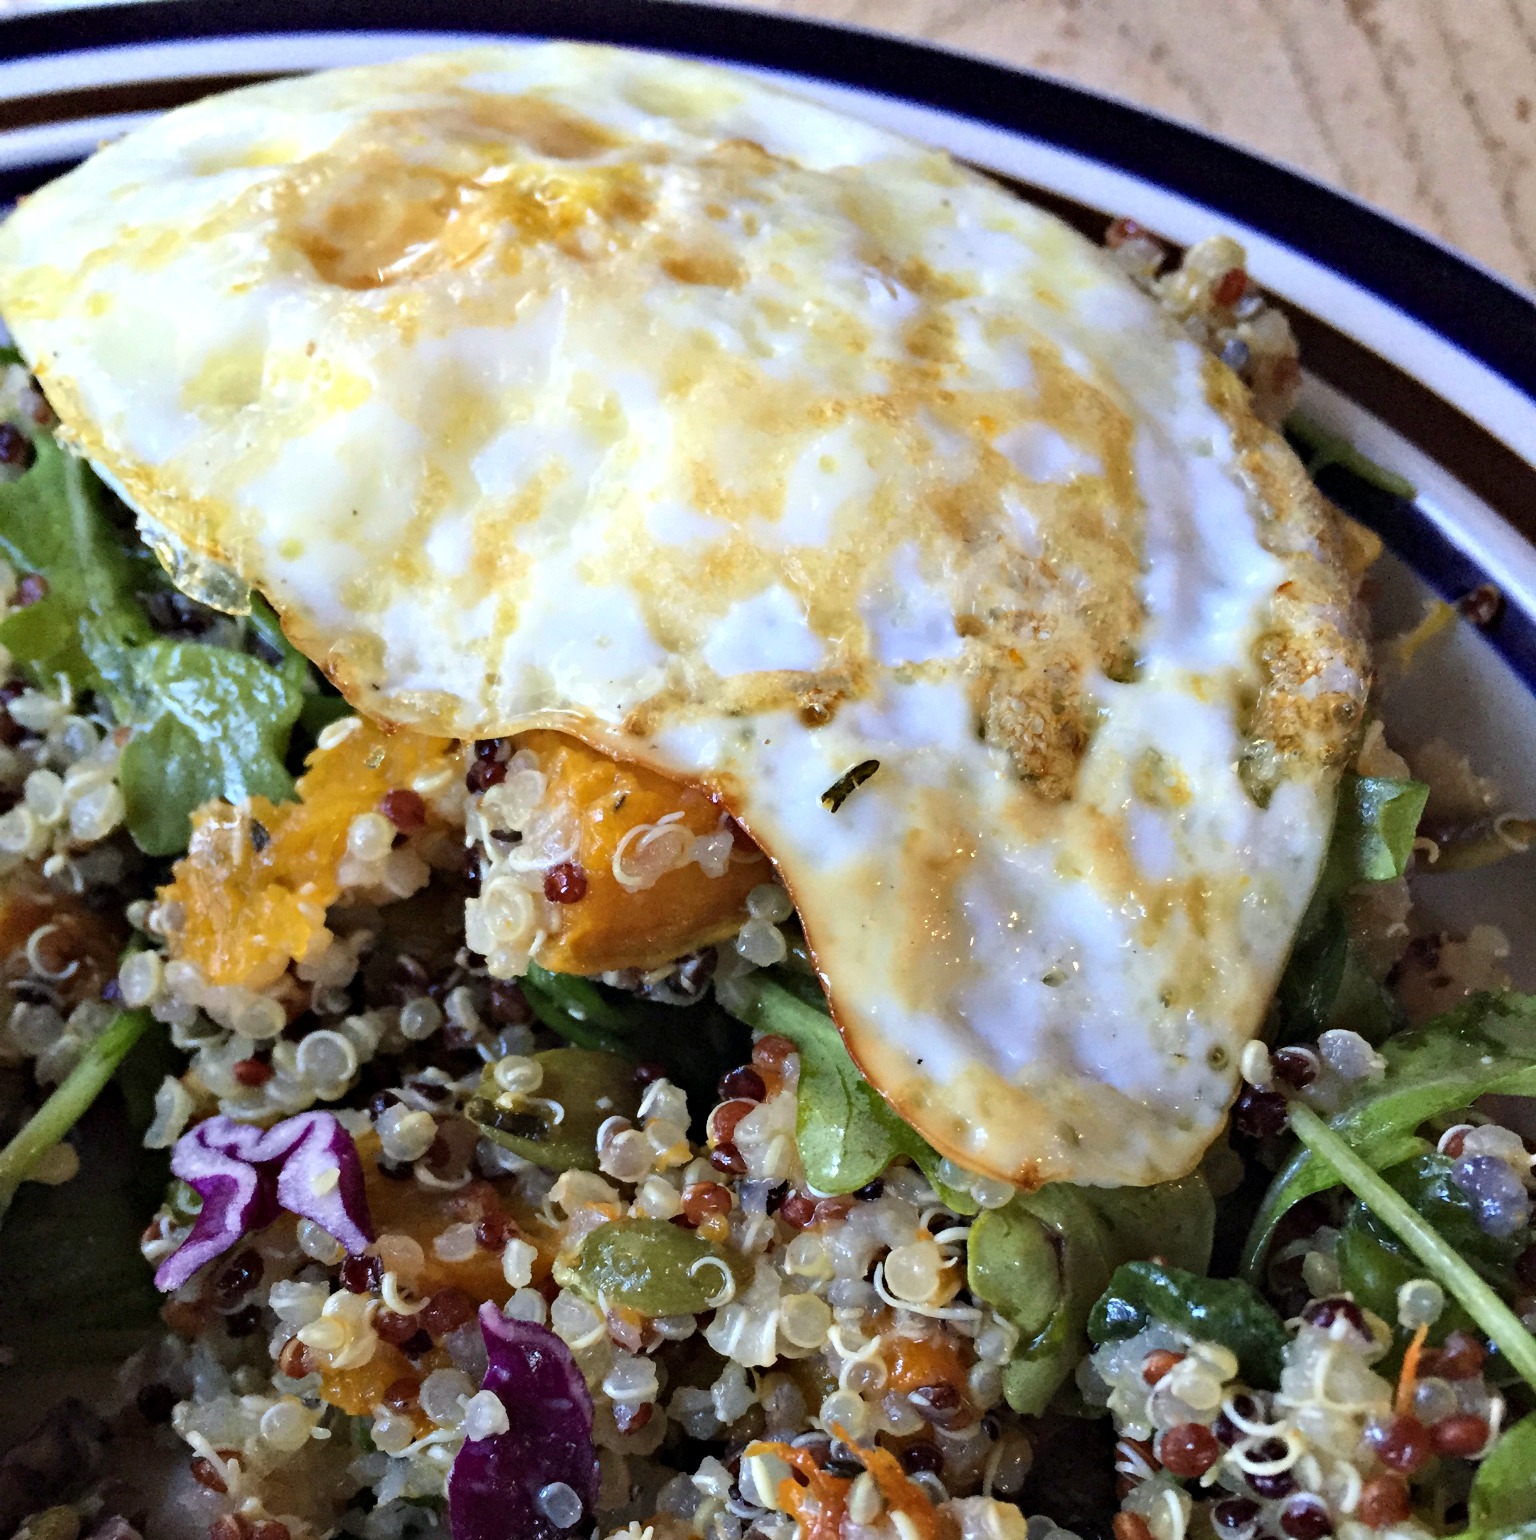
When we were on a trip to Upstate New York last month, we even served it with a (slightly overcooked!) fried egg on top. This one is a keeper 🙂

egg with quinoa salad

Squash Salad Banner


Butternut Squash, Quinoa & Arugula Harvest Salad

This salad makes for a hearty side dish to a fall meal and combines some of our favorite fall ingredients – squash, pecans, and cranberries. You can serve it with a side of chicken or fish or add some chickpeas to up the protein content.

Salad

  • 1 large butternut squash (peeled and cut into 1-inch cubes)
  • 2 teaspoons fresh rosemary (minced)
  • 2 tablespoons olive oil (extra virgin)
  • 1/2 teaspoon coarse sea salt
  • 1 cup quinoa (rinsed and drained)
  • 1/2 cup dried cranberries or tart cherries
  • 4 cups arugula
  • 2/3 cup pecans (toasted and chopped)

Dressing

  • 1 tablespoon raw apple cider vinegar
  • 2 teaspoons Dijon mustard
  • 1 tablespoon pure maple syrup
  • 1/2 teaspoon sea salt
  • 3 tablespoons olive oil (extra virgin)
  1. Preheat oven to 400F. Line baking sheet with parchment paper or silicone baking mat.

  2. In a large bowl, combine squash, rosemary, and 2 tablespoons oil. Season with salt and pepper. Spread in a single layer on baking sheet. Roast in preheated oven for 35-40 minutes, stirring every 12-15 minutes, until squash is tender. Let cool completely.

  3. While squash is cooking, cook quinoa. Rinse quinoa in a fine mesh strainer until water runs clear. Fill medium saucepan with 1 3/4 cups water and add quinoa. Bring to a boil then cover with a lid and reduce heat to simmer for 12-15 minutes. Once water is just barely absorbed, remove pan from heat and leave covered for 5-7 minutes. Remove lid and fluff with a fork. Spread quinoa on a parchment lined baking sheet to cool and prevent it from clumping together. This last step is optional but really helps!

  4. In a small bowl, whisk together dressing ingredients in the order listed.

  5. In a large bowl, combine roasted squash, quinoa and dried fruit. Pour dressing over mixture and gently toss to coat. Season to taste with salt and pepper and add arugula and pecans, gently tossing to coat.

Warm & Cozy Pumpkin Spice Oatmeal {Gluten-Free}

Sometimes we read books that transform us and the way we think, and once we’ve read them, we’re never the same.

That’s how I feel about a book I recently finished reading, The Slow Down Diet by Marc David.

I’m putting together a separate post about the key takeaways from the book, but as a sneak peek, one of them is to SLOW DOWN and listen to your body.

Sure, it’s not a mind-blowing revelation, and it’s something most of us have been told before, but I’m finally at a point in my life where I’m open enough to hear it.

The other day, after I woke up, I drank a tall glass of water, sipped my cinnamon tea, set up my oil diffuser (like a candle but better!), and did a video session of Yoga with Adriene.

I’m going through her 30 Days of Yoga series and am LOVING it!

It helps me stay focused and grounded first thing in the morning and brings more oxygen into my mind and body for clearer thinking and a boost to digestion.

After my yoga session, I was ready for breakfast and headed into the kitchen.

I’ve started being more intuitive about what I eat. Instead of just gulping down a smoothie on my way out the door, rushing to get to whatever is waiting for me for that day, I’ve been taking more time with eating. I’ve been pausing before making decisions about what to eat and paying attention to what my “gut” is telling me.

So, instead of robotically slamming a smoothie every day (typical time to belly = 60-90 seconds), I’ve gone back to basics and have been enjoying some of my favorite breakfast foods, foods I can chew.

Foods that are warm. Foods that are packed with flavor and texture.

PS Oatmeal

The first image that popped into my mind as I was standing at the door of the fridge that morning was a warm and cozy bowl of oatmeal, perfect for the cooler weather we’ve been having.

For me, oatmeal is one of the best comfort foods for fall, especially when it’s full of flavors like cinnamon, ginger, clove, and maple.

My favorite oats to use are Bob’s Red Mill Gluten-free Oats. Almost every grocery store sells them. I even got to meet Bob Moore himself at the Natural Products Expo last month.

_20150918_105415

It was super cool!

I’ll be sharing a recipe for Banana Nut Oatmeal in November, but in the meantime, give this pumpkin spice version a try and let me know what you think!

PS Oatmeal Banner PS Oatmeal Closeup

Servings: 3-4

Ingredients

  • 2 1/4 cups water
  • Pinch sea salt
  • 1 cup gluten-free rolled oats (old-fashioned, not quick cooking)
  • 1 tablespoon pumpkin pie spice
  • 3/4 cup pumpkin puree
  • 2 tablespoons almond butter
  • 1 teaspoon vanilla extract
  • 1 tablespoon ground flax seed (flax meal)
  • 2 tablespoons 100% pure maple syrup
  • 2 tablespoons chopped pecans, lightly toasted
  • Optional: scoop of unflavored protein powder (I like Vital Proteins collagen peptides)

Directions

  1. Bring water, salt, and oats to a boil in a small saucepan. Reduce heat to a simmer and stir for 5 minutes.
  2. Stir in pumpkin puree, almond butter, vanilla and protein powder and stir. Remove from heat and cover for 5 more minutes.
  3. Stir in ground flax meal and maple syrup.
  4. Pour into serving bowl and top with chopped pecans.

Meghan’s Chocolate, Chocolate Pancakes {Gluten-Free, Dairy-Free}

As I shared in a post earlier this week, my culinary nutrition instructor, Meghan Telpner, just released her cookbook.

I’ve had the opportunity to try some of the recipes in it, and they are awesome!

Every recipe is based on using real, whole, unprocessed foods, and no refined sugar, gluten or dairy products, so it’s totally aligned with how I eat and what makes me feel best.

She also has a quirky sense of humor and honesty that makes the book fun to read.

Today I’m sharing with you my experience of making her “Chocolate, Chocolate, Say It Twice Pancakes.” 

undiet pancakes

When we’re cooking and baking, gluten-free, we can’t just swap a gluten-free flour for white flour because the gluten-free flours don’t contain the main ingredient that creates the “doughy-ness” that most of us love so much about bread…gluten!

That’s why you’ll see that this recipe uses a blend of gluten-free flours, including brown rice, buckwheat (which does NOT contain any wheat or gluten), arrowroot and chickpea flour. The company Bob’s Red Mill sells these at just about every grocery store, so they should be accessible to most people.

Meghan posted the recipe on her website as a sneak peek to the book, so I’m going to send you over there, today.

Here’s what the finished pancakes looked like when I made them.

pancake bite closeup pancakes

Bill was a big fan and had them for dinner last night alongside these greens and Meghan’s vegalicious quiche with a secret ingredient gluten-free crust. I’ll be post

*Click here to get the chocolate pancake recipe!*

If you haven’t already, pre-order the Undiet cookbook to get access to some super cool FREE bonuses, including:

  • Two Undiet meal plans
  • Bonus recipes that didn’t make the book
  • Online smoothie class
  • Online launch party

AND be entered to win these awesome prizes:

Easy Sauteed Greens & Onions {Paleo, Vegan}

As often as I share recipes for sweet treats and snacks, you might think that’s all I eat!

Fortunately, that’s not the case.

In fact, I’m a huge fan of vegetables and I eat LOTS of them. I eat vegetables at almost every meal and am a big fan of what Michael Pollan has to say about them:

IMG_2198-0

He goes on to say:

THAT, more or less, is the short answer to the supposedly incredibly complicated and confusing question of what we humans should eat in order to be maximally healthy.

Pollan’s advice is something that everyone in the nutrition community can 100% agree on, which is a rare thing these days.

Most of us spend so much time pitting one diet against another that we lose sight of the basic, universal truths all of us believe and know to be true about food and want people to know.

That’s why I wanted to share this recipe with you today. It’s loaded with plant-based goodness.

I’ve been cooking this dish for over 5 years and, for whatever reason, had never taken the time to share it with you!

greens onions

What prompted me to do it was hosting a table at two client health fairs in the past week and sharing my passion for G-BOMBS. G-BOMBS is an acronym coined by Dr. Joel Fuhrman, who wanted to come up with a simple way to remember the most nutrient-rich, anti-aging, immune-boosting, disease-preventive, protective foods on the planet.

You can read more about G-BOMBS in this blog post (which happens to be the most often read post on this blog!), but to sum it up here, it stands for:
Greens
Beans
Onions
Mushrooms
Berries
Seeds

This dish uses 4 of the 6 GBOMBS, but I’ve made a version of it with all 6 and will share that in another post.

A stack of Swiss chard at the farmer's market!

A stack of Swiss chard at the farmer’s market!

In this recipe, I’m using Swiss chard, a leafy green vegetable that often has colorful stems (rainbow chard) or white stems (regular chard). It’s a softer green than kale or collard greens, and it works really well in this recipe and in frittatas.

It’s packed with anti-aging antioxidants, anti-inflammatory compounds, supports bone health because of its high vitamin K and magnesium content, and has even been found to benefit blood sugar regulation – a KEY to having sustained energy and maintaining a healthy weight. Read more about this super star veggie here.

It comes together in about 20 minutes and is great for breakfast, lunch or dinner. We use it as a side dish and can easily split the whole thing between the two of us. It’s versatile, too.

Don’t have Swiss chard? Use kale.
No pumpkin seeds? Try sunflower seeds.
Out of red onions? Use yellow.

Just make the dish. It’s delicious, packed with nutrients and flavor and is simply prepared. Simple is doable, and simple is often best 🙂 Enjoy!

greens saute words greens plate

Servings: 4 people

Ingredients
1 tablespoon coconut oil or ghee (clarified butter)
1 red onion, thinly sliced into half moons
3 garlic cloves, minced
1/3 cup water
1 1/2 bunches Swiss chard
1 1/2 tablespoons raw apple cider vinegar or fresh lemon juice (about 1/2 of a large lemon)
1/4 cup lightly toasted pumpkin seeds or sunflower seeds
1/4 cup dried cranberries or goji berries (optional)
Scant 1/2 teaspoon coarse sea salt
Freshly ground black pepper

Directions

  1. Cut off stems at base of chard and compost or toss it. Chop chard leaves into 1/2 inch strips and set aside.
  2. In a large skillet over medium heat, melt oil/ghee. Add onions and cook about 10 minutes or until soft and translucent.
  3. Add the garlic and cook until soft, but not browned (it turns bitter when it browns). Add 1-2 tablespoons water to prevent sticking, if needed.
  4. Turn heat to medium-high and add greens and remaining water and toss with tongs to combine. Cover with a lid and cook for 4-5 minutes until greens are wilted but still BRIGHT green.
  5. Remove from heat and toss greens with cider vinegar (or lemon juice), pumpkin seeds, cranberries and sea salt and pepper, to taste, until everything is evenly coated and combined.

The ONLY Real Food Cookbook You Need to Buy This Year!

One of the things I love about this blog is that it gives me the opportunity to share fun and exciting info and inspiration with you guys. Today’s post is no exception!

As most of you know, I completed a culinary nutrition certification program last year, which helped me take my nourishing and yummy meals to another level.

It also gave me a community of people who love food, health and healing as much as I do!

my people

Meet, Meghan! :)

Meet, Meghan!

The creator and rock star behind the program is Meghan Telpner (more about her here). Her philosophy has inspired and is aligned with so much of the way I eat and how I live.

She has this unique way of presenting nutrition and healthy living in a way that makes it really fun, approachable and not at all intimidating, which is something I’m passionate about doing as well. Both of us want to take the “fear factor” out of eating well and make it accessible, so it’s something WANT to do instead of something we feel like we HAVE to do.

If any of you have come to a class or workshop I’ve taught, you’ve probably heard me declare it a “judgment-free zone” and Meghan takes the same approach, which I LOVE!

Both Meghan and I are happy for you to start from wherever you are on your journey and just make a few small changes, one step at a time. And neither of us will ever preach one kind of eating to you. We’re not pro-vegan, or pro-meat, or anti this or that. We really want people to pay attention to their food, skip the processed stuff and learn how to listen to their bodies to figure out what they need.

You can learn more about her take on everything by watching her creed. 

Meghan’s newest book sums up everything you need to know to live a vibrant, awesome life into one entertaining read.

undiet cover

Over the years, I’ve been following Meghan’s advice and have noticed for myself how much better my mood is, better sleep, fewer colds and flus and overall a better outlook. What I’ve learned is that health becomes this bonus of just following this rule-breaking way of living. I feel like the “UnDiet” lifestyle inspires me to live in a way that lets me feel alive and not filled with guilt or restriction.

I choose to live this way and am pumped to share everything I learn with all of you, so you can have your best life ever, too! That’s why I’m SO excited to tell you guys more about this cookbook put together by my teacher, Meghan.

The UnDiet Cookbook starts by Meghan telling her own story of how she healed from an inflammatory autoimmune disease that her doctors told her was incurable. From there, she breaks it down: why calories don’t count, how to eat real food, why we might want to kick-it gluten-free (with evidence based research to back it all up), and then we dive into 130 simple, delicious, beautiful and health supportive recipes.

The cookbook includes:

  • Over 130 gluten-free + dairy-free recipes (the oat-mazing berry banana muffins are AMAZING…seriously, you need them in your life!)
  • Guidelines for stocking an UnDiet pantry
  • Delicious recipes for DIY beauty care
  • UnDiet on the road: travel tips
  • UnDiet Entertaining menus for every kind of event
  • UnDiet Health Tips
  • Cooking Tips
  • Healthwashing Alerts
  • 85 mouthwatering, vibrant photos

The UnDiet Cookbook is on sale today and when you buy the book, she’s also giving away some pretty cool presents (more on those here). If you’re curious about this book, you can get instant access to your Sneak Peek.

Stay tuned for a few posts from me in the coming weeks giving you even more sneak peeks at the yummy dishes I’m creating from the book! I can only share one of the recipes though, so you’ll have to get the book if you want to know how to make everything 🙂 It will be well worth it!

click here

Easy Cranberry Almond Crunch Granola {Gluten-Free}

Earlier this week, I had the opportunity to teach a workshop about Yummy Snacks for Healthy, Happy Kids at the Institute for Integrative Health.

One of the goals I set for myself back in April of this year was to present at the Institute sometime this year, so to be able to accomplish that in such a short amount of time was super exciting.

I’m teaching my second class there on October 14th about Going Gluten-Free without Going Crazy. Click here to get more info about it and register!

I’m so grateful for everyone who attended Wednesday’s workshop and spent the evening with me! 🙂

group shot yummy snacks IMG_2027 closeup

A common snack that adults and kids eat that is often considered “healthy” is granola, and it was one of the snacks we sampled during the class.

Since there are so many companies that sell pre-made granola, why make your own?

  1. It’s easy.
  2. It’s more nourishing.
  3. You control the ingredients.
  4. It’s fun.
  5. It tastes better!

Let’s take a look at the ingredient list in Nature Valley’s Oats ‘n Honey Granola:

Whole Grain Rolled Oats, Sugar, Soy Protein Isolate, Canola Oil, Honey, Refiner’s Syrup, Rice Starch, Salt, Baking Soda, Corn Starch, Natural Flavor, Vitamin E (Mixed Tocopherols) Added to Preserve Freshness. Contains Soy; May Contain Almond, Milk, Pecan And Wheat Ingredients.

Instead of trying to figure out what each of those ingredients is (or wondering why it’s in your granola), why not take a stab at it?

Let me show you how simple it is to make yourself and why you’ll want to give it a try!

Cranberry Almond GranolaGranola Aerial

One thing I’ve learned from all of the moms I’m friends with and from books and blogs I’ve been reading is that kids LOVE to be involved in the process.

For this recipe, kids can help measure the ingredients, pour them and even mix everything together with their hands. If we make eating well fun AND tasty, then there’s a much better chance kids will come on board.

This recipe is meant to be versatile and could be done differently every time you make it, depending on what you have on hand.

You might already have all of the ingredients in your house! If you don’t have one of the nuts or seeds I use, just swap it out for what you do have 🙂 The goal is to keep it real and simple.

You can use this granola as a breakfast cereal, an afternoon snack or to sprinkle on top of something like this 2-minute banana ice cream!

Cranberry Crunch TextGranola Closeup Bowl

Ingredients

Directions

  1. Preheat oven to 300°F.
  2. Mix the oats, seeds and nuts together in a large bowl. Mix in the salt and cinnamon and stir to combine.
  3. Combine the oil, maple syrup, and vanilla in a small bowl and pour over granola mixture. Stir with a spatula or your hands to combine.
  4. Pour the granola onto two parchment-lined baking sheets and bake for 30-35 minutes, or until the mixture is light brown. Stir the granola every 10-12 minutes or so for an even color and to make sure the granola is cooking evenly.
  5. Remove from the oven and add the cranberries. Stir to combine. Let it cool, as it will continue cooking a little during the cooling process.

Store granola in an airtight glass container, and it should stay fresh for 7 to 10 days. For longer shelf life, store in the refrigerator.

Come to my next workshop about Going Gluten-Free without Going Crazy! Click here to register 🙂

Pizza! Pizza! Dip {Dairy-Free, Gluten-Free}

Pizza dip??? 

Yup!

You read that right. And, no, you’re not seeing things 🙂

This post is all about a super yummy new dip that I came up with a few weeks ago.

Pizza DipPizza Spices

I have to start off by letting you guys know how much I loved anything related to pizza for most of my life.

Pizza Hut pan pizzas (it made reading books SO worth it!). Celeste Pizzas-for-One. Totinos Pizza Rolls. Little Caesars (Pizza Pizza!). Joe Corbi cheesy bread and make-your-own pizzas.

Oh, and pizza-flavored COMBOS! Who could forget those little nuggets of joy?? If you’re a combo fan, check out this recipe for addictive paleo pizza poppers.

If you couldn’t tell…I LOVED PIZZA. 

When I realized as an adult that some of the ingredients in pizza made my body not feel so good (dairy + gluten + grease = bloating and ickiness for me!), I was pretty bummed.

So, as I’ve been experimenting with more recipes in my kitchen, I’ve thought about how great it would be to come up with a dip that brings back the delicious pizza flavors without all of the stuff that doesn’t nourish my body.

That’s how this easy dip came to be!

pizza hummus pic

I tinkered with this recipe about five times until I came up with this combo. My friend Sam, who is a self-proclaimed pizza aficionado, gave it two big thumbs up, and the bowl was completely cleared out yesterday when we took it with us to a cookout.

It’s packed with healthy fats and protein from the cannellini beans and tahini, and using cannellini beans instead of chickpeas results in a smoother, creamier dip.

Enjoy! 🙂

Pizza Pizza Dip

Ingredients

  • 2 cloves garlic, peeled
  • 1 (15-ounce) can no salt added cannellini beans, drained and rinsed
  • 1/4 cup tahini
  • 1/4 cup tomato paste
  • 1/4 cup fresh squeezed lemon juice (or Lakewood Organics or Santa Cruz lemon juice)
  • 1/8 teaspoon crushed red pepper flakes
  • 1 teaspoon dried basil
  • 1.5 teaspoons dried oregano
  • 1/8 teaspoon onion powder
  • 1/4 teaspoon dried thyme
  • 1/4 cup sundried tomatoes (if they’re not soft, soak them in hot water for 10-15 minutes to soften, so they blend more easily or try ones that come in a jar in oil)
  • 1 teaspoon sea salt
  • 2 tablespoons extra virgin olive oil 

Directions

  1. Turn on the food processor fitted with the metal S-blade and drop the garlic down the feed tube; process until it’s minced.
  2. Add the remaining ingredients and process to combine. Scrape down the sides as needed.
  3. Stream in olive oil if you’re using it until combined. Store in a glass container in your fridge. 

Serve with your favorite veggies or Mary’s Gone Crackers pretzel sticks – so good! 🙂

Crowd-Pleasing Pico de Gallo {Salsa Fresca}

One of my favorite parts of my job is interacting with people and inspiring and empowering them to eat in a way that feels good, tastes good and is good for them.

I feel most affirmed when I see people get excited about making wholesome, nourishing food and sharing it with their friends and family. I’m especially thrilled when they come to me after trying a recipe and say things like:

“I thought I didn’t like kale. Your kale salad is the only way I will eat kale!”

This summer, I’ve had the opportunity to spend eight Tuesdays at a company in DC teaching workshops and cooking classes to a group of their employees. For our final class and last hurrah, I thought I’d put a fun spin on it and do a “Taco Tuesday” inspired demo.

We made my favorite walnut tacos with cashew sour cream and a refreshing watermelon mojito side salad (minus the cucumber).

I knew I wanted to serve salsa with the tacos, but to be completely honest, I had never made my own salsa before!

RNK Pico de Gallo

I scoured some of my favorite sites for inspiration about combinations and ratios of ingredients until I tested out and came up with my own recipe.

Since it was my first time making it, I wasn’t sure how it would go over. When one of the employees came up to me afterwards and said, “The salsa gets the Latin seal of approval,” I knew I had a winner on my hands 🙂

Check out this yummy recipe, and serve it with tacos, veggies, this burrito bowl or your favorite dippables!

Pico de Gallo

Ingredients

  • 1 clove garlic, finely minced or grated
  • 1/2 cup red onion, minced
  • 2 tablespoons lime juice (about 1 lime)
  • 1/2 teaspoon sea salt
  • 1/4 teaspoon ground cumin
  • 1/2 jalapeno pepper
  • 5 roma (plum) tomatoes, deseeded and diced (click here for how to deseed a tomato)
  • 1/3 cup fresh cilantro, chopped
  • Black pepper, to taste

Directions

  1. In a medium bowl, combine garlic, red onion, lime juice, salt, and cumin, stir, and set aside for a few minutes while chopping the other ingredients.
  2. Cut out the seeds and inner membrane from the jalapeno and then mince the pepper. Add to the bowl.
  3. Add diced tomatoes and cilantro to bowl and toss all ingredients to combine.
  4. Refrigerate 2-3 hours before serving. Best served the day it’s made 🙂

Sunbutter Buckeyes {Nut-Free, Gluten-Free, Paleo}

When I was a kid, I loved everything about going back to school.

From our annual trip to JC Penney to buy fall clothes (which was kind of irrelevant because we wore uniforms) to hitting up Staples for our back-to-school supplies, I was in heaven.

IMG_1306

I was a picky eater as a kid, so I brought some interesting lunches to school like carrot sticks, yogurt, fruit and crackers or chips, since I didn’t like sandwiches.

I know other parents struggle with feeding their kids healthy food, so I’m here to give you options for them and you!

As I’ve been gearing up for a cooking class I’m teaching about Yummy Snacks for Healthy, Happy Kids on September 16th, I’ve been doing lots of research and recipe testing to make sure the workshop and recipes are awesomeClick here to register (we’re capping the class at 30 so make sure you sign up soon!).

After finding out that a lot of schools now have peanut and tree-nut restrictions these days due to increased concerns about food allergies, I started testing out more recipes made with seeds instead of nuts.

My friend, Missy, a rock star mama of three, tried the original version of these a couple of weeks ago. She loves sunflower seeds and since they’re made with sunbutter and sunflower seeds, she was a fan.

You can leave them as sunbutter bites, and they taste great!

But, she offered one suggestion to make them irresistible to kids.

Sunbutter Buckeyes

Dip them in chocolate.

That’s how I came up with these Sunbutter Buckeyes.

All they needed was a little hint of chocolate to turn them from Bites into Buckeyes 🙂

My friend Tim and Katie’s son, 20-month old son, Jack, tried these the other day and his smile afterward was all the approval I needed!

IMG_1365
I’ve since taste-tested them with over a dozen moms and kids (from 18 months to 8-years old), and they were a hit.

You’ll love them, too! 🙂

sunbutter buckeyes2Sunbutter Buckeyes

Ingredients

  • 1/2 cup pumpkin seeds
  • 1/2 cup sunflower seeds, unsalted
  • 1/3 cup shredded coconut
  • 1/4 teaspoon fine grain sea salt
  • 1/2 teaspoon cinnamon
  • 1 cup Medjool dates, packed and pitted (about 10 dates)
  • 1/3 cup sunflower seed butter
  • 1 teaspoon vanilla extract
  • 1/2 cup Enjoy Life chocolate chips
  • 1 teaspoon coconut oil

Directions

  1. Combine pumpkin seeds, sunflower seeds, coconut, salt and cinnamon in a food processor until it reaches a fine meal.
  2. Add dates, sunflower seed butter, and vanilla, and run food processor until all ingredients are combined.
  3. Roll dough into tablespoon-sized balls and put on parchment paper in refrigerator to chill.
  4. Make your own double burner to melt the chips. Fill a small saucepan with 1 inch water and place a small glass bowl on top. Set the burner to medium low heat. Put chocolate chips and coconut oil in the glass bowl and stir until melted.
  5. Remove bites from fridge and dip halfway into chocolate. Set on a sheet of parchment paper and put in fridge to harden (about 10 minutes).

If you haven’t already, make sure you sign up to come to the Yummy Snacks for Healthy, Happy Kids workshop in Baltimore on Wednesday, September 16th!

Page 6 of 15

Powered by WordPress & Theme by Anders Norén