Category: Holidays Page 2 of 3

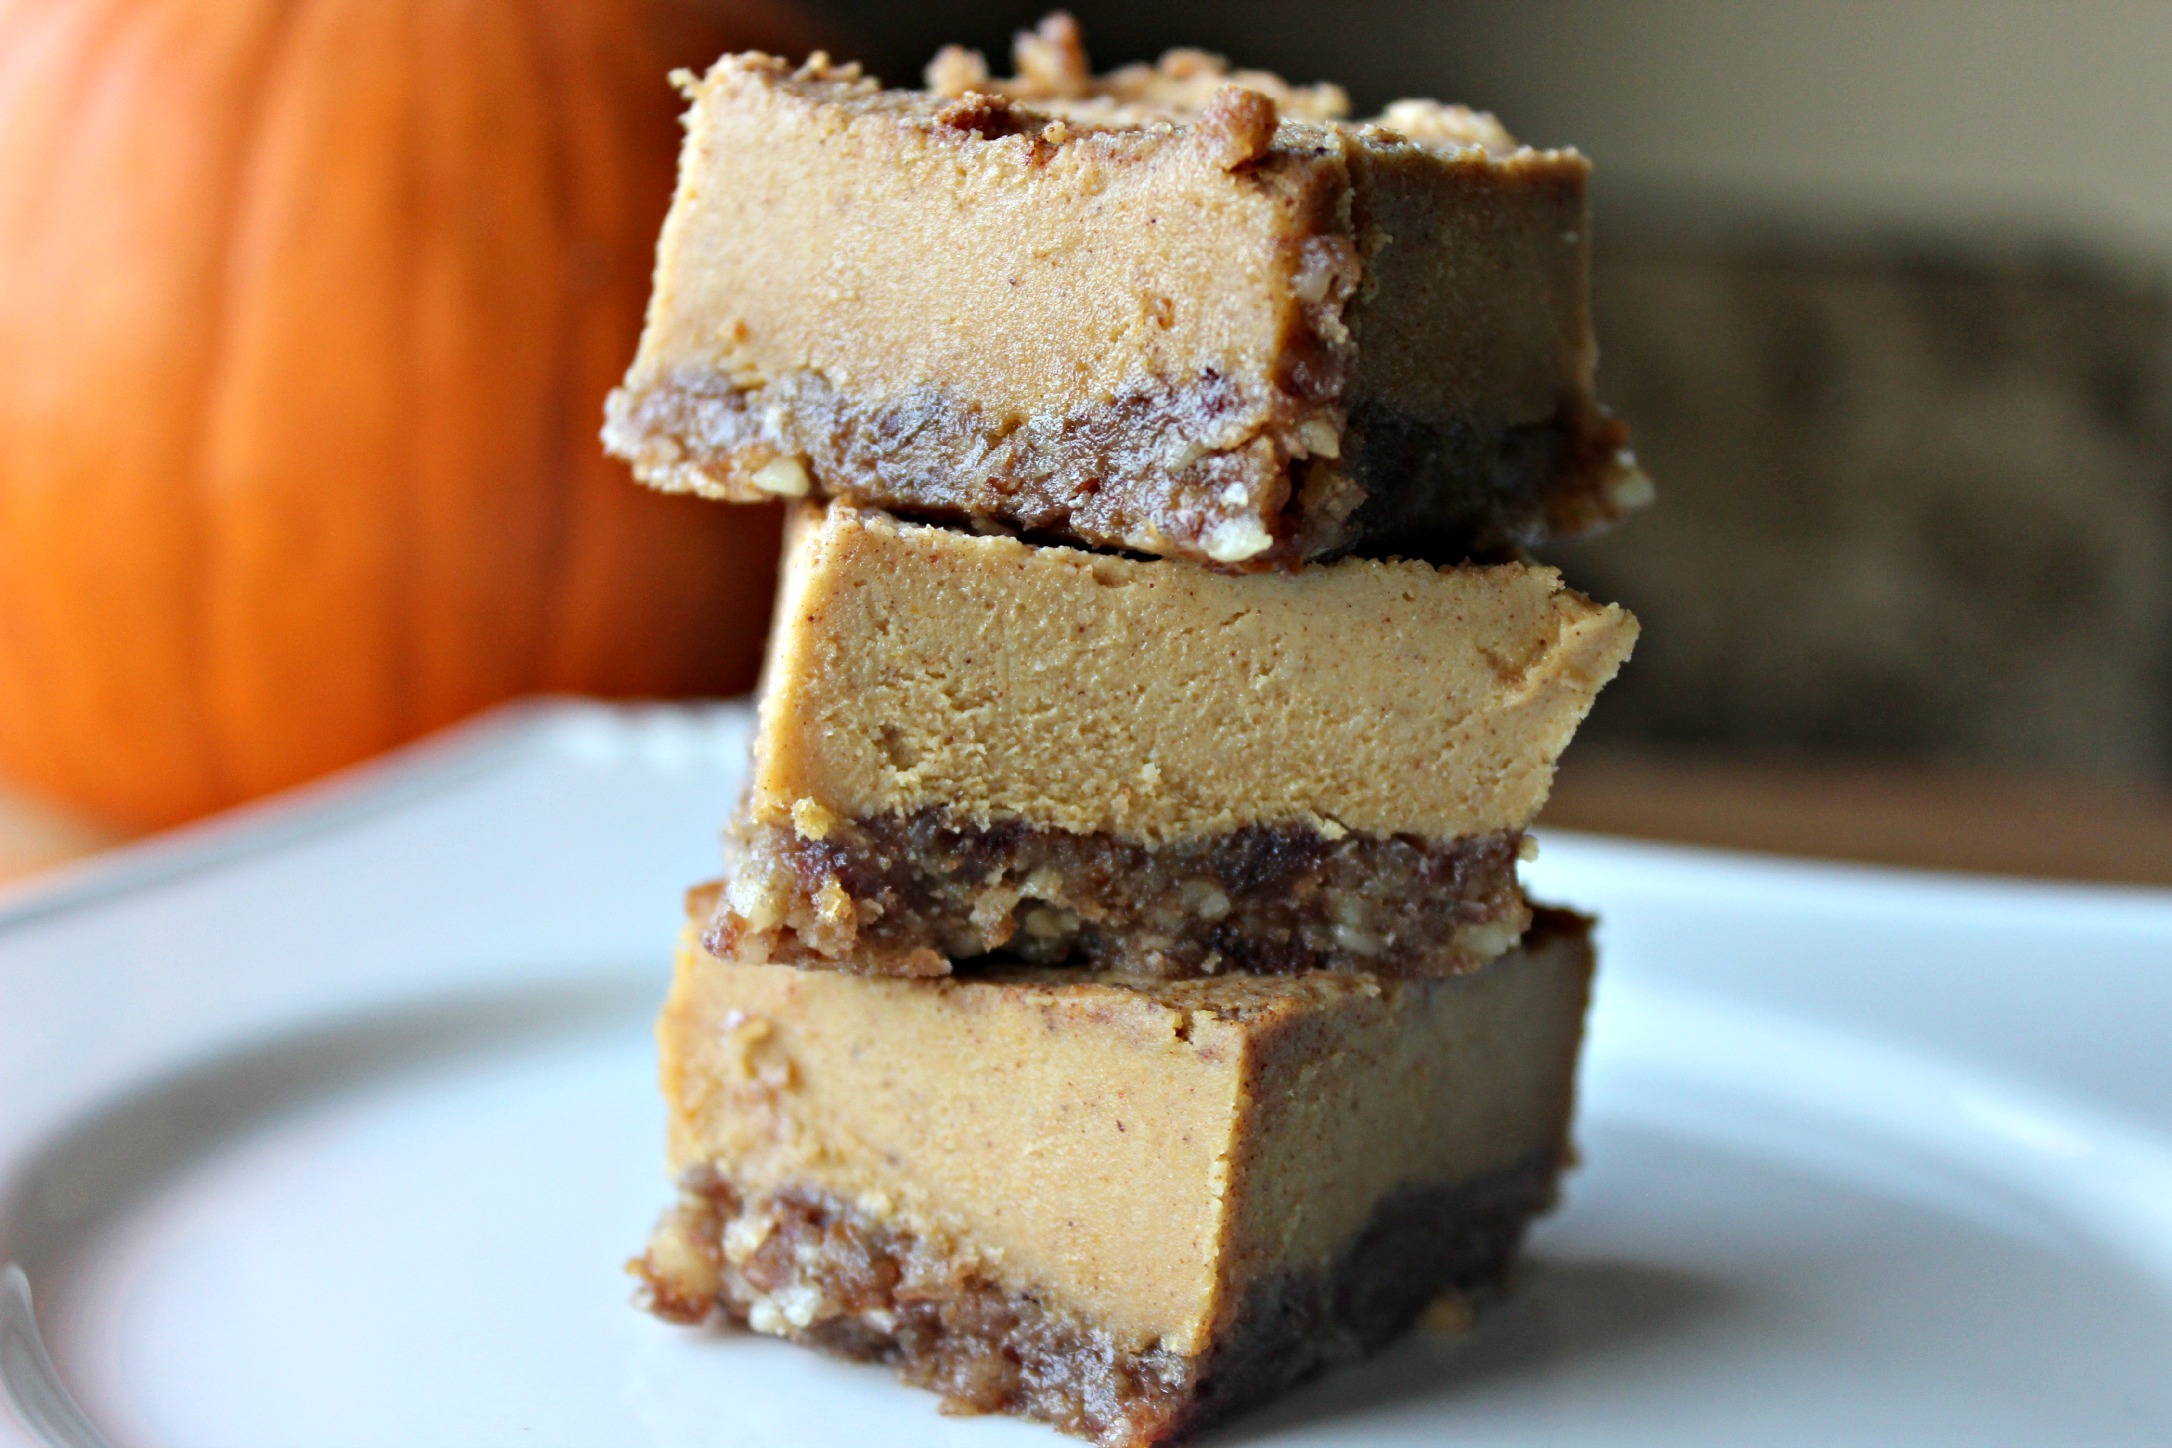
Pumpkin Cheesecake Squares {Paleo, Vegan}

As we’ve been gearing up for Thanksgiving and experimenting with different dishes, I’ve been trying some new desserts.

Inspired by the textures of Meghan Telpner’s Rawmazing Key Lime Pie, I thought I’d infuse the flavors of fall into a melt-in-your-mouth, coat-your-tongue, creamy, no-bake cheesecake.

And I wanted an excuse to use pumpkin.

Pumpkin

Because I love pumpkin.

All things pumpkin.

Especially when it’s mixed with sweet maple syrup, creamy cashews, and warming cinnamon and ginger.

It’s my new go-to for a Thanksgiving dessert.

Cheesecake StackPSquare Closeup

Pumpkin Cheesecake Squares.

I’m going to keep it short and sweet here today because this recipe is that good, but all you need to know is it’s easy to make, doesn’t require baking, and is so addictive you’ll want to eat multiple squares at a time.

The creaminess comes from the raw cashews (don’t knock it ’til you’ve tried it), and the slight hint of tartness we’d usually get from cheese comes from a spoonful of lemon juice.

Happy Thanksgiving!

cheesecake banner

Ingredients

Base

  • 1 cup raw pecans
  • 1/2 cup raw walnuts
  • 1 cup Medjool dates, pitted (make sure they’re soft)
  • 1 tablespoon coconut oil, melted
  • 1/4 teaspoon cinnamon
  • Pinch fine grain sea salt

Filling

  • 2 cups raw cashews, soaked in water 2-4 hours then drained and rinsed
  • 3/4 cup pumpkin puree
  • 1/2 cup pure maple syrup
  • 1/3 cup coconut oil, melted
  • 1 tablespoon lemon juice
  • 2 teaspoons ground cinnamon
  • 1 teaspoon ground ginger
  • 1/4 teaspoon ground nutmeg
  • 1/8 teaspoon ground clove
  • 1 1/2 teaspoons vanilla extract

Directions

  1. Put all the crust ingredients into a food processor, and process until the ingredients stick together. Stop and scrape down the sides as needed. Press the crust mixture into the bottom of a square baking dish.
  2. Put all filling ingredients in your blender or food processor (high-speed blenders like a Vitamix or Blendtec work best) and blend until smooth and creamy. You may have to stop to scrape down the sides. I had to use the tamper for my Vitamix to get it to be smooth and creamy.
  3. Pour the filling evenly over the base and smooth with a spatula. Cover the dish and place it in the freezer to set for 4-6 hours.
  4. Let the dish sit at room temperature for 10-15 minutes and then cut into squares. I sprinkled a thin layer of cinnamon on top before serving.

Two Soups for You! {Moroccan Chickpea & Curried Butternut}

It’s the perfect time of year for a nice big bowl of soup. As the weather cools, my body starts to crave foods like that, so I give it what it wants!

Soup is the ultimate savory comfort food for fall. Remember back to when you were a kid and your parents gave you a bowl of chicken noodle soup when we were sick? How about a dippable bowl of creamy tomato soup for your crunchy, buttery grilled cheese sandwich?

Foods like these are comfort foods because they give emotional comfort to us when we eat them.

Today I’m going to share recipes for two soups we recently tried from culinary translator and food as medicine guru, Rebecca Katz.

I recently wrote a post about her cancer-fighting, brain-boosting, longevity-promoting cookbooks and her famous Magic Mineral Broth. If you missed it, check out that post here. You’ll use the mineral broth in both of these soups, which is why we made it in the first place!

Broth

I love the rich flavors of today’s soups, especially the Moroccan Chickpea and Vegetable Soup. When I lived in Spain in college, I was in the southern town of Granada, so I was just a couple hours north of Morocco.

It was at that time that I first started to get comfortable trying new foods and experimenting with what I put on my plate. It also served as my introduction to Moroccan food.

I can’t say that I was always excited to be more adventurous with food, but the payoff has been incredible! I now enjoy so many different types of food and ethnic cuisines I would have not even thought to try before that experience.

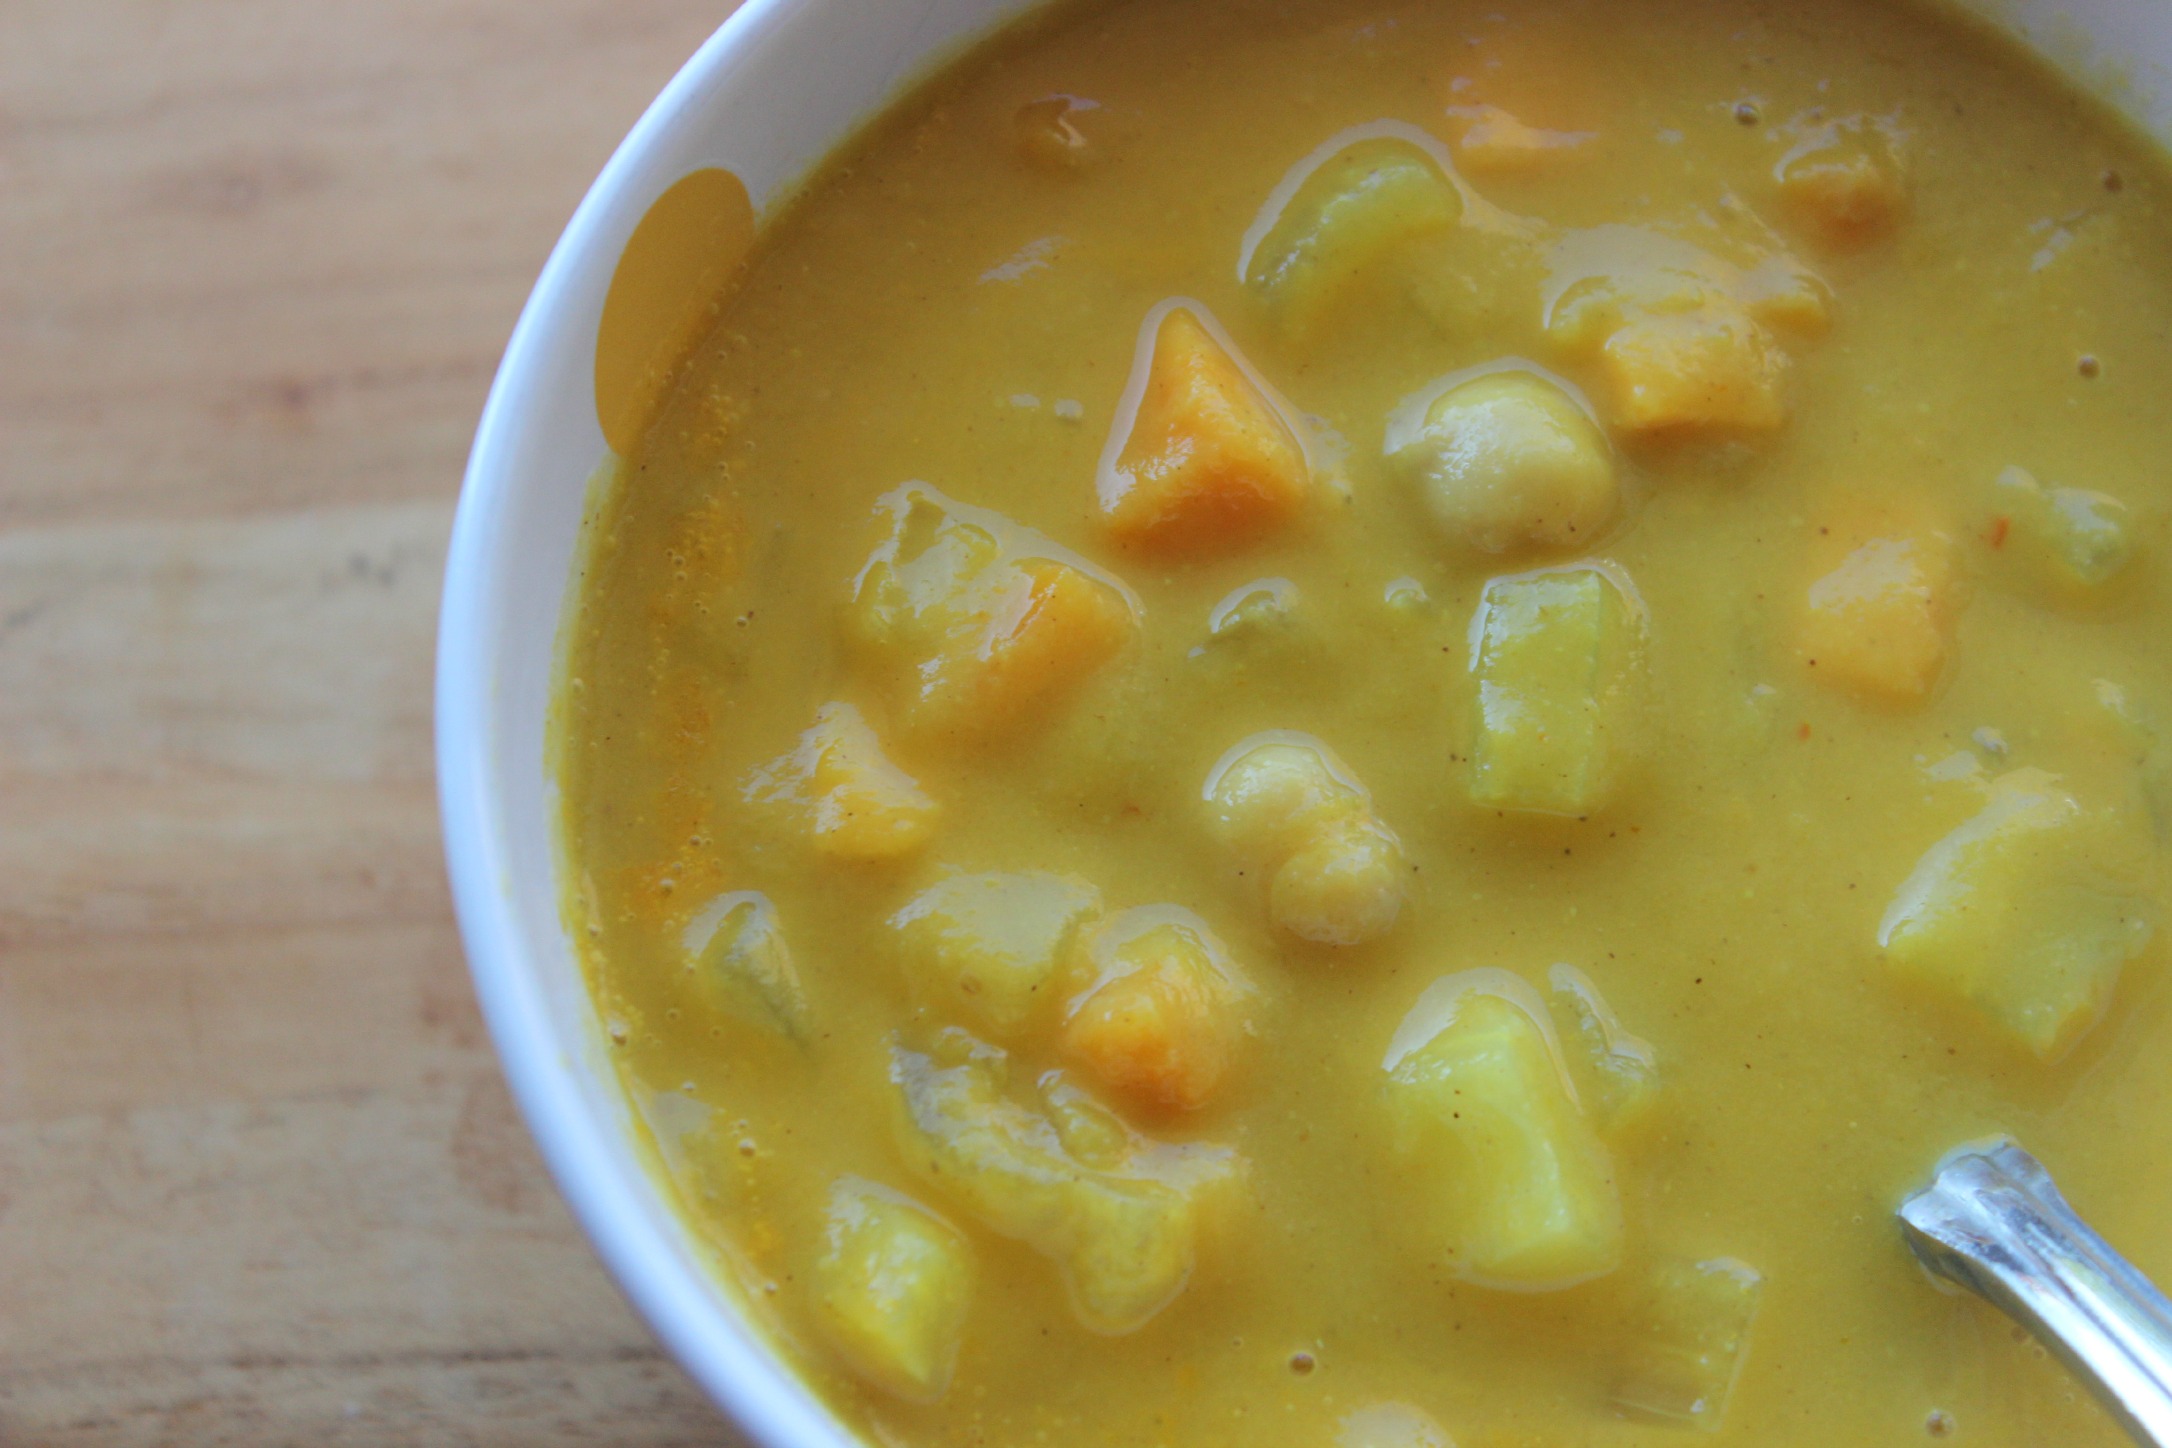
The second soup uses my favorite fall squash – butternut – and incorporates healing spices like turmeric, ginger, and cumin along with a rich, creamy can of coconut milk.

Butternut Squash Closeup

I found it to be a little thinner than I prefer, but you can always use less broth to start and then add more to thin it out.

If you’re looking for some immune-boosting, heart-warming, soul food for this weekend or upcoming week, try one of these two soups! They are delicious and packed with flavor.

Get the recipe for the Moroccan Chickpea and Vegetable Soup.

Moroccan Chickpea

And the recipe for the Curried Butternut Squash Soup.

BSquash Soup

Butternut Squash & Quinoa Harvest Salad {Gluten-Free}

One of the coolest concepts I learned about in my health coach training was food energetics.

Steve Gagne, an expert on the topic and author of the book Food Energetics: The Spiritual, Emotional, and Nutrition Power of What We Eat, taught us about the energetic properties of certain foods.

Now before you start thinking I’m going a little out there on you, listen up!

You may have already noticed this without even thinking about it based on how your food preferences change seasonally.

In the warmer months, we often crave lighter foods – salads, smoothies, raw fruits and vegetables, and chilled soups like gazpacho. These foods are naturally cooling, support our body’s detoxification processes and keep us feeling light during the hot and humid months.

As the fall approaches, we naturally turn to more warming comfort foods – things like hot soups, stews, chilis and squashes. We crave warming spices like cinnamon and ginger. We look forward to holding a piping hot mug of cocoa or tea.

IMG_2662

In other words, during the warmer months we crave lighter, cooling foods. During the colder months, we naturally go for grounding, warming foods and drinks.

Squash is one of those grounding fall foods and happens to be one of my favorites. There are so many varieties of squash that you could have a different one every day for weeks and not get bored!

Today’s recipe pulls in one of my absolute favorite squash and the one most of us are familiar with and have tried before – butternut squash.

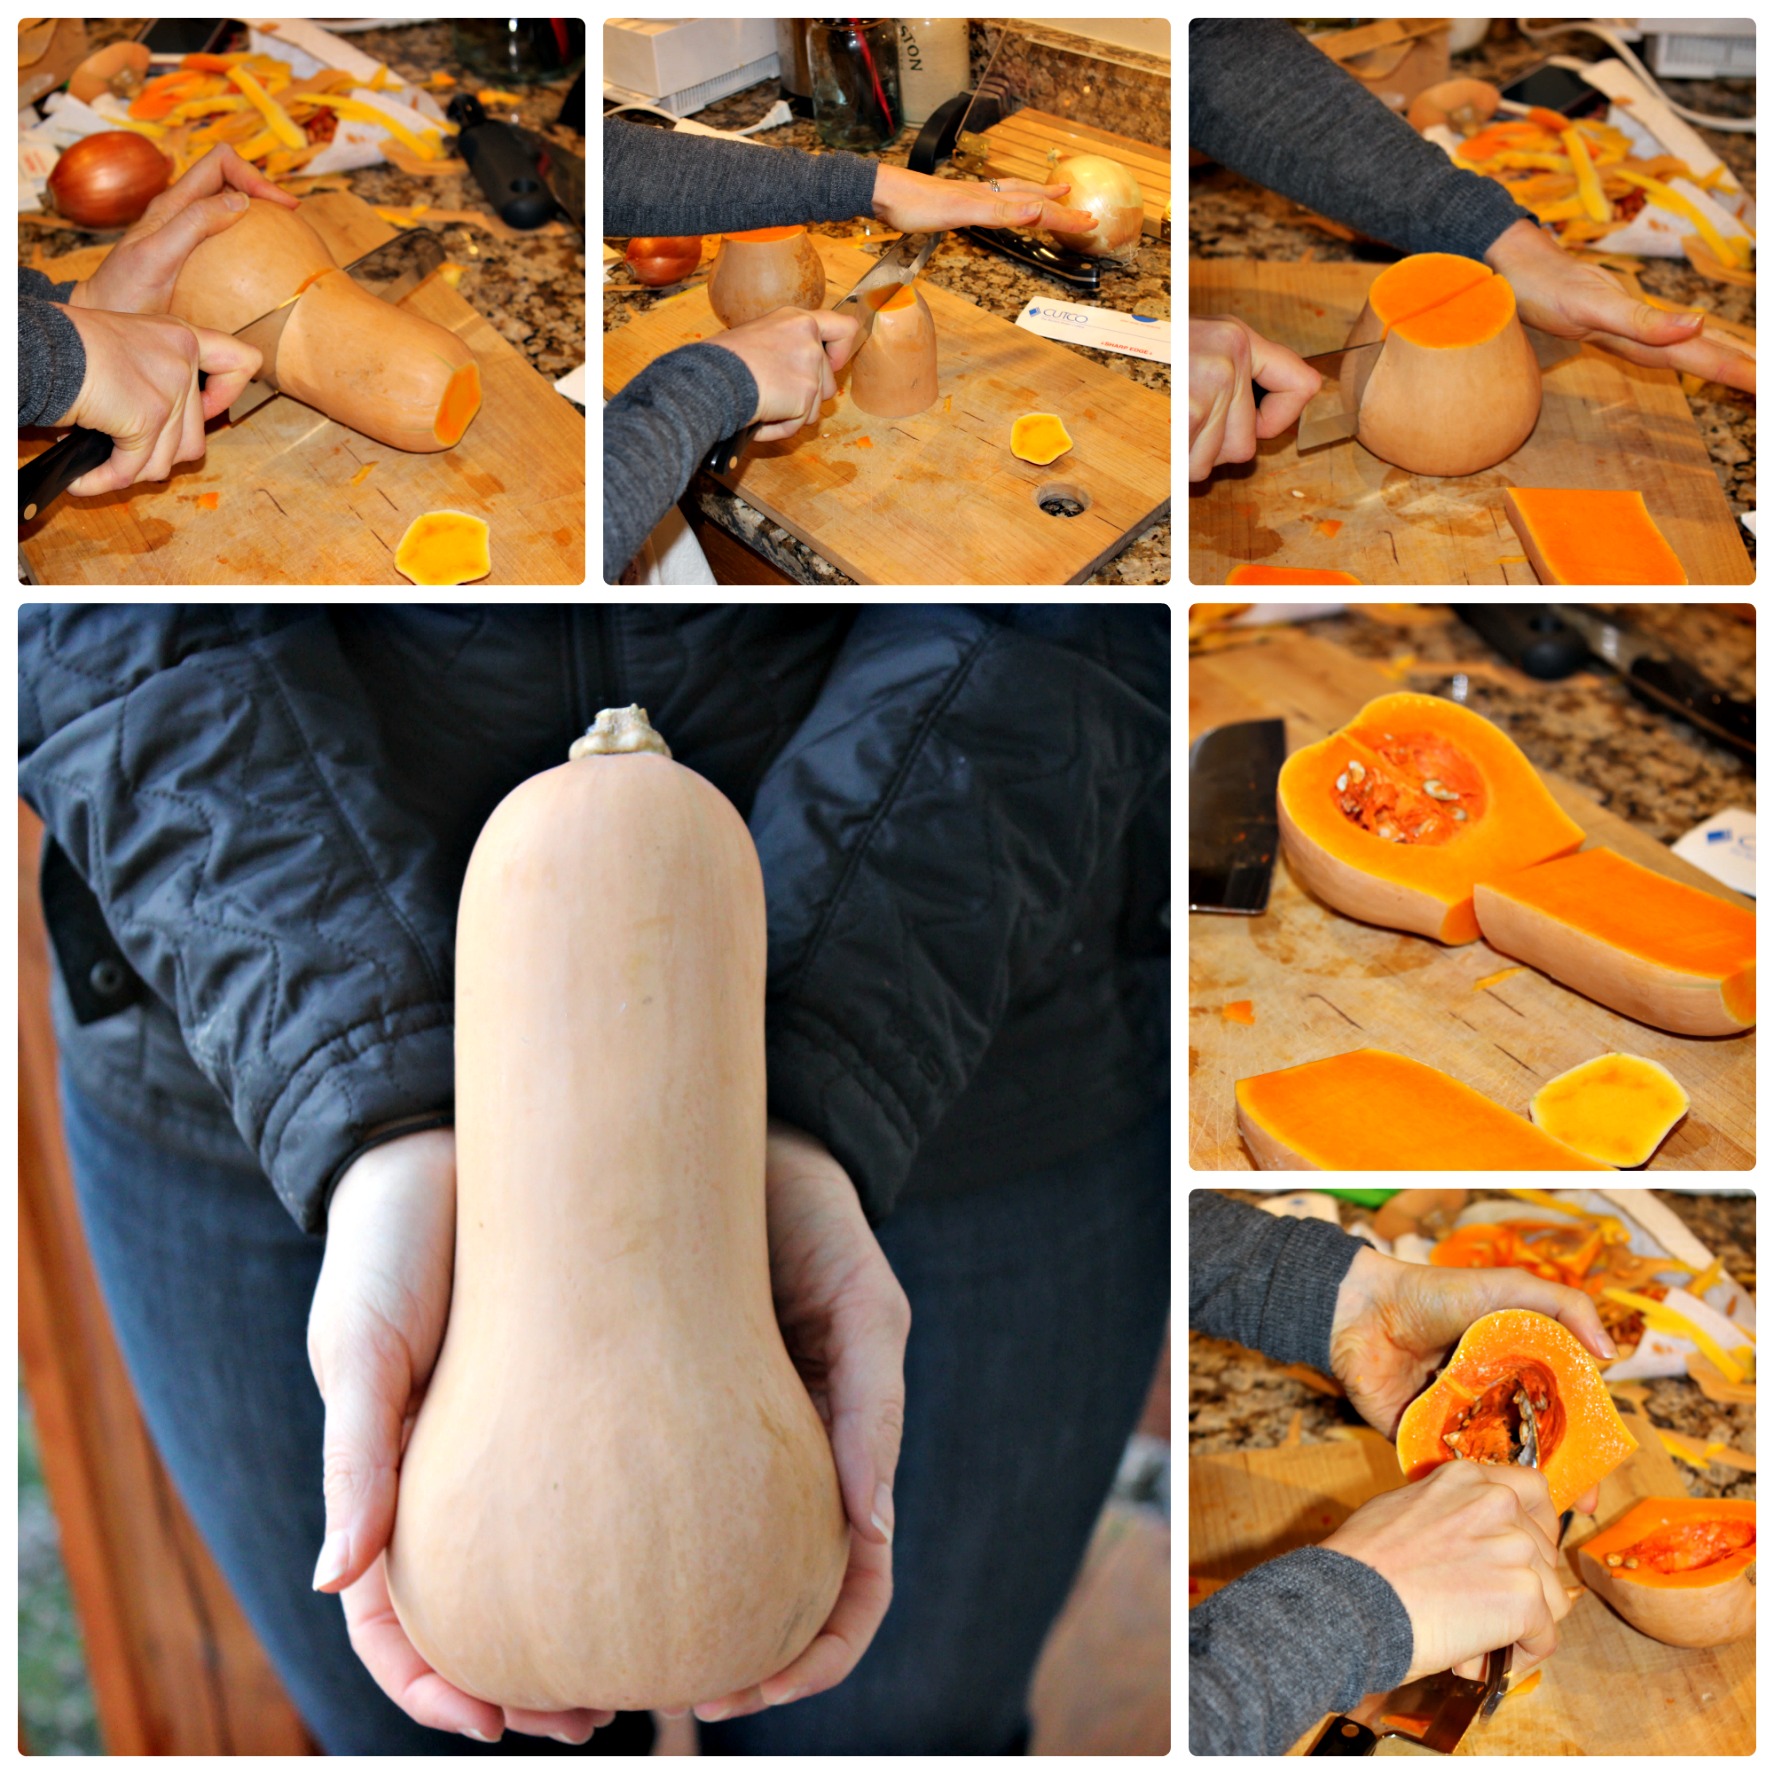
In case you want a little how-to about how to cut up this vegetable, check out the guide below. I find that it helps to peel it with a good quality vegetable peeler BEFORE cutting it up, but it works either way. Once you’ve cut it up, then dice it into cubes for this dish. 

Butternut squash how to

I made this recipe for my Going Gluten-Free without Going Crazy workshop in October and it was one of the most liked dishes I served all night!

We combine the roasted butternut squash with my #1 herb of all time – rosemary – and toss it with some dried tart cherries, toasted pecans, and a simple apple cider vinegar Dijon dressing. To add some lightness and a bit of peppery spice, we mix in a bunch of arugula, one of the tastiest salad greens out there.

We’ve since made it multiple times, so it’s quickly become one of our fall staples. It would make the perfect side for Thanksgiving dinner or for any fall or winter meal.

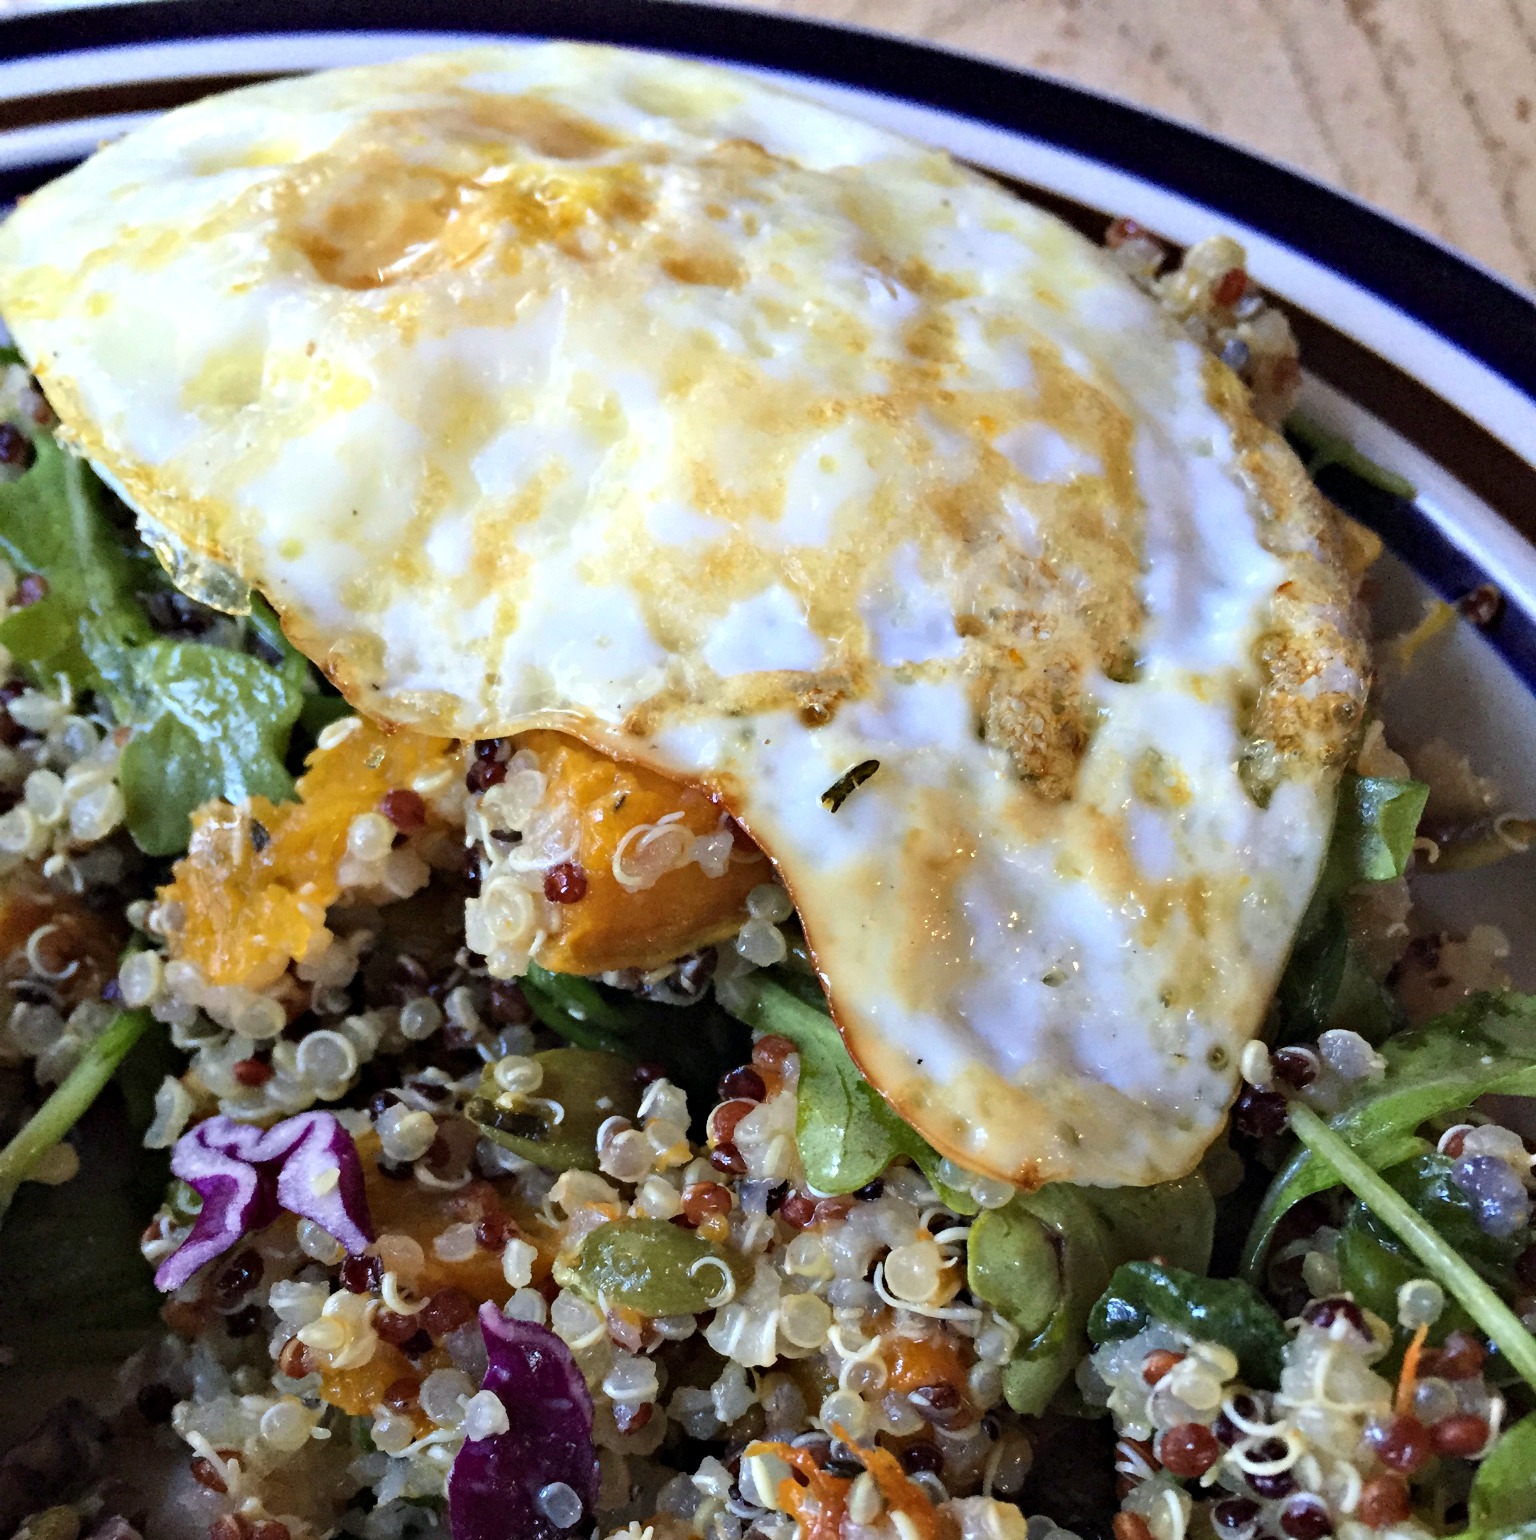
When we were on a trip to Upstate New York last month, we even served it with a (slightly overcooked!) fried egg on top. This one is a keeper 🙂

egg with quinoa salad

Squash Salad Banner


Butternut Squash, Quinoa & Arugula Harvest Salad

This salad makes for a hearty side dish to a fall meal and combines some of our favorite fall ingredients – squash, pecans, and cranberries. You can serve it with a side of chicken or fish or add some chickpeas to up the protein content.

Salad

  • 1 large butternut squash (peeled and cut into 1-inch cubes)
  • 2 teaspoons fresh rosemary (minced)
  • 2 tablespoons olive oil (extra virgin)
  • 1/2 teaspoon coarse sea salt
  • 1 cup quinoa (rinsed and drained)
  • 1/2 cup dried cranberries or tart cherries
  • 4 cups arugula
  • 2/3 cup pecans (toasted and chopped)

Dressing

  • 1 tablespoon raw apple cider vinegar
  • 2 teaspoons Dijon mustard
  • 1 tablespoon pure maple syrup
  • 1/2 teaspoon sea salt
  • 3 tablespoons olive oil (extra virgin)
  1. Preheat oven to 400F. Line baking sheet with parchment paper or silicone baking mat.

  2. In a large bowl, combine squash, rosemary, and 2 tablespoons oil. Season with salt and pepper. Spread in a single layer on baking sheet. Roast in preheated oven for 35-40 minutes, stirring every 12-15 minutes, until squash is tender. Let cool completely.

  3. While squash is cooking, cook quinoa. Rinse quinoa in a fine mesh strainer until water runs clear. Fill medium saucepan with 1 3/4 cups water and add quinoa. Bring to a boil then cover with a lid and reduce heat to simmer for 12-15 minutes. Once water is just barely absorbed, remove pan from heat and leave covered for 5-7 minutes. Remove lid and fluff with a fork. Spread quinoa on a parchment lined baking sheet to cool and prevent it from clumping together. This last step is optional but really helps!

  4. In a small bowl, whisk together dressing ingredients in the order listed.

  5. In a large bowl, combine roasted squash, quinoa and dried fruit. Pour dressing over mixture and gently toss to coat. Season to taste with salt and pepper and add arugula and pecans, gently tossing to coat.

The Ultimate Gluten-Free Bread Stuffing {Paleo}

Last weekend, my husband and I went out of town for a little fall getaway and spent a long weekend in the Adirondacks of Upstate New York.

With all of the (exciting!) things that have been going on in the way of travel, presentations, cooking demos, and workshops, I was in need of a break, and Bill and I were overdue for some time to reconnect and relax.

It was SO beautiful, and fall was in full swing. We captured this beautiful view of the town of Lake Placid, overlooking Mirror Lake.

ADK

This is my favorite time of the year for those reasons and because I absolutely love fall food.

Roasted root vegetables. Creamy squash soups. Savory stews. Hearty chilis. Heart and soul-warming cups of tea and bowls of oatmeal.

Hungry yet?

And with Thanksgiving coming up next month, things like turkey, stuffing, roasted Brussels sprouts and pumpkin everything will start to take center stage.

Earlier this month, I had the opportunity to teach a workshop and cooking demo about Going Gluten-Free without Going Crazy. (I’m working on a few other posts all about gluten, so stay tuned for those.)

But, in the meantime, we’re going to focus on one of the top-rated meals I served at the class that everyone loved…Paleo Bread Stuffing!

Stuffing Aerial

After the class, one of the attendees said:

That stuffing recipe is officially my new go-to. I’m confident I’ll blow away my 3 sisters-in-law this Thanksgiving, which isn’t easy to do.

If you’re ready to wow some of your family members this year, look no further than this recipe.

Most gluten-free bread is full of LOTS of other ingredients (they have to put something in if they take out the key ingredient in bread…gluten) and tends to have less fiber than its gluten-containing counterparts. Because of that, I’m not a huge fan of eating bread just because it’s gluten-free.

A “gluten-free” label on a package doesn’t deserve the health halo so many of us have given it. It’s 100% necessary for those with Celiac disease and people avoiding gluten for medical reasons, but “gluten-free” does not automatically mean “good for you.”

But this bread is different.

SM Bread Box SM Bread Closeup

It’s naturally gluten-free and only has 6 SIMPLE, REAL FOOD ingredients. The bread mix is from a company I met at the Natural Products Expo – Simple Mills – and all you need to make it is oil, apple cider vinegar and eggs!

  1. Almond Flour
  2. Arrowroot Powder
  3. Flax Meal
  4. Baking Soda
  5. Sea Salt
  6. Organic Coconut Sugar

That’s how the label of a packaged food should look. Let’s not compromise quality of ingredients just because we’re not making it ourselves! 🙂

Here’s the recipe! You are going to LOVE it.

Stuffing Banner Stuffing Closeup

The Ultimate Gluten-free Bread Stuffing (Paleo)

For a healthier spin on this year’s stuffing, try this recipe!

  • 1 box Simple Mills artisan bread mix (or 1 medium loaf gluten-free bread)
  • 1 tablespoon ghee (AKA clarified butter)
  • 1 cup celery (chopped)
  • 1 cup carrots (chopped)
  • 1 medium onion (chopped)
  • 1 tablespoon fresh rosemary (chopped)
  • 1 tablespoon fresh thyme (chopped)
  • 2 tablespoons fresh sage (chopped)
  • 1 teaspoon coarse sea salt
  • 1 cup walnuts (chopped)
  • 1/2 cup dried cranberries (chopped)
  • 3 large eggs (whisked)
  • 2 cups broth (chicken or bone both preferred)
  1. Bake the bread that morning or the day before according to the directions provided on the back of Simple Mills Artisan Bread mix bag.

  2. Preheat oven to 350°F.

  3. Cut the loaf bread into cubes; toast the cubes in the preheated oven about 10 minutes to draw out the moisture. Add walnuts and toast another 8 minutes. Remove from oven and set aside.

  4. While the bread cubes are toasting in the oven, heat a large saucepan or Dutch oven over medium heat and sauté celery, carrots, and onion in ghee for 5-8 minutes or until the vegetables have developed some color and are tender.

  5. Raise oven temperature to 400F.

  6. Add toasted bread, herbs, walnuts and cranberries to pan and toss to combine. Remove pan from heat. Whisk eggs together and pour on top of bread mixture, tossing to coat evenly. Then, pour on the broth and toss to combine.

  7. Pour veggie/bread mix into a baking dish and bake for 30 minutes, covered. Remove lid/cover and bake uncovered for 10 more minutes to crisp up the top. Sometimes we give it a stir and then put it back in the oven for another 15 minutes or so, depending on how crunchy you like it!

  8. If you save it for a day or two, I find that adding 1/2 cup-1 cup of broth to the mix to remoisten it before heating it up in the oven helps and prevents it from drying out. Enjoy! 🙂

You can find Simple Mills products on Amazon, at Target, MOMs Organic Market, Wegmans, and Whole Foods.

54 Healthy Summer Cookout Recipes {Gluten-Free, Dairy-Free}

It’s that time of year again.

SUMMER.

As a summer baby who got married to a summer baby in the summer, this time of year is something I look forward to because of all of the celebrating that happens.

Like many of you, I’m also invited to lots of picnics and cookouts and always make sure to bring a yummy dish with me.

In my last post, I shared my top 10 tips to upgrade your summer cookout spread, and today I’m going to be breaking it down and giving you LOTS of recipe options for each course. My goal is inspire you to actually make one of them instead of sending them to the Pinterest black hole 🙂

Rest assured, most of these recipes have been taste-tested by my husband, friends, family and co-workers. Some are newbies I haven’t made yet but am excited to try.

If the recipe links to a post within my site, you’ll know that it’s gluten-free, dairy-free, free of refined sugar and that I’ve made it and have gotten two thumbs up! 🙂

mains

Our FAVORITE veggie burgers are from Hilary’s Eat Well. Bill eats them every week. If you opt for beef hot dogs or burgers, make sure they are grass-fed and don’t contain any nitrites or nitrates (it will say on the package!). Applegate Organics is a great option to try for hot dogs. For chicken, buy “pasture-raised” and for seafood, look for “wild caught.” After all, we ultimately eat what the animals eat, and we don’t want to be eating hormones, antibiotics or pesticides!

sides and salads

Well Plated’s Red, White & Blue Quinoa Salad

dips spreads

desserts

IMG_9609

If you have any cookout-friendly recipes you’d like to share, feel free to post them below!

5-Minute Basil Walnut Pesto Sauce & Cucumber Bites {Paleo, Vegan, Dairy-Free}

If you are looking for ideas for a healthy New Year’s Eve appetizer recipe, look no further! After I shared this dish at a friend’s Christmas party and everyone devoured it, one of my friends there asked me for the recipe so she could make it for her family’s Christmas dinner. This is tried, tested, and approved 🙂 And you can whip it up in 5 minutes!

—————————————————————————————————————-

The first time I shared this recipe was two weeks ago during my very first cooking class. I had so much fun teaching it and can’t wait to do more classes in 2015!

During the class, we focused on making recipes that “cool,” calm and nourish the body. One of those recipes was for an Italian favorite – pesto sauce.

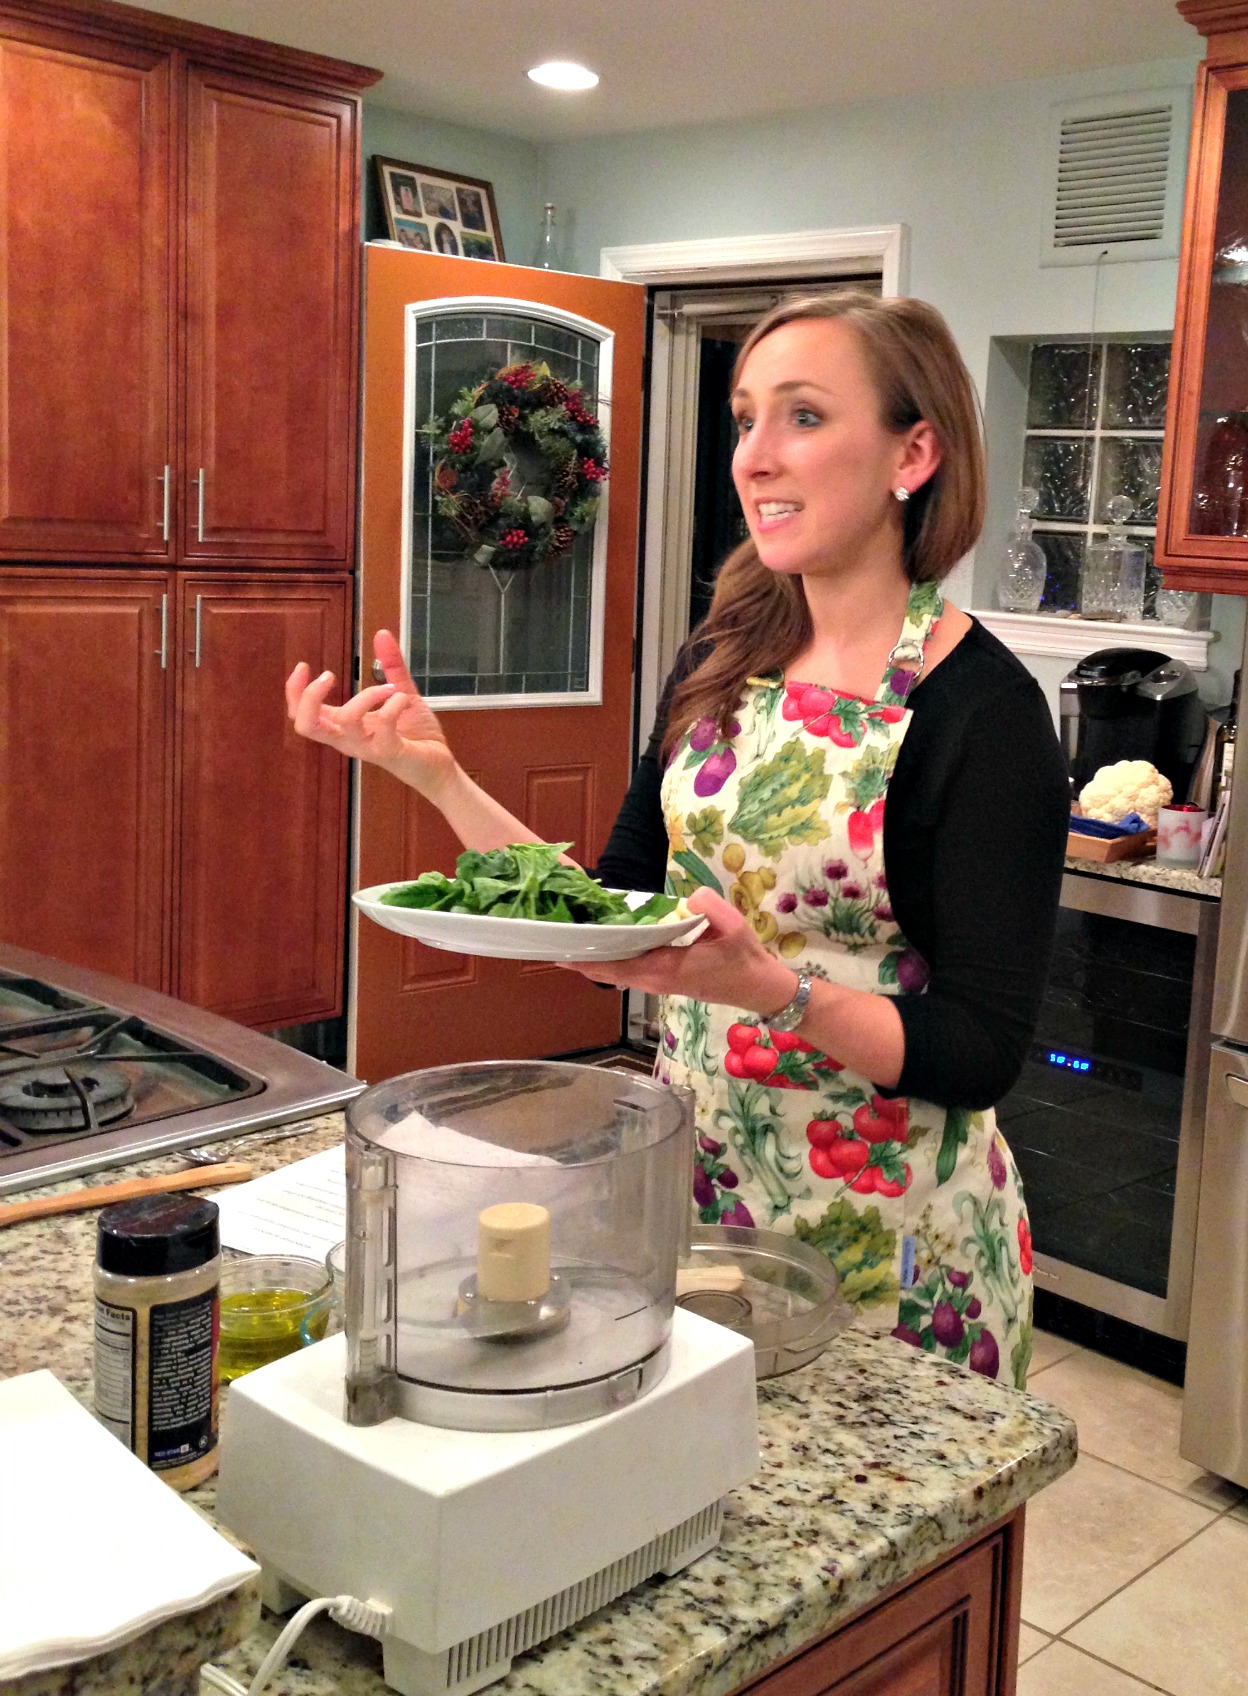
pesto demo

Teaching everyone about the health benefits of basil!

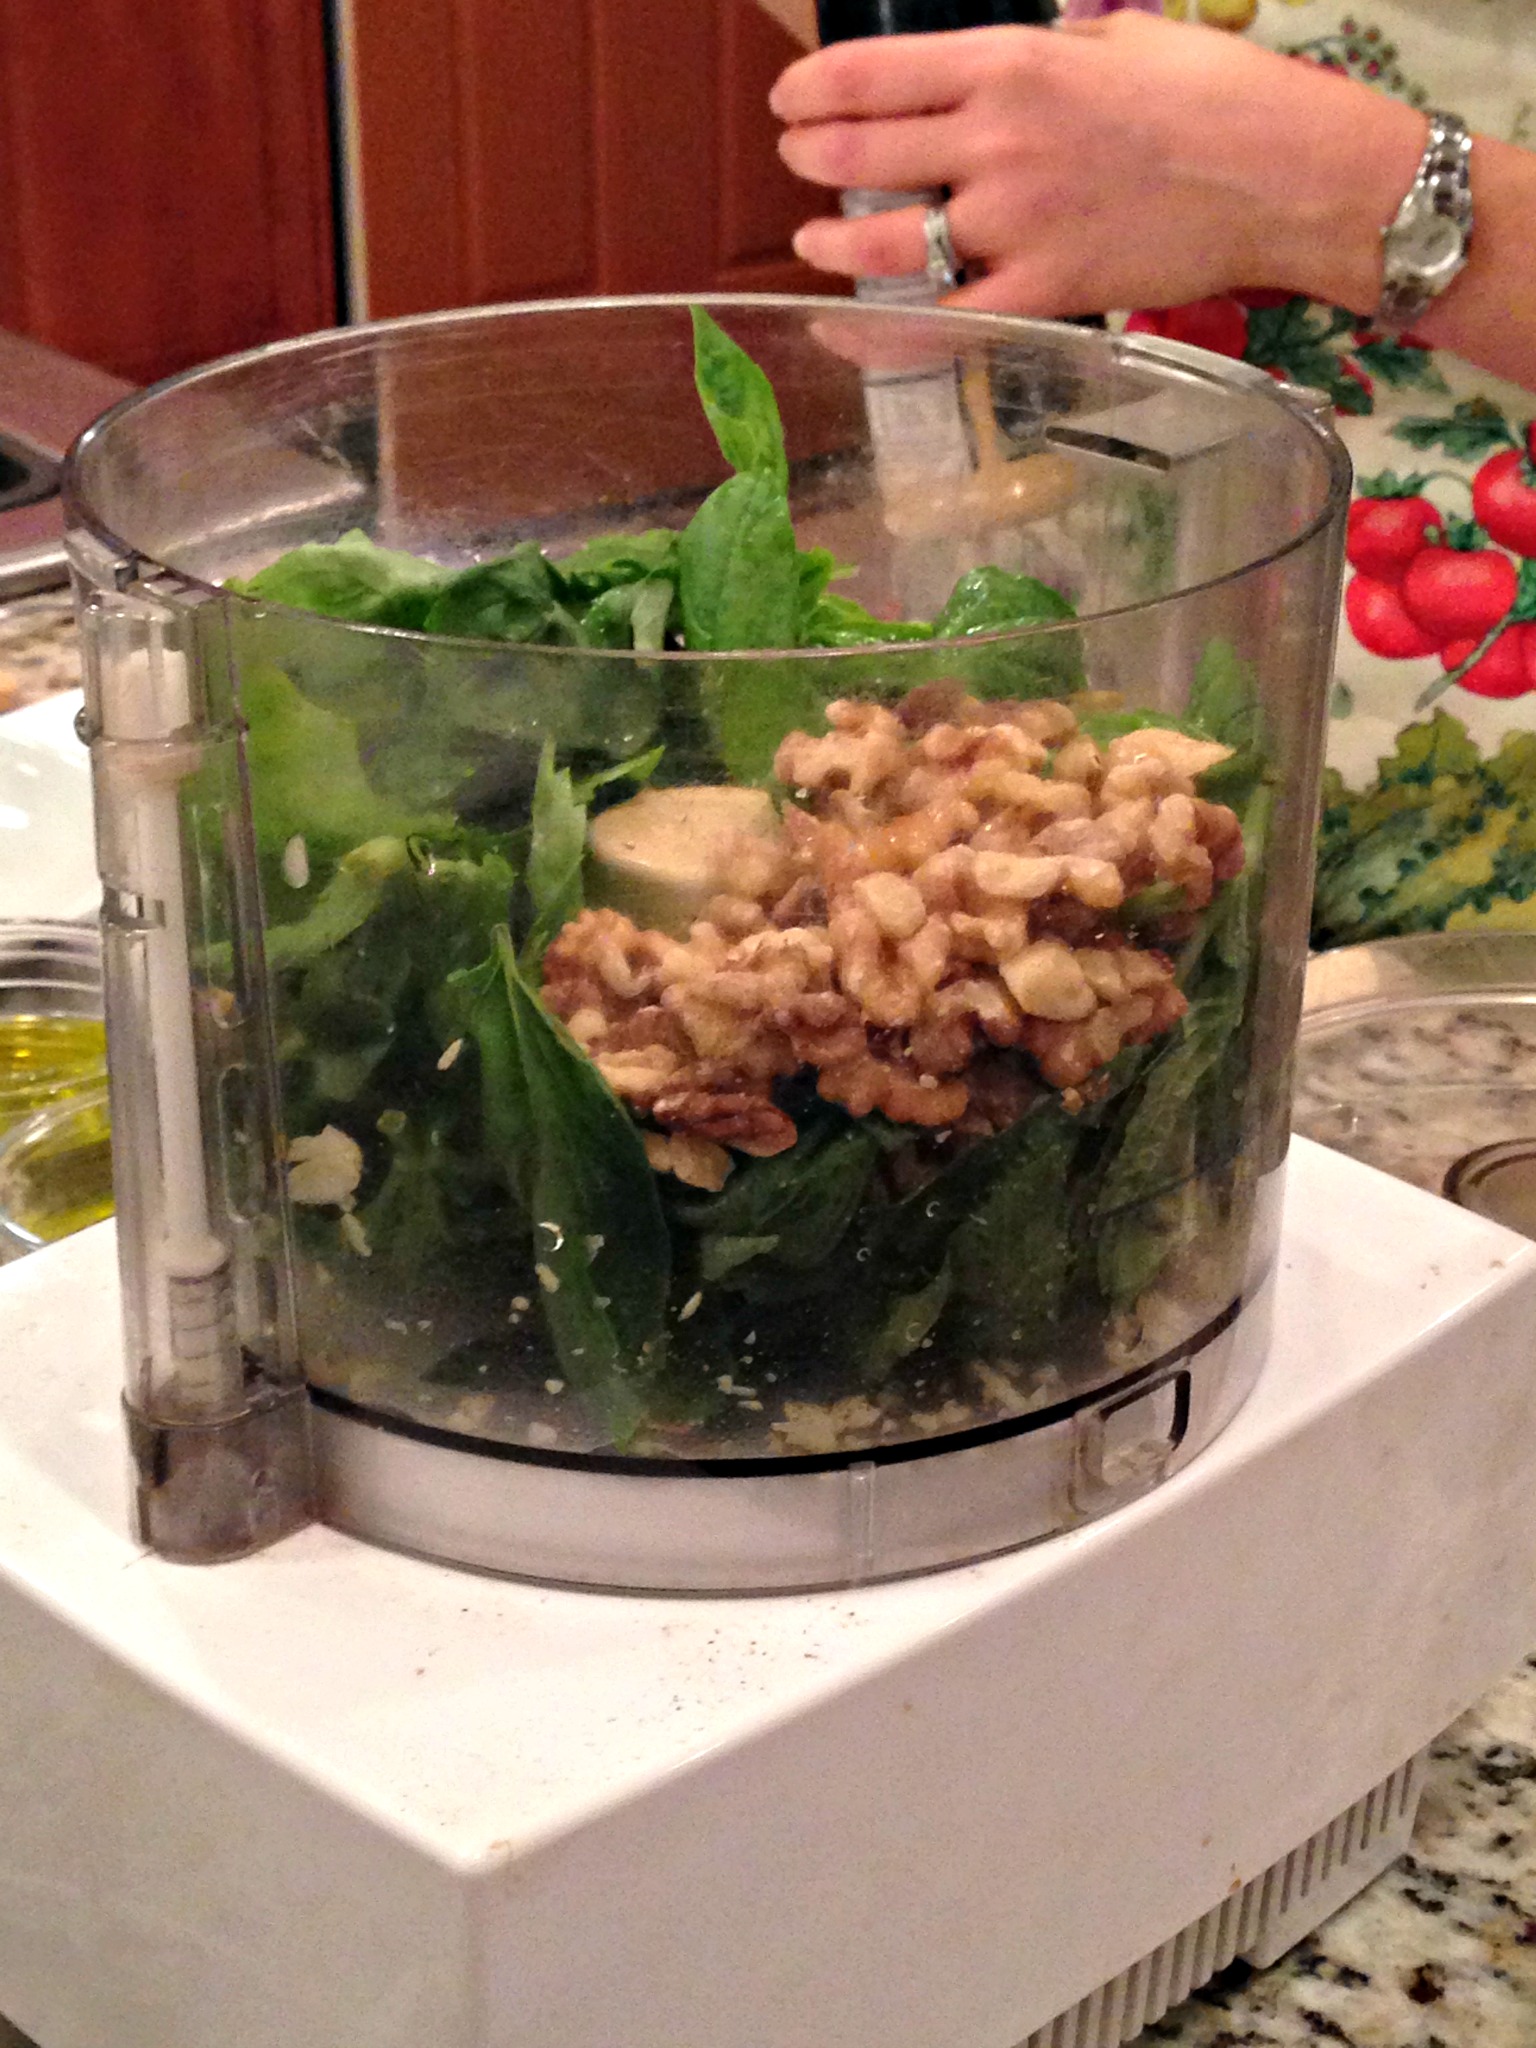
pesto food processor

All of the ingredients in the food processor before they are blended together.

Traditional pesto sauce is made with either parmesan or romano cheese, and since I’m dairy-free, I wanted to come up with a recipe that I could eat.

Something I’ve learned over the past couple of years that was news to me is that conventional dairy products are pro-inflammatory.

They promote inflammation in our bodies – and show up in annoying symptoms like excess mucous production and congestion, and other digestive, sinus and respiratory issues. Many people find that ditching dairy helps them get rid of or reduce all of those symptoms.

I never would’ve thought it was possible that I could go through a winter without bronchitis or congestion, but I have now for 2 years in a row, so I can attest to the fact that going dairy-free works 🙂

After experimenting with about 5 different versions of this recipe for pesto sauce, I finally came up with one that I liked. The ingredients in it are amazing for our health because they are immune & beauty-boosting and inflammation-reducing.

plate of pesto

Inflammation is one of the main reasons most of us are carrying around extra weight and getting sick.

Fat tissue is often inflamed tissue, and as long as our bodies are inflamed, we will have trouble keeping off weight long-term.

Not only that, but inflammation is at the root of most major diseases from digestive issues like heartburn, Crohn’s disease and irritable bowel syndrome to diabetes, heart disease, asthma, bronchitis, sinusitis, and arthritis. For many of us, it’s “silent” so we may not even know it’s happening. We want to eat foods that help us “cool” our body from the inside out, so we can be well.

Check out the amazing anti-inflammatory benefits of this pesto:

  • Garlic. Known as an “allium” vegetable (same family as onions, leeks, shallots, etc.), garlic is a potent anti-inflammatory and antibacterial food. Two of garlic’s sulfur compounds inhibit the activity of inflammatory messenger molecules in our body, thereby reducing inflammation.
  • Walnuts. These brain-shaped nuts are an excellent source of an anti-inflammatory omega-3 fat known as alpha-linolenic acid (ALA). Omega-3 fats also help keep our blood sugar levels regulated, which helps us avoid inflammatory spikes. Extra virgin olive oil, which is also used in this recipe, is another source of healthy omega-3 fats.
  • Basil. This green herb contains an oil that blocks harmful enzyme activity that promote inflammation in our body. It’s also rich in flavonoids (plant pigments found in high levels in deeply colored fruits and vegetables) and antioxidants, which help “cool” and calm our body.
  • Lemon. Citrus fruit high in flavonoids and antioxidants that combat harmful free radicals that damage our body and its cells and promote disease.

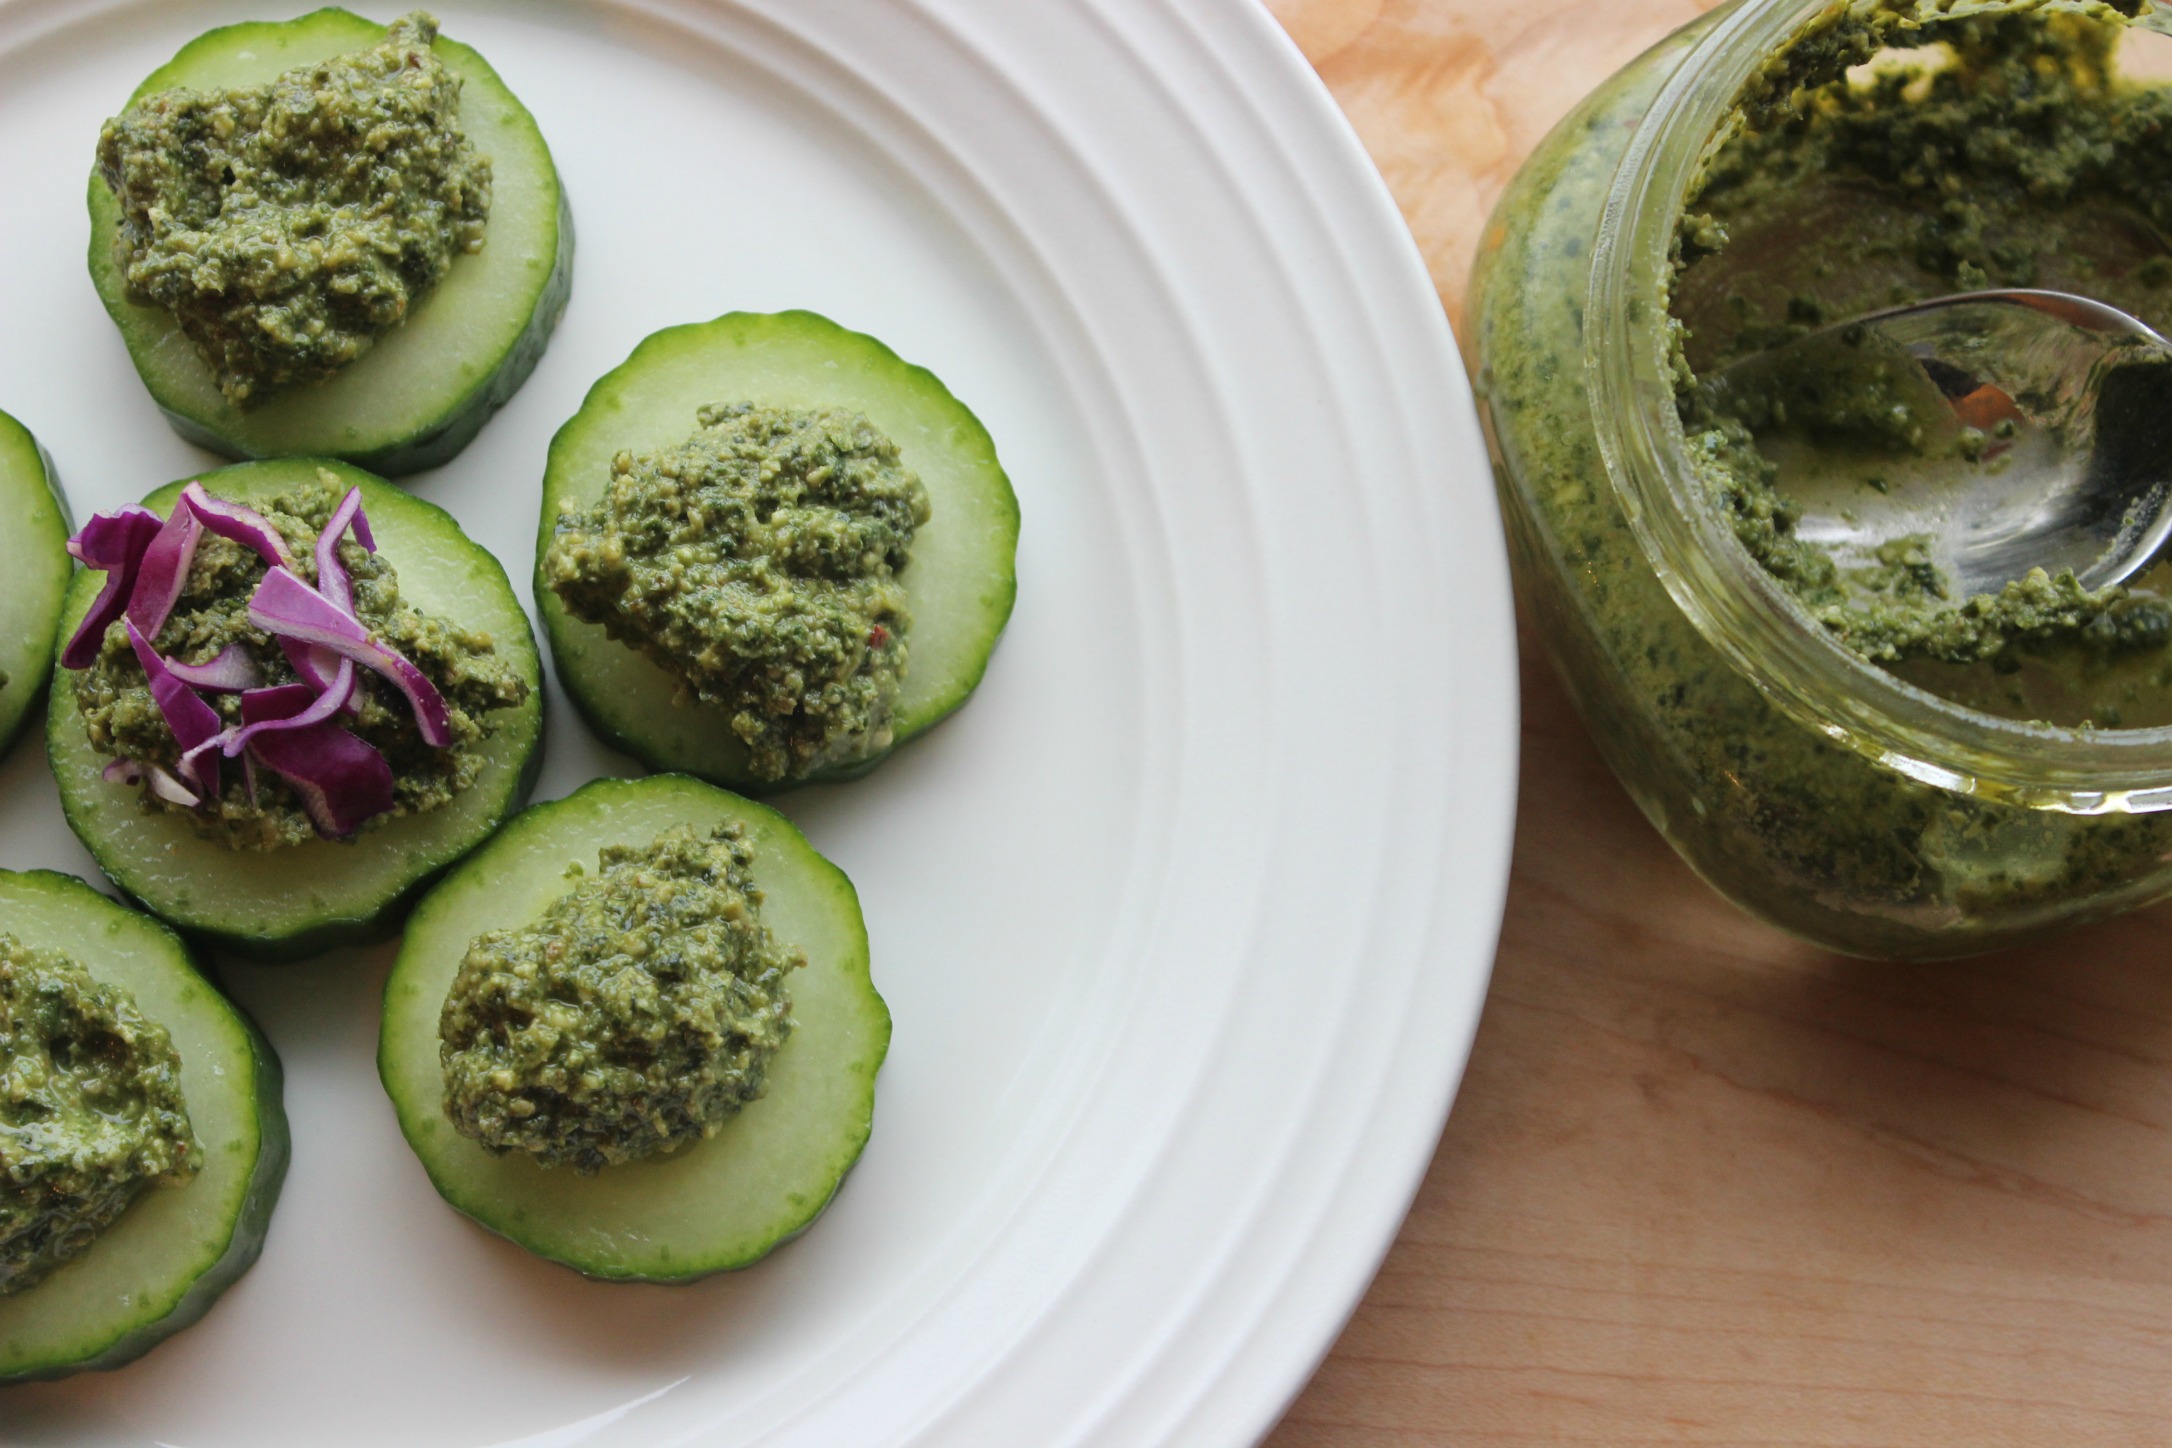
I served the pesto on cucumber slices and topped them with some shredded red cabbage. They are PERFECT for a holiday appetizer or just as a snack. Your guests will rave about them if you bring them to a party! 🙂

pesto bites

Ingredients

2 small cloves garlic, peeled (or 1 medium)
2 cups packed fresh basil (I bought one pack of organic basil from Trader Joe’s and it was the perfect amount!)
1/2 cup raw walnuts
3 tablespoons lemon juice (juice from about 1 1/2 lemons)
1/4 teaspoon sea salt
Few dashes black pepper
1/8 teaspoon crushed red pepper flakes
2 tablespoons nutritional yeast
1/3 cup extra-virgin olive oil

2 cucumbers
Optional: shredded purple cabbage

Directions

  1. Process garlic cloves in the food processor until the garlic is minced.
  2. Add the basil, walnuts, lemon juice, salt and pepper, red pepper flakes, and nutritional yeast. Process until a uniform paste has formed. Scrape down the sides of the bowl as needed.
  3. Turn on the food processor and drizzle in the olive oil in the top hole.
  4. Process until the pesto reaches your desired consistency, stopping to scrape down the sides as necessary. Taste and add more lemon juice or salt if necessary.
  5. Cut ends off of cucumber and slice into 1/2 inch circles. Top each cucumber slice with 1 tablespoon of pesto. When I taught my cooking class last week, some of the attendees came up with the awesome idea of putting the crunchy purple cabbage (another super anti-inflammatory food) on top!

My 5 Favorite Healthy Cookbooks…All Gluten-Free {And My Wish List!}

“The pictures looked so good online. I don’t know why it didn’t turn out that way when I made it!”

Entire articles are dedicated to capturing people’s Pinterest fails when it comes to attempting new recipe creations.

hilarious-pinterest-fails-25

It can be discouraging to put all of the effort into trying something new only to have it end up in the trash. It’s one of the reasons people don’t try new recipes.

“What if it doesn’t turn out right?”

“What if I ruin it?”

“I hate wasting food…and money on food.”

Yes, yes, yes! I’m with you on all three of those. I want my dishes to be tasty and delicious and to feel like buying the ingredients was money well spent.

One of the ways I’ve learned to give myself a better chance of making successful recipes over the years is using cookbooks. What I’ve found is if I like a few of someone’s recipes, I tend to be more confident that other dishes they’ve created will be good, too. And usually, I end up with a yummy meal.

Whether you’ve been cooking for years, are just getting started or are learning a new way to cook based on some health challenges or the way you want to feel, using a cookbook can be a great way to bring some excitement and variety to your kitchen.

Check out a few of my favorite go-to cookbooks when I’m feeling burnt out from Pinterest, am looking for inspiration, or just want to go old school and use an actual book instead of a website. I’ve also given you a list of the top cookbooks on my wish list. Any of these would make great Christmas gifts for yourself or the food lovers in your life!

IMG_6709

Nourishing Meals: Healthy Gluten-Free Recipes for the Whole Family by Alissa Segersten & Tom Malterre

You know a book has good recipes when you have about 100 Post-it flags sticking out of it of all of the recipes you have made or plan to make. My nutritionist raves about Tom Malterre, the co-author of this cookbook, citing him as one of the best nutrition experts out there. He and his wife, Alissa, have 5 kids and are incredibly knowledgeable about how to eat for health AND make kid-friendly meals and snacks.

Favorite Recipes: Asian Chicken Salad, Apple Cider Baked Beans, Cajun Red Beans and Quinoa, Chipotle Yam Fries, Chana Masala, Mint Chocolate Chip Ice Cream and Peanut Butter Monster Cookies. I could go on forever! This is hands-down one of our favorites.

The Whole Life Nutrition Cookbook by Alissa Segersten & Tom Malterre

In their newest cookbook, Alissa and Tom feature 300 Delicious, Whole Foods Recipes, including Gluten-free, Dairy-Free, Soy-Free, and Egg-Free Dishes. They don’t just share recipes for everything from smoothies and muffins to dressings, dips and desserts. They also teach some vital information about food sensitivities (we’re not just talkin’ peanuts), digestive health, how to stock your kitchen, and cooking techniques. Not only that, but the photos are stunning!

Favorite Recipes: Banana Almond Pancakes, Apple-Cranberry Oatmeal Muffins, Gingered Carrot Soup, Spiced Citrus Salmon, Superfood Fudge, and Chocolate-Raspberry Hazelnut Tart. Hungry yet?

3 Books

Clean Food by Terry Walters

Written by a graduate of my health coach training program, Clean Food, was a gift from my mother-in-law when I finished grad school. Chef Mario Batali said:

“Clean Food is the most exciting book based on fresh produce and simple produce I have used in years.”

He’s seen a lot of cookbooks, too! I love how Terry organizes the cookbook by season and promotes the use of whole, fresh ingredients. Also, for anyone who has food sensitivities or allergies to things like dairy and gluten, this cookbook will give you tons of new inspirations and alternatives, and you will not feel deprived or slighted in the least!

Favorite Recipes: Basic Balsamic Vinaigrette, Three-Bean Chili, Roasted Kabocha Squash, Ginger and Pear Crisp, and Banana Coconut Chocolate Chip Cookies

Undiet by Meghan Telpner

I’ve spent the past three months boosting my culinary nutrition skills and knowledge and being entertained by Meghan as she has taught me and dozens of other students the keys to culinary nutrition. Her book, Undiet, includes practical tips and guidelines for how to get yourself off the “diet” train so you can enjoy life, eat amazingly delicious and nourishing food, and thrive! Any recipe Meghan puts out there, whether it’s in the CNE program, through her blog, or in this book is a winner. She’s releasing her first full cookbook in October 2015, so stay tuned for when that happens. I will definitely be talking about it!

Favorite Recipes: Yogi Tea, Lemon Lentil Vegetable Soup, Sundried Tomato & Bean Hummus, Life-Affirming Chili, Veggie Rice Wraps with Almond Dipping Sauce, and Almond Power Cookies

The Beauty Detox Foods by Kimberly Snyder

I’m not entirely sure what prompted me to buy this book, but I’m glad I did! I use this book not only for the recipes but also for the guide that it includes to highlight which foods are best for which beauty and body goals. I often give this book to brides-to-be as part of a shower gift to help them beautify their bodies before the big day! Because it’s more of a detox-focused book, it’s not something I use every day, but I have found some staple recipes and have learned a lot about different foods and their beauty benefits, which has made this book worth it for me!

Favorite Recipes: Creamy Dijon–Tahini Dressing, Raw Purple Cabbage Slaw, and Raw Gorilla Taco Wraps

And now for a few cookbooks on MY Wish List 🙂

ohsheglows

The Oh She Glows Cookbook: Over 100 Vegan Recipes to Glow from the Inside Out by Angela Liddon

Don’t let the word “vegan” in this title scare you off. You’ll miss out if you do. One of the reasons I like vegan recipes is because they automatically nix dairy products (a trigger food for my history of health issues – and many other people’s as well!) and because they make plants the focal point of the dish. Most of us don’t eat enough plants, even though they are the most nutrient-dense, antioxidant-rich foods out there.

practical-paleo

Practical Paleo: A Customized Approach to Health & A Whole-Foods Lifestyle by Danielle Sanfilippo

I’ve heard from multiple people that this book is a must-have for anyone living a dairy-free, gluten-free, grain-free lifestyle. The cookbook includes 30-day meal plans, over 120 easy recipes, and even some handy tear-out guides.Danielle also writes for a paleo blog called Balanced Bites, which is definitely worth checking out!

blendergirl

The Blender Girl by Tess Masters

I’ve heard great things about this book (and the beautiful pictures in it) from one of my favorite people (and head of the CNE program I just finished), Meghan Telpner. She raved about this book, so I plan to get it! I’ve also checked out some recipes on Tess’s blog and love the variety, especially for smoothies. She even has a smoothie app now, too. The app lets you punch in what you feel (happy, sluggish, wired), need (a detox, to lose weight, to chill out), and crave (light and fruity, clean and green, an exotic ride) to find the right smoothie for that day. For great detox and weight loss smoothies, check out this list from Dherbs.

make-ahead-paleo

Make-Ahead Paleo: Healthy Gluten-, Grain- & Dairy-Free Recipes Ready When & Where You Are by Tammy Credicott

I was not familiar with this book, but a classmate from the Culinary Nutrition program I just finished suggested it as one of her “go to” cookbooks, so I thought I would add it to my list! Bill and I meal plan most weeks (as often as we can!) to make it easier and more affordable to eat the way we do – fresh, whole, unprocessed. Just this past week, we thawed out a vegetarian Shepherd’s Pie we had made in October and enjoyed it again for a few lunches this week. It saves so much time to have meals made ahead of time.

bittman

How to Cook Everything: Completely Revised 10th Anniversary Edition by Mark Bittman

As the title says, use this book as a guide to learn every basic (and not so basic) cooking technique you could ever imagine. Bittman explains in simple, how to steps with lots of pictures and has even given a really great TED Talk about food. I gave this book to one of my best friends, who doesn’t feel confident in her cooking skills, as part of her wedding gift this year.

What are some of YOUR favorite cookbooks? Feel free to comment below!

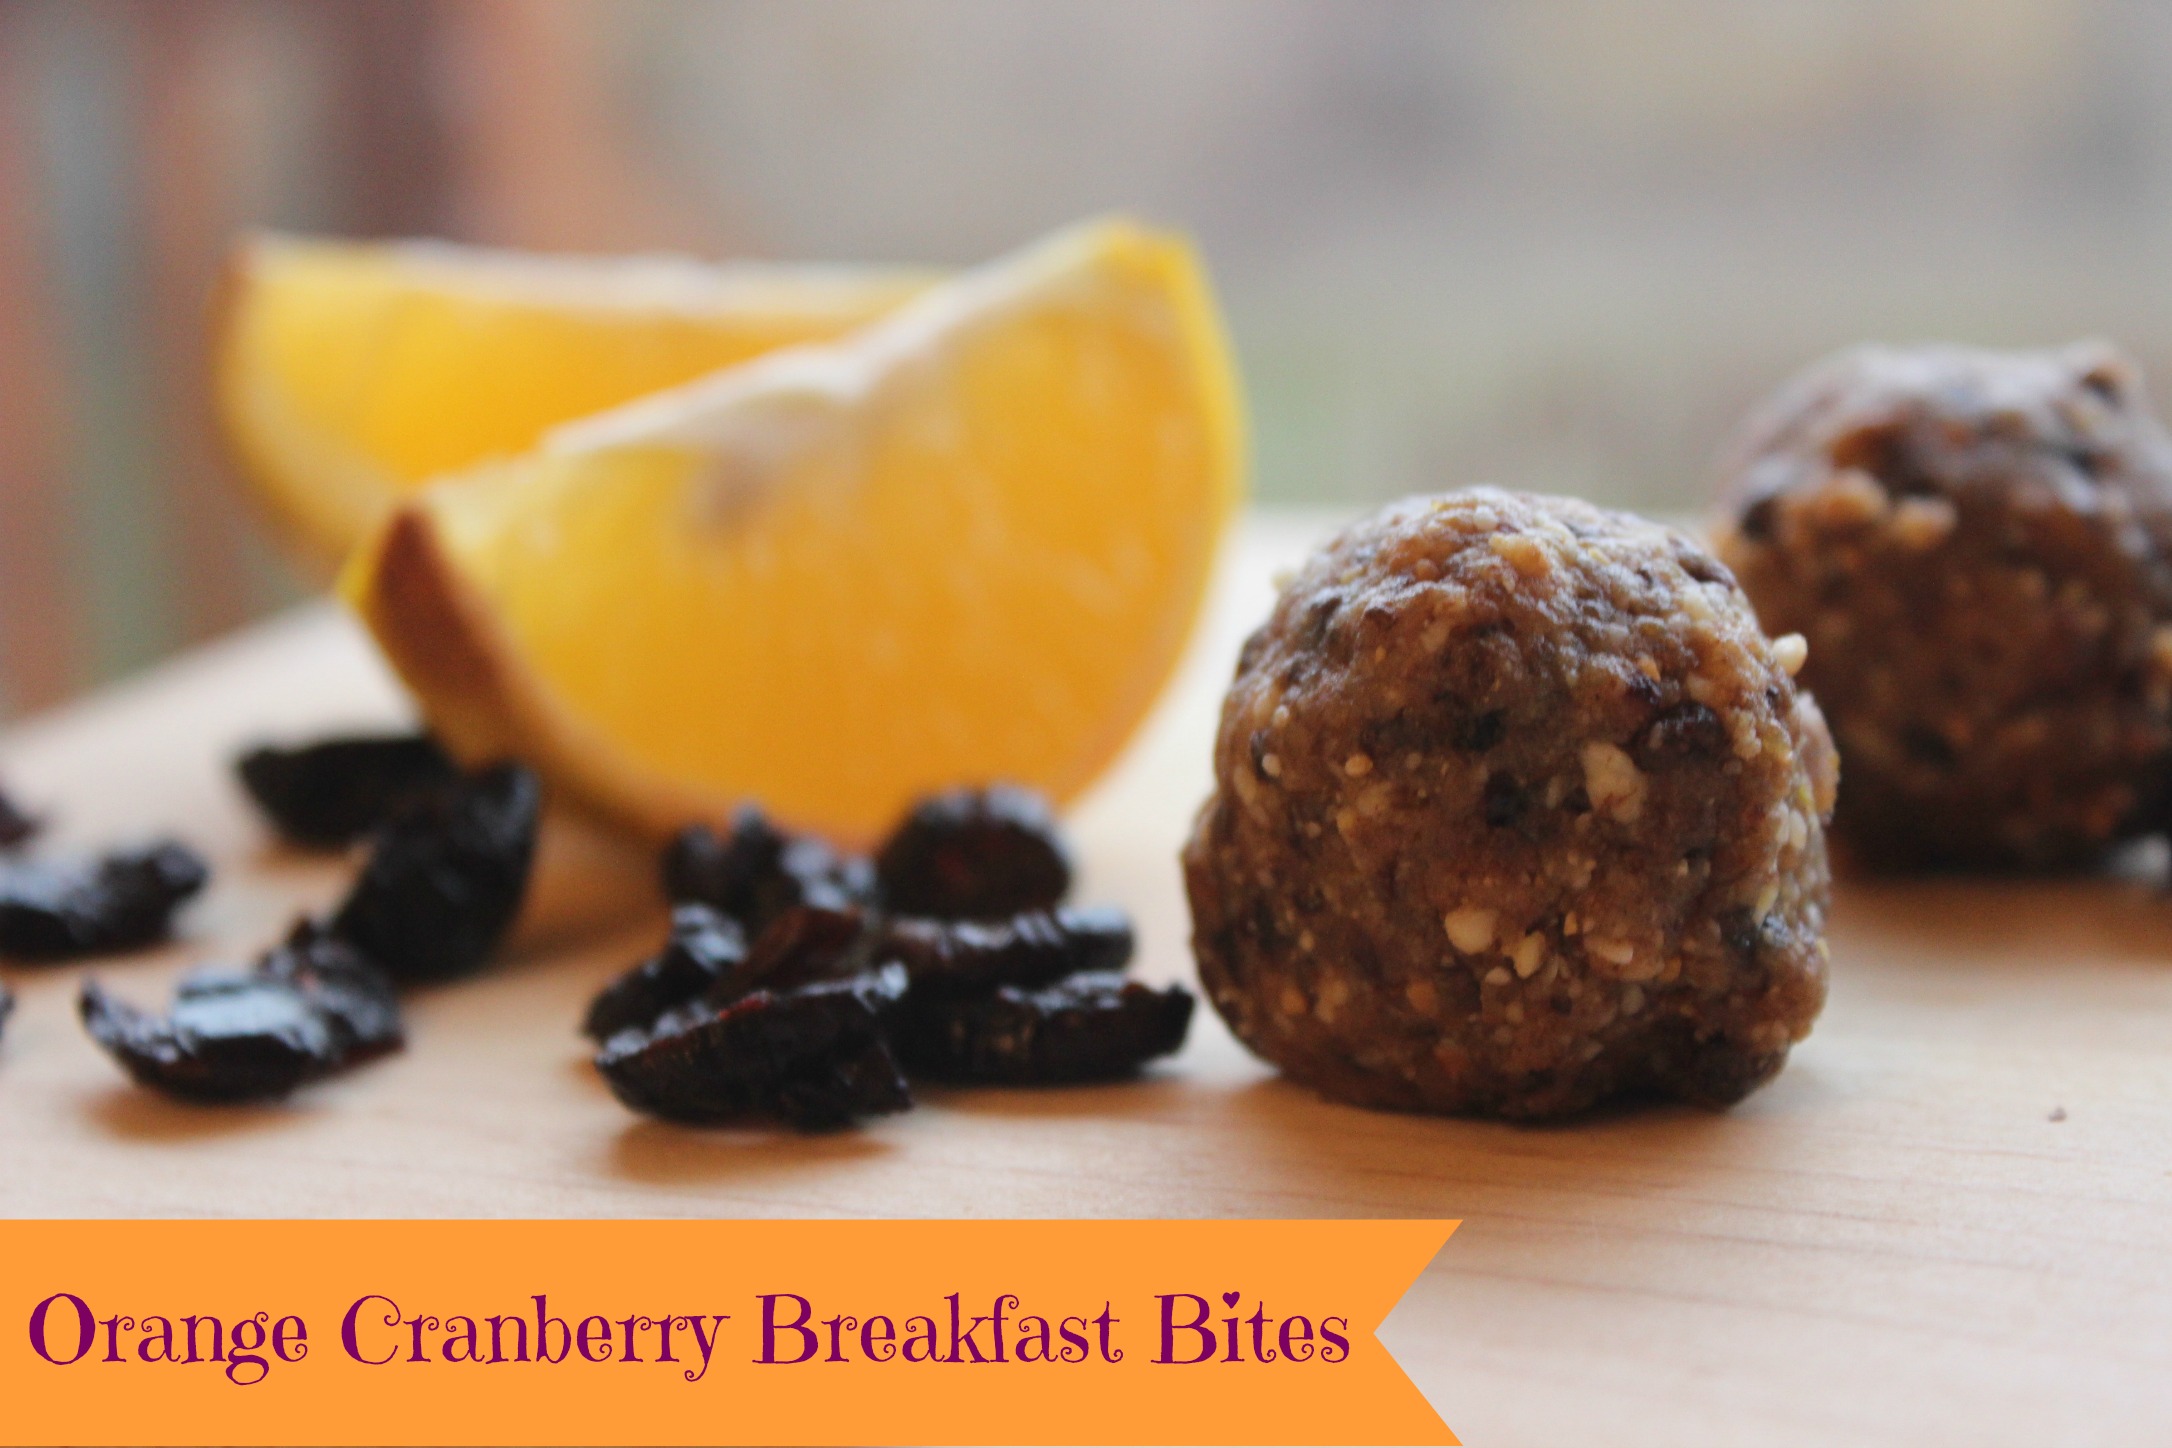
No-Bake Orange Cranberry Breakfast Bites {Paleo, Vegan, Gluten-Free}

I was inspired to make these when I was making a batch of healthy donut holes for a presentation last week.

Mmm delicious!

Mmm delicious!

I had some dried cranberries left over from another recipe for a grain-free apple tart that I made recently, and I had one or two oranges in my fridge.

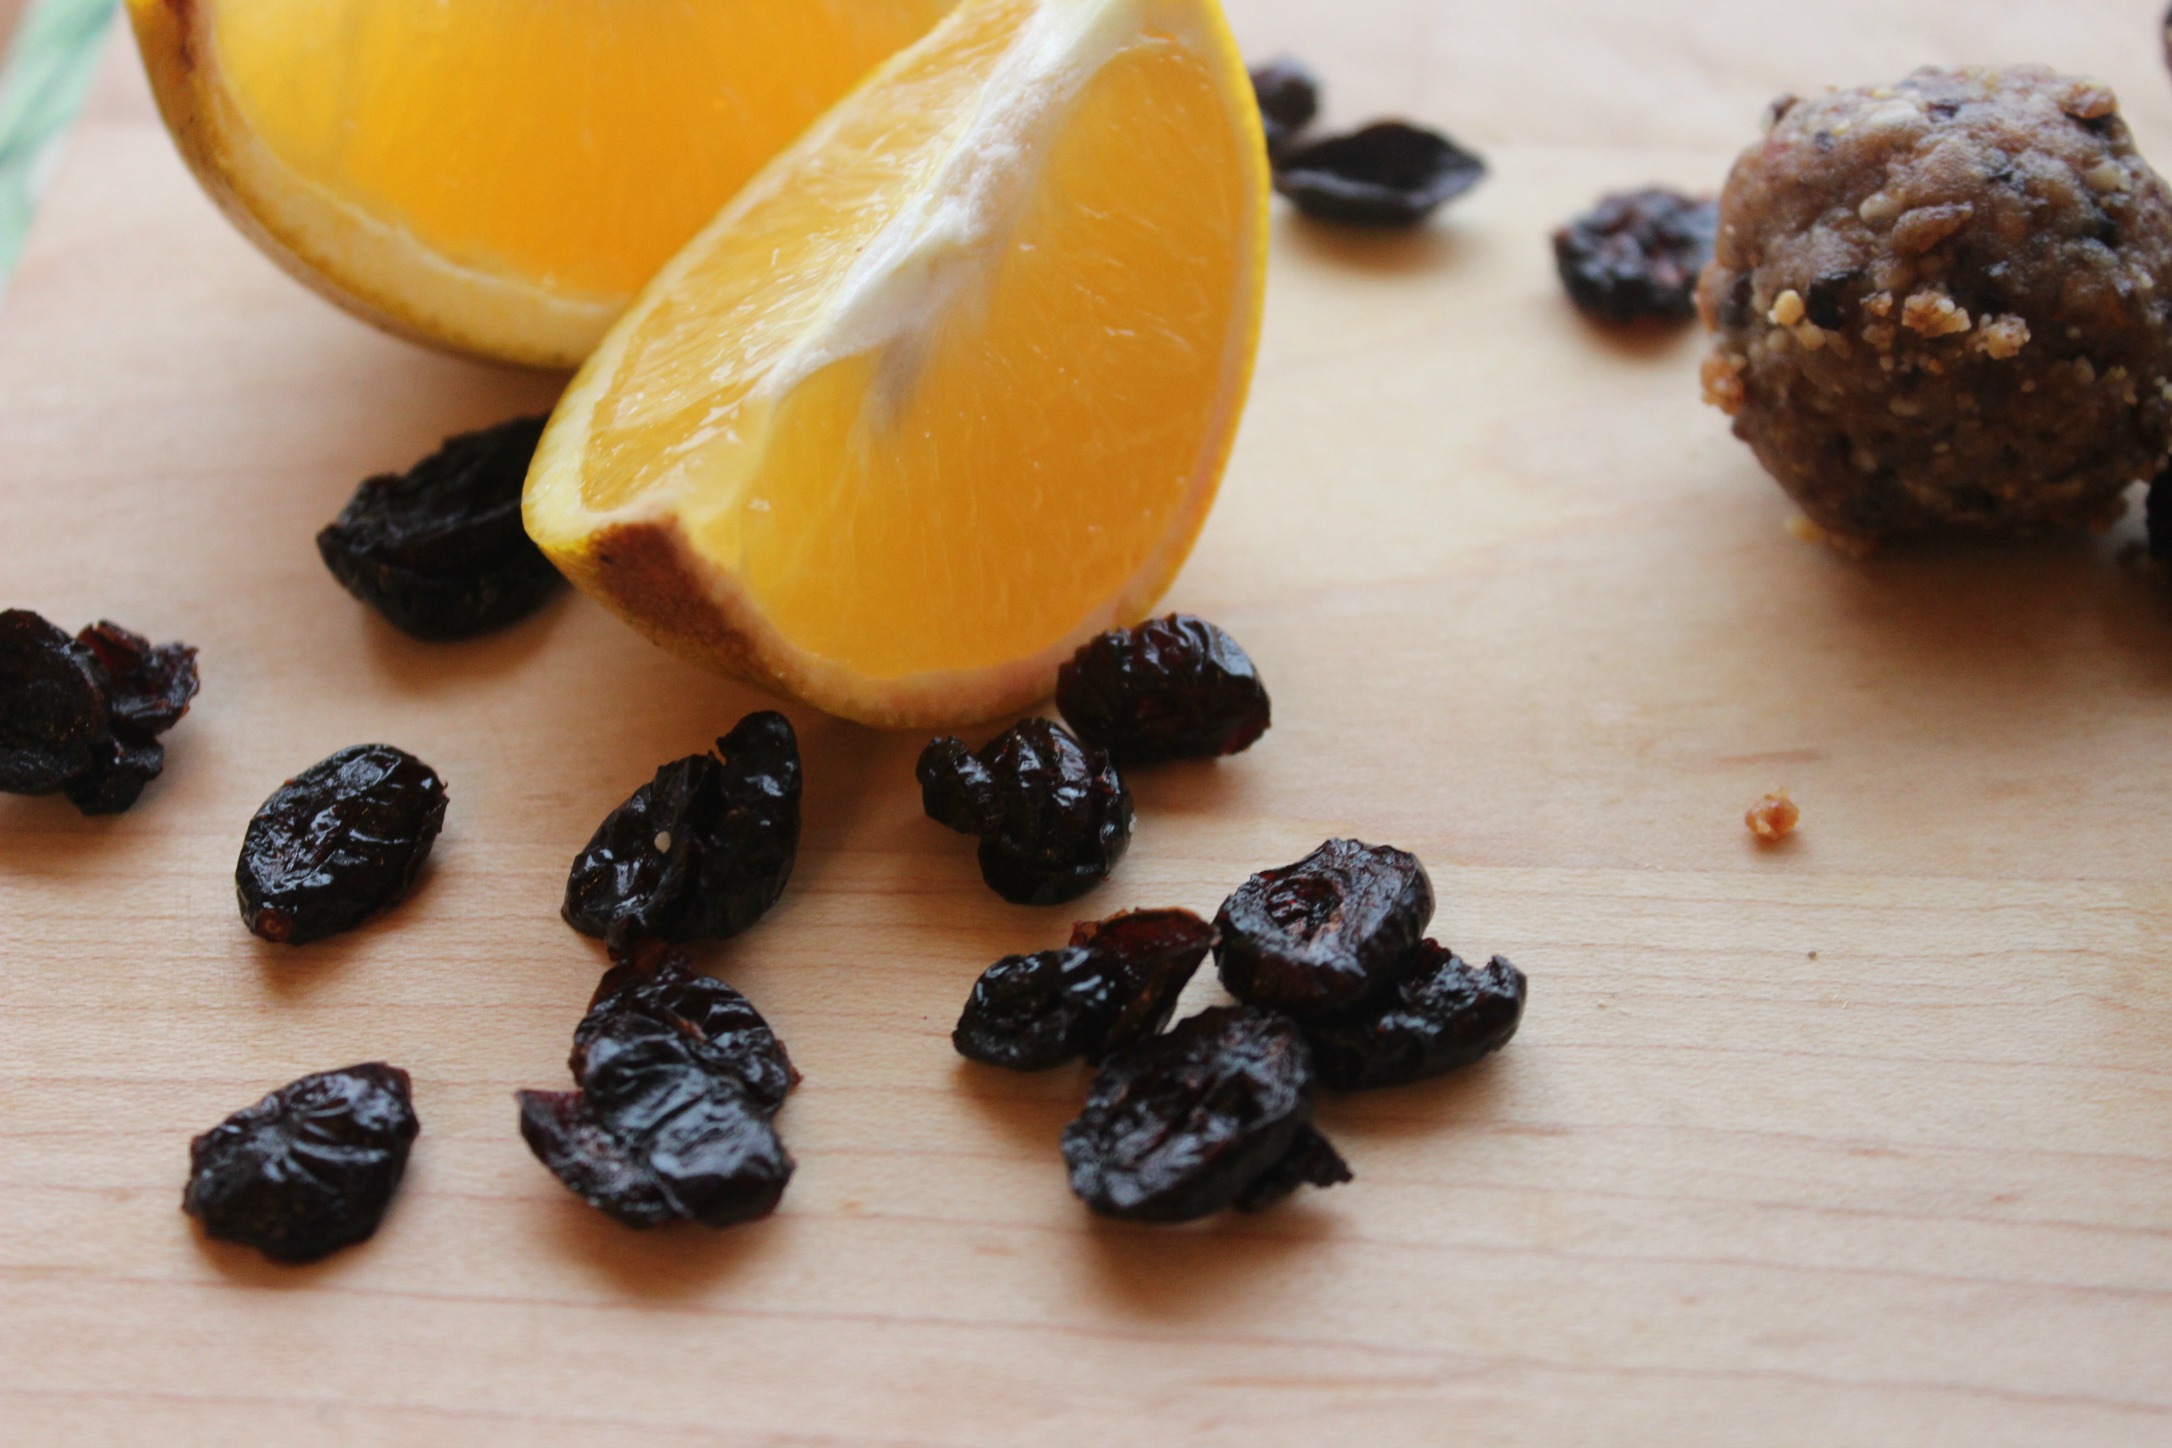
Oranges and cranberries go well together, especially with a hint of ginger, so I did a little experimenting and ended up with these little hunks of yumminess!

orange slices

bitten bite

These are a quick and easy option for a grab-and-go breakfast, pre or post workout snack, afternoon snack, or even dessert, just like last week’s Paleo Pecan Pie Poppers!

These could also be called “Energy Bites” because of the combination of healthy fats and protein from the nuts and almond butter, fiber from the dates, and blood-sugar stabilizing cinnamon. The orange zest is also energizing and adds a little something special.

They are SO GOOD! There’s just enough orange flavor from the zest, and it pairs nicely with the tartness from the cranberries and mild bite from the ginger.

These little treats are addictive. You’ve been warned 🙂

OJ bites

bites cluster

Yield: 16-18 Bites

Ingredients

  • 1/2 cup raw almonds
  • 1/2 cup raw walnuts
  • 1 cup Medjool dates, pitted
  • 1/4 cup dried cranberries (Try to use cranberries sweetened with apple juice instead of sugar)
  • 1/2 teaspoon ground cinnamon
  • 1/2 teaspoon ground ginger
  • 1 teaspoon orange zest (Use a microplane or other fine grater to grate the skin of the orange…AKA the “zest”) OR 3 drops therapeutic grade Wild Orange essential oil
  • 1/4 teaspoon sea salt
  • 1/4 cup raw almond butter
  • 1 teaspoon vanilla extract
  • Optional: shredded, unsweetened coconut

Directions

  1. In the food processor fitted with the “s” blade, grind the almonds and walnuts until finely ground.
  2. Add the dates, cranberries, spices, orange zest and salt and grind until blended.
  3. Add the almond butter and vanilla extract and process again until completely mixed.
  4. Form into balls about 1 inch in diameter, and, if you like coconut, roll in shredded coconut.

Rachel’s Healthy Holiday Gift Guide Part 2: Kitchen Gifts Under $20!

Bill and I finished up most of our Christmas shopping this weekend, which was a big relief! We have a few more things to do, including sending out our Christmas cards, but the end is in sight.

In case you missed my post a couple of weeks ago, I shared my budget-friendly favorites and seasonal splurges, which you could add to your wish list this year…or get for a friend or family members who likes to cook and spend time in the kitchen.

Kitchen gadgets make great gifts for any foodies in your family, but if you are looking for something a little larger, a BBQ smoker can make an excellent present. Not sure where to start looking? Check out some of these gear reviews over on gearsurfer.com to make your search a little easier.

Today’s post is about some smaller gifts, many of which could make great stocking stuffers. Check out the info below about some of my favorite kitchen gifts!

stocking stuffers

I wrote a post earlier this year about my favorite kitchen tools, and a few reappear on today’s post. Check out Part 1 and Part 2 of those blog posts for the complete list.

OXO Ice Cream/Muffin Scooper. So, we don’t just use this to scoop homemade ice cream. It’s also a GREAT way to ensure that you measure out evenly sized muffins or cupcakes.

Citrus Squeezer. I love lemons. They fight inflammation, detoxify or “clean out” the body, are anti-aging, anti-bacterial, and help fight infections and disease. For all of those reasons (and because they taste great!), we juice a lot of lemons throughout the week. This lemon squeezer makes it easier. I got this stainless steel one for my dad, and it’s even better than the one I have, but I recommend either one!

Stainless Steel Garlic Crusher. This is something everyone should have in their kitchen and is one of my favorite gadgets. Why? Well, it makes mincing garlic fun and simple AND it’s stainless steel. Just rub your fingers on the ends after you’re done mincing to get rid of the garlic smell! Trust me, it works 🙂

Switch It Spatula. So, this is one of my *new* favorites! One of the annoying things about the Vitamix is that the jar is REALLY tall, making it almost impossible to fit a normal sized spatula in it to reach the stuff at the bottom. This is important, especially when we’re making raw caramel apple dip or queso dip and don’t want to waste a bit of the deliciousness! The Switch It spatula is long enough to reach the bottom and also is super handy when you’re trying to get the remnants of almond butter or tahini out of a jar.

Avocado Cuber. Whenever I bring this to a cooking demo or workshop, people are always fascinated by it! You can easily score an avocado with a knife and then scoop or pop out the cubes, but this kitchen toy makes it more fun. My hubby got it for me as a stocking stuffer a few years ago, and I love it! Williams-Sonoma sells it.

Mason Jars. Over the past 4 months, as we’ve gotten rid of the plastic containers in our house to support our health, we’ve switched to mason jars. #1 – They’re cheaper than plastic containers; #2 – You can freeze stuff in them and still get them open (not something I could easily do with plastic lids); #3 – They rinse out much more easily than plastic and won’t stain. We have a variety of sizes. We bought some at Target, others at Michaels with a coupon, and larger ones at Home Goods.

Microplane Zester/Grater. We use this tool to grate ginger and turmeric root and to zest lemons, limes and oranges. We are thinking about getting these gloves because if you’re not careful with this thing you can definitely nick yourself!

Cookie Dough Baller. Whenever I make cookies or brownie bites, this little gadget ensures that I’ll have even sizes. It’s fun and simple to use.

What are your favorite healthy cooking gadgets and stocking stuffer ideas? Feel free to share below!

Chai-Spiced Yogi Tea: How to Make It Yourself (SO EASY!)

I love tea.

There’s something calming and comforting about wrapping your hands around a warm cup of herbal tea, especially chai tea.

IMG_6853

I used to get chai tea and chai tea lattes from Starbucks this time of year, but my recipe assignment last week for the culinary nutrition program I’m taking gave me a chance to make it myself!

All I can say is WOW.

I had never made my own tea before, but this recipe is definitely a game changer, AND it was super EASY!

IMG_6844

First of all, the recipe makes 8 cups of tea, which is enough for at least half of a week for me. Here are a few more reasons to try this recipe for yourself at home:

  • The spices in this recipe and the ginger are cleansing, healing, comforting, and warming to the body – perfect for this time of year! For more information about the incredible health benefits of the spices in this tea, click here.
  • Cinnamon, ginger, cardamom, and cloves simmering on the stove smells AMAZING.
  • It’s cheaper than buying tea by the box!

If you’d like, you can also add in your favorite non-dairy milk, but I just drank it as is. Deeelicious!

I’ve already made it twice in two weeks and will be serving it t0 everyone attending my cooking class tonight.

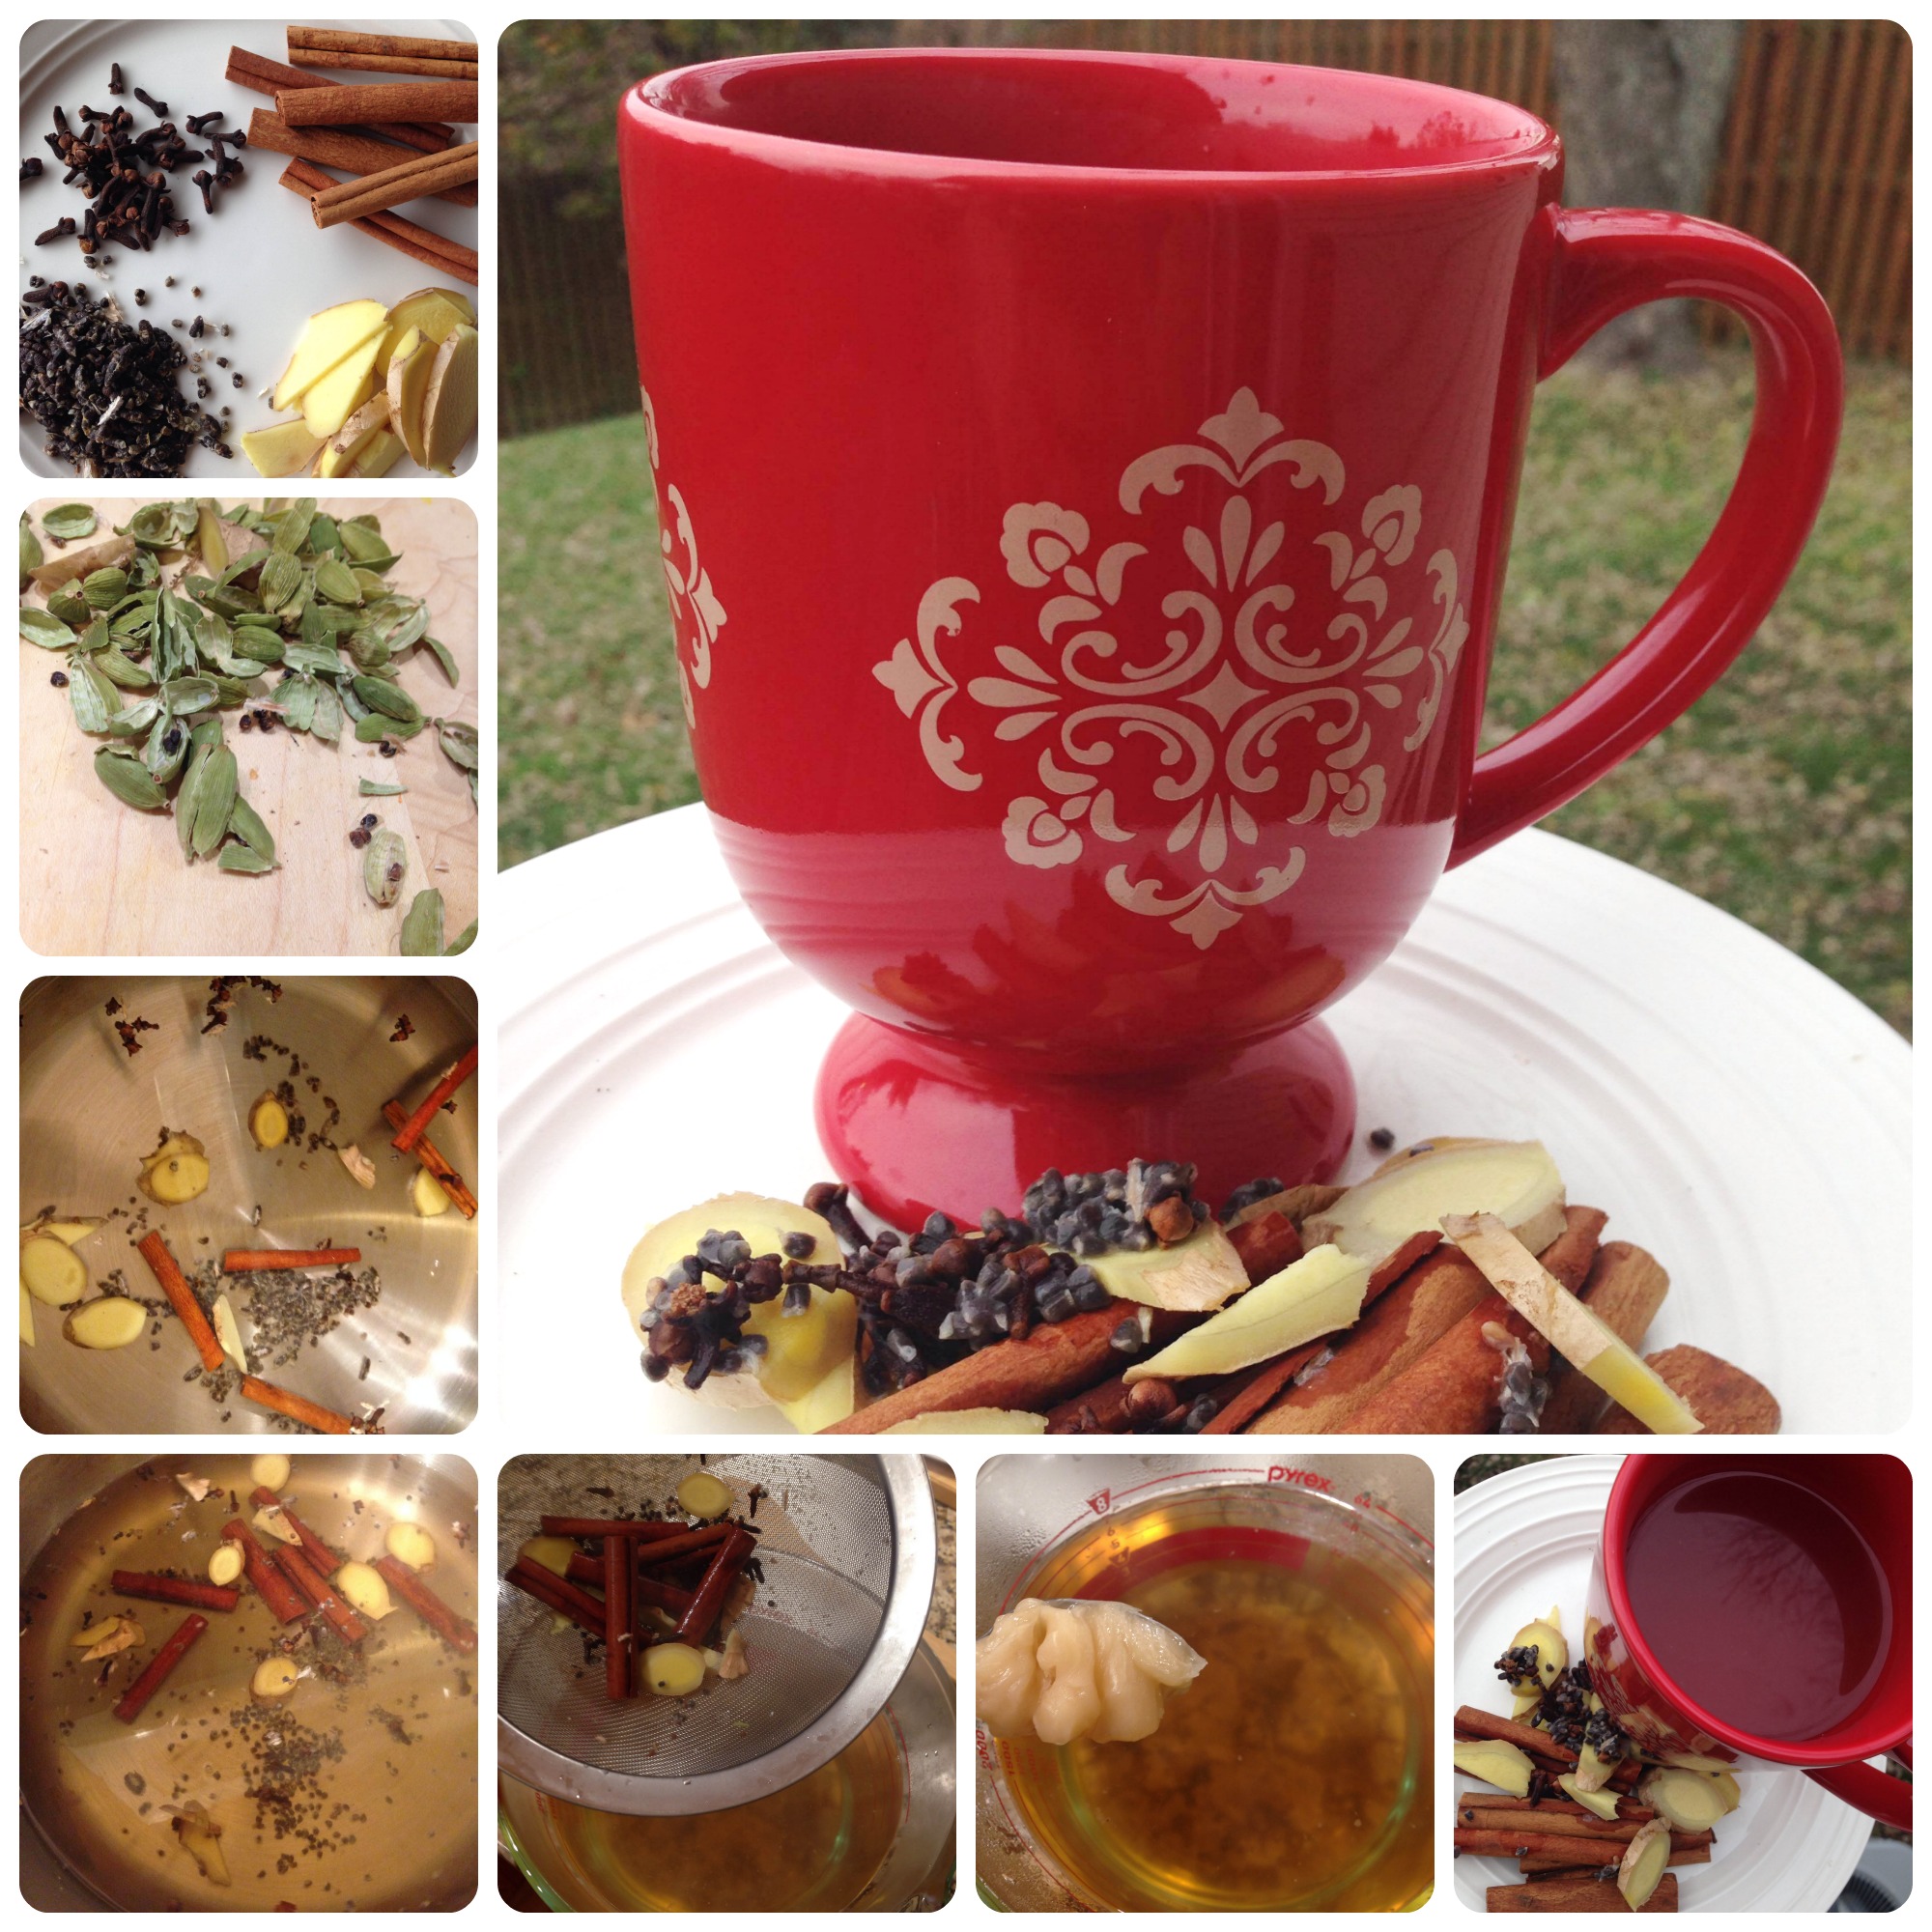
Yogi Tea

Ingredients (8 cups)

  • 8 cups water
  • 6 cinnamon sticks
  • 2 tablespoons cardamom seeds (pop them out of the pods for stronger flavor (that’s what I recommend) or use whole pods for a milder flavor)
  • 2 tablespoons whole cloves
  • 2 inches fresh ginger root (sliced)
  • 1/4 cup raw honey
  • almond milk as desired

Here’s the full recipe from the awesome Meghan Telpner! Just make sure you strain it with a fine mesh strainer as shown above after simmering everything. We don’t want to be eating cinnamon sticks 🙂

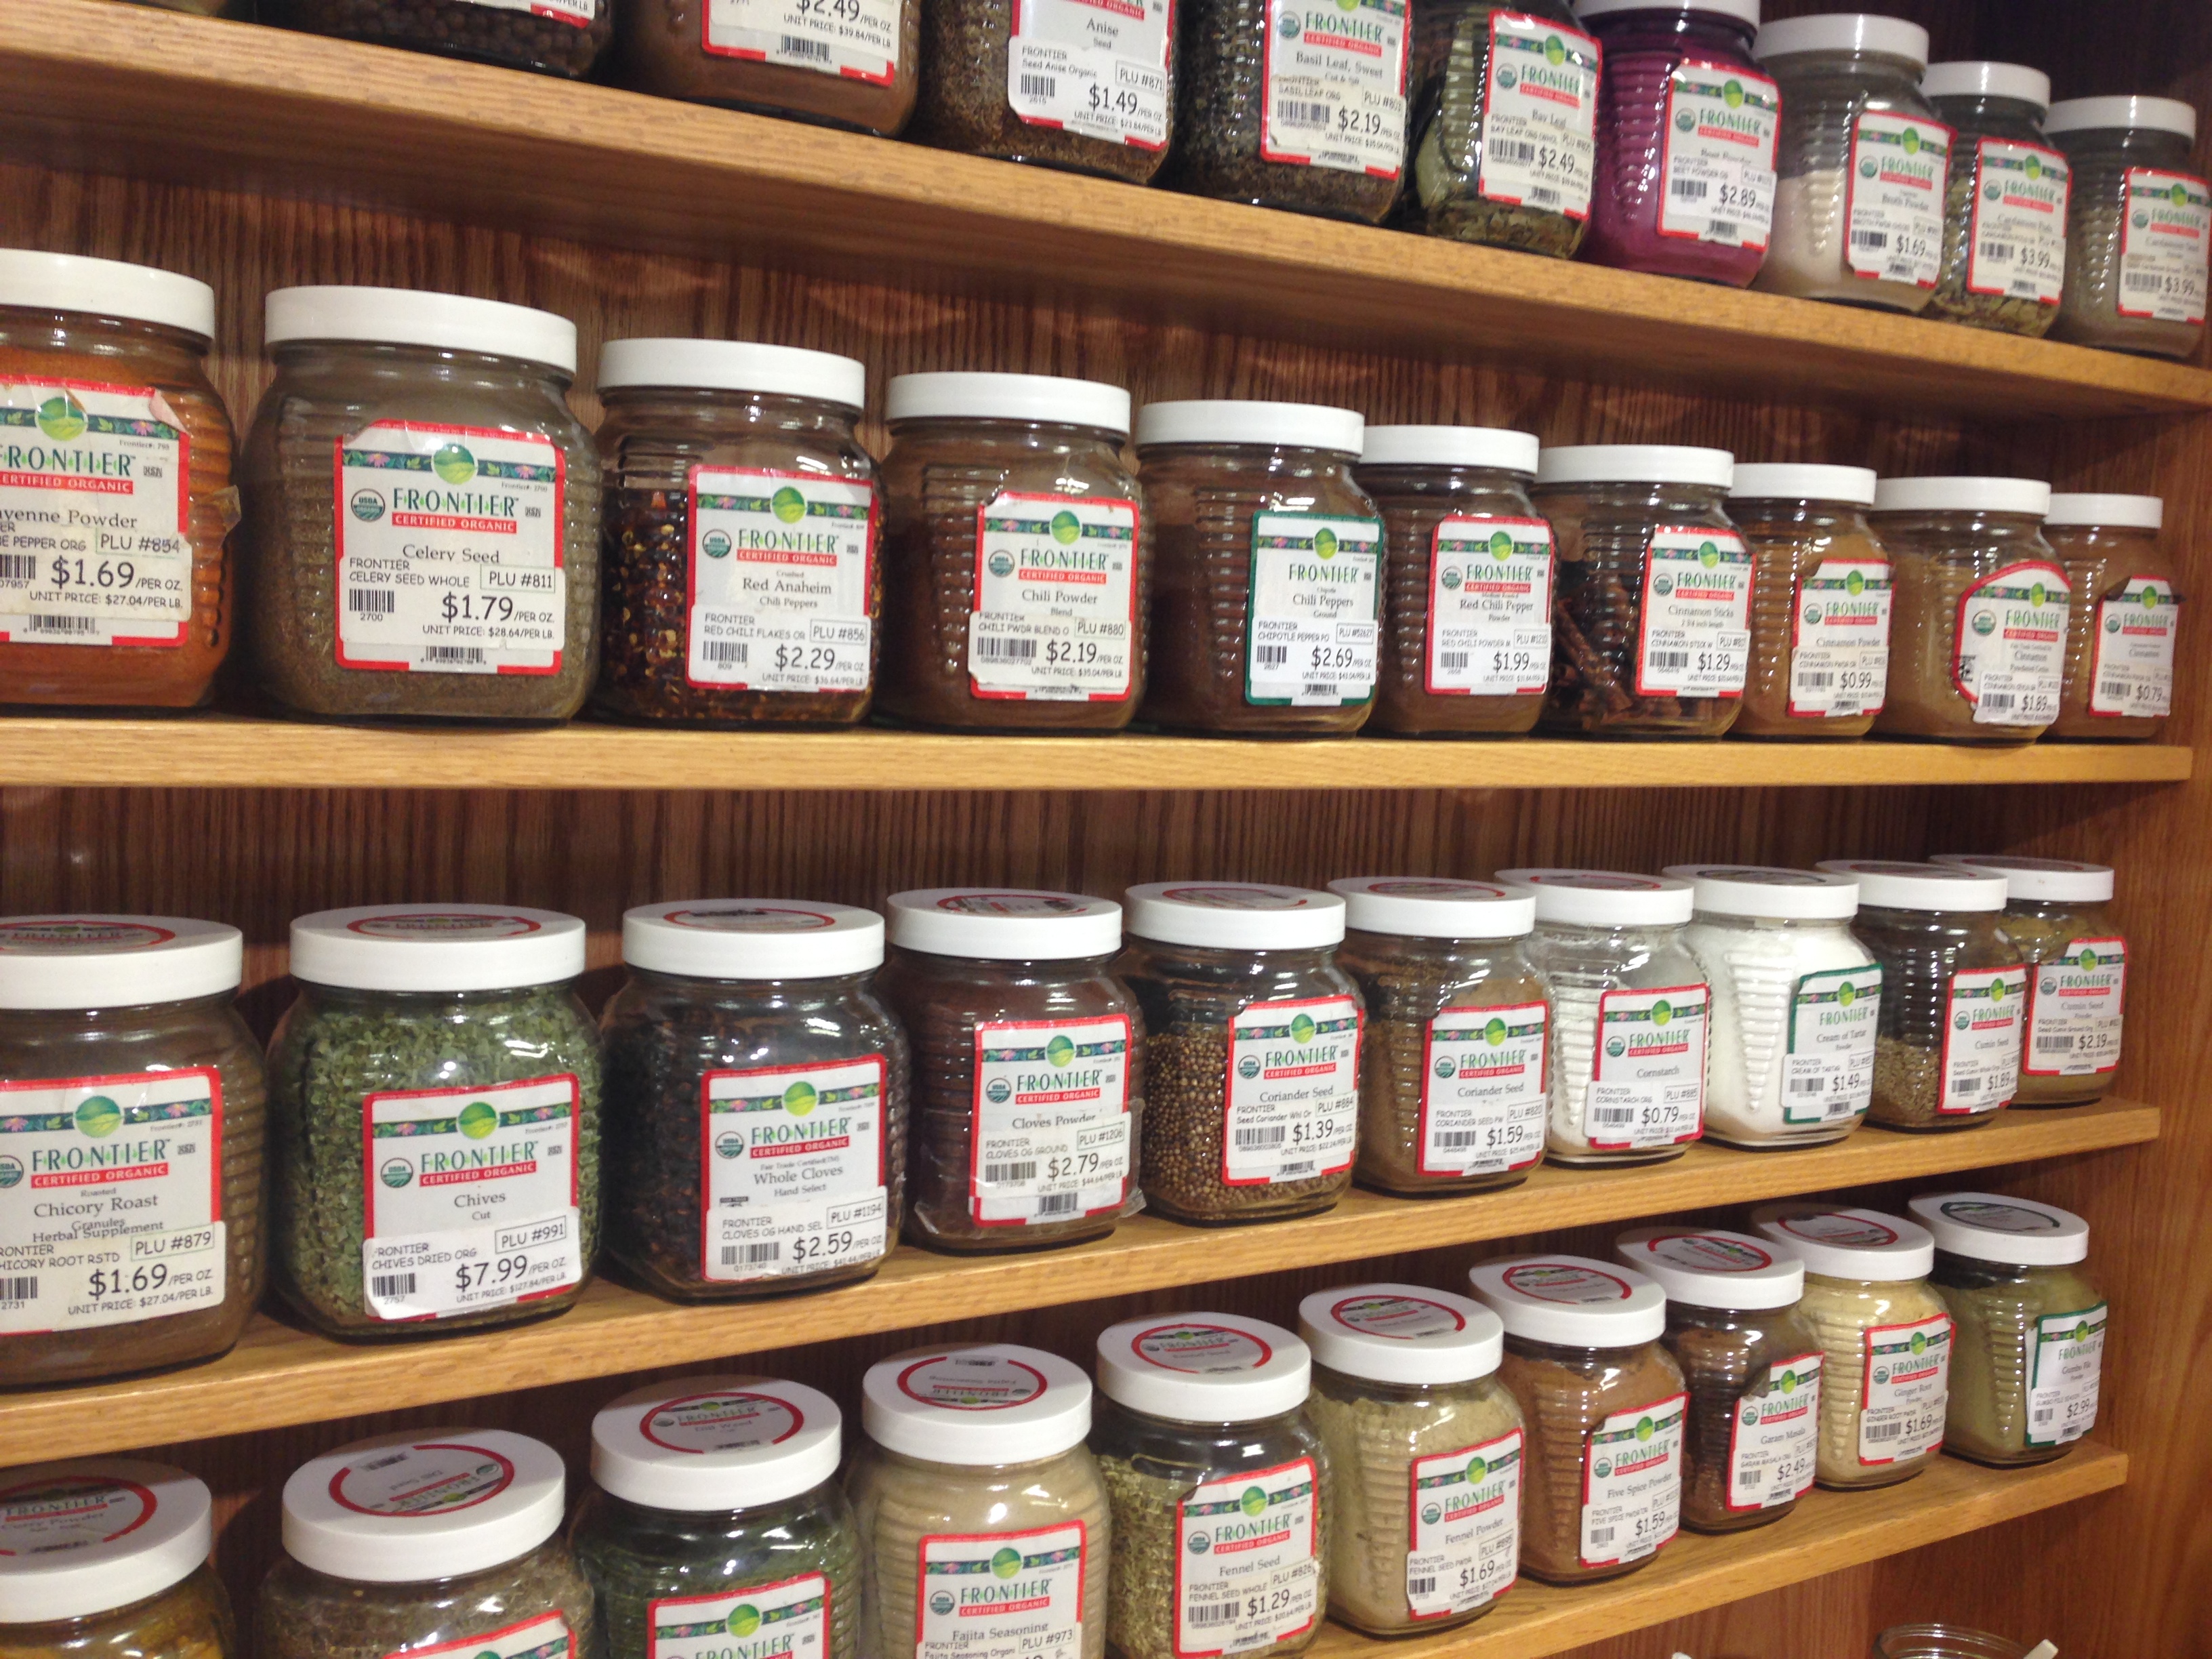
*Helpful Hint: I buy my spices in the individual jars at MOMs Organic Market; you can also find them at Roots Market and other natural food stores. It’s MUCH cheaper than buying an entire jar of something when you only need 1 or 2 tablespoons or a few sticks. You can also order spices online, but a natural food store near you should have fresh spices in bulk if your grocery store doesn’t.

IMG_5712

Page 2 of 3

Powered by WordPress & Theme by Anders Norén