Notice: Function _load_textdomain_just_in_time was called incorrectly. Translation loading for the social_sharing domain was triggered too early. This is usually an indicator for some code in the plugin or theme running too early. Translations should be loaded at the init action or later. Please see Debugging in WordPress for more information. (This message was added in version 6.7.0.) in /var/www/wp-includes/functions.php on line 6121
Vegetarian Archives · Page 11 of 11 · Rachel's Nourishing Kitchen

Category: Vegetarian

Happy National Kale Day! {Plus a NEW Kale Salad Recipe to Try}

Happy National Kale Day!

In all honesty, I had no idea this was even a “thing” until I woke up this morning and saw it all over twitter.

We love kale and all of the amazing health benefits it provides. It’s a super versatile super food.

kale

Two weeks ago, I had the opportunity to attend the Natural Products Expo East in Baltimore and had the privilege of meeting Mr. Kale himself – Brad of Brad’s Raw Kale Chips

Total food nerd moment 🙂

brad

I’ve featured kale in several recipes on this blog in addition to the one I’m sharing today! I use it in everything from salads, soups and sautees to smoothies and frittatas.

To celebrate National Kale Day, try one of these recipes, the *new* salad below, or one of the others on the National Kale Day website:

  1. Taste the Rainbow Kale Salad
  2. Upgraded Kale Waldorf Salad
  3. Mediterranean Chickpea and Sundried Tomato Kale Salad
  4. Mini Kale & Mushroom Breakfast Frittatas
  5. Peachy Keen Kale Salad
  6. Tuscan Bean Soup (scroll to the bottom of the page next to the picture of the soup)
  7. Caribbean Island Breeze Smoothie
Kale leaves after being pulled off of the pretty purple stems

Kale leaves after being pulled off of the pretty purple stems

I was on Facebook the other day and was intrigued by the headline, “The Recipe That Will Make You Fall In Love With Kale All Over Again” on MindBodyGreen’s page.

Being the kale lover that I am, I had to click on it.

Reading through the ingredient list piqued my interest, so Bill and I made it for dinner using the purple kale that we had in our fridge. I’m so glad we did!

The lemon juice broke down the bitterness of the kale (as it always does!), and the combo of the sweetness from the dates, complex flavors of the curry powder, bite of the ginger, tanginess of the tahini and crunch of the pumpkin seeds was a real mouth party!

kale salad

Salad Ingredients

  • 1 big bunch of kale (any variety), thinly chopped (about 5 cups)

Dressing Ingredients

  • 2 tablespoons tahini (usually in the international section of the grocery store)
  • 1 tablespoon lemon juice
  • 1/2 teaspoon curry powder
  • 1 garlic clove, minced
  • 1 teaspoon ginger root, peeled and grated
  • 3 Medjool dates, pit removed and soaked in hot water for 10 minutes to soften them
  • 1/8 teaspoon sea salt
  • 1/4 cup water
  • pinch of cayenne pepper

We topped ours with some raw pumpkin seeds for an extra crunch 🙂

Click here for the full recipe from MindBodyGreen!
Ingredients for the salad. This is the best (and cheapest!) tahini we've found. We bought it at a Mediterranean grocery store/cafe nearby called Cedar Cafe

Ingredients for the salad. This is the best (and cheapest!) tahini we’ve found. We bought it at a Mediterranean grocery store/cafe nearby called Cedar Cafe

“The Best Thing You’ve EVER Made” {My Father Knows Best!}

I’m especially excited about this recipe because it marks a special point in my food journey.

As I shared in one of my first posts, I used to hate the main ingredient in this recipe…

IMG_6569

Eggplant.

The very idea of the funky-shaped purple vegetable weirded me out, and I had no desire to eat it…ever.

Fast forward to today, and I’ve come up with an eggplant recipe that I dare say would get ANYONE (even kids!) to like eggplant.

I made a similar version of these a few months ago in the form of eggplant fries, but the coating on these chips is absolutely to die for and makes them – as my dad AND husband said – “One of the best things you’ve EVER made.”

We liked them SO much that my sister, Jane, even requested that I make them for her 21st birthday dinner the other night. Everyone gobbled them up!

Almond & Rosemary-Crusted Eggplant Chips

IMG_6655

Ingredients

  • 1 large eggplant, cut into ¼” discs
  • 1-2 free-range eggs, whisked (I only needed 1, but depending on the size of your eggplant, you might need 2)
  • 1 cup raw almonds
  • 2 tablespoons arrowroot powder (sub in cornstarch if you don’t have arrowroot)
  • 1 heaping tablespoon fresh rosemary (or 1-2 tsps dried…fresh tastes best!)
  • 1 teaspoon garlic powder
  • 3/4 teaspoon sea salt
  • 1/2 teaspoon black pepper
  • Additional sea salt to sprinkle on the eggplant to draw out moisture

Directions

  1. Preheat oven to 425F.

    Place eggplant slices on a paper towel and sprinkle sea salt on top and let sit for 15-20 minutes. You’ll notice little pools of liquid forming on top of the slices. This helps draw the moisture out of the eggplant, so that it crisps up when baked. Use another paper towel to press any remaining moisture out of the eggplant slices, and shake off any excess salt.

    Place eggplant slices on a paper towel and sprinkle sea salt on top and let sit for 15-20 minutes. You’ll notice little pools of liquid forming on top of the slices. This helps draw the moisture out of the eggplant, so that it crisps up when baked. Use another paper towel to press any remaining moisture out of the eggplant slices, and shake off any excess salt.

IMG_5622

Grind the almonds, arrowroot powder, rosemary, garlic, pepper and sea salt in a food processor until small chunks remain. Pour almond coating onto a plate.

IMG_6615

Dip the eggplant slices one by one in the egg wash and shake off any excess egg. Then, coat both sides of each slice generously with the almond coating.

Place eggplant slices on a foil or parchment-lined baking sheet and bake for 20-25 minutes, flipping once at the 10-12 minute mark.

Place eggplant slices on a foil or parchment-lined baking sheet and bake for 20-25 minutes, flipping them over at the 10-12 minute mark.

IMG_6655

Remove from oven and enjoy by themselves or in a tomato dipping sauce linked below!

Crispy, crunchy, and savory with a hint of salt. No soggy eggplant here, folks!

They’re also incredibly addictive and DEEElicious!

You’ll enjoy them even more with this tomato dipping sauce on the side.

I guarantee you will eat the whole tray.

We did 🙂

"I Can't Believe There's No Mayo" Cole Slaw {Paleo, Too!}

Guilt-free, mayo-less, nourishing, healthy…cole slaw?

It’s possible!

nomayocoleslaw

As I’ve mentioned before, I used to be a super picky eater (and wouldn’t even let different foods “touch” on my plate).

One of the foods I’ve never liked is cole slaw. 

Since I’ve started experimenting more in the kitchen, I thought I would take a stab at a cole slaw recipe after my friend Elise posted one on my Facebook page a few months ago.

I first attempted this recipe a few weeks ago and brought it to a bachelorette party weekend to serve at lunch alongside this Chipotle-style burrito bowl (which was also a HIT!).

I don’t even know what cole slaw is supposed to taste like since I’d never eaten it, so I crossed my fingers and hoped everyone would like it.

Much to my surprise, they LOVED it!

What I like about this recipe is that it UPGRADES the ingredients in a traditional cole slaw recipe, and that’s what I like to focus on doing – upgrading our diet to nourish our bodies.

Cabbage is one of the ultimate anti-cancer GBOMBS foods. GBOMBS are a group of the most nutrient-dense, disease-fighting, health-promoting foods in the world, foods we should eat a lot of on a daily basis. Go to this post for the full details on GBOMBS and how you can benefit from eating them! In the meantime, here are the other health benefits of cabbage:

  • Anti-aging/great for your skin because it contains vitamins A, C and E
  • Helps to detoxify or purify the blood (which also contributes to clearer skin and reduced inflammation…good for anyone with inflammatory conditions like arthritis, skin irritations, diabetes, etc.)
  • High in fiber so it “keeps things moving🙂
  • Good for the thyroid and other endocrine glands because of its iodine content

I wrote about why two other ingredients in this recipe – raw apple cider vinegar and raw honey – are so good for our bodies in this post, so check it out!

Two of the surprise ingredients in this delicious cole slaw!

Two of the surprise ingredients in this delicious cole slaw!

Here’s a challenge for you. The next time you go to a party and need to bring a side dish, bring this.

I talked to a friend at a wedding this weekend, and she said she prepared this at home for her husband after the bachelorette party, and he said it was the best cole slaw he’d ever had!

nomayocoleslaw

Testing Note: Due to some helpful feedback from a reader, I revised the original recipe for improved taste, so check out the revised recipe below.

Serves: A crowd! You can easily feed 20 people with this recipe as a side dish. I pack it in mason jars and have it with my lunches during the week. It holds up well!

Ingredients

  • 8-10 cups green cabbage, shredded
  • 1 cup canned, full fat coconut milk (we use the Native Forest brand. Make sure you shake the can first)
  • 2 tablespoons raw apple cider vinegar
  • 1 tablespoon raw honey
  • 1/2 teaspoon sea salt
  • 1/2 teaspoon black pepper
  • 1/2 teaspoon onion powder
  • 1/2 teaspoon garlic powder
  • 1/2 teaspoon celery seed
  • You could also add some shredded carrots for an additional pop of color!

Directions

Whisk together coconut milk, apple cider vinegar, raw honey, sea salt, pepper, onion and garlic powder, and celery seed for the dressing. Set aside.

IMG_6764

Shred one head of green cabbage. I cut mine into chunks, cutting off the tough, inner triangle piece at the base as shown in the picture below. I used the shredding attachment on my food processor and just pushed the pieces through the tube, but you could also use a knife or a box grater.

IMG_6754 IMG_6757 IMG_6758

IMG_6759

Pour dressing over cabbage and toss to combine, so all of the cabbage is coated. Set in the fridge for at least one hour (but preferably a few hours or even overnight), so all of the flavors combine.

Set out for about 10 minutes before serving (that’s what I prefer) and toss just before serving, as the dressing settles a bit at the bottom of the bowl. Enjoy!

IMG_7146

Easy 5-Minute Chocolate Avocado Mousse

Indulgent

Creamy

Rich

Silky

Chocolatey

Smooth

Decadent

Those words pretty much sum up this dessert and it’s awesomeness. Seriously though, this stuff is AMAZING…and family and friend approved! I’ve served it at multiple cooking demonstrations, dinner parties, and events, and it is a hit every time.

Before trying something I’ve made, people who know me will often say, “Don’t tell me what’s in it.”

After seeing recipes for caulifredo sauce, zucchini pasta, no-cheese nacho cheese, and green smoothies, I guess I can see why they’d be hesitant 🙂

More often than not, though, they take the risk…try it…and LOVE it!

The next question follows just about every time:

“Okay…what’s IN this??”

The secret ingredient in today’s recipe for chocolate mousse?

Avocado.

Our friends couldn’t believe avocado was in this dish. They commented how rich and delicious it was, too. When I told them there was no dairy or refined white sugar in it either, the head scratching continued.

This mousse is super easy to make (takes 5-10 minutes), and a little goes a long way. You can print the recipe below, but here is a fun video that shows you how it’s done!

https://youtu.be/BTP84aP2At4

Use it as a dip for sliced fruit or berries, serve it as a pudding with berries or cacao nibs sprinkled on top, or add some almond milk to it (maybe a cup?) and then pour it into Popsicle molds for a frozen chocolate treat!

Or, if you’re like me, just take a few spoonfuls straight out of the blender and indulge right away 🙂 Your secret’s safe with me!

Chocolate Lover’s Chocolate Avocado Mousse (Dairy-Free)

IMG_5799

Chocolate Avocado Mousse

You’ll never know there are avocados hidden in this decadent mousse. Top it off with some fresh berries and raw cacao nibs for additional texture, flavor and color!

  • 6 large Medjool dates (if they're not soft, soak them in water for 10-15 minutes first, then pour off the water)
  • 1 large avocado
  • 2 tablespoons almond butter
  • 1/3 cup raw cacao powder
  • 1/3 cup 100% pure maple syrup
  • 1/3 cup water
  • 1 teaspoon vanilla extract
  • 1/8 teaspoon fine grain sea salt
  1. Put all ingredients in the order listed in a food processor and process until it reaches a smooth, mousse-like consistency.  I run mine for about 3-5 minutes, scraping down the sides as needed.

Top with berries, chopped nuts or seeds, shredded coconut or cacao nibs for a bigger health boost!

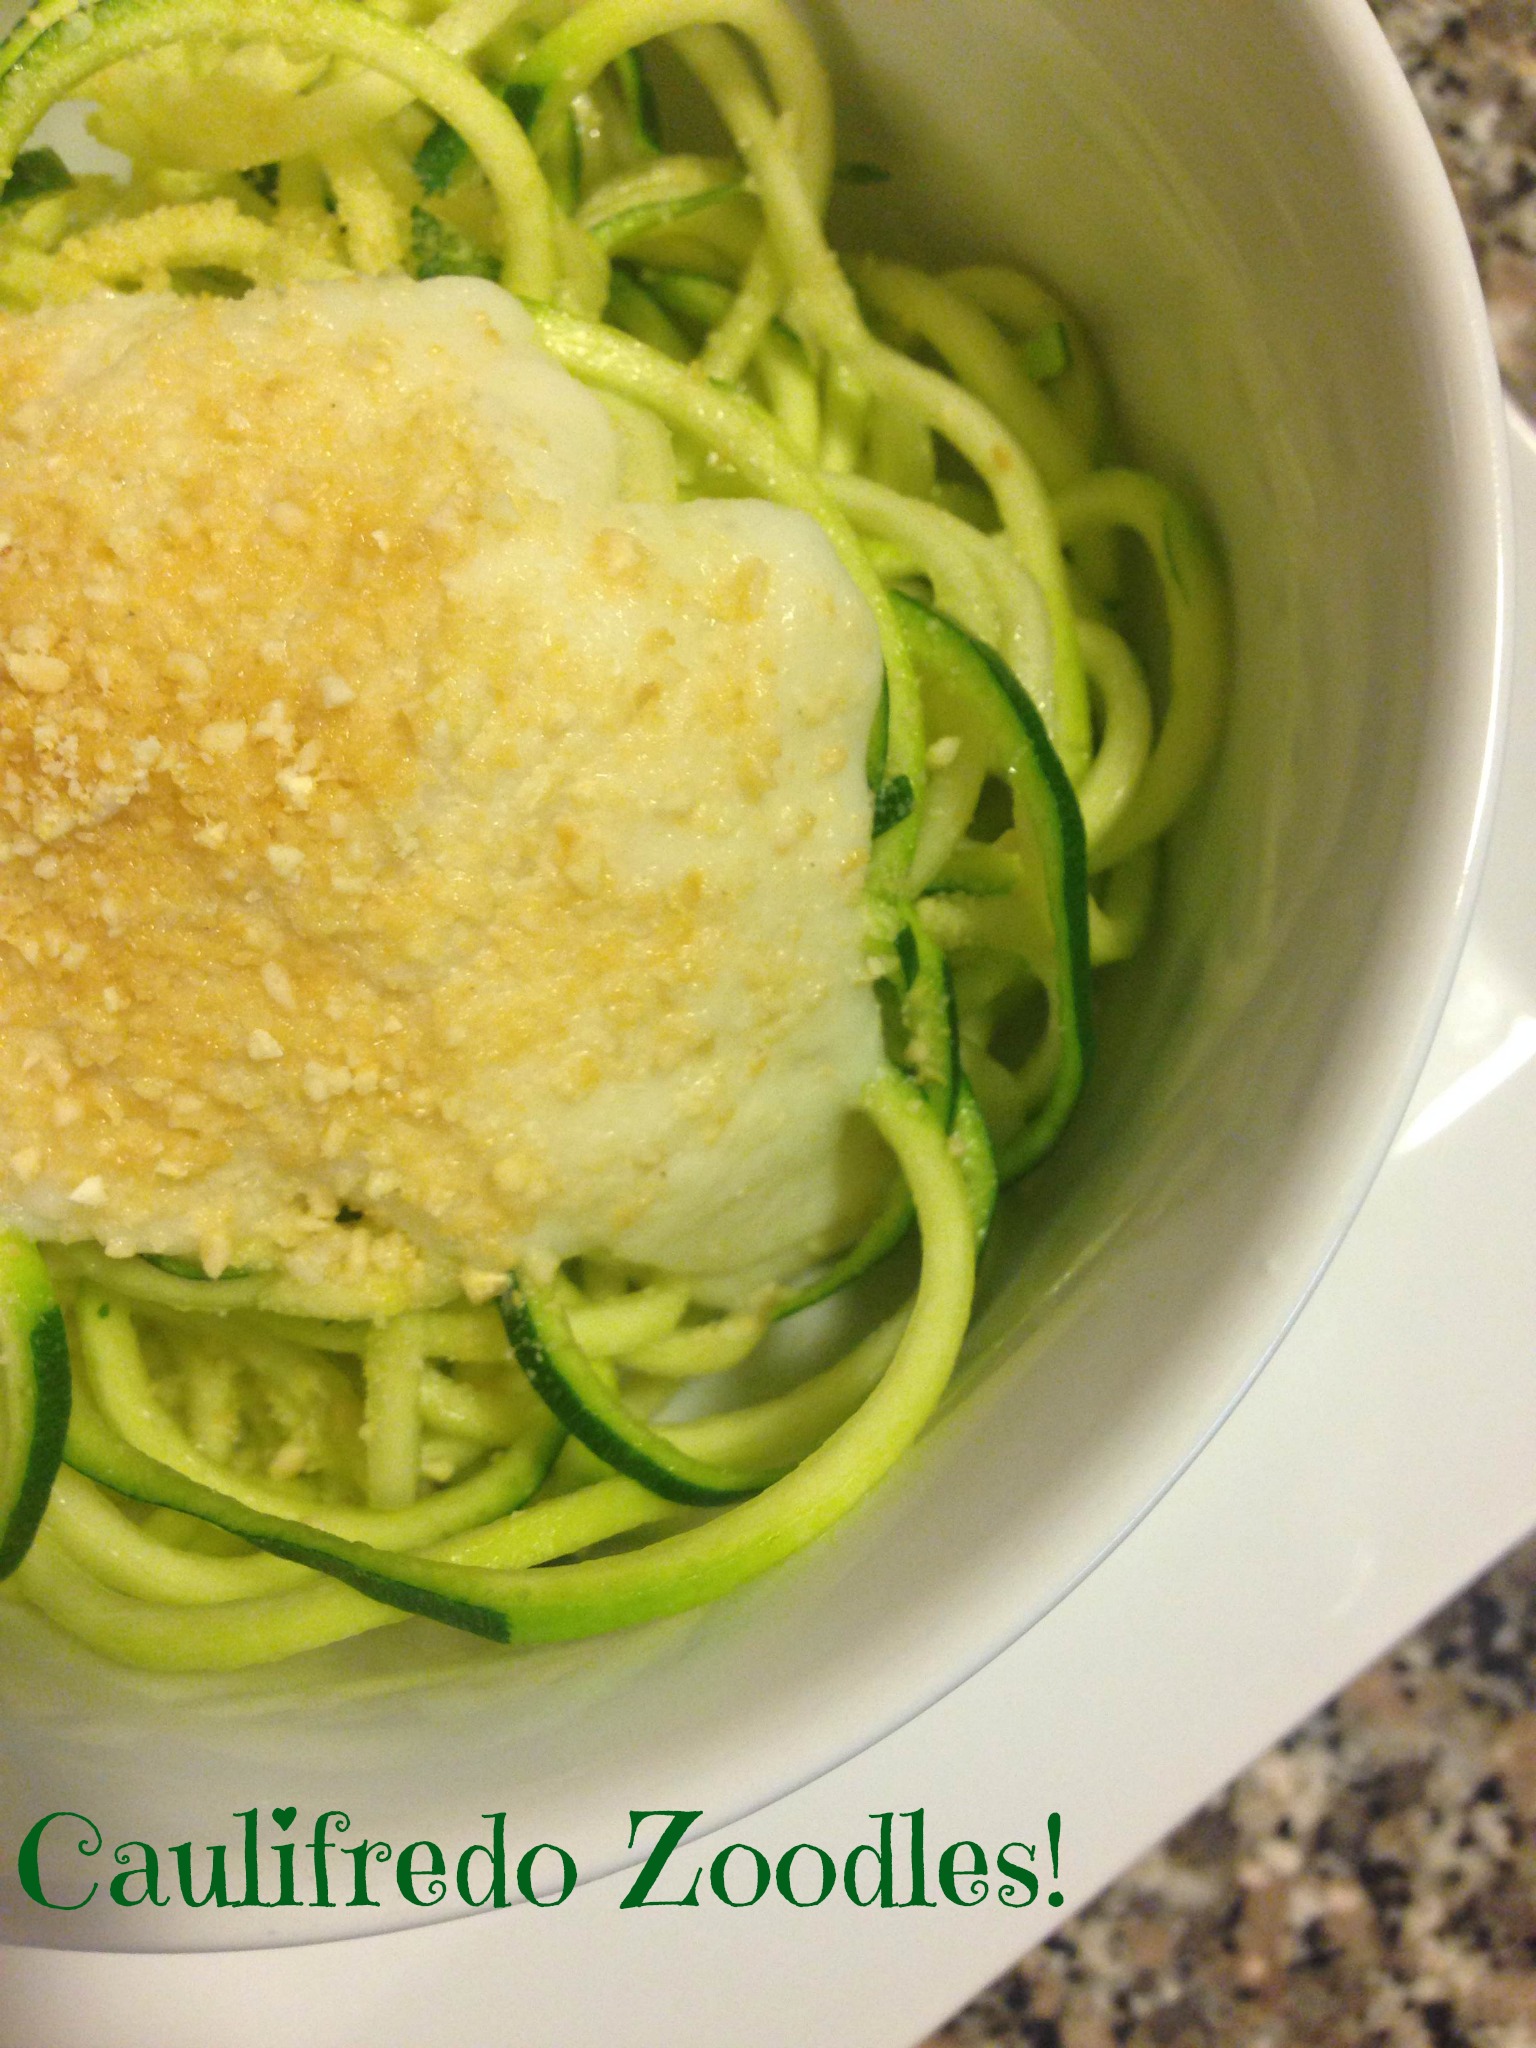
Creamy Cauli-fredo Sauce! {Paleo, Vegan}

Fettuccine Alfredo.

If I had to guess, I would bet this dish is one of the most popular and beloved comfort foods of all time.

But with a cup of butter, almost as much heavy cream, and over a cup of cheese in a typical Alfredo sauce recipe, it’s not something many people can enjoy very often, especially if you’re trying to stay away from dairy or just notice that you feel better without it.

If you absolutely love fettuccine Alfredo, my goal isn’t to get you to give it up for good. Instead, I want to introduce you to a new way of preparing a similar dish…one that is a lot healthier but still creamy and comforting!

The main ingredient?

Cauliflower.

IMG_3944

Cauliflower in Alfredo sauce?? Wait a minute…how can this possibly taste good?

I have to admit, when I first saw this recipe, I was a bit skeptical…and so was Bill.

I know it sounds kind of absurd…but, trust me, it works!

One of my passions is showing how some of our favorite recipes that might not be so healthy can be flipped to a more nourishing version that is still delicious and kid/family-friendly

My ultimate test for knowing whether I’ve made a successful recipe is to have my husband, Bill, try it.

If something we make doesn’t taste good, he has no qualms saying so.

But if it’s delicious, I usually get an emphatic “oh yeah” or “this is great” (which is a lot coming from him!).

Bill and I were pleasantly surprised by the outcome of this recipe and licked our bowls clean!

Not only does this recipe taste delicious, but it doesn’t use any fancy ingredients and can be whipped up in about 20 minutes.

caulifredo

Ingredients

  • 4 zucchini, spiralized using this awesome gadget! (You could also sub in your favorite gluten-free pasta of choice – we like the Tinkyada brown rice pasta)
  • 2 teaspoons extra virgin olive oil

Caulifredo Sauce

  • 3 cloves garlic, minced
  • 1 tablespoon extra virgin olive oil or grass-fed ghee
  • 1 head cauliflower, chopped into florets (here’s how to break apart a head of cauliflower in seconds!)
  • 1 cup water
  • 1 teaspoon sea salt
  • ½ teaspoon onion powder
  • 1 generous pinch of pepper, to taste
  • juice from 1/2 lemon (about 1.5 tablespoons)

Directions

  1. Sauté the minced garlic in coconut oil or butter in a medium saucepan over low heat. Allow to cook for a few minutes, until the garlic is tender and fragrant but not browned.
  2. Add the 1 cup of water to the saucepan, along with the cauliflower florets, and bring the water to a boil. (The water will not cover the cauliflower, but that’s okay.) Once the water is boiling, reduce the heat to a simmer and cover the pot for 12-15 minutes or until the cauliflower is fork-tender and very soft.
  3. Transfer the entire contents of the saucepan into a blender or food processor, and season with salt and pepper. Add in lemon juice and onion powder. Process until very smooth and creamy, with a texture similar to traditional cream sauce. (Always be careful when blending hot liquids– the steam pressure can blow the lid off your blender!).
  4. Season with additional salt and pepper, if desired, and serve hot. If it seems thick, add more water. If it seems dry, add a liberal drizzle of olive oil.
  5. Place spiralized zucchini in a medium-sized frying pan greased with coconut oil, and stir for 3-4 minutes or until zucchini takes on a cooked pasta texture, sort of wilted and soft. Be careful not to overcook.
  6. Transfer zucchini noodles (AKA “zoodles”) to a plate or bowl and pour sauce on top. Sprinkle this 3-ingredient paleo parmesan cheeze on top and start eating!

MYO Chipotle-Style Bean Burrito Bowl {Vegetarian, Gluten-Free}

One of the questions I’m often asked is:

How can I eat healthy without going broke or spending hours in the kitchen?

My kitchen is my happy place, and I love spending lots of time there, but I know that time and patience to cook tend to be on the short side for most people.

That’s why I’m sharing a SUPER simple recipe with you today. It’s cheap, easy, quick AND delicious! You can have dinner on the table in less than 20 minutes. 🙂

When I finished making this dish for the first time, my husband Bill said, “You’re done already?”

Yup! It was that quick!

After his first bite, he gave me an “Oh yeah” and said this is one of his new favorite dishes. Success!

If you like Chipotle or Qdoba but don’t want to spend $8/person on a meal, this could be a new “go to” recipe for you. I bet it will become one of your favorites!

Chipotle Bowl 2

Here are a few keys to keep in mind when making your own quick and healthy meals, which served as the motivation to test out this recipe!

  • Cook more, dine out less. You will almost always pay more to dine out than to make a meal yourself. On average, a McDonald’s dinner for a family of four costs almost $7/person compared to a dinner based on rice and beans, like this one, which costs less than $2.50/person.
  • Make some of your meals meatless. Meat and dairy products and processed foods tend to be some of the most costly items on a grocery bill. Swapping out meat with beans – even one day a week – can help you save money…and time!
  • Eat vegan before 6:00 p.m. Mark Bittman was given the choice to either go on medication or adopt a vegan diet. He didn’t want to do either, so he started eating vegan before 6:00 and then having smaller portions of high quality animal products at dinnertime. He lost 35 pounds and didn’t have to go on medication. Click here to learn more about his story and book. In the meantime, check out this awesome recipe!

RNK Chipotle Burrito Bowl

Chipotle-Style Bean Burrito Bowl

This is one of the most popular recipes on my blog and is always a crowd pleaser, even for people who claim to dislike beans and avocado! It’s also one of the cheapest meals you can make for a group!

Base Ingredients

  • 1 29-ounce can (about 3 cups) black beans or pinto beans (drained and rinsed (I use Eden brand))
  • 2 cups cooked brown rice (heat up a precooked frozen bag!)
  • 4 cups romaine lettuce (chopped)
  • 1 jar salsa
  • 2 avocados (diced)

Cilantro Lime Vinaigrette

  • 1/3 cup fresh lime juice
  • 1/3 cup cilantro (chopped)
  • 2 cloves garlic (minced)
  • 1 teaspoon honey
  • 1/2 teaspoon coarse sea salt
  • 1/4 cup extra virgin olive oil
  • Black pepper (to taste)
  • Pinch cayenne pepper ((if you like some heat!))
  1. Whisk vinaigrette ingredients together.

  2. In a large bowl, combine rice, beans, salsa, avocado, and lettuce. Pour the vinaigrette on top, and toss all ingredients together to combine. Serve immediately.

If you want to save this for 2-3 days, add the lettuce and avocado when ready to serve to prevent browning and preserve freshness.

Optional add-ons: grilled or sautéed meat or seafood and/or sautéed veggies (onions, peppers…whatever you like!)

Optional topping: dairy-free sour cream


I LOVE Caramel…and This Rich & Creamy Caramel Apple Dip! {Paleo, Vegan}

Whether they’re from Wockenfuss, Rheb’s or Krause’s, homemade dark chocolate caramels have always been my favorite indulgence since I was a kid.

I just love the rich, creamy, buttery taste of caramel!

IMG_7956

One of the unfortunate side effects of the typical deprivation and dieting mentality is that we feel like we have to “give up” anything that tastes sweet or satisfying.

At some point, we decided that “healthy” food just doesn’t taste good and that we have to settle for less flavor if something is deemed healthy.

Well, I refuse to give up flavor or sweets! When I cook and bake, I make sure that any recipes I prepare are delicious AND nourishing, even the sweet ones!

I came across this recipe for a raw caramel apple dip while I was on one of my favorite blogs, Nourishing Meals, and I just HAD to make it (and share it with all of you!).

Make it for yourself, your friends and family or bring it to a party or potluck. It has become one of my go to recipes for parties, and people often ask me to bring it back again. It’s super easy to make, too.

Dip your favorite fruit in it (we used some crispy, sweet organic Fuji apples), and enjoy!

caramelIMG_7961

Ingredients
1 cup medjool dates, pits removed (about 8 to 10 dates)
1/4 cup 100% maple syrup
2 teaspoons vanilla extract
pinch of sea salt

soaking water from dates, as needed

Here’s the full recipe from Nourishing Meals!

Just a few simple ingredients go into this tasty dip!

Just a few simple ingredients go into this tasty dip.

Soaked cashews serve as the creamy base. You would never guess it's dairy-free!

Soaked cashews serve as the creamy base. You would never guess it’s dairy-free!

Medjool dates. These are used to naturally sweeten foods and act like caramel in most of my sweet recipes!

Medjool dates. These are used to naturally sweeten foods and act like caramel in most of my sweet recipes!

Walnut Tacos with Dairy-Free Sour Cream

I originally wrote this post in February 2014, but since then I have made some tweaks to the recipes to make them my own and improve them. I served these at a workshop I did today, and my coworkers LOVED them. One person even said she likes them better than regular tacos 🙂

——————————————————————————————————-

My husband Bill and I saw The Lego Movie last week, which inspired me to bring a raw taco recipe to work this week for our Real Food Challenge and to celebrate Taco Tuesday!LEGO Taco Tuesday Guy Set 71004-12

When I think of tacos, I think of the crunchy, salty Old El Paso shells filled with seasoned ground beef and variety of other toppings, like cheese, salsa, and sour cream. Some of those toppings are healthy, but others aren’t. Instead of giving up tacos, why not put a new, healthier spin on them?!

One of the things I enjoy most about what I do is reinventing our favorite comfort foods, so they are healthier but just as (if not more!) delicious and flavorful.

I prepared the “meat” and “cream” for today’s Taco Tuesday lunch for my coworkers, and it was a HUGE hit! Skeptics and believers alike raved about these tacos and dairy-free sour cream, so I’m going to share with you the recipes for how to make them!

The secret ingredient in the “meat”? Walnuts!

raw walnut tacos taco meat closeup

Ingredients

  • 2 cups raw walnuts
  • 1 tablespoon ground cumin
  • 1 teaspoon chili powder
  • 1 teaspoon paprika
  • 1 teaspoon dried oregano
  • 1 teaspoon coriander
  • 1/2 teaspoon garlic powder
  • Pinch cayenne powder
  • 2 tablespoons tamari (wheat-free soy sauce) – You can find this in the Asian section of most grocery stores or online. Use coconut aminos to make this dish paleo.
  • 1 head of baby Romaine lettuce (use one leaf as the taco “shell”)

Add your own toppings, including but not limited to the following:

  • Dairy-free sour cream (below!)
  • Black or pinto beans
  • Brown rice
  • Diced onions
  • Salsa
  • Guacamole
  • Diced avocados
  • Diced tomatoes

Directions

Put all of the ingredients in a food processor and pulse until it resembles the size and texture of ground meat!

Now, on to the sour cream! 🙂

whole taco

Since I stopped consuming milk products a few years ago for health reasons, I’ve had to find alternatives to the creamy goodness of dairy, and I’ve been happy with the recipes and options I’ve tried. I will be devoting several blog posts in the future to some of my favorite deliciously dairy-free recipes, but for today, we’re going to spotlight a recipe for sour cream…without the cream.

The secret ingredient? Cashews!

Cashews can be used as a base for creamy, dairy-free sauces, dips, spreads, and even cheesecakes (Zia’s makes the best!). When you soak cashews overnight in water, they get really soft and can be blended together with savory ingredients to create a delicious, dairy-free alternative to sour cream.

words sourcream

Ingredients

  • 1 cup raw cashews, soaked overnight and then rinsed and drained
  • 3 tablespoons fresh-squeezed lemon juice
  • 1 tablespoon raw apple cider vinegar
  • 1/4 teaspoon onion powder
  • 3/4 teaspoon sea salt
  • 1/3 cup water

Directions

Put all ingredients in the blender and blend until smooth. I had to use the tamper for my Vitamix to push it down.

**If you don’t have a high speed blender, you will likely need to stop a few times to scrape down the sides and might need to add a bit more water to thin it out.

The taco “meat” should be able to last a few days in the fridge, since there are no cooked ingredients in it, and the sour cream will likely be good for up to a week.

Enjoy!

It’s Taco Tuesday! Walnut Tacos & Dairy-Free Sour Cream {Vegan, Raw, Gluten-Free}

I originally wrote this post in February 2014, but since then I have made some tweaks to the recipes to make them my own and improve them. I served these at a workshop I did today, and my coworkers LOVED them. One person even said she likes them better than regular tacos 🙂

——————————————————————————————————-

My husband Bill and I saw The Lego Movie last week, which inspired me to bring a raw taco recipe to work this week for our Real Food Challenge and to celebrate Taco Tuesday!LEGO Taco Tuesday Guy Set 71004-12

When I think of tacos, I think of the crunchy, salty Old El Paso shells filled with seasoned ground beef and variety of other toppings, like cheese, salsa, and sour cream. Some of those toppings are healthy, but others aren’t. Instead of giving up tacos, why not put a new, healthier spin on them?!

One of the things I enjoy most about what I do is reinventing our favorite comfort foods, so they are healthier but just as (if not more!) delicious and flavorful.

I prepared the “meat” and “cream” for today’s Taco Tuesday lunch for my coworkers, and it was a HUGE hit! Skeptics and believers alike raved about these tacos and dairy-free sour cream, so I’m going to share with you the recipes for how to make them!

The secret ingredient in the “meat”? Walnuts!

raw walnut tacos taco meat closeup

Ingredients

  • 2 cups raw walnuts
  • 1 tablespoon ground cumin
  • 1 teaspoon chili powder
  • 1 teaspoon paprika
  • 1 teaspoon dried oregano
  • 1 teaspoon coriander
  • 1/2 teaspoon garlic powder
  • Pinch cayenne powder
  • 2 tablespoons tamari (wheat-free soy sauce) – You can find this in the Asian section of most grocery stores or online. Use coconut aminos to make this dish paleo.
  • 1 head of baby Romaine lettuce (use one leaf as the taco “shell”)

Add your own toppings, including but not limited to the following:

  • Dairy-free sour cream (below!)
  • Black or pinto beans
  • Brown rice
  • Diced onions
  • Salsa
  • Guacamole
  • Diced avocados
  • Diced tomatoes

Directions

Put all of the ingredients in a food processor and pulse until it resembles the size and texture of ground meat!

Now, on to the sour cream! 🙂

whole taco

Since I stopped consuming milk products a few years ago for health reasons, I’ve had to find alternatives to the creamy goodness of dairy, and I’ve been happy with the recipes and options I’ve tried. I will be devoting several blog posts in the future to some of my favorite deliciously dairy-free recipes, but for today, we’re going to spotlight a recipe for sour cream…without the cream.

The secret ingredient? Cashews!

Cashews can be used as a base for creamy, dairy-free sauces, dips, spreads, and even cheesecakes (Zia’s makes the best!). When you soak cashews overnight in water, they get really soft and can be blended together with savory ingredients to create a delicious, dairy-free alternative to sour cream.

words sourcream

Ingredients

  • 1 cup raw cashews, soaked overnight and then rinsed and drained
  • 2-3 tablespoons fresh-squeezed lemon juice (start with 2 T then taste and add a third if needed. I prefer just under 3 tablespoons)
  • 3 teaspoons raw apple cider vinegar
  • 1/4 teaspoon onion powder
  • 3/4 teaspoon sea salt
  • 1/4 cup water (or more for desired consistency)

Directions

Put all ingredients in the blender and blend until smooth. I had to use the tamper for my Vitamix to push it down.

**If you don’t have a high speed blender, you will likely need to stop a few times to scrape down the sides and might need to add a bit more water to thin it out.

The taco “meat” should be able to last a few days in the fridge, since there are no cooked ingredients in it, and the sour cream will likely be good for up to a week.

Enjoy!

Page 11 of 11

Powered by WordPress & Theme by Anders Norén