Month: September 2014

Pumpkin Pie Overnight Oats: Easy & Healthy Breakfast To Go! {GF, DF}

It’s almost fall…and you know what that means…

PUMPKINS!

pumpkin

I love just about anything made with pumpkin.

From my favorite creamy, “I can’t believe this is good for me” pumpkin pie smoothie shake that literally tastes like pumpkin pie in a glass to pumpkin pie, pumpkin tea, pumpkin muffins and a whole slew of pumpkin recipes I plan to try this fall…pumpkin rocks!

pumpkin-pie-shake

It’s gotten some not so positive press this year due to the FoodBabe’s investigation of the ingredients in Starbucks’ Pumpkin Spice Latte (but if those are your thing, at least there are healthier recipes out there for how to make them yourself!).

Because I like to focus on the positives when it comes to our health and what we eat, here are just a few reasons pumpkin is so good for us and we should eat more of it!

  • Loaded with the antioxidant beta carotene, which the body converts to Vitamin A for healthy, glowing skin, strong vision, and to boost our immune system.
  • Contains anti-inflammatory compounds that reduce the risk of developing diseases like heart disease and arthritis.
  • Great source of potassium, an essential mineral we need to keep our hearts and muscles working at their optimal levels.

A few weeks ago, I made some “berry” quick overnight oats, and due to all of the positive feedback you shared, I wanted to try round 2 and make pumpkin-based overnight oats.

If you like the flavor of pumpkin and all of the wonderful, warming spices of fall, then you have to try this recipe 🙂 The longer I let it sit in the fridge, the more the flavors melded together. Seriously guys, this stuff is deeelish!

This will keep in the fridge for 3-4 days, so you can make up a few ahead of time and enjoy them throughout the week!

IMG_6422

IMG_6442

Pumpkin Pie Overnight Oats

Ingredients

  • 1/3 cup canned pureed pumpkin, NOT pumpkin pie filling (I use this kind)
  • 2 teaspoons chia seeds
  • 1/2 teaspoon pumpkin pie spice (or 1/4 tsp cinnamon, 1/8th tsp nutmeg, 1/8th tsp ginger, pinch clove)
  • Pinch fine grain sea salt
  • 1 tablespoon pure maple syrup, divided
  • 1/4 teaspoon vanilla extract
  • 1/3 cup rolled oats, gluten-free
  • 1/2 cup almond milk, unsweetened
  • Optional toppings: chopped walnuts, almond butter, raisins, unsweetened shredded coconut

Directions

  1. In a pint-size (16 oz.) mason jar, combine pumpkin puree, chia seeds, spices, 1/2 tablespoon of maple syrup and vanilla extract and whisk until evenly combined.
  2. Add oats and almond milk and stir with the whisk or spoon for about 30 seconds, so it combines evenly.
  3. Cover with a lid and leave in fridge overnight or for at least 1 hour. Add remaining 1/2 tablespoon maple syrup and any additional toppings or mix-ins. A tablespoon of almond butter makes it even creamier!

"I Can't Believe There's No Mayo" Cole Slaw {Paleo, Too!}

Guilt-free, mayo-less, nourishing, healthy…cole slaw?

It’s possible!

nomayocoleslaw

As I’ve mentioned before, I used to be a super picky eater (and wouldn’t even let different foods “touch” on my plate).

One of the foods I’ve never liked is cole slaw. 

Since I’ve started experimenting more in the kitchen, I thought I would take a stab at a cole slaw recipe after my friend Elise posted one on my Facebook page a few months ago.

I first attempted this recipe a few weeks ago and brought it to a bachelorette party weekend to serve at lunch alongside this Chipotle-style burrito bowl (which was also a HIT!).

I don’t even know what cole slaw is supposed to taste like since I’d never eaten it, so I crossed my fingers and hoped everyone would like it.

Much to my surprise, they LOVED it!

What I like about this recipe is that it UPGRADES the ingredients in a traditional cole slaw recipe, and that’s what I like to focus on doing – upgrading our diet to nourish our bodies.

Cabbage is one of the ultimate anti-cancer GBOMBS foods. GBOMBS are a group of the most nutrient-dense, disease-fighting, health-promoting foods in the world, foods we should eat a lot of on a daily basis. Go to this post for the full details on GBOMBS and how you can benefit from eating them! In the meantime, here are the other health benefits of cabbage:

  • Anti-aging/great for your skin because it contains vitamins A, C and E
  • Helps to detoxify or purify the blood (which also contributes to clearer skin and reduced inflammation…good for anyone with inflammatory conditions like arthritis, skin irritations, diabetes, etc.)
  • High in fiber so it “keeps things moving🙂
  • Good for the thyroid and other endocrine glands because of its iodine content

I wrote about why two other ingredients in this recipe – raw apple cider vinegar and raw honey – are so good for our bodies in this post, so check it out!

Two of the surprise ingredients in this delicious cole slaw!

Two of the surprise ingredients in this delicious cole slaw!

Here’s a challenge for you. The next time you go to a party and need to bring a side dish, bring this.

I talked to a friend at a wedding this weekend, and she said she prepared this at home for her husband after the bachelorette party, and he said it was the best cole slaw he’d ever had!

nomayocoleslaw

Testing Note: Due to some helpful feedback from a reader, I revised the original recipe for improved taste, so check out the revised recipe below.

Serves: A crowd! You can easily feed 20 people with this recipe as a side dish. I pack it in mason jars and have it with my lunches during the week. It holds up well!

Ingredients

  • 8-10 cups green cabbage, shredded
  • 1 cup canned, full fat coconut milk (we use the Native Forest brand. Make sure you shake the can first)
  • 2 tablespoons raw apple cider vinegar
  • 1 tablespoon raw honey
  • 1/2 teaspoon sea salt
  • 1/2 teaspoon black pepper
  • 1/2 teaspoon onion powder
  • 1/2 teaspoon garlic powder
  • 1/2 teaspoon celery seed
  • You could also add some shredded carrots for an additional pop of color!

Directions

Whisk together coconut milk, apple cider vinegar, raw honey, sea salt, pepper, onion and garlic powder, and celery seed for the dressing. Set aside.

IMG_6764

Shred one head of green cabbage. I cut mine into chunks, cutting off the tough, inner triangle piece at the base as shown in the picture below. I used the shredding attachment on my food processor and just pushed the pieces through the tube, but you could also use a knife or a box grater.

IMG_6754 IMG_6757 IMG_6758

IMG_6759

Pour dressing over cabbage and toss to combine, so all of the cabbage is coated. Set in the fridge for at least one hour (but preferably a few hours or even overnight), so all of the flavors combine.

Set out for about 10 minutes before serving (that’s what I prefer) and toss just before serving, as the dressing settles a bit at the bottom of the bowl. Enjoy!

IMG_7146

How I Found My Voice and Came Alive: A Lesson in "Going for It"

As I mentioned in my initial post, most of what I write is about food…but a portion of this blog is about non-food nourishment, about the other ways we fuel ourselves and feel alive.

Being well is about more than just what we eat, even though that plays a big part.

It’s also about finding what nourishes our body, mind AND soul.

A special event at one of my best friend’s weddings prompted me to share this part of my story!

————————————————————————————————————————————————

IMG_5385

I’ve always liked to sing.

I grew up belting out the likes of Mariah Carey, Celine Dion, and Desiree, and Shania Twain from the dining room of my childhood home. I made sure all of the doors were closed, my headphones were snugly covering my ears, and the music was turned up to what was probably a deafness-inducing volume.

I never wanted anyone else to hear me, not even my family. Singing is such a personal, vulnerable thing. As a kid, I figured if I couldn’t hear myself, then no one else could hear me either.

I closed my eyes and drowned out the world around me, singing song after song, sometimes for hours at a time.

I was shy as a kid. Singing made me feel alive.

But the thought of other people hearing me sing frightened me. I went through middle school and high school absolutely terrified of singing in front of people.

What if they didn’t like my voice?

What if I didn’t sound quite like Mariah?

Would they reject me? Would they make fun of me?

Elementary and middle school weren’t exactly a walk in the park for me socially and feeling like I fit in was tough, so I was super sensitive to being rejected, disliked or made fun of.

The potential reward wasn’t worth the risk.

So, I avoided opportunities to sing publicly, despite the fact that I loved it…even though it made me come alive and filled me with joy.

I didn’t join the choir in high school (which so many of my peers joined and enjoyed).  When I was within a group singing at a school liturgy or other public event, I softened my voice to a dull whisper if I thought anyone would be able to hear me.

For years, I silenced a very vibrant, authentic part of myself.

I took private voice lessons my senior year of high school and had my jaw just about lock for the first 10 seconds at our year-end recital. I had resisted having to sing publicly all semester but finally agreed to do it. I had chosen the haunting “Angel” by Sarah McLachlan, and I’m sure I looked haunted myself as I opened my mouth to sing.  I had held back, afraid my voice might crack if I really went for it the way I did when I was alone.

Then, I went off to college. And something changed.

It was a Thursday night. Gospel choir practice was wrapping up. I had joined after witnessing the fun they had at their fall concert. The group was SO loud that I knew I would be able to preserve my vocal anonymity while still being able to sing.

I lingered around after practice, waiting until the last choir member left the chapel. Then, I decided to go for it.

eric byrd

I sauntered up to our gospel choir director, Eric Byrd, who is still one of the most alive and vibrant people I know, and told him I wanted to try out for one of the solos. I had thought about asking for weeks and finally chalked up the nerve to do it.

I knew I could do it…I just had to give myself permission to try.

He began playing the song on the piano, and in that moment, I took a deep breath…and sang.

I closed my eyes as I released the years of Mariah, Celine, and Shania I had kept locked up inside.

About a verse or so in, Eric bolted up from the piano, gave me a bewildered look as he smirked and shook his head in surprise and proceeded to knock over a nearby music stand.

“Where did that come from?!”

I sheepishly blushed and averted my eyes down. “I don’t know,” I told him.  “I’ve always been afraid of singing in front of people…but I really wanted to do this.”

I raised my eyes and formed a smile. He was smiling, too.

I got the solo.

I had come alive. 

come-alive

One of the ways we nourish our bodies and our souls is by doing things that make us come alive, things that bring out our truest, most authentic selves.

Since then, singing has been an integral part of my story and my journey.

It’s how my husband and I first connected in college, as he would play piano and I would sing along with him in our campus chapel.

It was the bond between us as we joined our first church choir together during his last 2 years of college.

It’s become part of how we serve our current church, Horizon Church of Towson, on Sunday mornings, along with the rest of the music team.

Recording Christmas carols with Horizon Church...never thought I'd be doing this!

Recording Christmas carols with Horizon Church…never thought I’d be doing this!

And it’s just something that, regardless of where I am, brings me joy.

A few weeks ago, I had the honor and privilege of singing a duet with the band (Sly45) at one of my best friend’s weddings.

I was so excited!

The lyrics effortlessly spilled out as I soaked in the moment, appreciating the gift of music, the joy of singing, and the happiness of the day.

What if I’d never gotten past my fear?

What if I had refused to make myself vulnerable for fear of rejection or not being “good enough”?

IMG_5387

I'm with the band :) Never thought I would do something like this!

I’m with the band 🙂 Never thought I would do something like this!

After the song was finished, the groom came up to me, hugged me and said, “That was like the best wedding present ever.”

Do you ever feel like you’re trying to “find your voice” or truly come alive?

What would you do if you weren’t afraid of failing? Rejection? Disapproval?

Think of ONE thing that scares but also excites you. What can you do to move one step closer to tackling it?

Give yourself permission to think about the potential for what could happen…and go for it!

soul happy

How I Found My Voice and Came Alive: A Lesson in “Going for It”

As I mentioned in my initial post, most of what I write is about food…but a portion of this blog is about non-food nourishment, about the other ways we fuel ourselves and feel alive.

Being well is about more than just what we eat, even though that plays a big part.

It’s also about finding what nourishes our body, mind AND soul.

A special event at one of my best friend’s weddings prompted me to share this part of my story!

————————————————————————————————————————————————

IMG_5385

I’ve always liked to sing.

I grew up belting out the likes of Mariah Carey, Celine Dion, and Desiree, and Shania Twain from the dining room of my childhood home. I made sure all of the doors were closed, my headphones were snugly covering my ears, and the music was turned up to what was probably a deafness-inducing volume.

I never wanted anyone else to hear me, not even my family. Singing is such a personal, vulnerable thing. As a kid, I figured if I couldn’t hear myself, then no one else could hear me either.

I closed my eyes and drowned out the world around me, singing song after song, sometimes for hours at a time.

I was shy as a kid. Singing made me feel alive.

But the thought of other people hearing me sing frightened me. I went through middle school and high school absolutely terrified of singing in front of people.

What if they didn’t like my voice?

What if I didn’t sound quite like Mariah?

Would they reject me? Would they make fun of me?

Elementary and middle school weren’t exactly a walk in the park for me socially and feeling like I fit in was tough, so I was super sensitive to being rejected, disliked or made fun of.

The potential reward wasn’t worth the risk.

So, I avoided opportunities to sing publicly, despite the fact that I loved it…even though it made me come alive and filled me with joy.

I didn’t join the choir in high school (which so many of my peers joined and enjoyed).  When I was within a group singing at a school liturgy or other public event, I softened my voice to a dull whisper if I thought anyone would be able to hear me.

For years, I silenced a very vibrant, authentic part of myself.

I took private voice lessons my senior year of high school and had my jaw just about lock for the first 10 seconds at our year-end recital. I had resisted having to sing publicly all semester but finally agreed to do it. I had chosen the haunting “Angel” by Sarah McLachlan, and I’m sure I looked haunted myself as I opened my mouth to sing.  I had held back, afraid my voice might crack if I really went for it the way I did when I was alone.

Then, I went off to college. And something changed.

It was a Thursday night. Gospel choir practice was wrapping up. I had joined after witnessing the fun they had at their fall concert. The group was SO loud that I knew I would be able to preserve my vocal anonymity while still being able to sing.

I lingered around after practice, waiting until the last choir member left the chapel. Then, I decided to go for it.

eric byrd

I sauntered up to our gospel choir director, Eric Byrd, who is still one of the most alive and vibrant people I know, and told him I wanted to try out for one of the solos. I had thought about asking for weeks and finally chalked up the nerve to do it.

I knew I could do it…I just had to give myself permission to try.

He began playing the song on the piano, and in that moment, I took a deep breath…and sang.

I closed my eyes as I released the years of Mariah, Celine, and Shania I had kept locked up inside.

About a verse or so in, Eric bolted up from the piano, gave me a bewildered look as he smirked and shook his head in surprise and proceeded to knock over a nearby music stand.

“Where did that come from?!”

I sheepishly blushed and averted my eyes down. “I don’t know,” I told him.  “I’ve always been afraid of singing in front of people…but I really wanted to do this.”

I raised my eyes and formed a smile. He was smiling, too.

I got the solo.

I had come alive. 

come-alive

One of the ways we nourish our bodies and our souls is by doing things that make us come alive, things that bring out our truest, most authentic selves.

Since then, singing has been an integral part of my story and my journey.

It’s how my husband and I first connected in college, as he would play piano and I would sing along with him in our campus chapel.

It was the bond between us as we joined our first church choir together during his last 2 years of college.

It’s become part of how we serve our current church, Horizon Church of Towson, on Sunday mornings, along with the rest of the music team.

Recording Christmas carols with Horizon Church...never thought I'd be doing this!

Recording Christmas carols with Horizon Church…never thought I’d be doing this!

And it’s just something that, regardless of where I am, brings me joy.

A few weeks ago, I had the honor and privilege of singing a duet with the band (Sly45) at one of my best friend’s weddings.

I was so excited!

The lyrics effortlessly spilled out as I soaked in the moment, appreciating the gift of music, the joy of singing, and the happiness of the day.

What if I’d never gotten past my fear?

What if I had refused to make myself vulnerable for fear of rejection or not being “good enough”?

IMG_5387

I'm with the band :) Never thought I would do something like this!

I’m with the band 🙂 Never thought I would do something like this!

After the song was finished, the groom came up to me, hugged me and said, “That was like the best wedding present ever.”

Do you ever feel like you’re trying to “find your voice” or truly come alive?

What would you do if you weren’t afraid of failing? Rejection? Disapproval?

Think of ONE thing that scares but also excites you. What can you do to move one step closer to tackling it?

Give yourself permission to think about the potential for what could happen…and go for it!

soul happy

The Recipe That Got My Husband to Like Green Beans

IMG_6333

Everyone dislikes certain foods.

For me, it’s olives.

My friend Sam loves olives and would probably put them on just about everything if she could.

I’m just not a fan.

I even lived in Spain when I was in college, and Spain is THE place for olives.

I remember one meal in particular that my Spanish host family served me – a tuna fish, olive, and hard-boiled egg salad.

At the time, those three foods by themselves were a no-go, so the trifecta totally grossed me out.

But I had to at least TRY it because it’s rude not to in Spain (even if you’re 100% sure you won’t like it). After forcing down one nausea-inducing bite, I smiled and politely said, “It’s not my favorite” and was off the hook for the evening. Phew!

For my husband, Bill, that “thanks, but no thanks” food was green beans. 

Until tonight.

IMG_6319

Sometimes, the reason we don’t like certain foods is because we’ve only had them prepared in ways that doesn’t make them taste very good.

When most people think of green beans, for instance, images of the precut, brownish-green, mushy beans that come in a can and are then boiled to death come to mind.

Maybe you’ve only ever had canned vegetables and have never tried those same vegetable prepared a different way – roasted, sauteed, or tossed into a chili or stew.

Consider giving them a second chance…like Bill did!

To put it bluntly, we housed this recipe. We couldn’t stop eating them. They were that good.

Cooked “al dente” (AKA still crispy and brightly colored!), the green beans were tossed in a mixture of garlic, lemon, slivered almonds and a touch of sea salt. They were downright addictive.

We were licking the bowl clean, scraping up the last bits of crunchy slivered almonds before finally putting the bare dish in the sink.

My husband is a green-bean-hater no more. Mission accomplished!

Garlicky Green Beans Almondine with Lemon

IMG_6334

Ingredients

  • Equal parts water and vegetable broth (see step 1 below)
  • 2 pounds green beans, ends cut off
  • 3/4 cup slivered raw almonds
  • 4 cloves fresh garlic, peeled & minced
  • 3 tablespoons fresh lemon juice
  • 2-3 tablespoons coconut oil (The original recipe called for cold pressed extra virgin olive oil, which you could also use. I use coconut oil because it holds up better than olive oil when it’s heated.)
  • ½ tsp finely grated lemon zest
  • sea salt, to taste

Directions

  1. Fill a large stock pot with half water, half vegetable broth and bring it to a boil. Make sure the amount of water/broth is at least twice as much as the amount of beans you intend to cook.
  2. Gently blanch the green beans (cook them in the boiling liquid for about 3 minutes until just al dente (brightly colored and crisp)). Drain beans in ice cold water (or put them in a bowl containing an ice water bath and set aside). This stops the cooking process.
  3. In a wok or large deep frying pan, heat the oil and garlic on medium heat for 2-3 minutes. Don’t let the garlic brown.
  4. Add in the almonds and stir for about a minute. Then mix in the lemon juice and finely grated lemon zest.
  5. Add the cooked beans to the stir fry mixture and toss to combine and coat. Add salt to taste (I added about 1/4-1/2 teaspoon of sea salt).
  6. Top the beans with additional lemon zest, if you prefer.

For more information about WHY green beans are so good for us (including building strong bones, filling us up, and being an anti-fat storage anti-cancer GBOMBS food according to Dr. Fuhrman) click here.

The recipe above is a variation of this recipe from Healthy Blender Girl.

How to Stock a Healthy Pantry: My Top 10 Everyday Essentials! {Dairy-Free, Gluten-Free}

This post has been a long time coming, so I’m super excited to finally publish it!

A few of you have asked if I could put together a list of pantry items that I always have on hand and use frequently in recipes.

I’m going to be doing this a few times over the next few weeks starting off with two rounds of Everyday Essentials as well as Baking Basics, Smoothie Staples, and Herb & Spice It Up. All of these items will be gluten-free and dairy-free because that’s how I cook, and when I eat that way, my body feels its best and my skin glows 🙂

I could just give you a simple list of 10 items, but one of my goals is to get back to WHY eating these things is so good for us, rather than just “telling” you what to buy, so for each item, I’ll share:

  1. Why I love it
  2. How I use it (including all the recipes I’ve posted using that ingredient)
  3. Where you can find it

You don’t have to go out and buy all of these things tomorrow. Maybe add one or two a week to your grocery list and work up to having most or all of them on hand.

Remember, the health journey is a marathon, not a sprint!

I would love to hear your feedback about this post, so please take a moment to comment if you find this to be helpful!

IMG_5322

Raw Apple Cider Vinegar (ACV)

Why I Love It: I dedicated an entire post to ACV, so you can head over there to learn all the details about why I love this ingredient so much. In general, it supports healthy digestion, clear skin, and knocks out just about any incoming cold. My dad calls it “the concoction” and uses this detox drink at the first sign of a sniffle.

How I Use It: I use it as a staple ingredient in this salad dressing and this one, as a “splash” to cut the bitterness of sautéed greens like kale, collards, spinach or just drink it with a straw in a detox drink. One of my college professors now swears by the ACV detox drink for her family. I had the privilege of doing lots of research with her as an undergrad and she really encouraged me to pursue my passion for nutrition.

Where to Find It: The kind you buy is VERY important. You want to buy Bragg’s Raw Apple Cider Vinegar with “The Mother.” It has all the tummy-friendly enzymes in it that we want that the heat-treated, pasteurized versions of ACV lack. Most grocery stores sell Bragg’s ACV these days (I saw it at Safeway the other day), but I find it cheapest at MOMs Organic Market. You can also find it at Whole Foods, Wegmans, any natural food store, Health Food Online from Wholesome Hub or online at Vitacost and Amazon.
IMG_0015

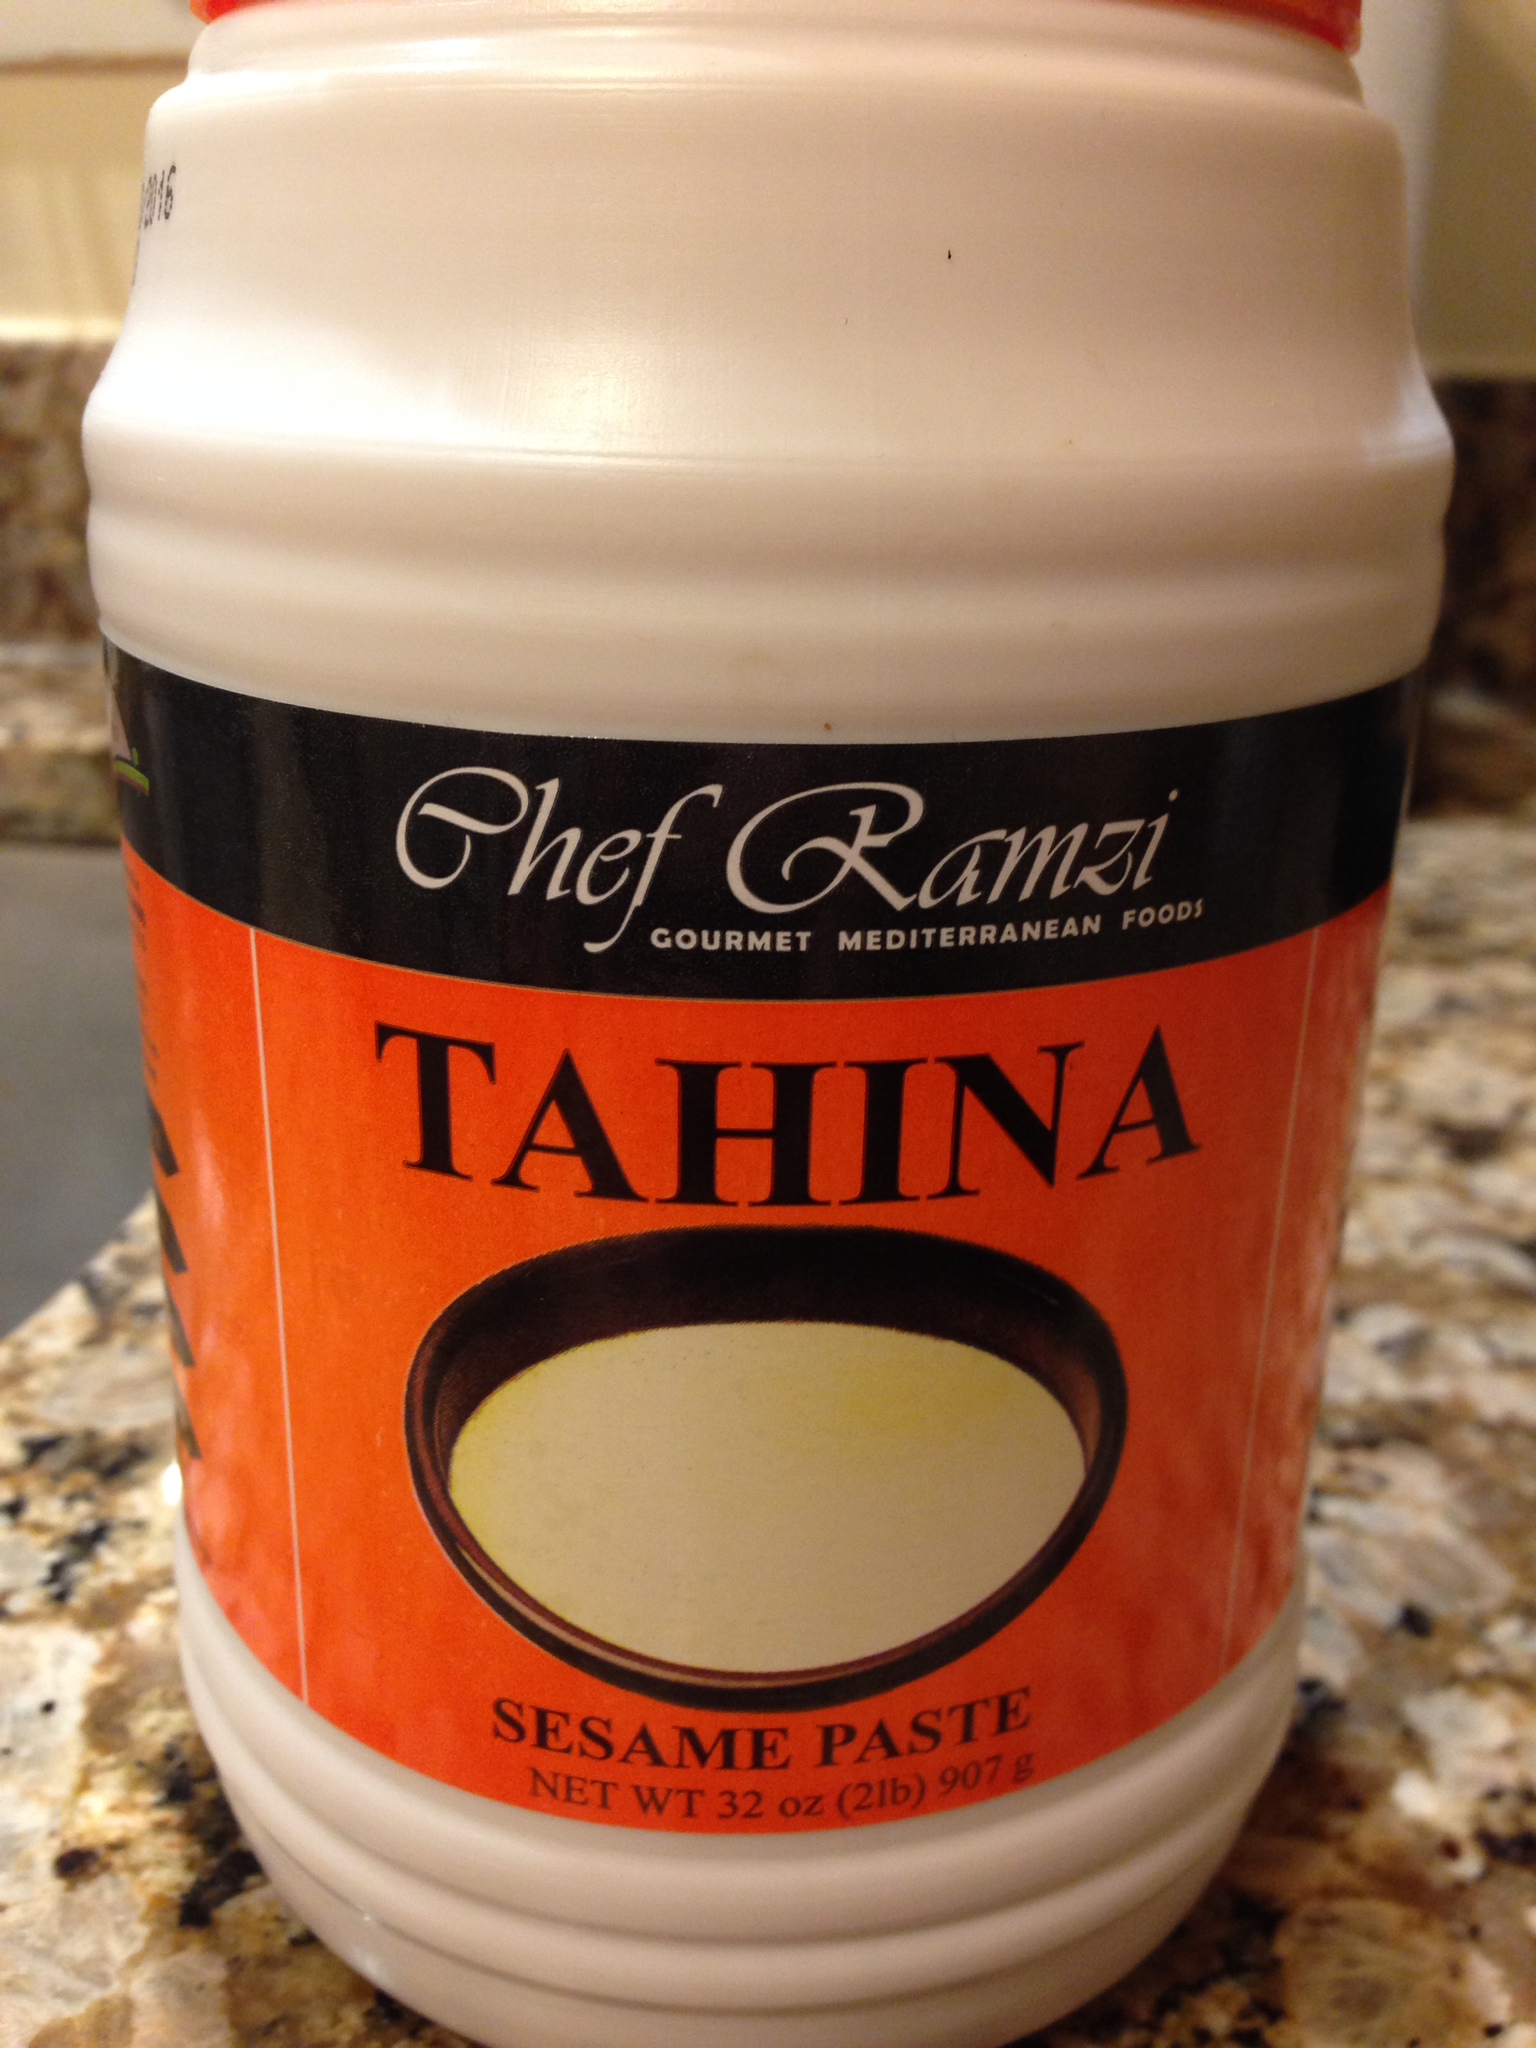
Tahini

Why I Love It: Tahini is basically just a fancy name for sesame seed butter. It’s one of the main ingredients in hummus and makes salad dressings creamy. It’s a rich source of key minerals and healthy fats that our body needs to maintain healthy skin and muscle tone, and it’s higher in protein than most nuts. Check out this article about the top 10 reasons to add tahini to your diet.

How I Use It: Whenever we want to make a creamy salad dressing, we use tahini. It’s one of the key ingredients in our favorite kale salad and in this beautifying detox salad. You also use it to make hummus.

Where to Find It: You can usually find it in the international aisle at your grocery store. Otherwise, check out an ethnic grocery store near you or go to Wegmans, MOMs or Whole Foods. They all carry it. It’s also available online (like everything else these days!), so check out Amazon or Vitacost. We get ours from a little Mediterranean Café in Towson called Cedar Cafe because it’s cheapest there AND tastes the best (the one in the picture above).
IMG_5291

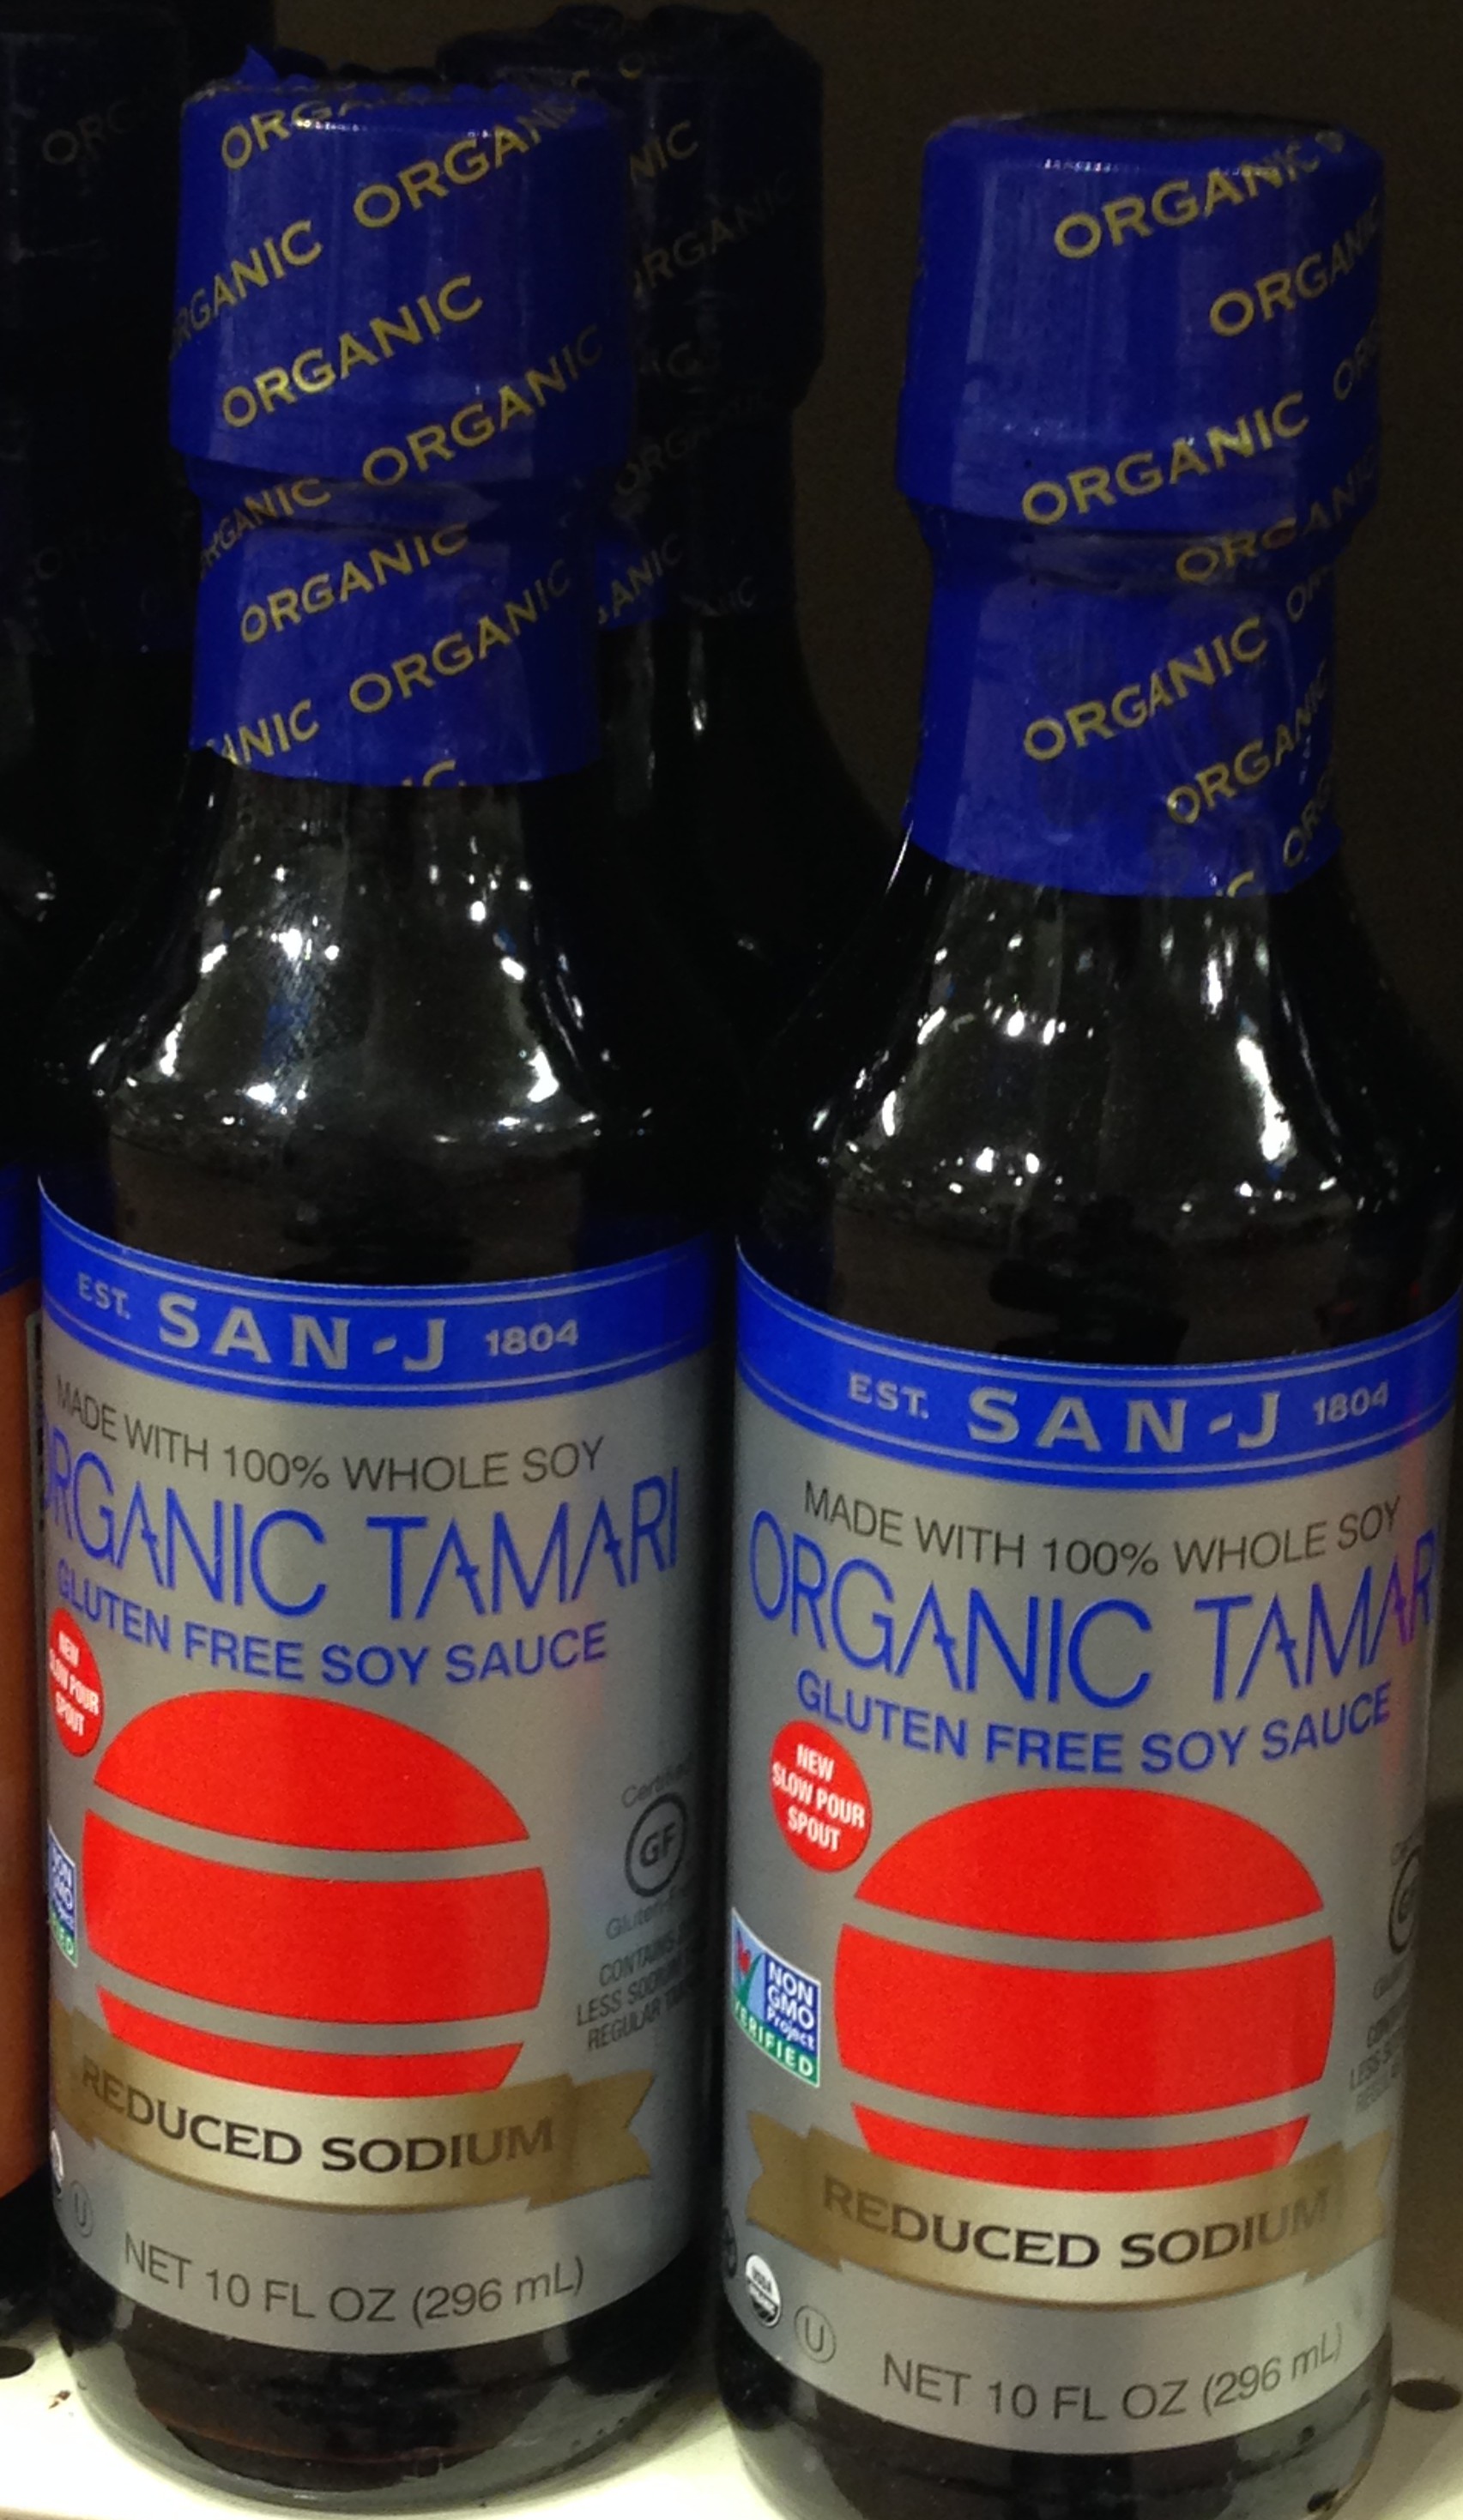
Tamari

Why I Love It: It’s a gluten-free alternative to soy sauce, so it typically does not contain wheat. Check out another blogger’s post about the differences between soy sauce and tamari. Gluten is a sticky protein found in wheat, barley and rye that is often found in condiments, so if you’re eating gluten-free, you can still have the flavor of soy sauce by using tamari. Even if you don’t have a gluten allergy or intolerance, you may find that you have fewer issues with bloating and other digestive annoyances when you remove gluten. Check out this blog post from one of the world’s top nutrition experts about going gluten-free. To avoid soy AND gluten, you can also use Coconut Aminos instead of tamari (surprisingly, they don’t taste like coconut!).

How I Use It: Whenever you would usually use soy sauce. We use it in salad dressings (including our favorite kale salad) along with these other recipes: Beautifying Detox Salad, The Ultimate “Noocho” Cheese Sauce!, and in these walnut tacos. We also use it whenever we make stir fries, so stay tuned for a simple stir fry recipe in the next 2 weeks!

Where to Find It: In the Asian food section of the grocery store, sometimes in the international aisle. Every grocery store I’ve been to sells it. If you opt for coconut aminos instead, you can find them at any natural food/health food store, Wegmans, Whole Foods, or online at Vitacost or Amazon.

IMG_5306

Coconut Oil

Why I Love It: For years, it has gotten a bad rap because of its high saturated fat content, but coconut oil contains a different kind of fatty acid that your body is more likely to burn as energy (without spiking your blood sugar) vs. store as fat like most other oils. It also has a higher smoke point and is heat stable, so you don’t have to worry about things like “does coconut oil go bad“, as this makes it a better option for cooking (we use it instead of olive oil, which is more delicate and heat-sensitive). Not only that, but the lauric acid in coconut oil can kill bacteria, viruses and fungi, helping to prevent infections and illness. Check out this post about coconut oil’s benefits from Kimberly Snyder, one of my favorite nutritionists.

How I Use It: Coconut oil is one of the most versatile items in our pantry. Whether I’m using it to saute or roast vegetables, make a crumble topping for a fruit crisp, glazed roasted peaches, firm up seductive raw chocolate fudge, create a chocolate shell for raw cookie dough bites OR moisturize my skin or lips, coconut oil is a must-have in our kitchen (and bathroom!). Read this article from Wellness Mama about 101 uses for coconut oil.

Where to Find It: We buy ours either online at Vitacost or Amazon OR wait for the sales at Whole Foods or MOMs Organic Market. I’ve also had some great coconut oil finds at Home Goods in their pantry section. Most grocery stores sell it these days, and I’ve even seen it at BJs Wholesale Club, so check out any of the stores above or your wholesale club for the best deal on coconut oil! Look for organic, unrefined, extra virgin, cold-pressed as keywords for the highest quality coconut oil.
IMG_5324

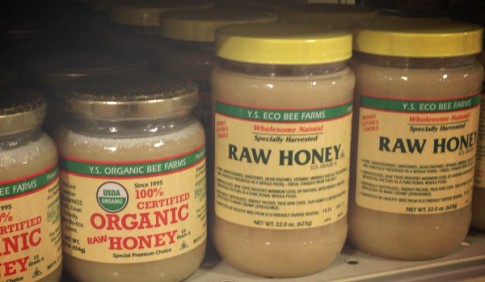
Raw Honey

Why I Love It: Raw honey is not treated by heat (which is why it is solid vs. runny and amber-colored), so it contains lots of health-promoting, illness-preventing, beauty-boosting nutrients that the commercial bottled bear honey lacks. In addition, locally produced raw honey often contains little bits of local pollen that can actually help with your seasonal allergies!

How I Use It: From salad dressings and cupcakes to raspberry lime popsicles, chia jams, and honey mustard sauce, we use this ingredient a lot! I try to use it most often in raw (uncooked) preparations because exposing it to high heat destroys a lot of the enzymes. I just find that I like the taste of raw honey better than the bottled bear stuff, so it’s become my go-to for honey in general. Here is a link to all my recipes that use raw honey.

Where to Find It: You can find raw honey at any natural food store, Wegmans, Whole Foods, MOMs and sometimes at farmer’s markets as well as online. If you are looking at manuka honey for sale, a lot of e-stores like Steens Honey and similar others sell raw, unpasteurized honey straight from mother nature herself. It is a fact that honey is beneficial for both our skin and body, the demand for raw honey, thus, tends to be very high.This is the kind we buy (pictured above).
IMG_5289veggie broth banner

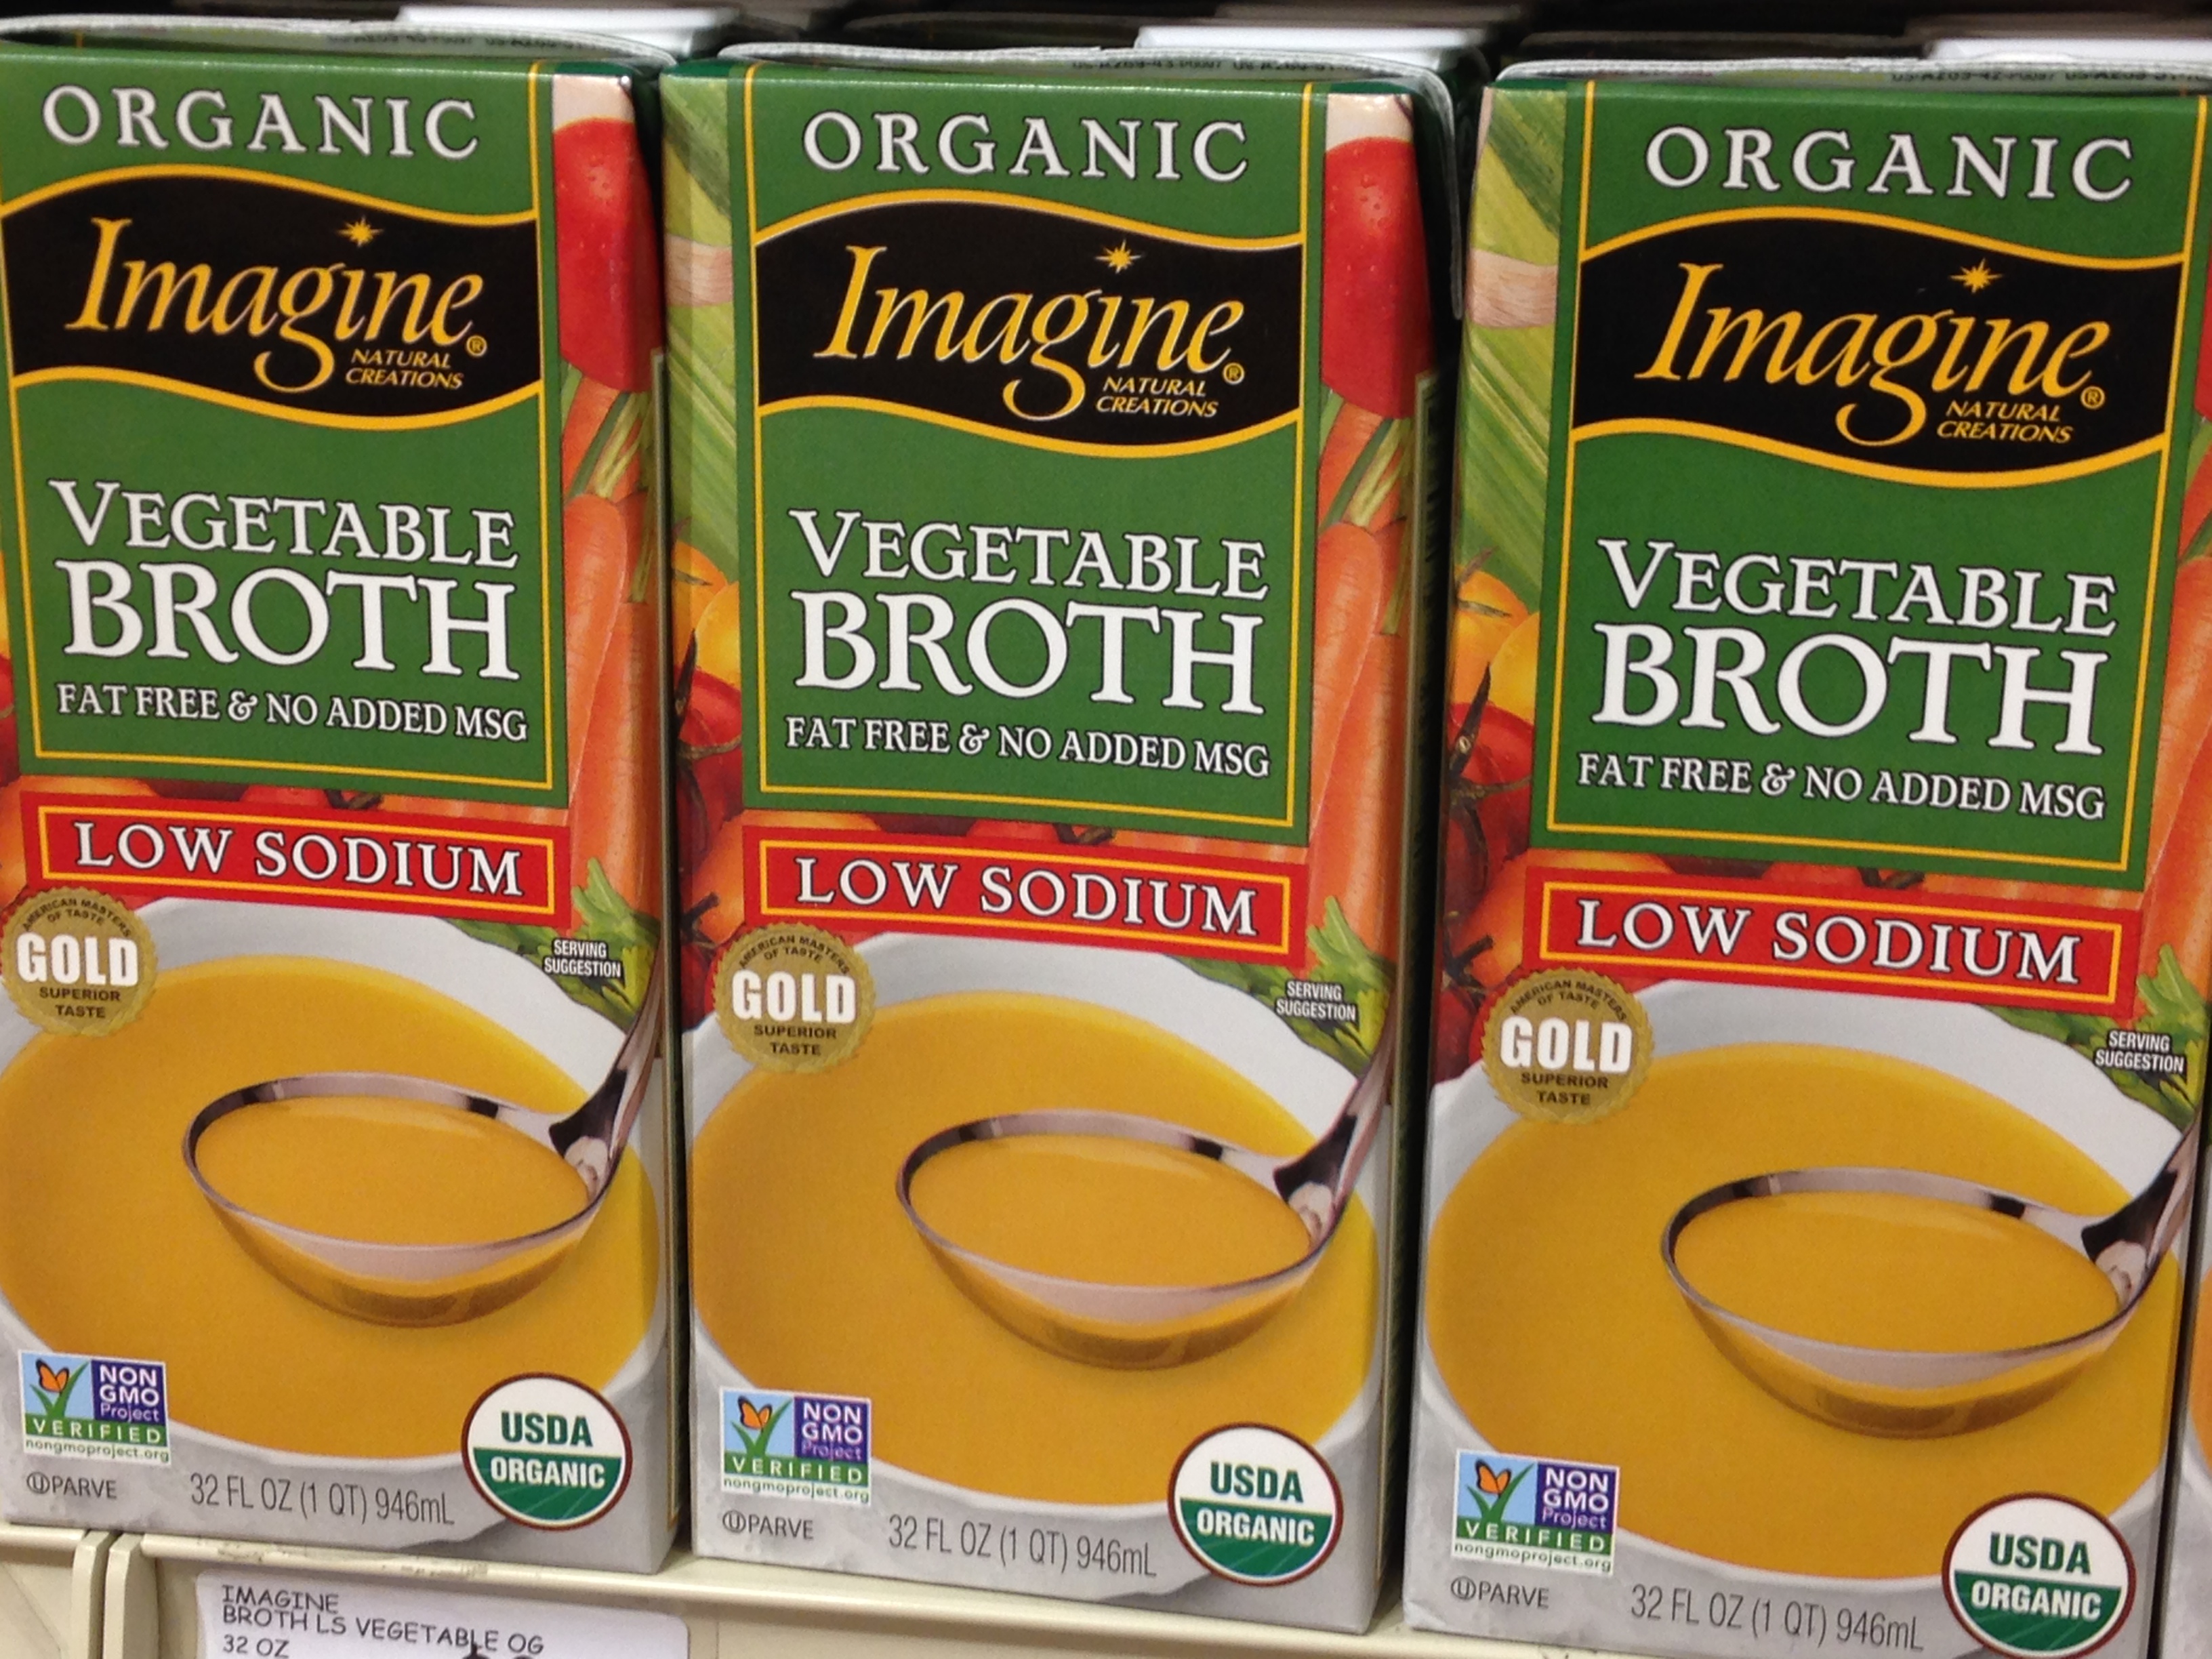
Vegetable Broth

Why I Love It: It’s a great way to add flavor to food and is something we always have on hand in the fall, since we like to make soup, especially when we have veggies to use up and nothing else to do with them. It’s versatile and flavorful.

How I Use It: I use it as the base for most soups (can’t wait to share soup recipes this fall and winter!). I also use it as an oil-free way to sauté or cook down vegetables on the stove. You can use it as an alternative to butter or oil but need to add enough to prevent your food from sticking to the pan, so add as you go. I also add a few splashes of it in with greens (kale, Swiss Chard, spinach) when I’m sautéing them on the stovetop to help them cook down.

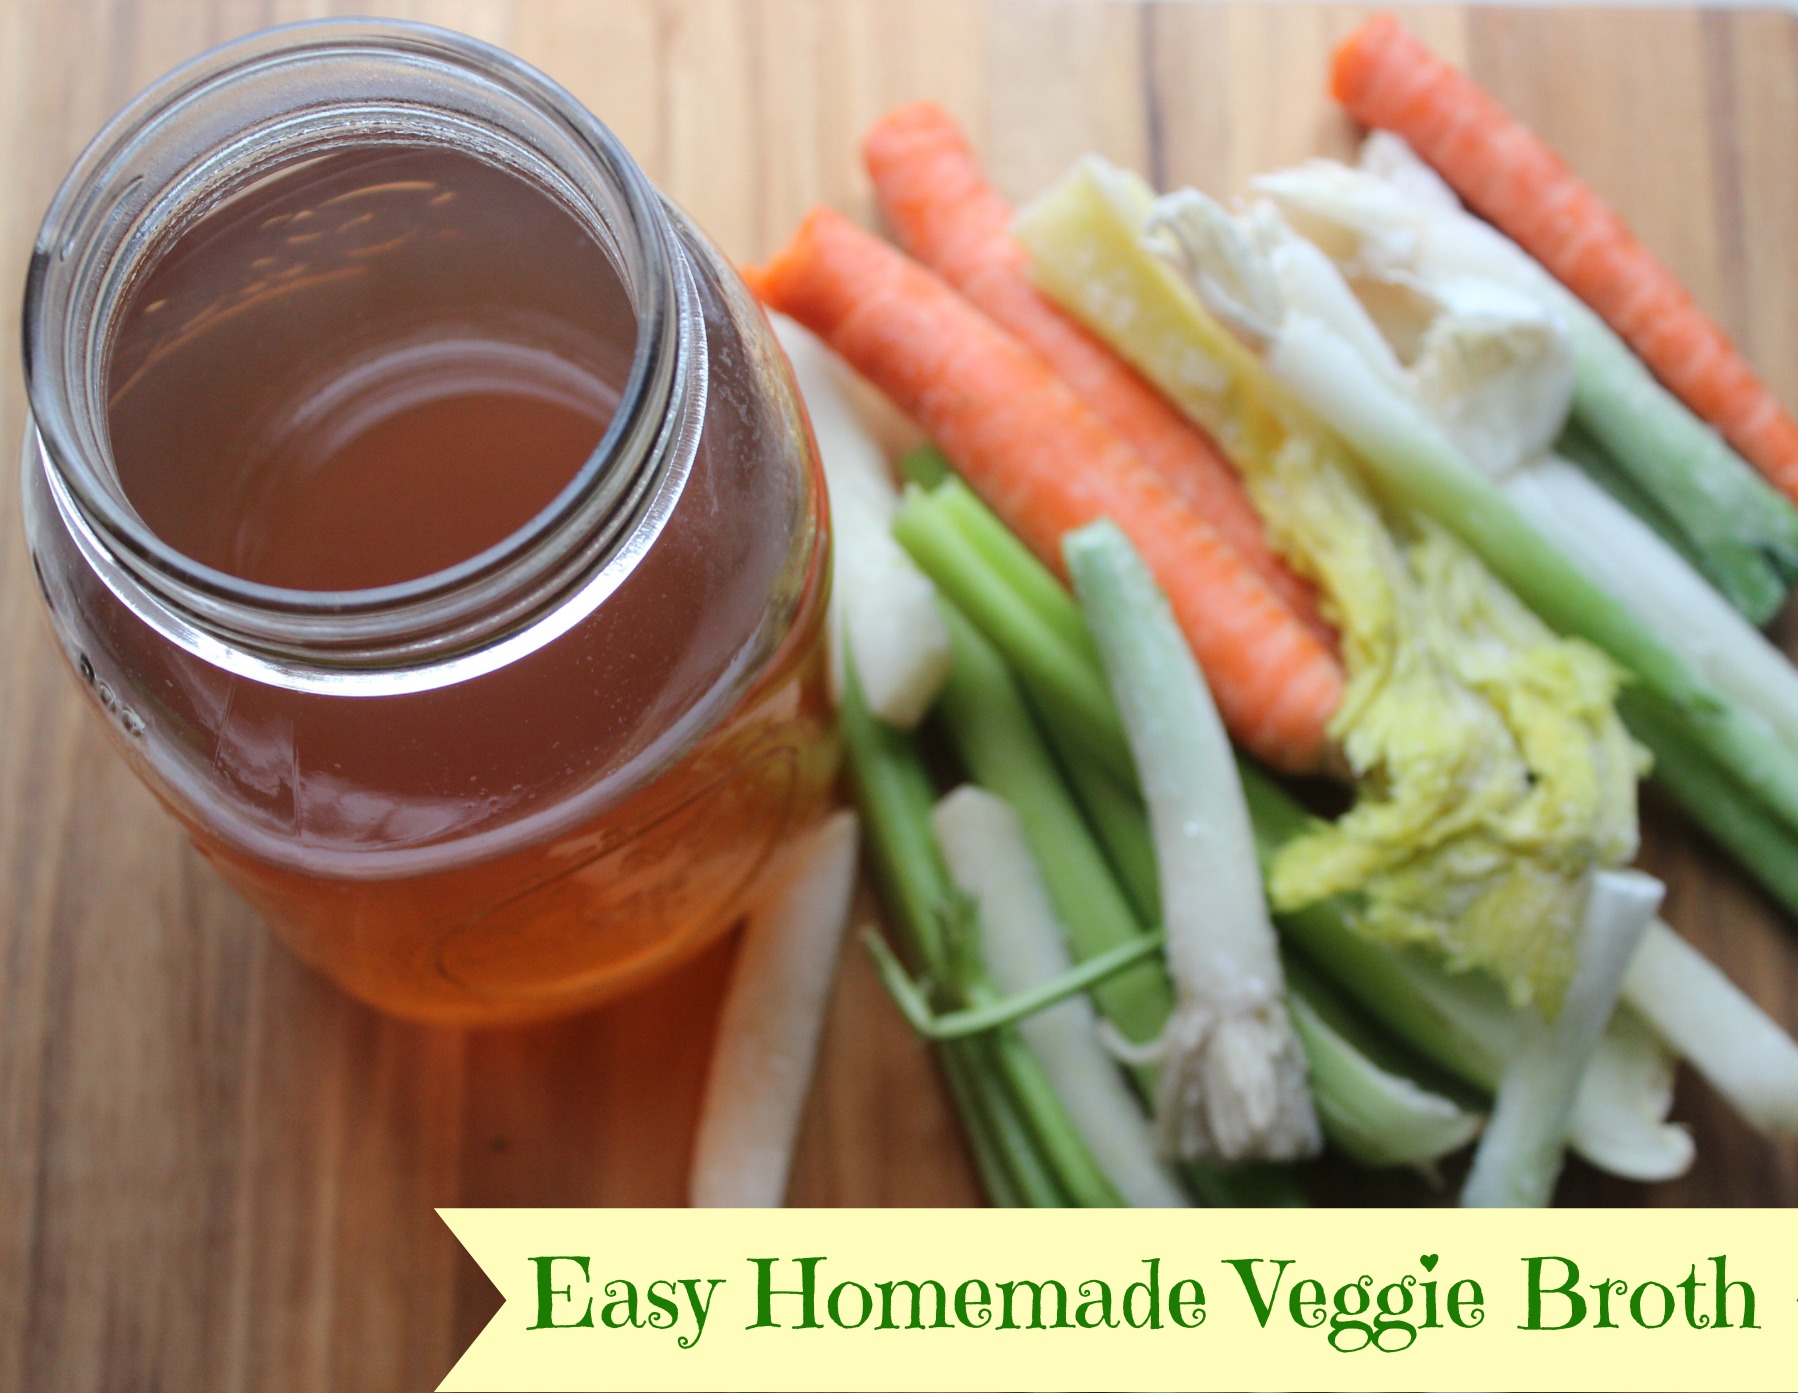
Where to Find It: UPDATE! I’ve found that it is SO much easier and A LOT cheaper to make my own vegetable broth from vegetable scraps I would have otherwise thrown away. Check out the simple process here for how to make your own vegetable broth.

IMG_5326

Lemons/Bottled Lemon Juice (Santa Cruz)

Why I Love It: In an ideal world, I would buy 5 pounds of lemons every week and squeeze out the juice as I go, since I use it in so many recipes. But, sometimes convenience prevails, and that is definitely the case with bottled lemon juice, which is always always in our fridge.

**I used to buy the lemon juice in the green bottle AKA “Real Lemon” but it turns out there are way more ingredients in it than just lemon juice, so I stopped buying it. It’s not the same as squeezing juice from a lemon, so opt for the Santa Cruz bottled kind instead if you’re making a recipe that calls for fresh lemons (or use the whole lemon!).

How I Use It: Mixed in with slightly warm water and a pinch of cayenne to get things moving in my morning detox drink, in smoothies (it helps break down oxalates in greens like kale, which get in the way of calcium absorption), and in everything from salad dressings and frosting to creamy, dairy-free cheesecakes and homemade pesto.

Where to Find It: In the bottled juice section of specialty food stores like Wegmans, MOMs, Whole Foods, and other natural food stores. Or just buy whole lemons. Every grocery store sells those!

IMG_5321

Nutritional Yeast

Why I Love It: Aside from its pretty awful name (can we opt to change it to “Nooch”?), this stuff is great. Since removing things like cheese, milk and cream from my diet, this ingredient, which is loaded with energy-boosting B vitamins, has been a lifesaver for me when I want to give foods a cheesy taste without using cheese. I wrote an entire blog post dedicated to nutritional yeast, so check that out for the 411.

How I Use It: Sprinkle it on popcorn, use it to make the BEST paleo parmesan cheese substitute (coming from someone who used to buy parm cheese by the family-sized container), noocho cheese sauce, pesto, and one of my favorite beauty detox salads.

Where to Find It: Every health food store sells this stuff, as do Whole Foods and Wegmans. You can also find it online at Vitacost or Amazon. I bought it the first time in a jar (above) and now I just get refills from the bulk foods section at MOMs Organic Market. It’s super cheap!
IMG_5325

Beans

Why I Love It: Beans are one of Dr. Fuhrman’s GBOMBS foods, making them one of the top anti-fat, anti-cancer foods we can eat. They are full of soluble fiber that keeps us energized and full for a long time (lentils fill me up longer than any other food!). According to one of my favorite nutrition experts, they “act as an anti-diabetes and weight-loss food because they are digested slowly, having a stabilizing effect on blood sugar, which promotes satiety (fullness) and helps to prevent food cravings.”

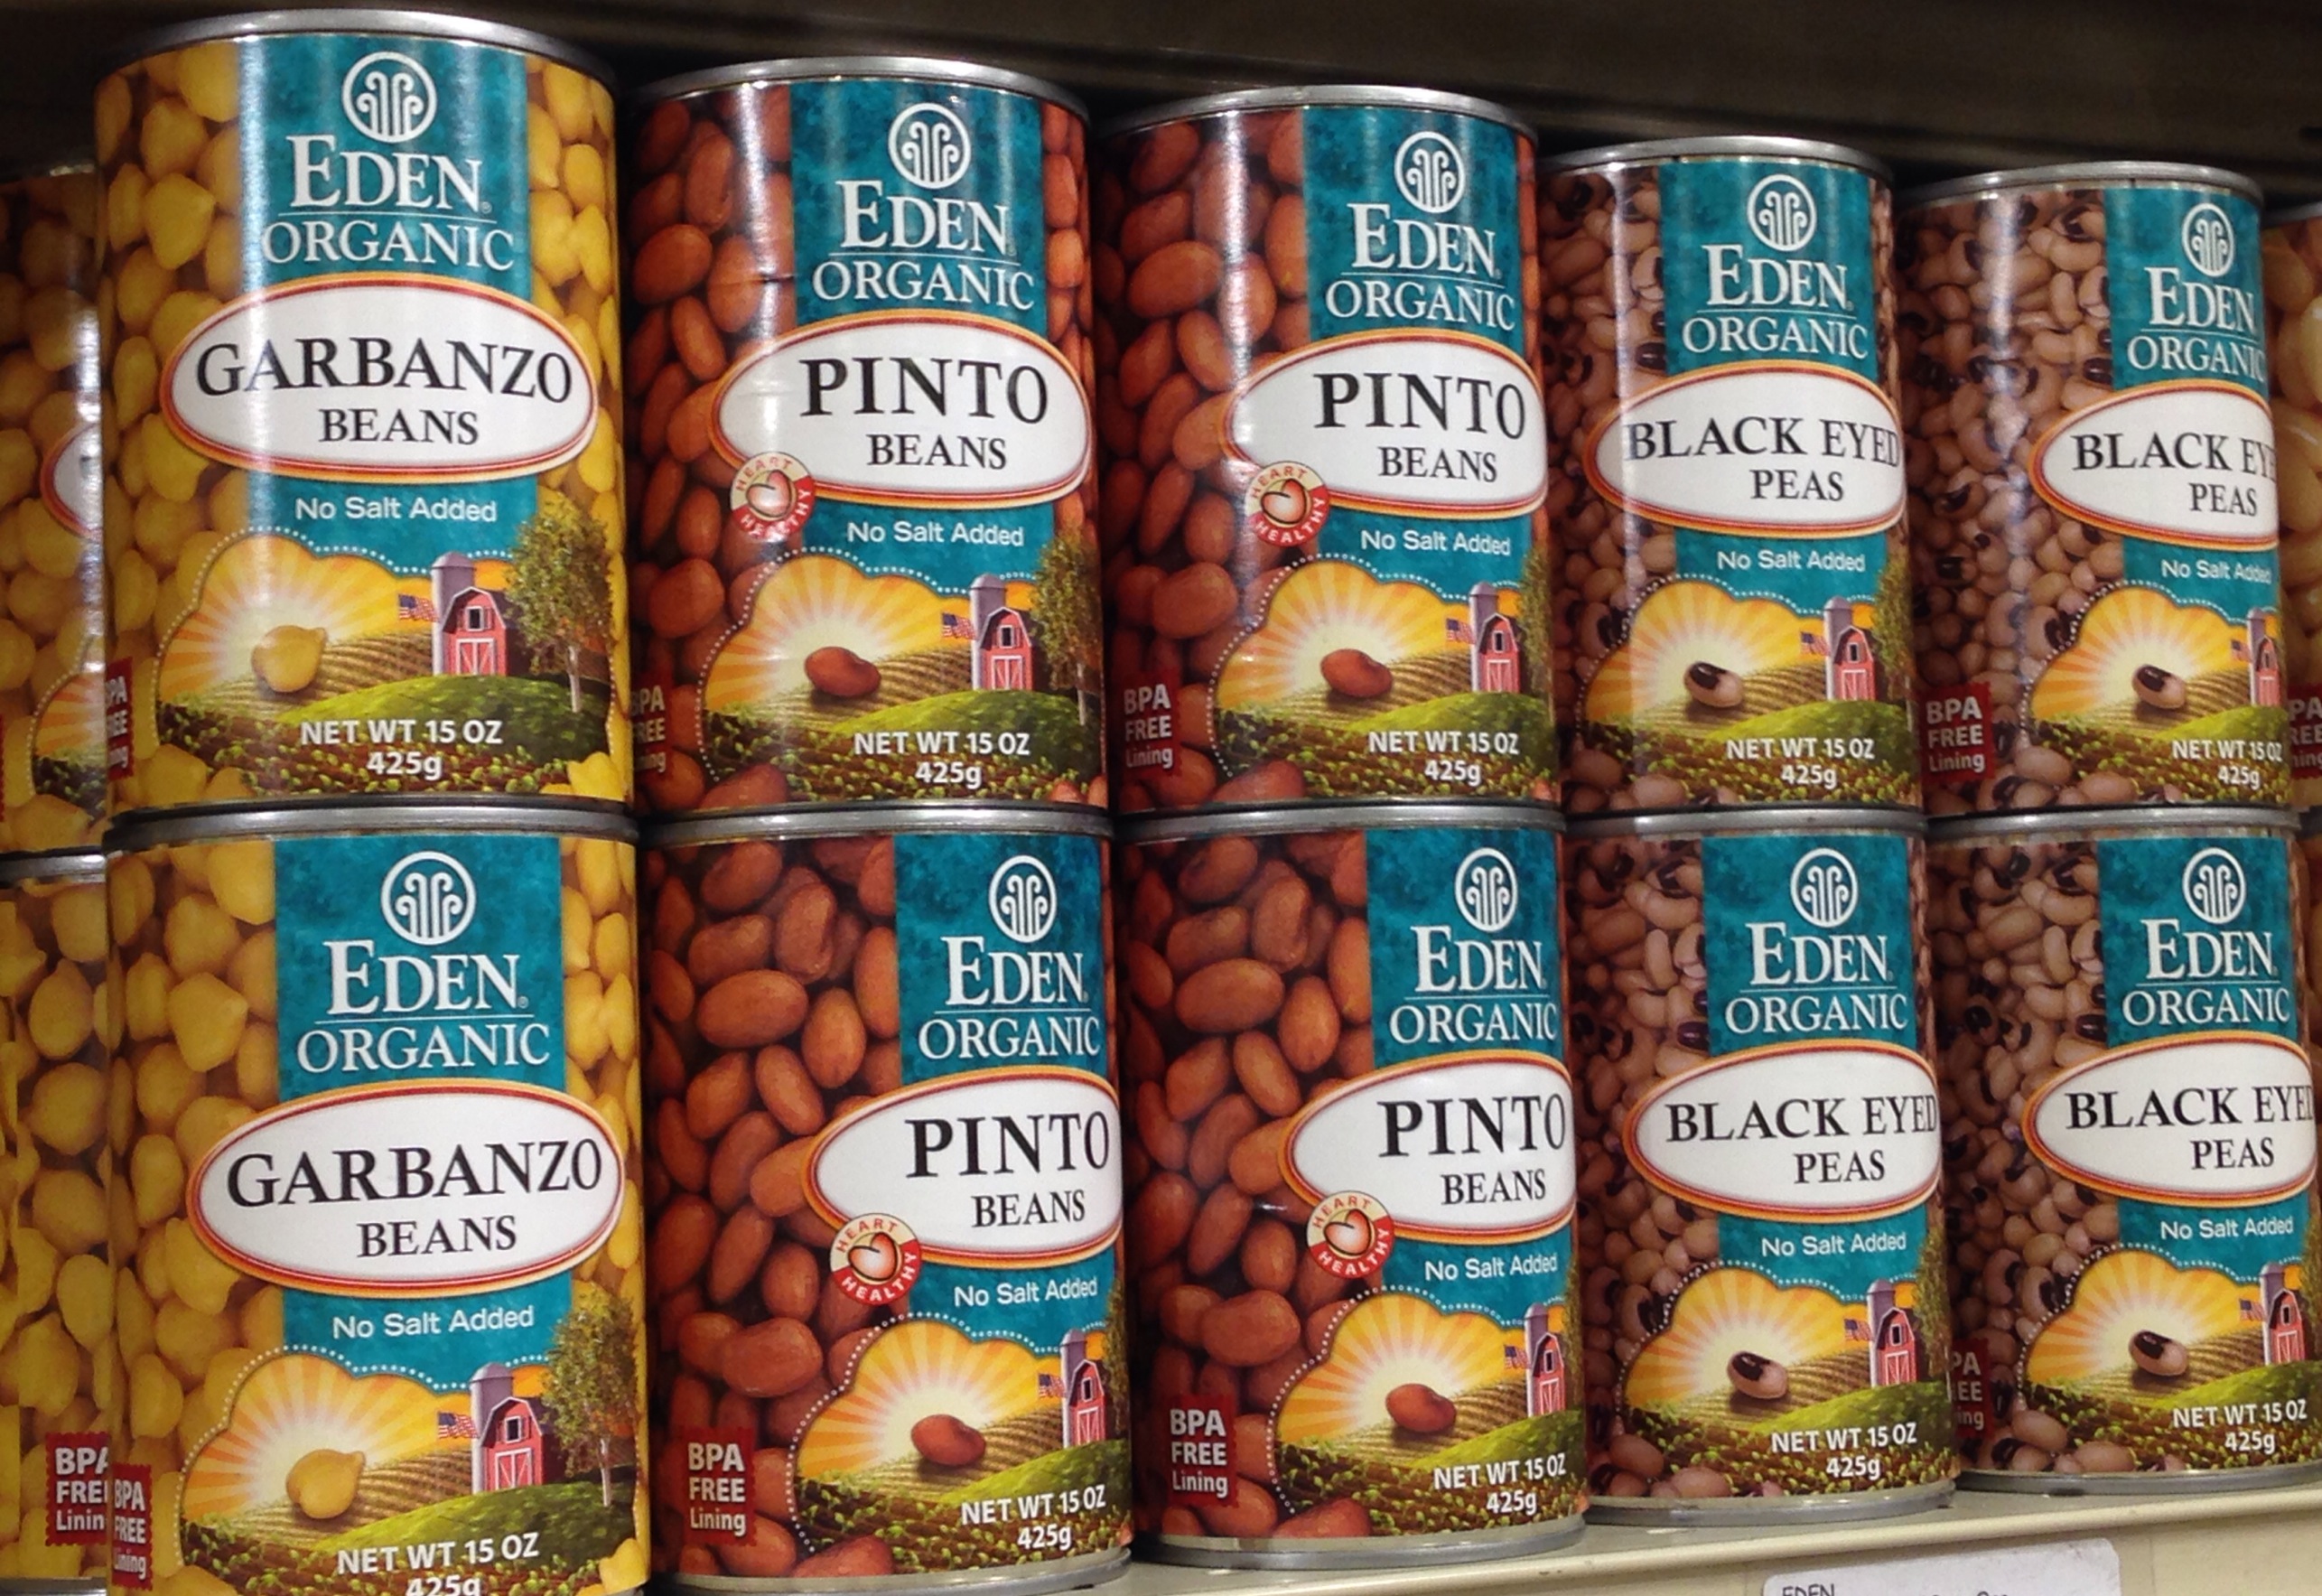
While it’s best (and cheapest!) to cook dried beans yourself, this is another situation when convenience wins out, so we usually opt for the Eden Organics line of canned beans. We always have black beans, garbanzo beans (chickpeas), kidney beans, and pinto beans on hand. Eden’s Aduki beans tend to be more easily digested than other beans, so they’re a good one to start with if you don’t eat a lot of beans now.

How I Use It: We put beans in lots of recipes! From soups, salads, and burgers to no-bake cookie dough bites (seriously!) and burrito bowls, beans are a staple at our house. Change up your beans and try different ones each week. Here is a link to all of my bean recipes.

Where to Find It: You can buy dried beans at any grocery store. We buy the canned Eden Organics beans at Wegmans, MOMs, or Whole Foods, but Amazon now sells them in their Amazon Pantry section, so check that out if you don’t live or work near a store that sells them. If you buy another brand of canned beans, make sure the cans don’t contain the chemical BPA (should say “BPA-free” on the label).

IMG_5287

Dijon Mustard

Why I Love It: I have to start by saying I used to HATE mustard. Well, I was so picky I actually didn’t eat any condiments until college (truth be told!). Unlike other condiments that tend to be loaded with chemicals and sugar, mustard tends to have a very simple and short ingredient list, and there are lots of varieties depending on your taste. I like Dijon the best.

How I Use It: It’s a great ingredient to have on hand for making your own simple salad dressings. You can combine it with lemon juice, olive oil and whatever herbs and spices you like for a tasty, healthy dressing that beats a bottle of store-bought dressing any day! I used it in this kale waldorf salad, crunchy chicken tenders, and easy honey mustard sauce.

Where to Find It: In the condiment aisle of the grocery store. We like the Organicville brand, which you can find at Wegmans, Whole Foods, MOMs, Fresh Market or a health food store. You might also be able to find it in the organic section of your grocery store.

So, what did you think? Was this helpful? Useful? Drop me a line and let me know!

Crispy Baked "Smokra" Bites (Incredibly Simple…and Hubby-Approved!) {Paleo, Vegan, Gluten-Free}

This is probably not the first vegetable you think to grab at the grocery store or farmer’s market.

Before this week, it wasn’t at the top of my list either.

In fact, I’d never bought it or cooked with it before, so all of us are in for a learning experience this week 🙂

IMG_6269

I write for another blog (Hometown Harvest), and depending on the week, my friend Kaitlyn who works for them will send me challenges for seasonal ingredients to use.

“Can you make anything with…eggplant?”

(I was less than thrilled, considering eggplant was, at the time, my least favorite vegetable.)

“I’ll see what I can do!” I replied.

The best part of getting requests like that is having to think beyond what’s familiar to me and do something I encourage other people to do all the time…try new foods (even ones we’ve sworn we despise!).

So, on another creative culinary journey I went. It turns out that I actually don’t mind eggplant, as long as it’s prepared certain ways.

Eggplant fries = the recipe that got me to like eggplant! Check it out here.

My challenge vegetable this week?

Okra.

IMG_6307

Prior to cooking okra for the first time this week, I knew two things about it:

1) It’s my dad’s least favorite vegetable, and

2) Stone Mill Bakery uses it in their ridiculously awesome vegetable soup (which, although a bit overpriced, is worth the splurge if you’re looking for a delicious lunch in Baltimore).

I can’t say I was super pumped about this one, considering how little I knew about how to prepare okra.

So, to Pinterest I went in search of a tasty way to cook up this less than popular veg…and ways to make it not slimy, since that was a common complaint among people trying to cook with it.

I also wanted to learn more about okra’s healthy claims to fame.

When I find out just how good something is for my body, I tend to be a lot more excited to try it!

IMG_0018_2

Check out this blurb about all of the health benefits of okra from another blogger, Nourished & Grounded:

Okra is FULL of vitamins and minerals, especially vitamin C, A, K, Folate, Niacin, Thiamin, B6, magnesium, manganese, carotene, as well as lutein and zeazanthin [crucial for eye health].  It contains polysaccharides that improve blood circulation.  It contains numerous antioxidants such as epicatechin, catechin, rutin, procyanidin B1 and B2 and quercetin which help the body prevent damage from oxidative stress and environmental factors.  And what about that gooey liquid that gives it such a bad wrap?  Surprise, that’s the best part! The gel-like fiber (mucilage) soothes and coats the intestines, and a healthy gut is crucial for overall health.  This is the same stuff found in aloe vera and it’s SUPER healing.

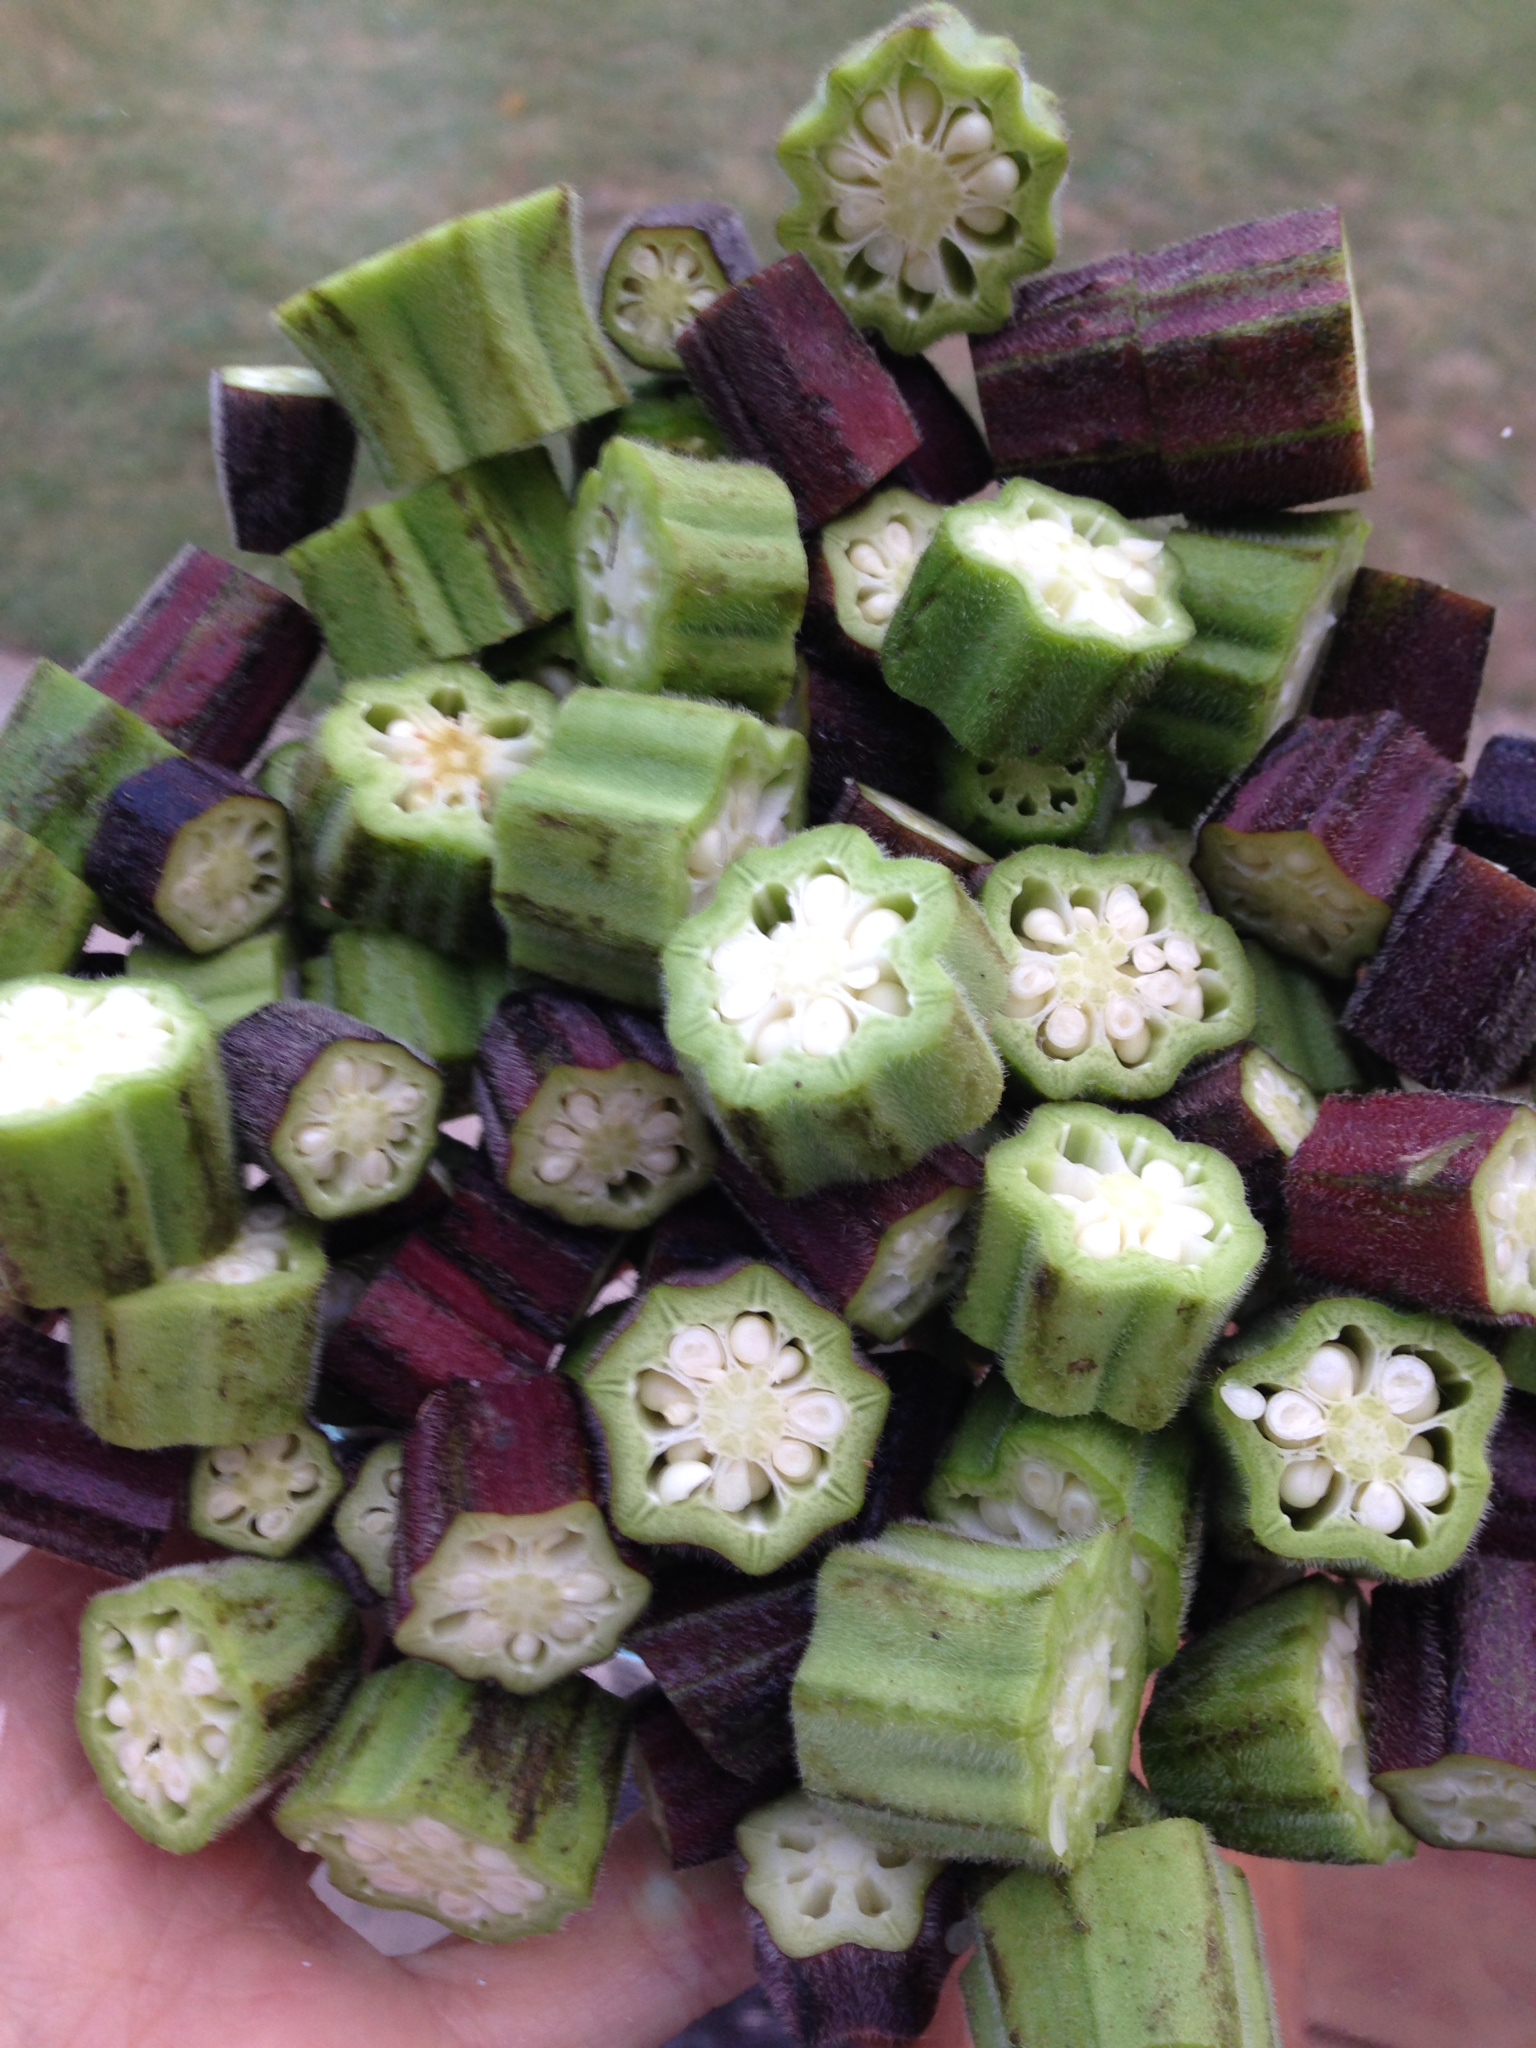
My favorite way to make just about any other vegetable is to roast it, so that’s what I did with okra. Prep time is under 5 minutes, and these little okra bites will be ready in about 20 minutes!

Even after I tried them and approved of their crunchy texture, mild flavor, and pleasant “pop” from the edible seeds, I wasn’t 100% sure my husband would like them.

To my surprise (and satisfaction!) he did 🙂

That makes these crispy little bites wife-tested and hubby-approved.

Crispy Baked Okra Bites: 2 Ways

IMG_6272

IMG_0021

Basic Ingredients

  • 1/2 pound okra, chopped into 1/2 inch discs (about 18 pods) – cut off the top and bottom stems
  • 1-2 tablespoons coconut oil, melted
  • 1/2 teaspoon sea salt, or to taste
  • 1/4 teaspoon black pepper, or to taste

**You can use any combination of spices you like on these. They taste great with just salt and pepper if you want to keep it simple, or try one of my favorite variations below:

Garlic Version: Add 1 teaspoon garlic powder.

Smokra Version: Add 1 teaspoon smoked paprika (also called “smoked sweet paprika” – This spice is AWESOME on everything from roasted veggies to soups to popcorn. Add it to your grocery list!).

IMG_0016

Directions

  1. Preheat oven to 450F.
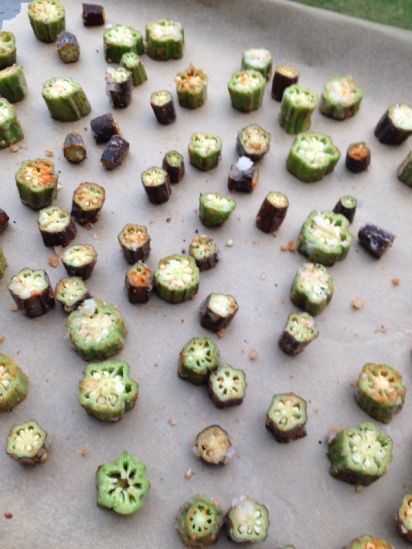
  2. Toss okra with coconut oil and spices and spread out in a single layer on a foil or parchment-lined baking sheet.
  3. Roast for 20 minutes, stirring halfway through, until the bites are browned and crispy. Cook longer to crisp them up even more!
  4. Serve immediately.

IMG_0019

Crispy Baked “Smokra” Bites (Incredibly Simple…and Hubby-Approved!) {Paleo, Vegan, Gluten-Free}

This is probably not the first vegetable you think to grab at the grocery store or farmer’s market.

Before this week, it wasn’t at the top of my list either.

In fact, I’d never bought it or cooked with it before, so all of us are in for a learning experience this week 🙂

IMG_6269

I write for another blog (Hometown Harvest), and depending on the week, my friend Kaitlyn who works for them will send me challenges for seasonal ingredients to use.

“Can you make anything with…eggplant?”

(I was less than thrilled, considering eggplant was, at the time, my least favorite vegetable.)

“I’ll see what I can do!” I replied.

The best part of getting requests like that is having to think beyond what’s familiar to me and do something I encourage other people to do all the time…try new foods (even ones we’ve sworn we despise!).

So, on another creative culinary journey I went. It turns out that I actually don’t mind eggplant, as long as it’s prepared certain ways.

Eggplant fries = the recipe that got me to like eggplant! Check it out here.

My challenge vegetable this week?

Okra.

IMG_6307

Prior to cooking okra for the first time this week, I knew two things about it:

1) It’s my dad’s least favorite vegetable, and

2) Stone Mill Bakery uses it in their ridiculously awesome vegetable soup (which, although a bit overpriced, is worth the splurge if you’re looking for a delicious lunch in Baltimore).

I can’t say I was super pumped about this one, considering how little I knew about how to prepare okra.

So, to Pinterest I went in search of a tasty way to cook up this less than popular veg…and ways to make it not slimy, since that was a common complaint among people trying to cook with it.

I also wanted to learn more about okra’s healthy claims to fame.

When I find out just how good something is for my body, I tend to be a lot more excited to try it!

IMG_0018_2

Check out this blurb about all of the health benefits of okra from another blogger, Nourished & Grounded:

Okra is FULL of vitamins and minerals, especially vitamin C, A, K, Folate, Niacin, Thiamin, B6, magnesium, manganese, carotene, as well as lutein and zeazanthin [crucial for eye health].  It contains polysaccharides that improve blood circulation.  It contains numerous antioxidants such as epicatechin, catechin, rutin, procyanidin B1 and B2 and quercetin which help the body prevent damage from oxidative stress and environmental factors.  And what about that gooey liquid that gives it such a bad wrap?  Surprise, that’s the best part! The gel-like fiber (mucilage) soothes and coats the intestines, and a healthy gut is crucial for overall health.  This is the same stuff found in aloe vera and it’s SUPER healing.

My favorite way to make just about any other vegetable is to roast it, so that’s what I did with okra. Prep time is under 5 minutes, and these little okra bites will be ready in about 20 minutes!

Even after I tried them and approved of their crunchy texture, mild flavor, and pleasant “pop” from the edible seeds, I wasn’t 100% sure my husband would like them.

To my surprise (and satisfaction!) he did 🙂

That makes these crispy little bites wife-tested and hubby-approved.

Crispy Baked Okra Bites: 2 Ways

IMG_6272

IMG_0021

Basic Ingredients

  • 1/2 pound okra, chopped into 1/2 inch discs (about 18 pods) – cut off the top and bottom stems
  • 1-2 tablespoons coconut oil, melted
  • 1/2 teaspoon sea salt, or to taste
  • 1/4 teaspoon black pepper, or to taste

**You can use any combination of spices you like on these. They taste great with just salt and pepper if you want to keep it simple, or try one of my favorite variations below:

Garlic Version: Add 1 teaspoon garlic powder.

Smokra Version: Add 1 teaspoon smoked paprika (also called “smoked sweet paprika” – This spice is AWESOME on everything from roasted veggies to soups to popcorn. Add it to your grocery list!).

IMG_0016

Directions

  1. Preheat oven to 450F.
  2. Toss okra with coconut oil and spices and spread out in a single layer on a foil or parchment-lined baking sheet.
  3. Roast for 20 minutes, stirring halfway through, until the bites are browned and crispy. Cook longer to crisp them up even more!
  4. Serve immediately.

IMG_0019

Page 2 of 2

Powered by WordPress & Theme by Anders Norén